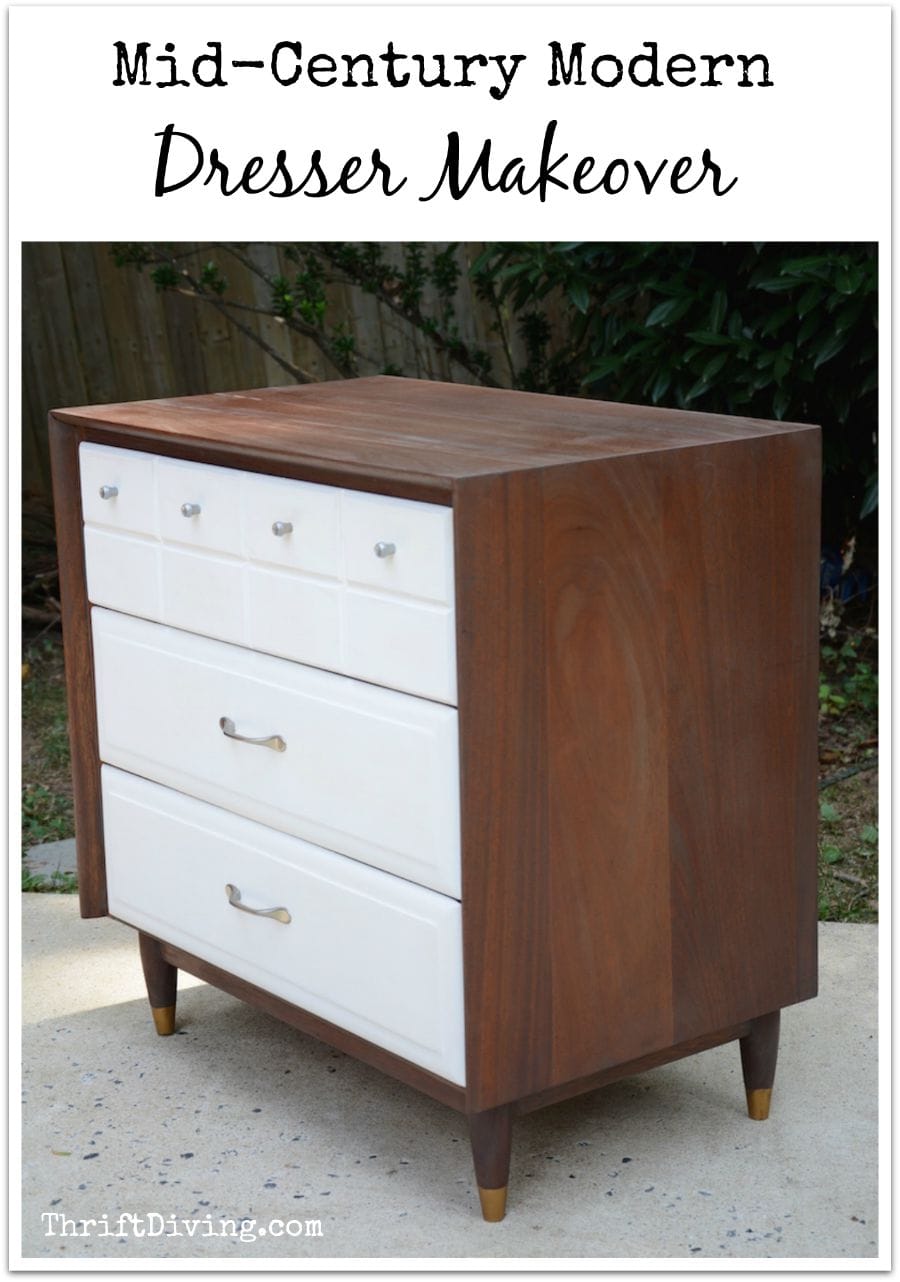
A Mid-Century Modern Dresser Makeover
You’d laugh if you saw my 9-year-old’s dresser.
They say that laughter is the best medicine, so if you’re feeling in need of a good laugh, here’s your daily dose of chuckles.
I didn’t clean up for you :). That disorganization is real, y’all!

I know….poor thing. The handles were falling off of this cheap $20 thrifted particle board dresser. It simply served a purposed, but it’s overstayed its welcome.
I’d been meaning to refinish a dresser for him.
It’s not like I don’t have a plethera of options (have you seen the stuff I find at my favorite thrift store???)
Like this one:
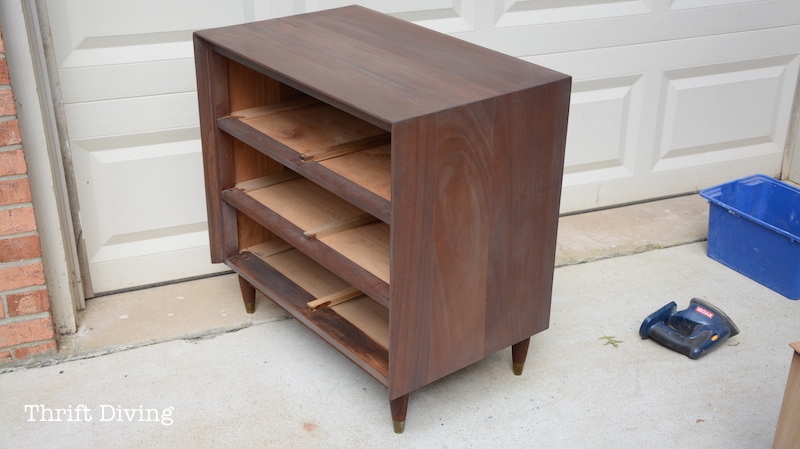
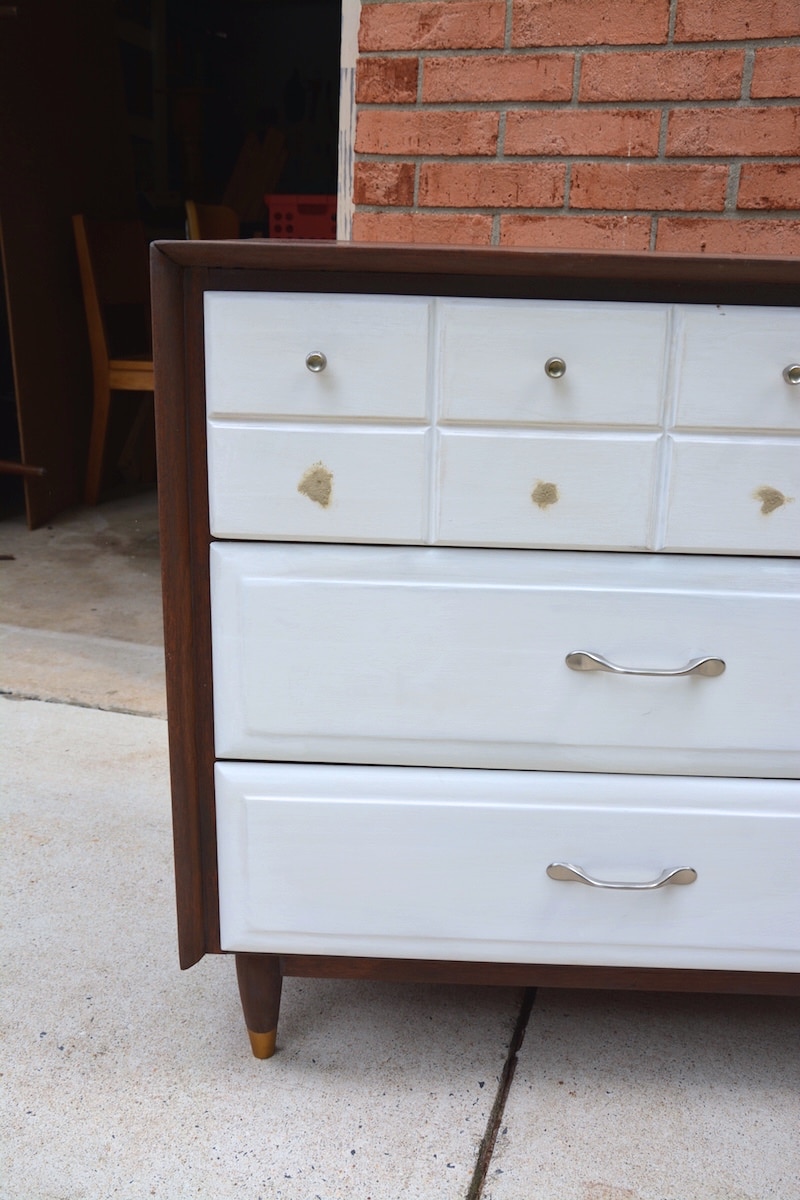
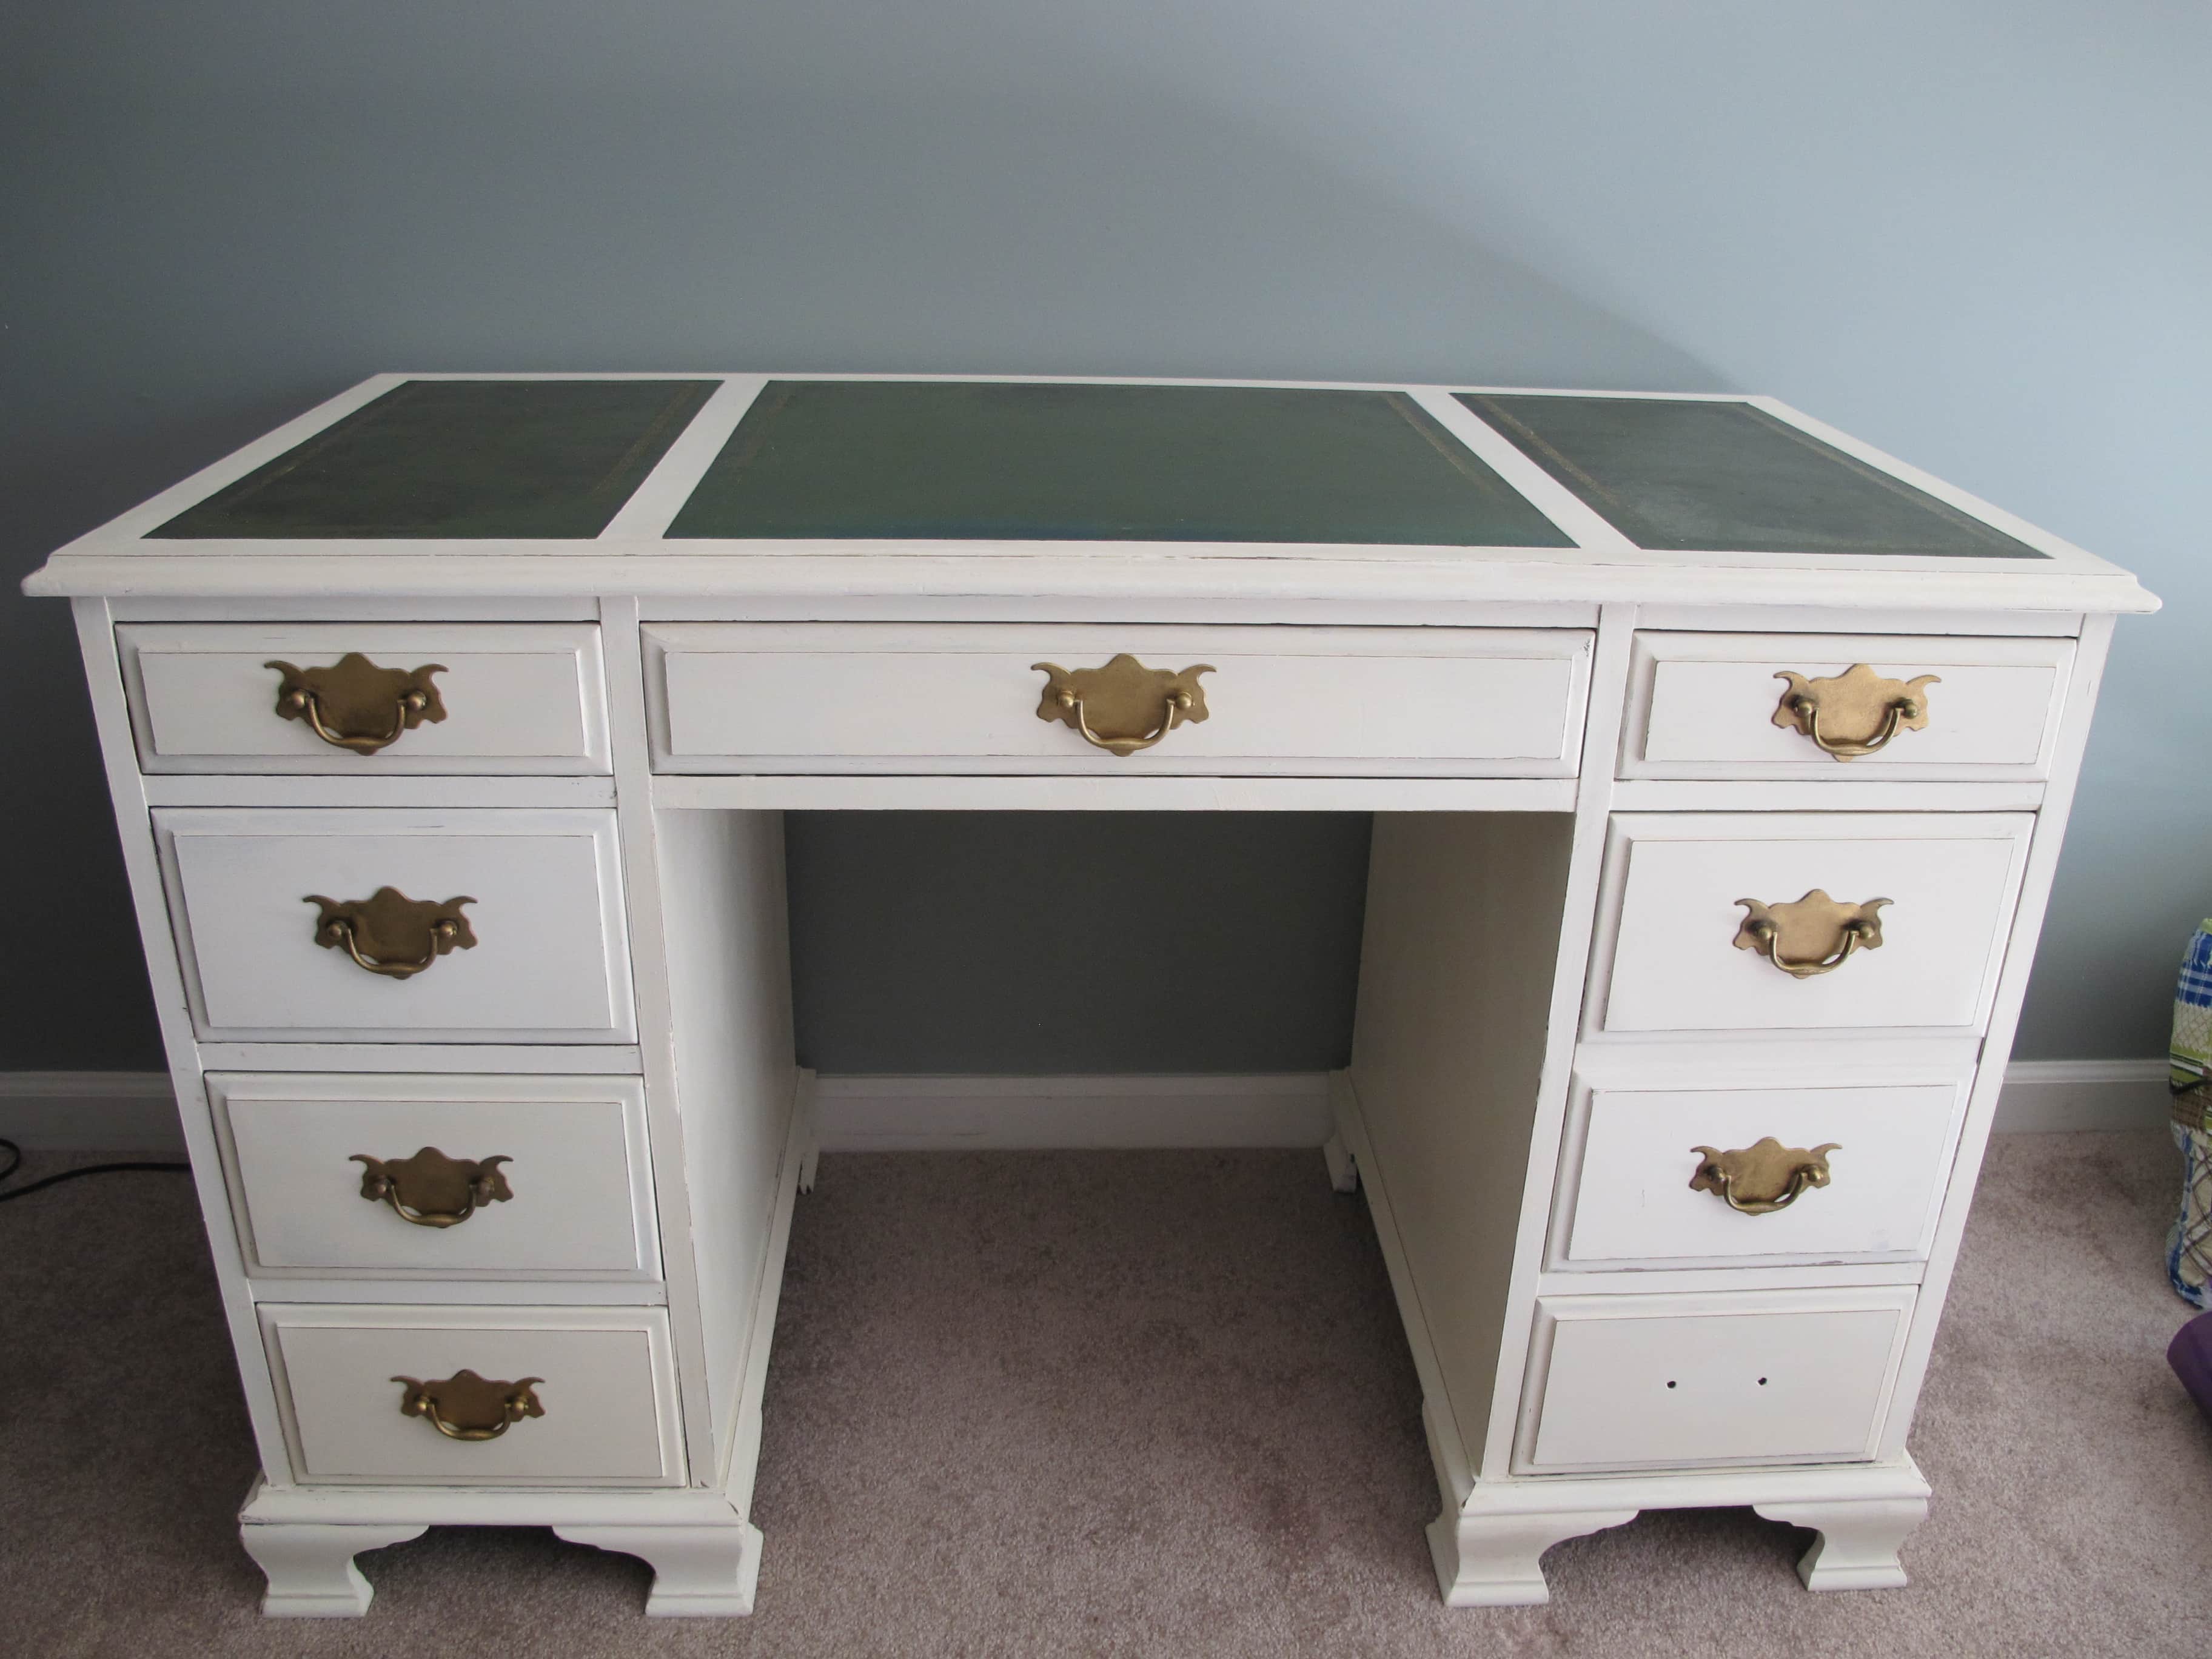
BEFORE
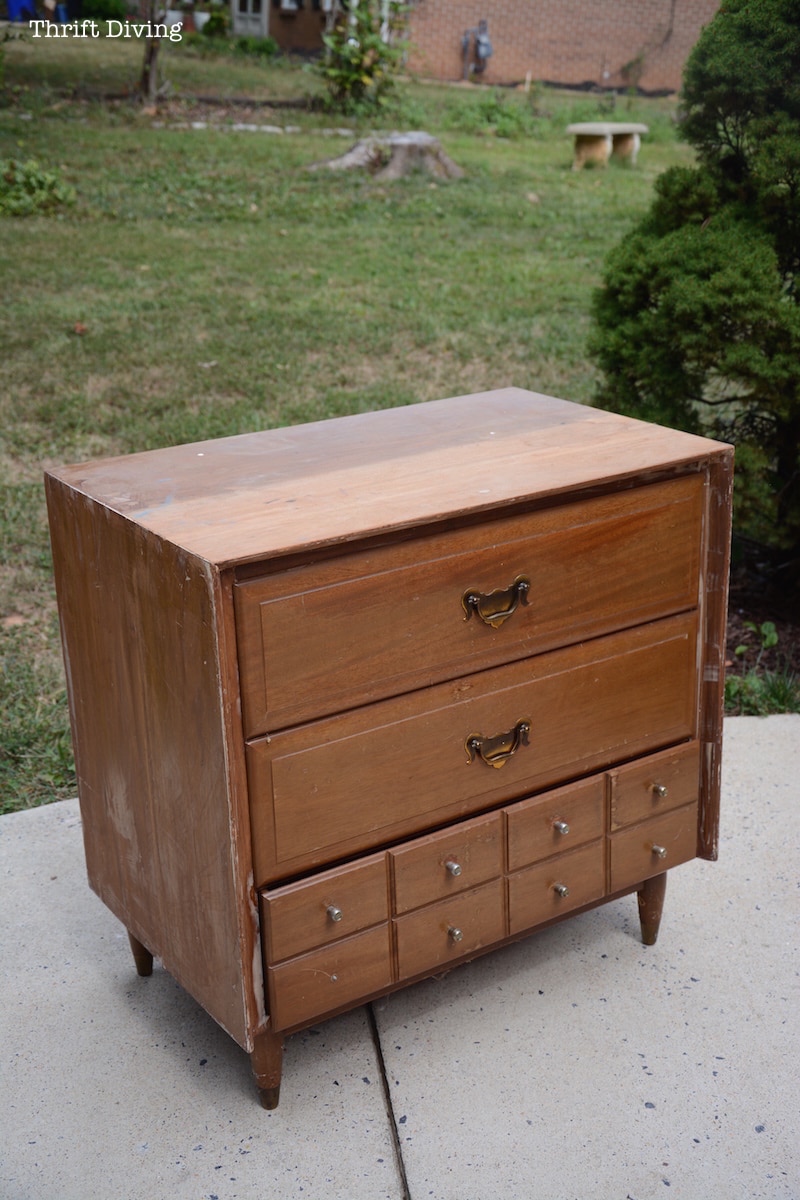
I had found this little guy about a year ago, and for $20, I couldn’t pass that up. Even if it was missing a knob.
….Only, I let it sit in my garage. While my baby’s dresser was falling apart. (Sorry, sweetie!).
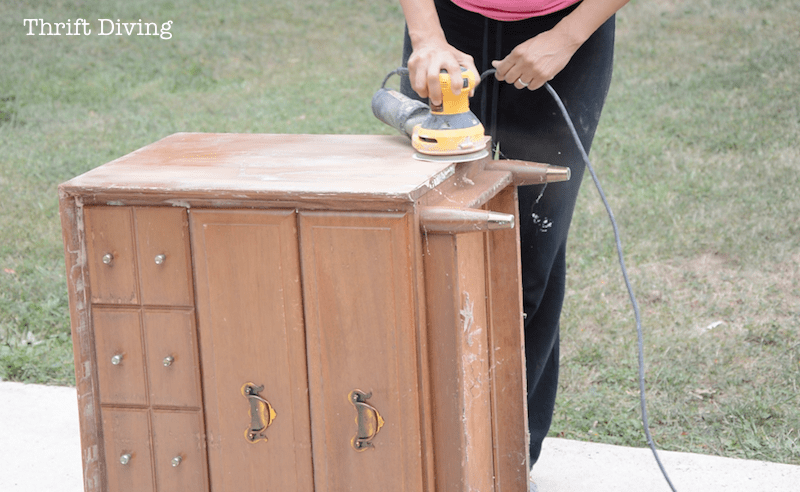
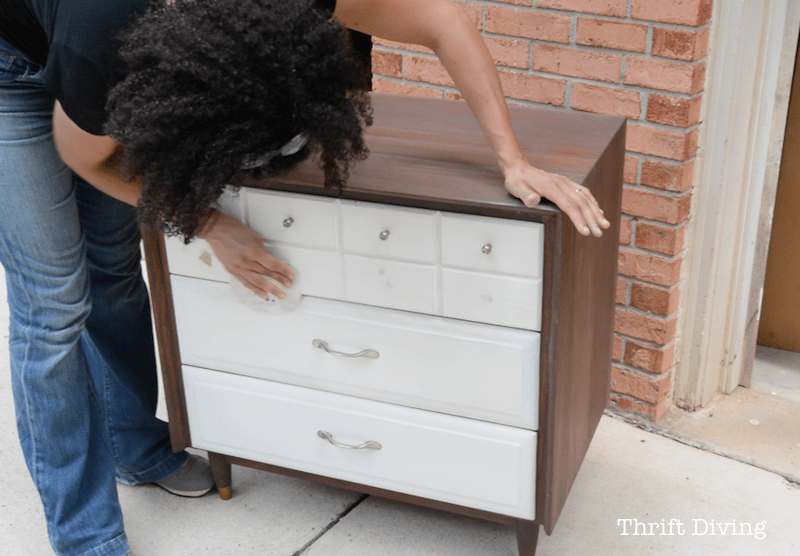
Well, this weekend, I busted out my sanding skillz and decided to transform this baby into something that my 9-year old could be proud of.
When I asked him if he likes it when I was done, he asked, “Why wouldn’t I??”
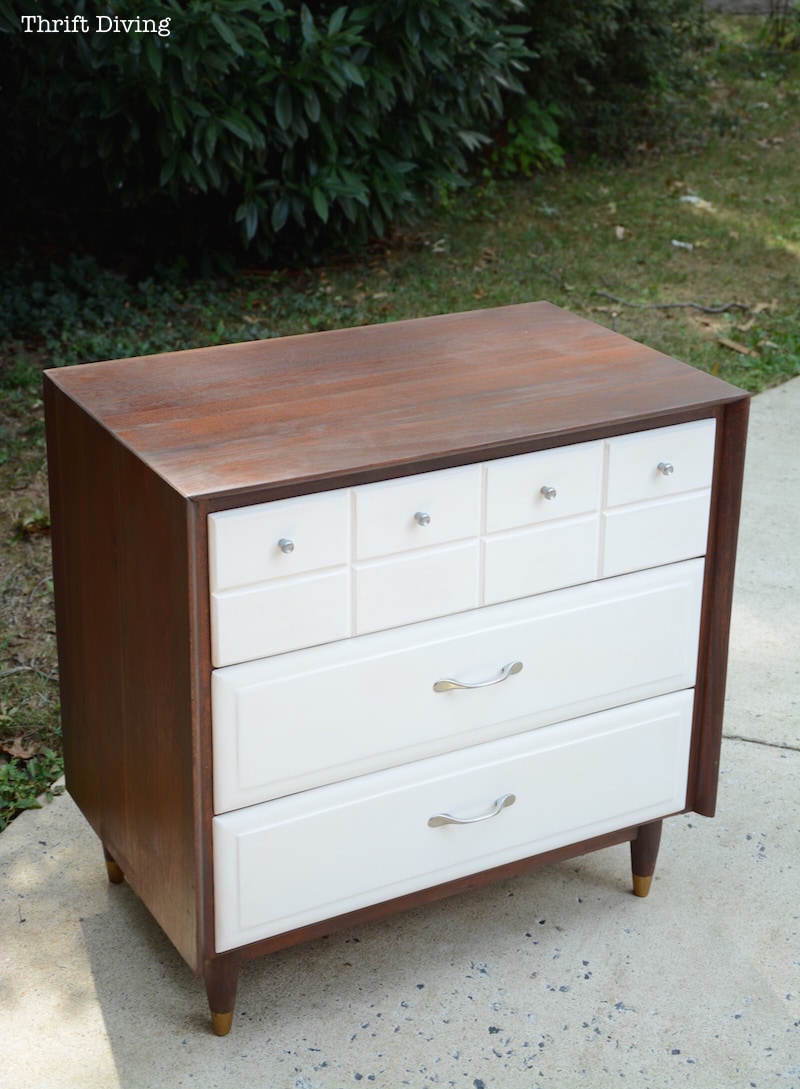
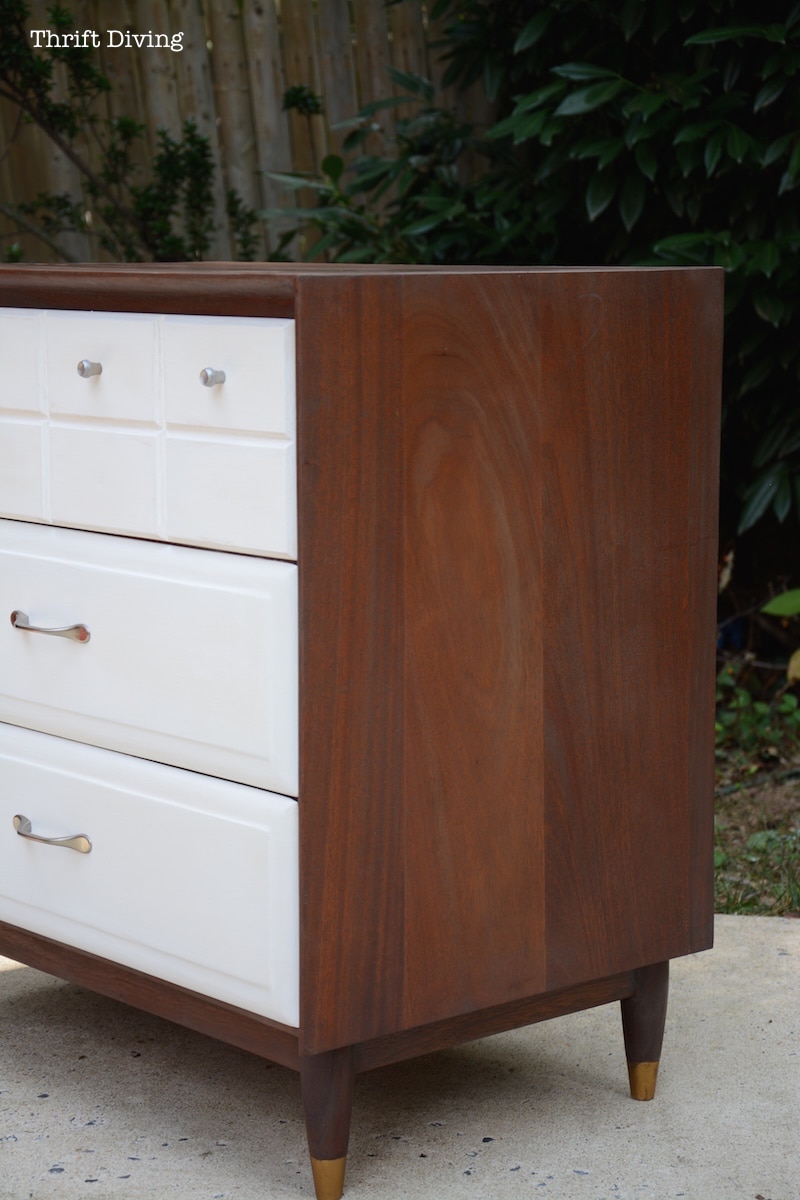
Here’s what it looks like now!
AFTER!

To Stain or Not to Stain?
That was the question.
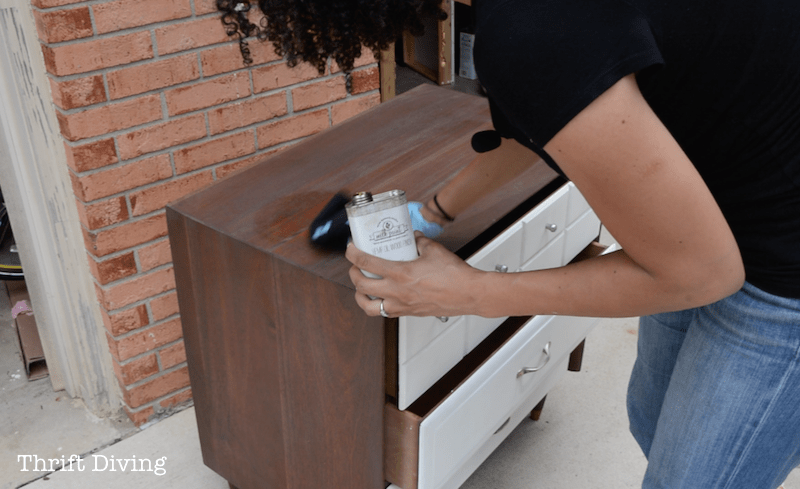
As much as I sometimes hate sanding, I actually really love that moment when stain hits fresh wood. It’s magical the way it sucks up the color like a magician. Paint just doesn’t have that same effect.
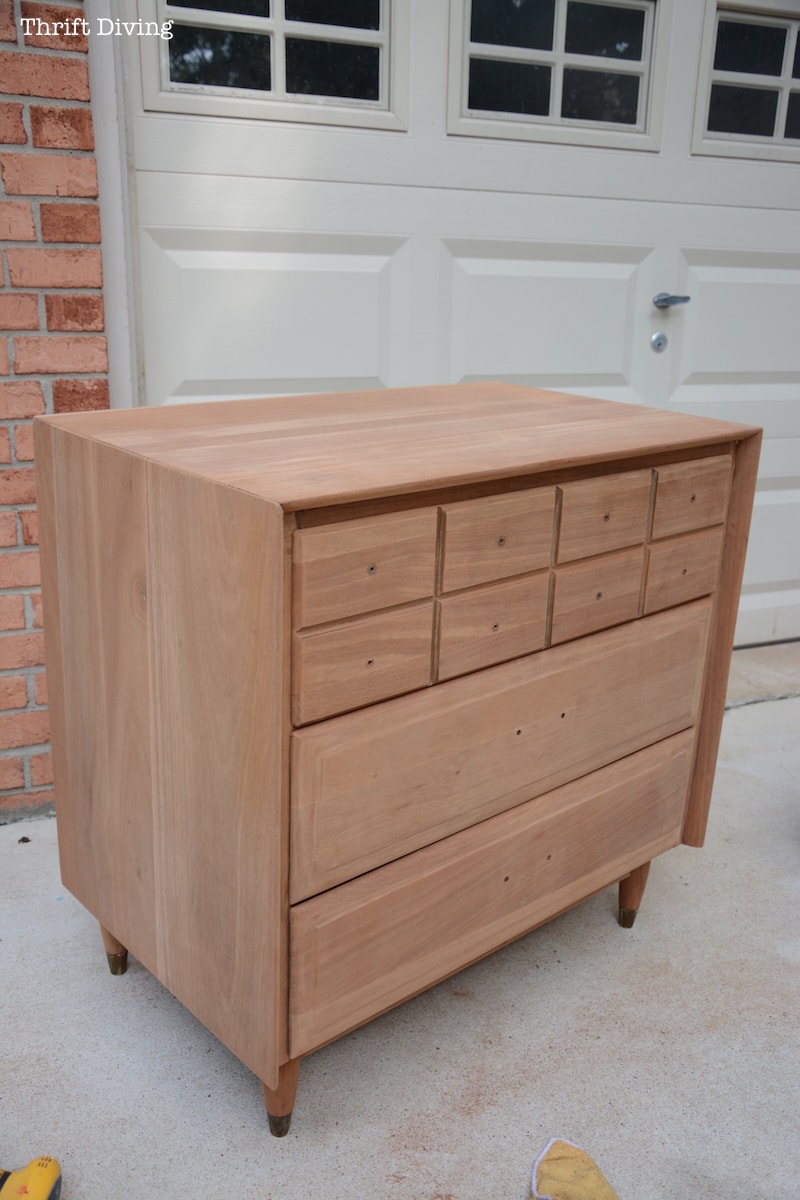
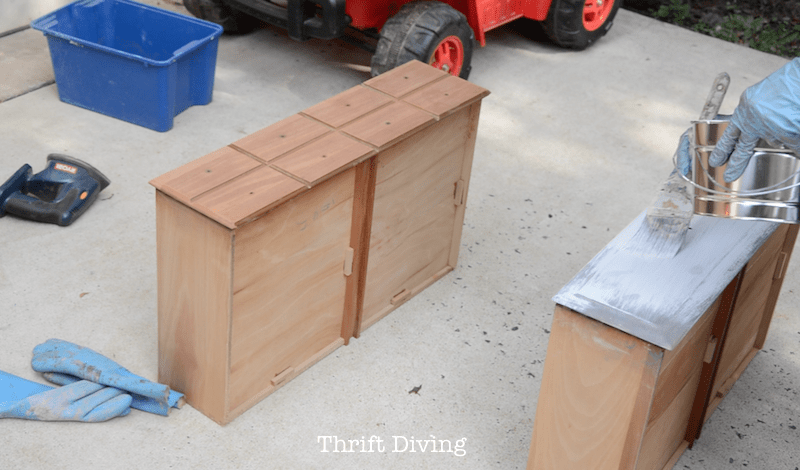
I decided to sand the dresser down to its bare wood, even the drawers.
TIP: When sanding wood with an orbital sander, start with tougher grit sandpaper and work your way down to a fine sandpaper.
There’s nothing like fresh, sanded wood, right?!
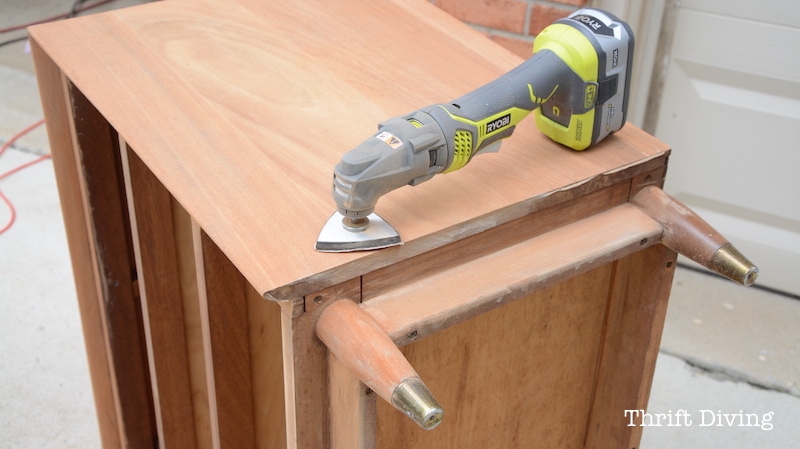
The thing I hate about sanding is getting into the corners. I just got one of these RYOBI Job Plus tools, which comes with a sander head for tough corners that my orbital sander can’t reach.
Sometimes I struggle with stains and figuring out what shade I really want.
But I stumbled on these two stains. They look awesome when paired together! (See how they look together on raw birch wood!)
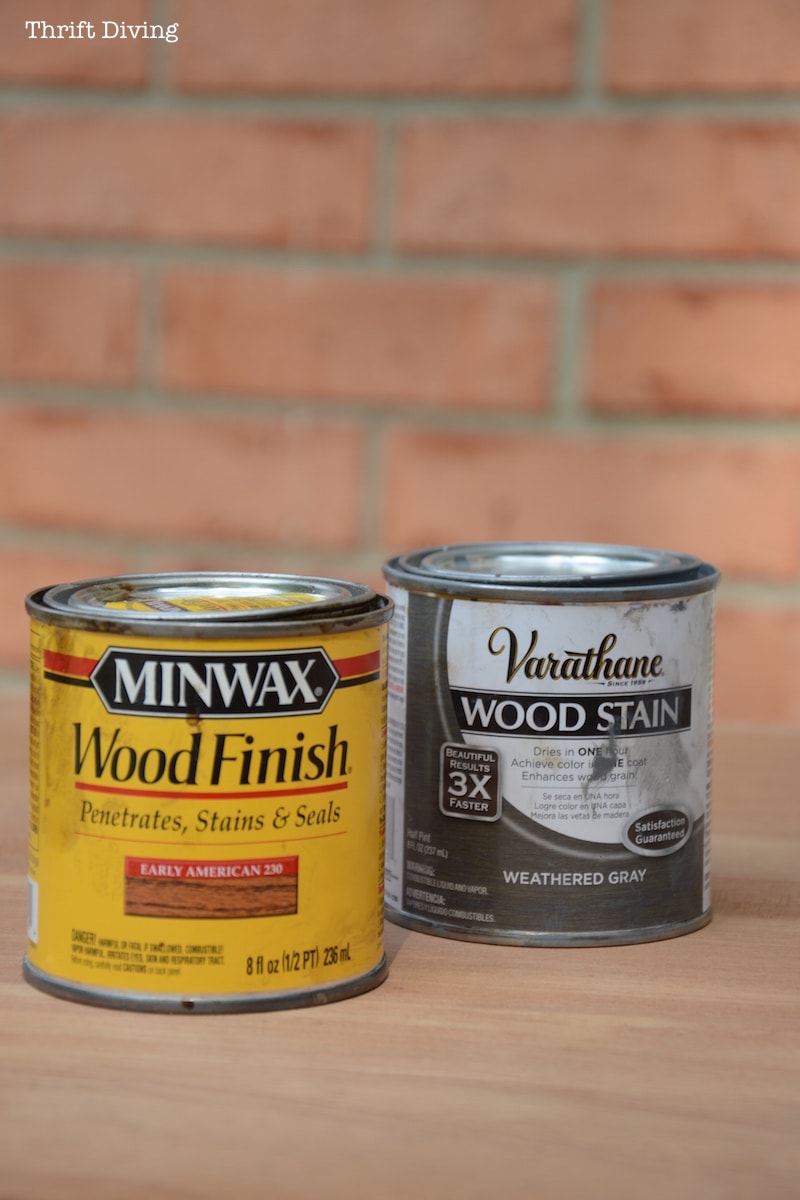
I wanted something that looked weathered, but the shade of the bare wood affected how the stain looked. The Early American shade turned out more reddish than I expected. I probably did two coats.
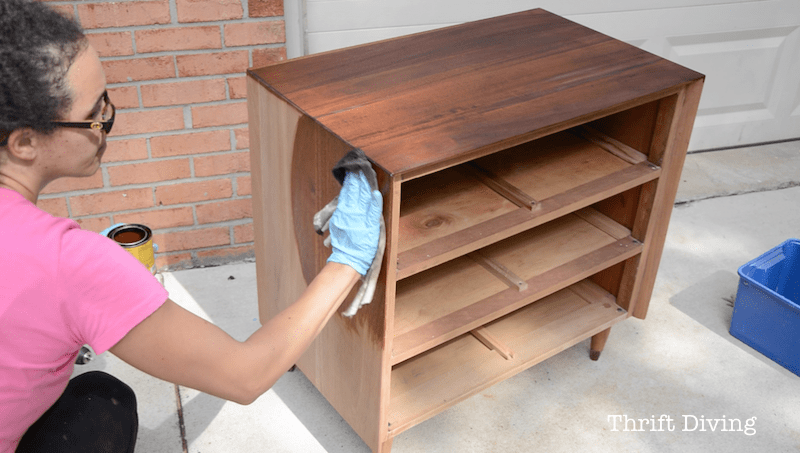
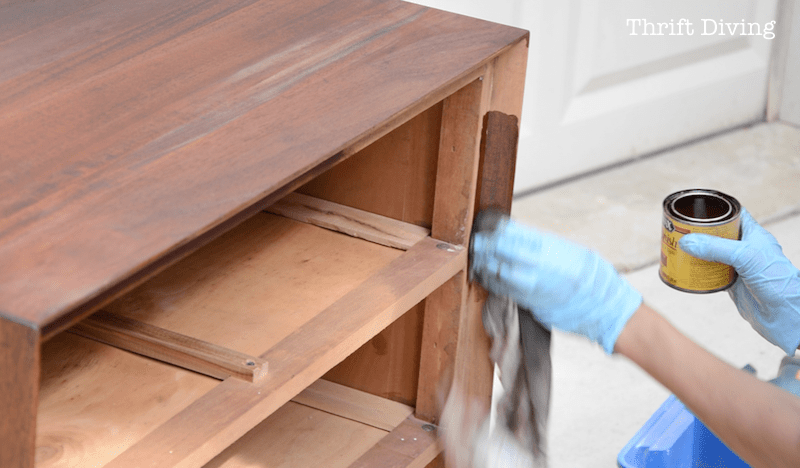
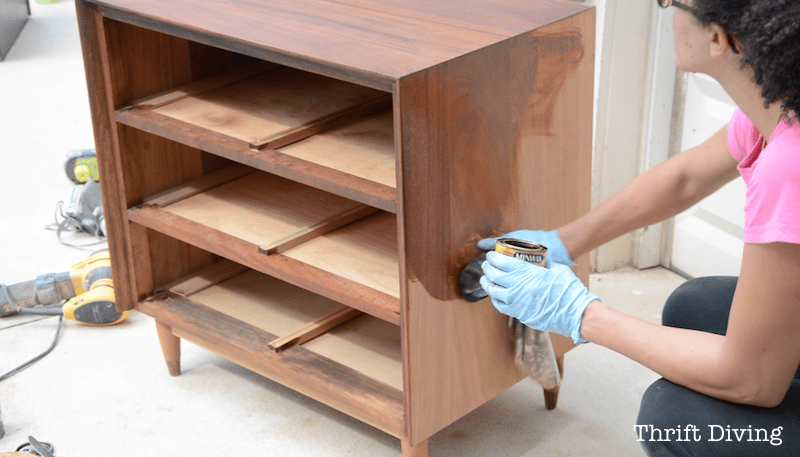
When I layered the Weathered Gray on top of the Early American, I wiped it off quickly.

Then, I dipped my rag in the Early American again and wiped another coat over the Weathered Gray.

The result was that the gray got ingrained into the grain which gave it a bit more texture. I love the result!!
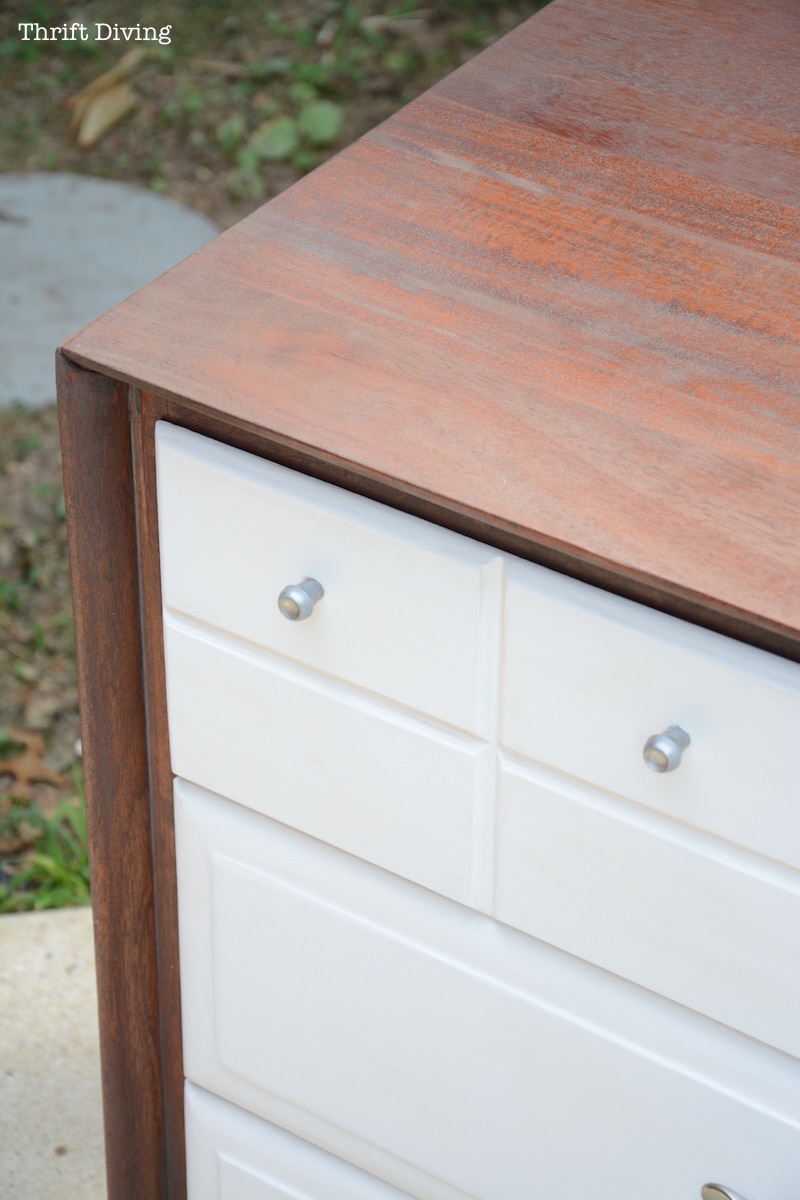
I painted the drawers white, but I had a crap of a time getting the white actually white because some of the old stain bled through where I tried to sand in between the grooves.
Finally, after just a couple coats, I just decided to apply a coat of wax over the paint and then try to paint again. Did it work? Meh– a little.
I finally decided that if I had a little bleed-through, oh well. My son wouldn’t notice. 😉
Not Enough Knobs!
Don’t you hate when you want to re-use knobs and pulls from an original dresser but you’re missing one?! I wish a magical Knob Fairy would just drop it in my mailbox.
This one had so many knobs it looks like the teats on the belly of a cat! HA!
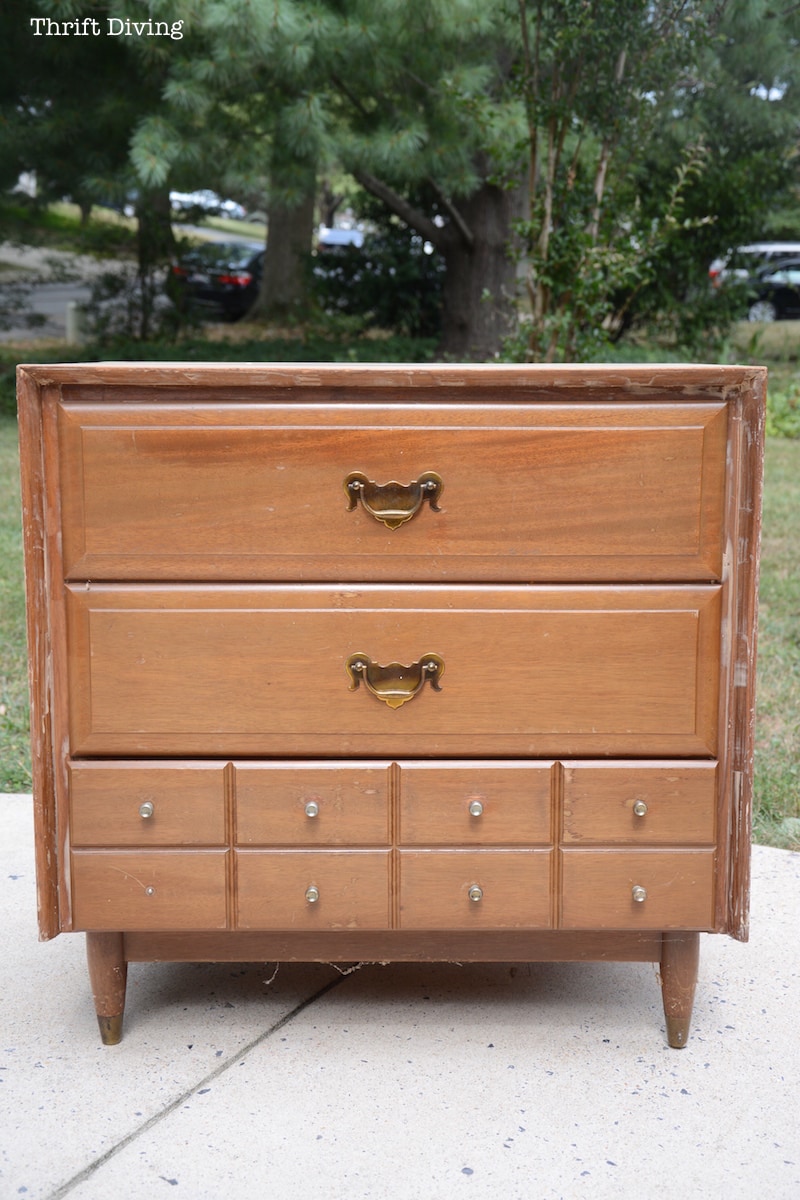
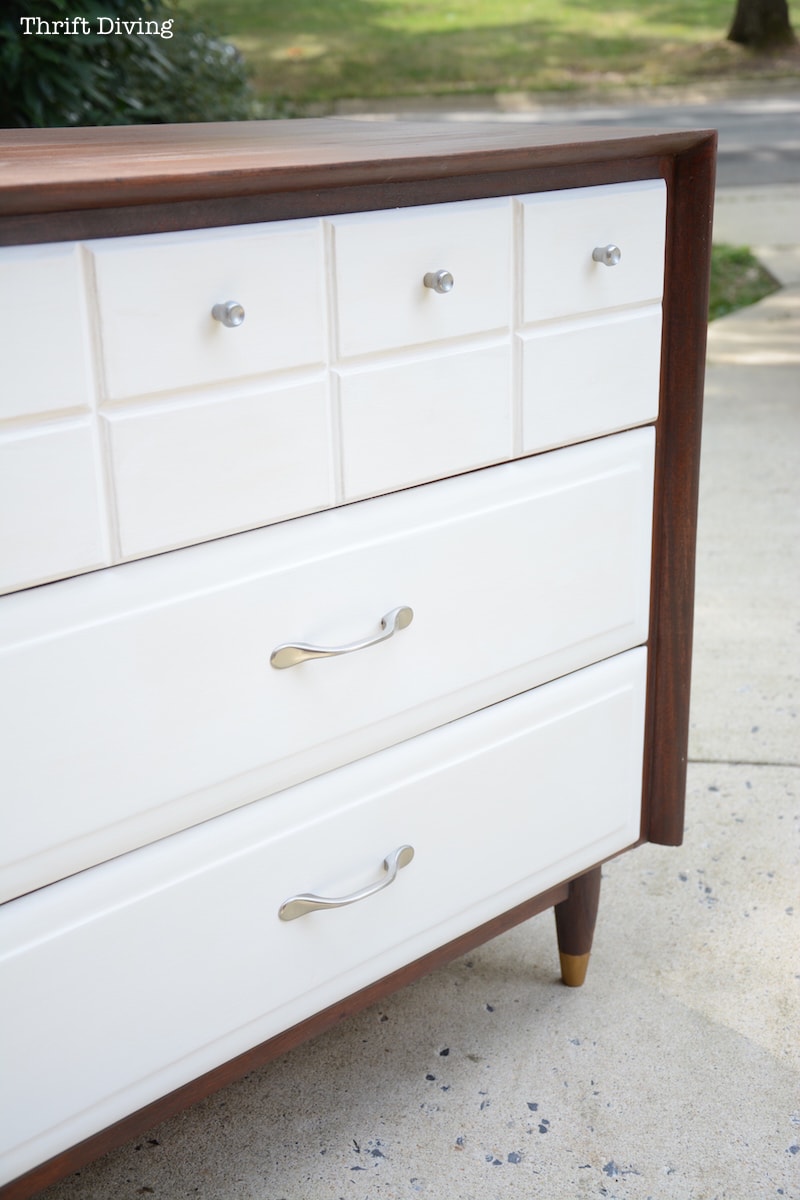
I decided that I would use only four of the knobs on top since I couldn’t find #8 and just use wood filler in the bottom row of holes (then sand them smooth). It was the best solution I could come up with without having to buy new knobs.
The knobs on the bottom were left-over when we redid our kitchen 5 years ago.
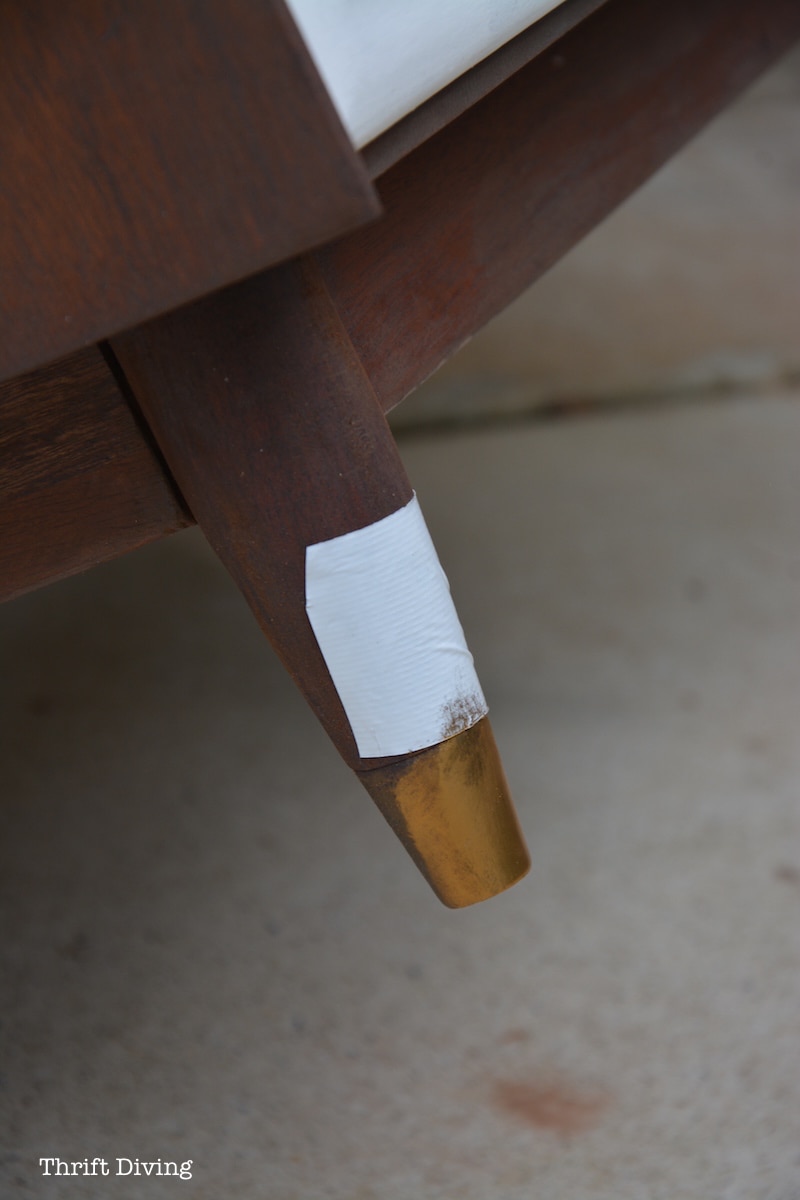
The knobs were chipped gold so I used a Sharpie oil-based paint marker to have them match the silver pulls.

And my favorite crafting tool of all is Rub n’ Buff. I can’t say enough about how transformational it is! (See my post: 5 Ways to Use Rub n’ Buff).
I think it turned out really nice!

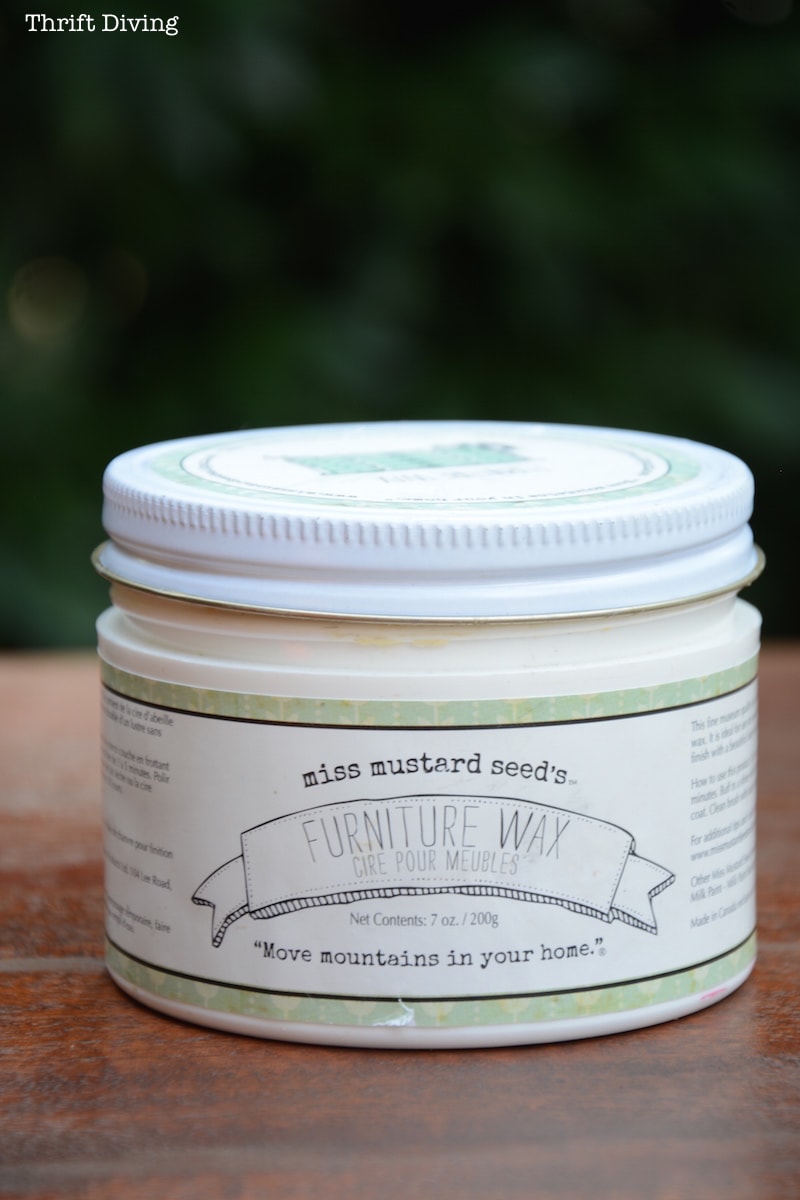
I love using Miss Mustard Seed’s hemp oil on freshly stained wood.
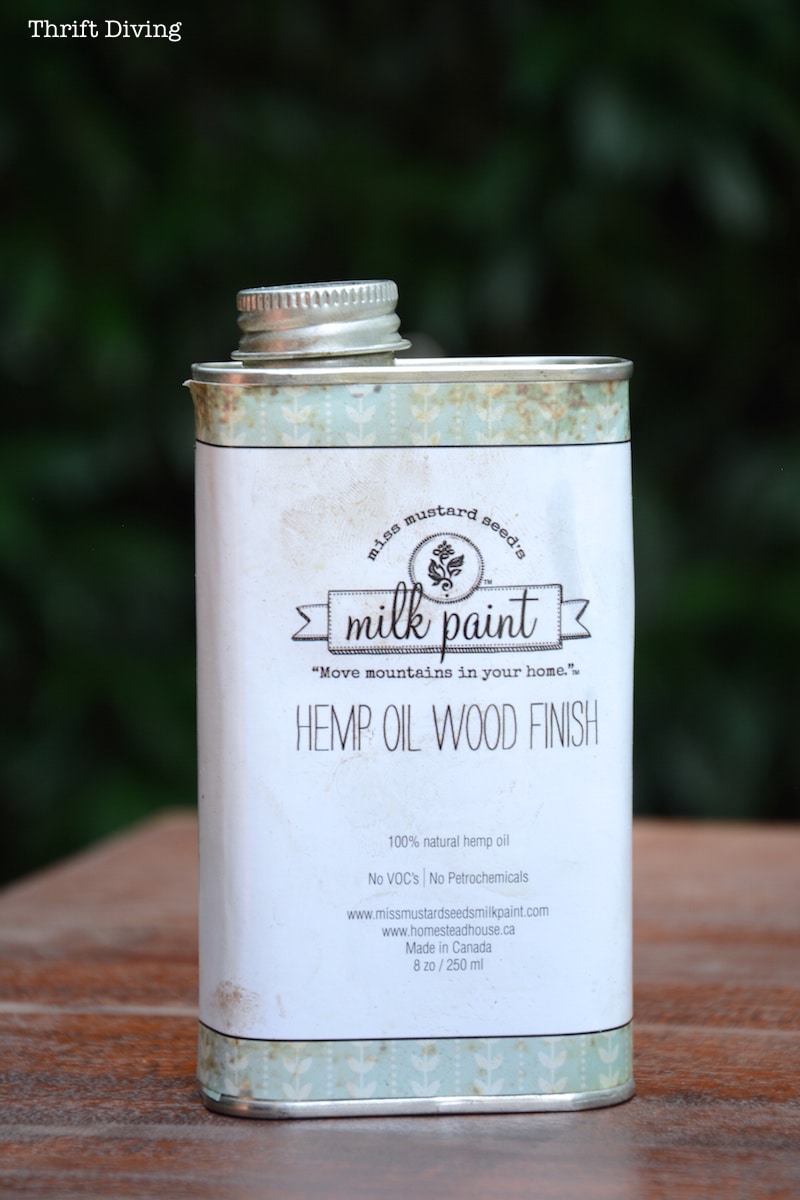
I wiped on two coats of oil.
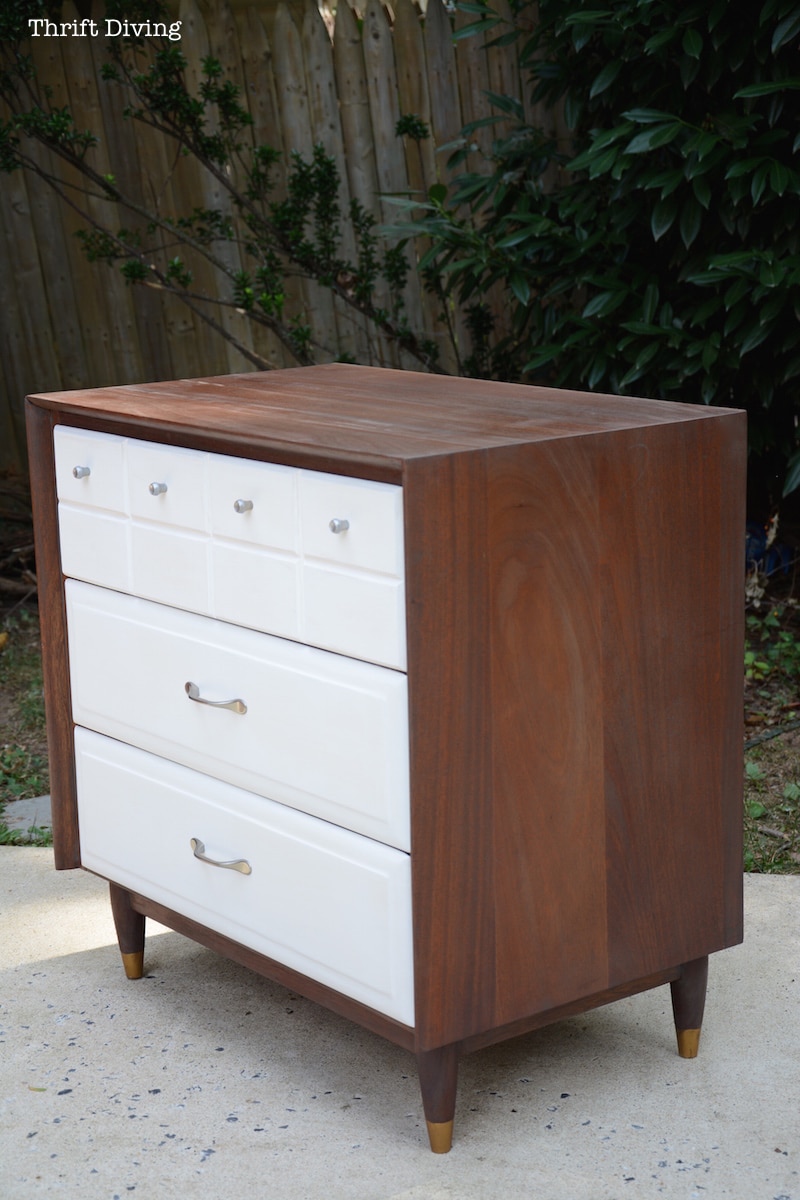
The top has a weathered look, too.
I finished the painted drawers with Miss Mustard Seed’s Furniture Wax.
I actually prefer this over the Annie Sloan clear wax because this wax doesn’t smell yucky like Annie Sloan wax!
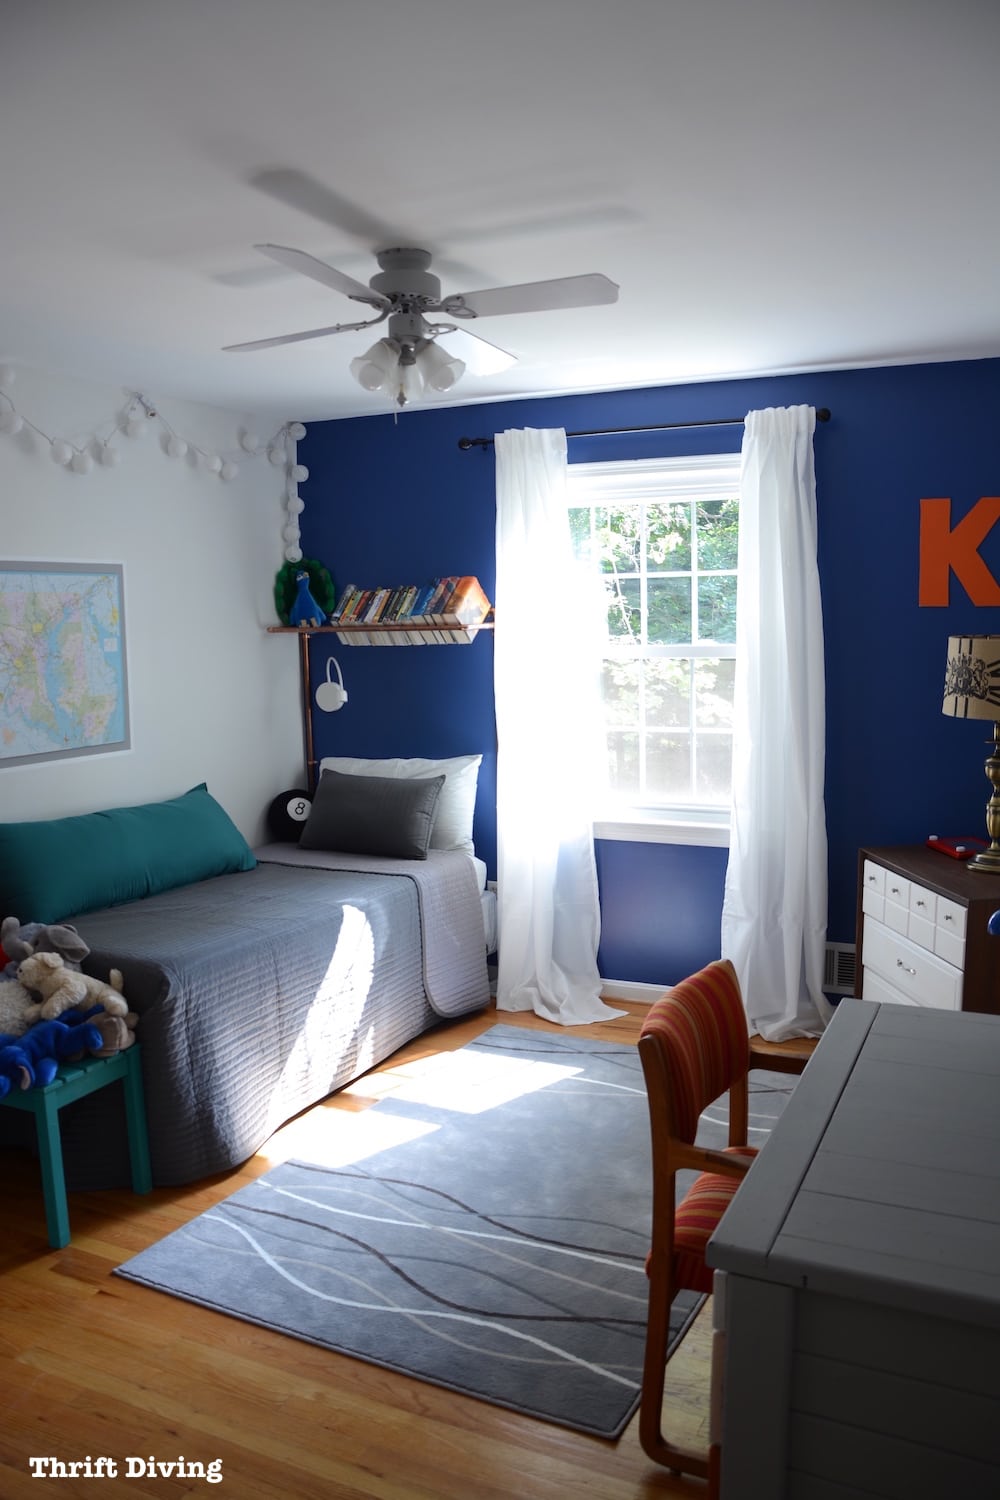
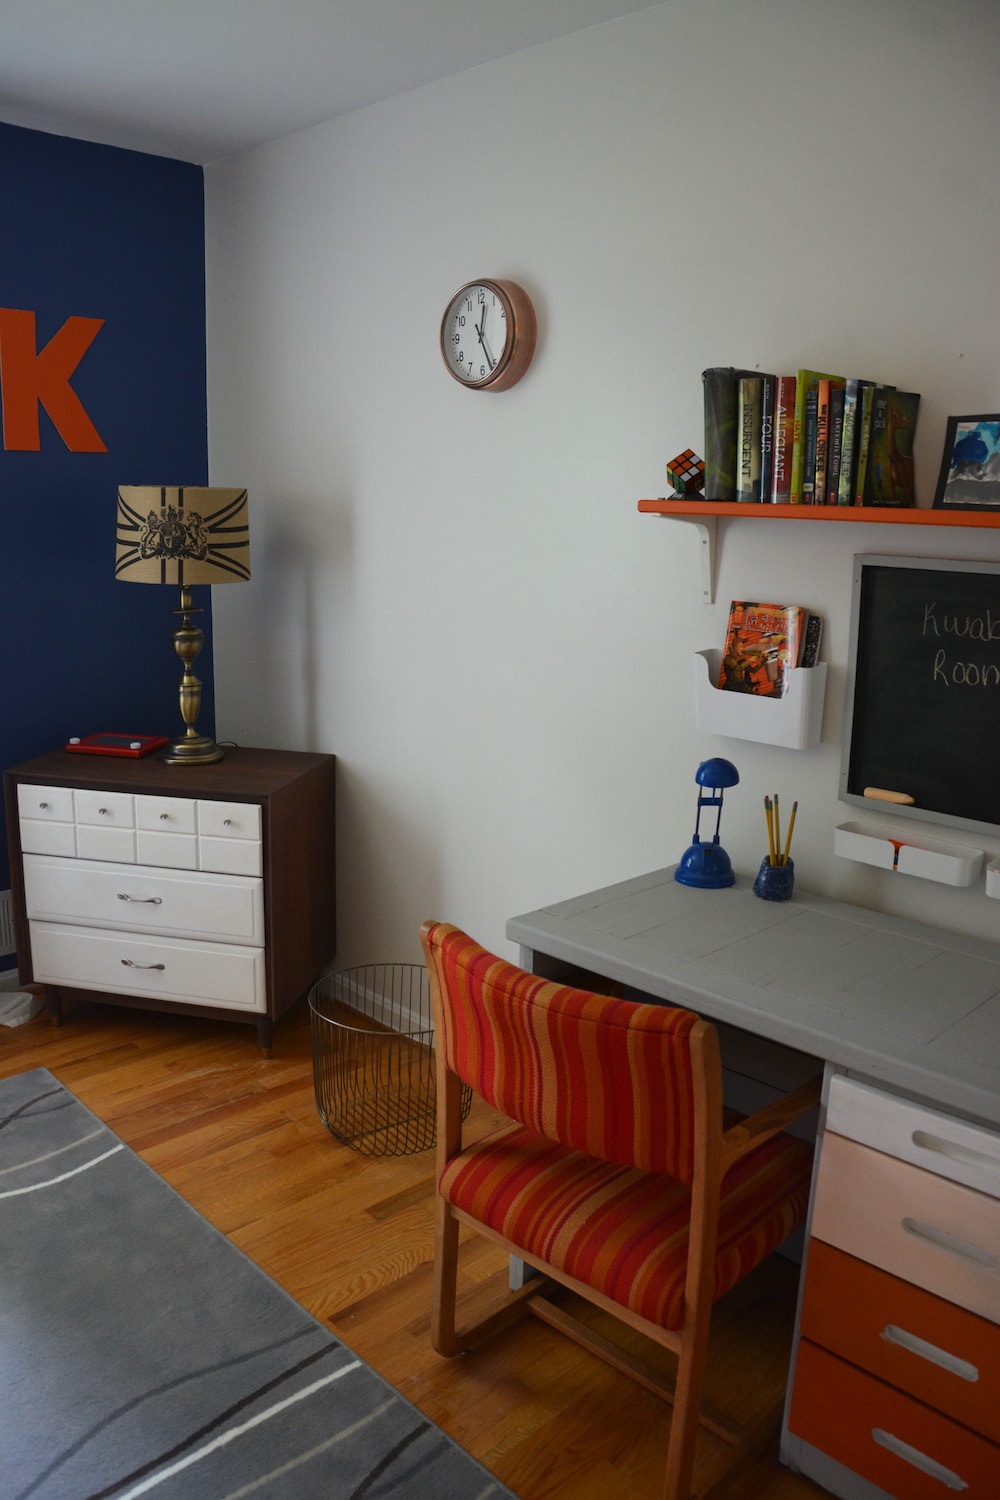
I don’t have my son’s room totally set up yet, so I’ll have to show you the dresser in its full glory once I get it together!
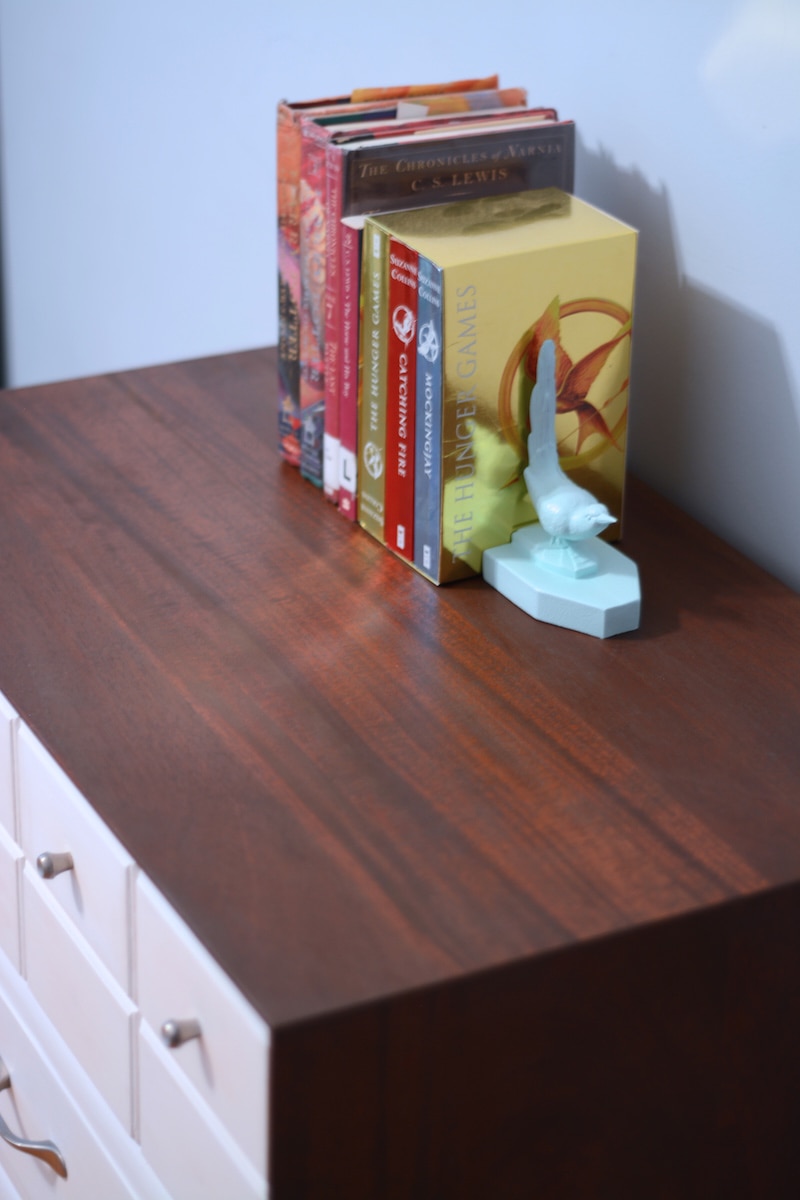
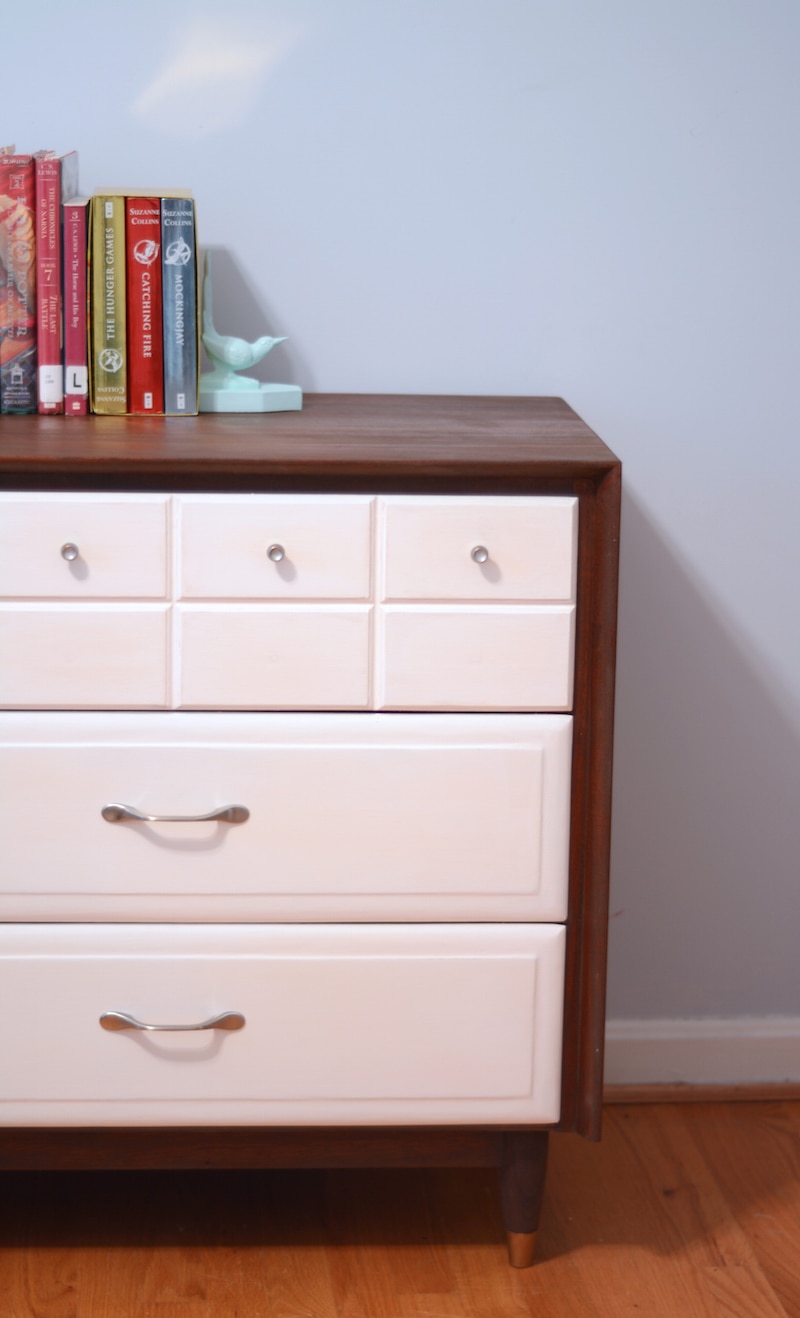
But I totally love how this turned out!
Maybe it’s a little grown up for my son, but he’s a big boy now. (He just started 4th grade today!)
And he doesn’t deserve a dresser that’s falling apart.
He deserves something that is handsome and functional.
The dresser was later put in my son’s blue accent wall bedroom!
So what do you guys think?! 🙂 Leave a comment and let me know what you think!

Link Party
Download the 5 freebies!

Thrift Diving inspires women to decorate, improve, and maintain their home themselves...using paint, power tools, and thrift stores! Use these 5 printables, checklists, and ebooks to get started!


I love the dresser too, can use it in so many different ways and as your son grows he’ll get lots of use out of it!
Noticed many recommendations for using shellac first to prevent bleed through. That’s a very old method of refinishing furniture and it is an excellent wood sealer. Actually used to come in flakes to mix with solvent to use! (OK_I’m not that old – heard about it!) Very popular when wood stain was King! It also works well to remove the build up of wax and dirt on very old furniture. I have heard that it can take the finish down to original color of the first wood finish. Not sure if that is safe to do though. There is only one draw back to using shellac the SMELL is horrible. I am sensitive to things like that and can’t use any products with shellac in them.
Oh, the smell! ICK! Thankfully I use a respirator mask, so even the nastiest odors don’t get through. It only cost about $30 at Home Depot and I use it for sanding and for spray paint (generally) since I hate the smell of spray paint. I’ve tried the spray shellac but didn’t find it that useful but I’m willing to try again and to keep some on hand in case I run into that problem again (I’m sure I will!).
Thanks, Mintchip! 🙂
super awesome gorgeous makeover!!!! im good at following instructions… but coming up with the ideas myselfy… not so much. mind blown!
Hey, md! Well, hopefully I gave you some pretty good instructions so you can re-create something like it! 🙂 Thanks for your comment!!
Totally handsome now! It looks fantastic and will grow with your son for years to come, Smart way to solve your hardware dilemma too 🙂
Thanks, Christy! Today we even bought a fresh-smelling drawer insert to make it smell really good inside! 🙂 He loves it!
Amazing!!!!!!,I love it.
Thanks, Ruth!!
Your dresser turned out beautifully! It looks brand-new, off the showroom floor! I really like the way you switched the drawer from the bottom to the top. Now it is the focal point of the piece. Keep those redo’s coming, Serena! 🙂
Thanks so much, Gracie! 🙂 Yep, sometimes a switcheroo is all you need! 🙂
Just beautiful – I love the white painted drawers!! I could kick myself for passing on a similar set in my neighborhood, dresser and chest with a walnut veneer for $50 just because I didn’t know what I would do with it!! I won’t do it again since I have read a lot of people have their garages full of future projects. Love seeing all that u do!
Join the Junky Garage Club, Nancy! 🙂 LOL. Yeah, if you see a reaaaally nice piece, don’t pass on it! Then again, don’t let your garage get totally out of control. Mine isn’t too bad anymore, because I stopped piling it up. Plus, I don’t generally sell my furniture and stuff; it goes in my house. Since I’m running out of walls to put stuff, I decided I can only bring something in if I am ready to remove something else :).
I think this is the best furniture makeover I’ve ever seen. Staining and painting was a brilliant idea!
You’re so sweet, Vanessa, thank you! 🙂
I have a dresser I planned to rehab but have been thinking I’d get it done instead. After seeing your transformation, I’m determined to do it myself!
You can totally do it, Margaret! It’s really not hard. Just takes some time, is all :).
The results is fabulous!! I love the contrast of dark against the white. I really want to try this. Thanks for the inspiration!!
beautiful–your hard work really paid off
Thank you, Jackie! 🙂