Wooden Kitchen Signs: They’re Easier to Make Than You Realize
This wooden kitchen signs tutorial is sponsored by The Home Depot.
What’s the first word that comes to mind when you think of wooden kitchen signs? Yep–if you’re like most people, the word “EAT” comes to mind. I bet you can’t walk into a Hobby Lobby without seeing at least one farmhouse weathered sign with huge E-A-T letters that would look great on your kitchen walls.
But that’s what I don’t like: what’s popular and en vogue. I don’t want my house looking exactly like the shelf of a store, where someone could walk in say, “Oh wow! I bought that same sign!”
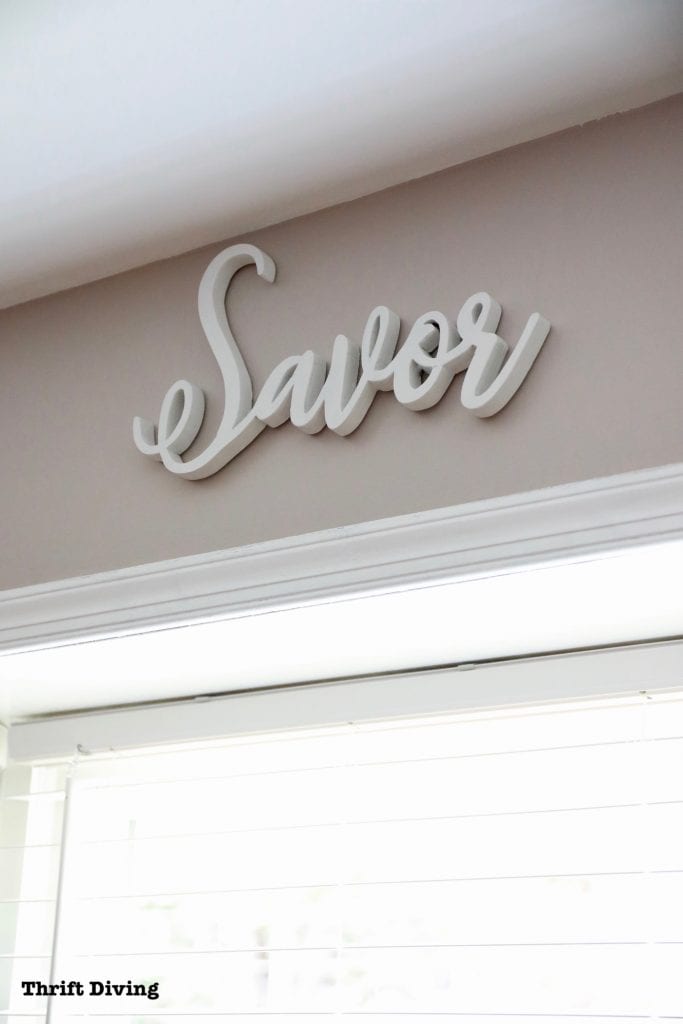
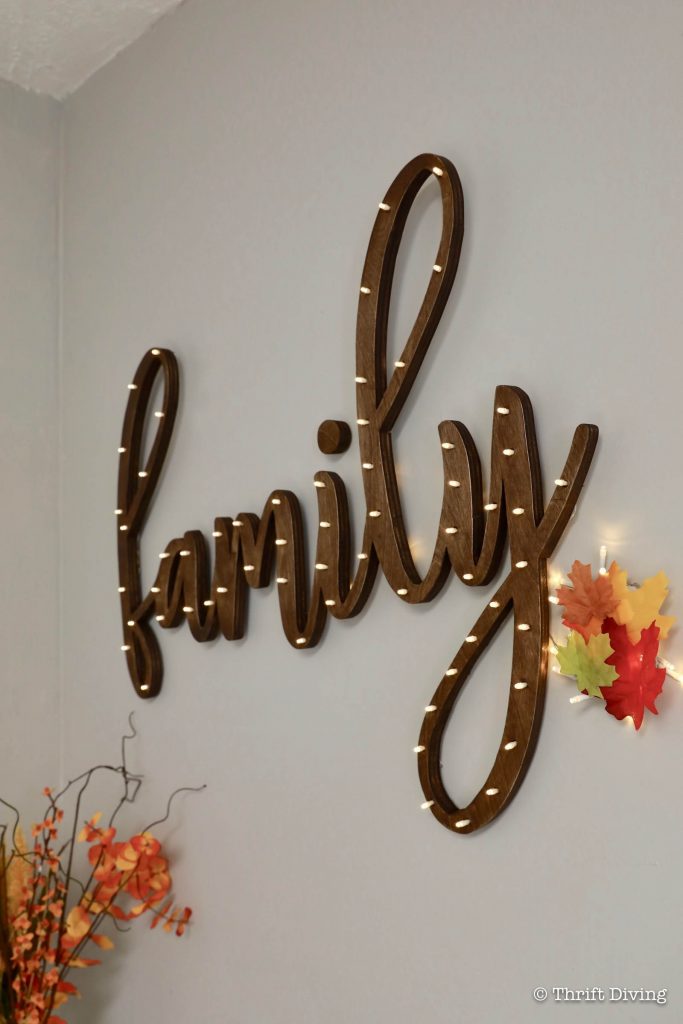
But you can’t deny how homey wooden kitchen signs look. So I decided to jump on the wooden kitchen signs bandwagon (and if you have been a reader for any length of time, you know how I hate bandwagons…). But instead of choosing a word a common EAT kitchen sign, I decided to make my own and choose a word that has even more personal meaning to me. And that word is: SAVOR

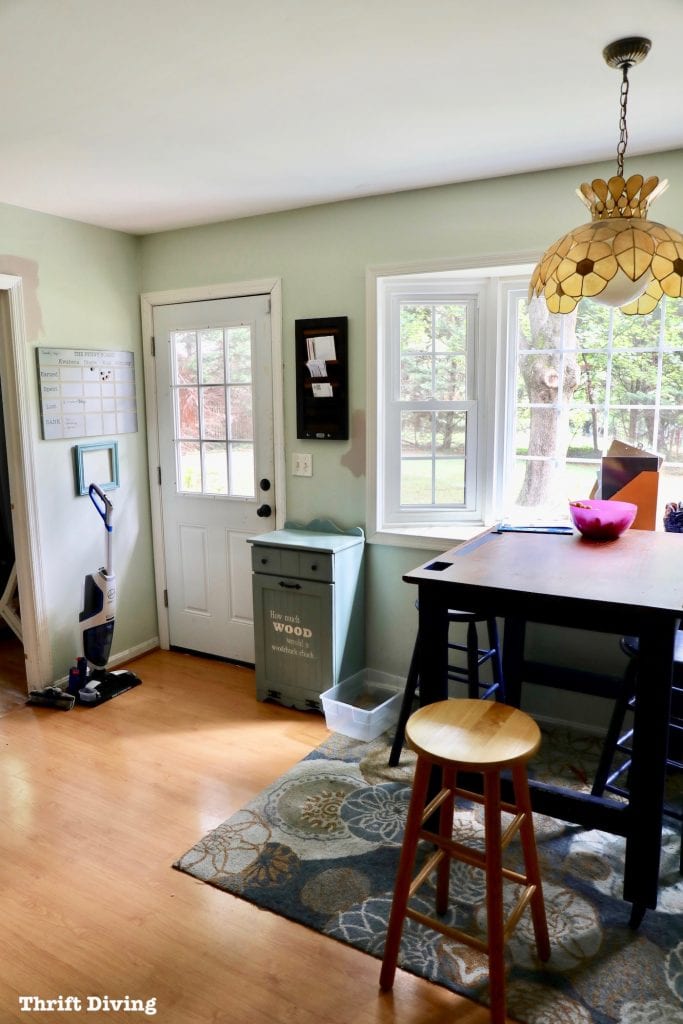
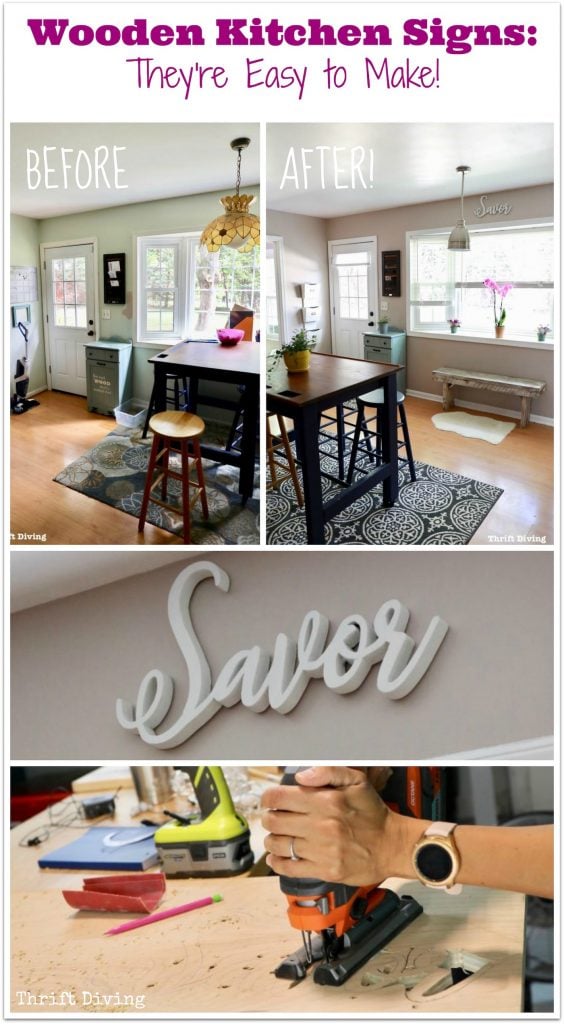
BEFORE
This, folks, was our kitchen. It has gone from Little House on the Praire when we bought it….to school bus yellow…to this horrid pale puke green that did nothing for the kitchen. For some reason, I could never get the color right in this kitchen because of the dark cabinets (which we had someone install when we moved in). What color goes well with dark kitchen cabinets? All the earthy colors that didn’t interest me: yellows, reds, green. Bleh!
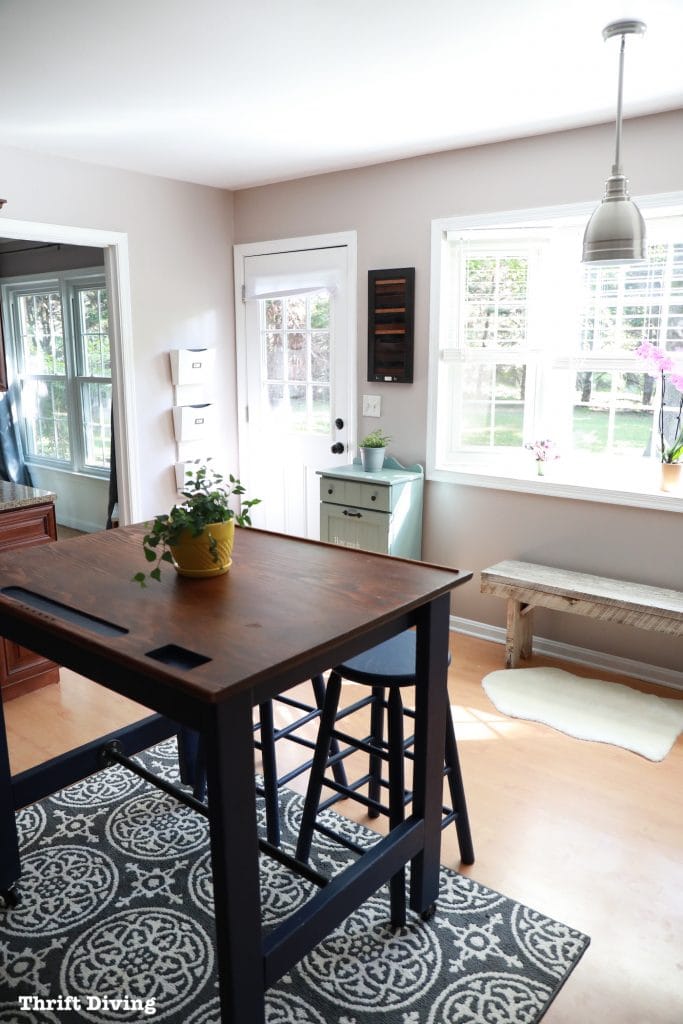
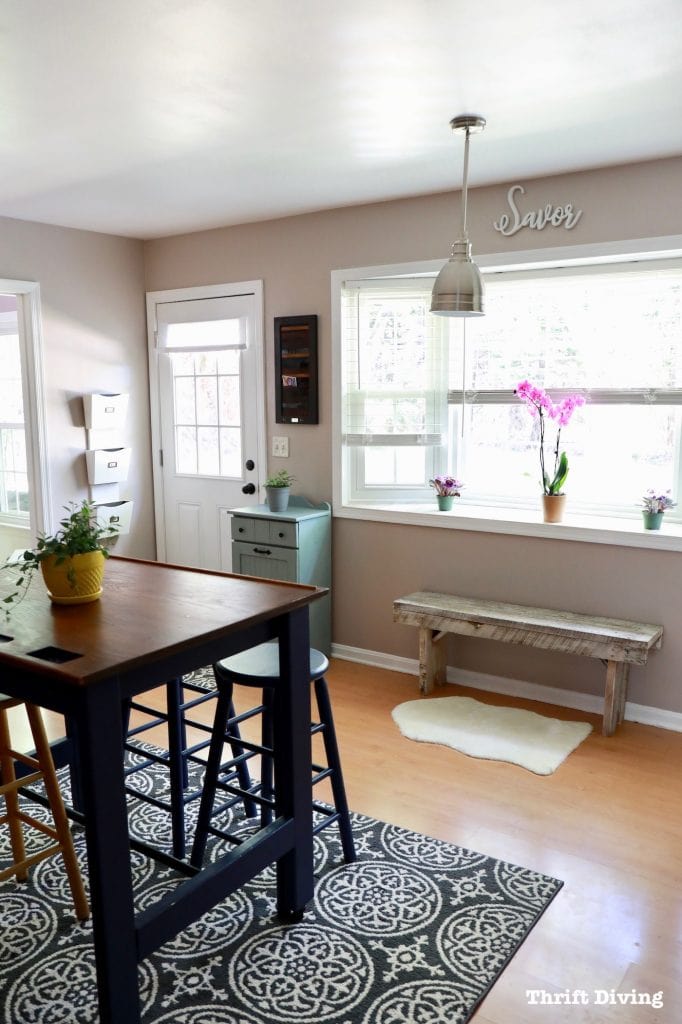
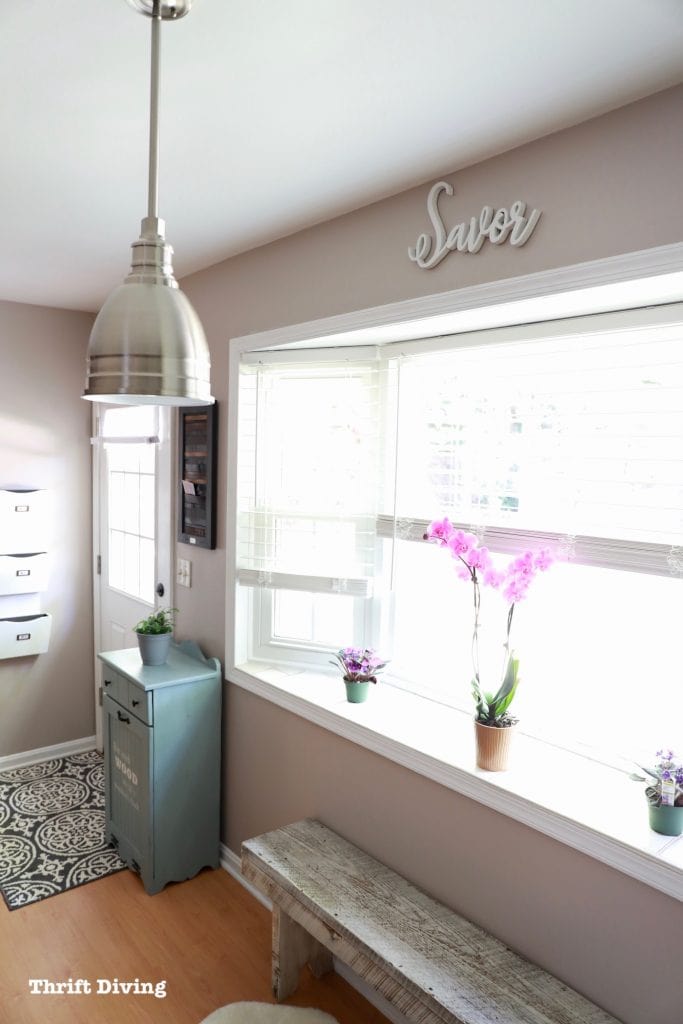
AFTER!
But finally! I found the perfect color (Sherwin Williams Temperate Taupe, which is the same color I used for my pretty basement makeover when I had to repair the drywall). The hint of lavender was so slight, but oh-so-right, that the cabinets no longer looked like an eyesore but actually complimented the paint color!
I mean….I know that I didn’t do that much to my kitchen, but the things I did do made that much impact! New lighting….new paint color (I adore this Temperate Taupe, with very slight lavender undertones)…new rugs…and simply moving the table to the center to use as a kitchen island….It all works! Oh, and if you want to see how I build that eat-in kitchen table, you can see how I turned an old drafting tabletop into this table.
Believe it when I say that I channel my inner Eddie Murphey when I walk into my kitchen now clapping my hands, “Hercules, Hercules!”
But the walls needed some wall art. So I chose the word “SAVOR” instead of an “EAT” kitchen sign. The reason this word is perfect is because that is how I treat my food now. You see, I have a medical condition called achalasia (you can read about my journey here). A little over a year ago, I literally wasn’t able to eat more than a few bites before I would feel sick and uncomfortable due to my tight esophagus and dead nerves. I suffered from chest pains, regurgitated in my sleep, and lost a lot of weight (that was the only benefit, which I can joke about now!).
Thankfully, with surgery, I am 95% improved (for now, at least, since it’s not uncommon to have problems again later, but that’s another topic for another day). So I wanted to make a kitchen sign in my newly decorated that honors my new relationship with food.
To make this “SAVOR” kitchen sign, keep reading for easy instructions!
Materials to Make a Wood Kitchen Sign With a Jigsaw
(I participant in a Home Depot affiliate program designed to provide a means for me to earn fees by linking to HomeDepot.com. This costs you nothing extra when making a purchase).
- 3/4″ plywood (although you can use whatever thickness of wood.)
- RIGID Jigsaw
- Computer paper to print a stencil. (Follow these instructions to make it.)
- Drill and drill bits
- RIGID Wet Dry Vac (for cleaning up).
- Sandpaper (150- and 220-grit)
- Paint
- Stain
- Rags/towels
- Sticky tabs or hooks for hanging
WATCH: How to Make Wooden Kitchen Signs
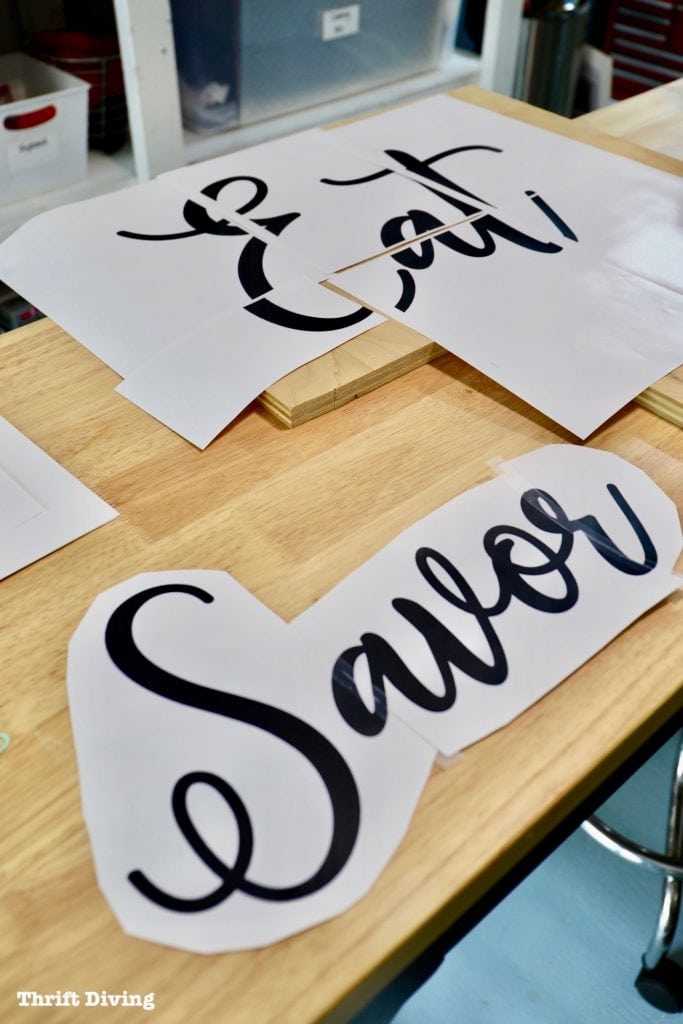
STEP 1: Print Out the Kitchen Sign Stencil
If you can believe it, you can make big wall stencils simply by printing them off of your printer at home! I won’t get into the nuts and bolts of how to do that (since I covered that step-by-step tutorial when I made another DIY word light sign the previous year). But it’s basically just printing out the sheets, taping them together, and then cutting them out!
- Savor
- Sip
- Indulge
- Drink
- Taste
- Delish (as in “delicious)
- Enjoy
- Relish
There are lots of words to choose from to make your wooden kitchen sign a bit more unique with more personality than just “EAT.” But as you can see, I did print one out just in case I decided that I wanted an “EAT” sign! LOL
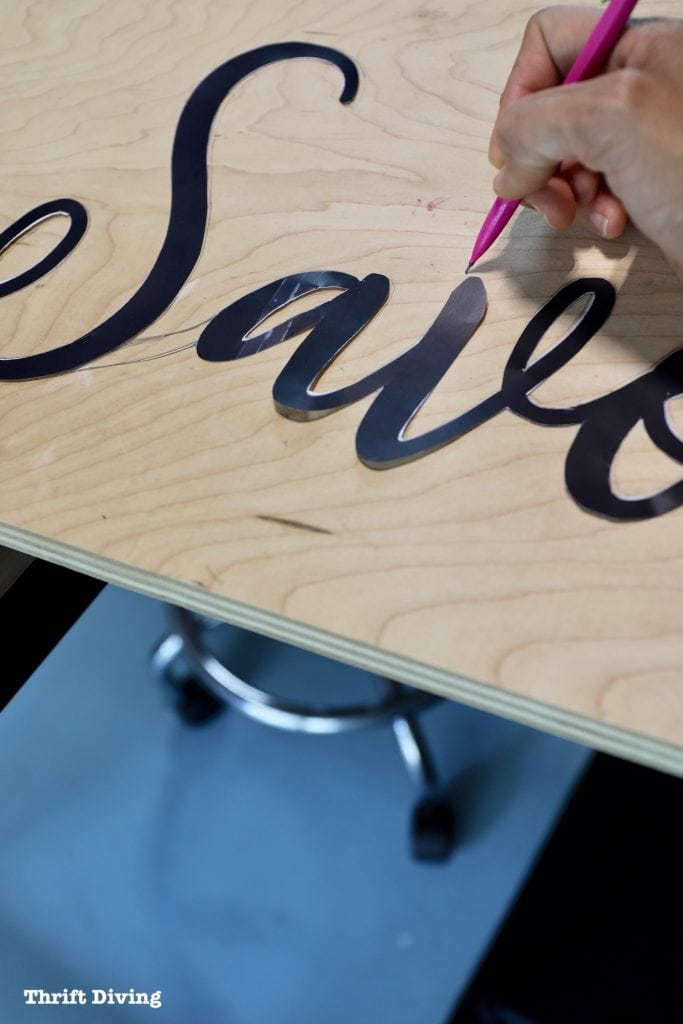
STEP 2: Trace Out the Wooden Kitchen Signs
Once the stencil is cut out, lay it on the wood and trace it out. I like to use thick printer paper so that the stencil has a little more oomph to it and won’t tear so easily. Plus, with thicker paper, you’re more likely to get a good tracing of the kitchen sign stencil onto the wood without it shifting all around. I wouldn’t tape or glue it down because then you won’t be able to reuse the stencil.
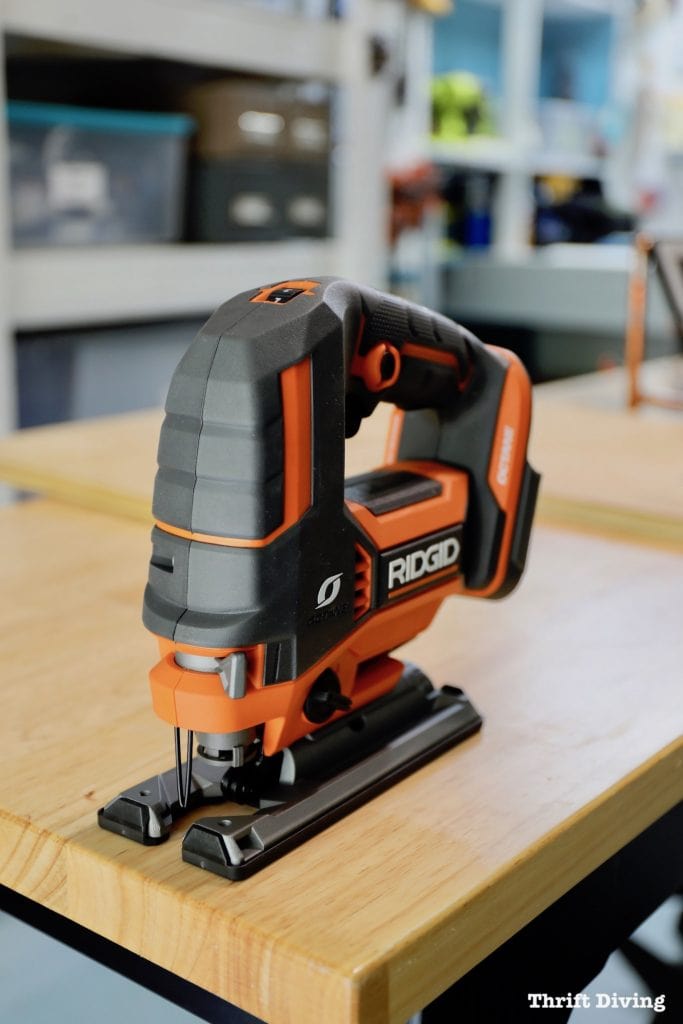
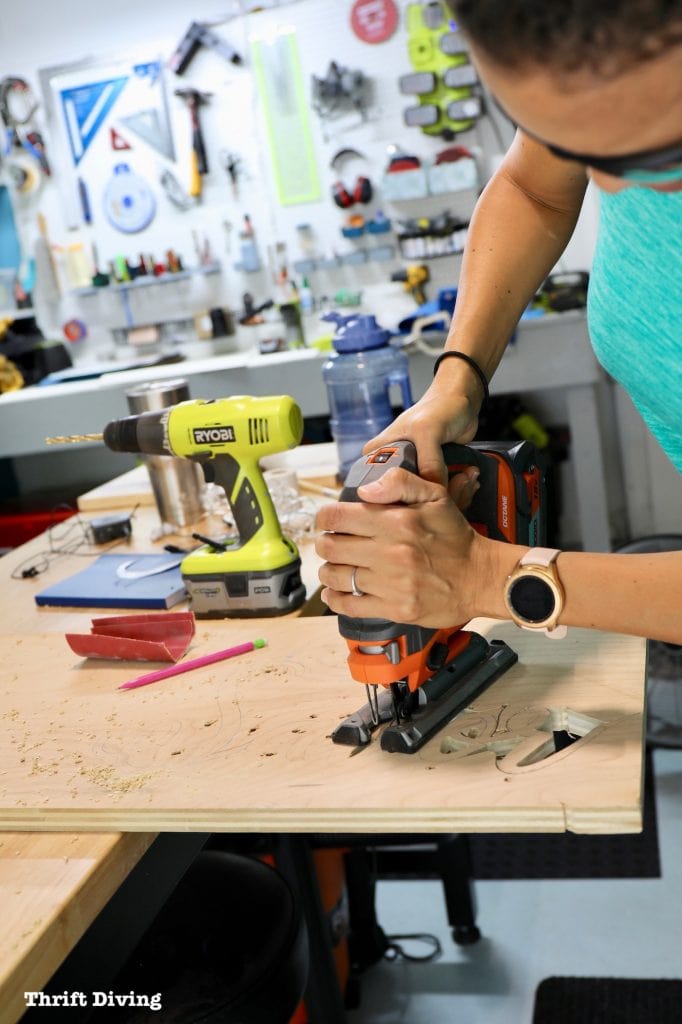
STEP 3: Cut Out the Wooden Kitchen Signs Using a Jigsaw Tool
Ahhh….the jigsaw. I had to admit that the jigsaw is my favorite power tool because it’s one of the least intimidating tools in the DIY toolbox. And it’s one of the few tools that allow you do such decorative cuts, like cutting out wooden letters and words.
If you’re not sure how to use a jigsaw, then you’ve got to check out my free 29-minute full-length video tutorial on how to use a jigsaw. I guarantee you’ll walk away feeling confident to pick up this baby and create something magnificent. 🙂
The Home Depot sent me this RIGID cordless brushless jigsaw to use for my project. What I like is that it has an optional vacuum attachment on the back so if you want to connect it to a vacuum, you’ll be able to prevent a lot of sawdust mess (not ever jigsaw has that attachment). It also is brushless, which basically means it’s more efficient, runs longer, and has less stress on the motor over the life of the tool. So…buy brushless tools when you can!
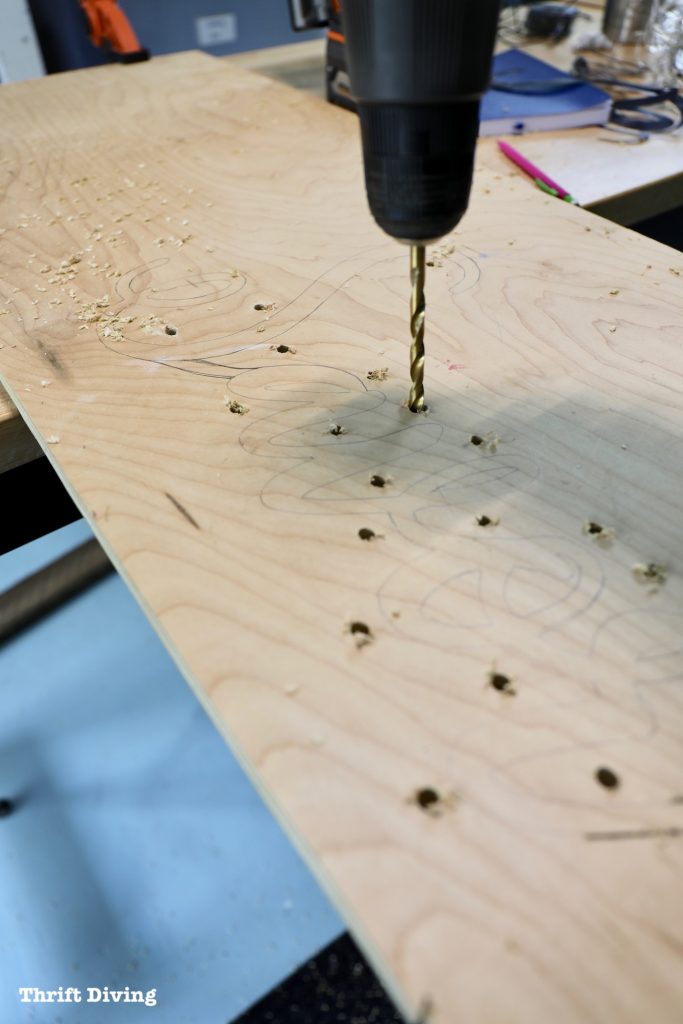
Here’s the key to being able to successfully cut out a decorative kitchen sign (or any decorative sign, for that matter).
- Drill pilot holes. These pilot holes will help you cut out the middle of letters, like “O” and “a”…you get the idea. The jigsaw blade should slip right into the hole to begin cutting.
- Use a scroll blade. A scroll blade is skinnier and is the only blade that will allow you to swivels and turn the jigsaw to get around those bends and loops of the wood sign letters. Use good quality blades! You can read more about jigsaw blades in my How to Use a Jigsaw Tutorial.
STEP 4: Vacuum Up the Mess
It seems common sense that you’d clean up the mess you made after cutting out your kitchen sign. But I’m actually telling you to clean up before you move on to sanding!
The reason why is because cutting out a sign creates all these little bits and pieces on the floor. I can’t tell you how many times I have stumbled on things I have cut and left on the floor (and have slipped, too!). Get into the habit of vacuuming up and picking up the sawdust and pieces before moving on.
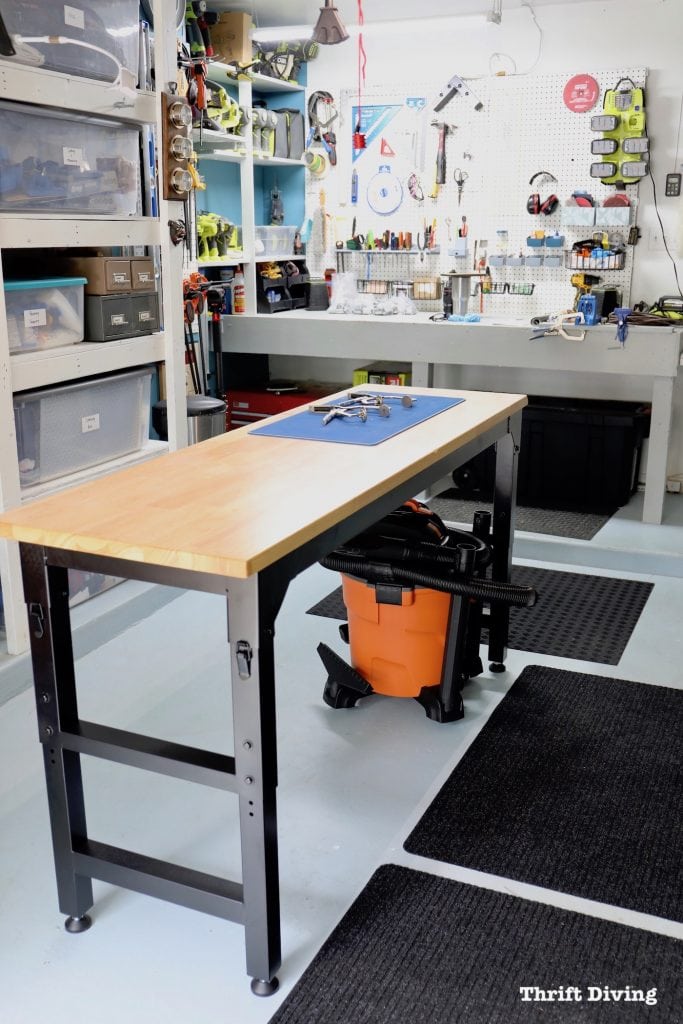
I’ve got a couple of these wet-dry vacs from RIGID in my garage, but I like this smaller 12 Gal 5.0 Peak HP NXT Wet/Dry Vac because it’s easier to store under the workbench and move around when needed.
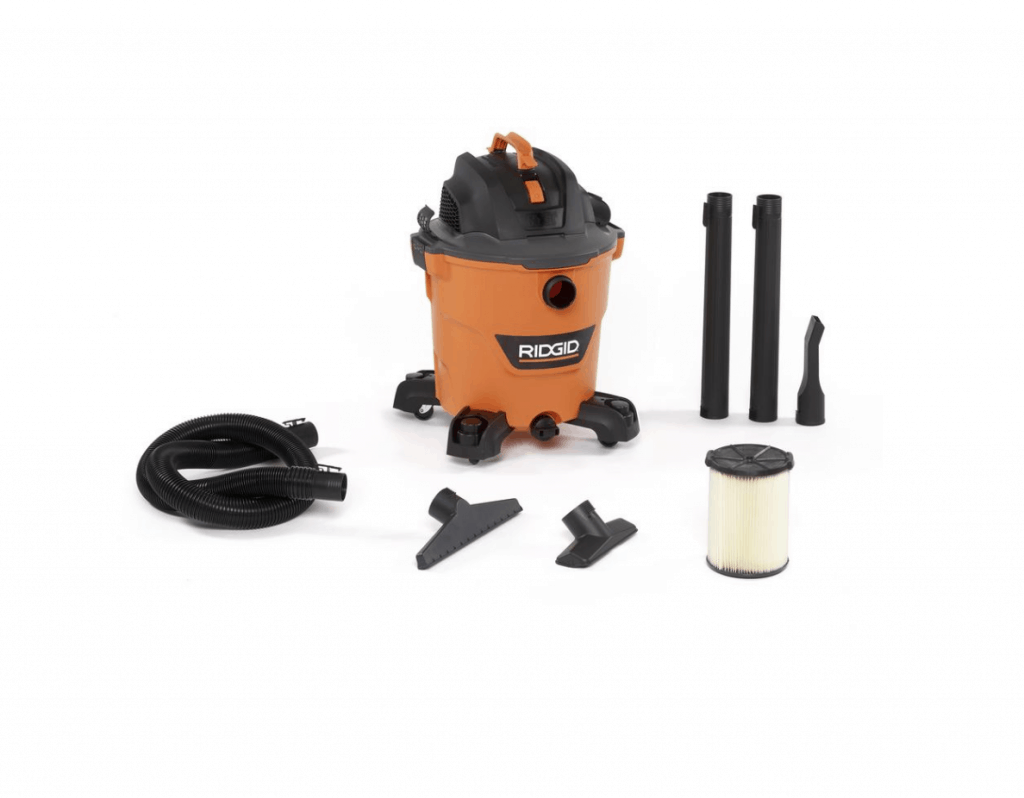
There are a lot of tools that can be connected to the wet-dry vac, too, so that while you’re cutting, there’s less debris for you to clean up. You just have to make sure you have the right adapters. The RIGID jigsaw can be hooked up to the RIGID wet-dry vac, too. I didn’t connect mine because I couldn’t find my adapters, but you can buy them on HomeDepot.com.

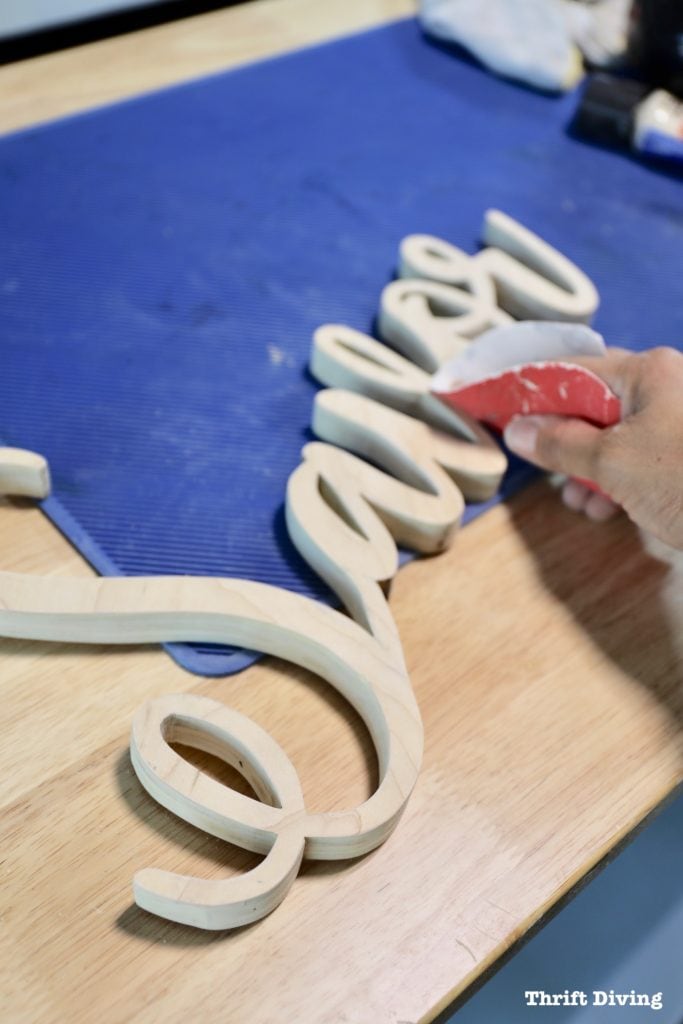
STEP 5: Sand the Wood Smooth
This is where the magic starts to happen! I bet you’ll have some rough edges. You might even be looking at your wooden kitchen sign like, “What the jagged?!” LOL. Don’t worry–it takes some practice to get a steady hand with a jigsaw. Even with a steady hand, you’ll need to do some sanding to smooth out those edges.
Start with 150-grit sandpaper, then finish with 220-grit sandpaper to remove all the scratches. This is super important (and a step that I skipped and paid the price for it–like you can watch in the video tutorial of this project on my YouTube channel).
If you start with 150-grit and don’t finish off with fine-grit sandpaper, like 220-grit, you’ll be able to see all those scratches when you go to stain your kitchen sign. Even if you’re painting your DIY kitchen sign, you want a smooth as possible surface, so don’t skip sanding.
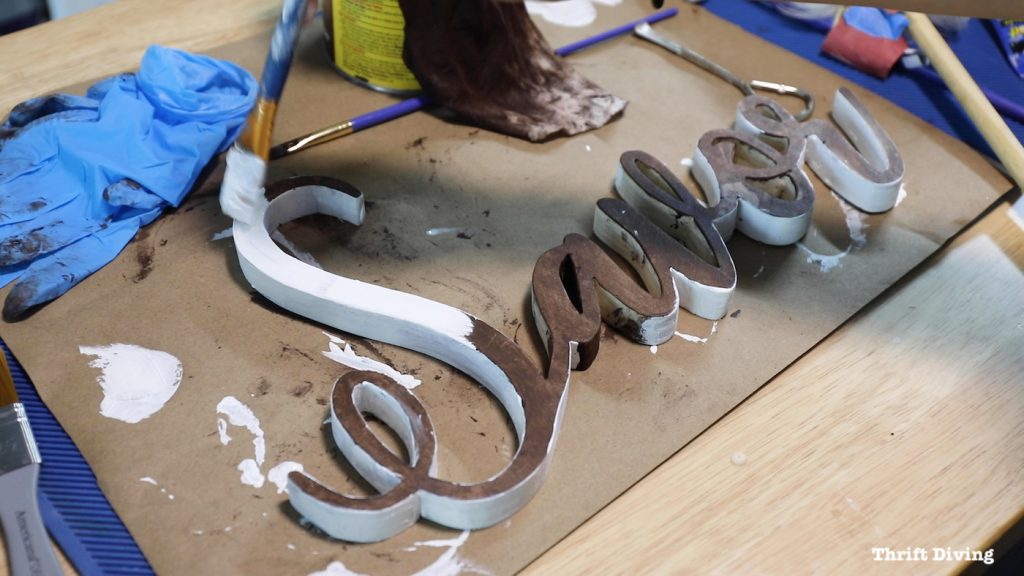
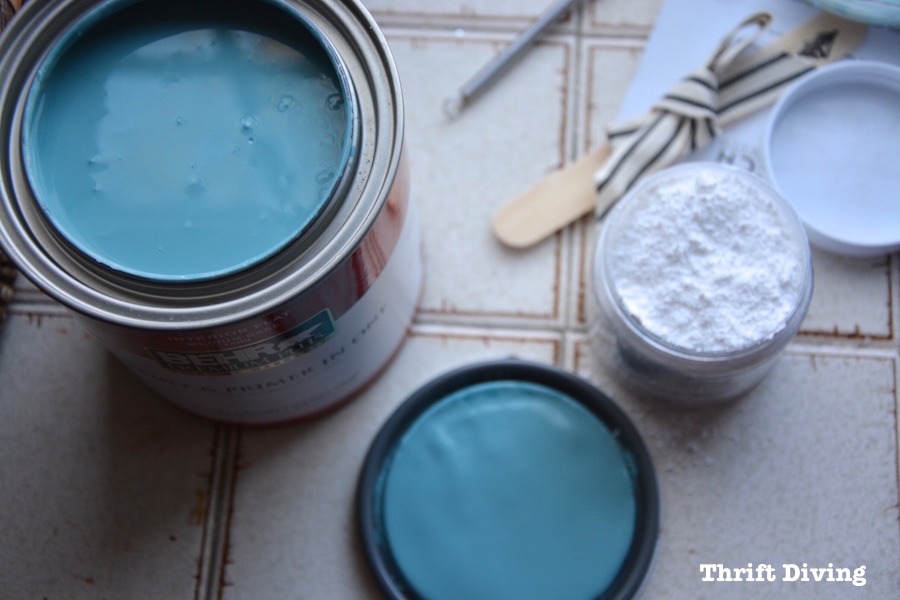
STEP 6: Paint or Stain the Wood
This is where I got a little confused about what I really wanted. I started staining but because I hadn’t sanded properly myself (do as I say….not as I do….LOL), the stain looked bad. Finally, I decided to just paint the kitchen sign, which is what I envisioned from the beginning anyhow.
Click here to learn about the best paints for furniture.
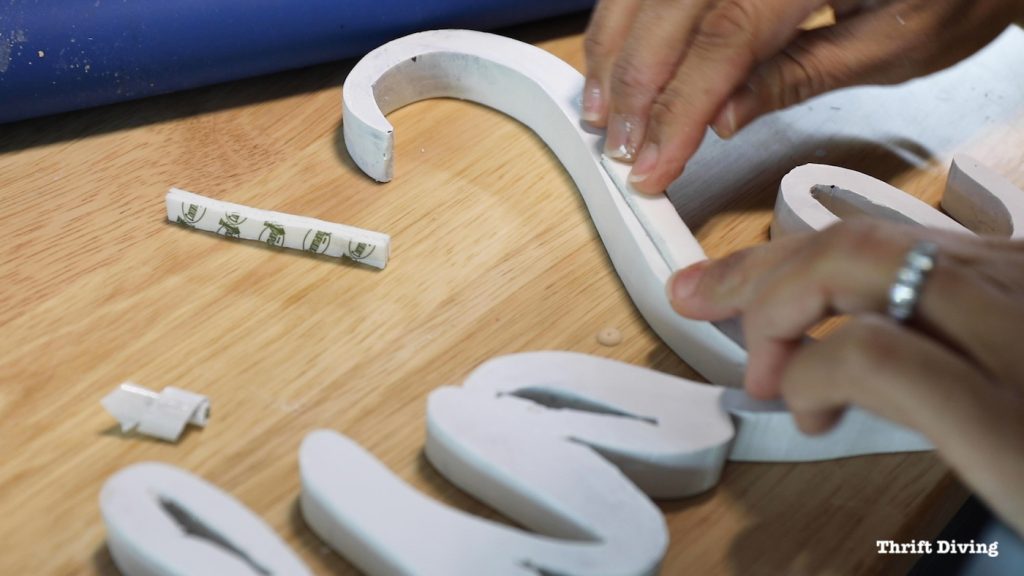
STEP 7: Add Sticky Tabs to the Back
You could also add metal picture hangers from the back, but if you’re using sticky tabs and your kitchen sign doesn’t weigh much, it should be fine. I had to cut mine in half to be disguised when the sign is hanging on the wall.
I’ll admit that I am a little addicted to making these wooden kitchen signs for my walls! I’ve never been one that likes buying ready-made art because there’s nothing unique about what you can just buy in the store.
Love this tutorial? Click here to SAVE it on Pinterest!
If you like wooden kitchen signs, you can check out this tutorial on how I created this DIY wood light sign which now hangs in my dining room! It’s a much larger version and has–gasp!–lights!
Enjoy making your easy wooden kitchen signs! After you’ve made your own, be sure to email me a pic of it to se****@**********ng.com. And be sure to subscribe to my mailing list and find me on YouTube for more DIY tutorials!

Download the 5 freebies!

Thrift Diving inspires women to decorate, improve, and maintain their home themselves...using paint, power tools, and thrift stores! Use these 5 printables, checklists, and ebooks to get started!

Thanks 🙏 soooooo very much Serena! You’re so thorough explaining step-by-step, and all the side tips worth mentioning👍. Any intimidation I had has gone out the window and I just had to let you know you were responsible! So thank you. I’d love to send you results🥰!
Now I want to check out your other vids💻!
Awww, Gia, that is so wonderful to hear! I am happy that you now feel confident to do this project yourself! WOOHOO! Yes, please email me pictures so I can see how it turns out for you! You can email me here: se****@**********ng.com. Enjoy your project!
Wow! Your transformation turned out great! That drafting table is gorgeous and your savour sign is fantastic!
Those signs are super cute and I just love that wall color! Pinned.