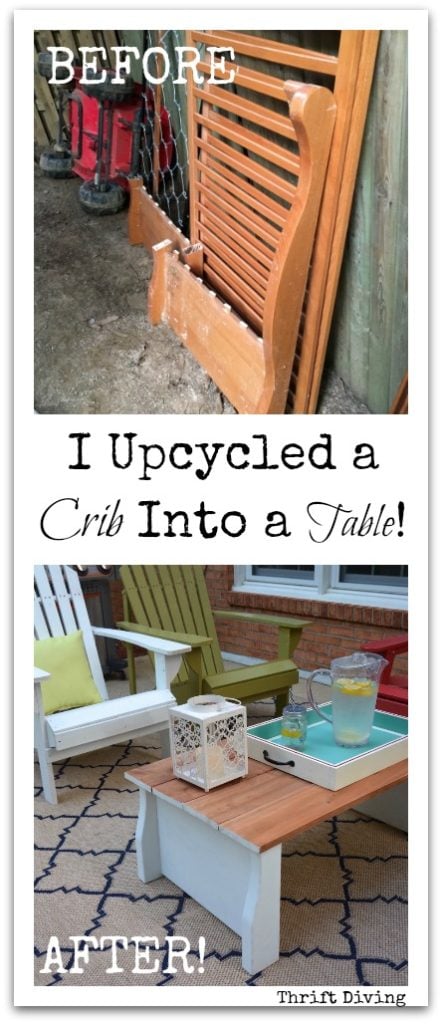
I Upcycled an Old Crib Into a DIY Coffee Table!
I upcycled an old crib into a table. And I absolutely love it!
In fact, those are the moments I love the most.
You know–when inspiration strikes.
And suddenly you’ve got a really creative idea that you totally didn’t plan.
That’s what happened to me last week when I took a chainsaw and a jigsaw to my son’s old crib.
Let’s first be clear that if I could have donated, sold, or given that crib to someone else, I would have.
But if you didn’t know, cribs that have a drop side have been banned.
Oh yes–banned, I tell you!
Kids were getting caught in them and they decided, “Okay, let’s just ban them!”
Which left parents like us that had dropped $500 on a crib no other options but to either break it up and use it as firewood…upcycle it…or guilty dump it in a landfill somewhere.
Well, you know I don’t dump because I think nearly everything can be reused.
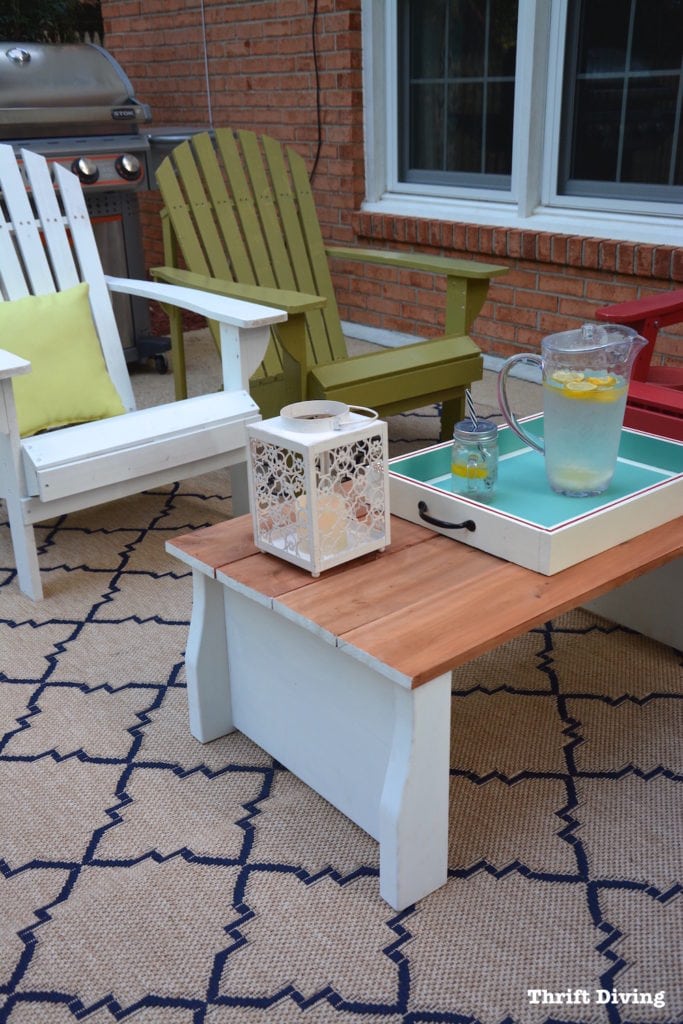
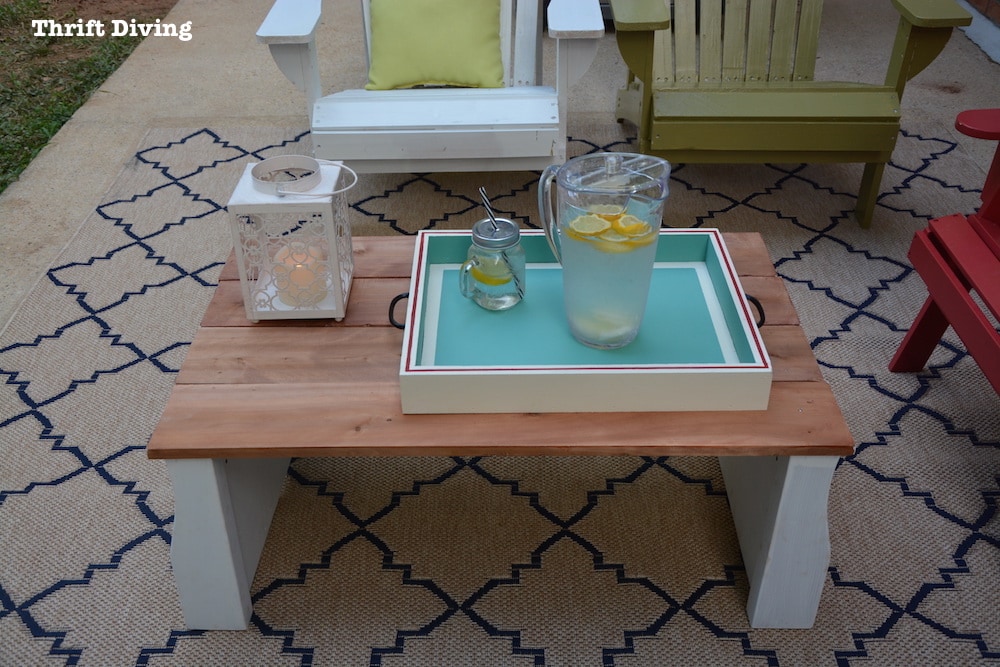
So I upcycled my sons’ crib into a coffee table for my patio!
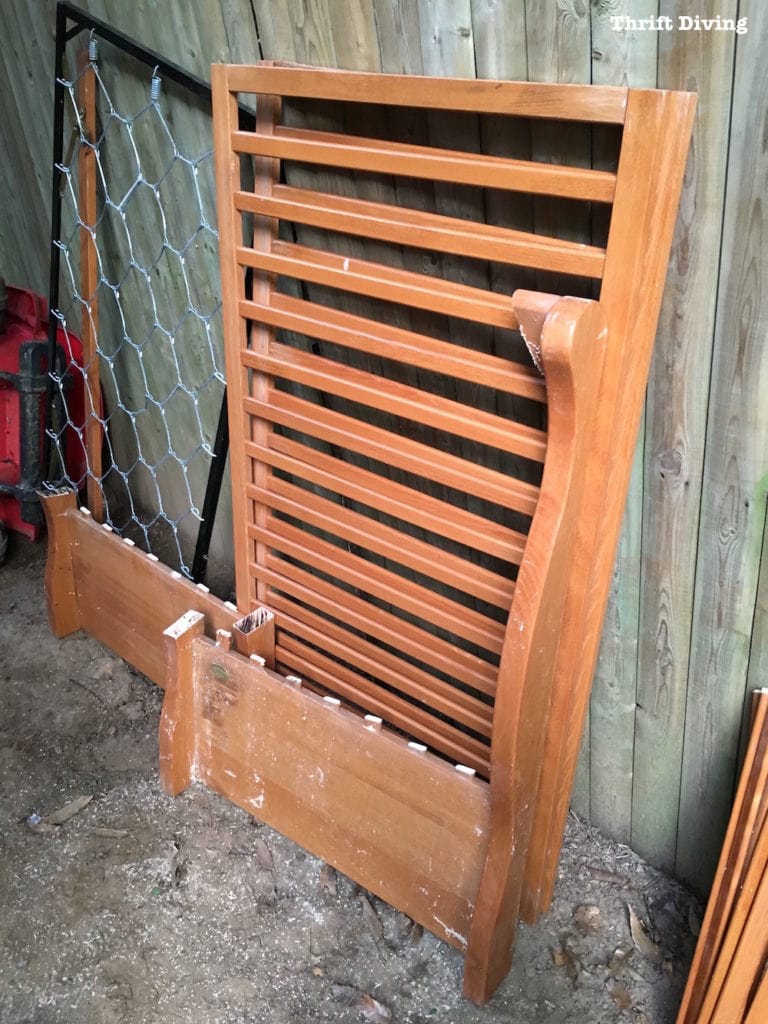
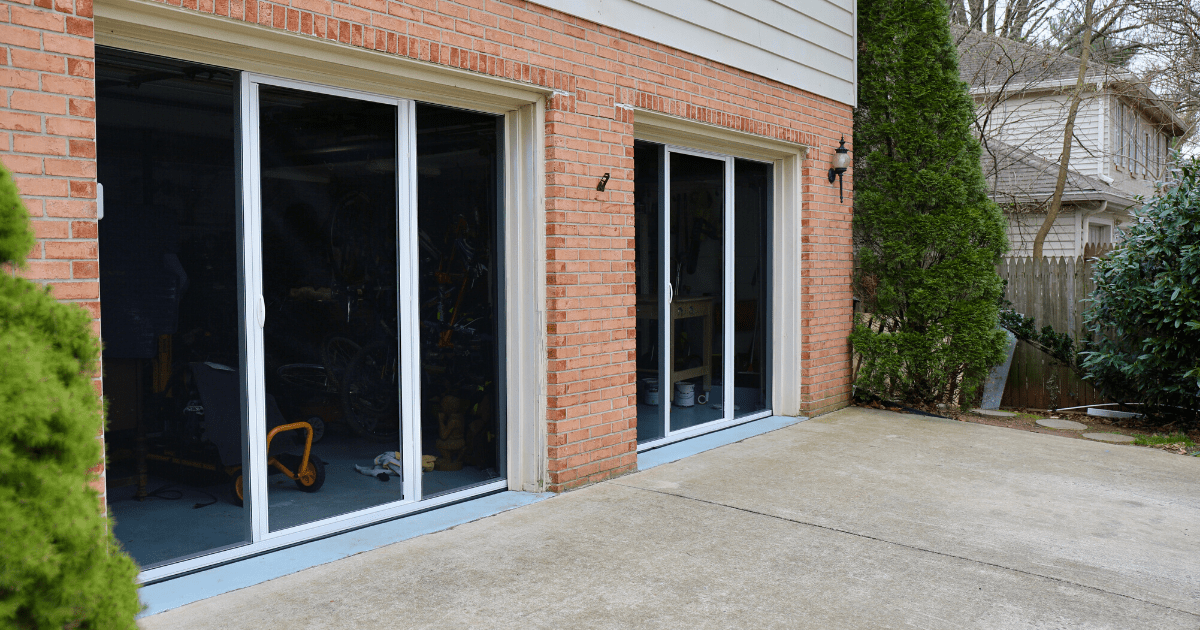
BEFORE
AFTER!
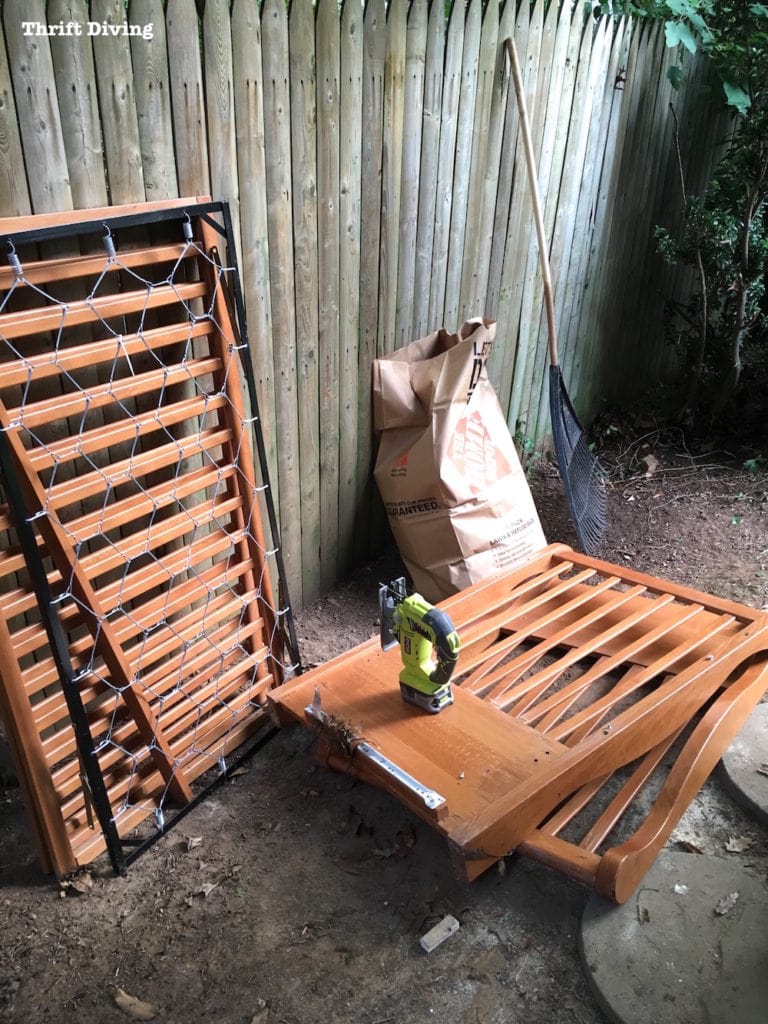
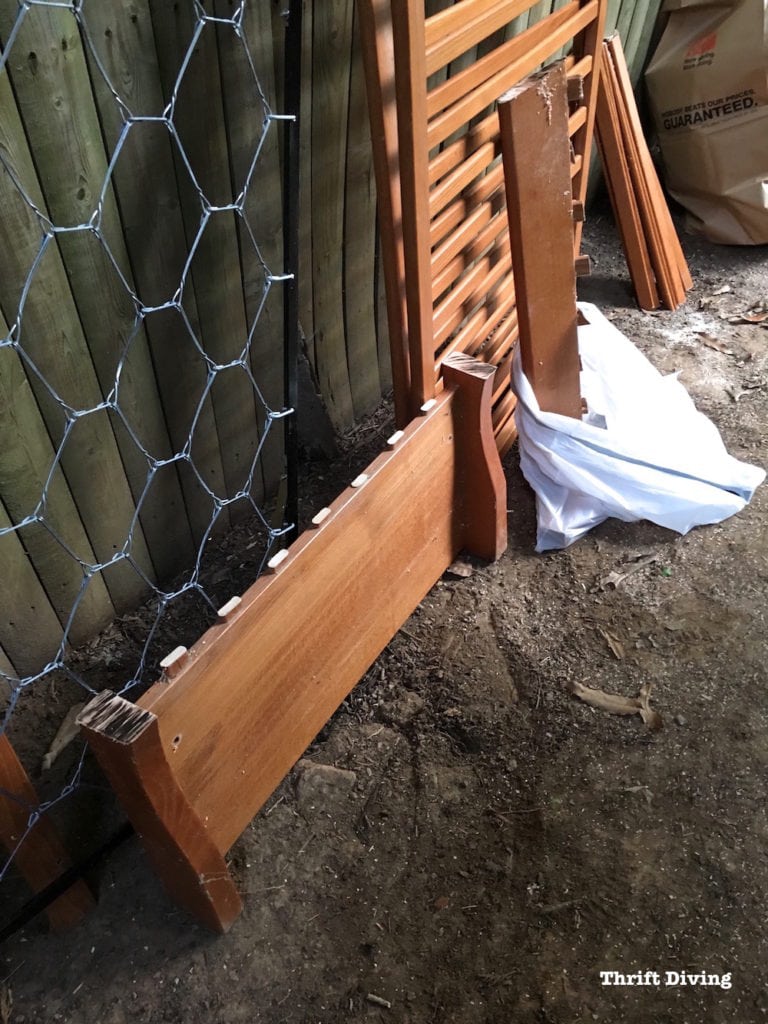
While cutting it into little pieces and salvaging what I could and bagging up the rest (since the trash won’t take awkward items like this), inspiration struck!
A coffee table!
Well…more like a table for my patio, which was getting a patio makeover for my Outdoor Overhaul challenge!
The looked like cute little bases on which I could totally make a DIY coffee table!
I even cut the slats off and started experimenting with upcycling those, as well, to create the top of the table. But there weren’t enough…and plus, I wanted something that would last in the elements!
I ended up using cedar wood for the top, and the result is awesome!
AFTER!
Now I’m going to show you exactly how I did it!
How To Upcycled an Old Crib Into a Table
Materials
- Crib or solid base from some other upcycled thing, like an old bookcase or dresser
- Power tools: jigsaw, miter saw, and/or circular saw
- Planks of cedar for the top
- Kreg Jig Pockethole system (or some other way to secure it all together)
- Wood glue
- Paint and waterproof stain
STEP 1: Find a Solid Base!
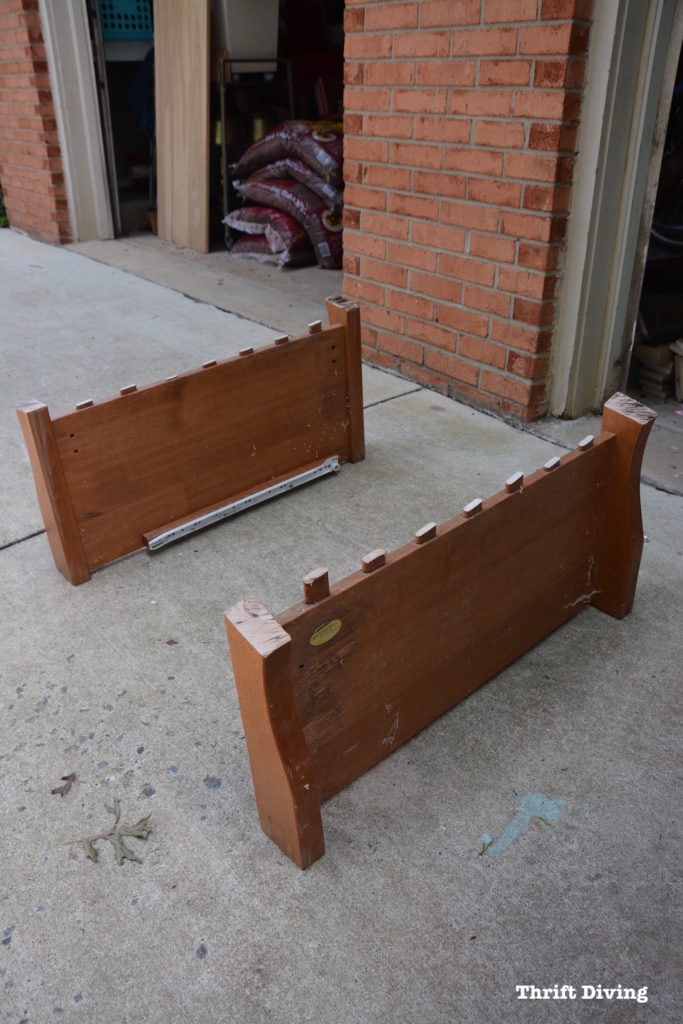
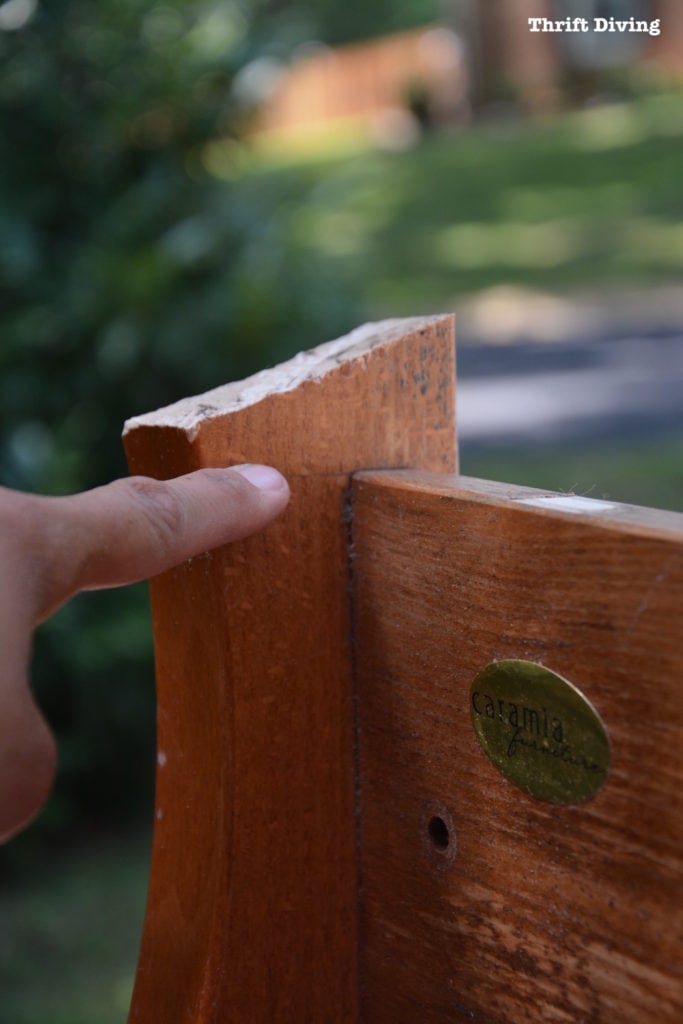
This project, of course, depended on using an old crib, but really, you could substitute the crib with any old piece of furniture–sides of dressers, sides of bookcases, and more.do this for any type of materials depend
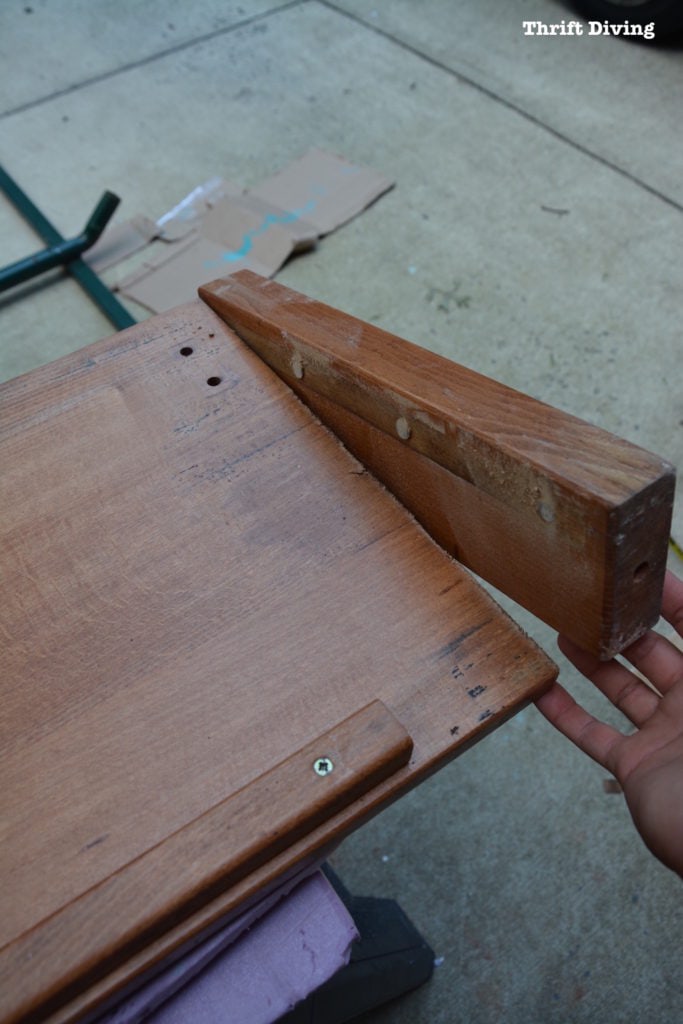
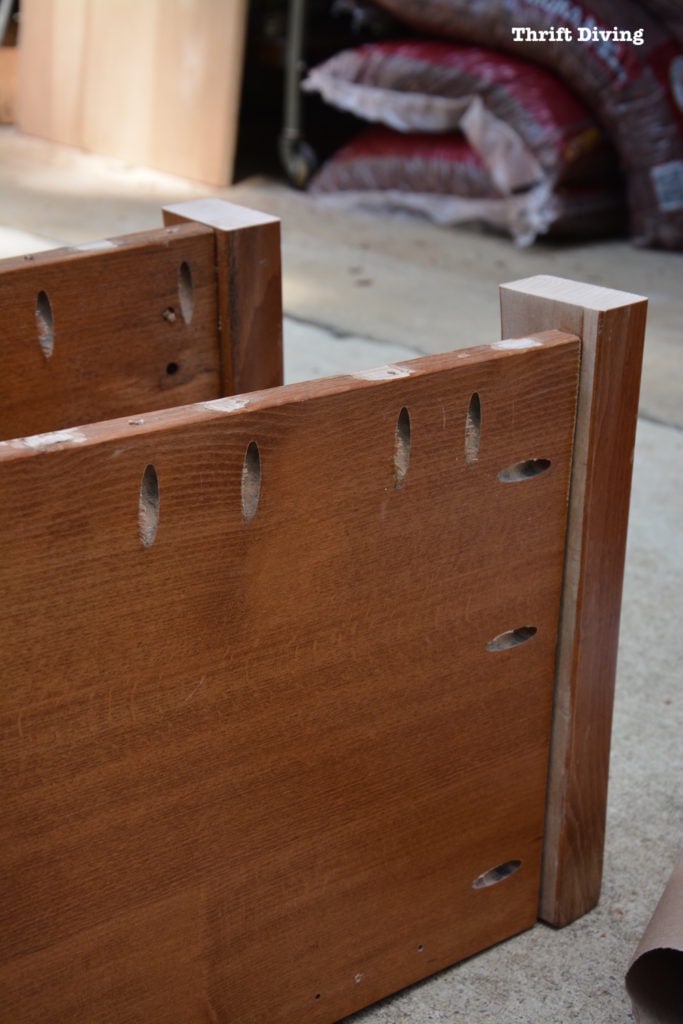
If you’re using a crib, most cribs, most cribs just have slats all the way around, but some cribs, like ours, had a pull-out drawer underneath. And to accommodate the drawers, the sides of the cribs had solid bases.
When I saw the cut up crib like this, I knew this would work perfectly!
Keep in mind that if you have an old bookcase or bookshelf, you can make a sturdy base from it!
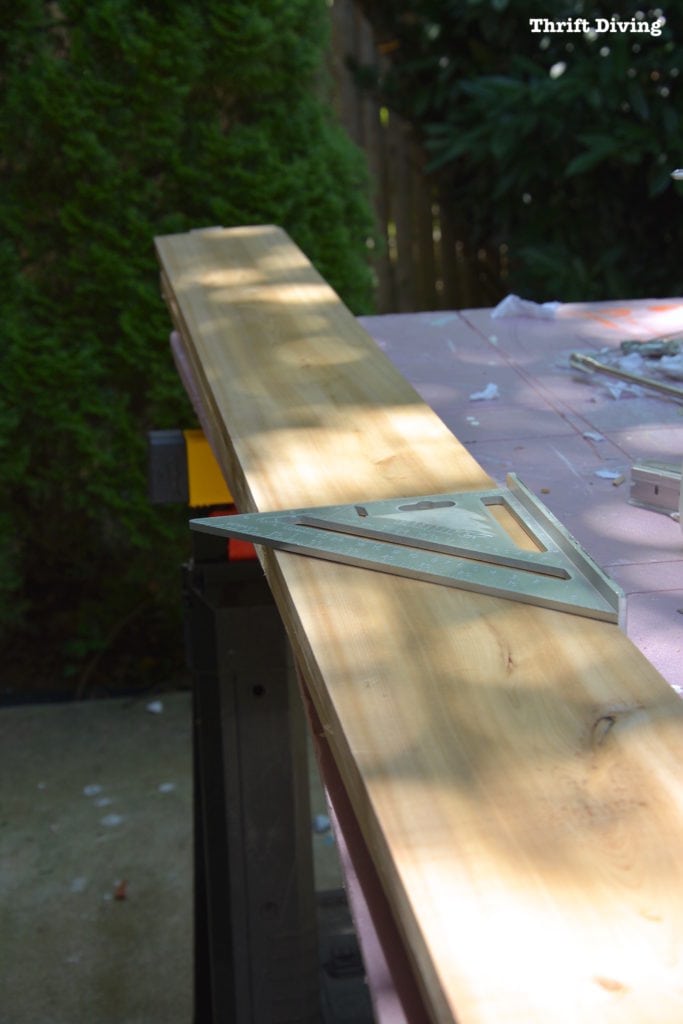
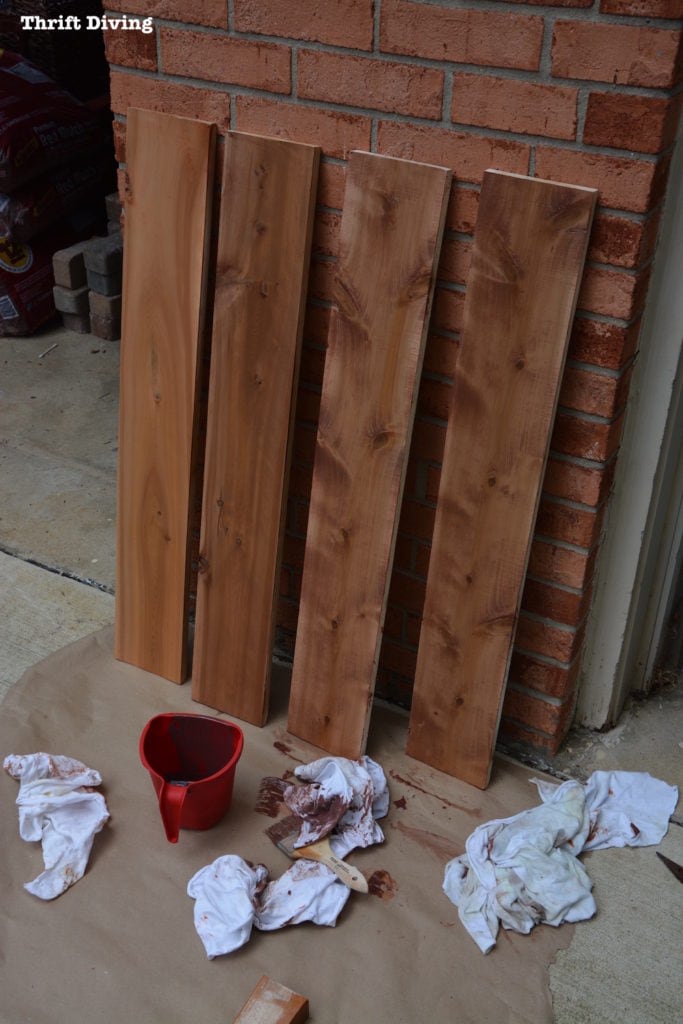
STEP 2: Get You Some Cedar, My Friend!
It’s tempting to use cheaper wood for projects, because it’s soooo expensive to buy wood! But if you’re doing an outdoor project, use the good stuff, like this cedar. It naturally resists the elements!
These were two 6-foot long cedar boards, about 6″ wide.
I had them on-hand so I didn’t need to buy more.
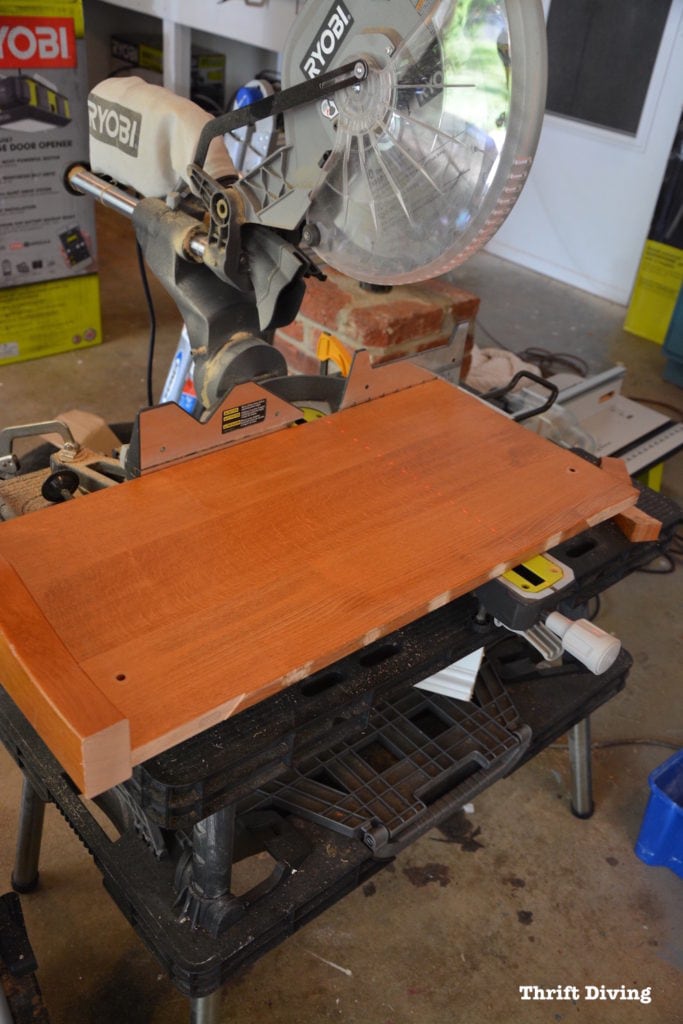
I marked them evenly in the middle and then used my miter saw to cut them.
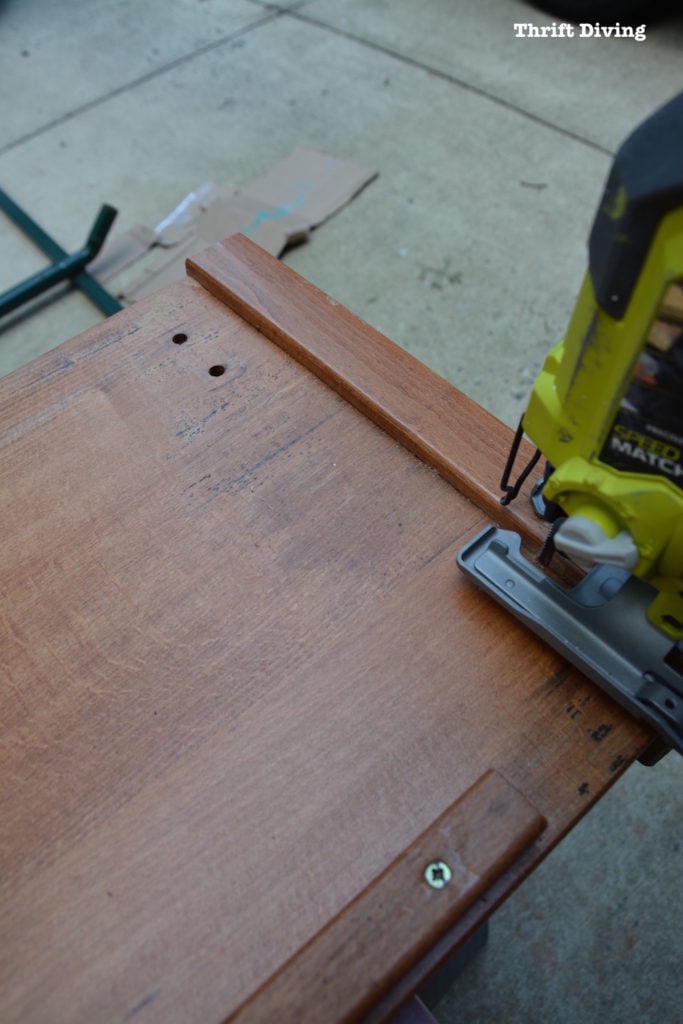
STEP 3: Getting Jiggy With the Jigsaw!
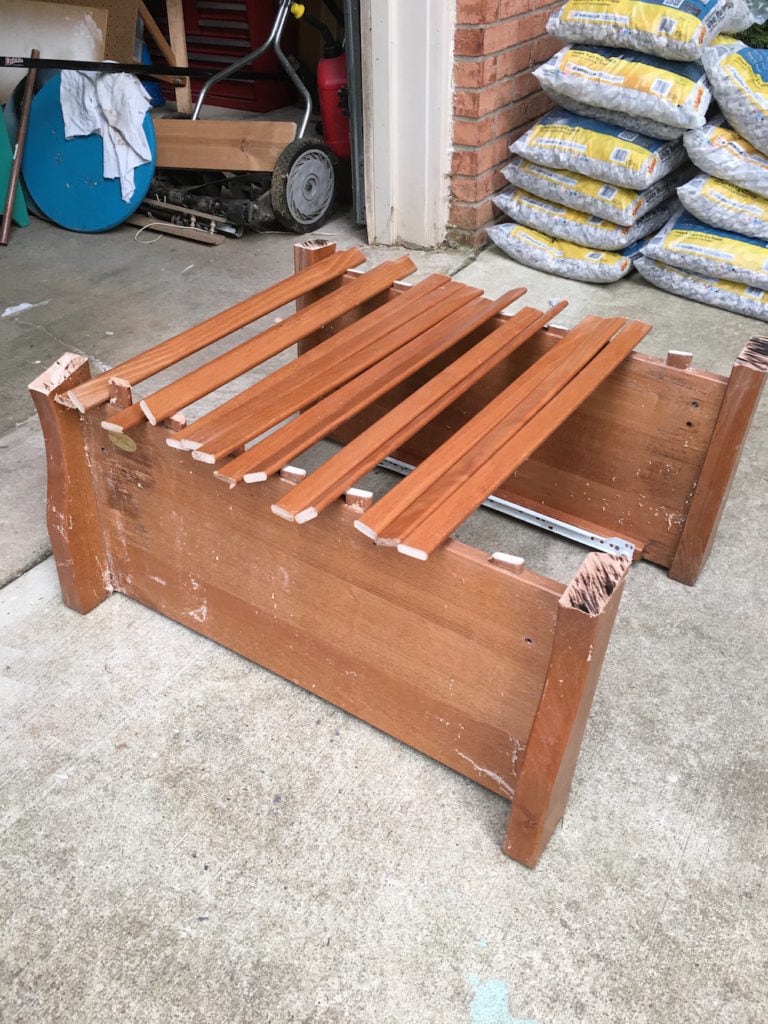
There was no way I could make a coffee table with these crib pieces “as is.”
Look how raggedly they were!
So it was time to bust out my favorites: the jigsaw and miter saw!
Click here to learn about the tools you should buy and how to use them.
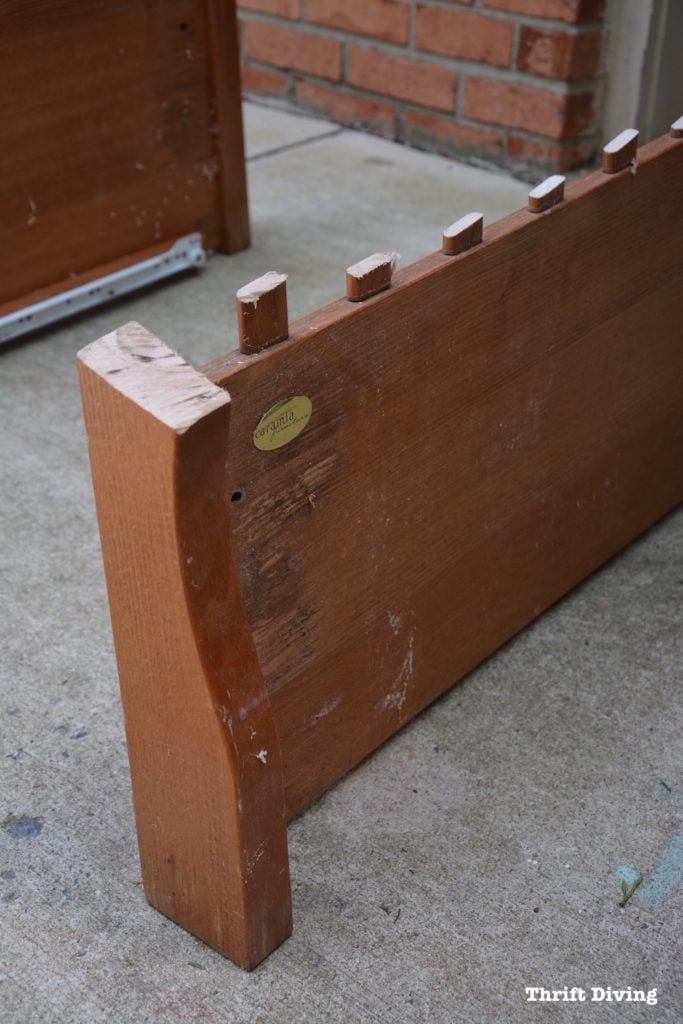
The first thing I did was remove the drawer rollers, which is where we stored my sons’ clothes. How sad to be deconstructing their crib, but happy that it wasn’t all going to the dump!
Then I used my jigsaw to trim off the slats, to create an even surface.
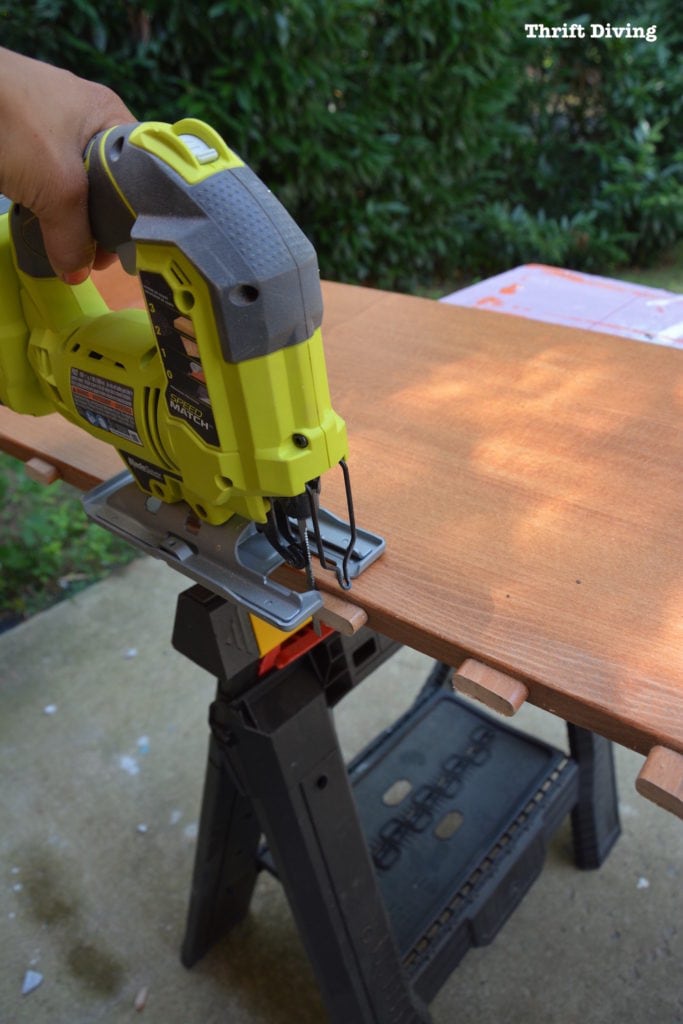
The jigsaw is one of my favorite tools because it can get do so much!
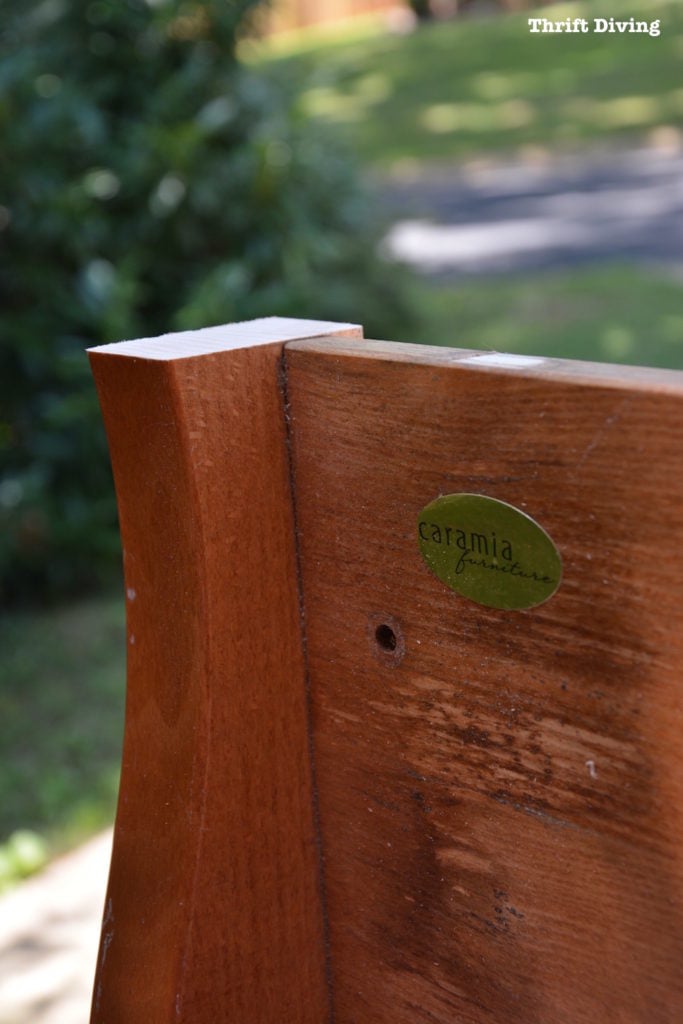
With all the slat stumps gone, I was ready to cut the legs to make it flush with the top, too!
I marked where I wanted my miter saw to cut.
I placed it on my miter saw and veeerrrrry carefully cut!
This is why it’s so cool to know how to use power tools! Because without them, you’re limited in how you can upcycle things! With tools, any idea you can think up you can make happen!
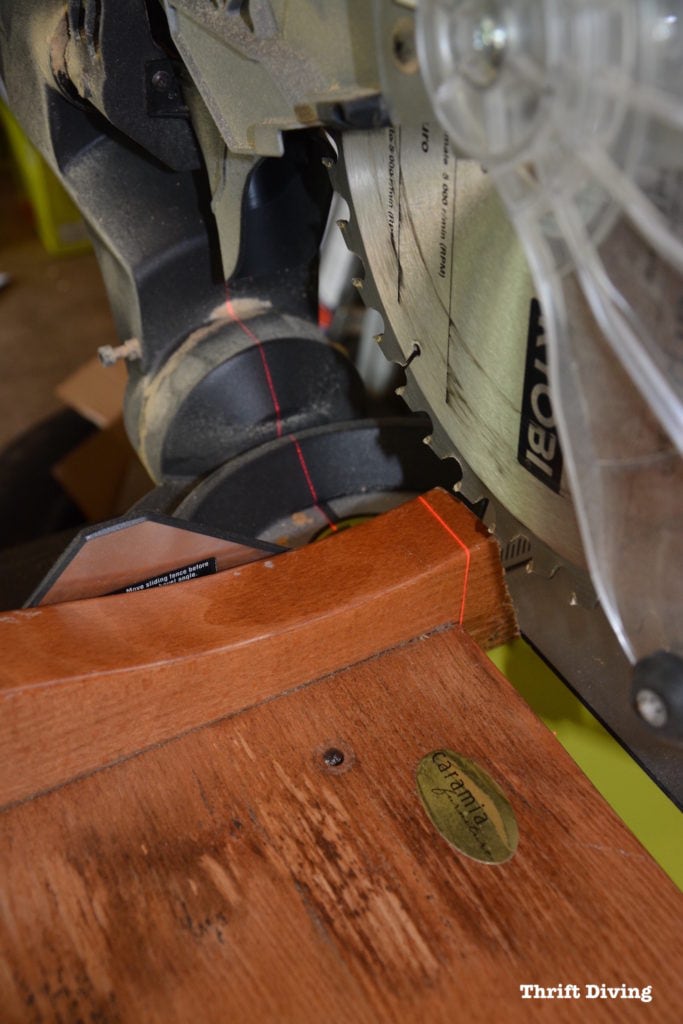
All freshly cut and even!
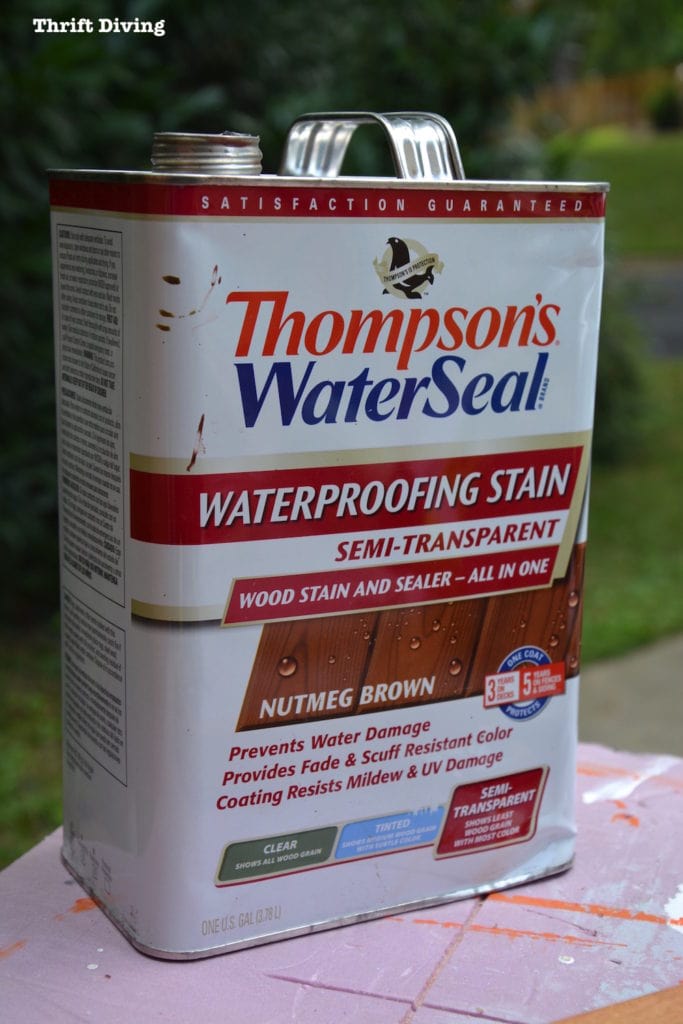
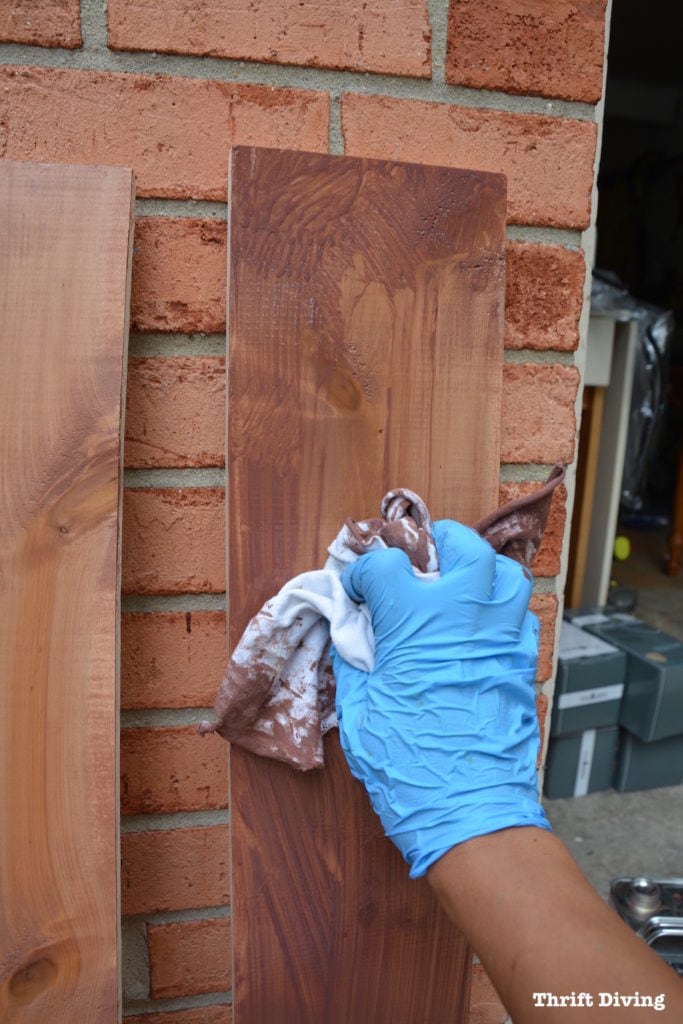
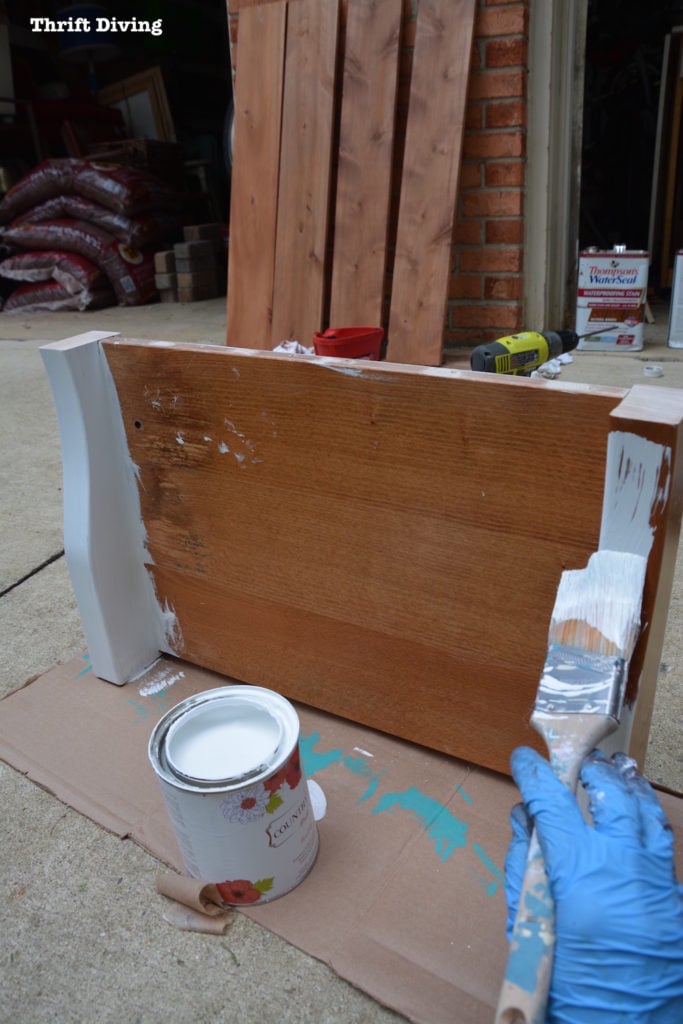
STEP 4: Waterproof the Top!
I wish the body were waterproof, but it’s not, so over time, it may get destroyed. We shall see…But I definitely wanted to make sure the top was waterproof!
Not only is it cedar, which is naturally resistant to the elements, using Thompson’s WaterSeal Waterproofing Stain will help make it more “hearty” to the outside elements.
First I “painted” on a bunch.
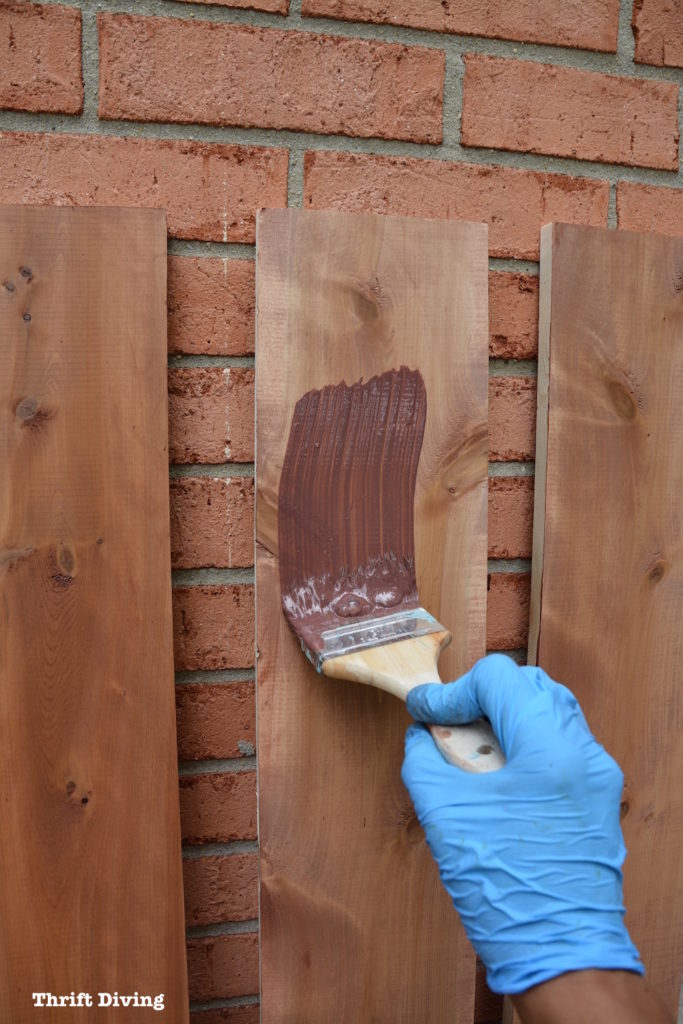
Then I used a rag to wipe it off. I like the color I was left with! Subtle, but definitely with some color!
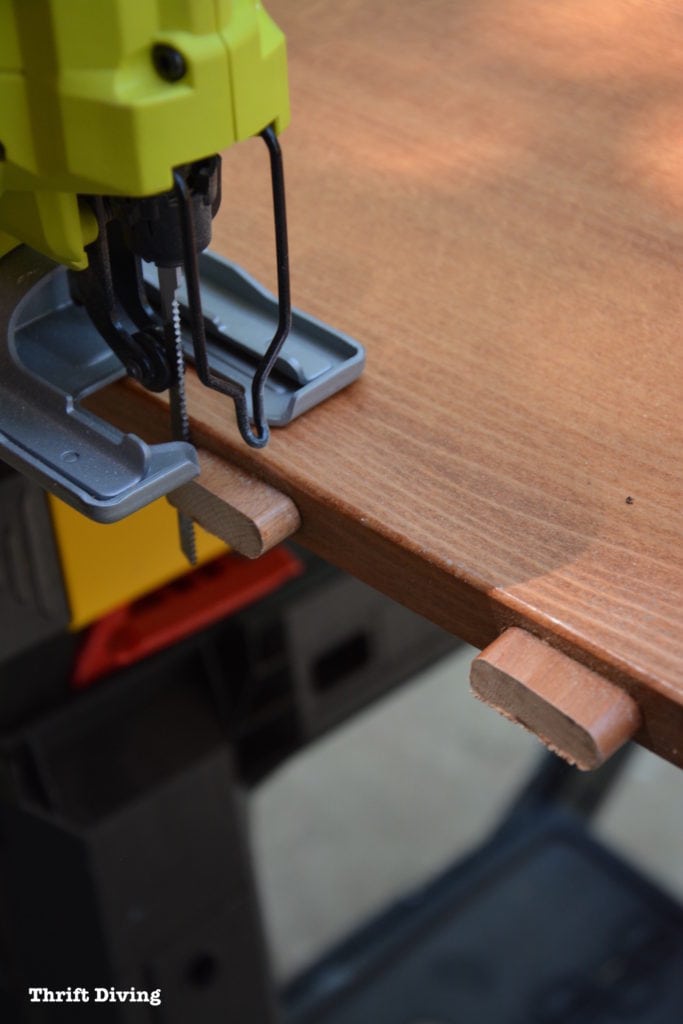
STEP 5: Does the Body and Top Fit??
Sigh….the project was going swimmingly….
Until this happened:
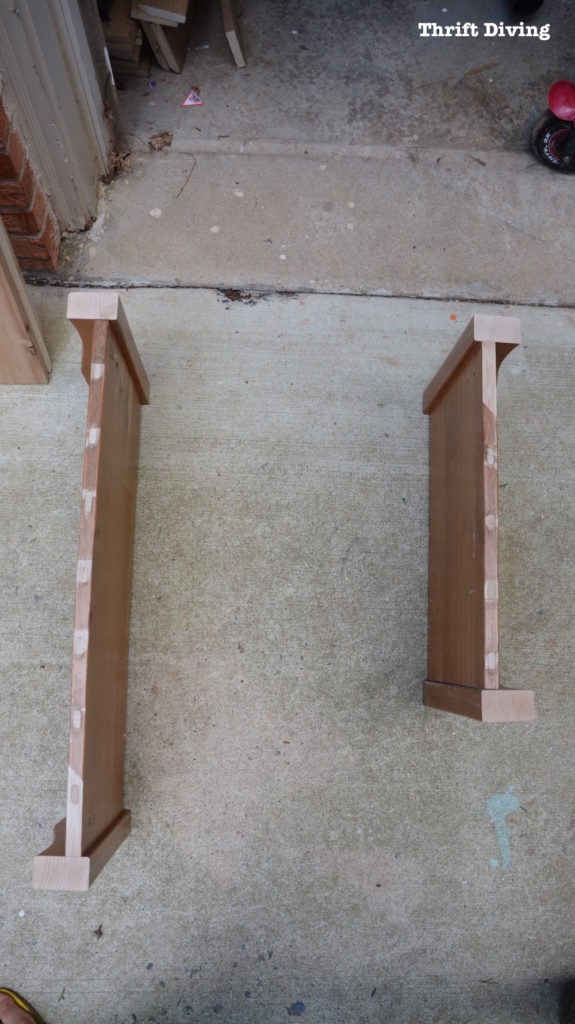
The crib sides were too long…and I didn’t have any extra cedar! Waaaahhh!!
Don’t you hate when stuff like this happens during projects?!
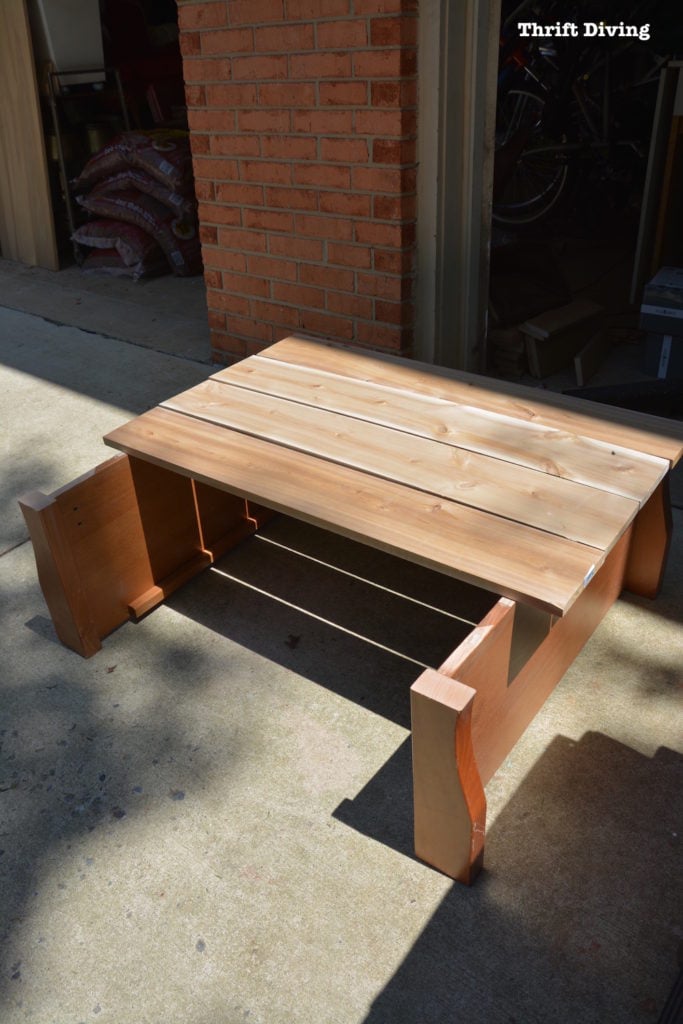
If the base doesn’t fit, you have one of two choices: 1) buy more wood for the top, which means more money and wasting time driving back to Home Depot…..or, 2) trim the base.
I decided to trim the base. I did this part while the waterproofing stain was drying.
I pulled out my trusty jigsaw again and separated the legs from the body.
Looks like it was only attached with those little wooden rod-thingys….dowels, I think they’re called…
I trimmed the body on my miter saw, after measuring. I cut off about 7-8 inches.
You can see here after doing one of them how much shorter it was than before!
The shorter size would easily accommodate my cedar planks!
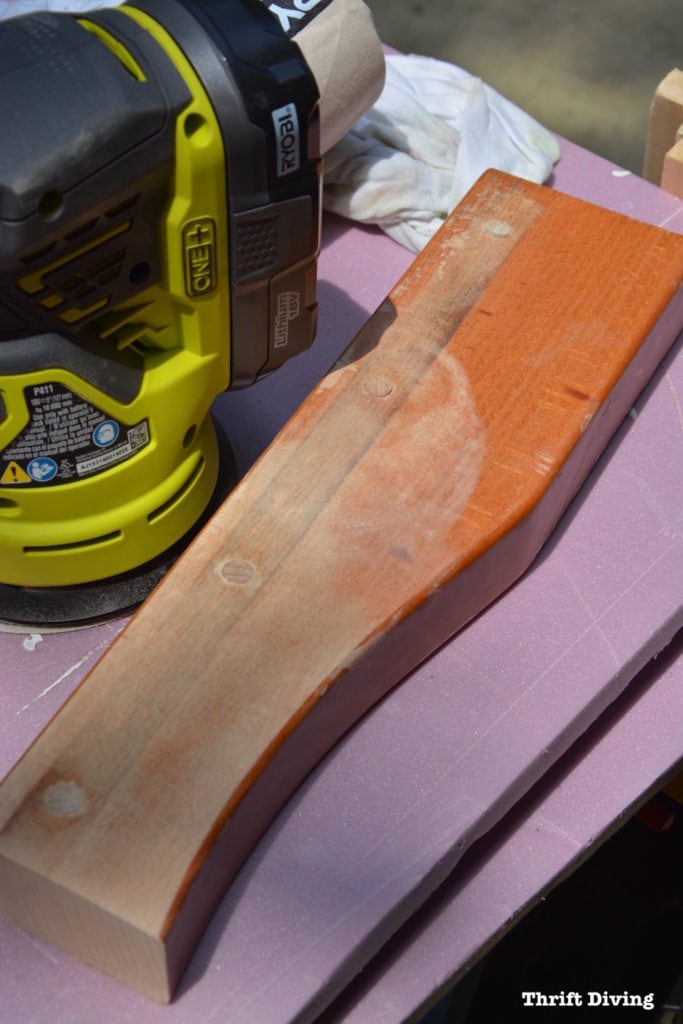
I sanded the little leg smooth with my RYOBI sander, so that it would fit well when I reattached it.
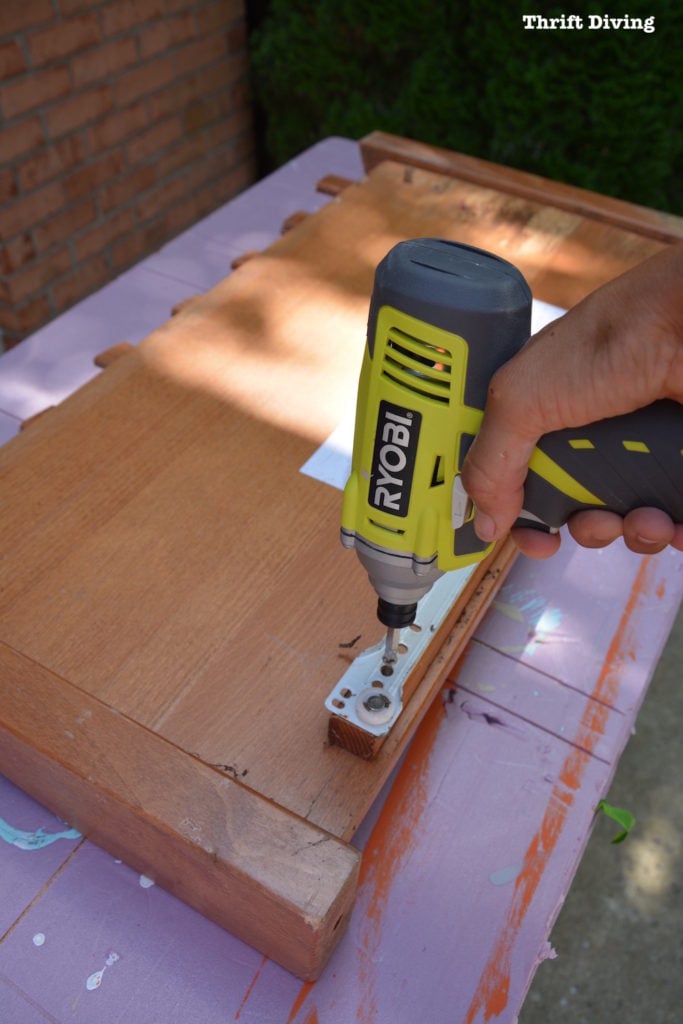
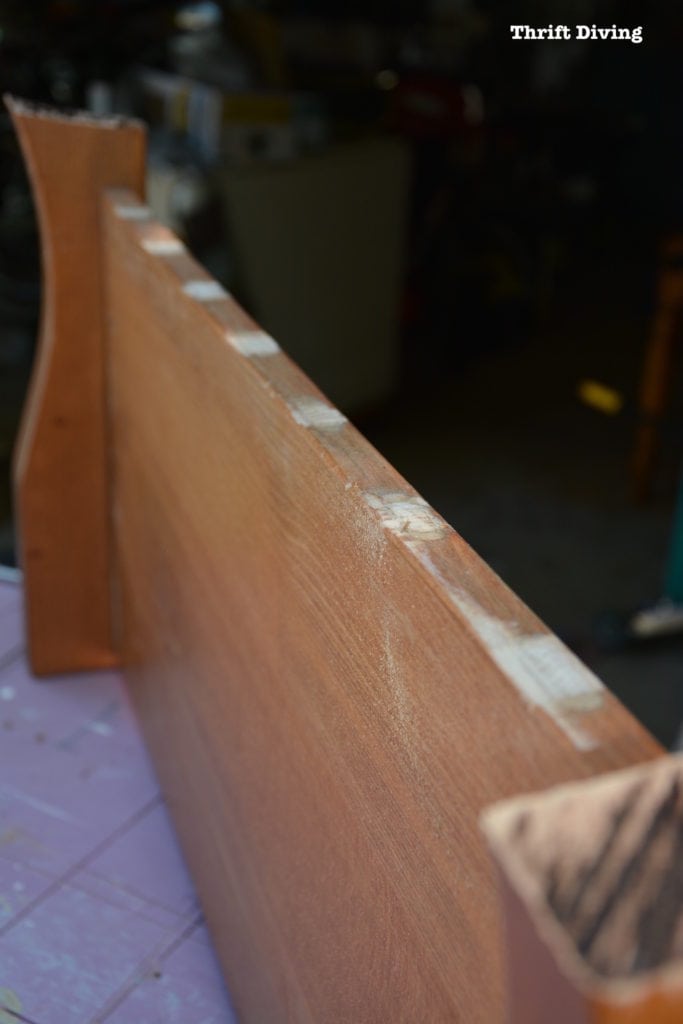
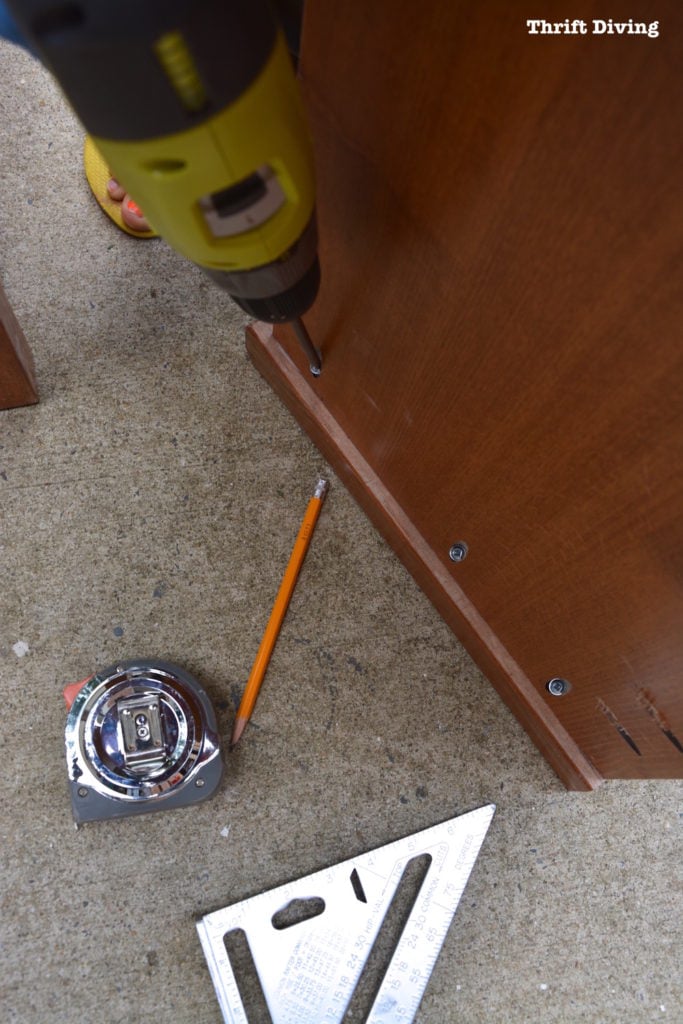
STEP 5: Pocket Hole Time!
If you’re new to building, you may have never heard of the pocket hole. I haven’t been using it a ton, but it’s come in handy when I have used it!
It’s basically a reeeeaalllly easy way to drill an angled hole, insert a screw, and then join two pieces of wood to form a strong joint. I’ll do a tutorial for you soon! They make building a cinch!
I have created pocket holes for the sides (to rejoin) the legs I cut off, and to secure the top cedar planks.
I created all the pocket holes with my Kreg Jig Pocket Hole System K4 (or you can buy the Kreg R3 Junior which is cheaper and does the same thing, only smaller.)
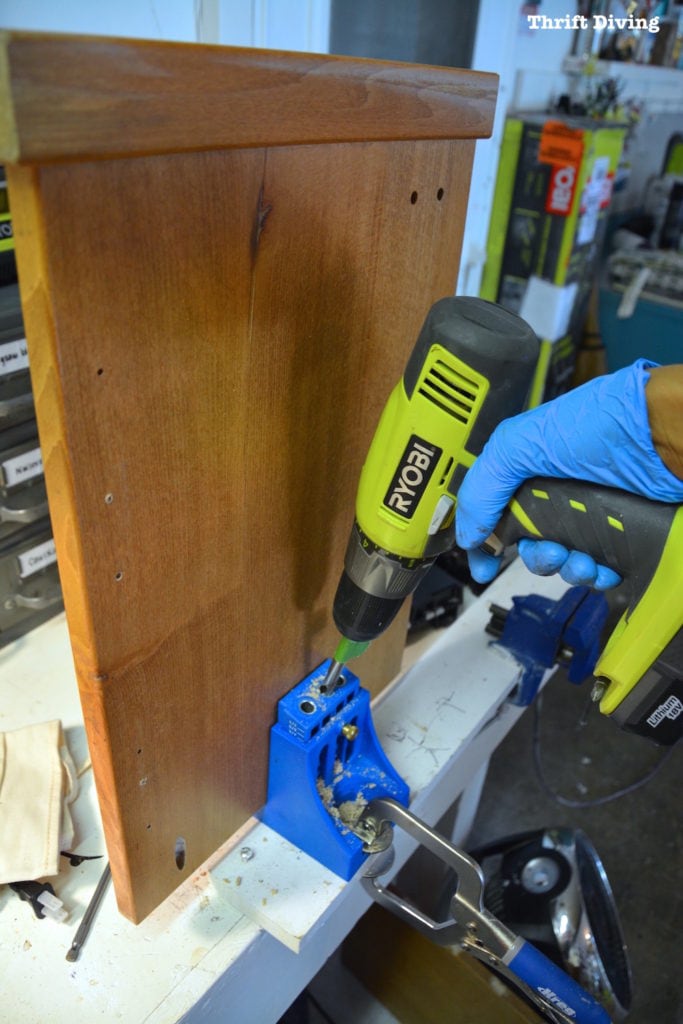
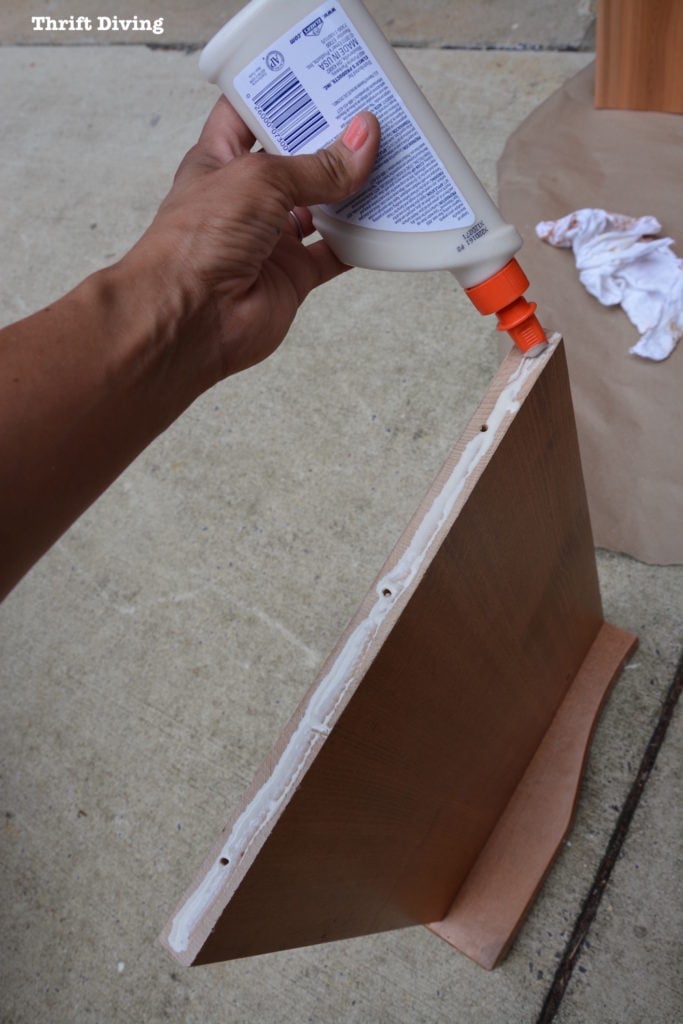
After all the pocket holes were trimmed and drilled, it was ready to put the side of the crib base back on.
I used Elmer’s Carpenter Wood Glue Max Interior/Exterior first. It’s always best to glue a joint because nailing or screwing it together. Extra reinforcement goes a long way! 🙂
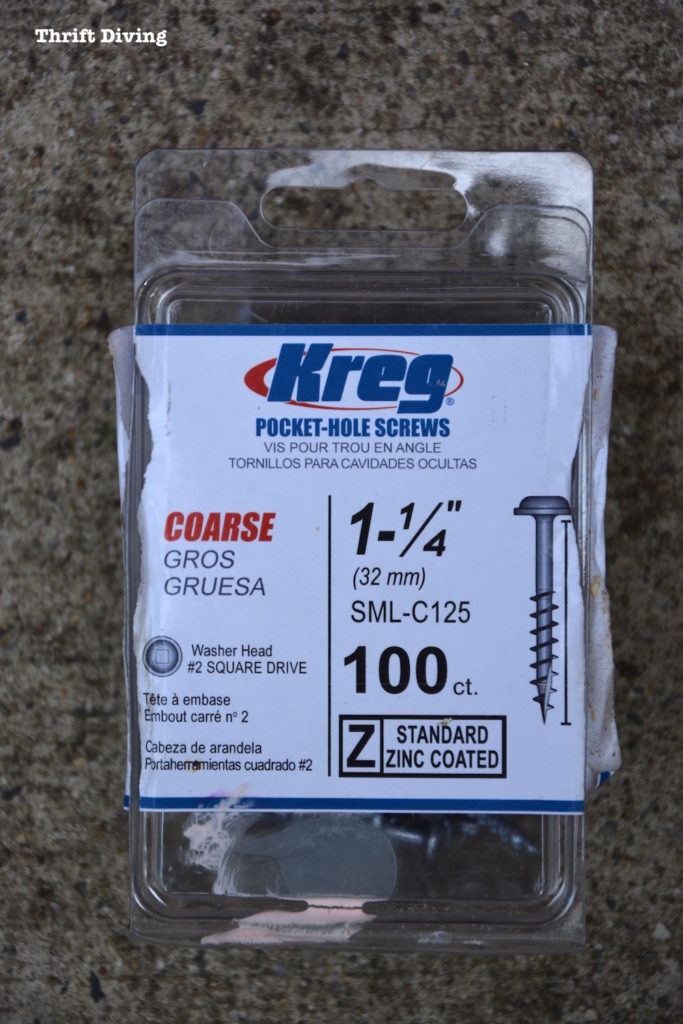
Then I used what was definitely the wrong pocket-hole screws on this project!
I should have used the weather-resistant blue pocket-hole screws, but I didn’t have any on-hand, so I’ll have to buy those and replace these ones, which will rust outside!
When using pocket holes like this, it creates a nice, tough 90-degree join!
Don’t want my table falling down when people put their drinks on it, huh? LOL
STEP 6: Paint the Base!
I can only hope that this Country Chic Simplicity paint that I used will hold up outside!
I know that you can use Annie Sloan Chalk Paint outside (just don’t wax when using outside). So I hope that is the case with Country Chic chalked paint, as well.
I added two coats.
STEP 7: Screw It All Together!
This was a blogger FAIL because I didn’t get good pics of the screwing down of the crib base/legs!
But what I did was lay the four pieces of cedar down on the ground, with quarters in between to keep them evenly spaced, and then secured the base to the top with the pocket screws, using my power drill!
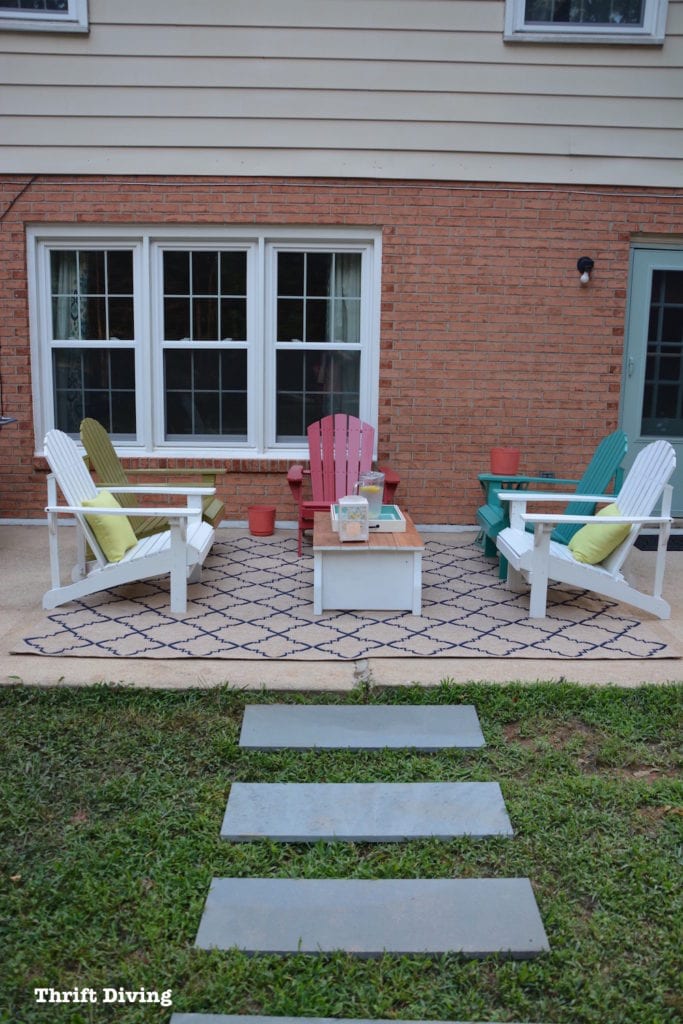
A New Table!
The patio and yard makeover were expensive enough (don’t ask–I stopped counting after 3-4 trips!!!). So the fact that I was able to create a table to unify the space without having to spend more money, was appreciated!
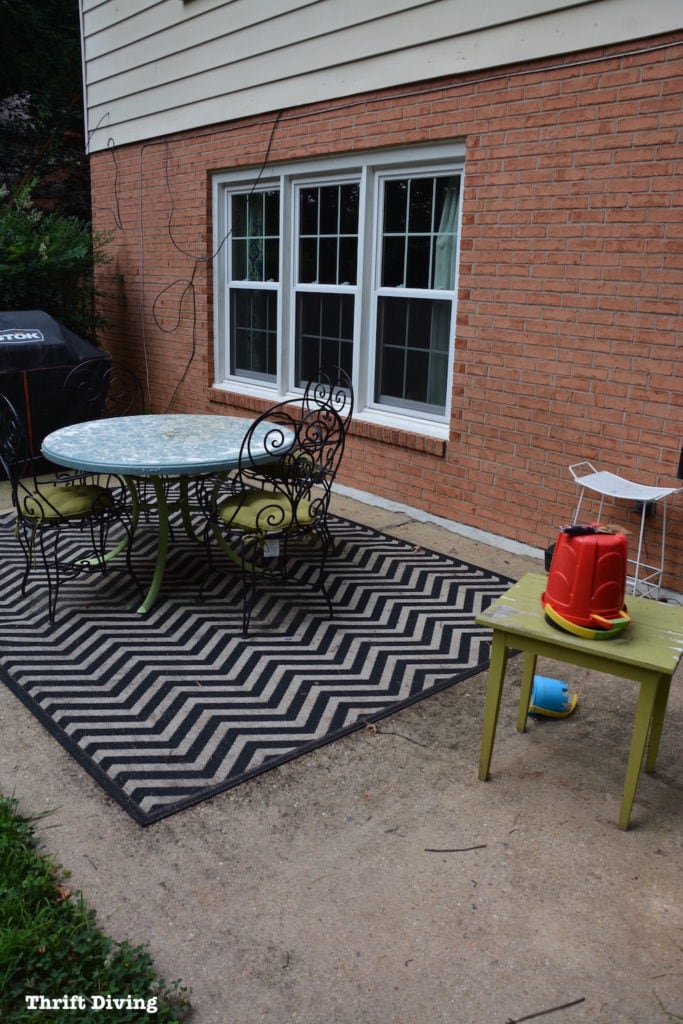
If you recall, this is what my patio looked like before.
BEFORE
With the freshly painted Adirondack chairs and new DIY upcycled patio table made from a crib, the space is now ready for my family and friends!
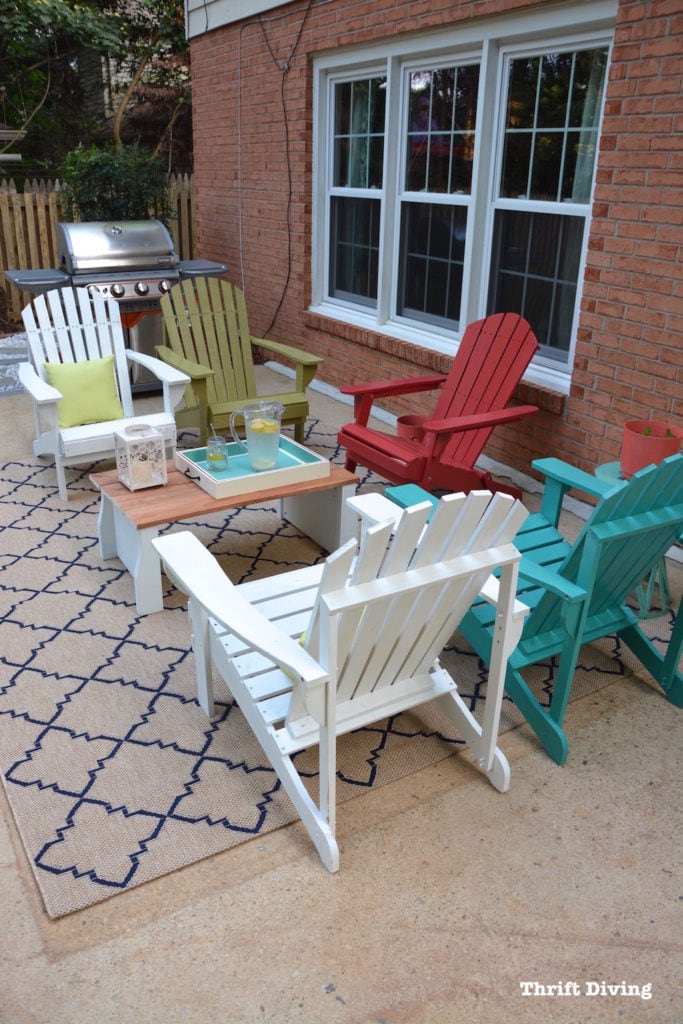
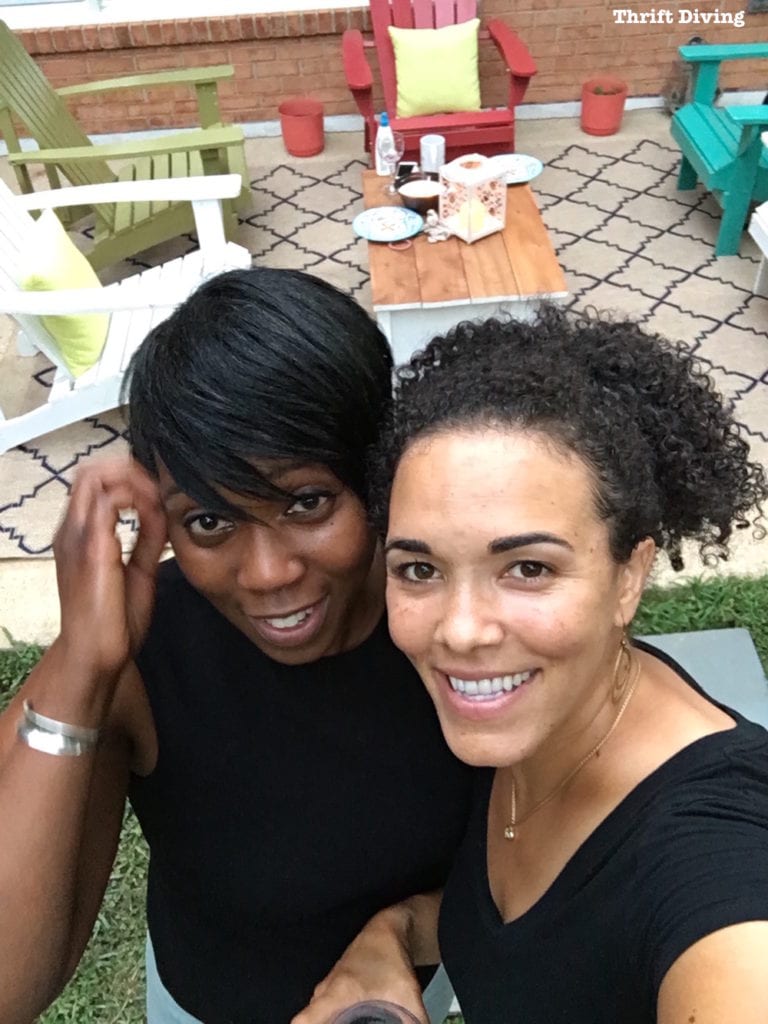
My friends and my family have already been enjoying the new space with me!
My best friend came over for wine and impromptu backyard dancing. HA!
And you’ll be happy to know that I’m having a little get-together in a couple of weeks!
Squeal!
This is exactly the kind of space I’ve wanted since moving in here in 2010.
Glad to see it’s finally coming together. 🙂
Want More??
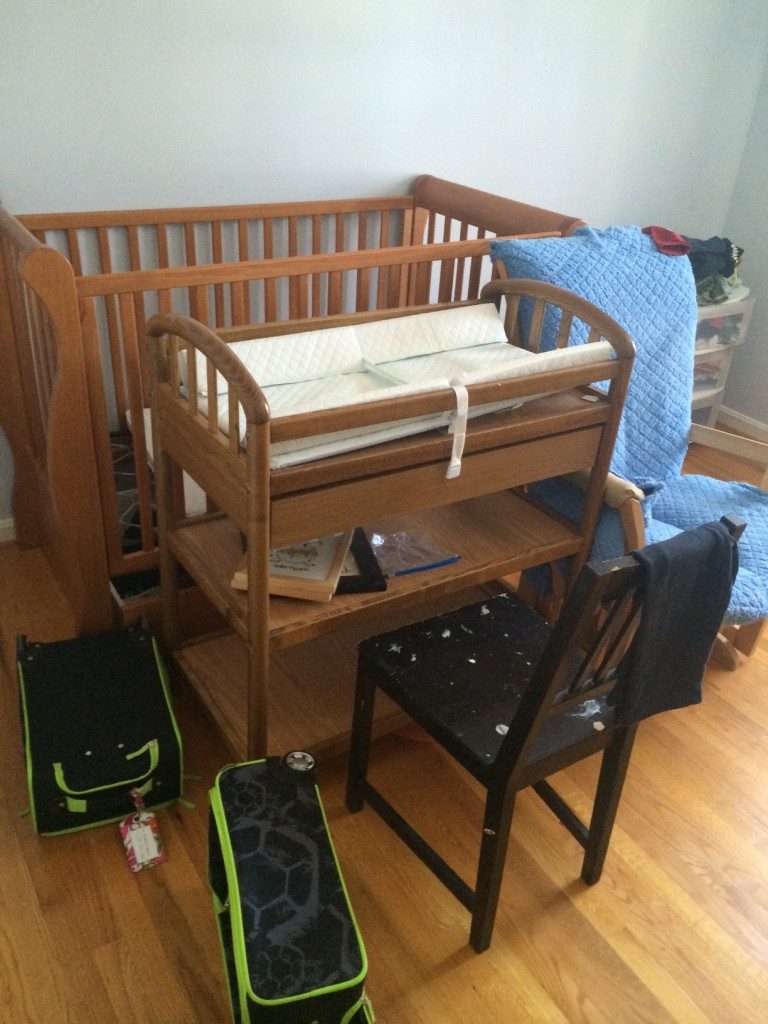
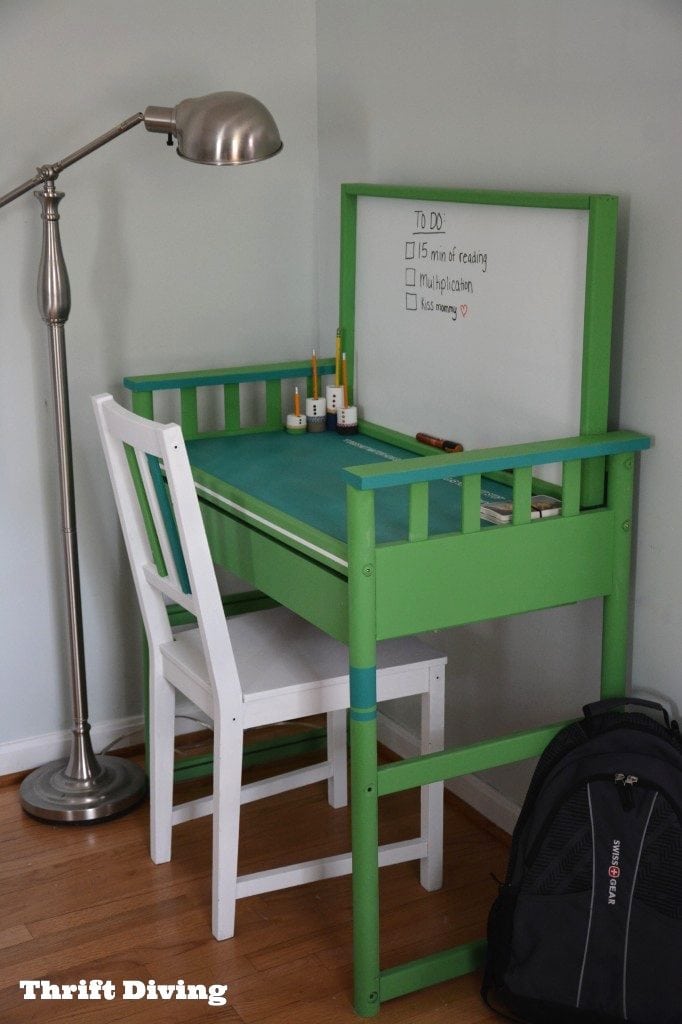
See how I upcycled my sons’ thrifted changing table into a desk!
So what do you think??!!
Leave a comment below…..and considering SAVING this project on Pinterest!

Pin This Project!
Feeling inspired?
Go ahead and pin this for later so you can come back to it!
![]()

Download the 5 freebies!

Thrift Diving inspires women to decorate, improve, and maintain their home themselves...using paint, power tools, and thrift stores! Use these 5 printables, checklists, and ebooks to get started!
Serena, the table is AWESOME!.
BUT I LOVE LOVE LOVE the springs to the bed as well. They remind me of a quilt pattern I use.
You got to find something dramatic for their use, on the wall, vines, hand prints of the kids, SOMETHING, THEY ARE BEAUTIFUL.
YOU DO SUCH GOOD WORK!
Bobbie
Thanks for leaving a comment, Bobbie, and for sending the pics of idea for crib springs! I can’t wait to do something with it. Thanks!
Cute table! I love jigsaw, too. They are so versatile. You know, this winter when you (you?) get a little more free time (that really is a joke!) you can put in the stainless steel screws. I got myself that Kreg pocket hole kit and lost it to hubby. He never thought it would work so well. Now it’s “his”. Party on.
HAHA, I know, right! Free time…what’s that? 🙂 I am going to put in some of the exterior screws as soon as I order them. I don’t blame your hubby for stealing the pocket hole. It’s an awesome tool!
Loving it!! Now you have a clean patio, lounging chairs and a fabulous back yard! Congrats! What a great way to up-cycle your old crib.
Thank you, Tammara!! 🙂
What a great idea! The table looks adorable and is even more special since it used to be your son’s crib.
Thanks, Haley! Exactly–even though he used it for only a short period of time, and I think the other boys even less, it feels nice being able to keep parts of it! I get attached and sentimental about those things. 🙂
Beautiful job on the table. I’ve heard of benches and headboards made from crib but you always come up with something new and beautiful. You did a great job with the desk also and I noticed a tray ,on the table,
that you made from a drawer. Very clever Lady. What I like most about your things — they don’t look homemade like some things(like you can get in stores for a lot of money. You are such an inspiration to all. Thank you,
Glad you like the tray, Betty! I actually made that from scratch! 🙂 You can see the project here: https://thriftdiving.com/make-a-diy-serving-tray/. I knew that one day I would have a patio to use it for, and so it feels nice being able to put it to good use! Thanks so much for the kind words. They mean a lot!
I love it! I am all about upcycling things like this! My son’s crib head and foot boards became my queen size headboard about 13 years ago. When I moved into a smaller place, the bedroom would not accommodate the bed, dresser, two nightstand, bureau set so I sold them. I still wanted a headboard and as I was cleaning out the storage area into the moving truck, it struck me that the bead board design from his crib might be big enough. I measured and it was perfect! I really should fill in the hardware holes and give it some paint, maybe somehow hook the two pieces together. Guess the unfinished look is ok with me. lol
Oh wow, Debbie, that would be awesome to see! Can you send me a picture of it? That sounds cool. Did you create it yourself?
Beautiful job! The outdoor chairs are gorgeous too. I love your backyard space you have created. The table just makes it more beautiful. Wish I could be there for your get-together. Have lots of fun.
You can totally join us in spirit, Vicki! 🙂 The backyard chairs still need an extra coat of paint, and if you can believe it, the white ones only have primer on them. LOL. But I’ll be pulling out my paint sprayer and giving them all a fresh coat in the next week. I used semi-gloss outdoor paint, thinking it would be “hearty” and stick well, but they feel sticky, which feels gross. So I’m going to give them a coat of chalked paint!
Great job and cool idea! Looking forward to seeing more about the Kreg tool as well. I want one of those bad boys!
Hey, Sherry! Yeah, the Kreg tool is awesome!! It’s really allowed me to create things that I wouldn’t have otherwise have been able to create! I won it last year at a blogging conference!! 🙂
These are absolutely fantastic! You did a marvelous job both with the reinvention and the outcome. Beautiful!
Aww…. Thanks! It makes me excited when ideas like this come to me! It’s the best part of DIY’ing! 🙂
Beautiful work again. Nerd side of me would use a slightly different fastener make up for exterior but I digress back to the nerd part again. I like your paint selection very much. Your color pallet is great! Love your work as always.
Hey, TK! What would you have used for the fastener? Please shed some wisdom on me. I love building stuff so if there is a better way, pass me the info! 🙂
For the outdoor furniture, Kreg has coated screws and there are other brands of pocket screws in stainless steel. You used zinc plated screws which do have a light coating for resistance to the elements it just that the others last a bit longer in the elements. I like your use of the pocket screw joinery. I have gave a Kreg kit to a few friends who have gotten the bug of RRR along with your web page for inspiration. Most of them have become quite talented to their own surprise. You are an inspiration.