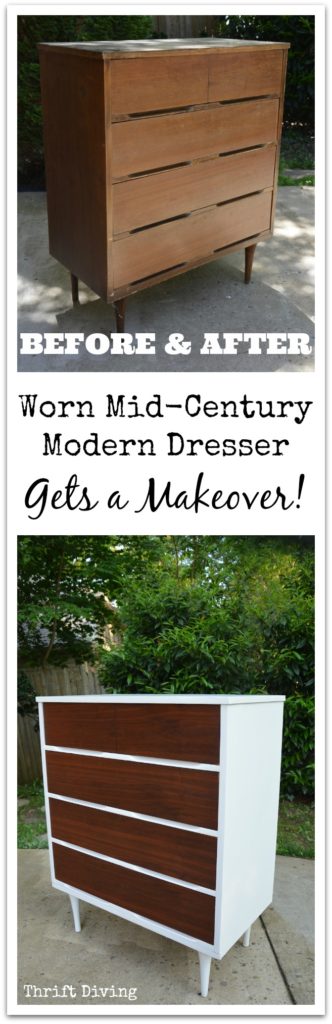
BEFORE & AFTER: Mid-Century Modern Dresser Makeover
This is the tale of what I consider an epic mid-century modern dresser.
Pull up a chair and a hot tea… This may take a while.
The Mid-Century Modern Dresser Makeover That Almost Didn’t Happen
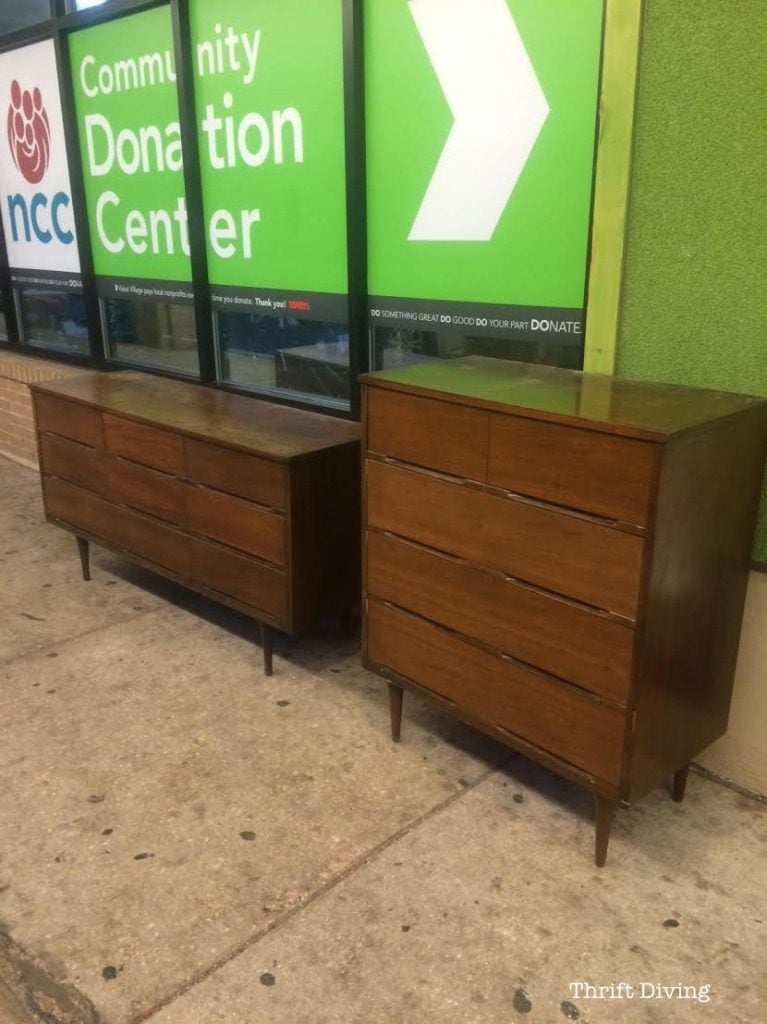
It’s quite funny now, thinking about how I had found these two mid-century modern dressers by total chance at the thrift store on a day when I was supposed to “be good” and just donate things to the thrift store and not buy stuff from the thrift store. (You can read all about how I found them here).
Yeah, so much for that plan, right? 😉
But at $14.99 for the tall skinny guy and $24.99 for his short, fat friend, it was too good of a deal to pass up.
Hard to believe such quality furniture was less than the cost of a 3-D movie and popcorn.
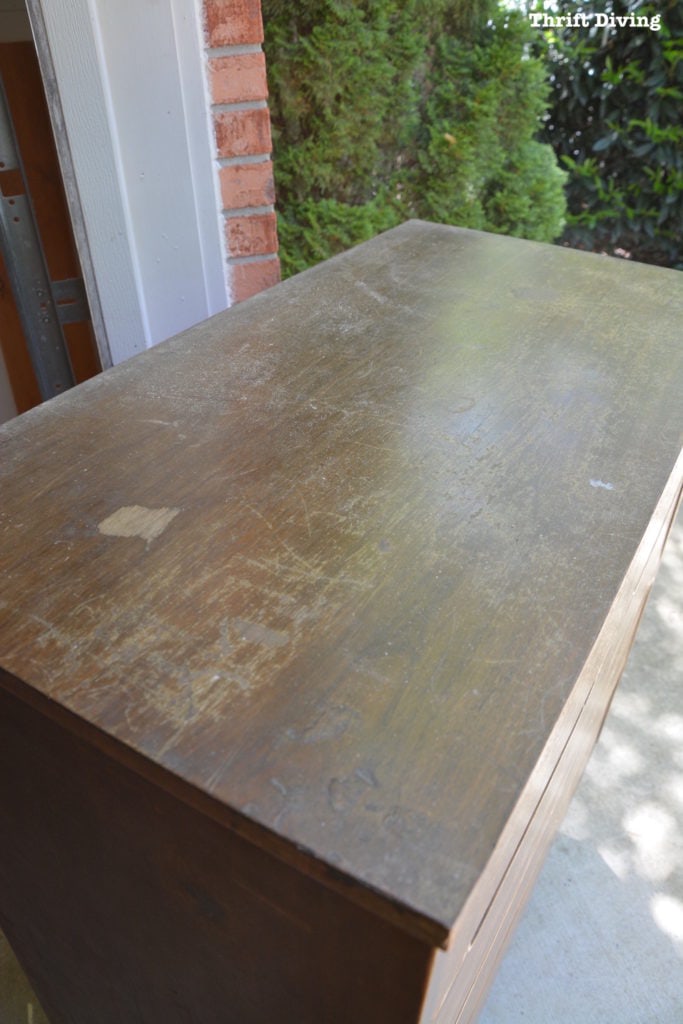
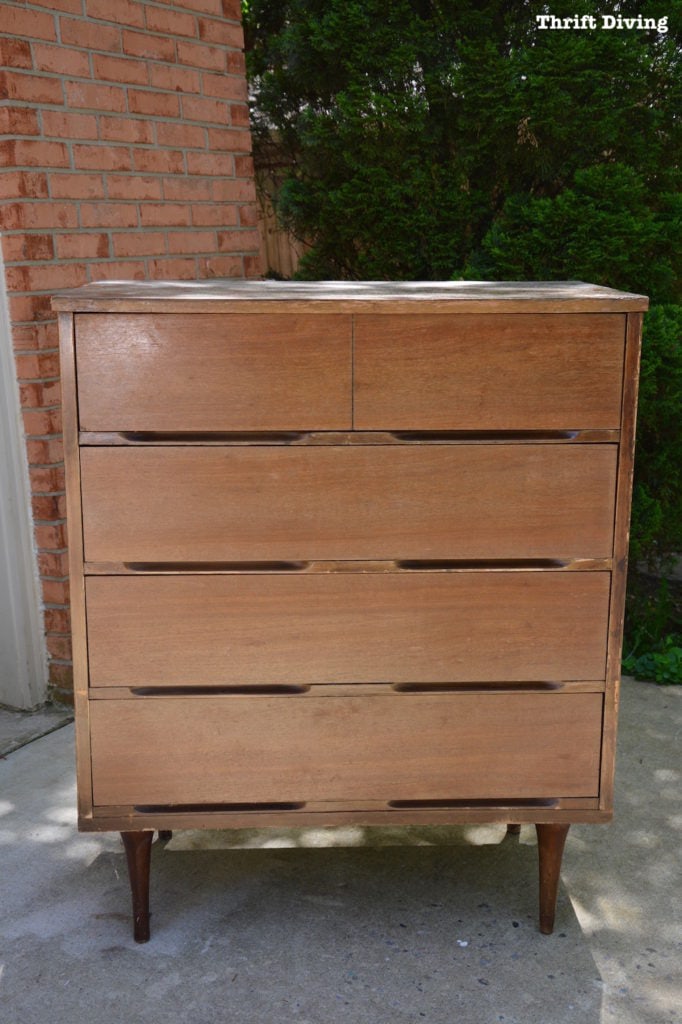
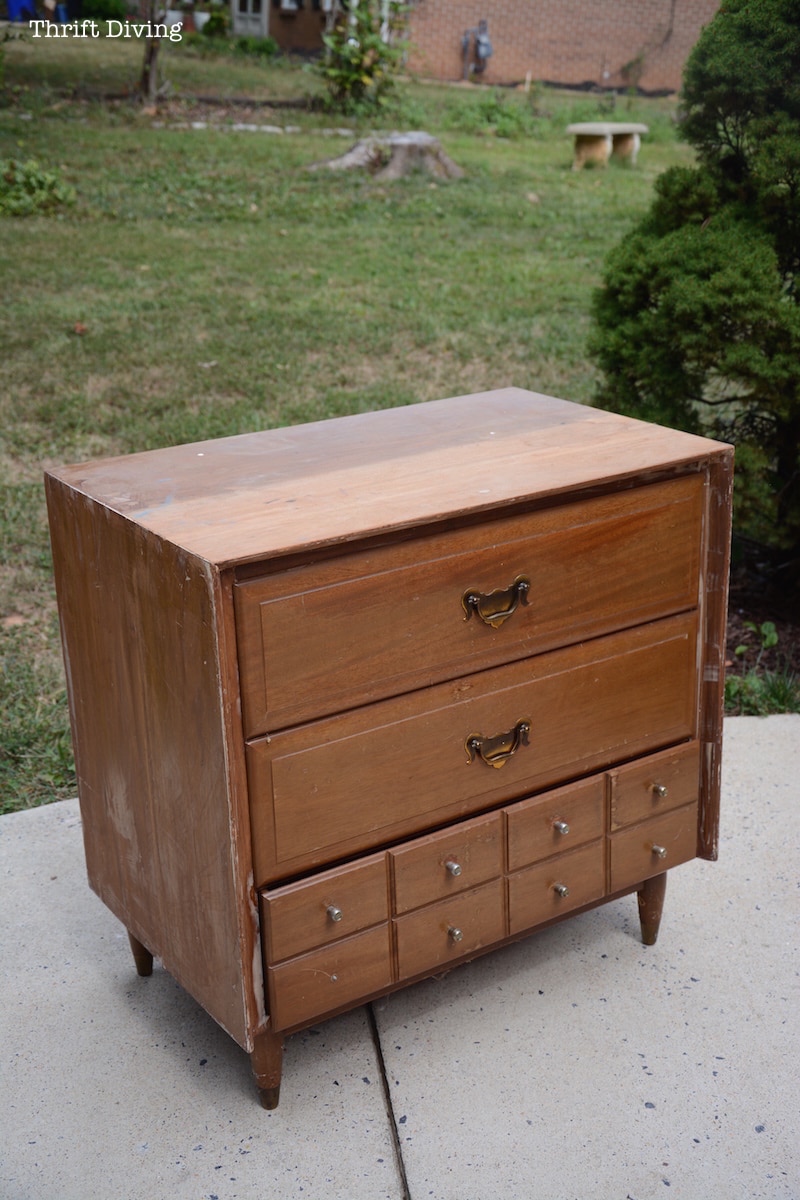
BEFORE
But DIY is awesome, isn’t it?
Especially when it’s a project that almost got the boot, but ended up so nice!
And then you create this wonderful something….
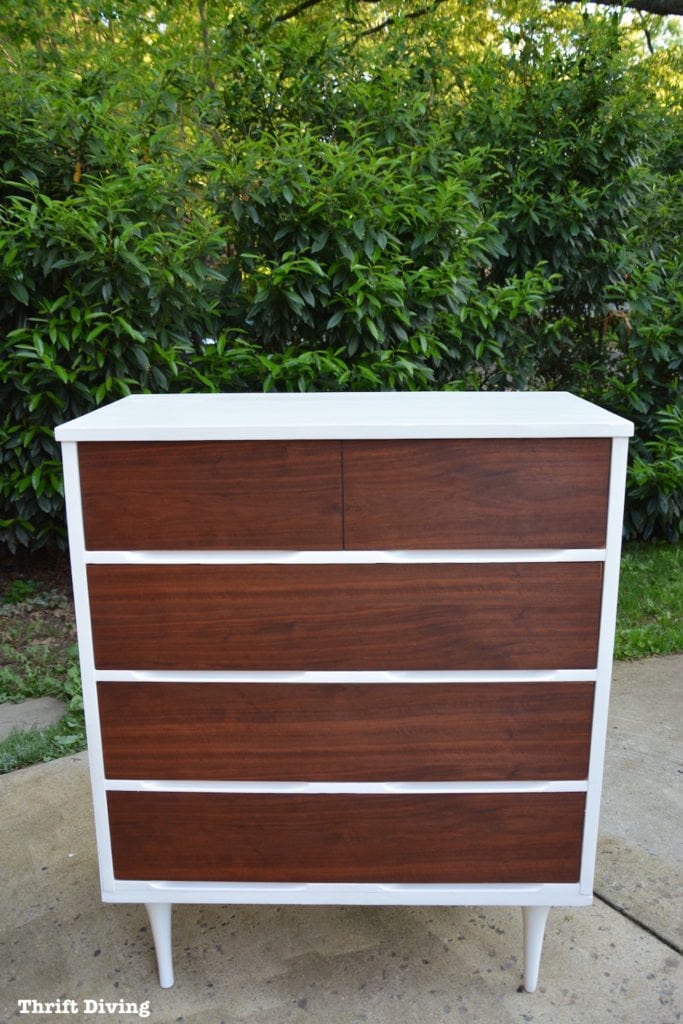
AFTER!

….and your love of DIY amplifies.
So, enough dawdling.
Here’s what happened.
There Are Always Problems, Aren’t There?
When working on furniture makeovers, wouldn’t it be great if they all turned out perfect and you could just marvel in your total DIY genius?
But that’s not always the case, now, is it?
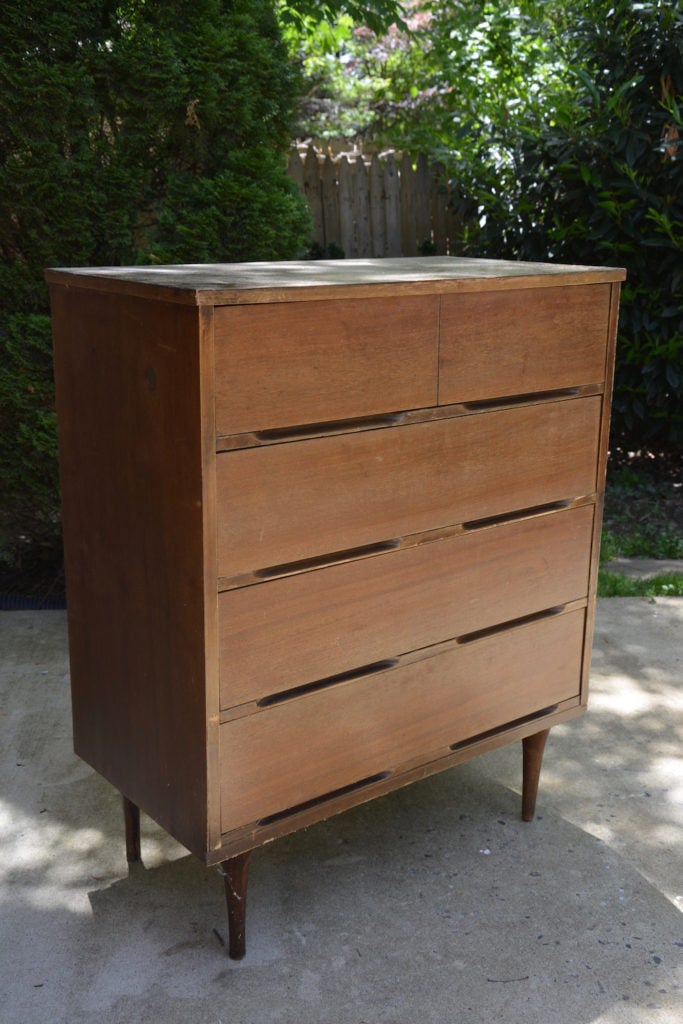
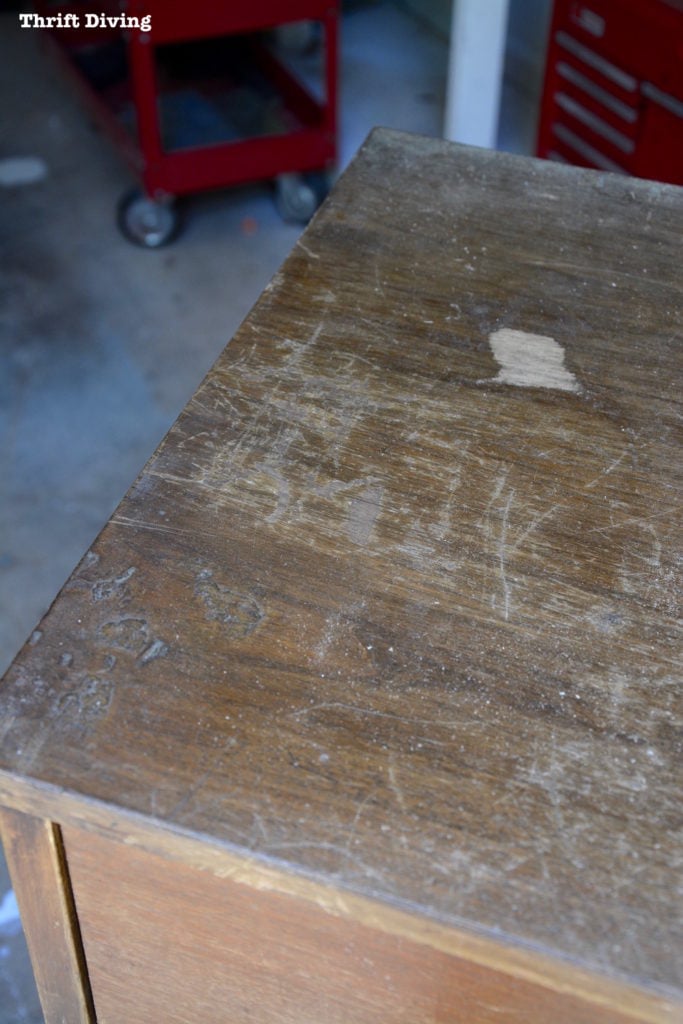
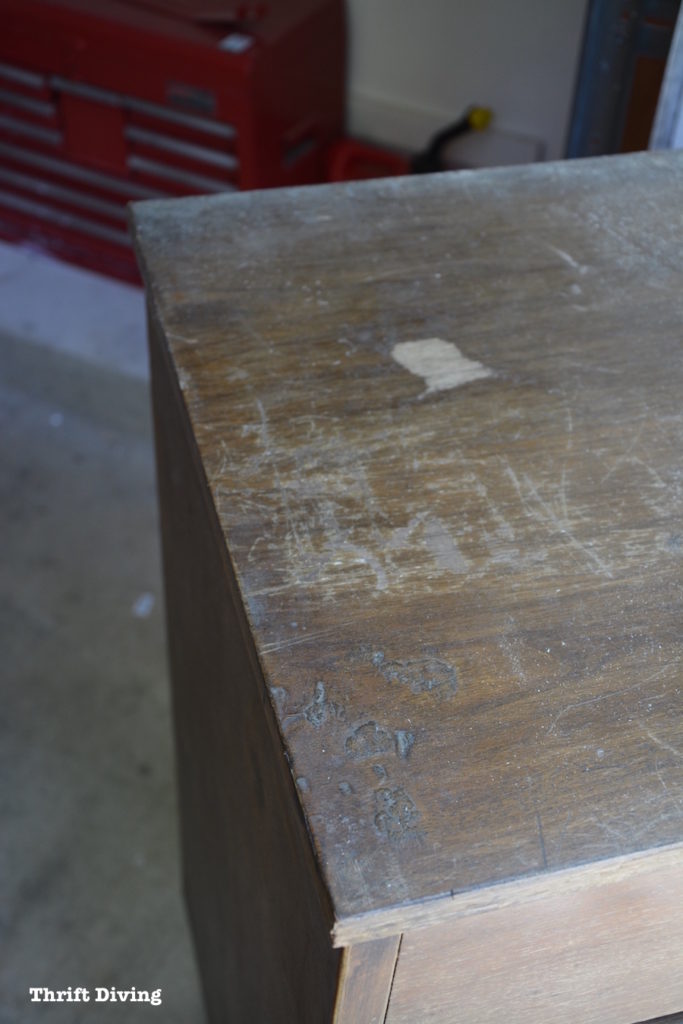
I could deal with the badly marred top.
Simple.
I knew I could just sand that down and–problem solved.
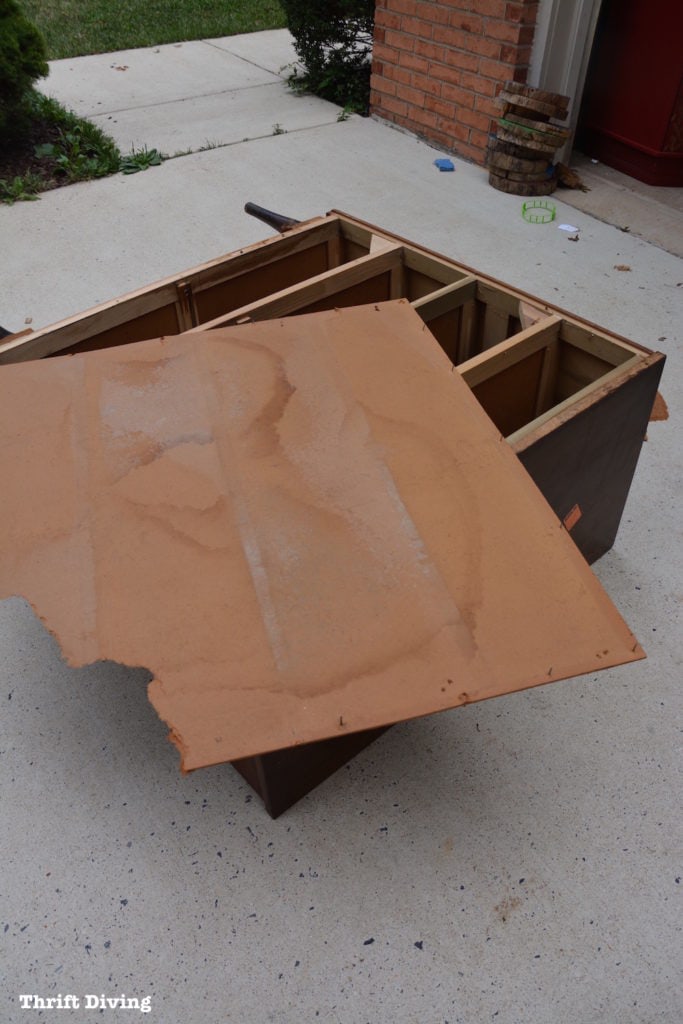
But what I couldn’t deal with was finding what appeared to be Roly Poly bug shells in the dresser.
That was Strike 1.
Then I detected a nasty “old wood” moldy smell inside.
Despite ripping off the back (with the goal of replacing it) and cleaning the inside with vinegar and water, I just couldn’t get rid of the smell.
Strike 2.
Well, sometimes you don’t wait for a Strike 3.
You just decide you’re done.
And that’s when I decided I would just re-donate this mid-century modern dresser back to the thrift store.
Even The Salvation Army Wouldn’t Take It!
The dresser was all packed up in the “Please Take My Junk” pile.
But with a gaping hole in the back of the dresser, they passed right on over it.
I came home after the pick-up and saw the dresser just sitting in front of my garage, left behind like a neglected stepchild.
Instead of moving it inside, I let it sit. For well over a month.

Rain fell on it…. snow sat on it for days….
I willed it to “die” and wither away so I wouldn’t have to think about hauling it back.
But it stood there, sturdy and hearty as ever, begging for a makeover.
Finally, I moved it inside of the garage.
It was about that time that my cousin mentioned in passing on Facebook that she needed a dresser.
Hmmm….could this dresser actually be saved?? Couldn’t old Roly Poly shells be cleaned out, and could you paint or replace the old musty parts?
It was worth finding out!
Solid, But I Had to Strip It
Most furniture paint….scratch that….all furniture paint brands will tell you that you don’t need to sand before priming.
It’s a lie.
It actually depends on the piece.
And this clearly needed sanding first.
To even think of painting over this would have been a nightmare and it would have looked horrible.
But you know me. I see potential in everything. And I knew once I made the commitment to transform it, it would be fabulous.
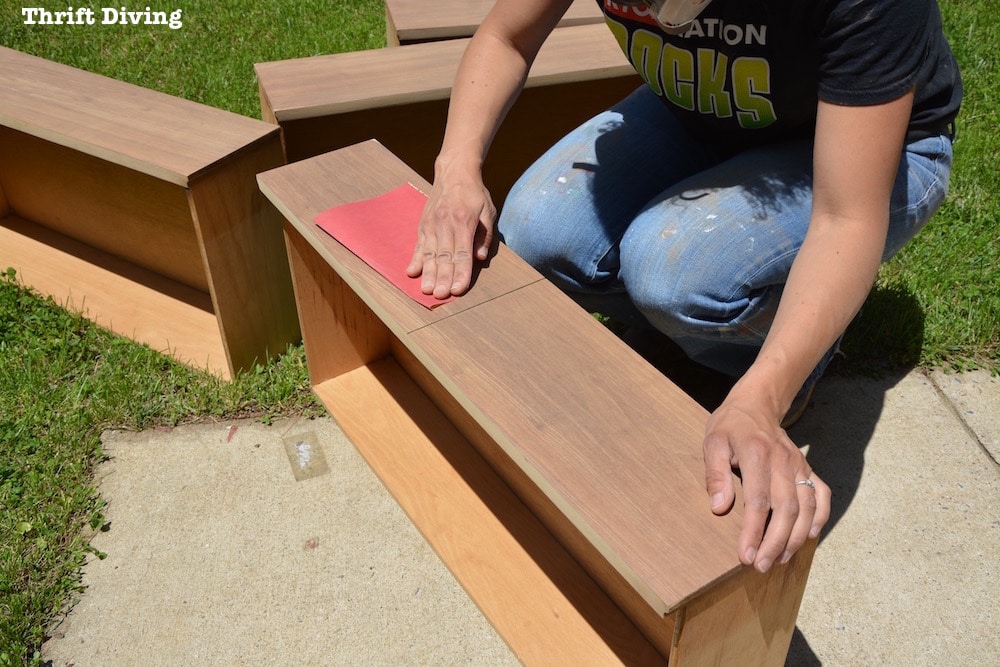
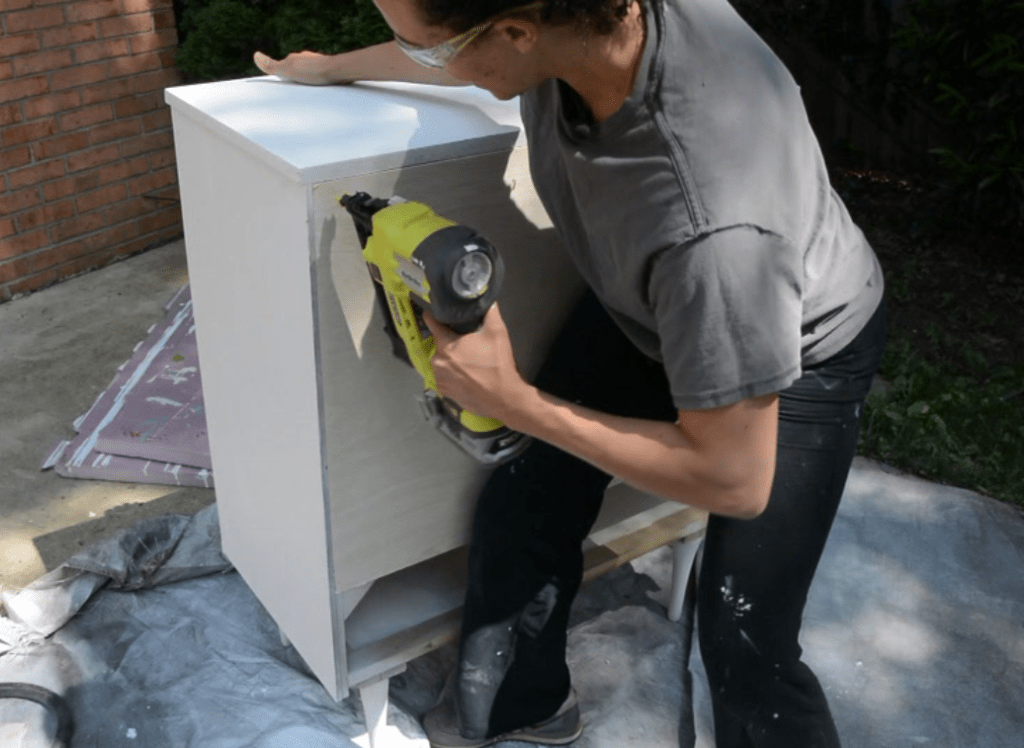
Stripping It Down With a Sander
As much as I love using chemical stripper (in an oddly satisfying way of scraping gunk), another part of me hates dealing with the mess.
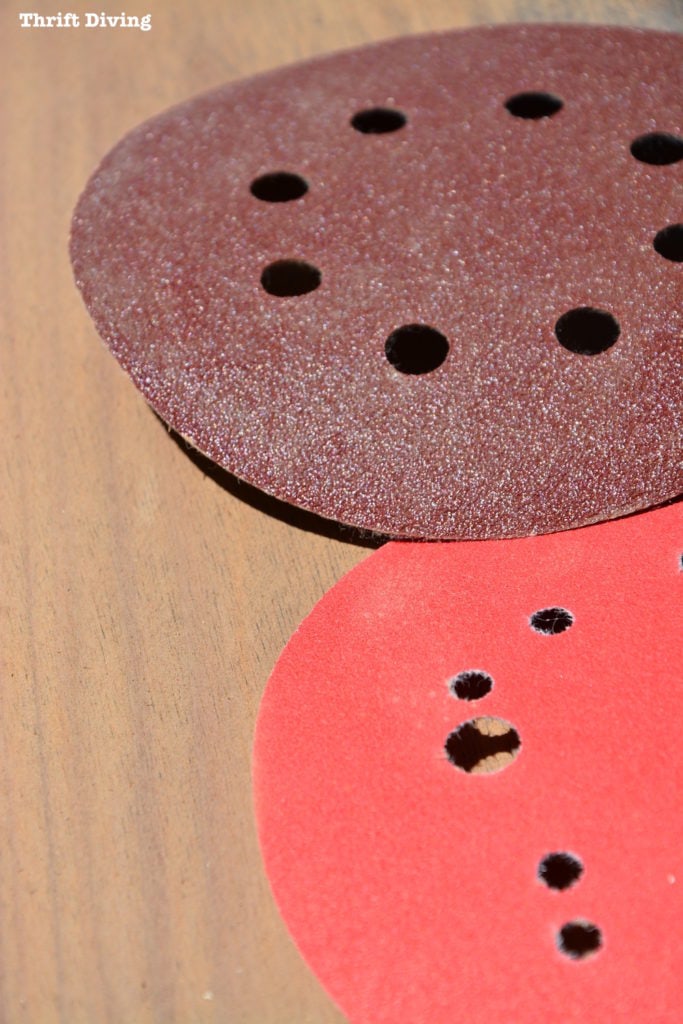
It’s easier for me to grab my orbit sander, throw on some 80-grit rough sand paper, and strip down the first layer, working my way from 80-grit to 150-grit (medium) to a fine 220-grit sandpaper. Doing this makes the wood soooo smooth and beautiful, keeping the “swirly marks” from an orbit sander much less visible.
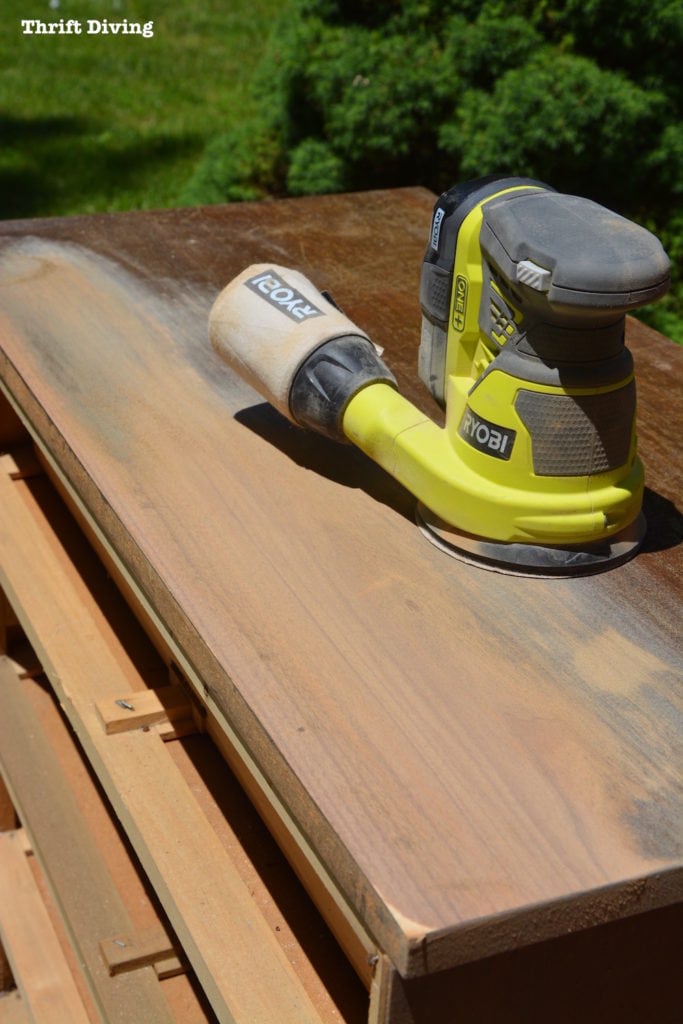
I only planned to sand the top since it was in bad condition.
I didn’t really need to sand the sides.
Once I was done, it looked great and ready for paint!
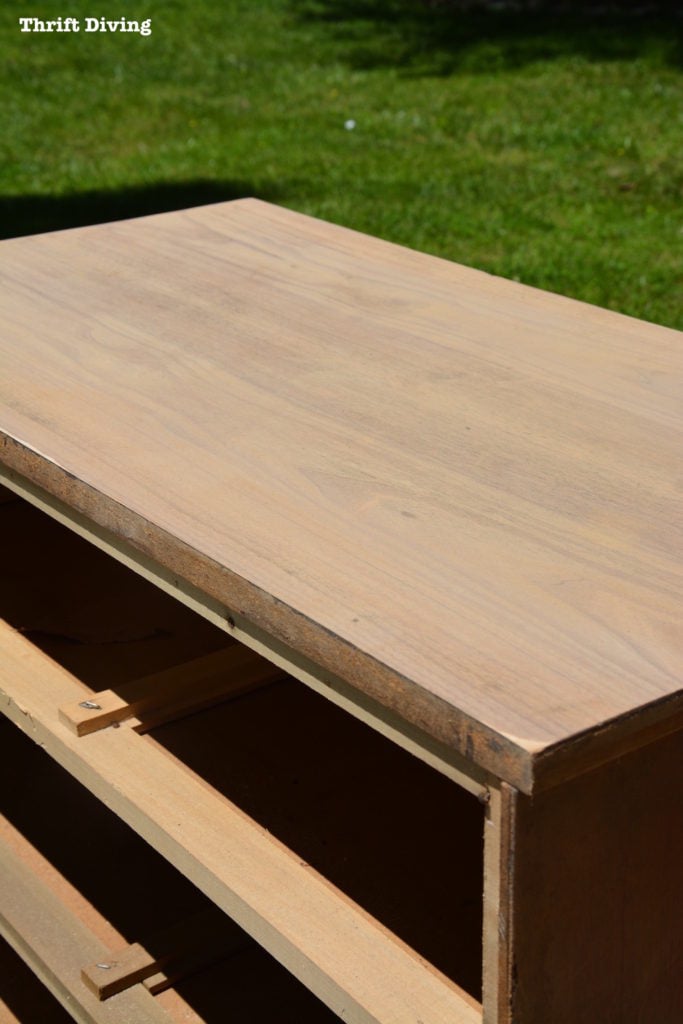
It was chipped in the front, but nothing that I little wood filler couldn’t fix.
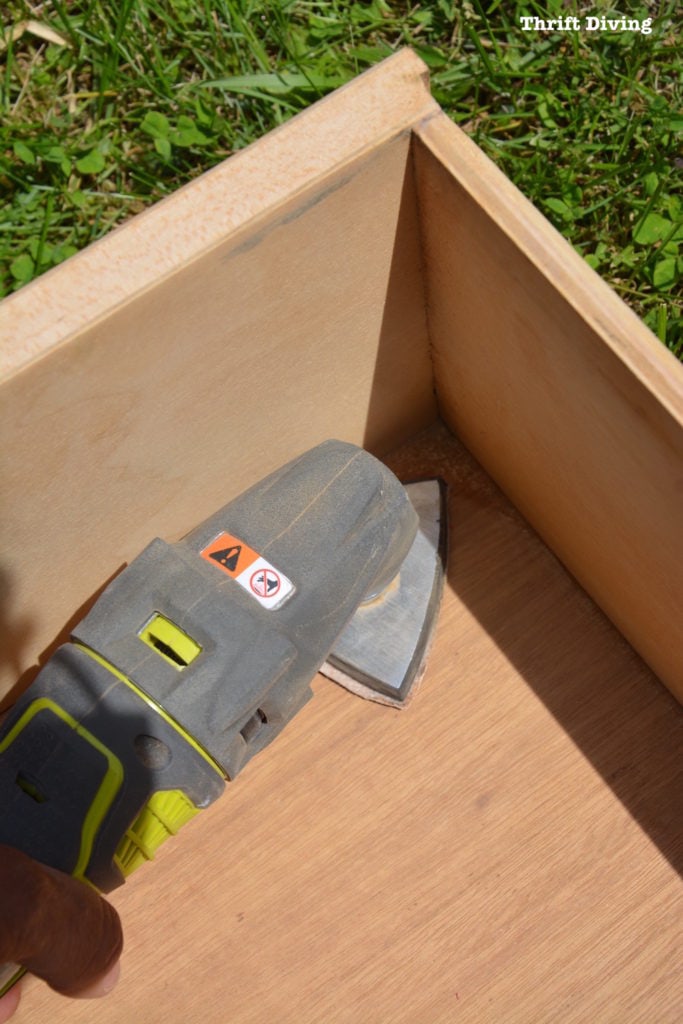
Have You Ever Sanded……the INSIDE of a Drawer?!
I bet you haven’t.
I never had, either, until now.
Well, the outside of the drawers were in decent shape, but very worn and “blah.”
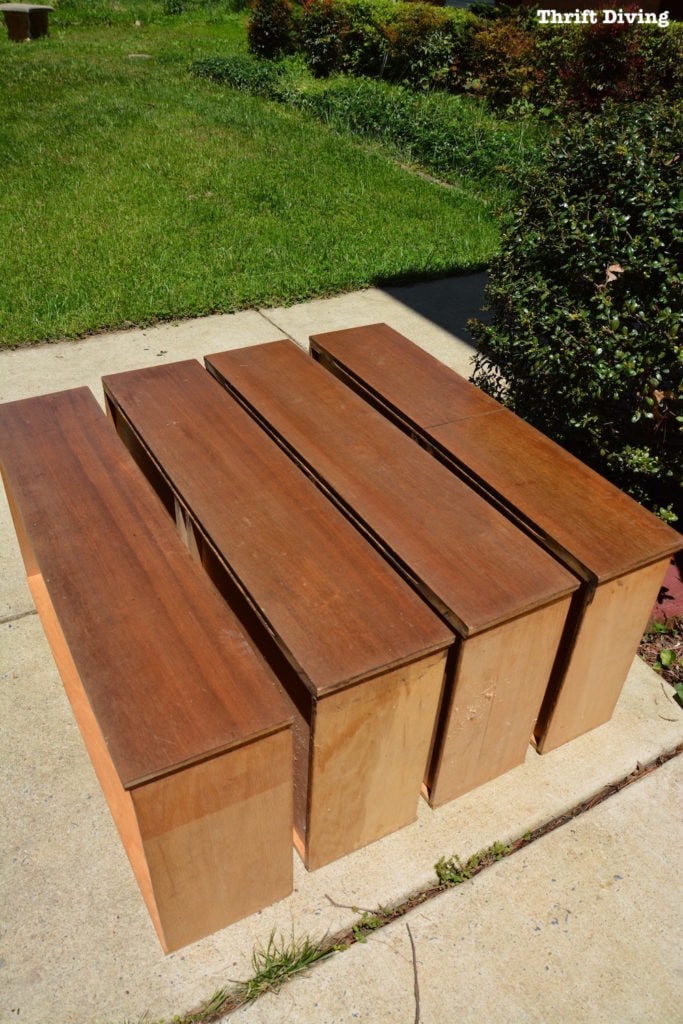
I sanded those down the same way: started with 80-grit…….then used 150-grit……followed by a finer grit. I finished off with a very fine grit by hand to remove any sanding marks. Afterward, it felt like buttah, baby!
But the insides were dingy yellow.
Would you want to put your clothes into some dingy yellow vintage mid-century modern dresser?
As cute as it is on the outside……um…..no thanks.
But check out how dramatic the difference was! It was total revitalizing, inside and out.
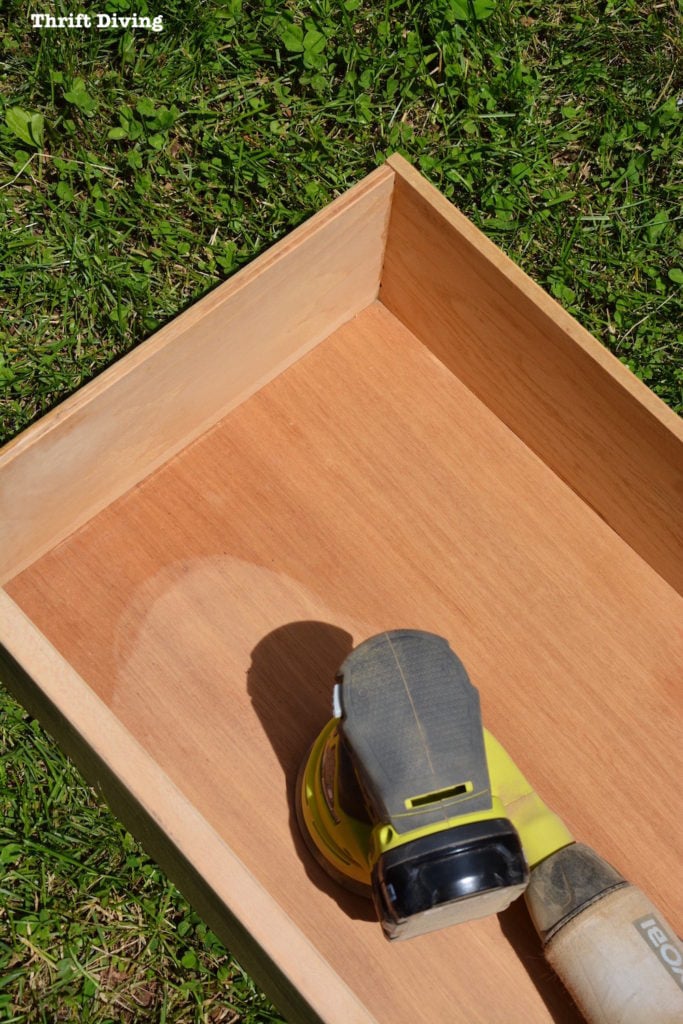
It didn’t take any time at all, really.
I’d highly recommend trying it for your next project with drawers. Really breathes new life into those ugly interiors of vintage furniture (if you’re not painting the drawers, that is).
I used the RYOBI JobPlus multi-tool with the corner attachment to get into the corners where the orbit sander couldn’t reach.
I Wanted It Smoooooooth
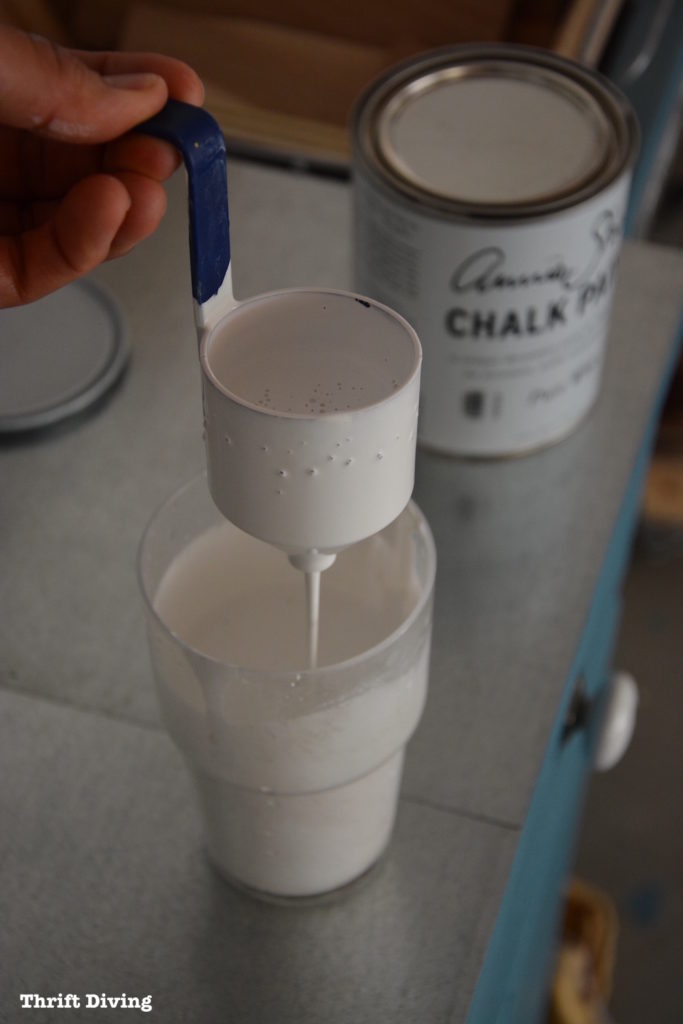
Chalk paint tends to leave brush strokes unless you water it down to get it super smooth (also, depends on the type of brush you use).
I decided I would just use my HomeRight Finish Max Pro paint sprayer, which also leaves a smooth finish without brush strokes.

When using a paint sprayer, you have to make sure the paint is thin enough to go through the sprayer without getting clogged. So you have to add water and test it the viscosity with the cup that comes with the sprayer. Just watch my video for instructions on how to do it.
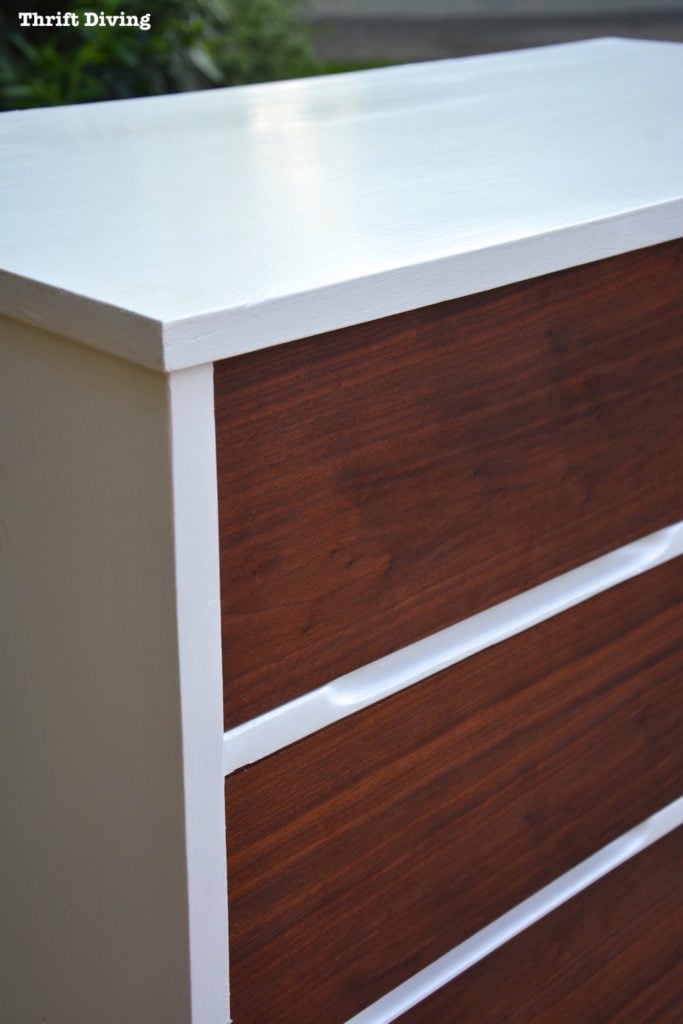
I used Annie Sloan Pure White for a crisp look.
In order to get nice coverage without drips, don’t over-spray. Keep the paint sprayer moving. And definitely add two coats.
This was with just 1 coat.
The second coat is where the coverage really starts to occur.
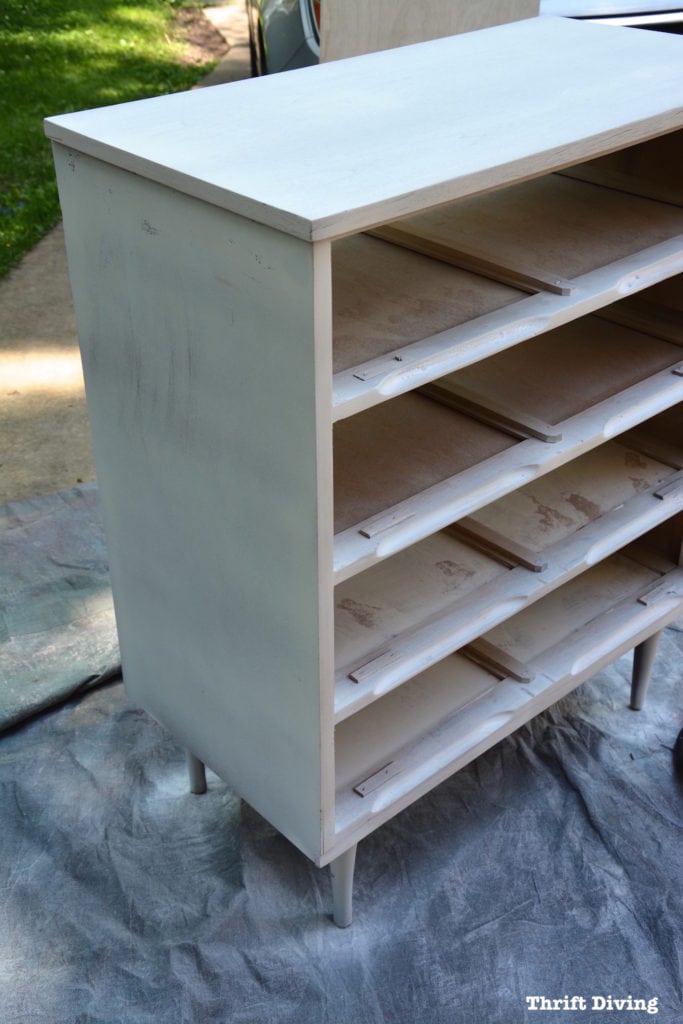
Oh No….The Dreaded “Bleeding Stain”
Even though I had sanded the top nicely, it must not have been totally clean. I should have cleaned it with mineral spirits or something, I guess. Because I started getting some staining from the raw wood underneath.
I ended up using 2 coats of Annie Sloan…..a coat of Kilz water-based primer (FYI….doesn’t work for crap)……and another coat of Annie Sloan.
Lesson learned: Do a test area first to see if you have bleeding. If you do, I would recommend either a coat of clear poly first, a coat of clear wax first, or an oil-based Kilz primer to stop the bleeding before adding the chalk paint on top.
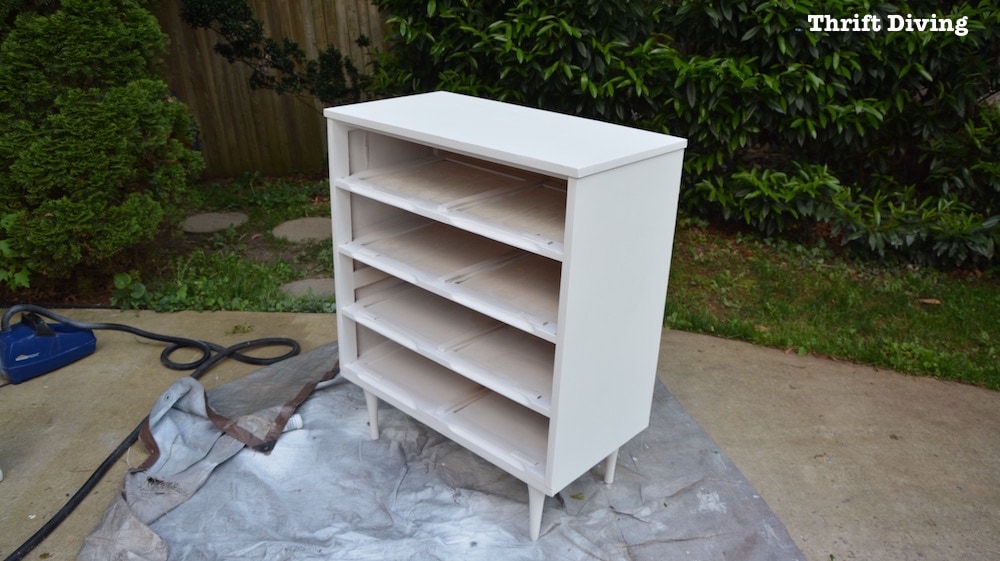
It was worth the effort because the white paint looked fabulous!
Adding a New Back
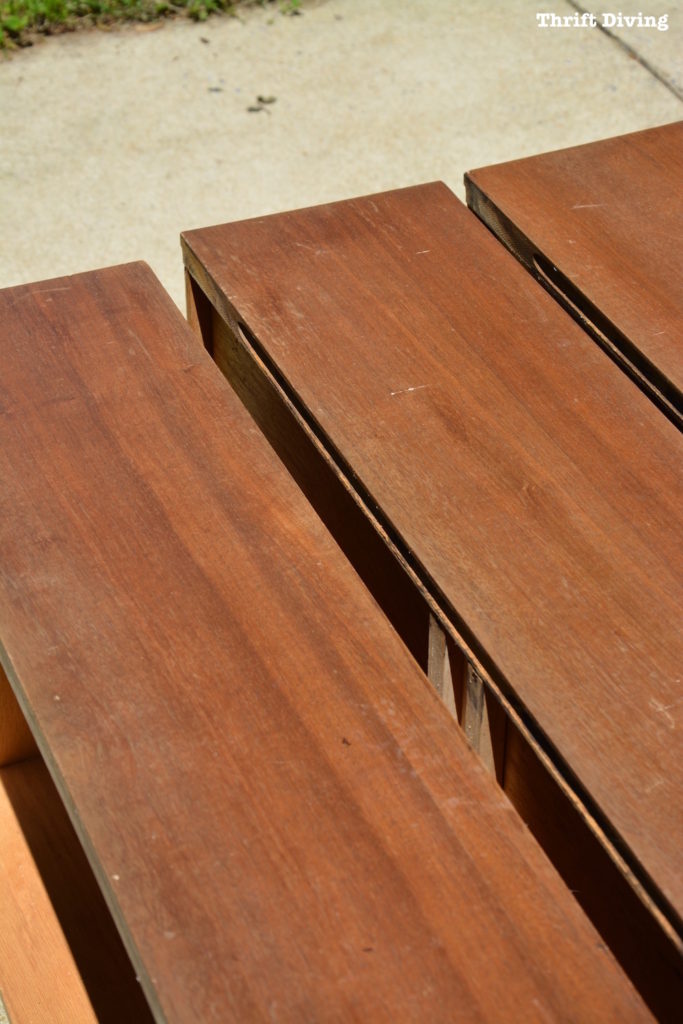
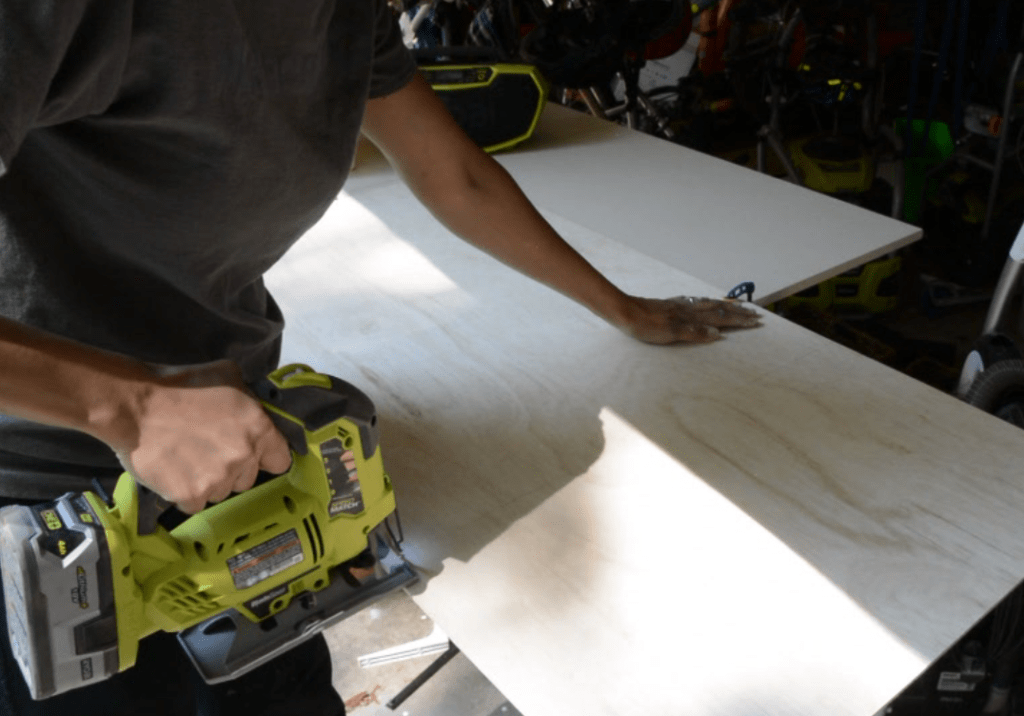
Another thing I needed to do was to add a new back to the dresser.
I got some 1/4″ plywood from The Home Depot (total was about $20 for the wood. Crazy that the plywood cost more than the dresser!!!!).
Then I used my jigsaw to cut pieces for the back.
I never have help with my DIY projects, so a fat ‘ole hip comes in handy when holding things up so you can nail it in there! LOL
I ended up having to cut two pieces to fit the back.
The back got a coat of paint, too.
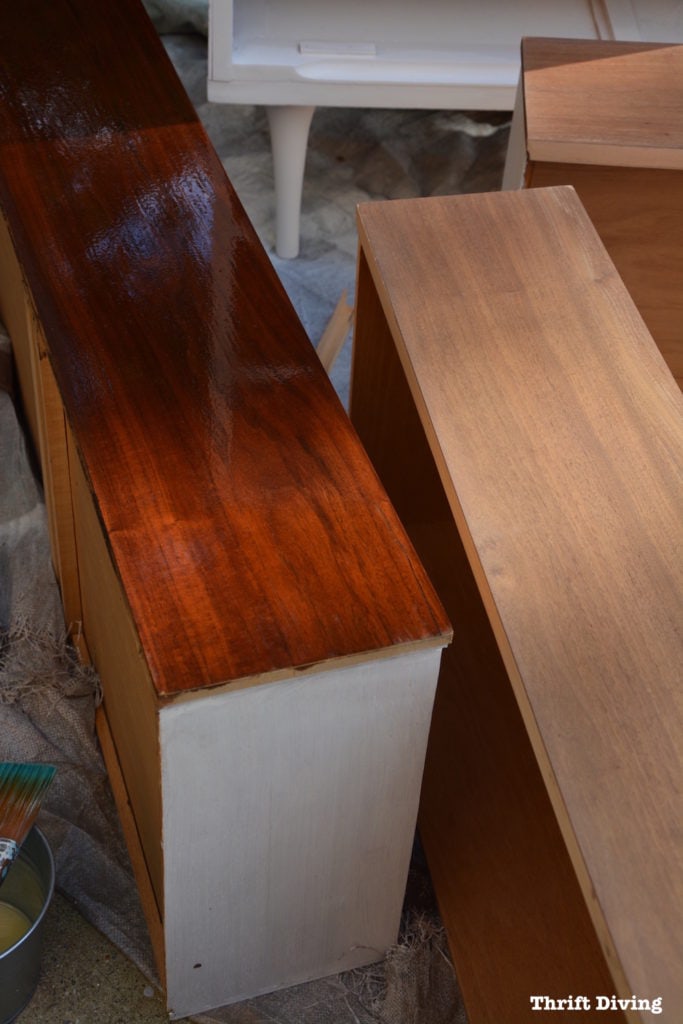
The Most Dramatic Difference
When I started this mid-century modern dresser makeover, I intended to stain the drawers.
But after using tung oil on my mid-century modern chair makeover some time ago, I was convinced of its powers to restore wood.
I decided to try it this time, too.
And OMG, you guys…….
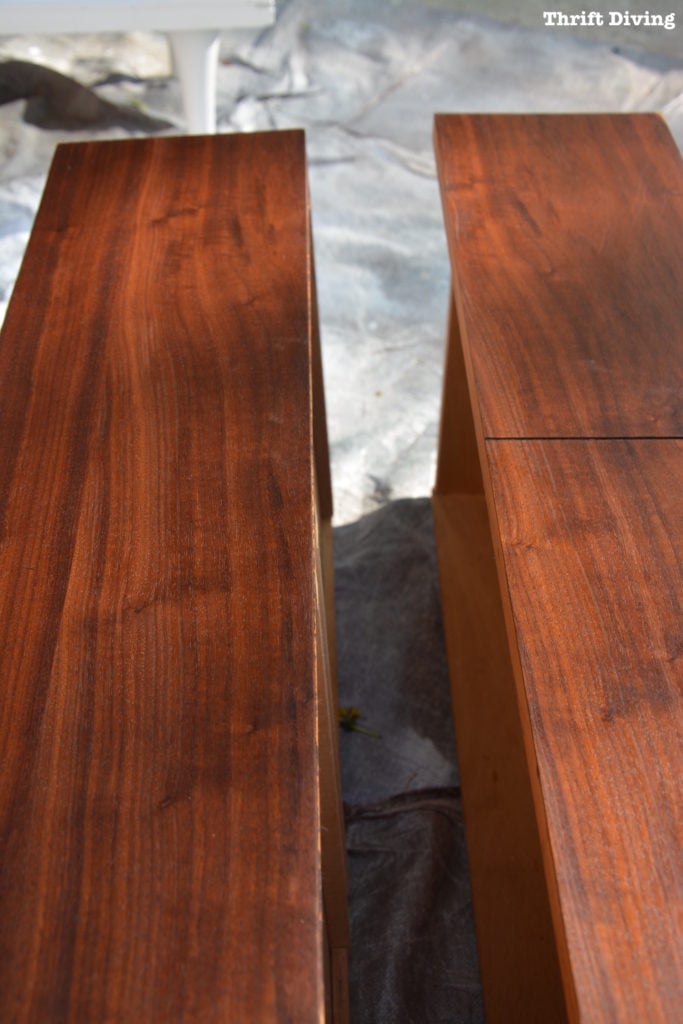
Look how amazing the results are, side-by-side!
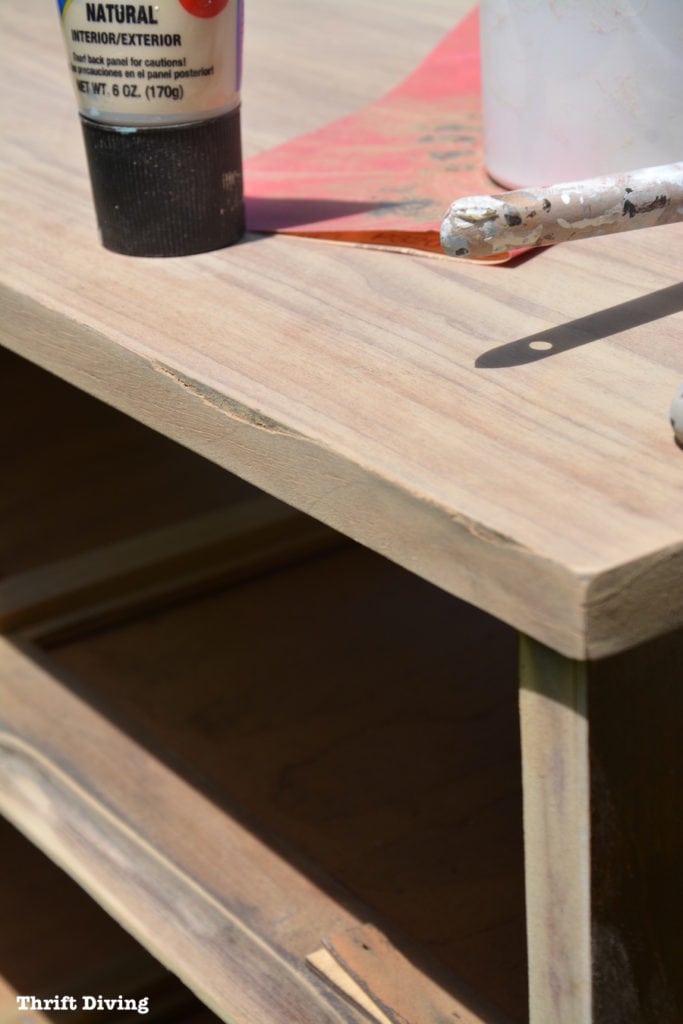
The directions on the tung oil said the first coat should be a 50/50 mix of tung oil and mineral spirits.
It said to wipe on and leave for 10-15 minutes, then wipe off.
24 hours later it recommends adding a second coat of tung oil only.
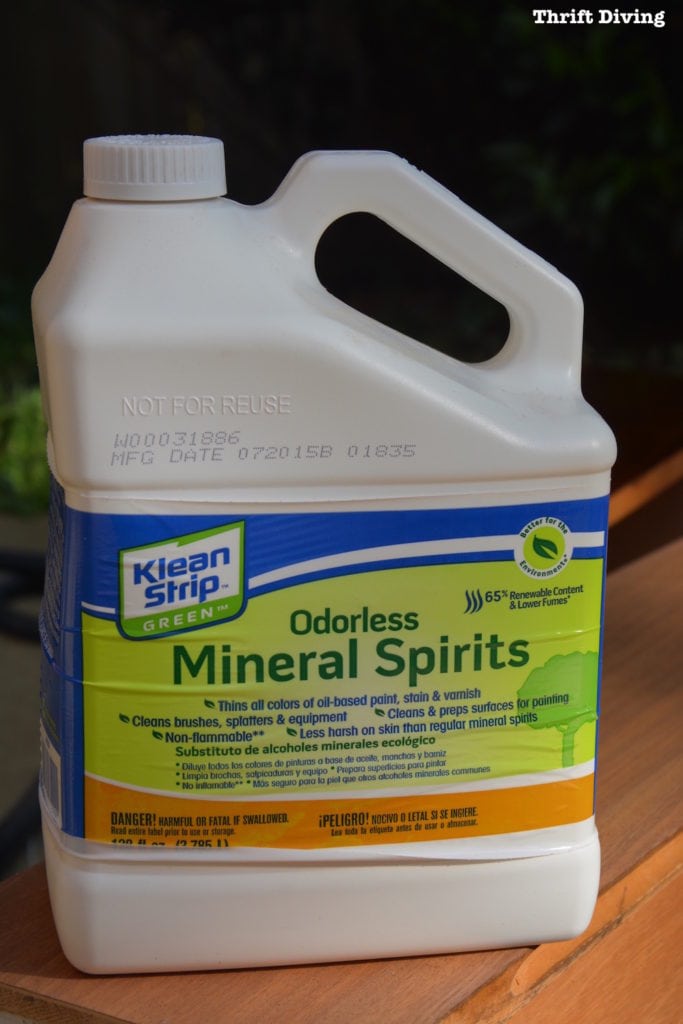
Keep in mind that I did NOT stain this wood….I only used the tung oil mixed with mineral spirits.
It’s gorgeous, isn’t it?!?!
A Coat of Satin Tough Coat
Since this piece is a mid-century modern piece, I didn’t want to use wax. I wanted something with a bit of shine, but not too much gloss.
The Country Chic paint people had sent me a sample of this Tough Coat some time ago and I had just gotten around to using it for this project.
And I loved it!
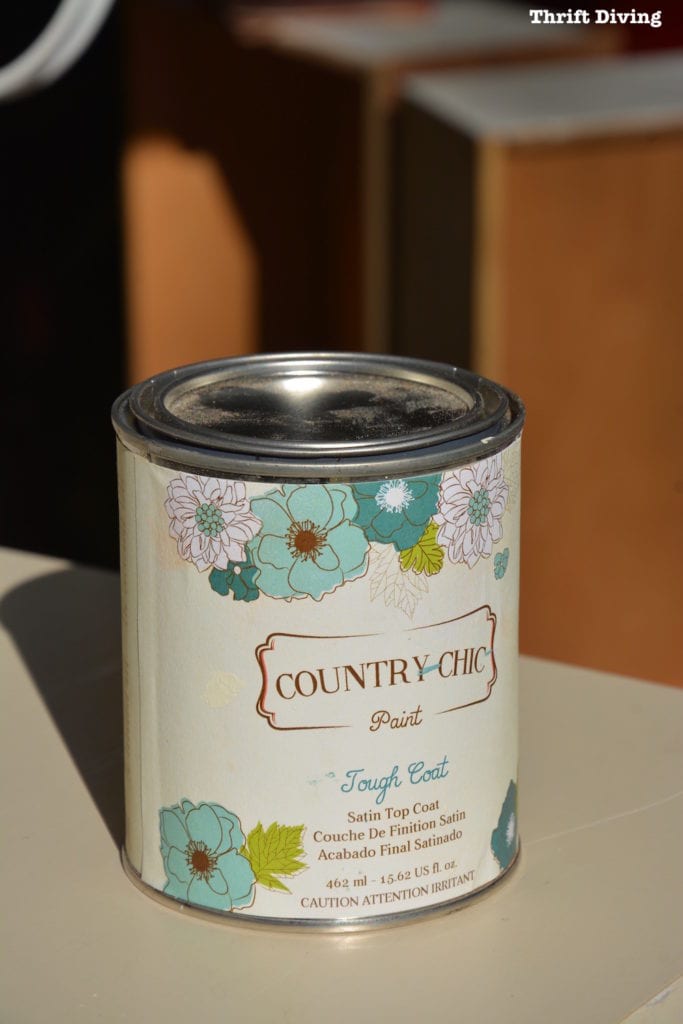
It left just the right amount of shine, without being too glossy.
It was hard to apply with a brush, though. Not because the brand, but because top coats are hard to apply perfectly without skill!
I don’t use them often enough to consider myself a DIY ninja with it.
I kept going over the same spots, messing up the finish, worried about leaving stroke marks.
I would recommend practicing on a scrap piece of wood first before using it on your final project. (Or, if you have a lot, use the paint sprayer, which can apply it evenly).

The results are pretty dramatic, don’t you think?
I mean… what should have been a mid-century modern reject ended up becoming a beauty that even took me a long time to appreciate!
BEFORE
AFTER!
Watch This Makeover in Action
A Gift For My Cousin
Lately I’ve gotten into this “furniture makeover giveaway” mode because I’ve been enjoying working on projects to give to my family than to keep for myself, like my previous furniture makeover of that vintage chair makeover from the nursing home I did for my mom.
And now this dresser.
It’s going to its new home to my cousin, Danielle, who needs a dresser for her son.

I’m so thankful that The Salvation Army left behind this awesome dresser!
And I’m sorry that I didn’t have the insight into what this dresser could be sooner. But I’m at least thankful that my cousin will be able to enjoy it!
So What About You?
Have you ever worked on a project that you later had negative feelings about, but it ended up turning into something you were proud of?
Leave a comment below and share your story!
Share This Post
If you’ve enjoyed the hard work that went into creating this project and post, do me a favor and share it with your friends and family! I would forever be grateful!
![]()

Linking up:
Download the 5 freebies!

Thrift Diving inspires women to decorate, improve, and maintain their home themselves...using paint, power tools, and thrift stores! Use these 5 printables, checklists, and ebooks to get started!

I sanded the inside of the drawers to a MCM dresser just 2 weeks ago. I couldn’t stand the feel of the “fuzzy” wood. What causes that?!? I had planned on painting the drawers but the woodgrain is so beautiful I may just do a wash or leave as-is. I did line the drawer bottoms though. I had some cool maps I just had to use!
I have no idea what causes that! But I do love the look of sanded drawers to get rid of that nasty dingy yellow inside! Seriously, try the tung oil. You might be surprised how beautiful it leaves the wood! Well, for the outside. I wouldn’t use it for the inside. LOL. I think you could leave the inside as-is 🙂 But I do like the map idea! A little “unexpected’ inside of drawers is always fun!
Wow!! Beautiful job, it looks so perfect. 😀 So, did I miss it somewhere in the post, or are we not getting a short matching twin dresser as a surprise later? Because that would be awesome. <3
Hey, Mariele! It’s coming!! 🙂 Although I don’t know how different it will look because I absolutely LOVE the look of this wood with tung oil and I may just duplicate it! Just depends on what I decide to do with it. It will be going back in the basement, and that doesn’t have any particular style. But yes, the makeover will be coming very soon, because it’s sitting in the garage and I need to get it out of there so I can paint the garage floor! 🙂
LOVE this after! I can’t believe you were trying to get rid of it. I feel like all of my projects are in that negative phase and are ready to move onto the rocking it phase.
Oh, it’s totally amazing what you can transform if you just give in to the ugliness! LOL. I’m probably going to do the matching shorter one next because it’s still in the garage and needs to go back into the basement, but I’m wondering what I should do to it. Hmmmm….I really want to use the tung oil again, but maybe on the body, and then paint the drawers….??
yes! Love the two tone look!
Looks like you did a lot of work on that dresser. BUT the results were worth it. It is lovely.
Great job! I specially like the drawers fronts.
Thanks, Altagracia! I do, too. The wood was so gorgeous that I couldn’t bear to paint over it! LOL
Wow! What an incredible transformation! I would have given up but not you. I love the idea of sanding the inside of the drawers. I have a dresser I recently redid and I’ve been considering painting the insides but I might try that instead. Thanks for sharing!
Not sure if this link will come through, but after I saw your dresser transformation I had to share it! It’s a before/after of a piece I got at a thrift store. Very similar update! Great minds ;-p
https://www.facebook.com/KatCruzFurniture/photos/a.891204090917303.1073741828.891131354257910/891210144250031/?type=3&theater
I love your trick of sanding in the drawers! That’s clever. I’ve lined the drawers for pieces that were particularly stained or icky. Now I know I have another trick to try! Thanks, Kat
Serena, you got a thing for bug shells! Just vacuum those suckers out…LOL. Anyway, your project turned out beautifully! I can’t believe you left it outside so long & nobody took it! Well, glad you rescued it after all. It was worth it, wasn’t it?
The original dresser looks like it had “blocks” in the center between the drawers. In the painted version, it looks like solid strips between the drawers. Please explain.
I love the finished dresser. I like white paint with stained wood (or polished wood) tops!
Hey there, Barb! I think what you’re seeing are the dark indentations where the handles are below the drawers in the original. Once painted, white, the handles/cut-outs where the handle are, kind of blend is. Is that what you’re talking about? And I’m right there with you–I love the mixture of white and wood!!
I really love the clean lines and just think embelleshment would ruin those lines – and gold would just “bling” it up – but probably best as is especially since it’s for a boy. I have a very old, very ugly desk looking piece that really needs to be dolled up – painted an ugly black. Got it out of my brother’s house after he died (he liked bargains and often went to flea markets). It’s been in my basement for probably 15 years and moved from one basement to another, so the time is coming when it’s going to get it’s makeover. I’d love to send you a pic and get suggestions!!
Hey, Sharon! Yes, please email me the picture. Would love to see it and see if I can offer any suggestions! I will post it on Facebook, too. People there usually have good suggestions, too!
I agree, I didn’t want to embellish because I wanted all the attention on that pretty wood! And you’re right–for a little boy, I don’t think he would have appreciated the gold. HAHA! Maybe I’ll do some gold on the short fat dresser that will be next up for a makeover!