Refinishing Wood Furniture: Vintage Drafting Table Makeover
This wood restoration makeover is sponsored by Franmar®.
As messy as it can be, I absolutely love refinishing wood furniture, restoring wood table tops back to (or at least close to) their amazing glory. But it wasn’t that long ago that I’d slap on a coat of paint over wood just because–well, who doesn’t love pretty painted pieces of furniture with pops of color?
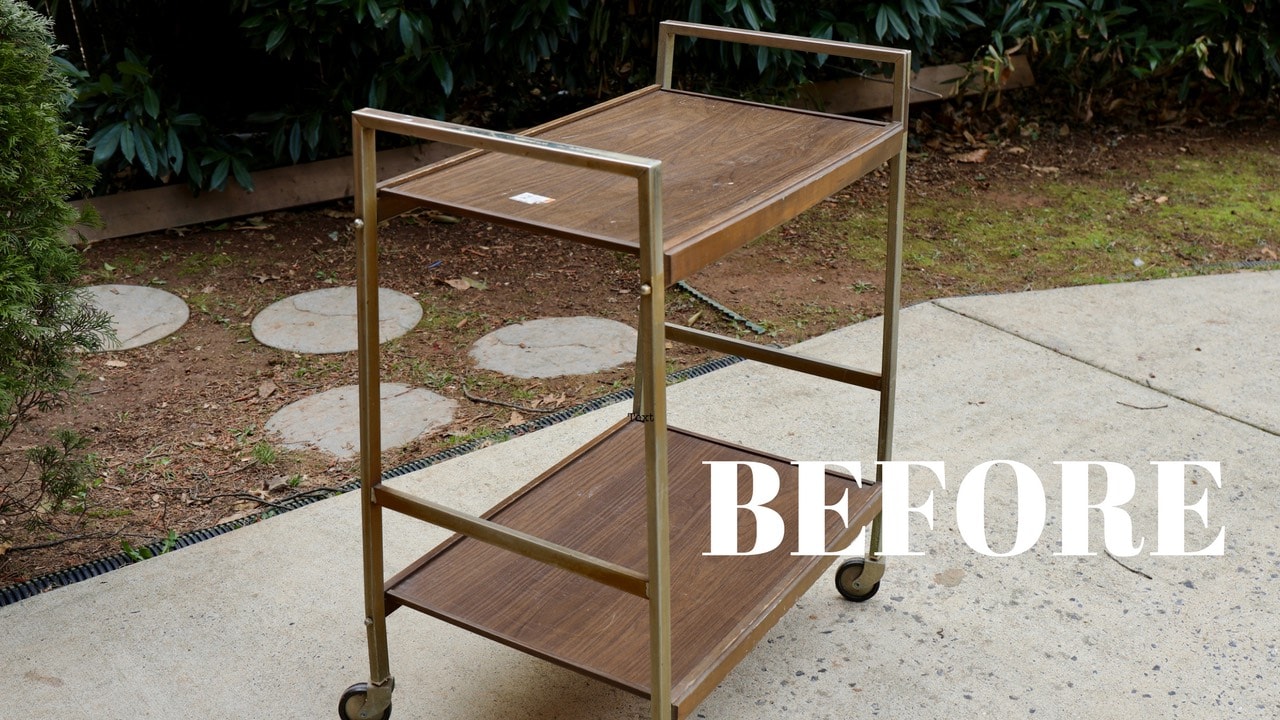
That’s what almost happened to this vintage Anco Bilt drafting table that I found at the thrift store years ago for–gasp!–only $30! I happened to pull up to one of my regular thrift spots to the announcement that there was 5 minutes left for an unexpected “Everything’s 50% Off” flash sale.
Moments later I saw this beauty sitting in the back of the store, with only moments to spare before the sale was ending. I talked the sales people into extending the sale a few minutes since technically I was already in line when it ended.
I dismantled the amazing drafting table, stuck it in my trunk, and was giddy to use it for the next 9 years in my office, where the kids and I would do crafting projects and more.
Click here to save this project on Pinterest.
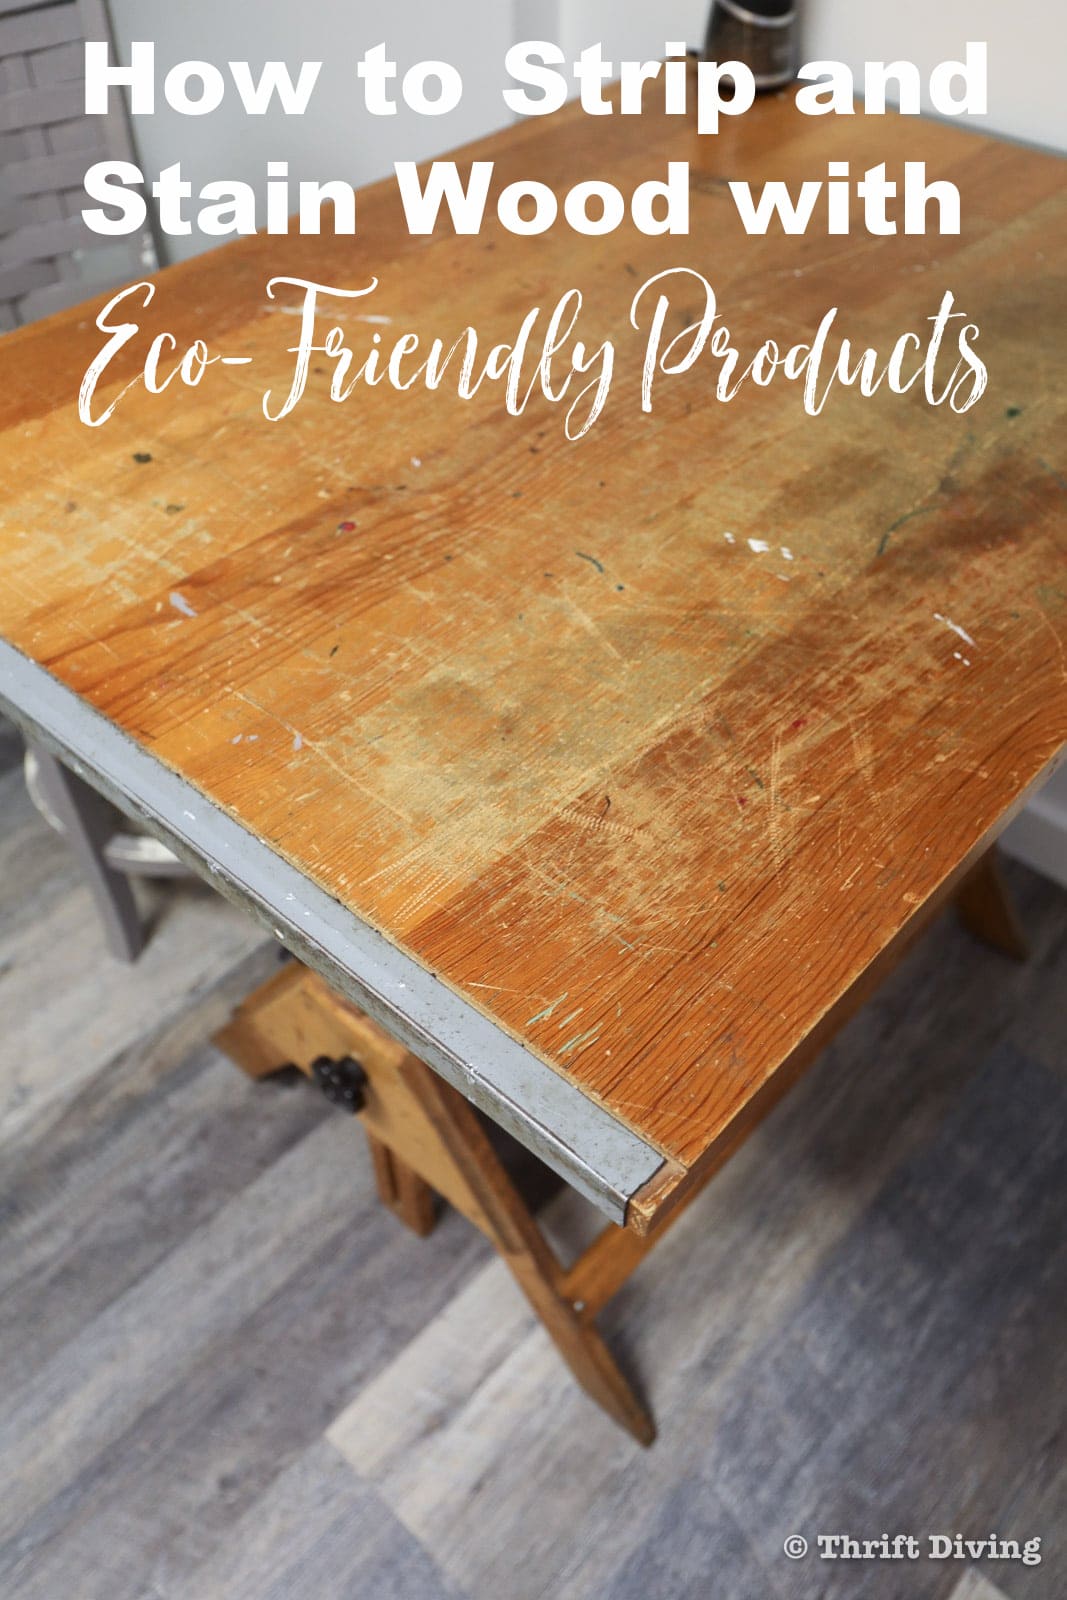
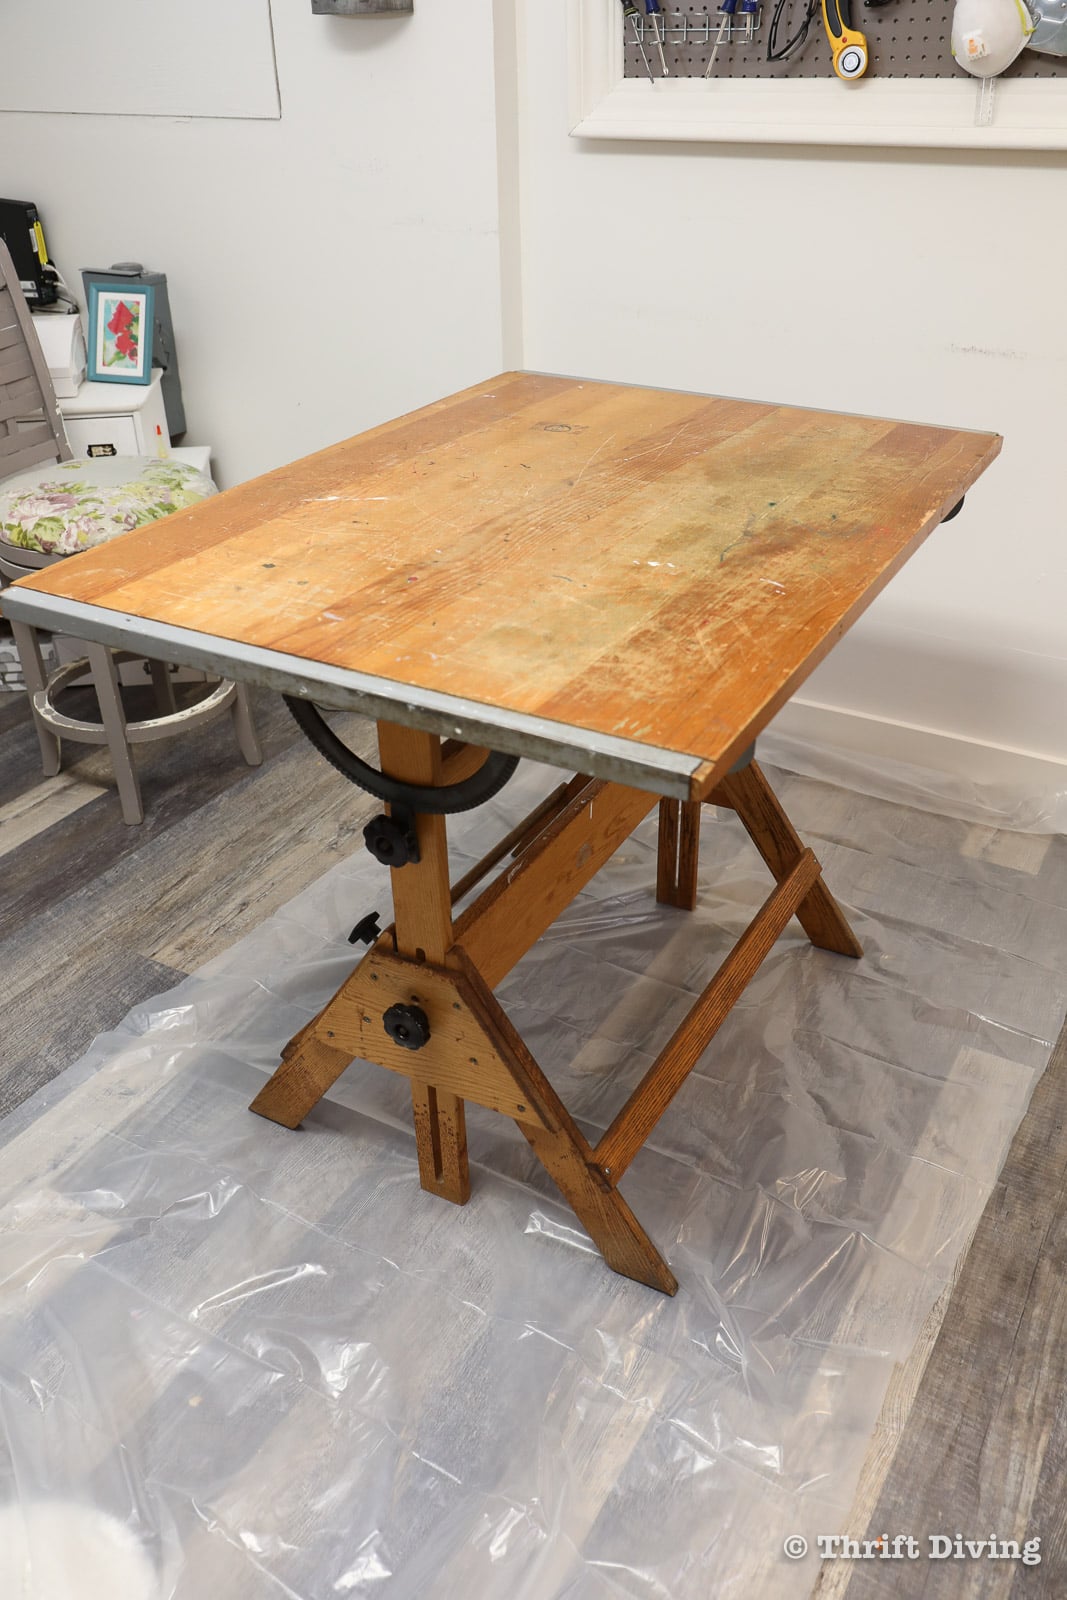
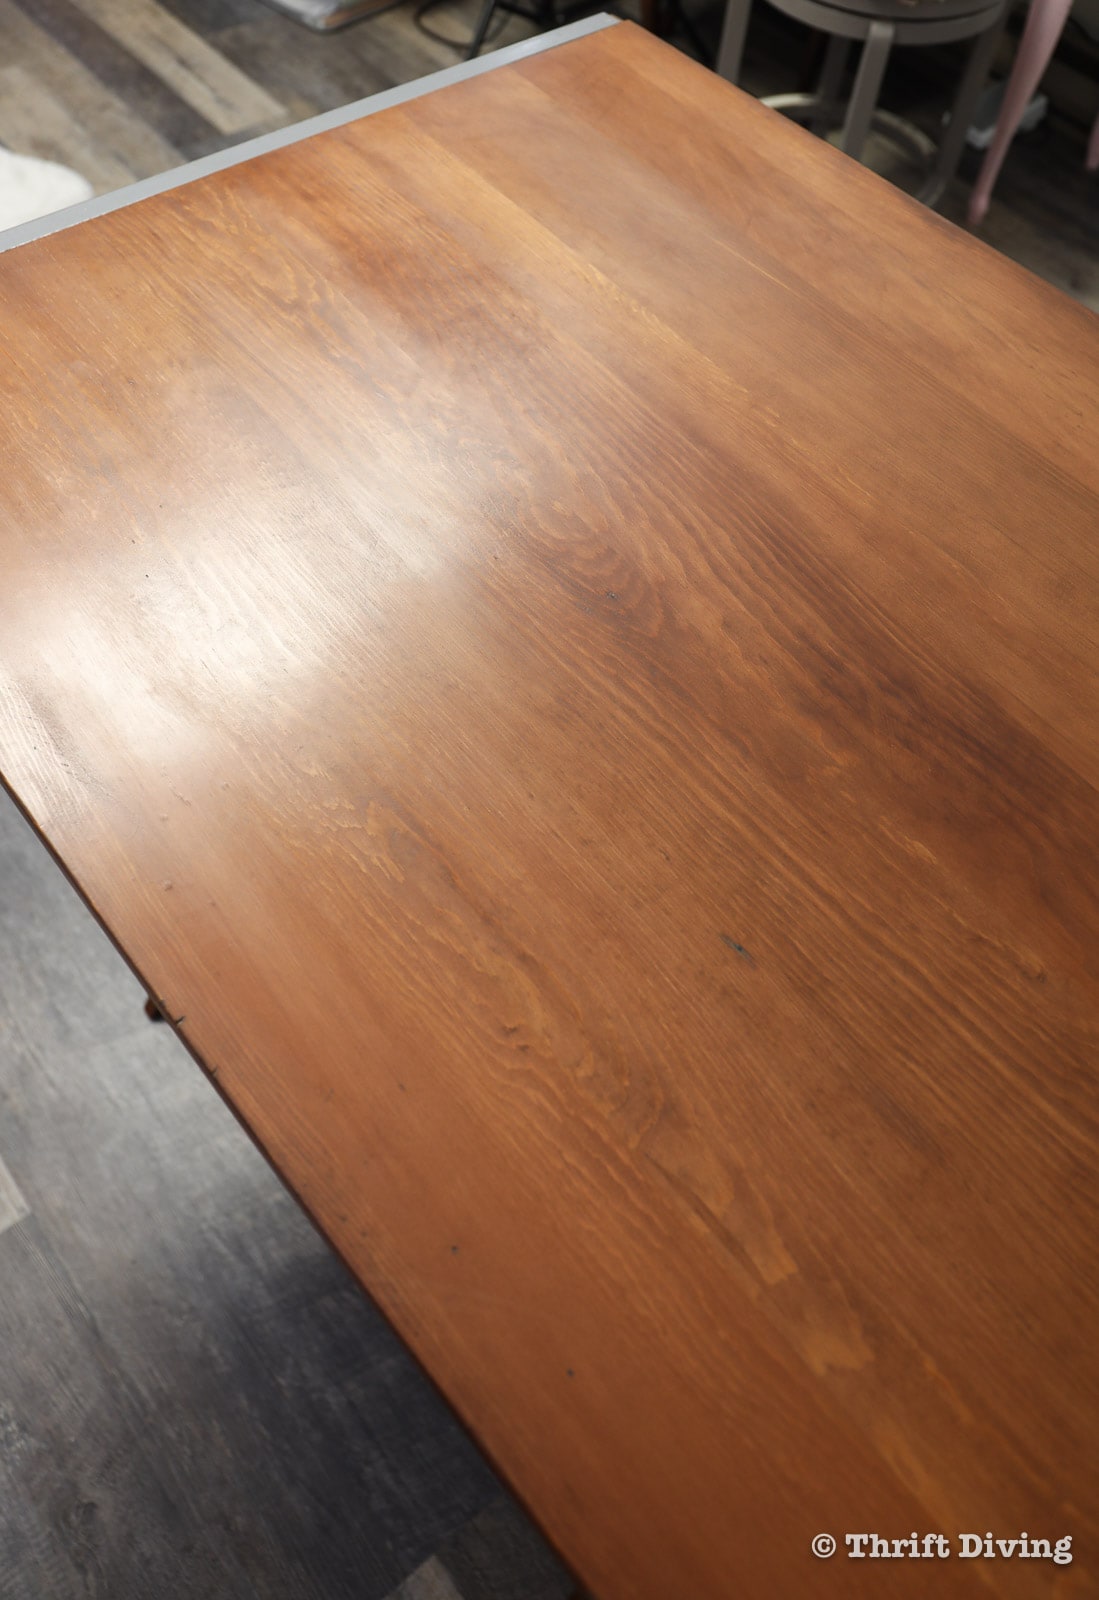
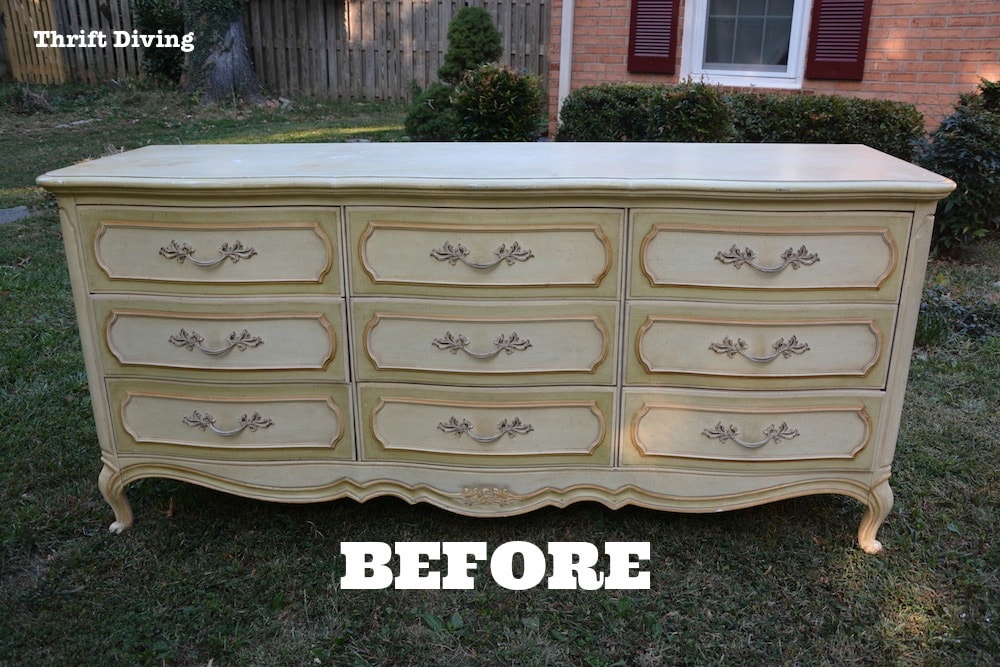
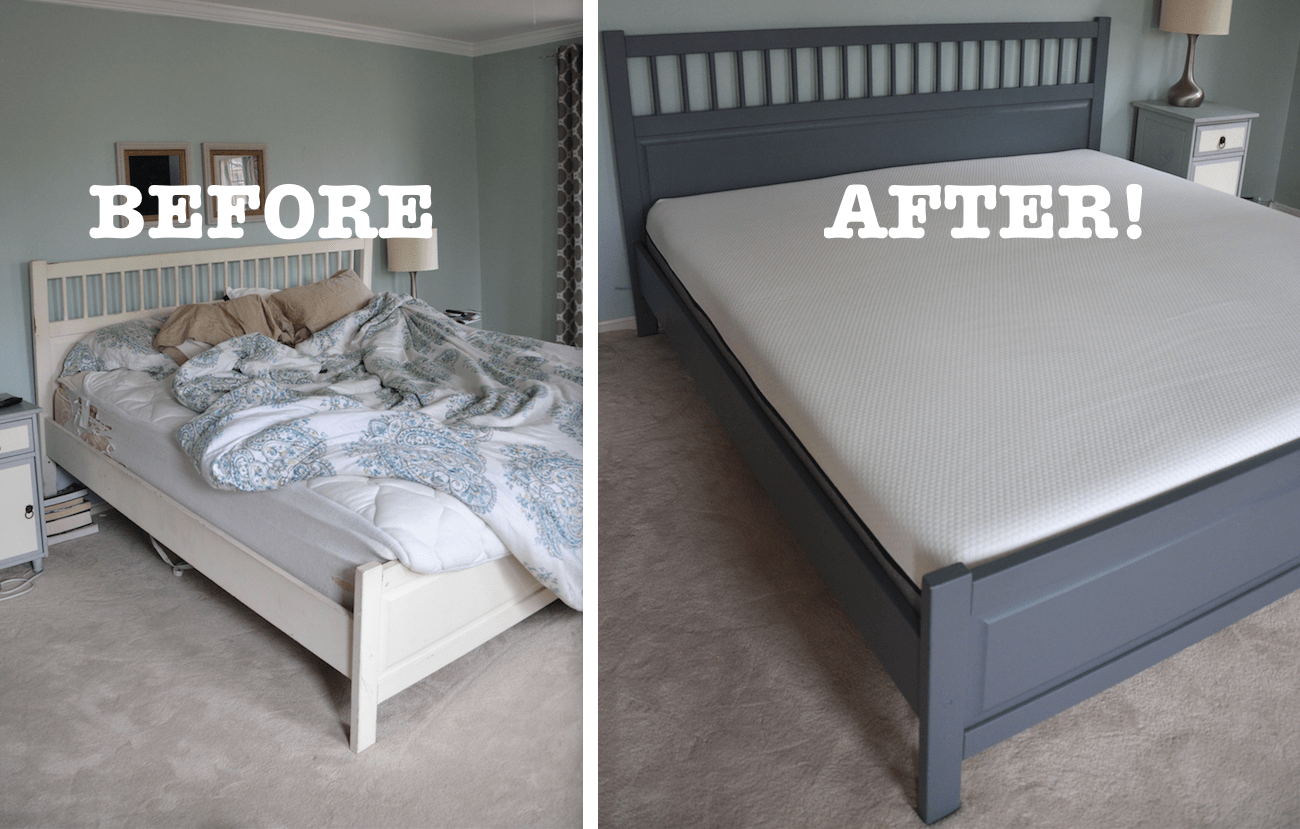
BEFORE

My first thought was that I would paint it. Idiot move, I know, considering later I saw that these vintage drafting tables sell online for upwards of $300 or more (I saw one for $700 last time I checked!).
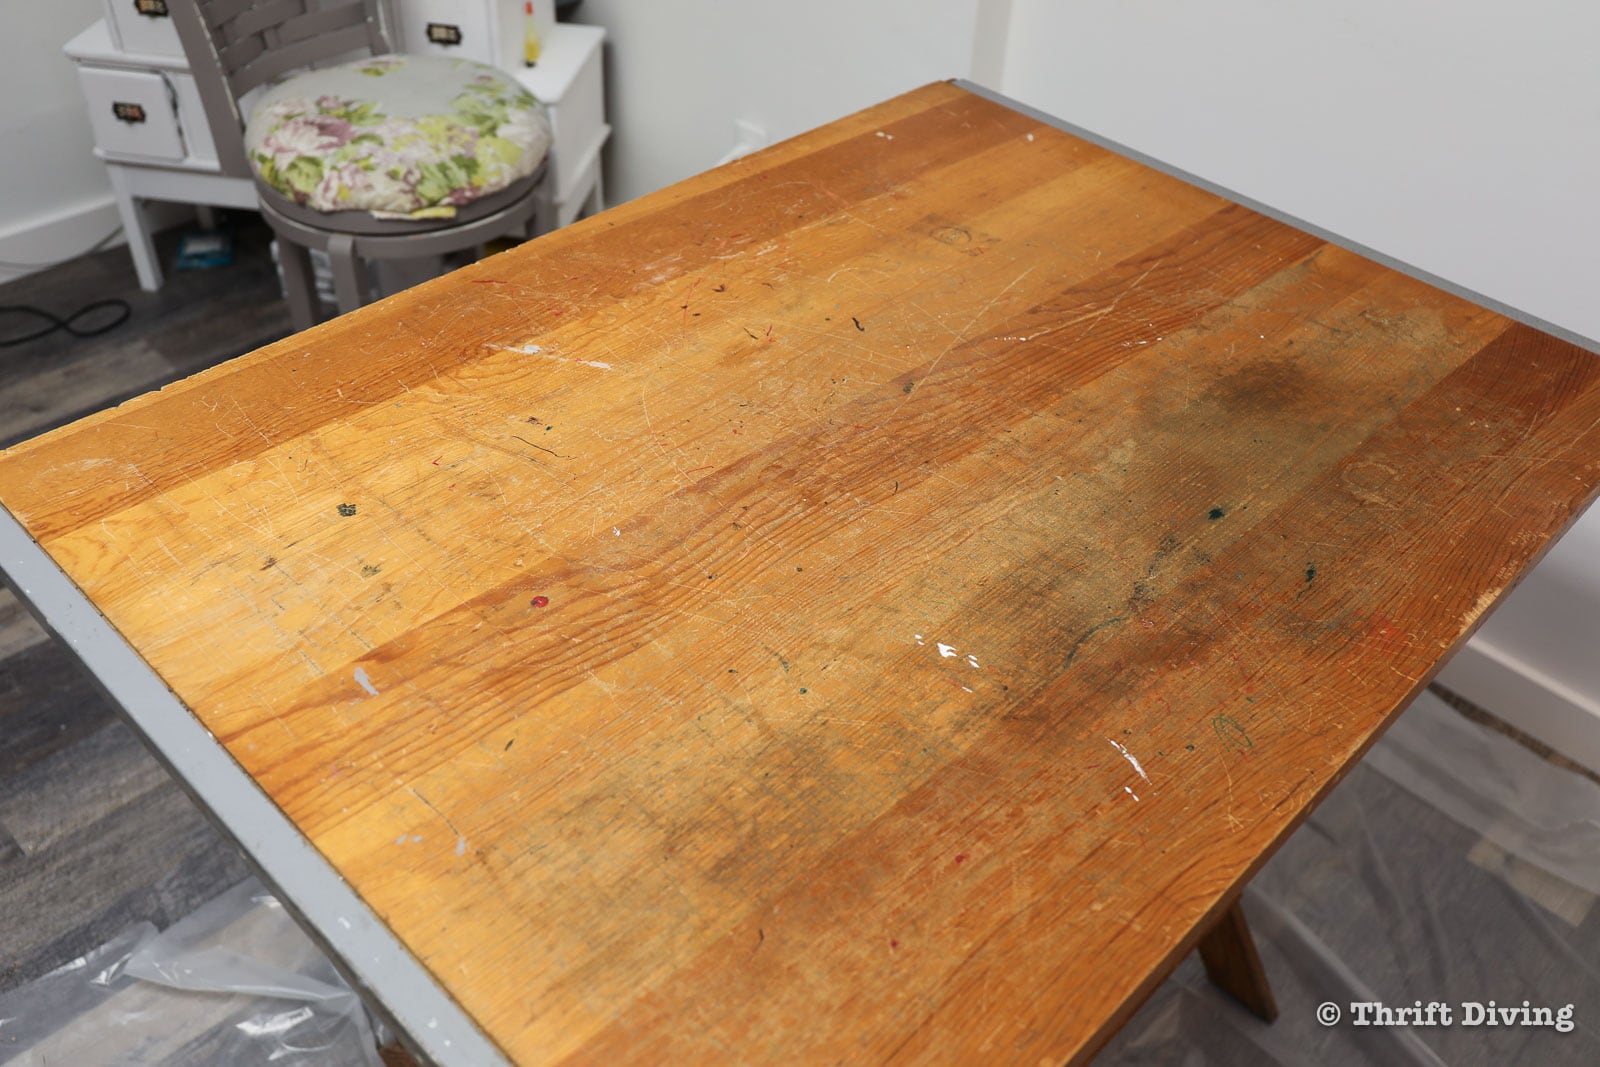
Instead of ruining the wood furniture with paint, I decided to leave it natural. Believe me when I say that it wasn’t in this bad of shape. Having young kids with no sense of morals or values to not destroy furniture in the house (did I not teach them this??!), it took a beating with carved names, scrapes, and dings.
Related: When Should You NOT Paint Wood Furniture?

Recently I decided it would make the perfect project to refinish! I teamed up with the awesome folks at Franmar® who make my favorite paint stripper: Blue Bear Soy Gel Paint & Urethane Stripper. I also decided to use eco-friendly, no VOC water-based wood stains, too, and turned what was a worn table top on a vintage drafting table into a gorgeous drafting table that looks like it’s been well cared for!
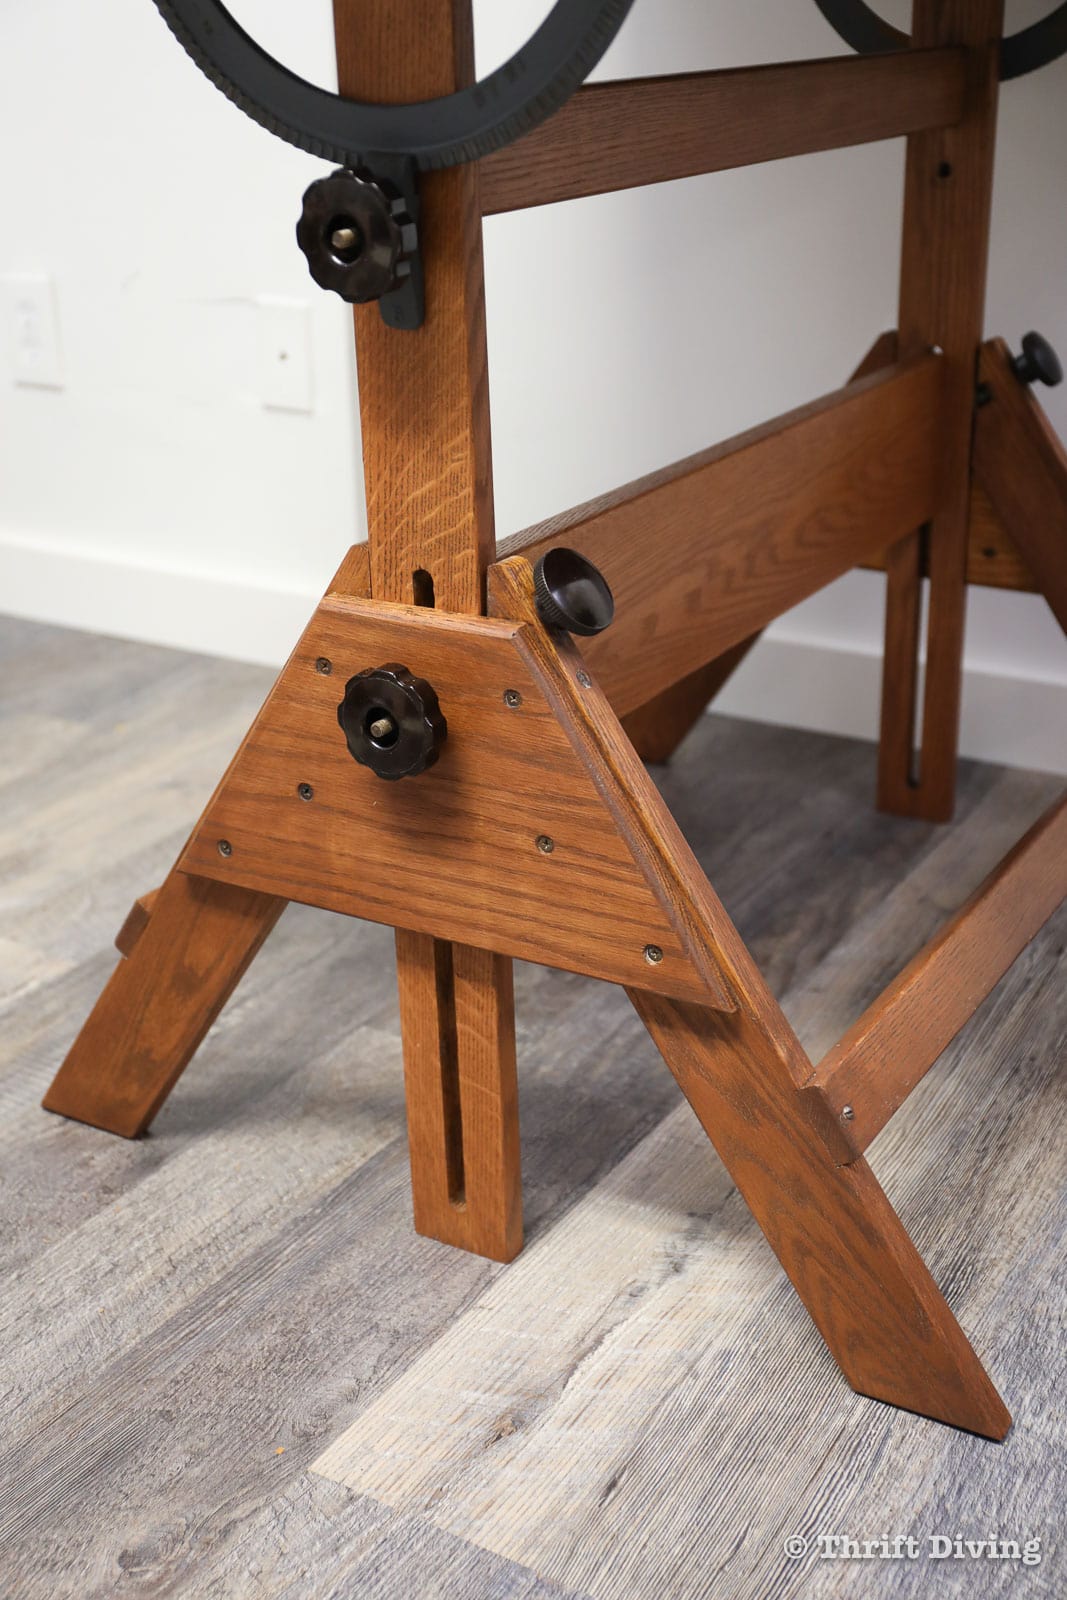
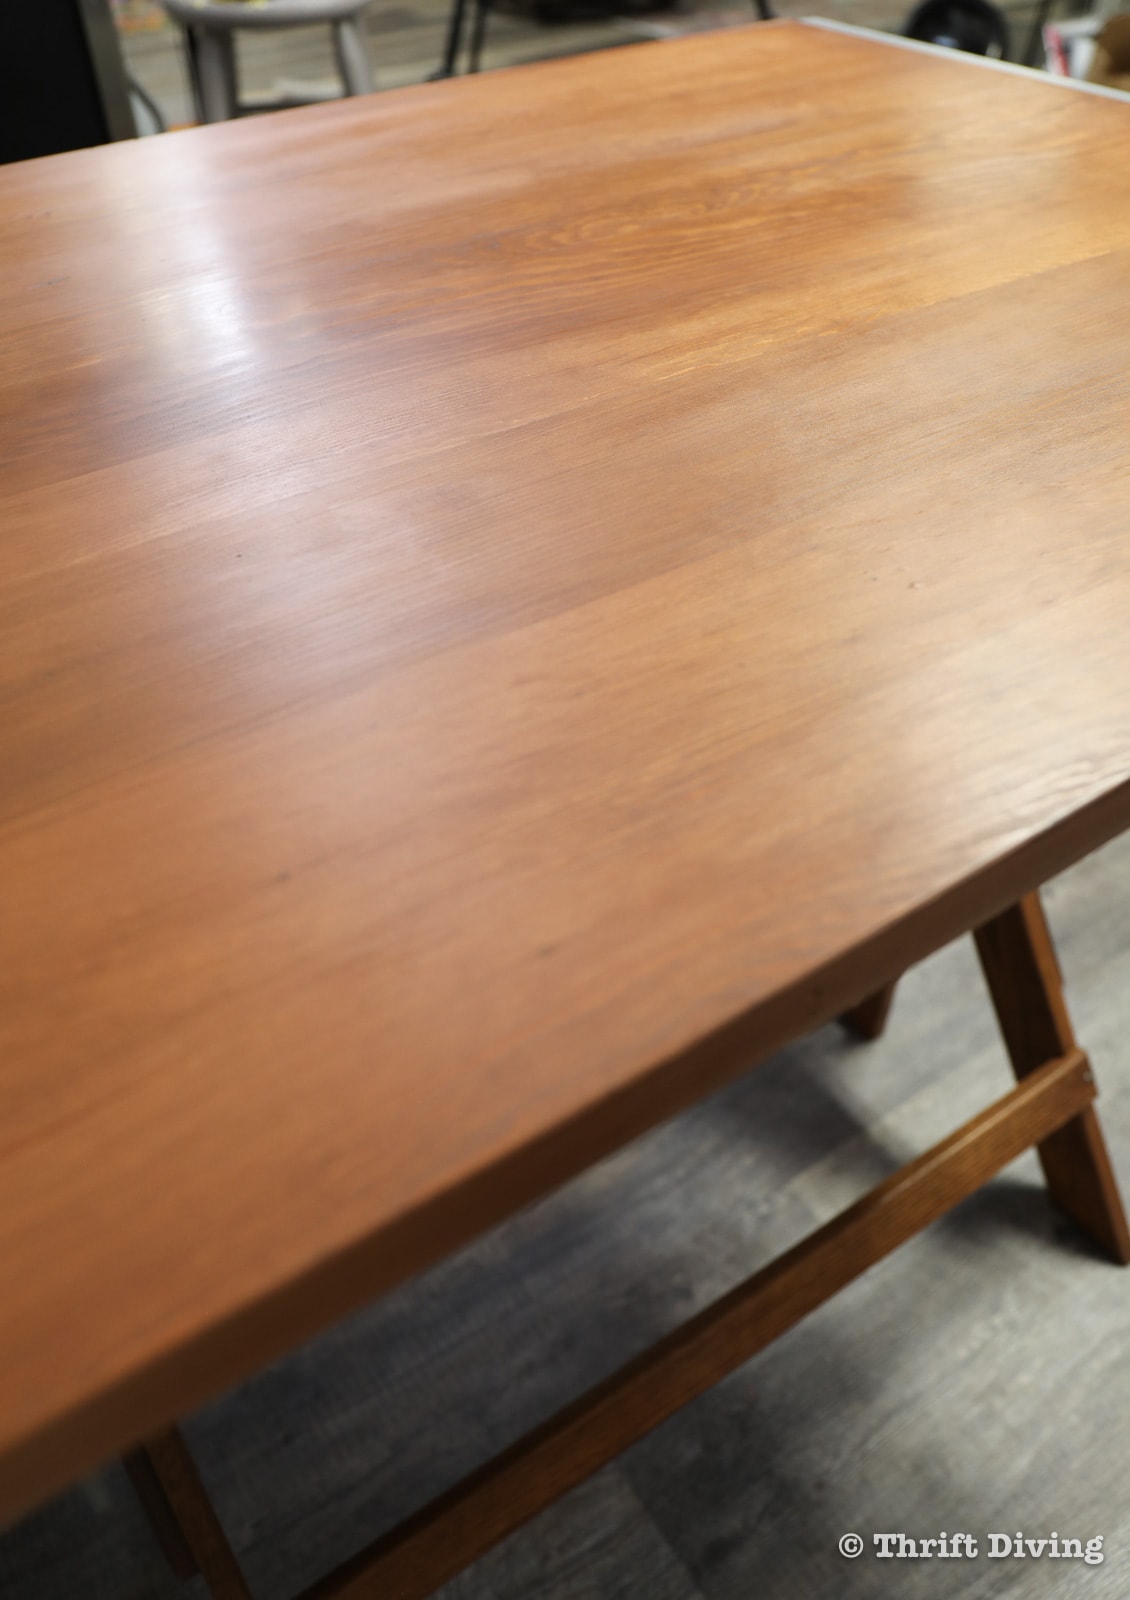
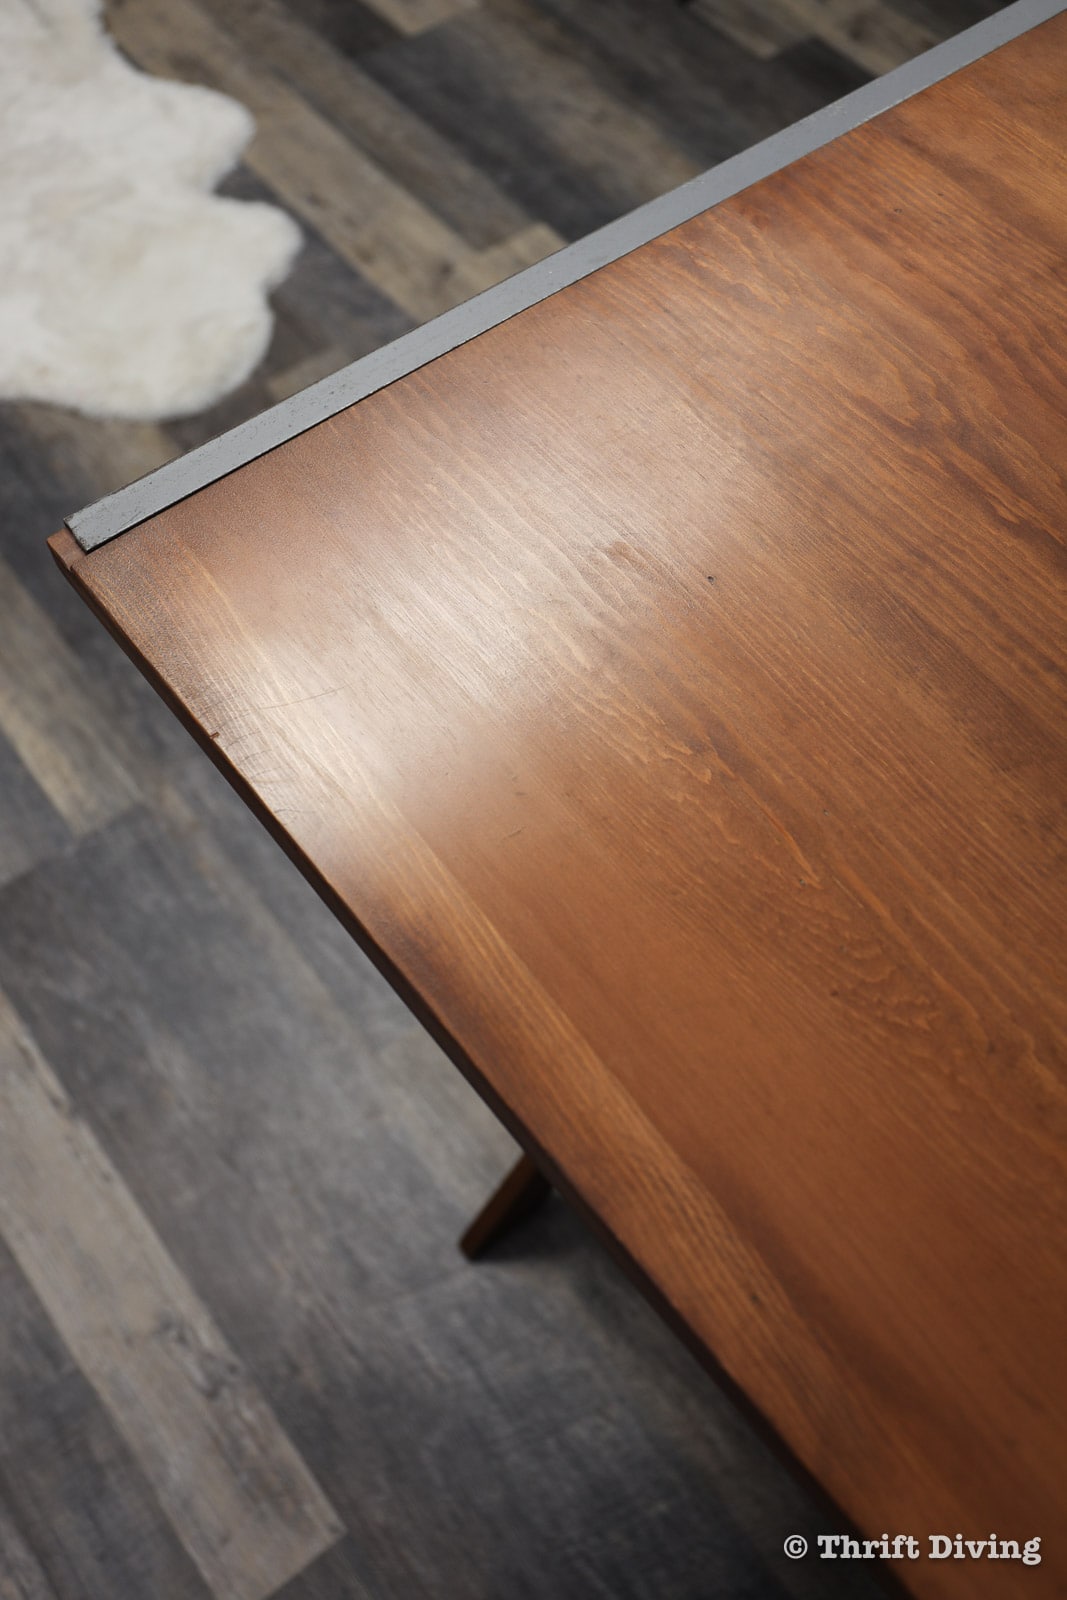
AFTER
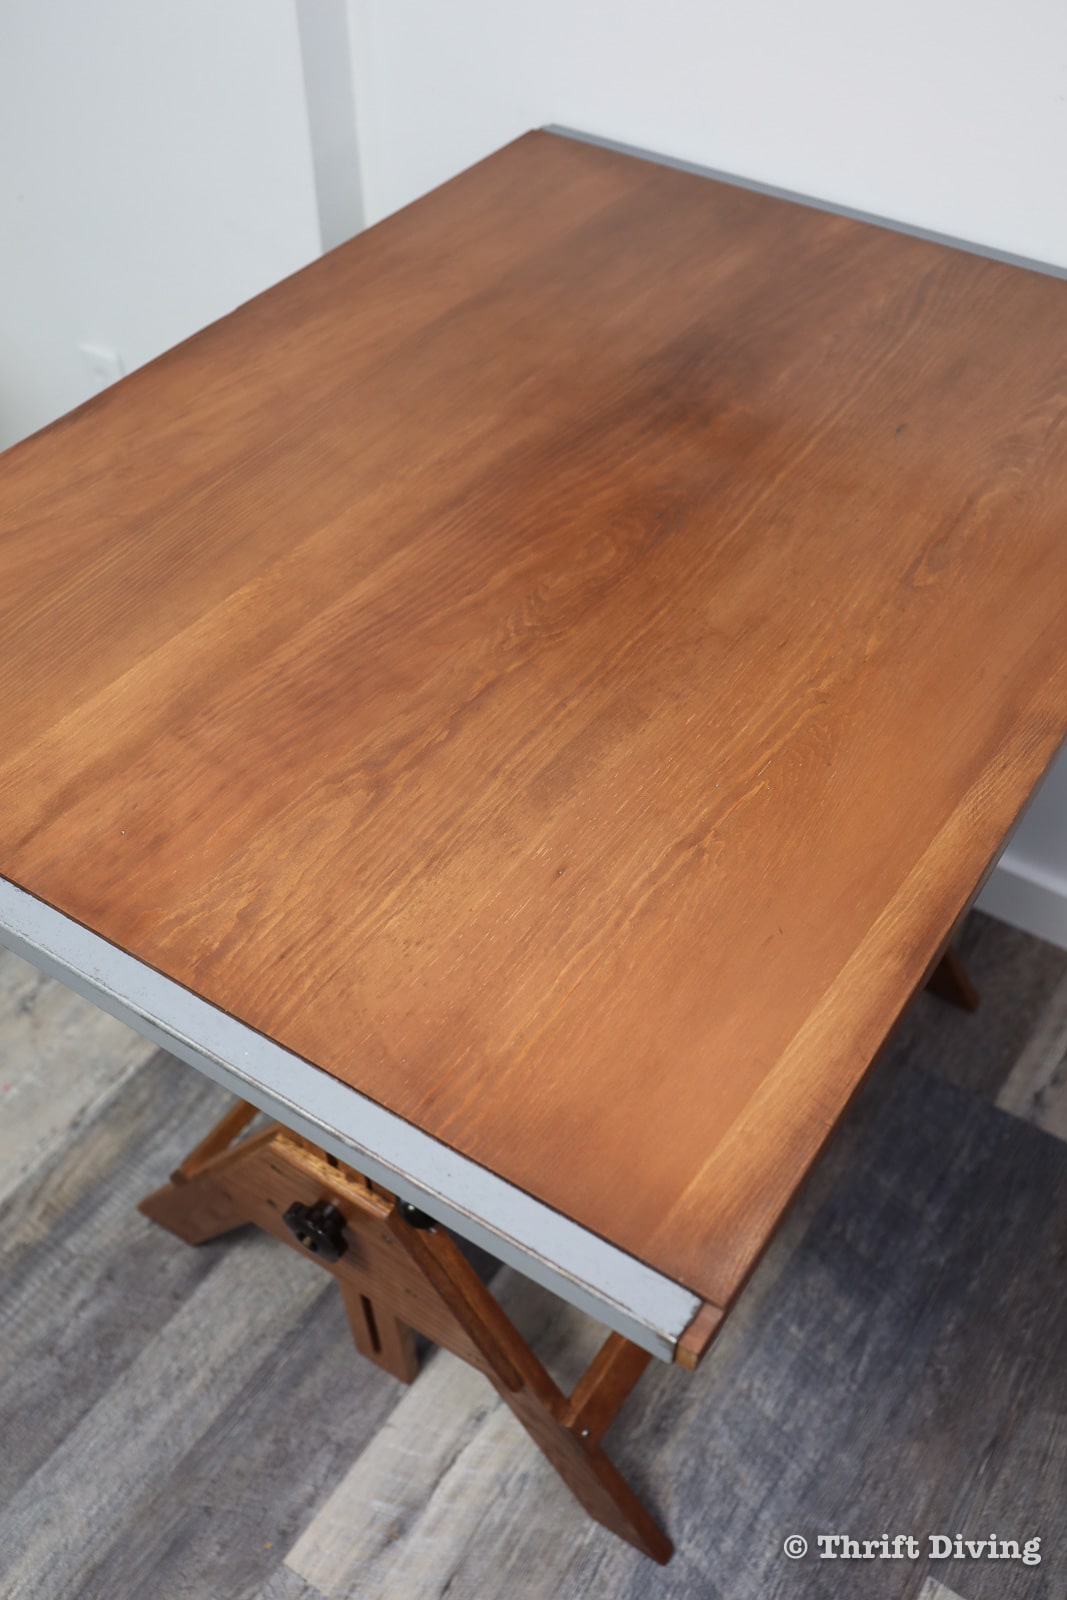
The wood top feels so luxurious with three coats of clear wax, too! And all the dirt and grim that on the table has been wiped and sanded away, replaced by a velvety luster!
Watch This Project in Action!
How to Refinish Wood Furniture: Vintage Drafting Table Makeover
Love this post? Click here to save it on Pinterest!
I wanted to walk you through how you can refinish wood furniture on your own thrifted or worn furniture so that you can bring it back to life without breaking the bank.
Here are the tools and materials I used, which may include affiliate links.
*Updated: When using paint stripper, it’s best to work outdoors. While this paint stripper can be used indoors, fresh air and ventilation is necessary. Always wear eye protection, cover your skin, and use chemical-resistant butyl rubber gloves to prevent skin exposure.
Materials & Tools
- Blue Bear Soy Gel Paint & Urethane Stripper
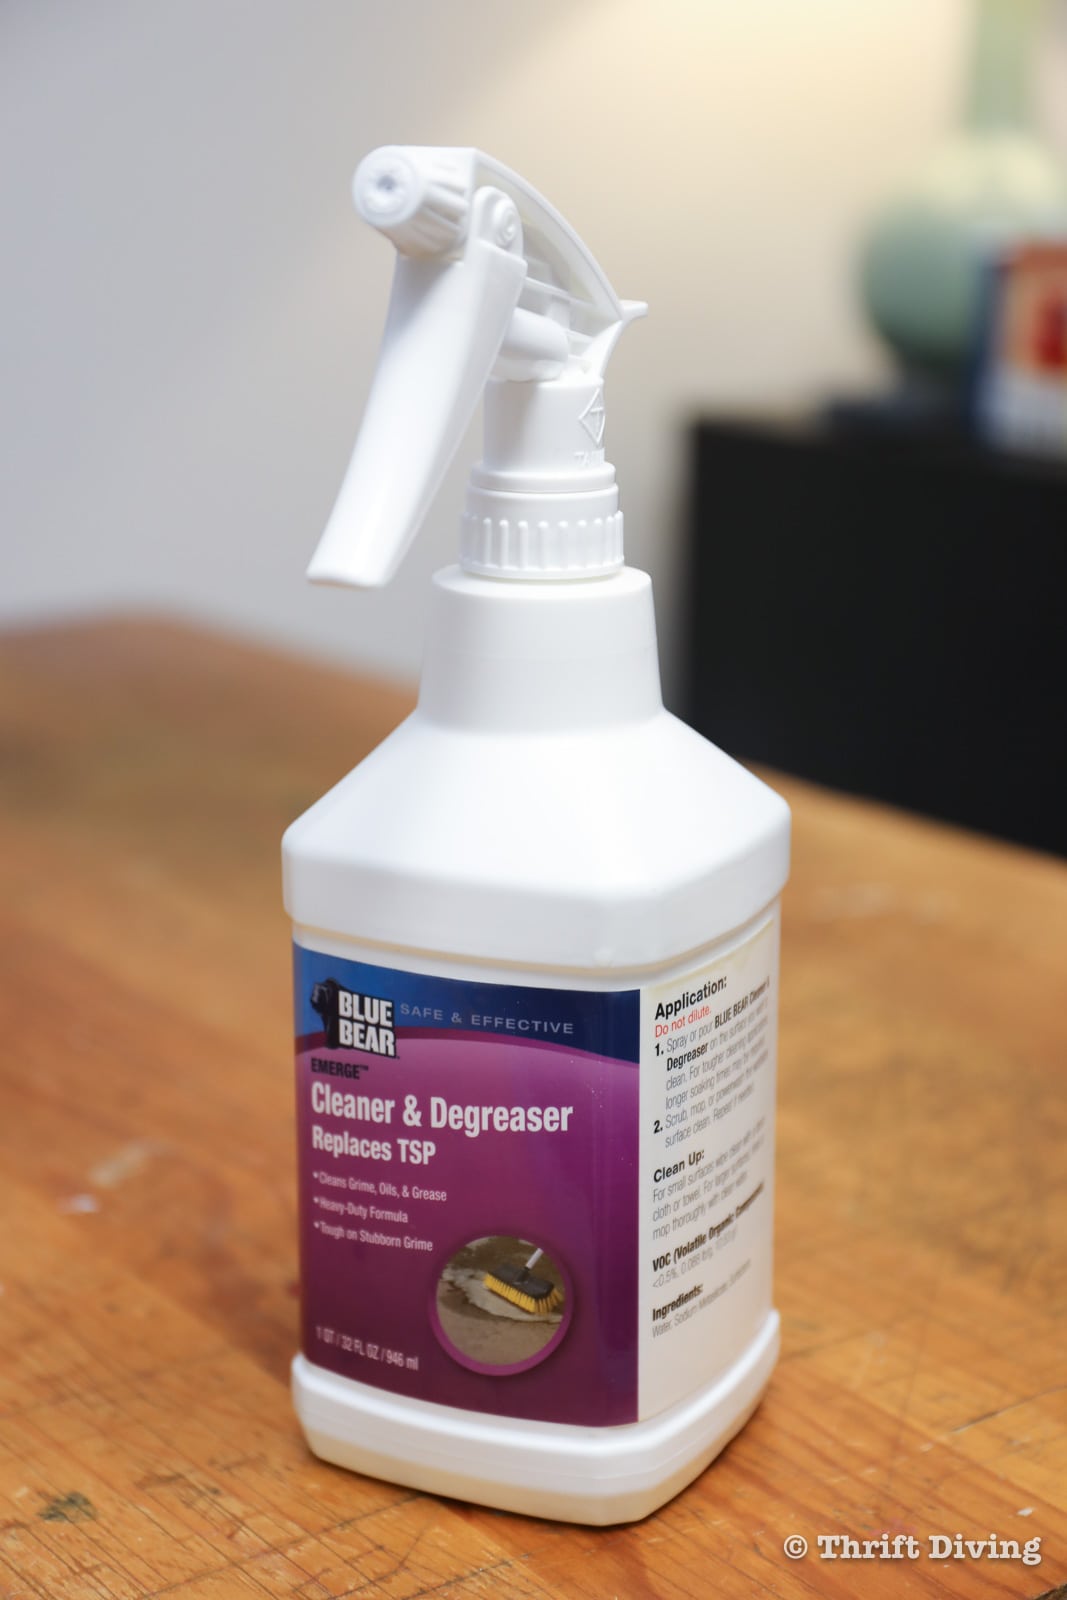
- Blue Bear Emerge Cleaner & Degreaser (Replaces TSP)
- ECOS Paints Water-based Wood Stain – Spiced Pecan
- ECOS Paints Water-based Wood Stain – British Chestnut
- Wood Conditioner
- Chemical-resistant butyl gloves
- Sandpaper (various grits: 40, 80, 120, 150, 220)
- Orbital Sander
- Clear wax
- Putty knife (metal or plastic)
- Paint brush or foam brush
- Plastic sheeting to protect floors
- Old mixing bowl or container
- Cardboard box or milk jug for waste
- Safety glasses
- Dust mask
- Lots of lint-free cloths

Let’s talk about why I absolutely have loved Blue Bear Soy Gel Paint & Urethane Stripper for the past several years!
- You can use it indoors. It used to be that if you even thought about stripping anything, that stuff had to be done outdoors because of the toxic fumes, due to methylene chloride, that could kill you. Those aren’t the kinds of products that I want to be using around myself, family, or (for those who have them) pets. Thankfully, this stripper doesn’t contain any methylene chloride. However, it does contain N-methyl-2-pyrrolidone (NMP), which you still want to limit your exposure to, so be sure there is lots of ventilation and fresh air. Better yet, strip furniture outdoors when possible as the best method of stripping furniture.
- It doesn’t have a strong odor. I’ve used some chemical strippers that smell horrendous–even ones said to be non-toxic! Chemical strippers, even non-toxic ones (and especially toxic ones) can have such strong odors that can leave you feeling sick to your stomach, or with a headache. While using Blue Bear Soy Gel indoors, it didn’t cause a headache or nausea. I still turned on a fan for ventilation, as it’s not completely odorless, but the smell is very mild.

STEP 1: Protect Your Floors
Let’s face it–refinishing wood furniture is not for the faint of heart, simply for the fact that it’s messy, even when using eco-friendly paint stripper. 🙂 If you’re working indoors, put down a sheet of plastic to protect your floors. The good thing to know is that even when the paint stripper landed on the floor in a spot or two, it didn’t eat through the plastic and damage my floors. So one good thick sheet is plenty to get started.
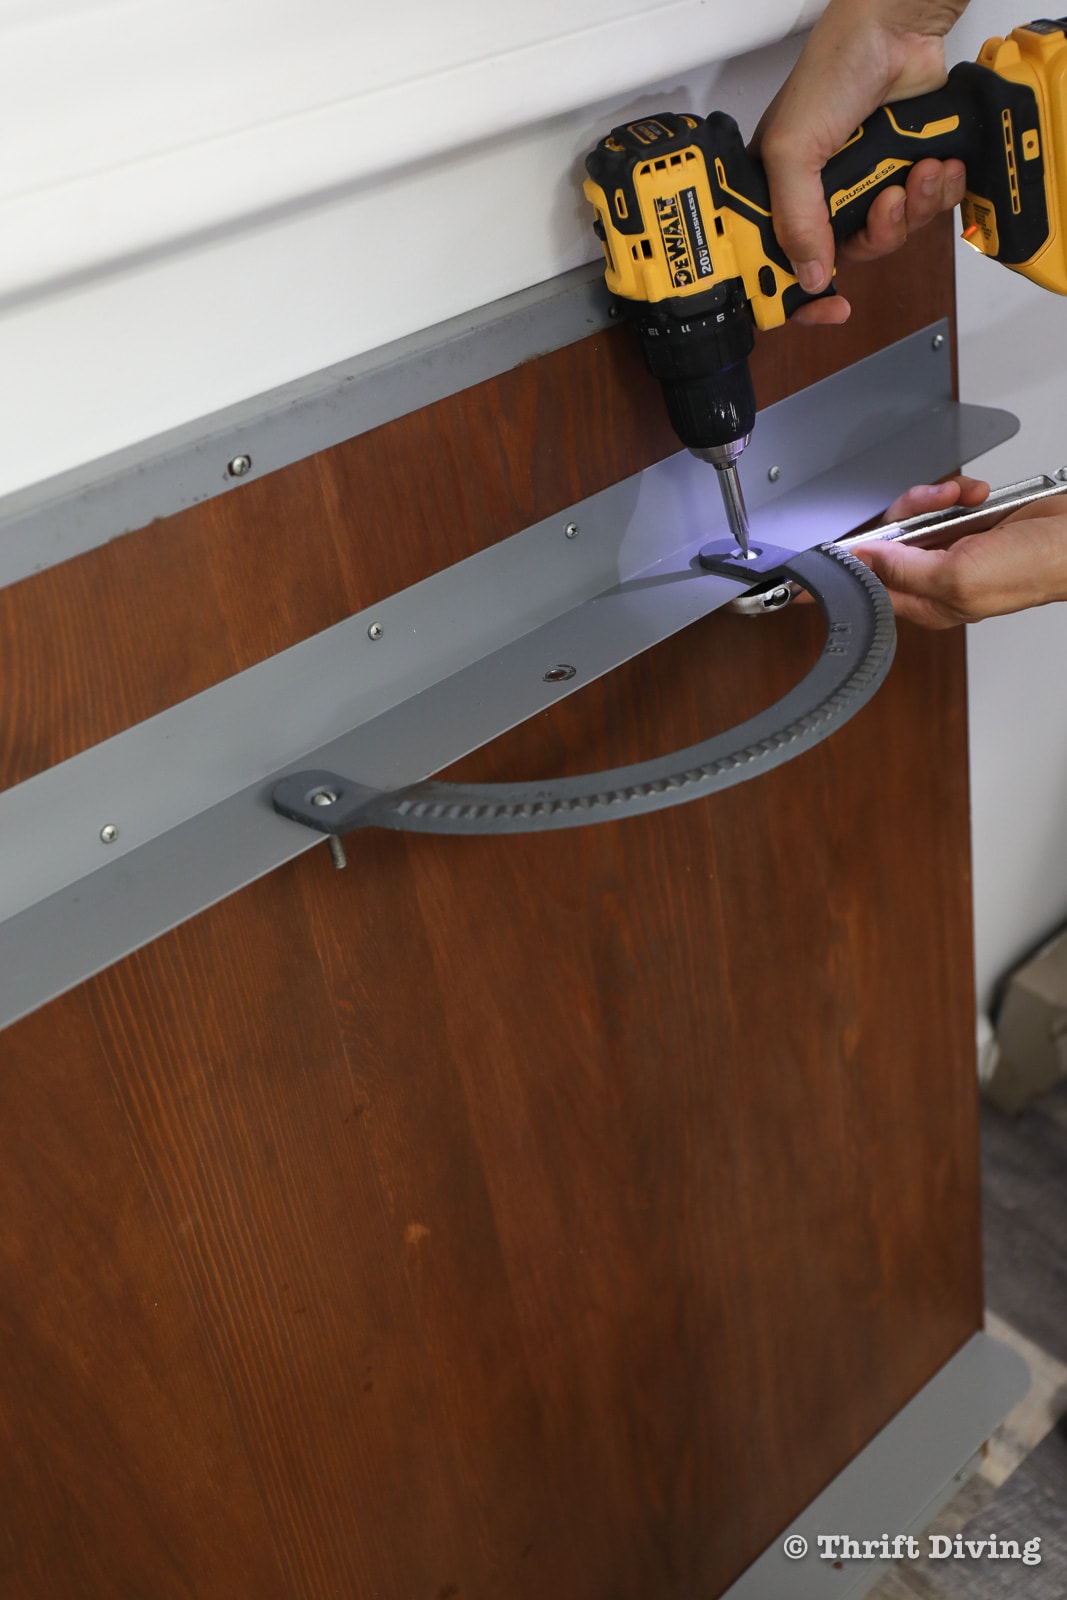
TIP: Take lots of pics and video of your project before you start if you’ve got to disassemble anything. It’s easier to look at the pics and videos to figure out how to put it back together again! 🙂
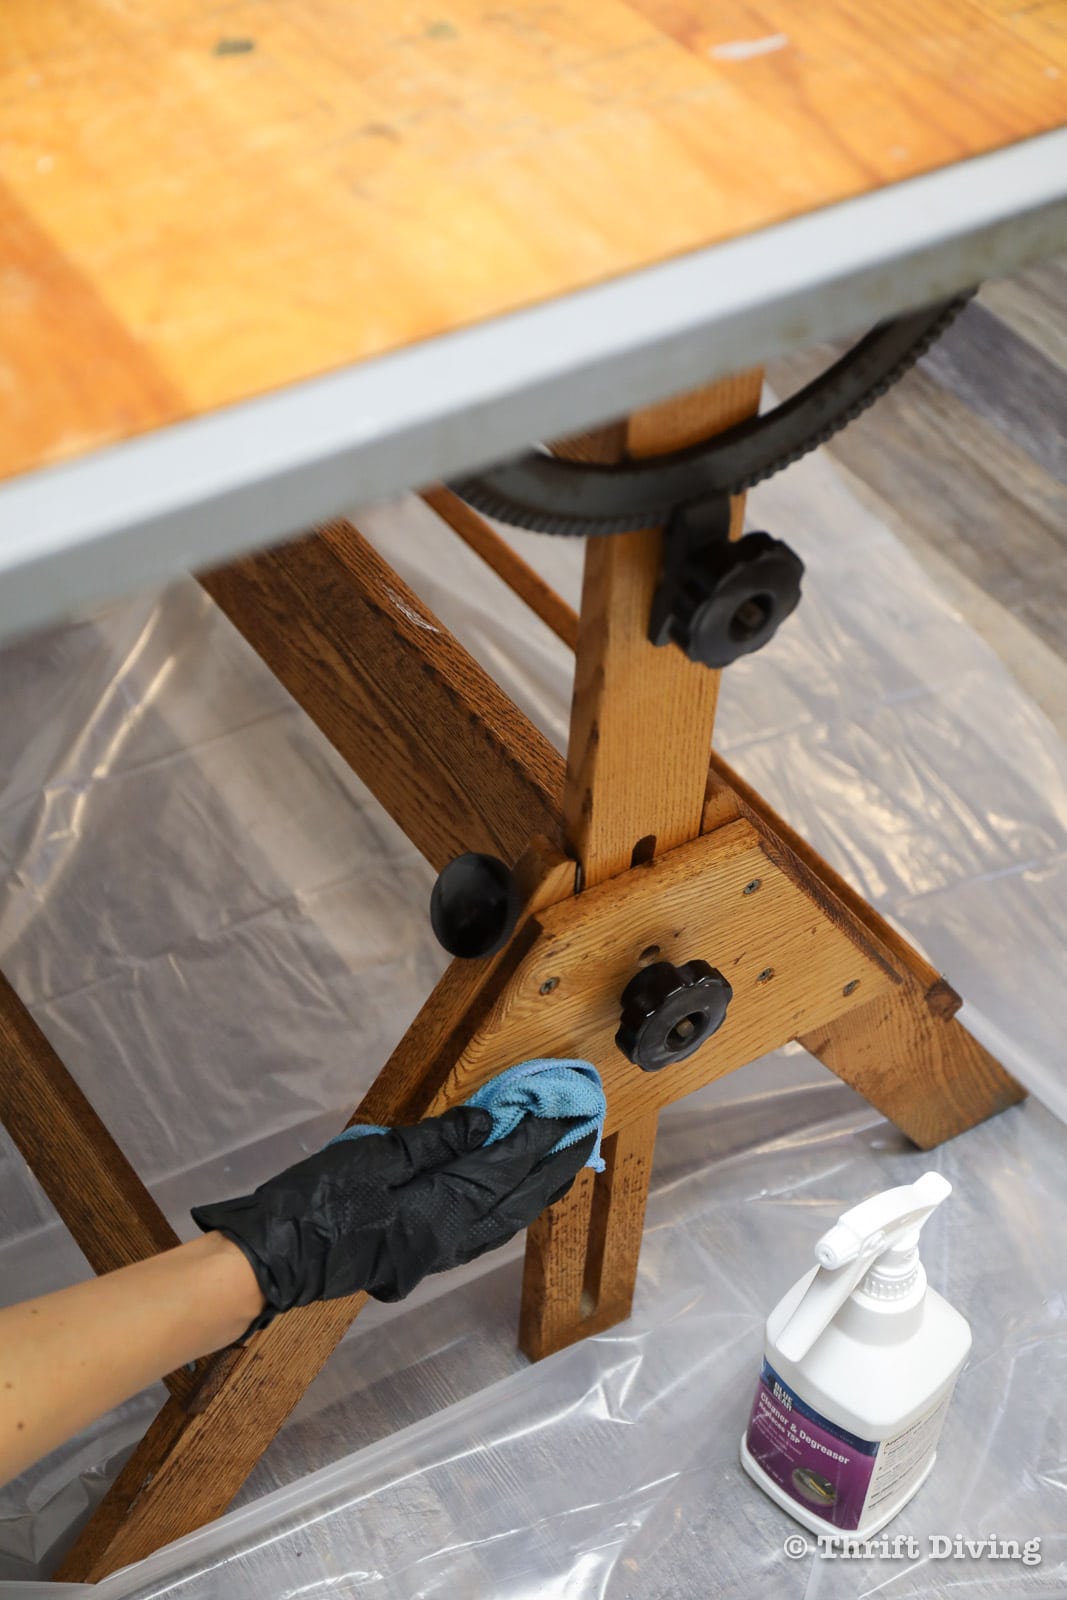
STEP 2: Clean the Wood with Cleaner and Degreaser
Even though you’re going to be refinishing your wood table top or furniture, it’s still a good idea to get into the habit of cleaning all furniture before doing any project. While you’d likely just be stripping off the dirt, should you be painting your furniture, you’d be painting over the dirt, which could effect the paint’s ability to stick to the wood.
So, good rule of thumb: just clean it first. 🙂 I’m using the Blue Bear Emerge Cleaner & Degreaser, which replaces a traditional TSP and is 100% biodegradable. If you can’t get your hands on it, vinegar and water works, too.
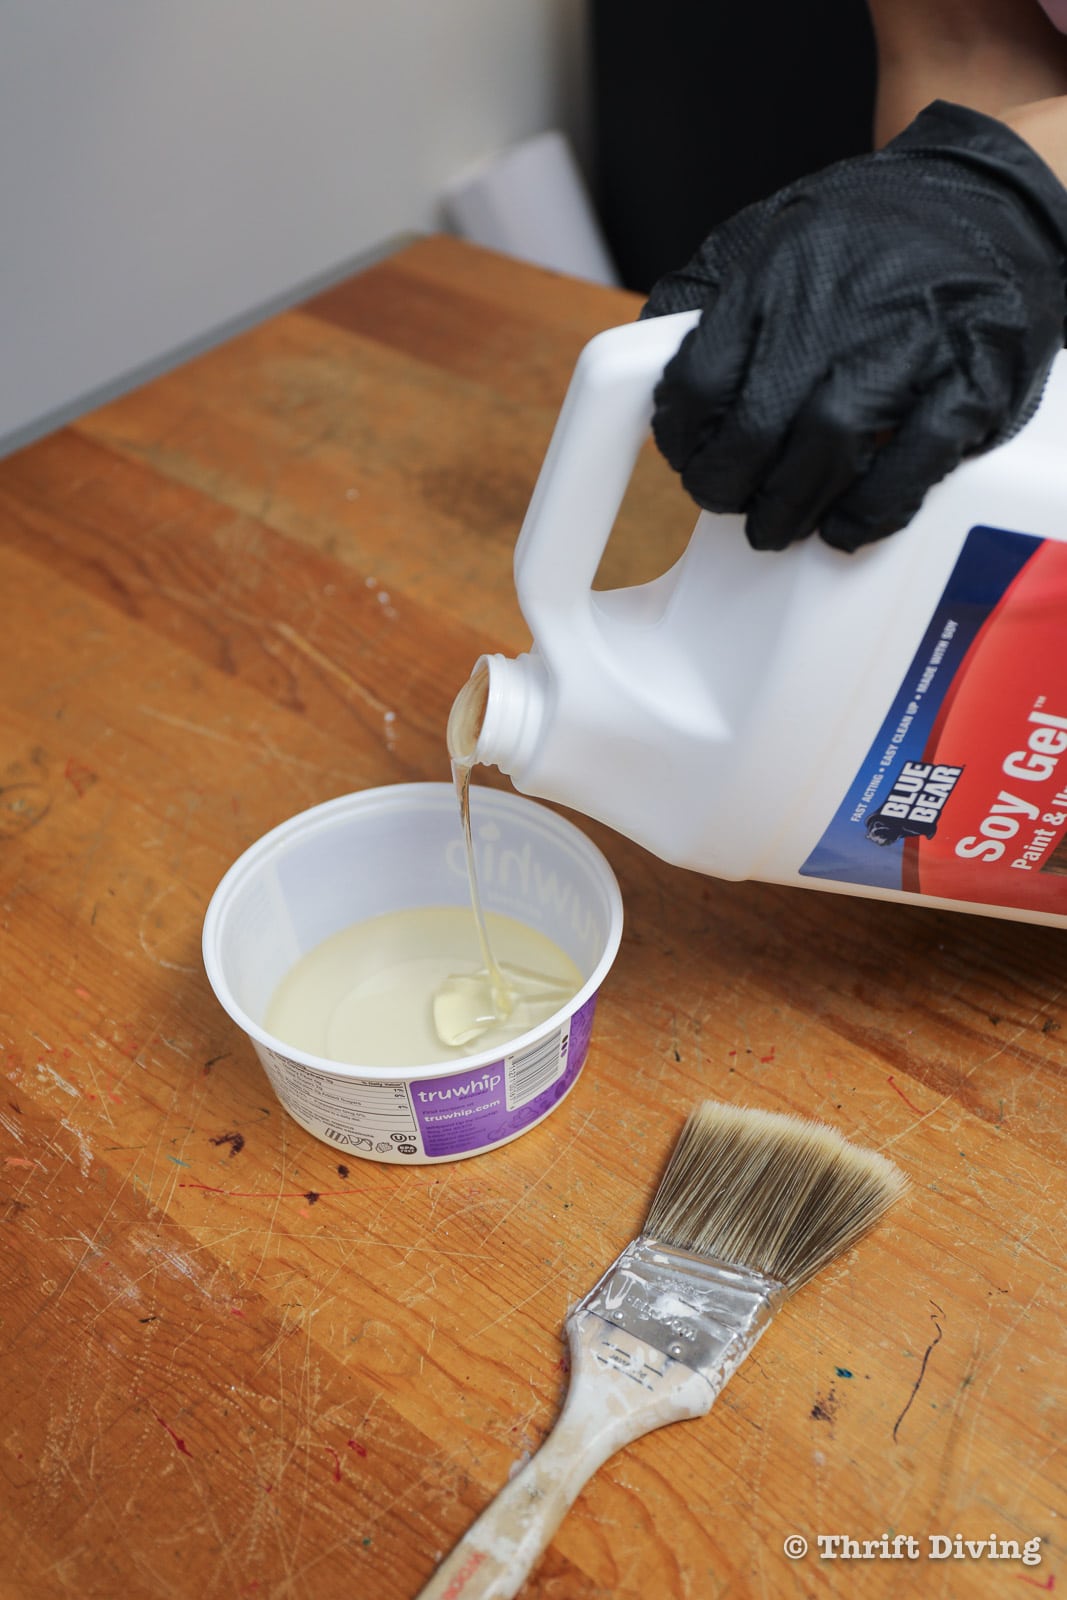
STEP 3: Apply a Thick Coat of Blue Bear Soy Gel Paint & Urethane Stripper
Once the wood has been wiped down, pour some of the soy gel paint stripper into an old container. You can apply it with a paint brush, or a foam brush. Whatever works to spread it around into a thick layer.
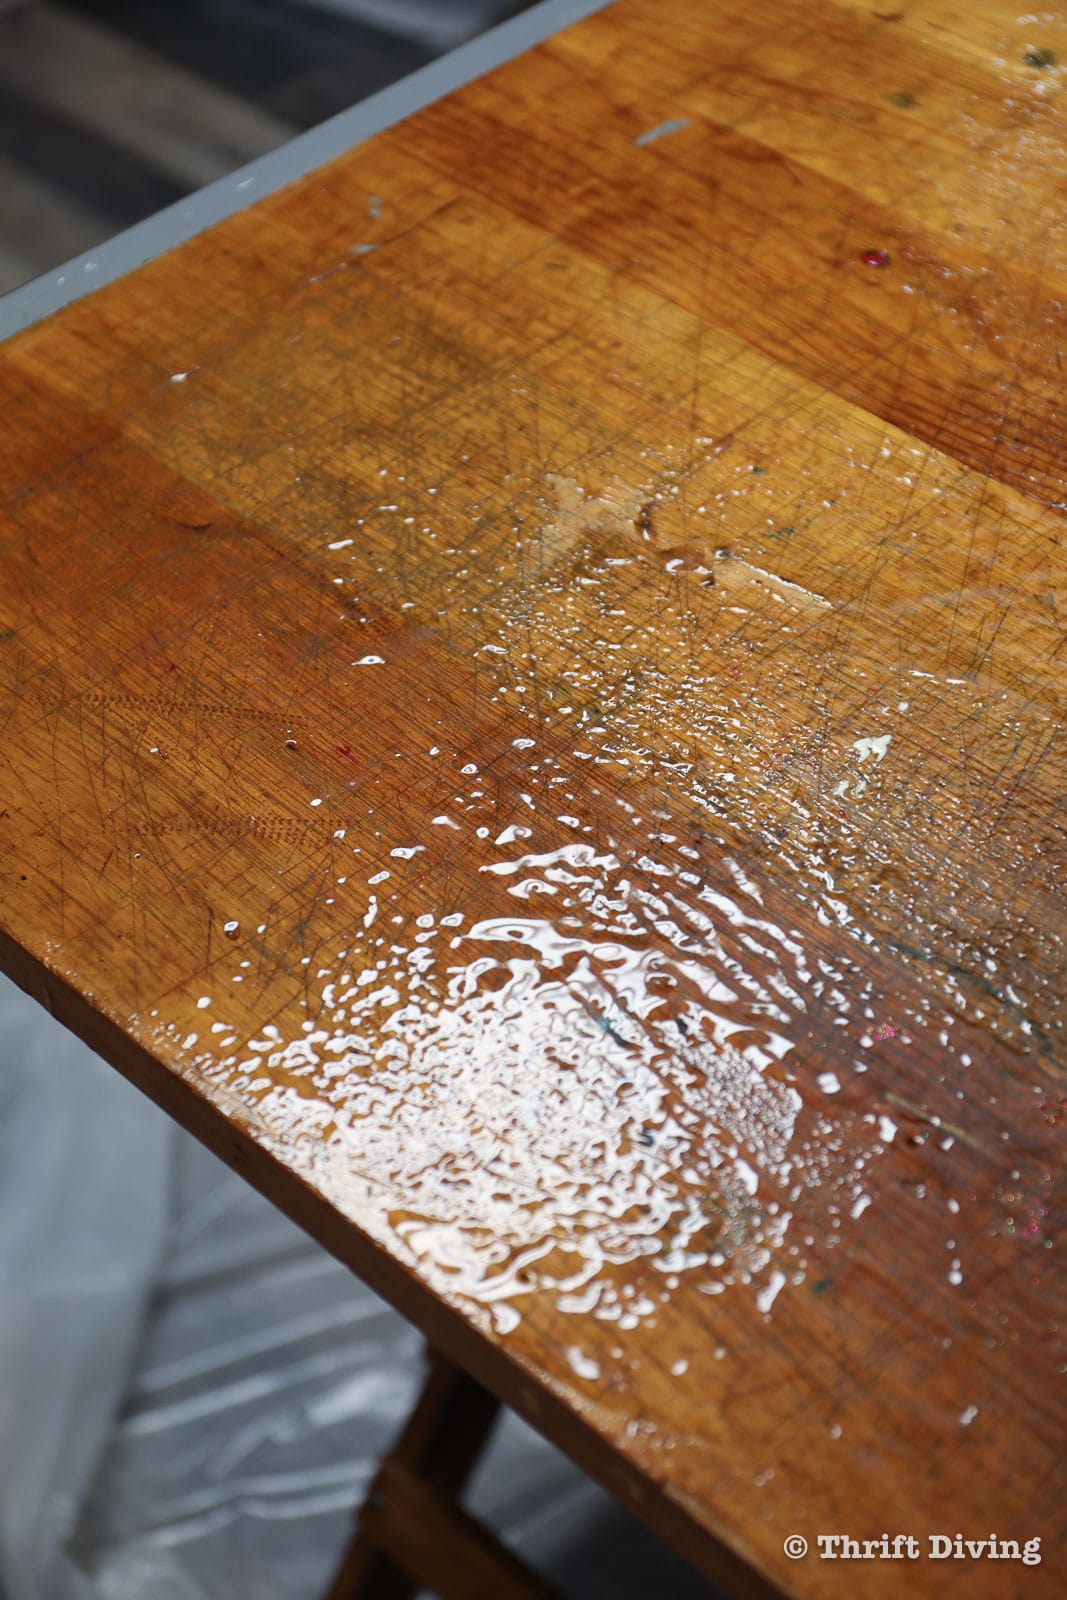
This soy gel paint stripper will stay wet when applied in a thick layer, so be sure to apply enough so it doesn’t dry out on your wood. I like to leave it on for about 15 minutes.
This soy gel can remove multiple layers in one application. This table didn’t have tons of layers. But typically at this point, even after a few minutes, you’ll start to see old layers of paint and finish bubbling up, ready to be scraped off!
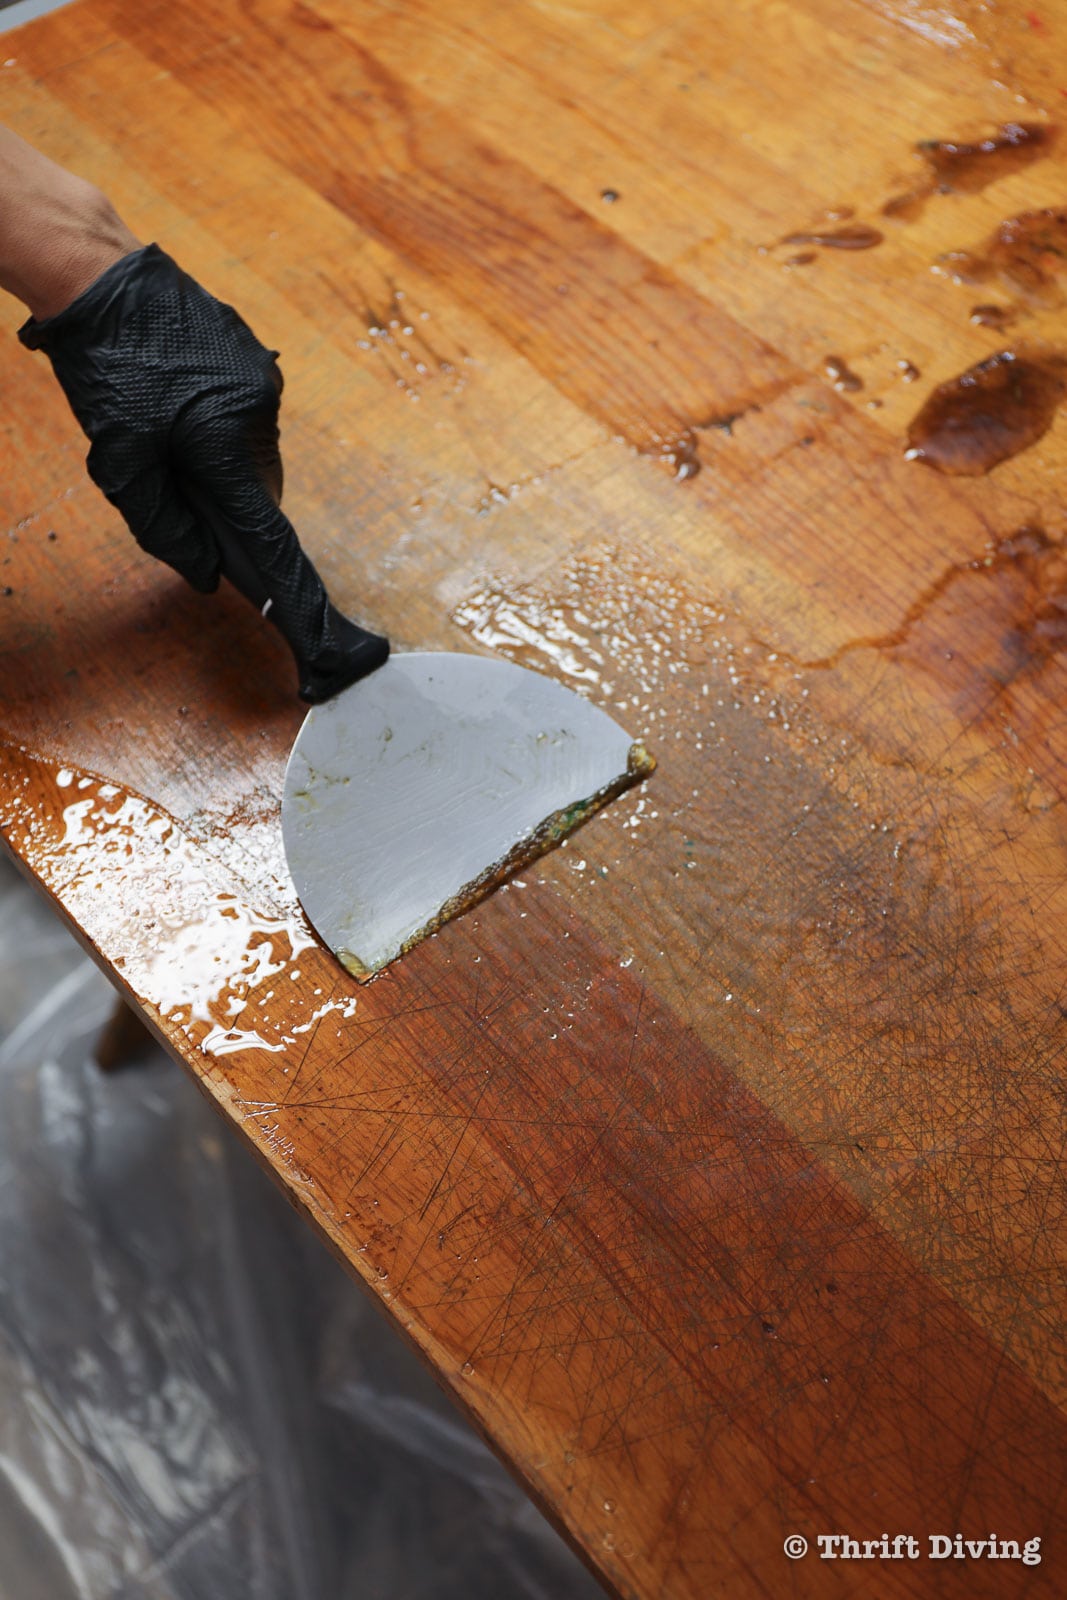
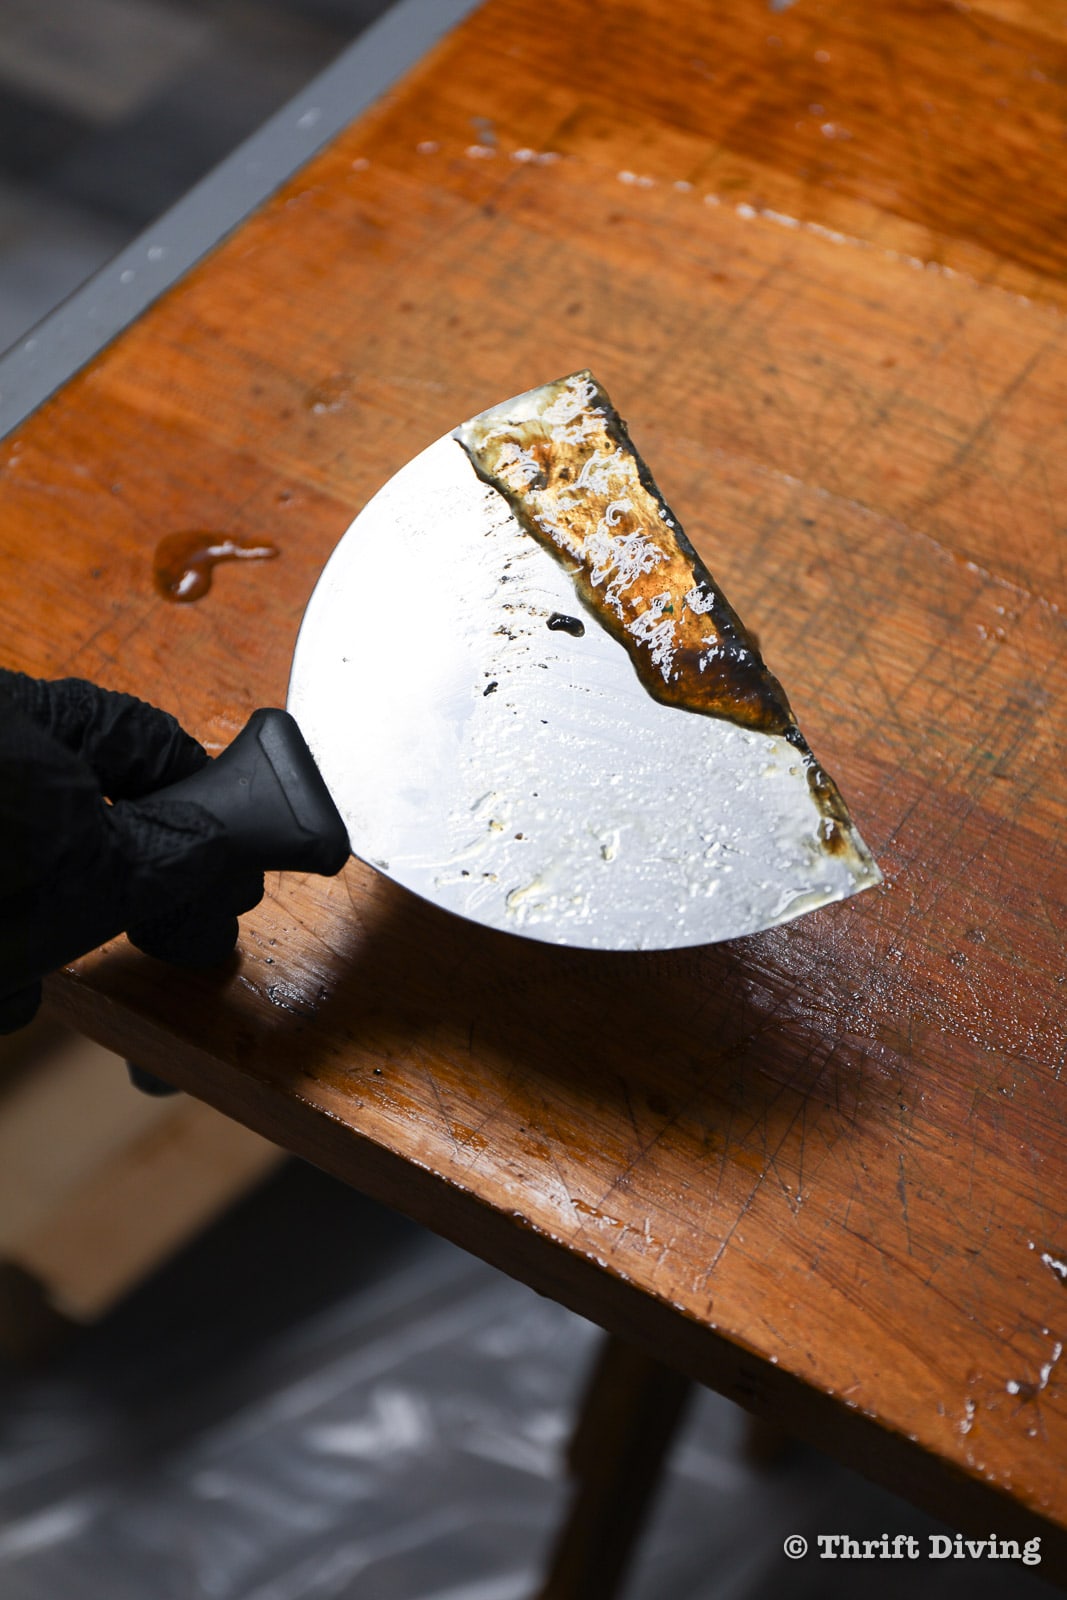
STEP 4: Scrape Off the Gunk
Now for the fun (and messy!) part. You can use either a metal putty knife or a plastic one. I prefer metal since it’s a sharper edge. But be careful with those sharp edges and corners. It could gouge your wood and cause extra scratches that weren’t there to begin with, which creates extra work to repair it.
Use an old box or the edge of a milk container or jug to scrape off the edge of the putty knife with the old gunk.
Soy gel is non-toxic, so I would think it’s safe to simply toss the discarded stripping gel in the box into the trash. But you might want to call your local recycling center to make sure that it’s safe to do so and follow their rules for proper disposal of the old finish removed by the stripping gel.
What started out as clear soy gel is now an amber color with the old stain and finish coming off.
STEP 5: Clean the Wood With Cleaner and Degreaser
No matter how many times you scrape, you’ll still have a film on your wood. You’ll need to clean that off before you move on to the next step. You can use the cleaner and degreaser for this, which is a TSP replacement.
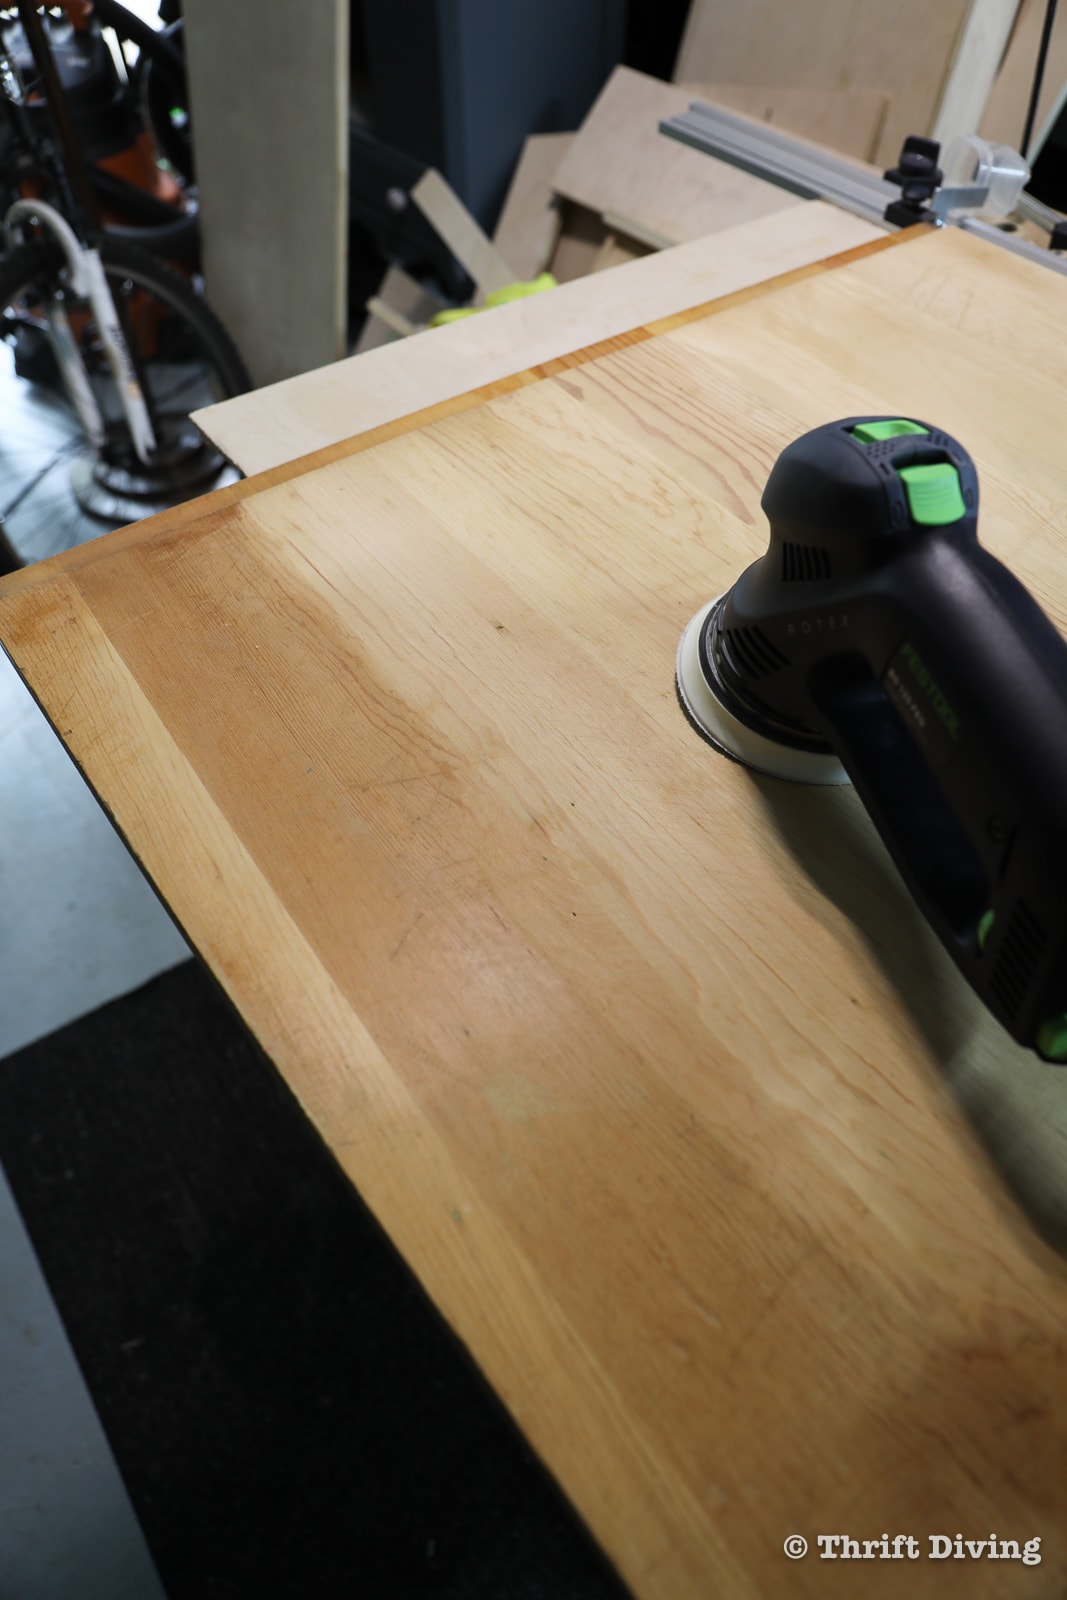
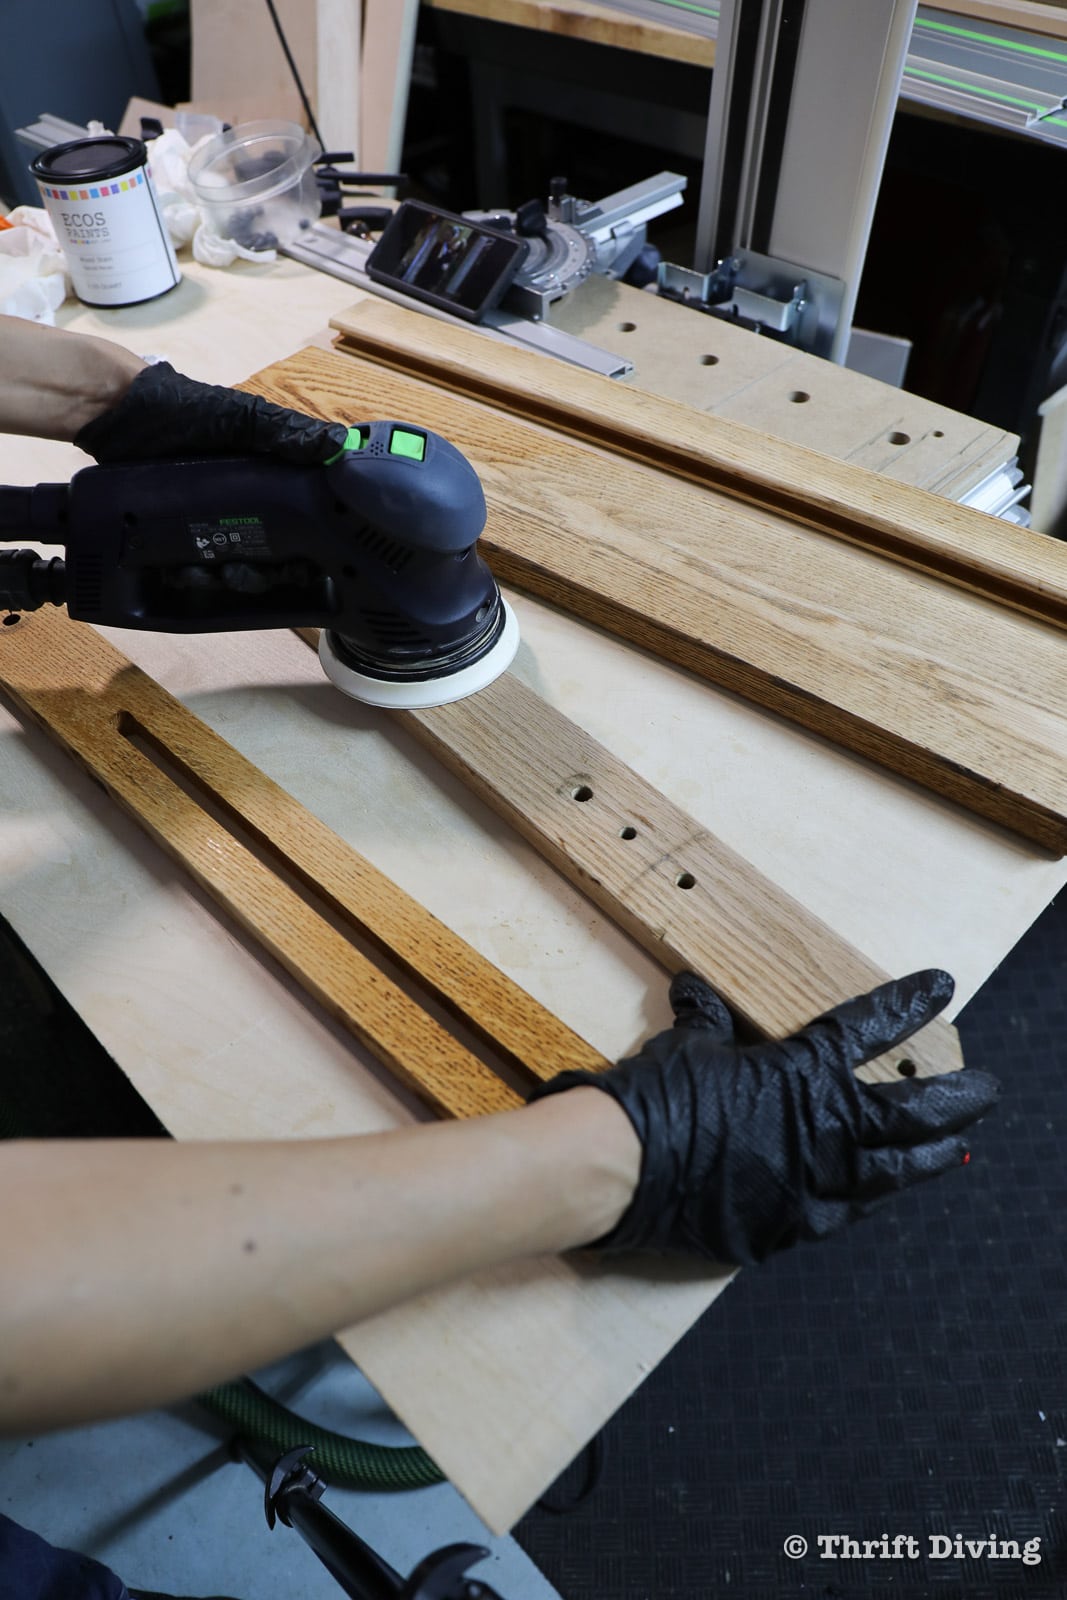
STEP 6: Sand Down the Wood with an Orbital Sander
Whatever you’re stripping, it’s likely to have stained wood once the wood dries. I waited until the next morning to start sanding to make sure it was completely dry. And you could see the staining of the vintage drafting table wood.
To create a blank slate, and to smooth out the wood, you’ll need to sand this down. While you can strip indoors pretty easily, sanding indoors requires a bit more planning; otherwise, you’ll have dust all over your house. To sand inside, use sheets of plastic and attach to the ceiling to create “curtains” to keep the dust inside. Wear a dust mask and safety glasses, too.
My advice would be to:
- Buy an inexpensive orbital sander. RYOBI and Dewalt make nice sanders for not a lot of money. I just invested in a higher end Festool Rotex 150 orbital sander, but you don’t need something fancy to get good results.
- Buy lots of sandpaper. Be sure to have a variety of grits of sandpaper: 40, 60, 80, 120, 150, 220. The lower the number (e.g. 40), the more aggressive the paper and the more that paper will scratch the surface to remove it. You have to work your way from the lower numbers up to the high numbers of grit without skipping too many in between for best results.
I discovered that the 80-grit wasn’t removing much of the top to level it smooth, so I dropped to a 40-grit and then worked my way up to 220-grit. Here are some tips to keep in mind:
- If you’re going to apply only an oil finish or wax, stop sanding at 220-grit for an ultra-smooth finish on the wood.
- If you’re going to apply a top-coat, you can stop at 150-grit, because the top coat will be smoothing out the finish.
Good rules of thumb to follow!
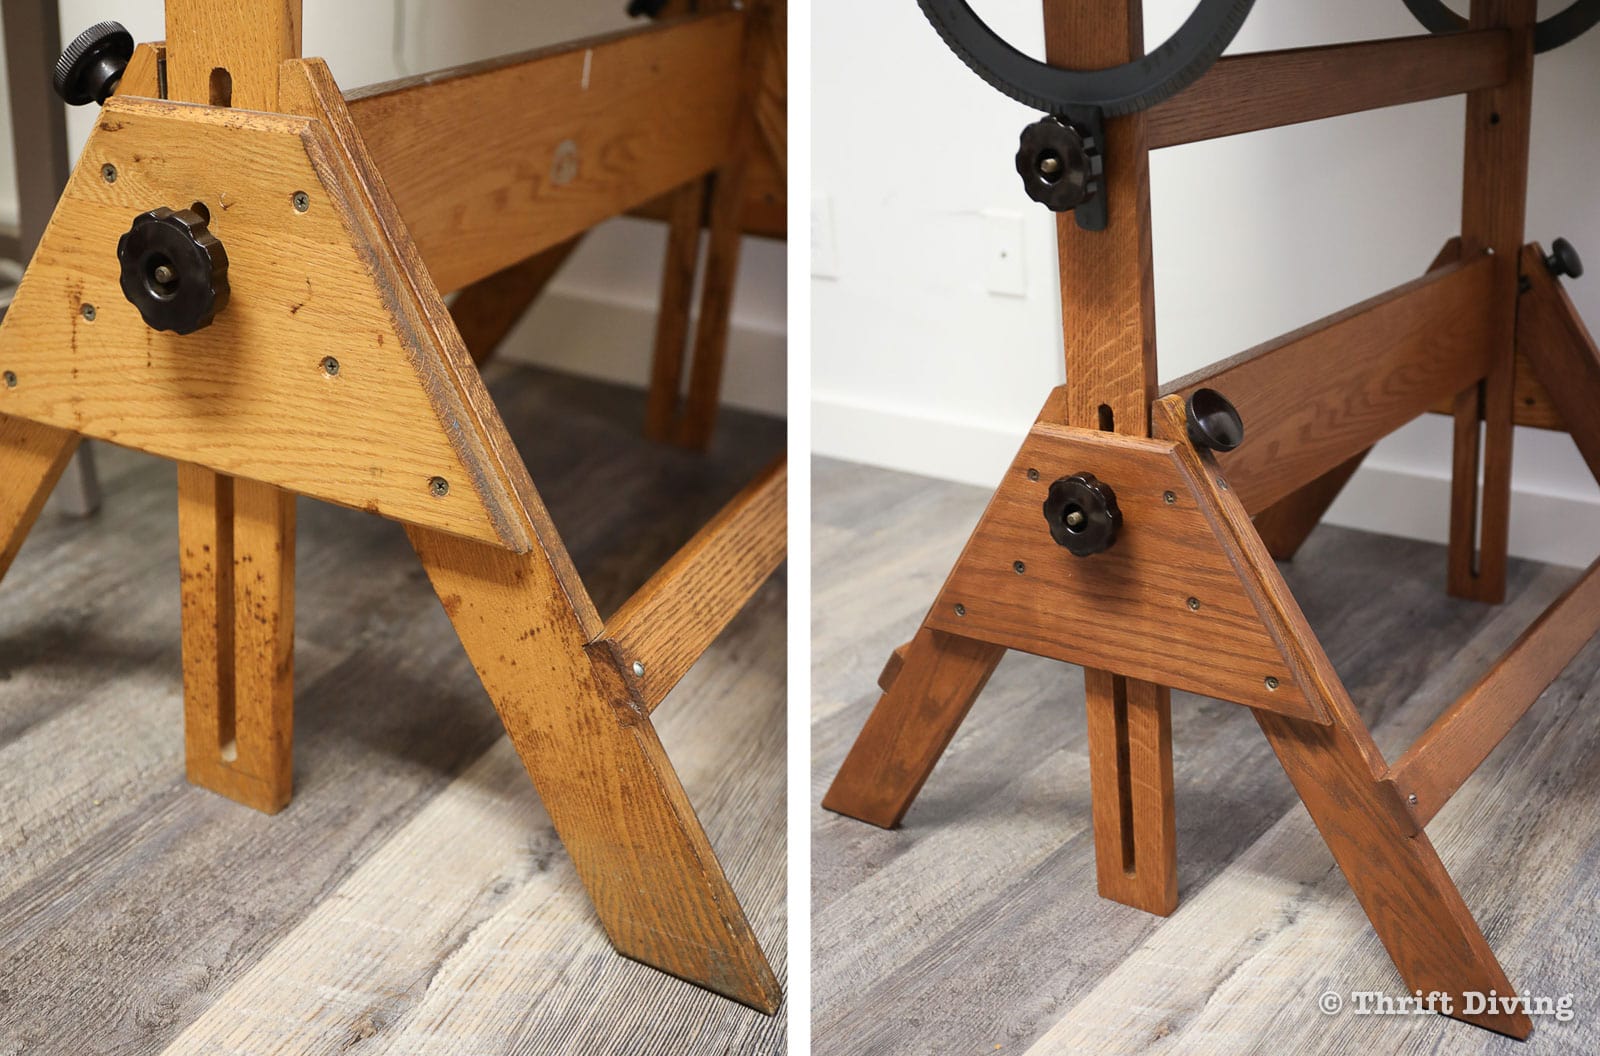
Oh, and I also stripped and sanded the base of the vintage drafting table.
STEP 6: Apply a Coat of Wood Conditioner
I’ve come to love wood conditioner. I used to remember thinking it was just another frivolous step when refinishing wood furniture, but yes, if you’re working with porous wood, you need wood conditioner. Without it, woods like pine and maple will look blotchy and streaked when you stain it.
Wood conditioner is like applying foundation when you wear makeup: it creates a nice, level, even surface upon which to apply makeup. By creating this even surface, the stain you apply will look more uniform in color. And the brand I am using is also eco-friendly, water-based, and non-toxic!
I applied a coat to the top of this vintage drafting table, let it set for a minute, then wiped it off and let it dry for 3o minutes before staining.
Related: Watch how I used wood conditioner on the walk-in closet organizer I built.
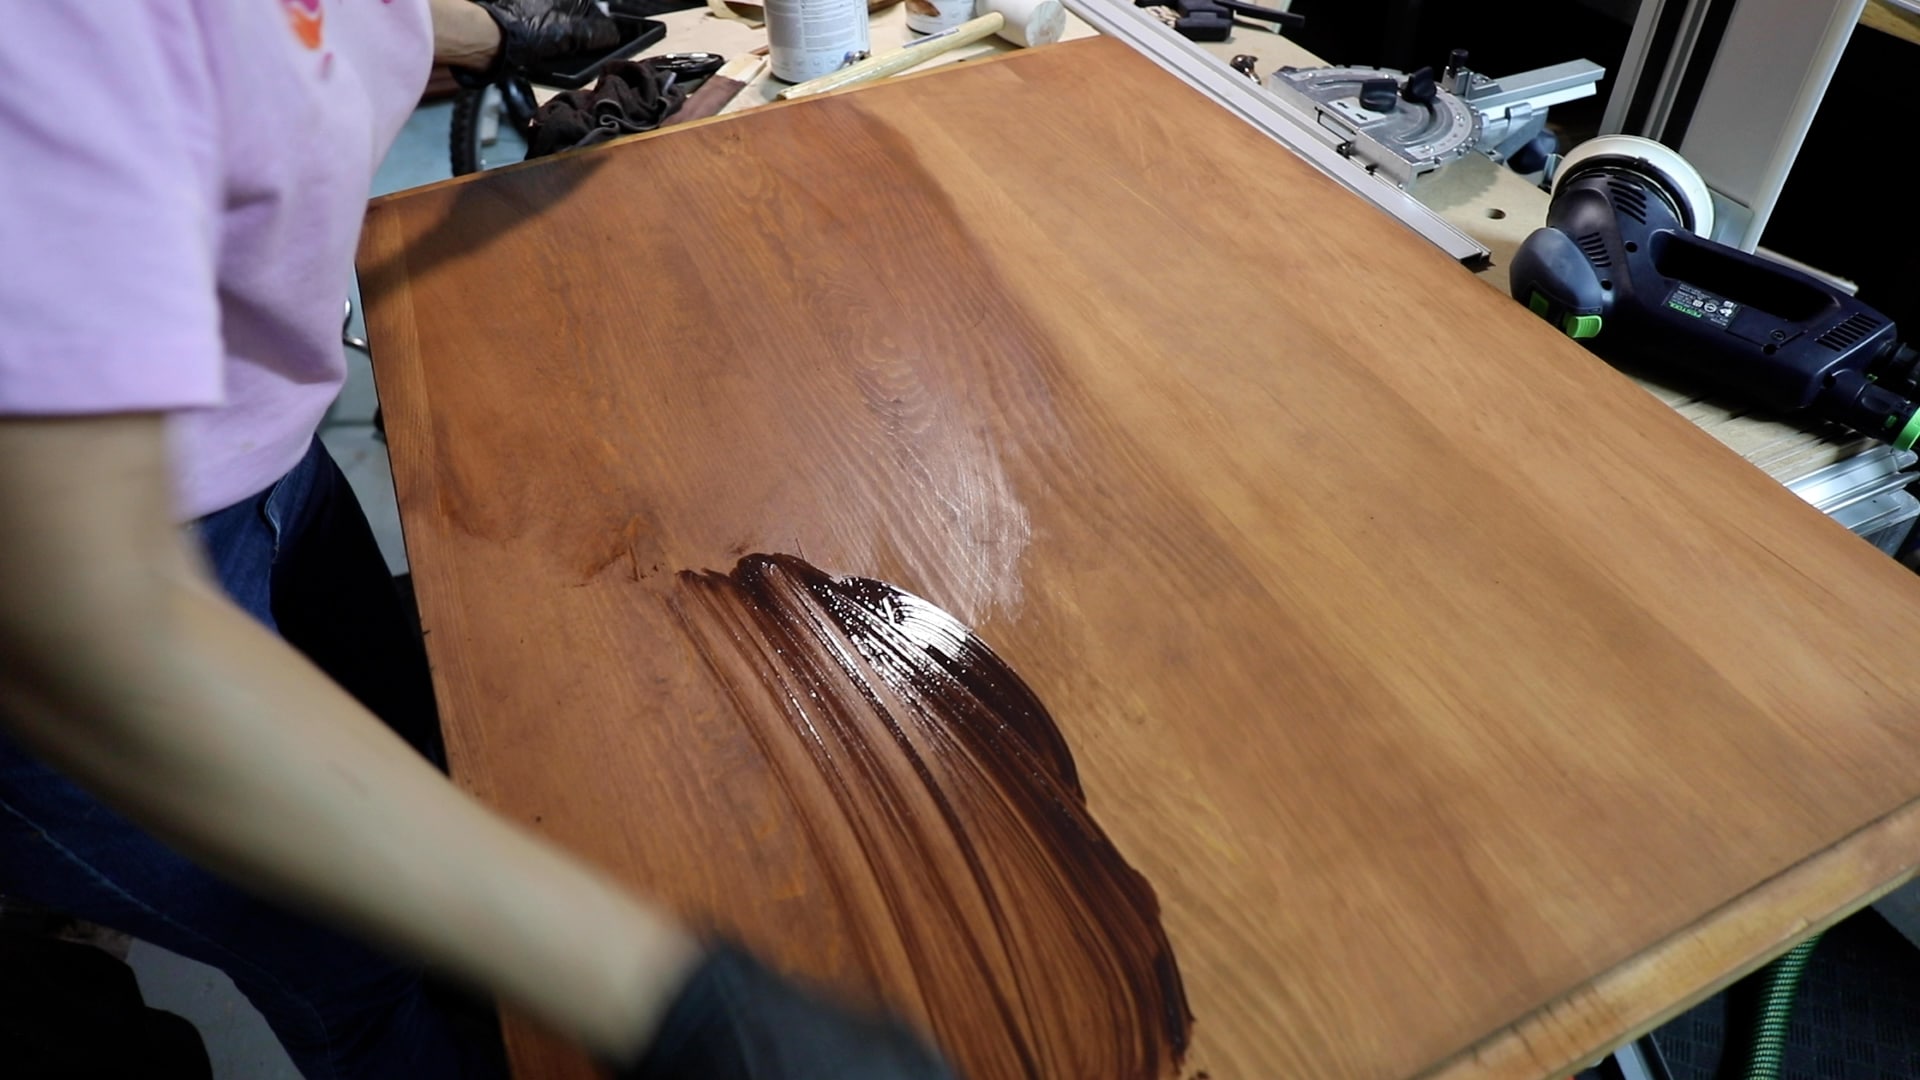
STEP 7: Apply 2-3 Coats of Eco-Friendly Wood Stain
I remember the day when wood stain would stink up the entire room when refinishing wood furniture. You’d bring it into the house and the off-gassing would create an odor that never seemed to dissipate. And even when it did finally stop smelling, it still would leave behind nasty chemicals in the air.
As I get older and more “woke” to the environmental impact of the products I am using, I am making changes in my workshop. One of my goals was to find eco-friendly wood stains (water-based, zero VOCs) that not only wouldn’t harm my health, but is easy on the environment and looked good, too.
I found these water-based stains and used them on a smaller project but nothing quite as big as a drafting table. I was nervous I wouldn’t like them but surprisingly, they worked well and had no odor, and can even be used indoors, just like the stripping soy gel! (Aren’t you glad that companies are finally catching up environmentally-friendly products?!).
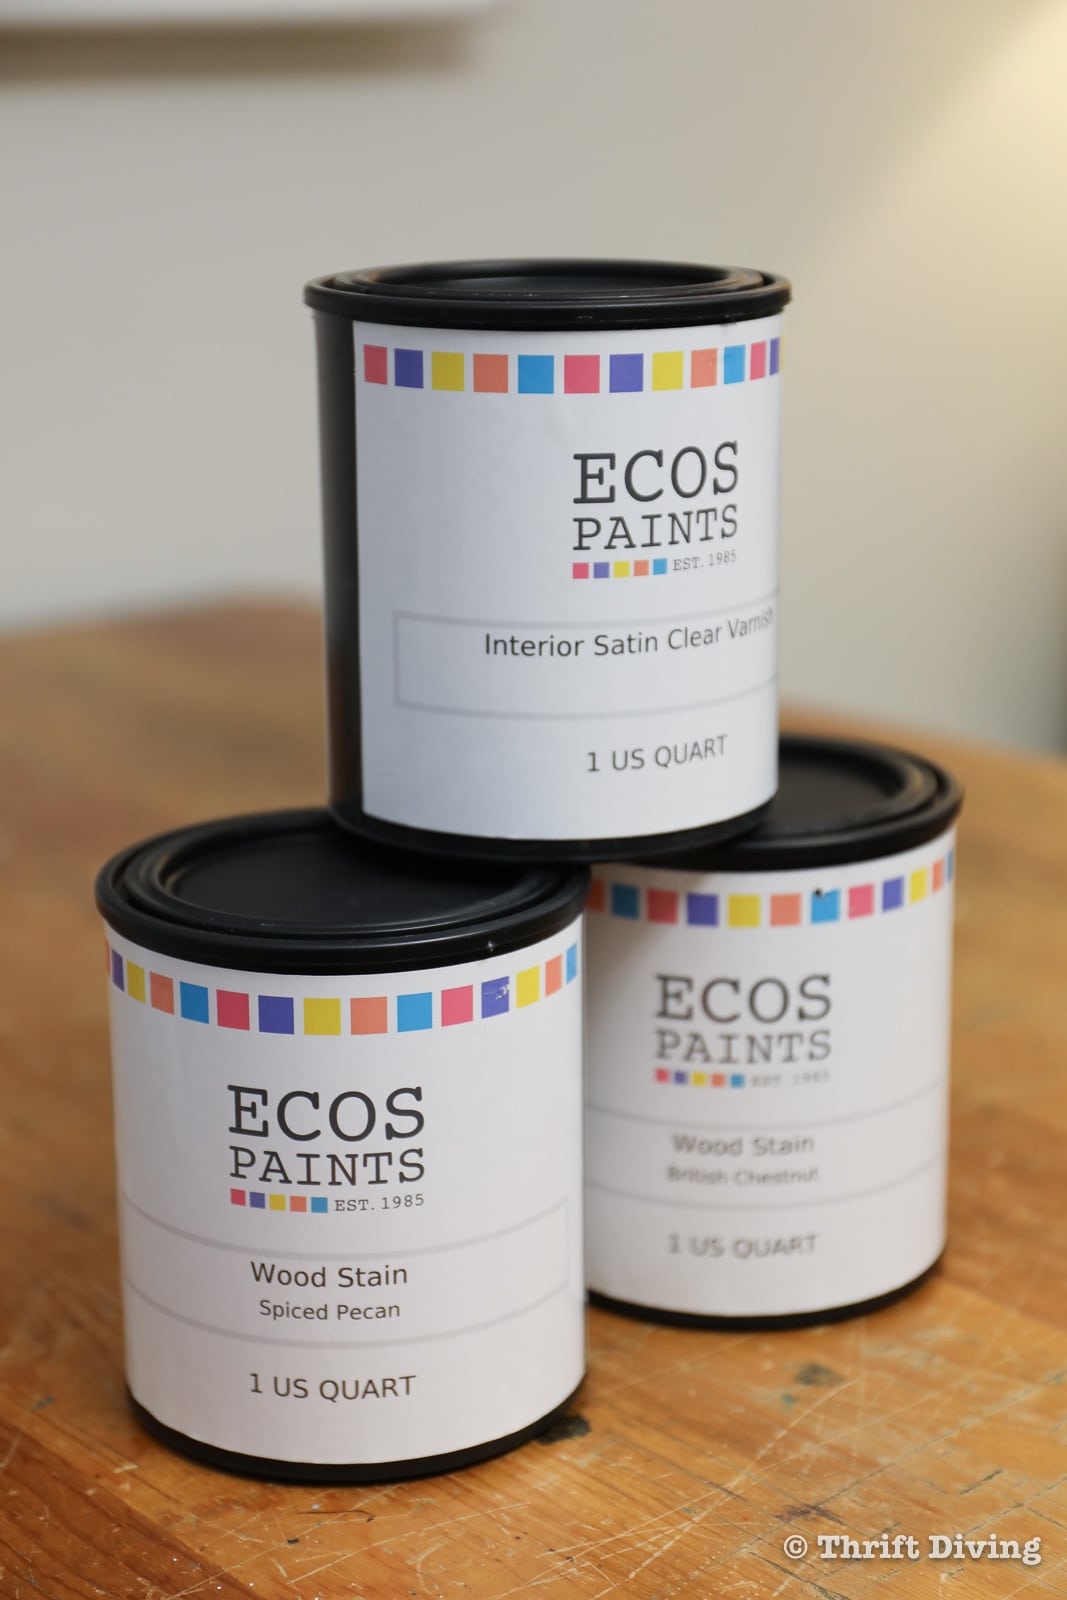
I wanted a rich color but not too dark, so I ended up layering two coats of Spiced Pecan (which was a bit more reddish than I wanted), followed by a single coat of British Chestnut, which helped to darken it up a little.
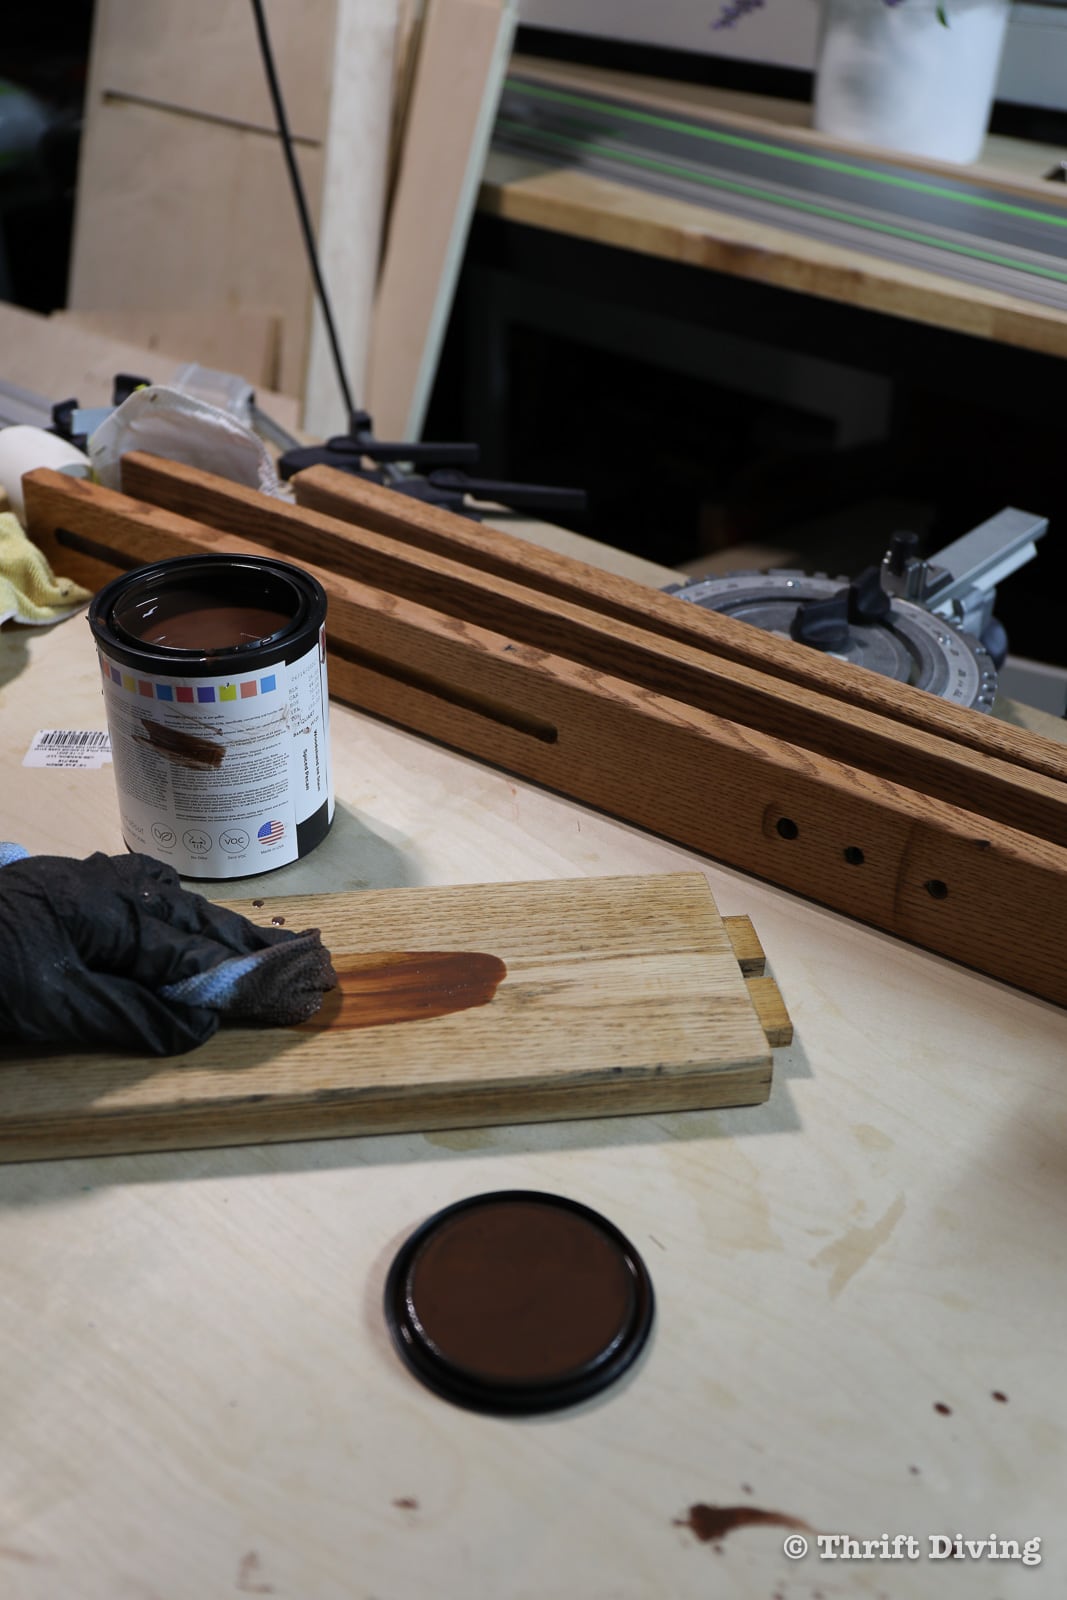
To apply the water-based stains, wipe it on with a lint-free rag (wiping with the grain), and then wipe it off immediately using strokes going with the grain. As the stain dries, it will lighten up, so you’ll want to add more layers depending on how deep you want the color to be.
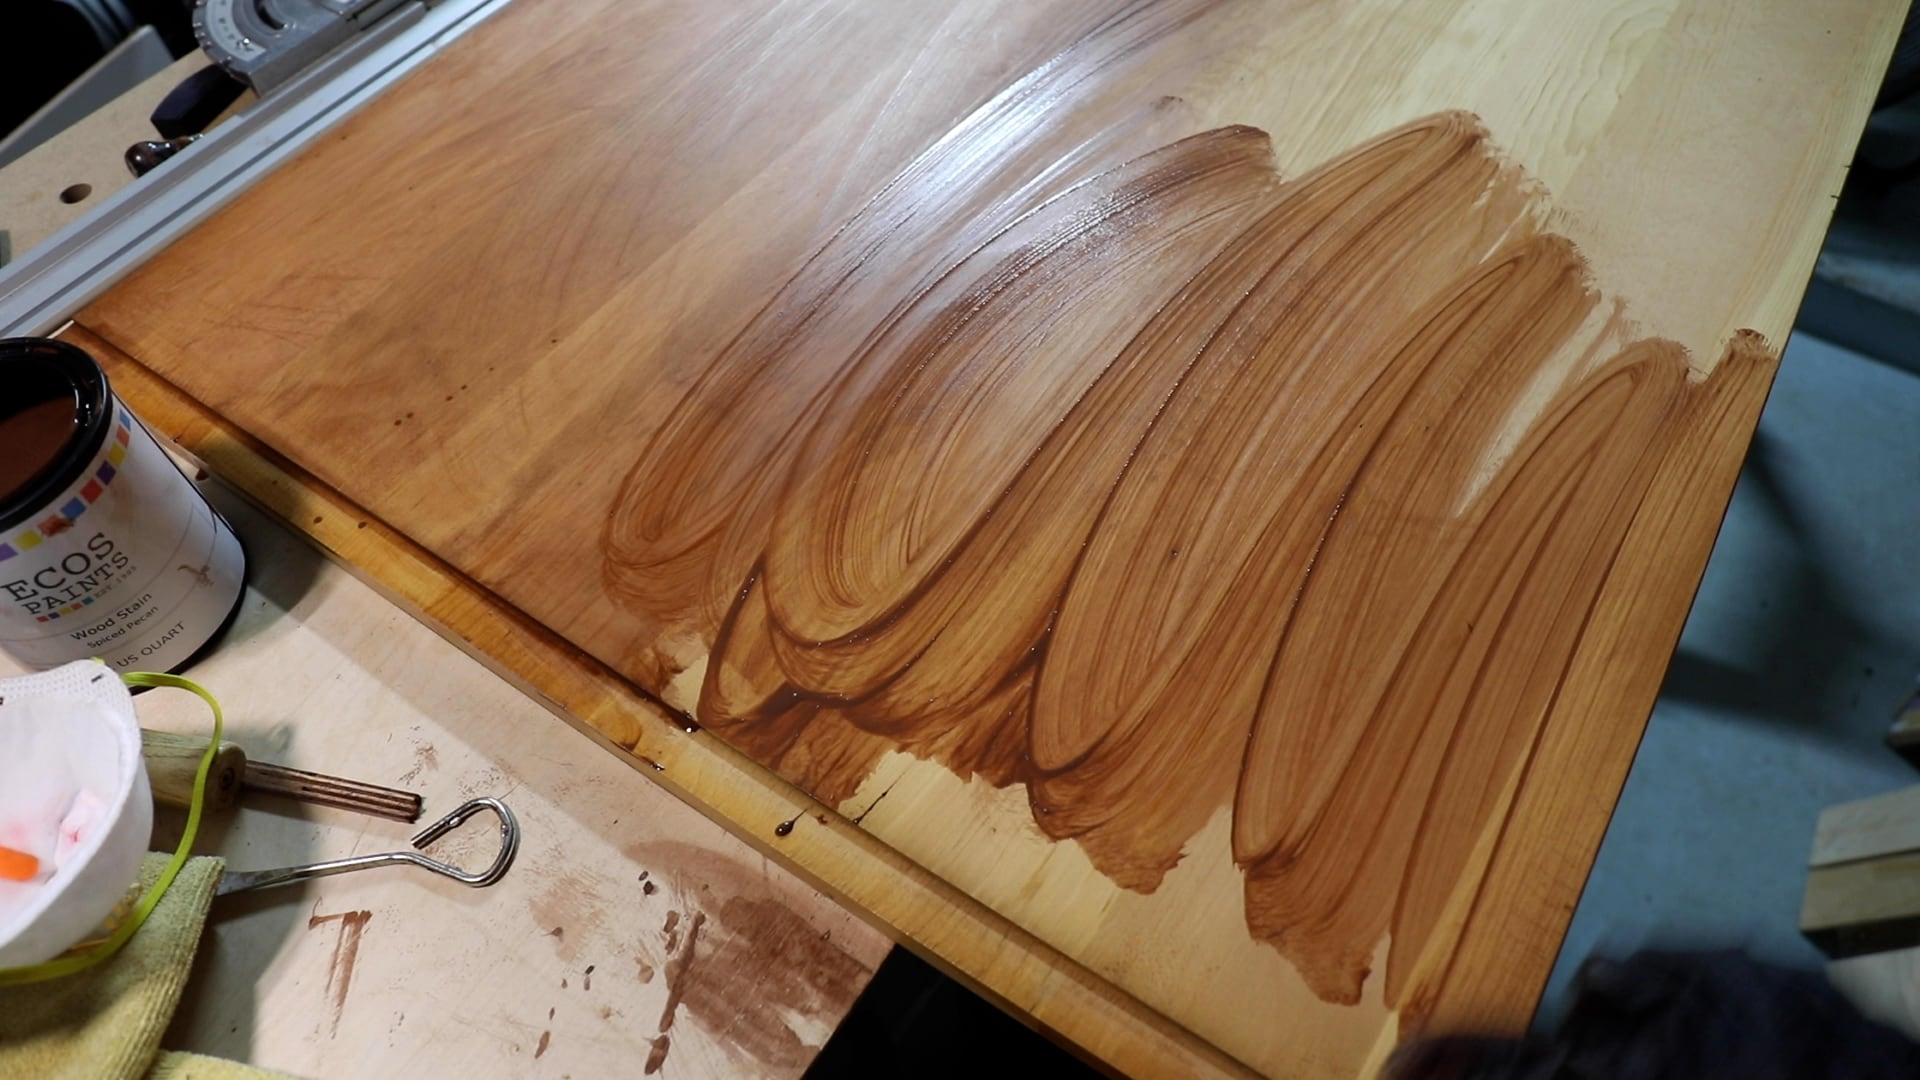
You can see here that with the two coats of Spiced Pecan, the color was still a bit light, but a third coat with British Chestnut helped to deepen the color while not making it too dark.
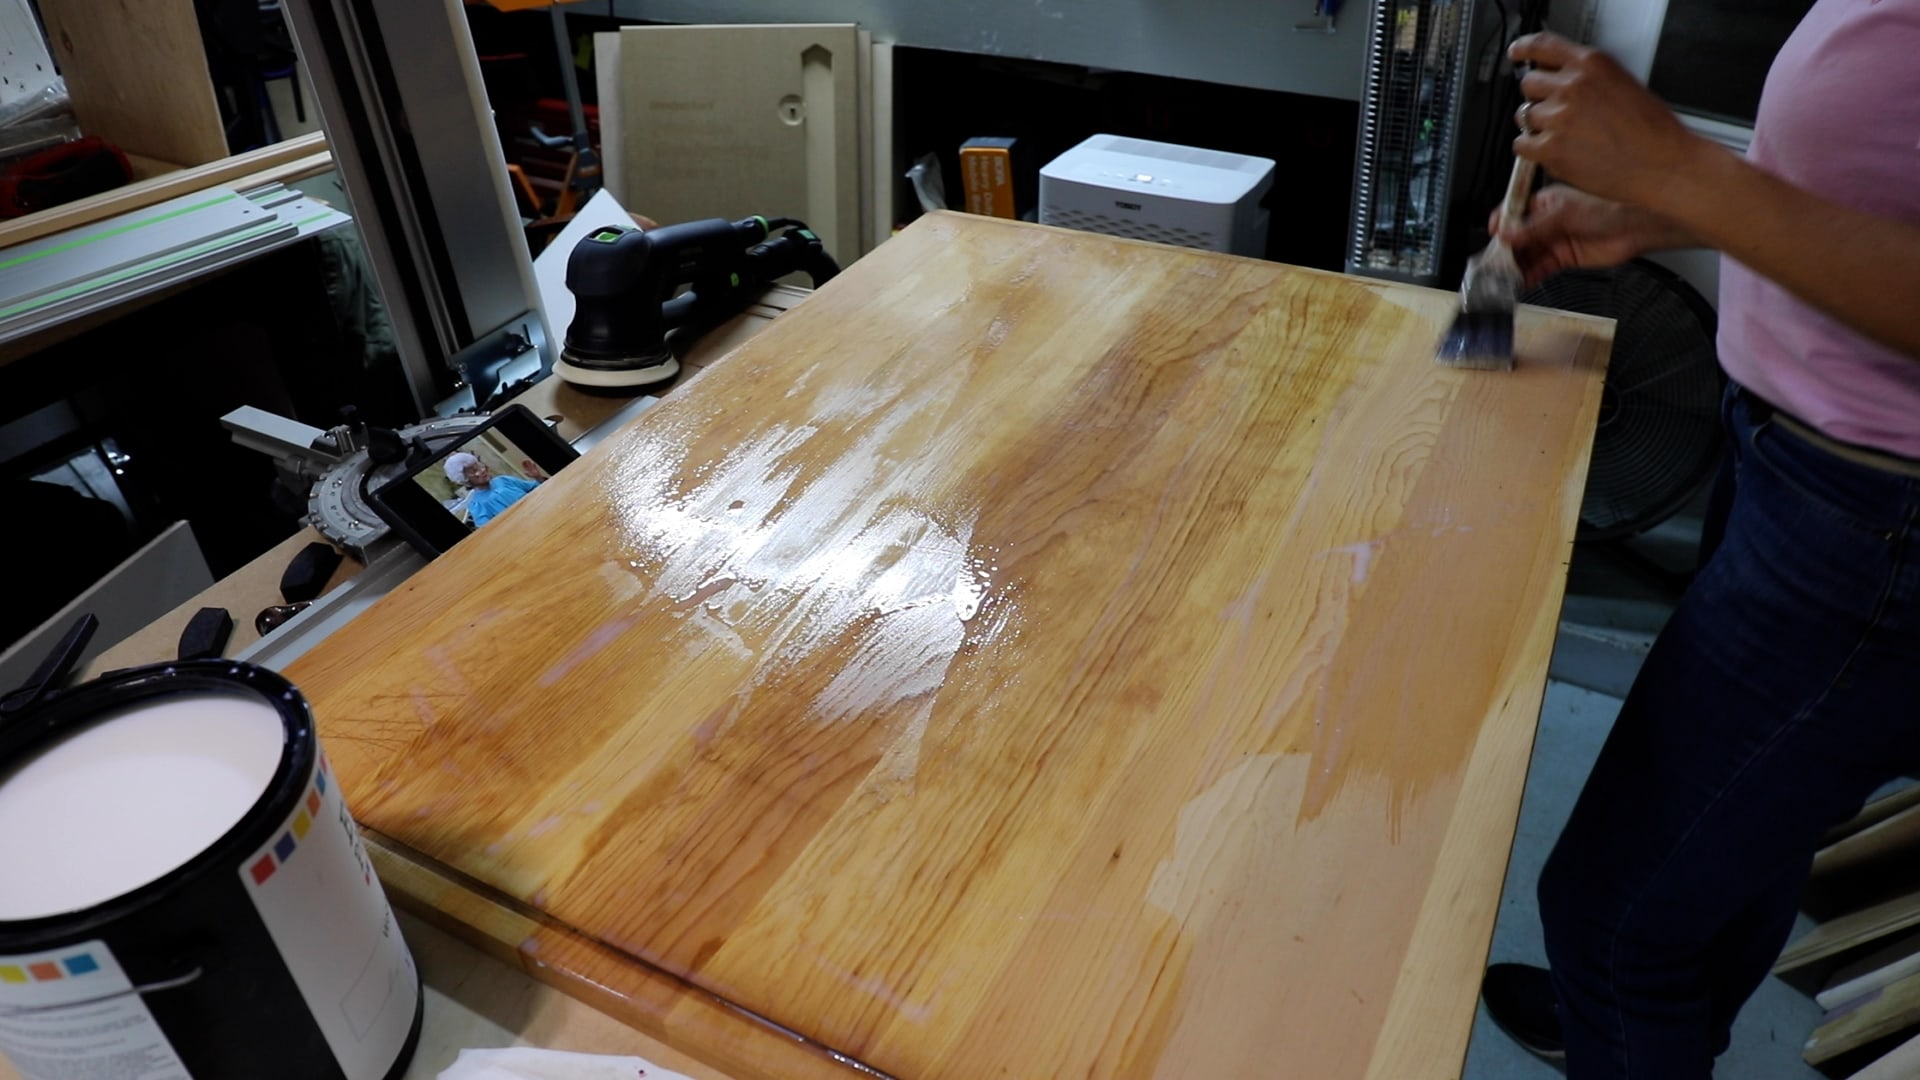
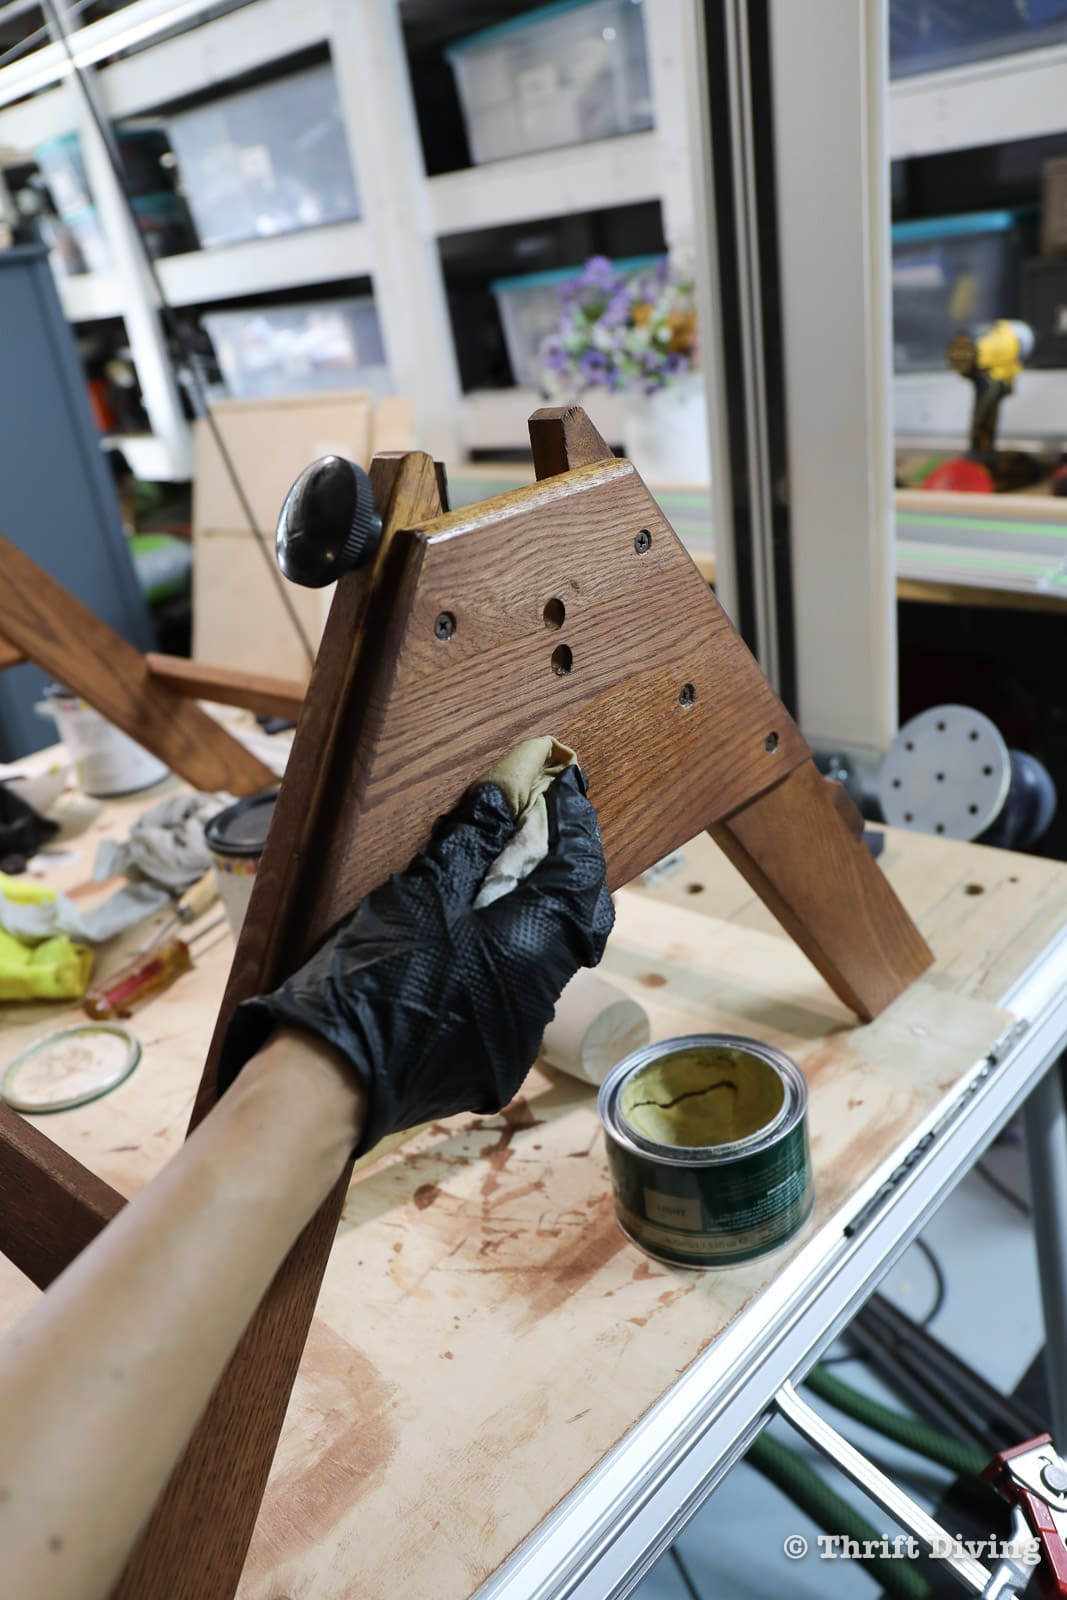
STEP 8: Slather on 2-3 Coats of Clear Wax
Once the stain dries, it’s time for a top coat! Because this is a vintage drafting table and my goal wasn’t to make it look brand new, I didn’t want to use a top coat that would make it look too polished. Instead, I opted for clear wax.
Here’s a tip: Instead of applying the wax directly to the wood, use a soft cloth to dip into the can and pull out a scoop of wax in the middle of the cloth. Fold the cloth over, into a ball. Hold the folded cloth in your hand and rub the ball of covered wax over the furniture, letting the wax soften and “ooz” out through the fibers of the cloth. This prevents too much wax from being applied to the wood. Let the wax dry for a moment, then rub and buff it smooth to a shine.
How many coats of wax to use?
Here are good rules of thumb:
- Add at least 2 coats of wax.
- For greater shine, add more coats of wax.
- If a piece of furniture gets of lot of “traffic” (i.e. a lot of use), consider adding additional layers of wax, telling them dry in between.
- Be careful about using wax on dining room tables or any surface that gets heat or moisture, which can ruin the wax and the wood.
- Re-wax every 6 months to keep the wood beautiful.
This is the only product that I’m not sure how eco-friendly it is. This is the furniture wax that I had on hand, but I plan to look into more furniture waxes that claim to be more all-natural, like this one on Amazon. This one does have an odor to it, but it’s not over-powering.
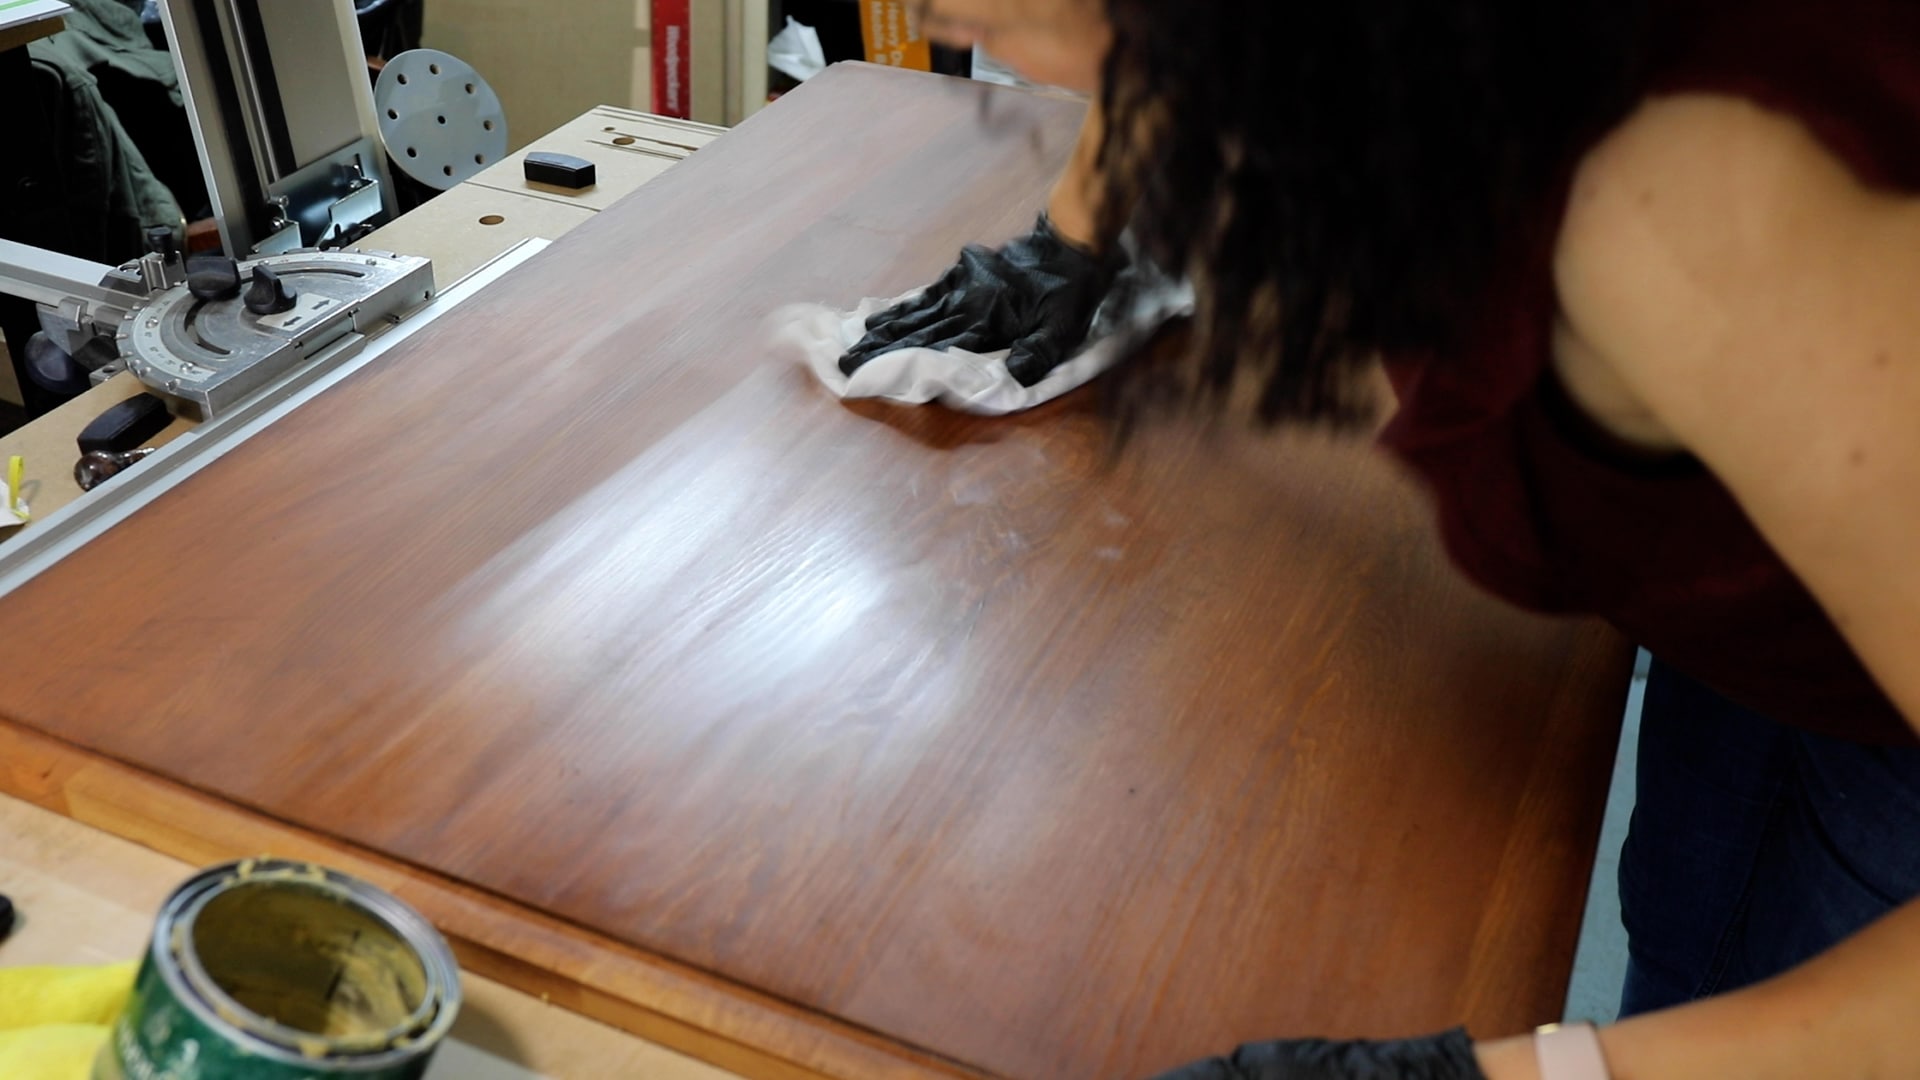
When wax is first applied, it is very dull, but after it dries for a couple minutes and buffed, you’ll start to see the shine coming through!
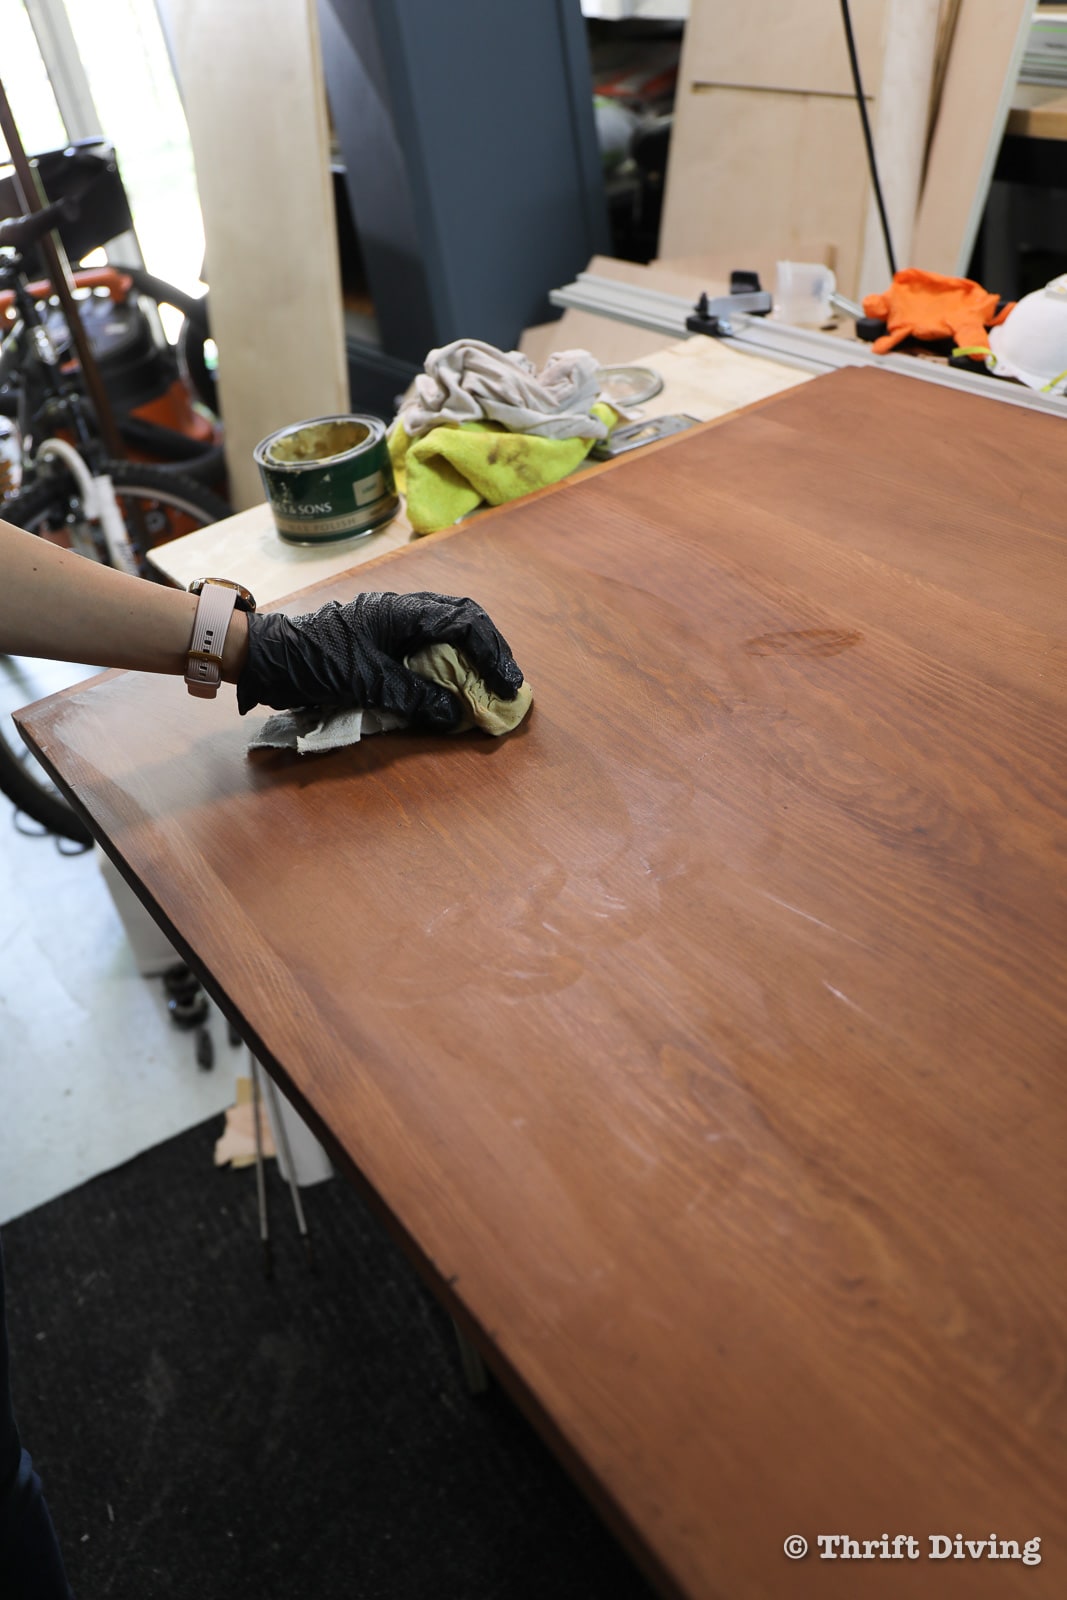
You can clearly see on the vintage drafting table top how part of it with wax was dull, but once I started rubbing and buffing with a lint-free cloth, the shine started to come to life! It feels very smooth, too.
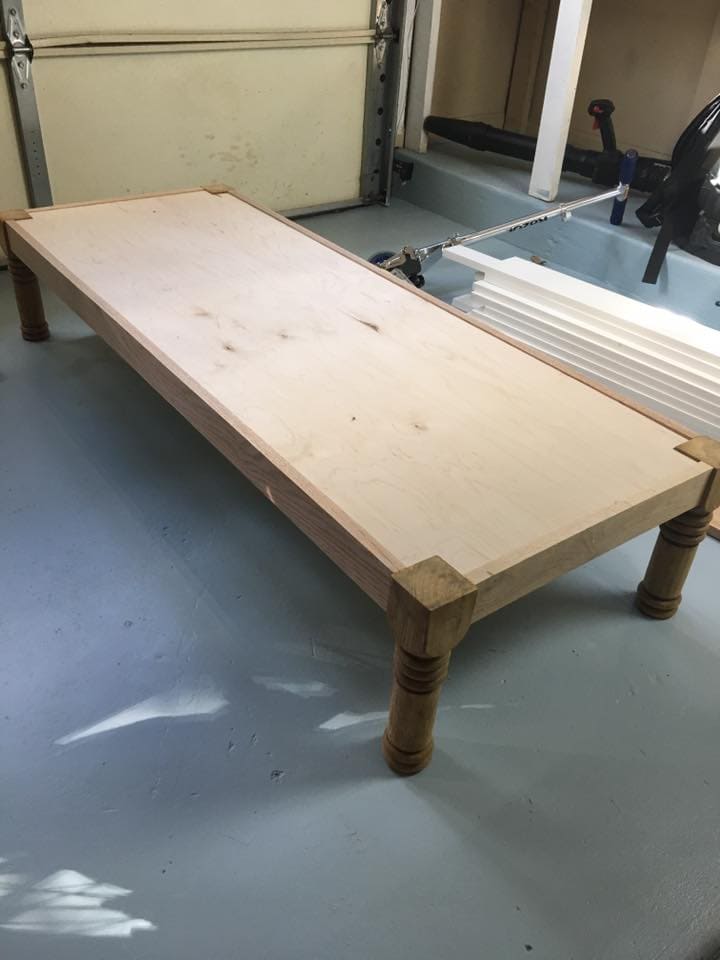
STEP 9: Reassemble Your Wood Furniture
Once everything has been refinished, put your furniture back together. Here’s a tip: check out the pics and videos you took of your project so you can remember how it goes back together. You’ll save yourself a lot of hassle!
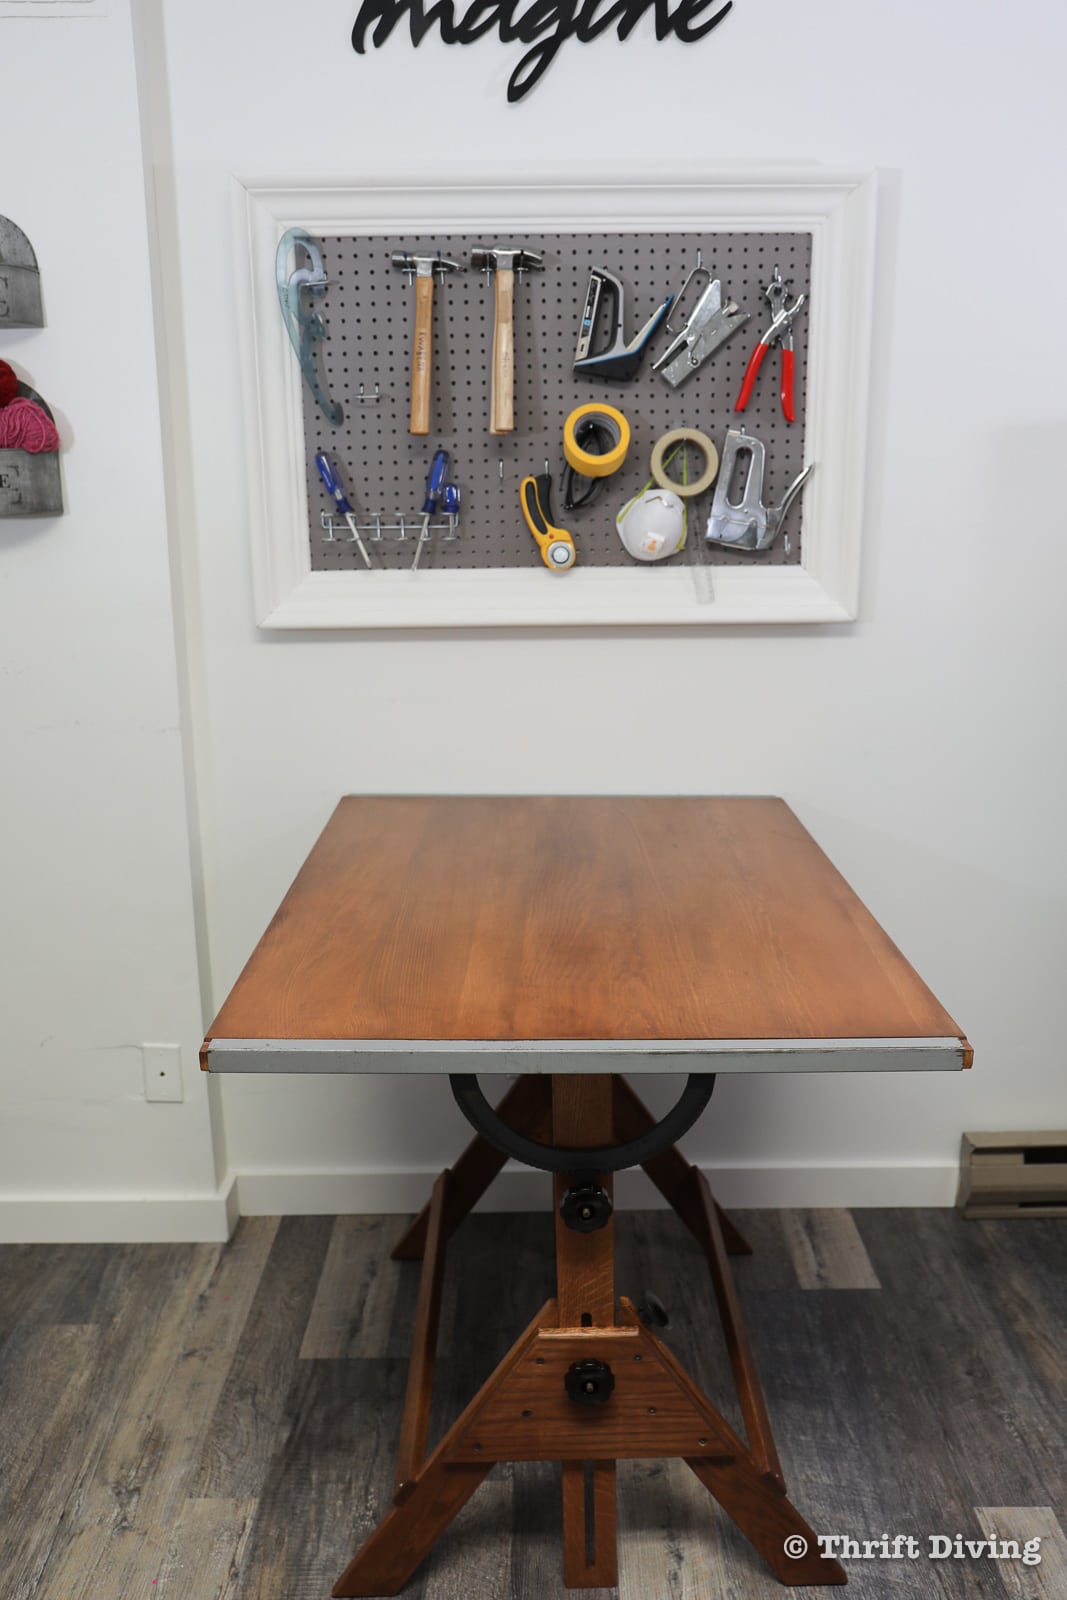
STEP 10: Enjoy Your Refinished Wood!
I absolutely can not believe how amazing this vintage drafting table turned out!! What started out as an ugly yellow with a dirty looking coat, now looks like a gently used Anco Bilt vintage drafting table in great condition!
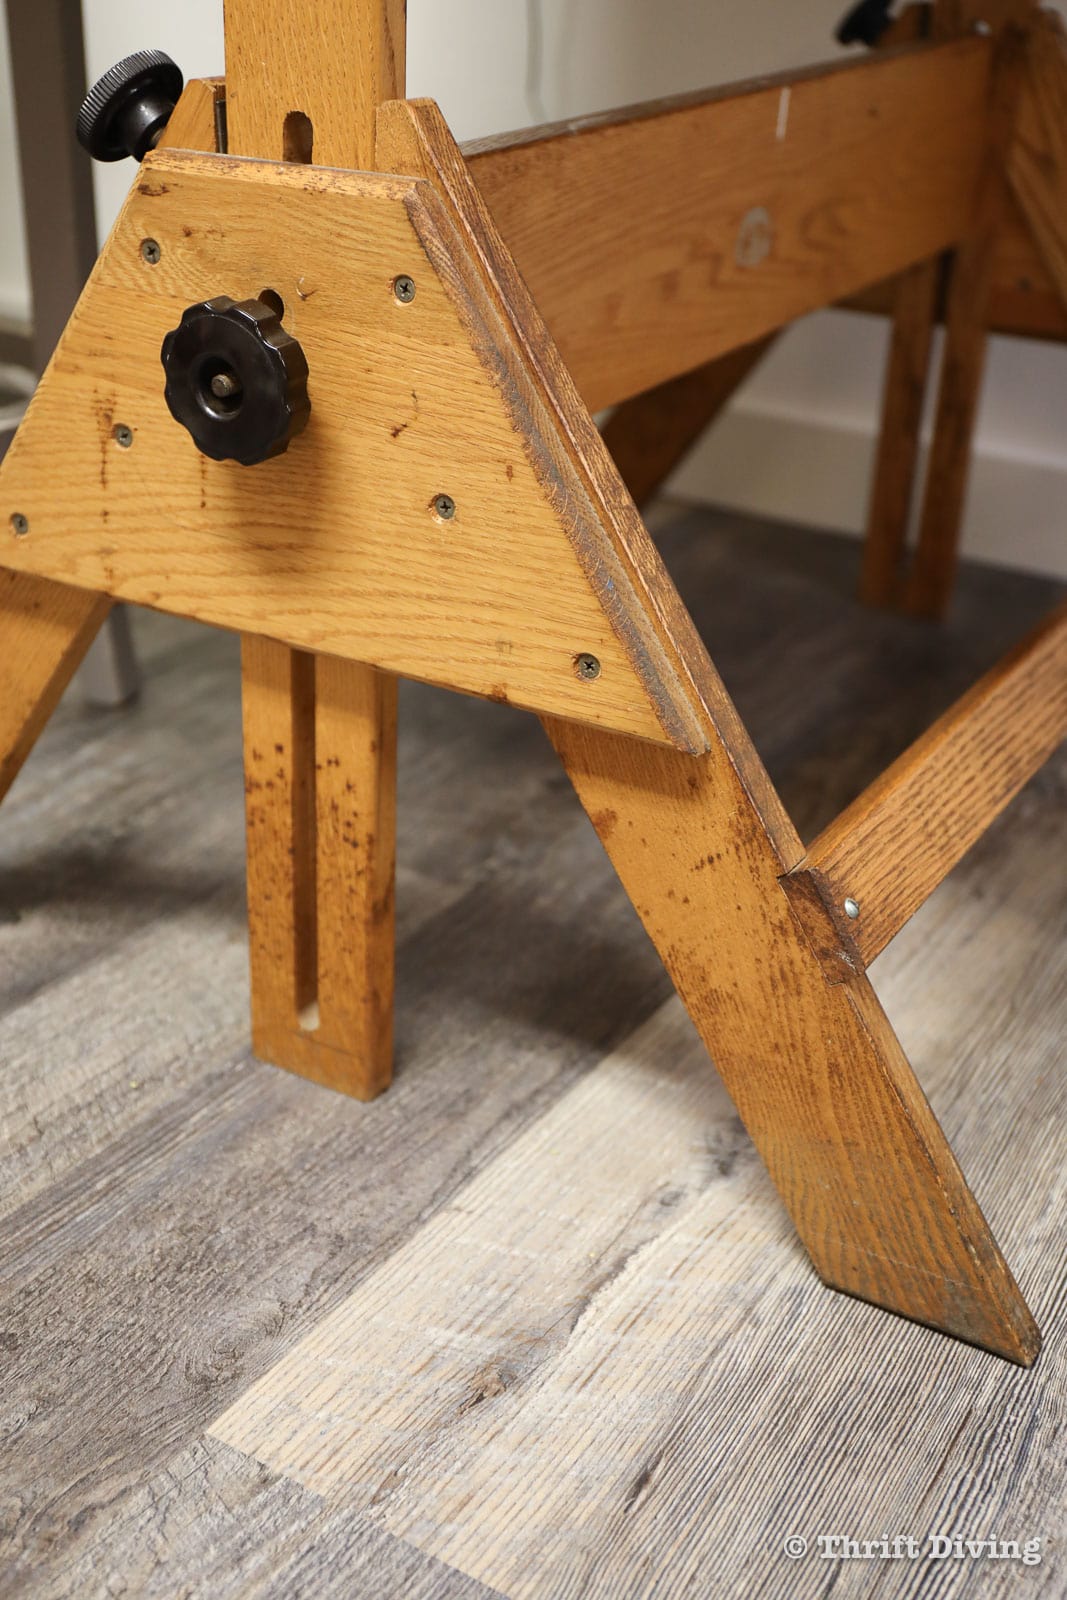
BEFORE
The top was in such bad condition, but because we use the table all the time, I honestly never paid much attention to it until Franmar® approached me to work together. And since I already love their products, I was ecstatic to work with them! I knew this would be the right piece for the project because it’s a gorgeous piece with “good bones” that deserves to be preserved.
Look how smooth that surface looks now!

With three coats of wax, the top gleams! They key to keeping this nice will be to cover it up when the kids and I are working on projects together on this table. Better yet, I might just move this out of the way and use our cheaper hobby table instead! 🙂 The kids have proven they can’t be trusted with my vintage drafting table! LOL
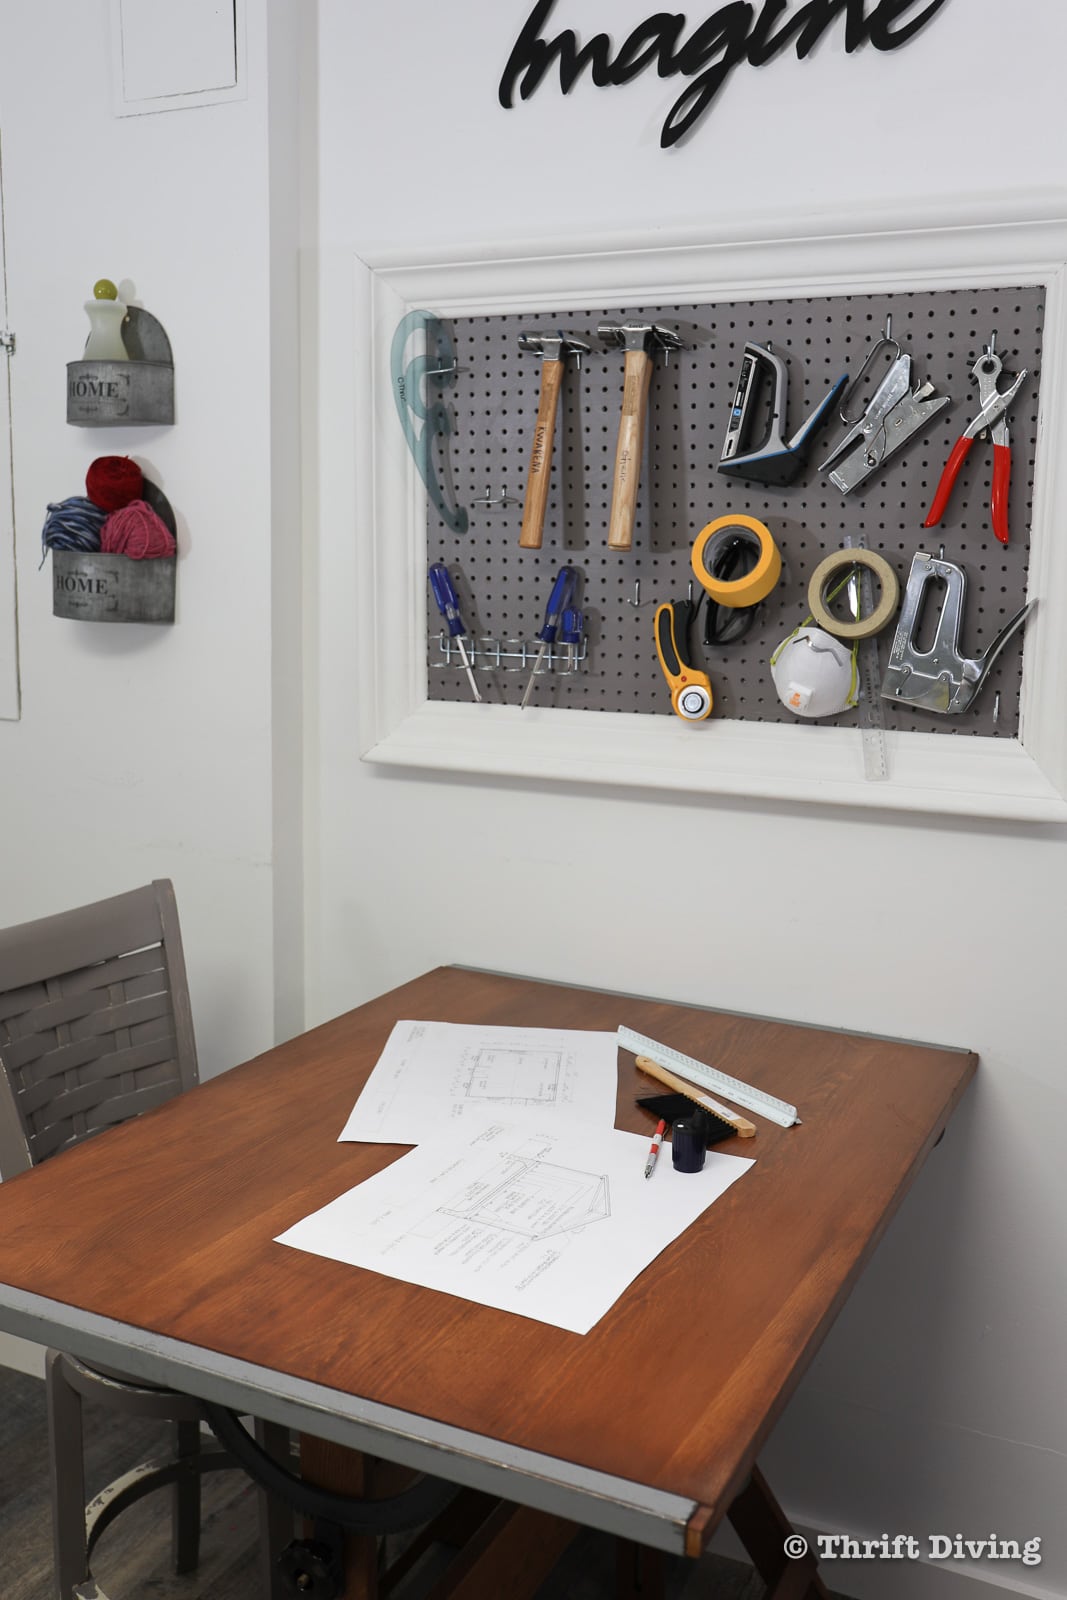
Right now, I’m in the midst of getting a huge 16′ x 26′ shed build in my backyard (so I’ll have space for refinishing wood furniture and building), so I had worked on some plans right here at this very desk. I’d also taken an architecture class and had spent many a’ hours leaned over this desk. What a great work space! I am so thankful to have found this gem!
Here’s a few side-by-sides so you can see how dramatic of a refinishing project this was. It feels good that I took time to restore the wood table surface and clean up the legs instead of painting over it. Believe me–paint has its place, but not on a vintage drafting table like this one!
This has always been my favorite place in my office. Now I need to find some thrifted stools to compliment the refinished drafting table, because those 2 stools aren’t it! 🙂


Do you enjoy refinishing wood furniture, too? Have you ever refinished? And did you know that you can safely strip and refinish wood furniture indoors using eco-friendly products? Leave a comment down below and let’s talk about it!
Do you love this project? Click here to save it on Pinterest!
![]()
Be sure to check out Franmar.com for more info about their environmentally-safe stripping products, as well as to buy the Blue Bear Soy Gel Paint & Urethane Stripper at AceHardware.com.

Download the 5 freebies!

Thrift Diving inspires women to decorate, improve, and maintain their home themselves...using paint, power tools, and thrift stores! Use these 5 printables, checklists, and ebooks to get started!

Im going to have to find these indoor stripping solvents!
I live in the North, so with freezing weather half the year and humidity in the warmer months, the window to strip and stain furniture outdoors is very limited! Stripper is messy and stinky and toxic and some furniture stains and polyurethanes are just as bad!
So products that you can use indoors will be a game changer!
I wonder if there is a eco friendly mahogany stain? Those are scarce!
Thank you once again for bringing us products we may never have heard of, because of big box stores selling the same old-same old!
You are so welcome, Lynn! As for the mahogany stain, check out the ECOS Paints water-based stains and see what they have. I’m sure they have one that will be as close to mahogany since it’s a popular color. Glad to hear that you’ll have more time to strip and stain indoors now!! 🙂 Thanks for commenting!
I can’t believe how PERFECT you made it look in the “after”! It looks brand new… y’know, straight from the catalogue of old. 🙂
Thank you, Mariele!! I just can’t believe it took this long to do it! I’ve had this table for years but just never paid much attention to it because it was always covered up with paper while the kids and I do projects on it! But I am so pleased with how it turned out! 🙂 Thank you!
The table is gorgeous! Refinishing old furniture is something I love to do, I’m a big fan of going to the restore and goodwill’s to get solid wood pieces and bringing them back to life. I have not used eco friendly products because I had the misconception that they wouldn’t work. After reading your blog, I’m converting! Your work inspires me to keep going. We’re flooded with these perfect images of projects but your blog always includes things that didn’t work out that you did that need more work, the fire pit redo. It helps me keep the perspective that it’s ok if you change you mind and that you can do something and be proud and then decide you want to improve it later. It’s about trying new things and doing what we love. It’s a great message
I’m so glad that I was able to show you that eco-friendly products DO work! I think we have to at least try various eco-friendly products to see which ones we like best. And I honestly do love the soy gel stripper and definitely love the water-based stains! And thank you SO much for the great feedback on my projects and I will show you the “real deal” of how it turned out, what worked, what didn’t, etc. I appreciate that so much!!
Amazing transformation. Real act of love. So glad you didn’t paint! Congratulations on a hard earned beautiful result. And delighted to know about the products.
Thank you so much, Cathy!!! 🙂 Paint on this piece would have been a travesty! lol! Thank you for reading and commenting.
Hi there, just found your sites recently and am enjoying (and learning) the heck out of you and your projects! I truly appreciate the eco-friendly refurnishing, I am focusing on being more friendly to the world these days.
A couple of quick questions, if you have time to answer.
1) How do you determine which stain (is there a different type used for certain woods) and color of stain?
2) I am wanting to break into refinishing/refurnishing/reupholstering something ~ anything! I just want to, you know, TRY IT! Ideas on something easy/beginner level?
Hi Elizabeth! Great that you found me!! 🙂 To answer your questions:
1) Good question, because I *DO* think that you’ll find certain colors of stains are more typically used for certain woods. For example, mahogany stain, which is reddish brown, is typically used on mahogany wood. But there are no hard or fast rules for this, though. But I do think that certain colors are used to accentuate the natural characteristics of wood. For example, oak has deep grooves that, when a dark stain is applied, can accentuate the deep grain on of the wood. I tell people to test different colors to see what you like on different types of woods, though. In time, you’ll start to know what you like.
2) Glad to hear that you want to do some refinishing and reupholstering! Check out this blog post, which was written just for people like you just starting out. 🙂 https://thriftdiving.com/how-to-paint-furniture-getting-started/