How to Properly Prep Furniture Before Painting
People get very confused on how to actually prep furniture before painting. It stops them from moving forward. But it’s not difficult at all! Here’s what you need to know about cleaning, inspecting, repairing, and testing each piece of furniture before painting it. In this post, we’re going to cover all these things.
Click here to SAVE this on Pinterest.

Some people are audible learners! Don’t worry, I’ve got you covered! Check out the podcast of this episode, and be sure to check all the other great episodes of The Thrift Diving Podcast!
Tools & Materials for Prepping Furniture Before Painting
The following list of tools and materials contains affiliate links.
- Vinegar & water
- Simple Green Surface Prep (optional)
- Blue Bear Emerge Cleaner & Degreaser (optional)
- Flashlight
- Power drill with drill bits and driving bits
- Screws (optional, depending on your repair)
- Wood glue or JB Weld
- Wood filler
- Plastic putty knife
- Clamps (for holding parts together that may need glue)
- KILZ oil-based spray primer (optional; as needed for bleed-through)
- KILZ oil-based brush-on primer (optional; as needed for bleed-through)
- Shellac Finish and Sealer (optional)
- Sandpaper in various grits
- Paint brush
- Rags/Lint-free cloths
- Dust mask
- Pencil and paper for taking notes
How to Prep the Surface Before Painting Furniture
One thing I have learned over the years is this: the results you get are directedly proportional to the amount of prep you did beforehand.
This is true for studying for a test…planning for meals for weight loss….and yes, even painting furniture.
The problem is that most people who are newbies aren’t sure exactly how to prep their furniture for painting, so let’s jump into the steps right now!
STEP 1: Clean Wood Furniture Before Painting
I know it seems to be common sense, but I’ll go ahead and throw myself under the bus now: there was a time or two when I first started out painting furniture, and even a few years after, where I would literally just start painting without cleaning it.
I would literally paint over a surface, dusty or not, and expect to get good results. But that was pure laziness or ignorance on my part.
Surfaces can look clean, too, but have grease spots that won’t even accept paint, creating a layer or film over the wood that won’t allow the paint to adhere.
The only way to ensure that your paint will be smooth and even is to clean the surface properly beforehand.
There are a few ways to do this:
Option #1: Vinegar and Water
Nothing beats the affordability and versatility of vinegar and water. Most people have vinegar lying around. Use an empty spray bottle and mix with water (maybe a half and half mixture?) and then clean your furniture. I personally don’t like the smell of vinegar, so I tend to skip this option for cleaning my furniture before painting.
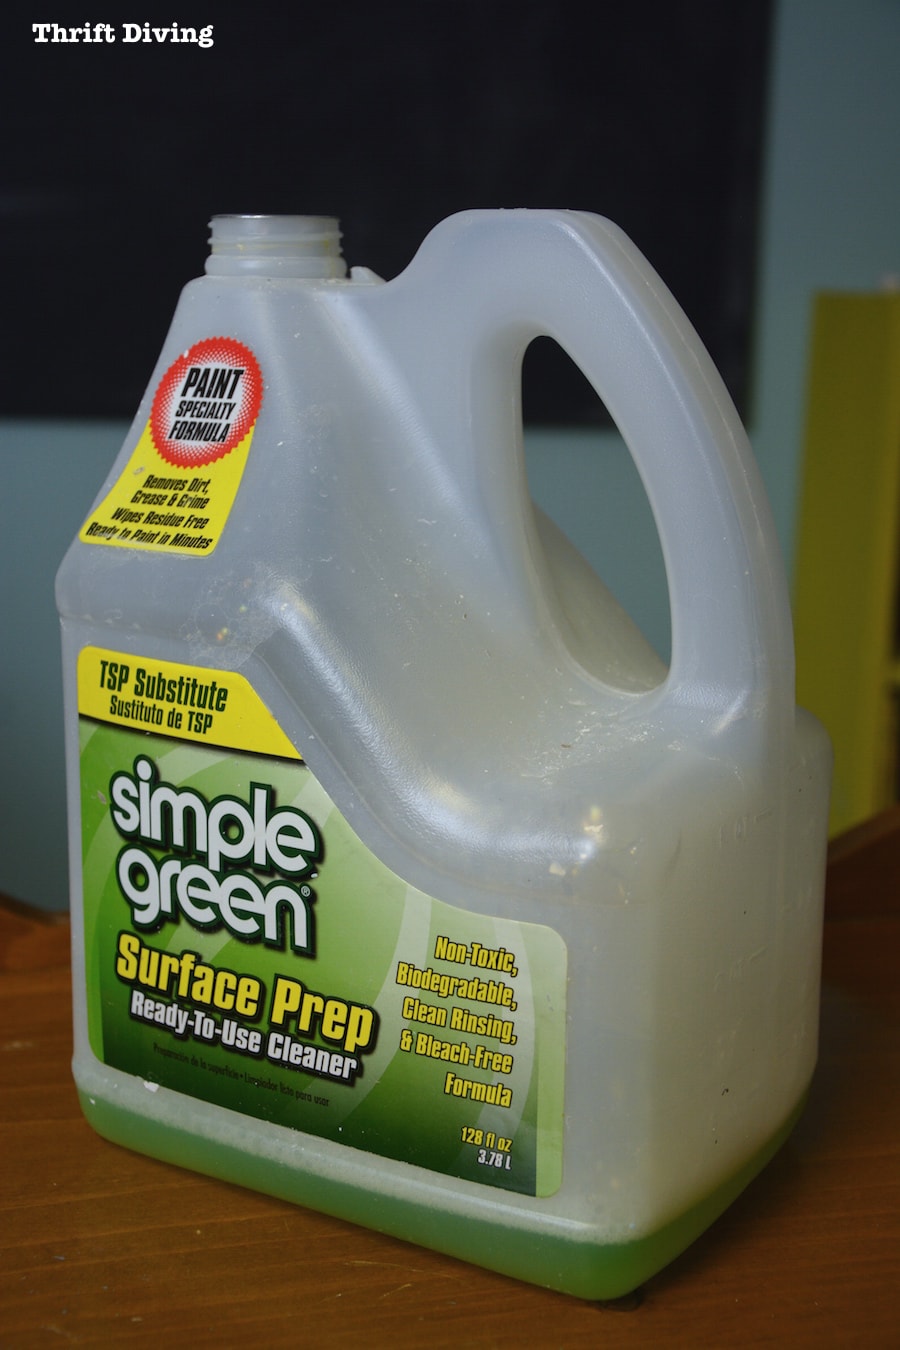
Option #2: Simple Green
I actually really love Simple Green cleaner. It takes the guess-work out of what to use, since it’s specially formulated for surface prep. I use it on walls, too, prior to painting them. Use an empty spray bottle, dilute the Simple Green with some water, spray, and wipe. Once it dries, go over it again with fresh, clean water.
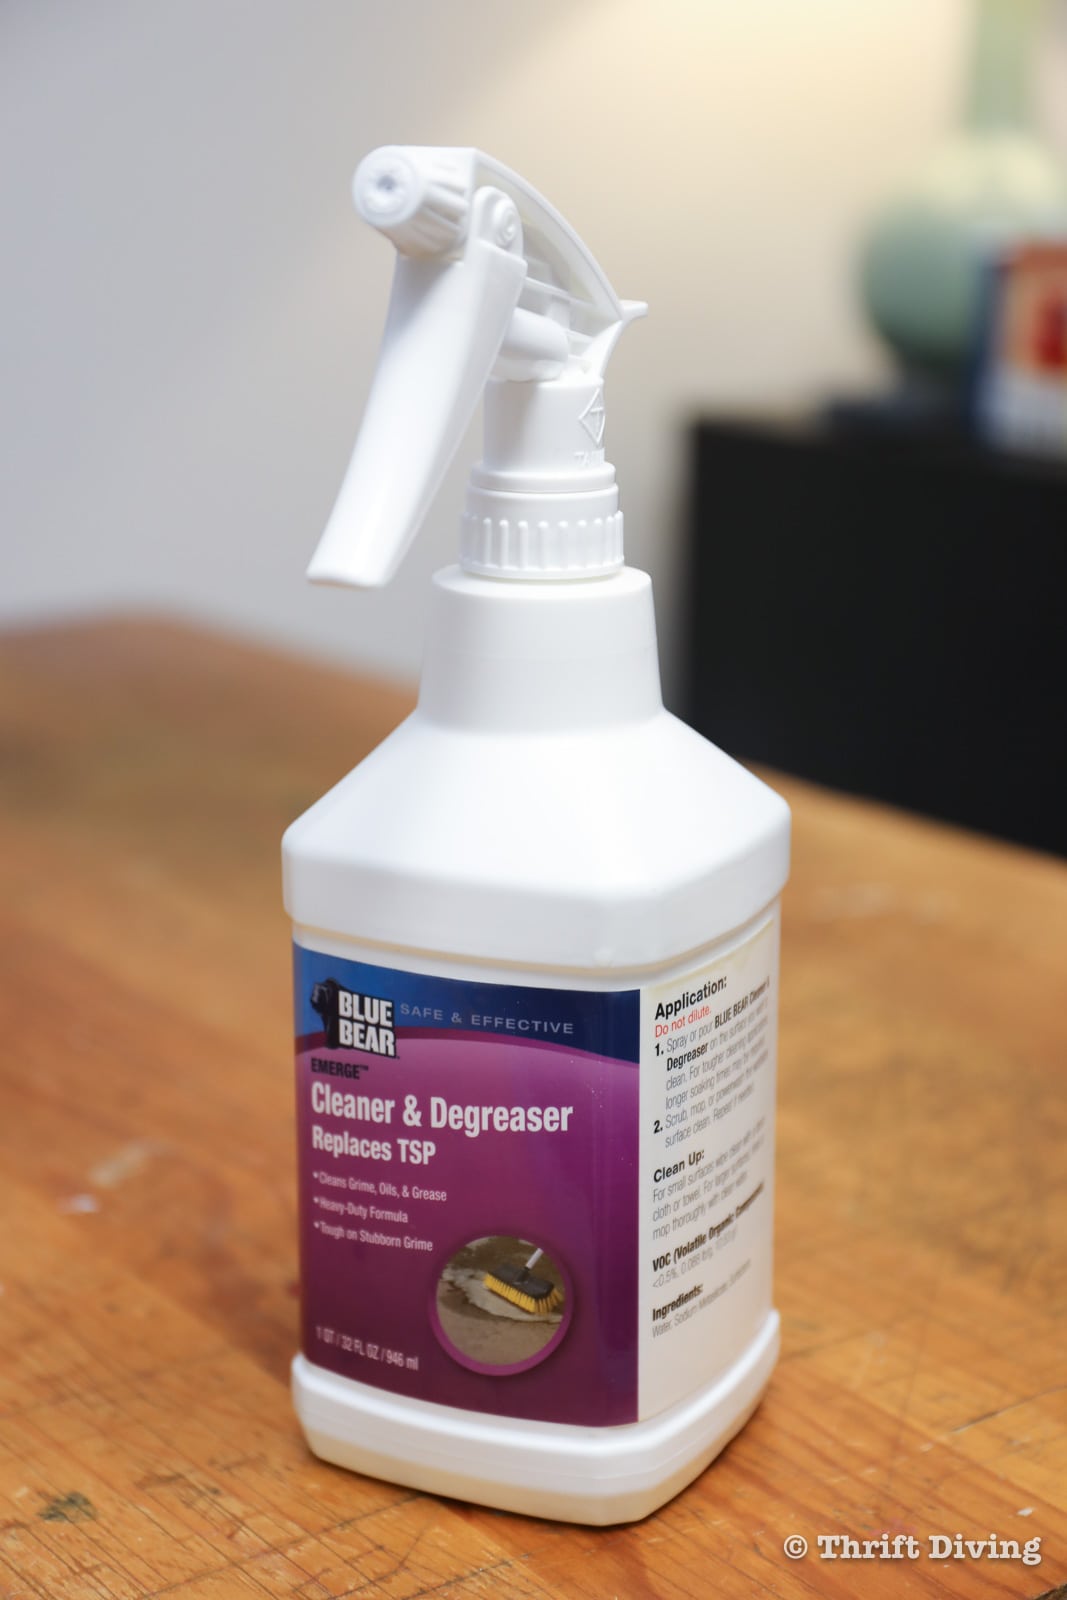
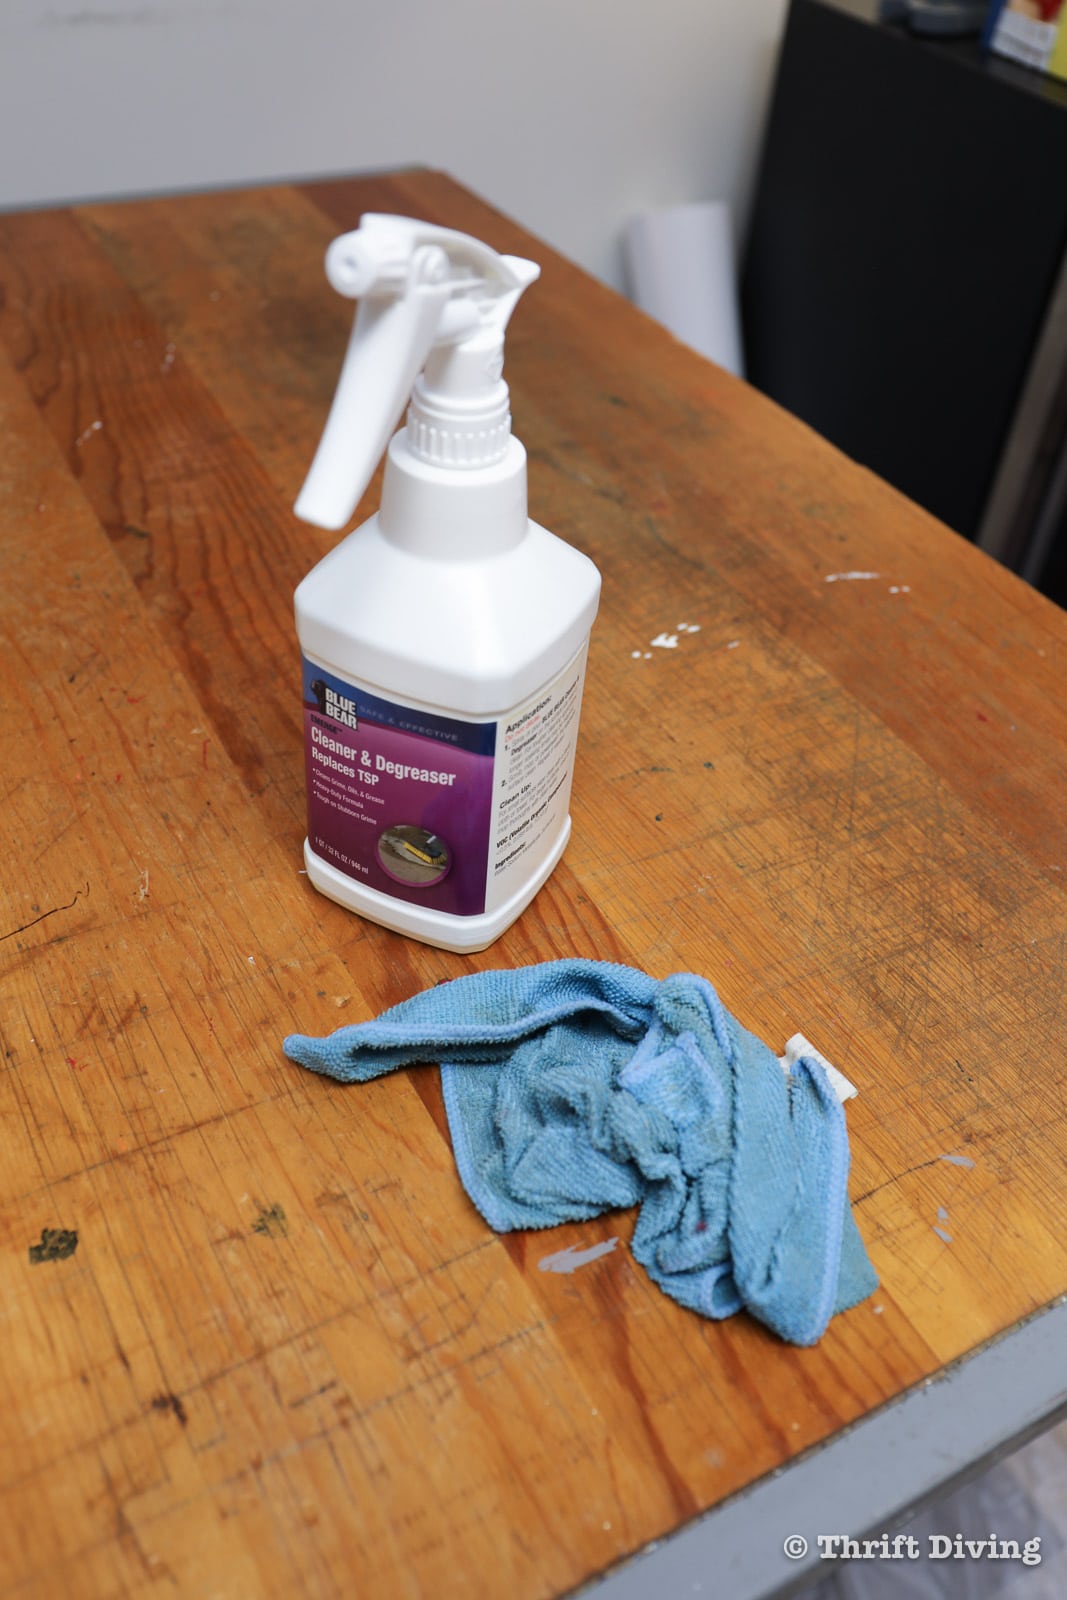
Option #3: Cleaner & Degreaser
My absolutely favorite prep cleaner is the Blue Bear Emerge Cleaner & Degreaser. I have used this stuff on my dirty vinyl wrapped windows when cleaning the exterior of my home and you would be amazed how well it works! I have tried pressure washing those windows but it never gets them as clean as spraying this stuff on and wiping off, revealing the gorgeous bright white vinyl underneath.
If it works that well on really dirty vinyl windows, it works excellent on furniture before painting!
Spray on, wipe off, and then use fresh clean water as your final wiping off.
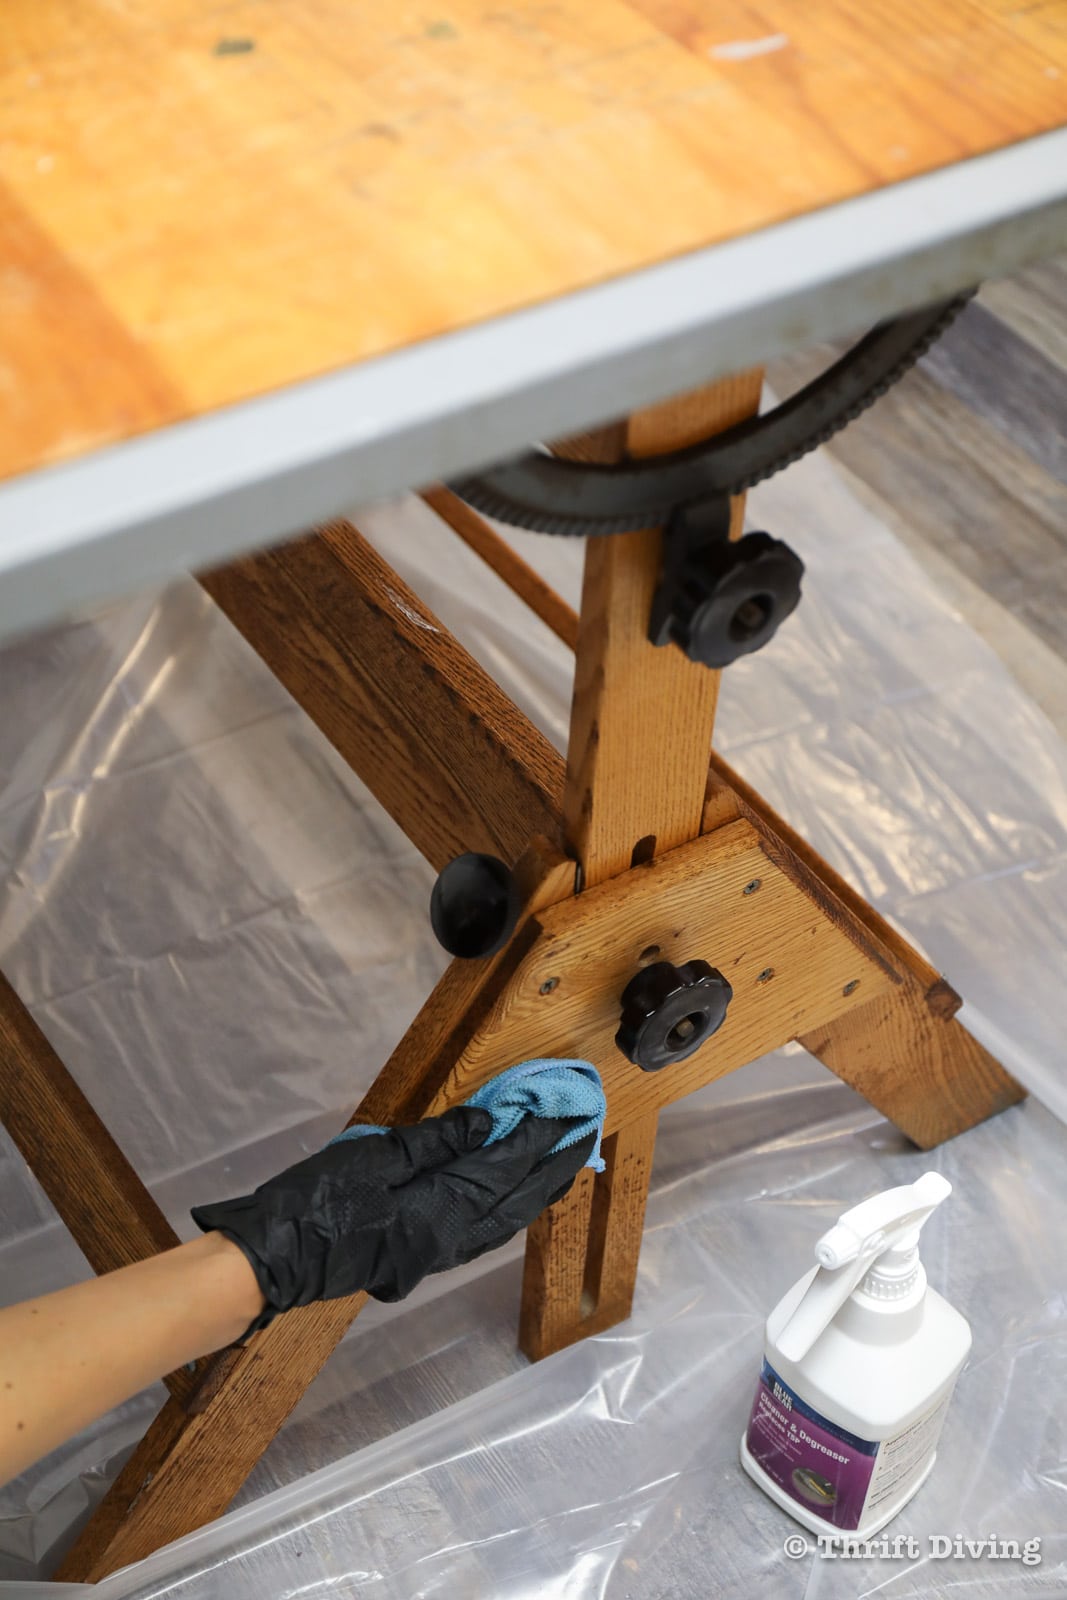
BONUS TIP: Be sure to clean the inside of your furniture, too. This means taking out the drawers and spraying and wiping the inside of a dresser behind where the drawers slide in and out, as well as the inside, underside of desks, chairs, etc. because cobwebs and dust can collect underneath there. And even if there are some parts that you’re not planning to paint, it sure is good to know there are no creepy crawlies and dust bunnies hiding in and under hidden parts!
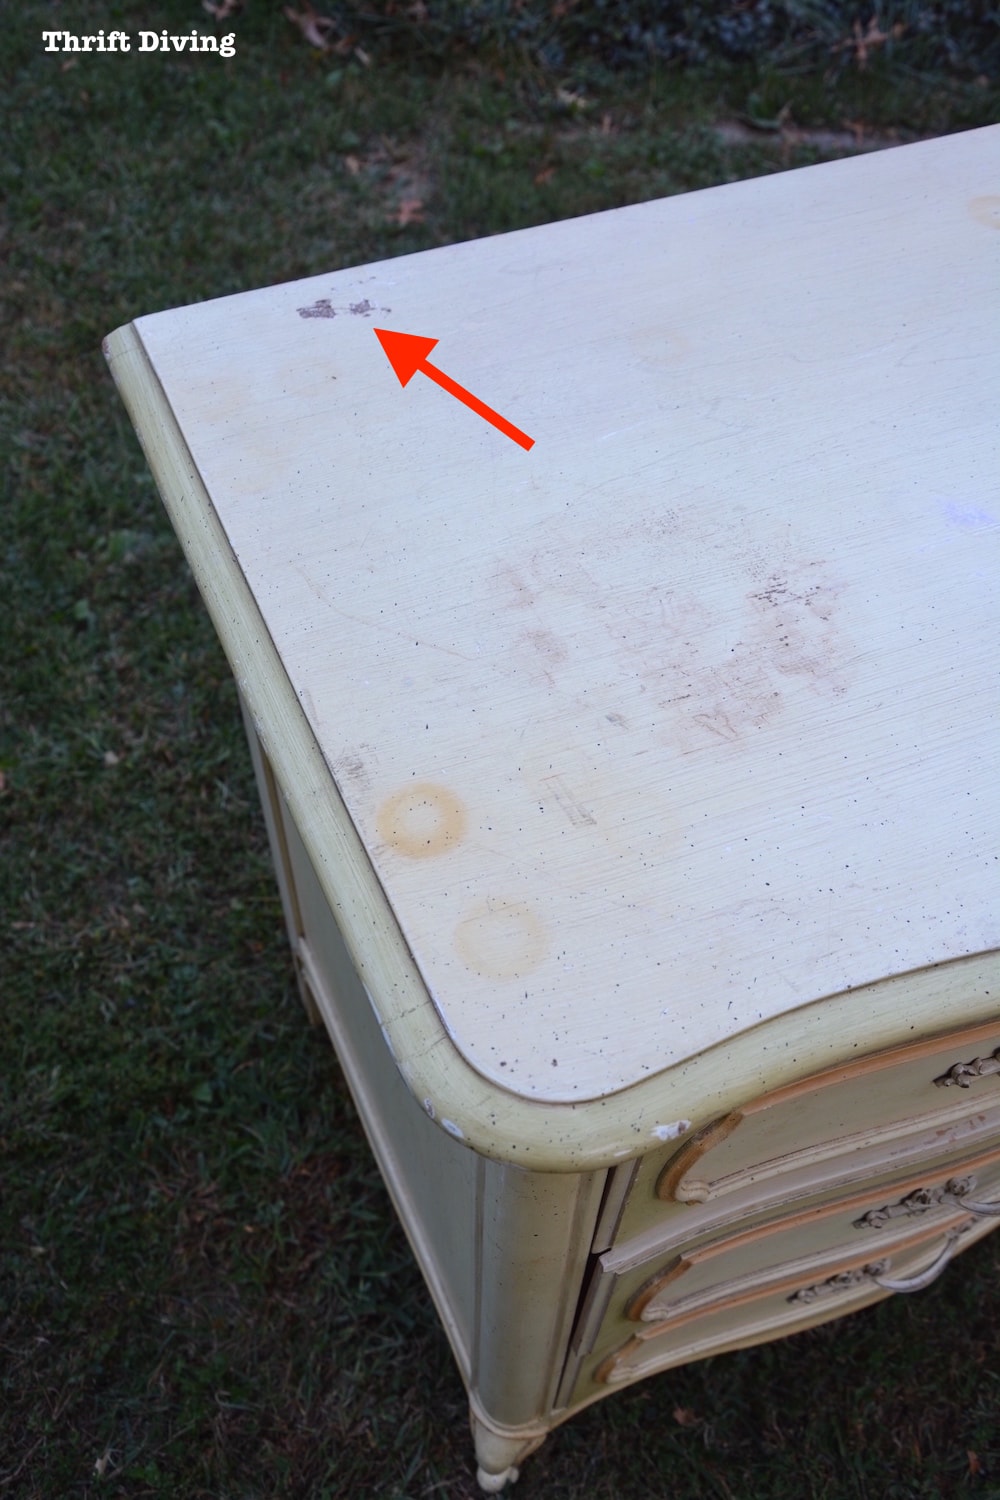
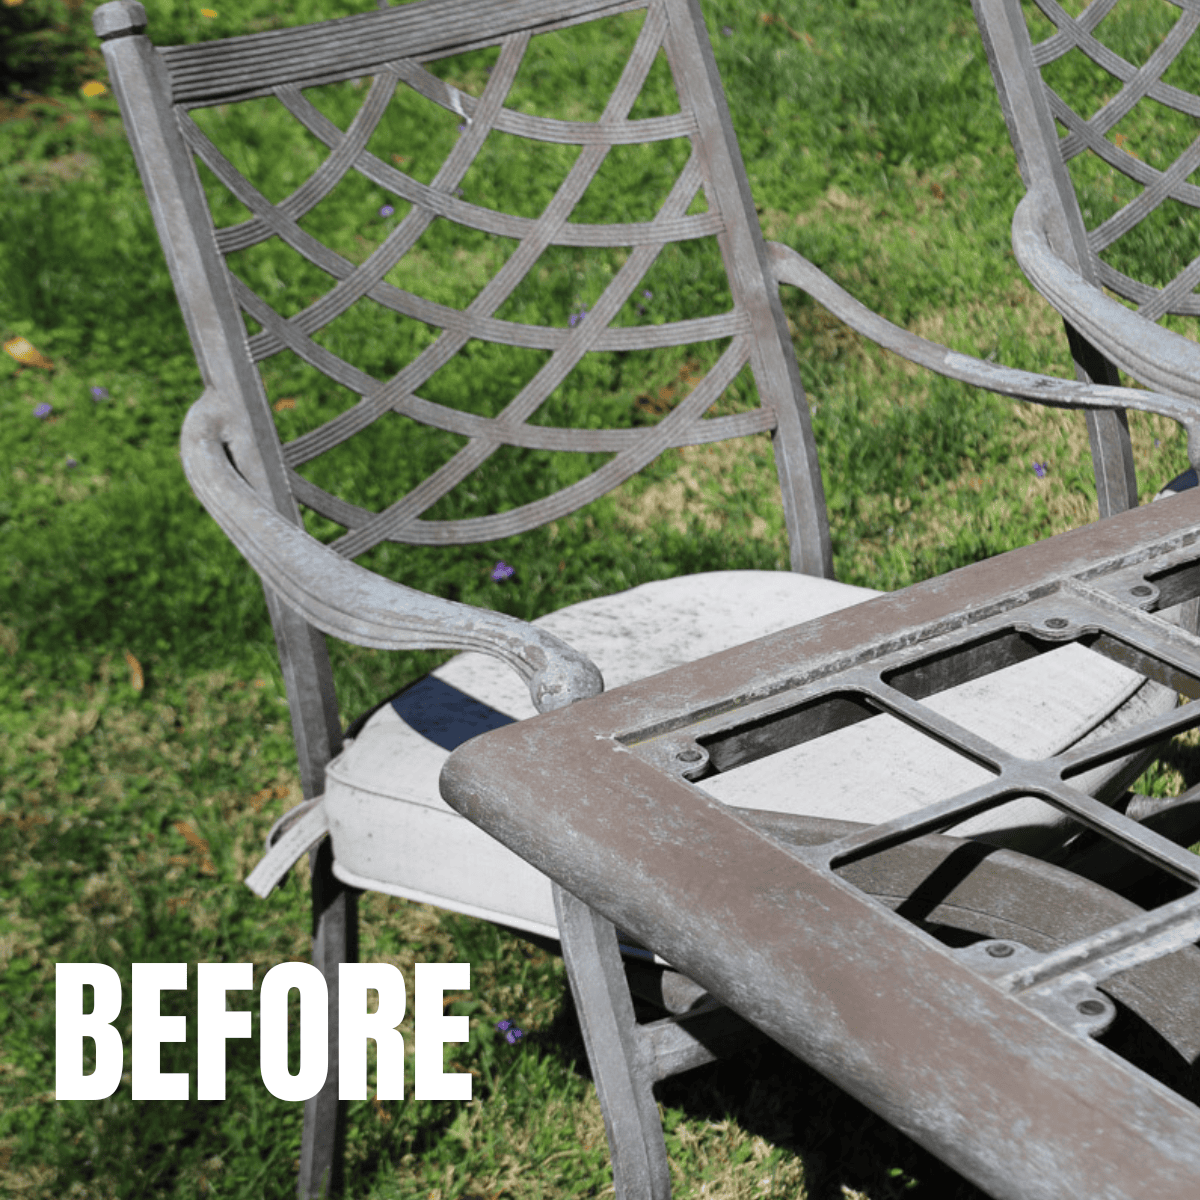
STEP 2: Inspect Your Furniture for Damage
Before you can move on to painting your furniture, you have to know exactly what tools and materials you need before jumping into the project.
The reason many people don’t finish a project is because they get sidetracked by one of these reasons
- A repair they didn’t realize they’ve have to fix and don’t know how to fix it.
- Don’t have the tools or materials you thought you’d need, and by the time you get the tool or material, you’ve already lost interest.
- It’s taking much longer than you expected and you’re like, “Dude, this is taking way too long. I’m over it.”
It’s not always obvious when starting a project what it will entail, but if you inspect things first, you’ll get a pretty good idea. Here’s how to inspect your furniture before painting.
How to Inspect Your Furniture Before Painting
STEP 1: Pull out all the drawers, shelves, or anything that is removable. Are there any bugs? Bug feces? Mouse turds? Signs of insect damage? If there looks to be bugs or evidence there that there once were bugs in this piece of furniture, I wouldn’t risk bringing this furniture into your home. (Watch my interview with an exterminator about why it’s so easy to bring in bedbugs and why they’re so hard to get rid of).
STEP 2: Use a flashlight to thoroughly search the entire project front, back, sides, underneath.
STEP 3: Gently rock the furniture back and forth. Is it loose because it’s broken or does a leg just need tightened? Write down what’s causing it to rock and if it looks like something you could fix or not.
STEP 4: Look for any gouges, chipped areas, cracks in the old finish, knots in the wood, or any areas that will prevent your painted furniture from having a smooth surface. These areas will likely need to be filled with wood filler before you can paint it.
Knowing what you’re getting into before you tackle a project helps you to determine how much time, tools, and materials you’ll need before you jump into a project!
Now would also be a good time to jot down a list of the tools and materials you’ll need, based on the repairs and prep work you’ll be doing.
STEP 3: Repair Your Wood Furniture Before Painting
Now that you’ve taken inventory of what may need to be fixed before painting, you can (hopefully) easily make the repairs. This is where wood filler is your best friend!

How to Use Wood Filler to Fill Gouges and Cracks in Your Wood Furniture Before Painting
STEP 1: Using your finger (do as I say….not as I do), spread the wood filler over the gouge or crack, pushing it into the gouges and piling it on taller than the surface you’re repairing.
STEP 2: Let the wood filler completely dry. The more you use, the longer it will take, by the way. Don’t let this discourage you, though. Use the appropriate amount to fill and cover those gouges and don’t try to rush the process.
STEP 3: Once dried, and wearing a dust mask, use 180-grit or 220-grit sandpaper (or another “medium” or “fine” sandpaper) to gently sand the dried wood filler away. Keep sanding with your hand flat and sand until the wood filler is flush with the surface of your furniture.
STEP 4: Add another thin layer of wood filler if the surface imperfection still isn’t completely smooth and flat. You won’t need to add quite so much. Use a plastic putty knife held at a 45-degree angle to help force the wood filler into the remaining low spots.
STEP 5: Once dry, sand smooth with a flat hand (or a sanding block), and that’s it! Wipe away the sanding dusk.
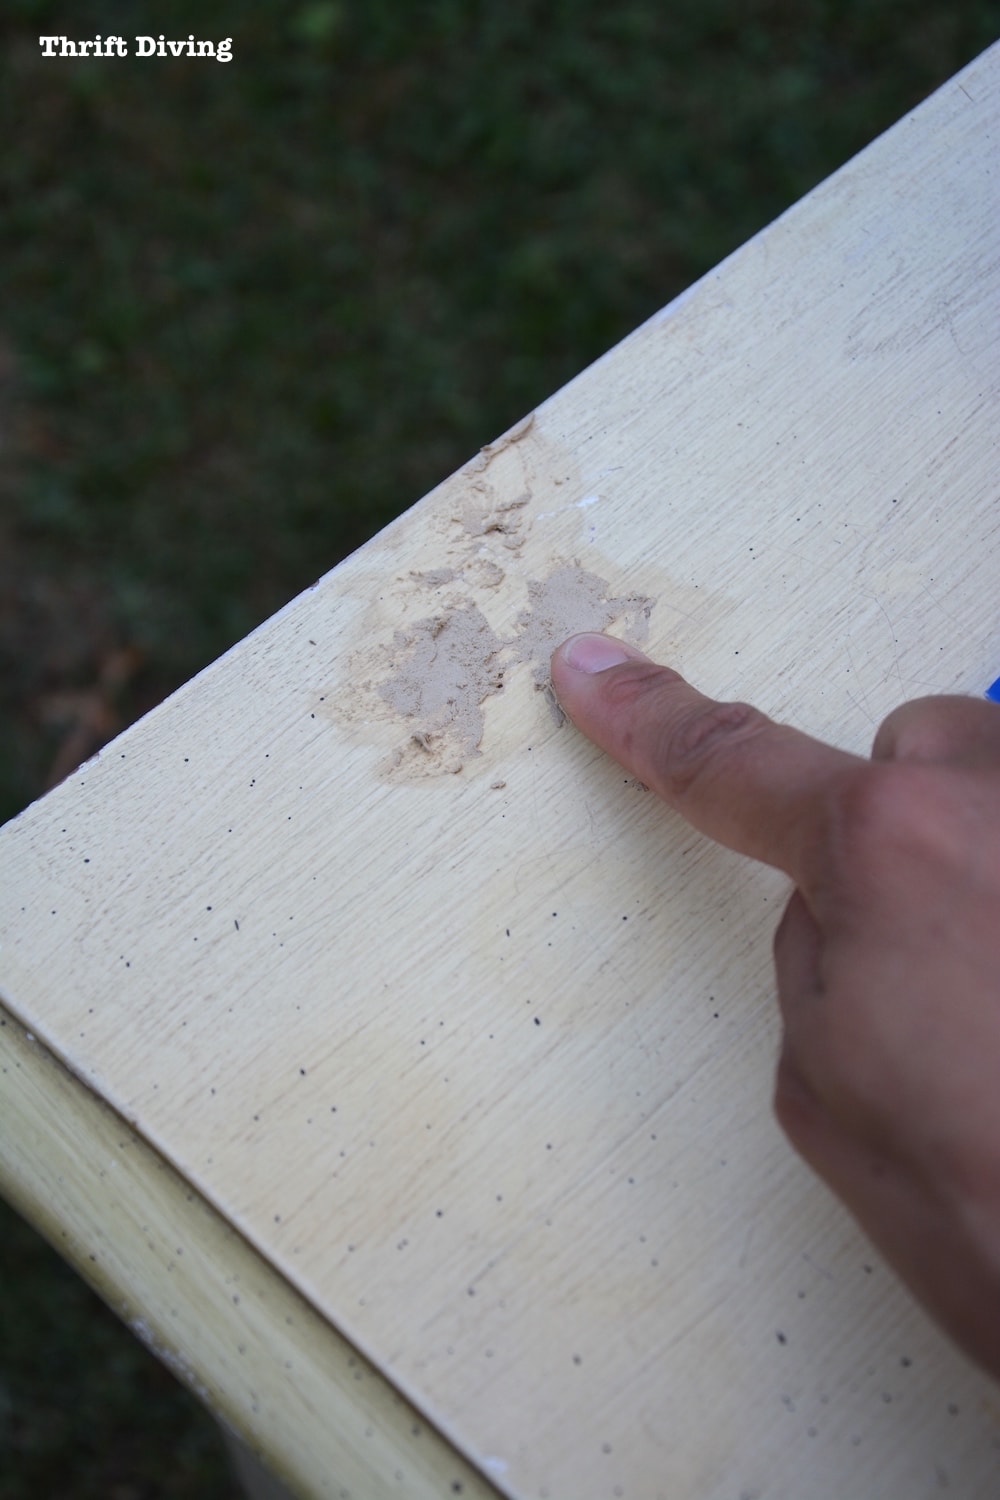
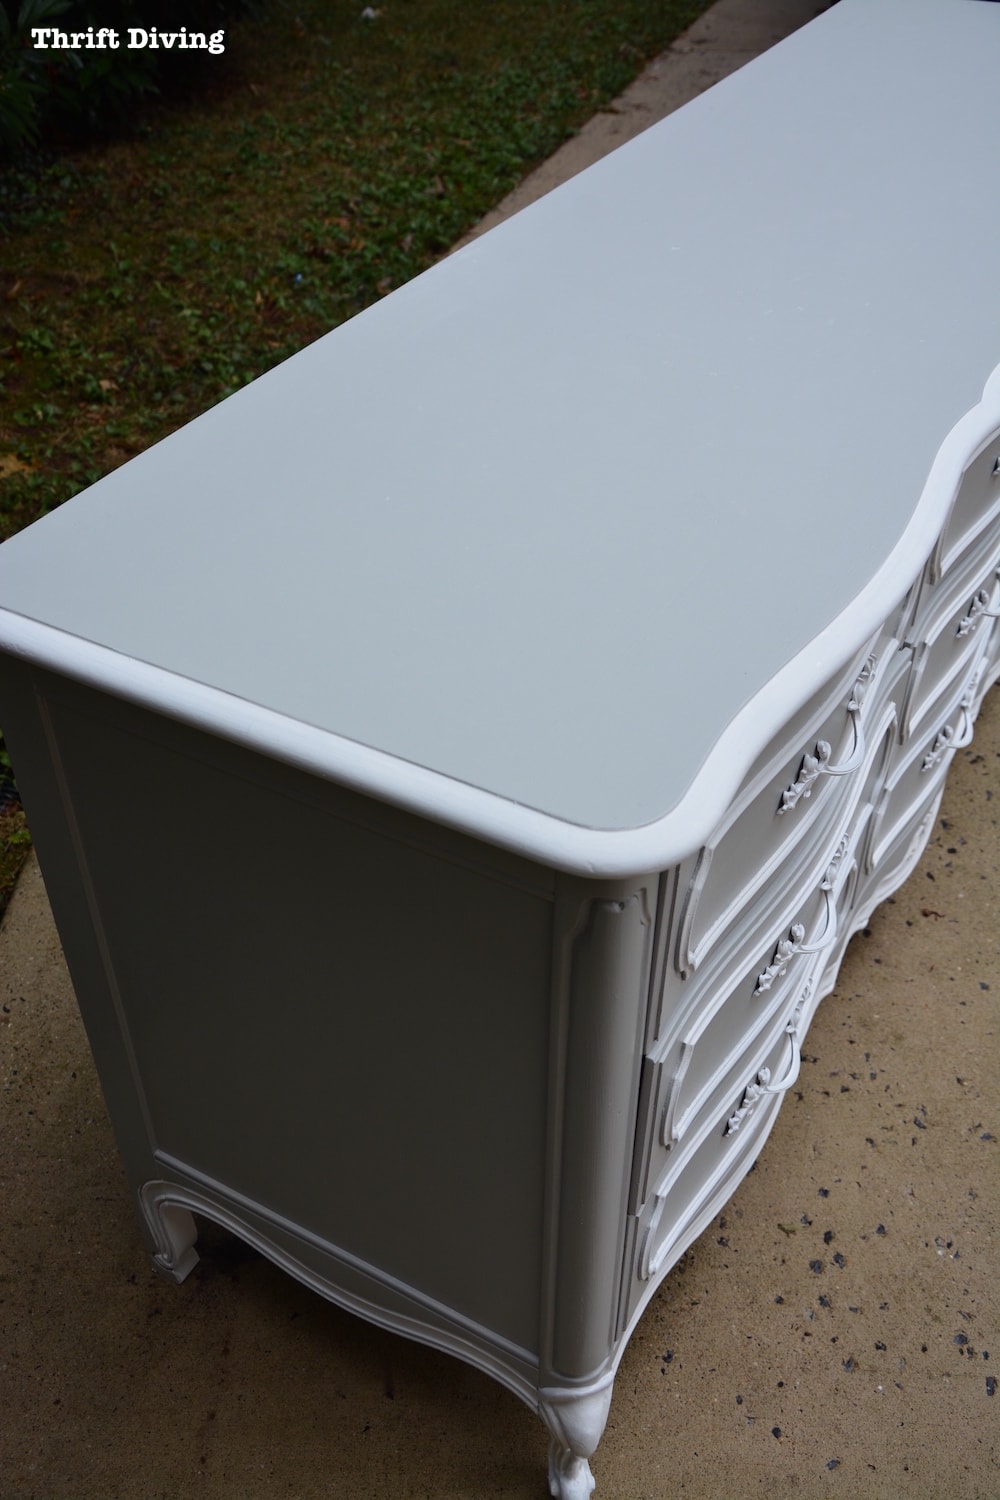
As you can see below, following these steps and then painting over the surface, the surface imperfections are gone. 🙂
Some Other Repairs You Might Have to Make Before Painting
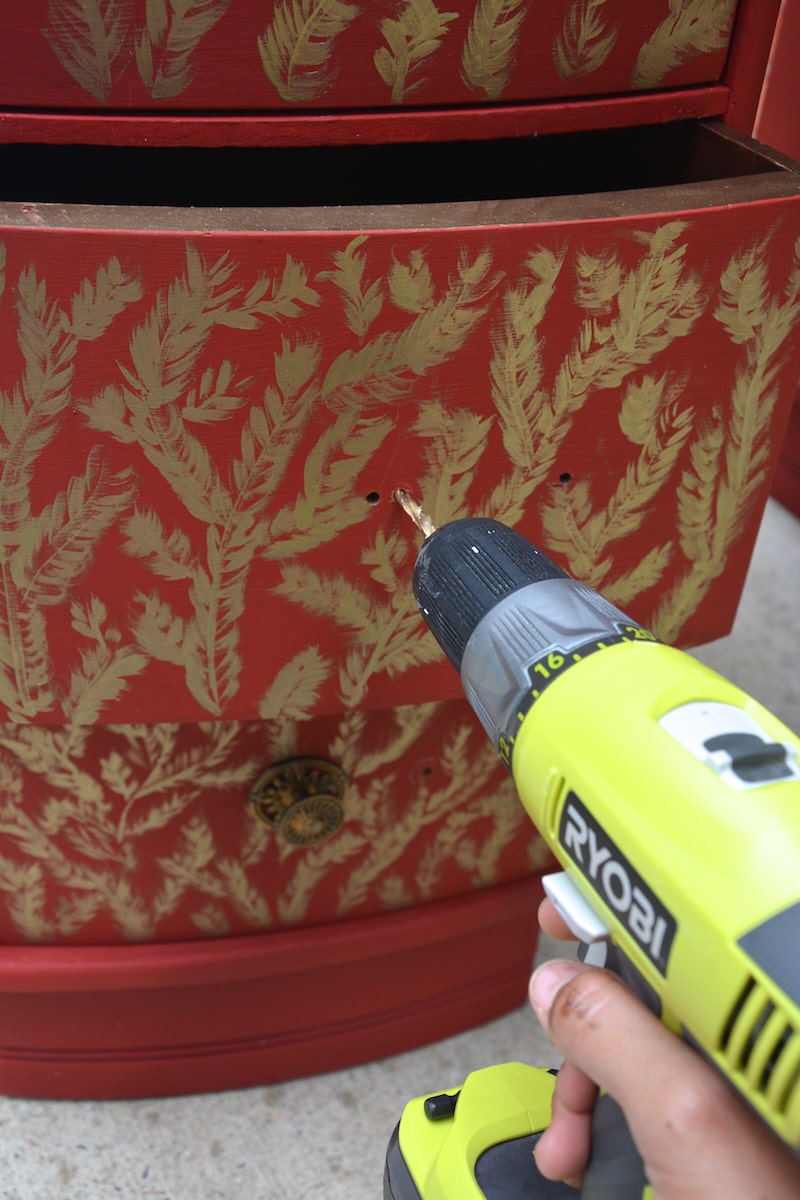
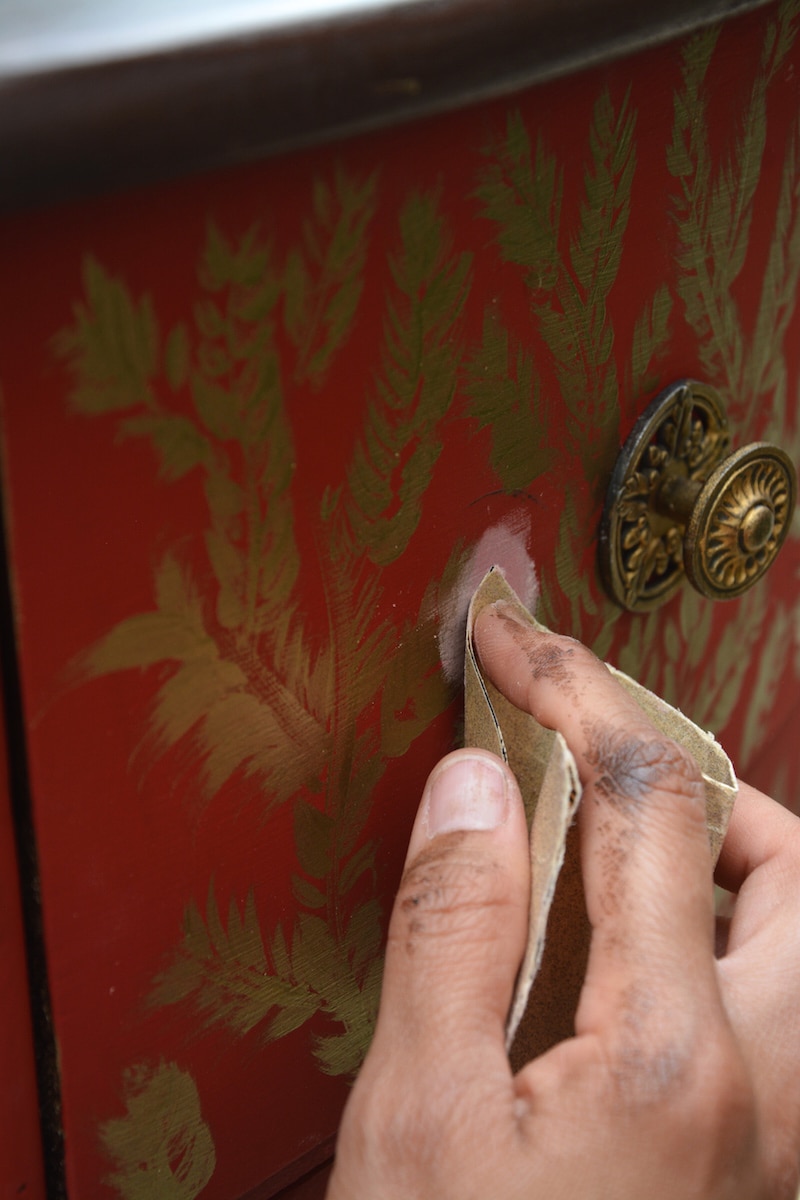
Gouges, chips, cracked veneer, and other low spots are pretty common. Another common thing that’s not quite a repair but may require wood filler, is if you’re changing the knobs on a dresser or other piece of furniture.
The old knobs might have two prongs, but you want to add some pretty knobs that require just one hole in the center of the drawer. Here’s how you do it:
How to Drill New Holes for Hardware
STEP 1: Remove the old knobs/handles.
STEP 2: Find the location that you’d like the new knobs/handles to go. Use a tape measure for accuracy. Mark it.
STEP 3: Use a drill bit to drill the new holes for your new knobs/handles. If you’re not sure what size drill bit to use, do a test on a piece of scrap wood first to make sure the drill bit isn’t too big or small and that your new knobs/handles fit properly. (Remember–it’s always ok to test first before doing something on your “real” project!)
STEP 4: Use wood filler (and the instructions above) on how to fill the old holes from the old knobs/handles so that when painted, the old holes aren’t visible.
STEP 5: Paint your furniture.
STEP 6: Add your new knobs/handles.
You can see down below that I attempted to add new knobs but didn’t do an important step before I hand-painted the golden designs! As a result, I messed up my beautiful finish and had to spend extra time and frustration fixing the finish. Again…do as I say, and not as I do. LOL
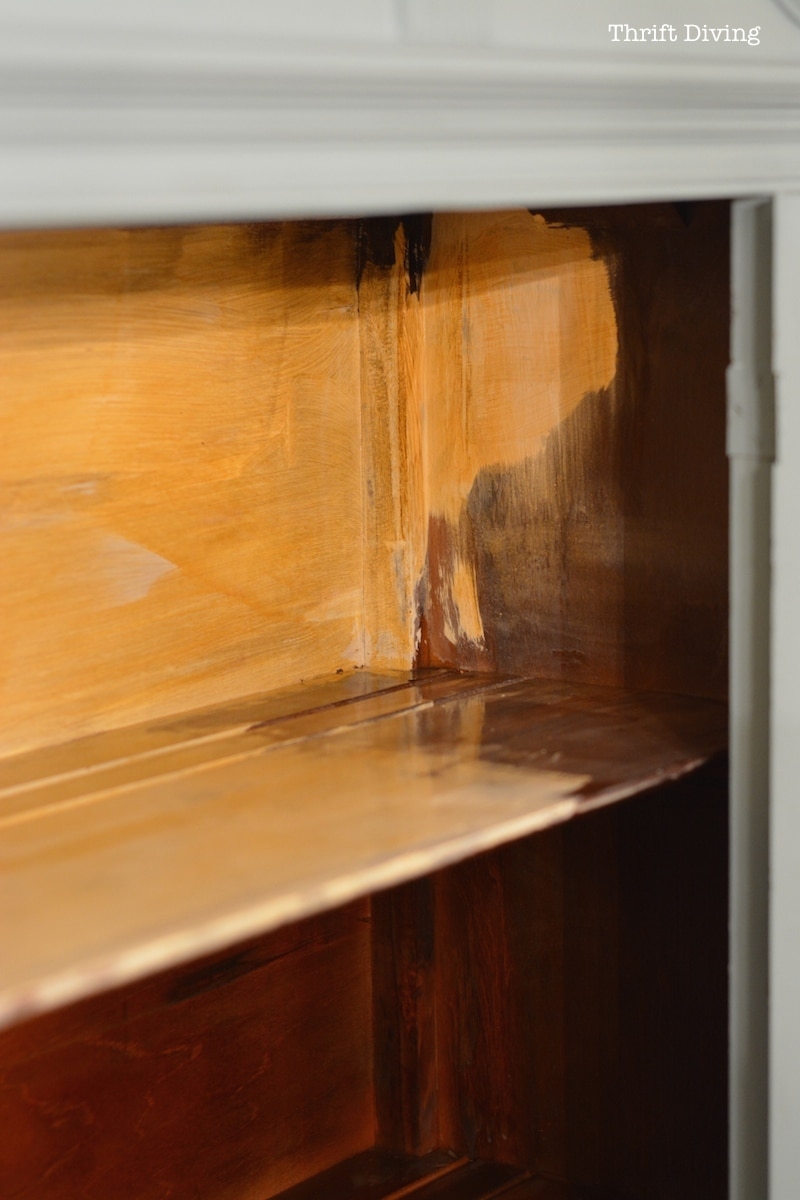
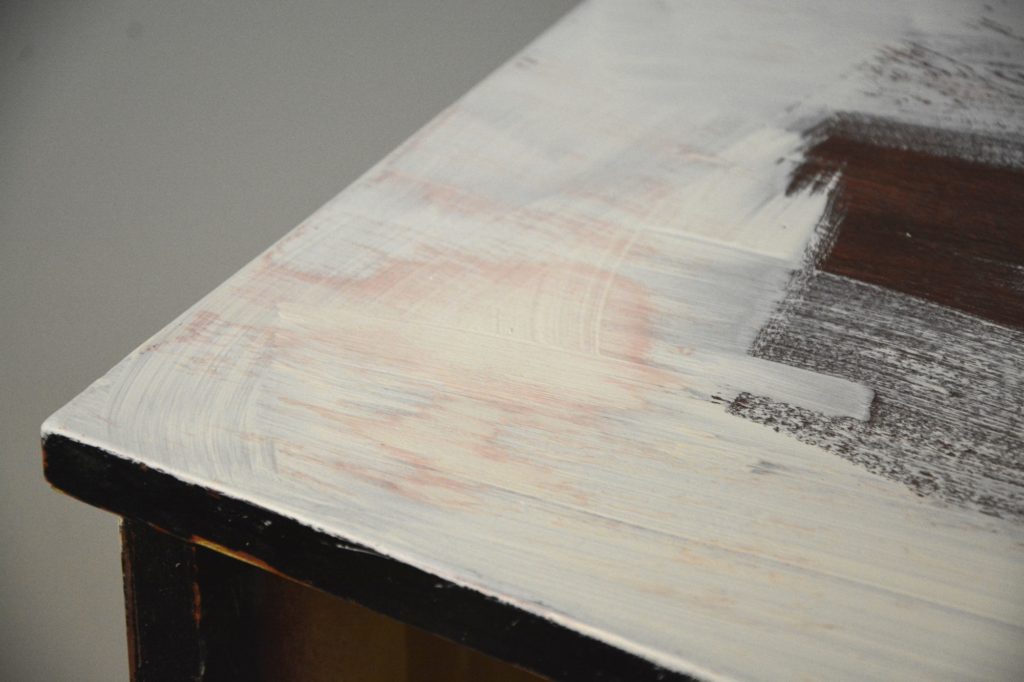
STEP 4: Test Your Wood Furniture for Bleed Through
Did you know that certain woods, such as redwood, cedar, and mahogany furniture are infamous for bleeding through your pretty white and light colored paint? Sometimes you’re not sure that a piece of furniture is going to bleed through, so you need to test a small inconspicuous area first to see.
These woods have naturally occurring tannins that cause brownish, tan discoloration in white and light-colored paints. And no matter how many coats of paint you put on your furniture, it will STILL.BLEED.THROUGH.
Seriously, it’s the worst.
It’s better to know this up front so you can properly prep a piece of furniture than to get to the end and think it’s beautiful, only to come back 2 hours later and see it discolored and reddish-orangey, like what happened to the inside of my pretty little china cabinet.
READ MORE: 10 Common Furniture Painting Mistakes and How to Prevent and Fix Them
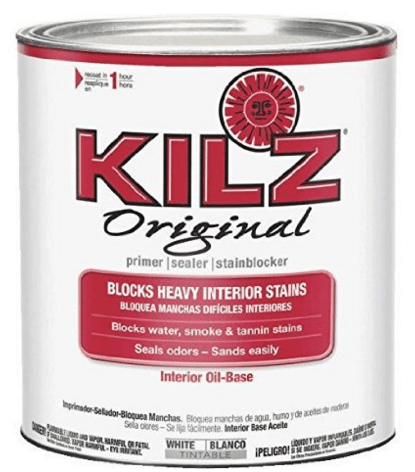
The best products to use if you discover that your wood furniture is bleeding through are (affiliate links):
- KILZ Oil-based Stainblocker (paint on)
- KILZ Oil-based Stainblocker (spray on)
- Shellac Traditional Finish & Sealer
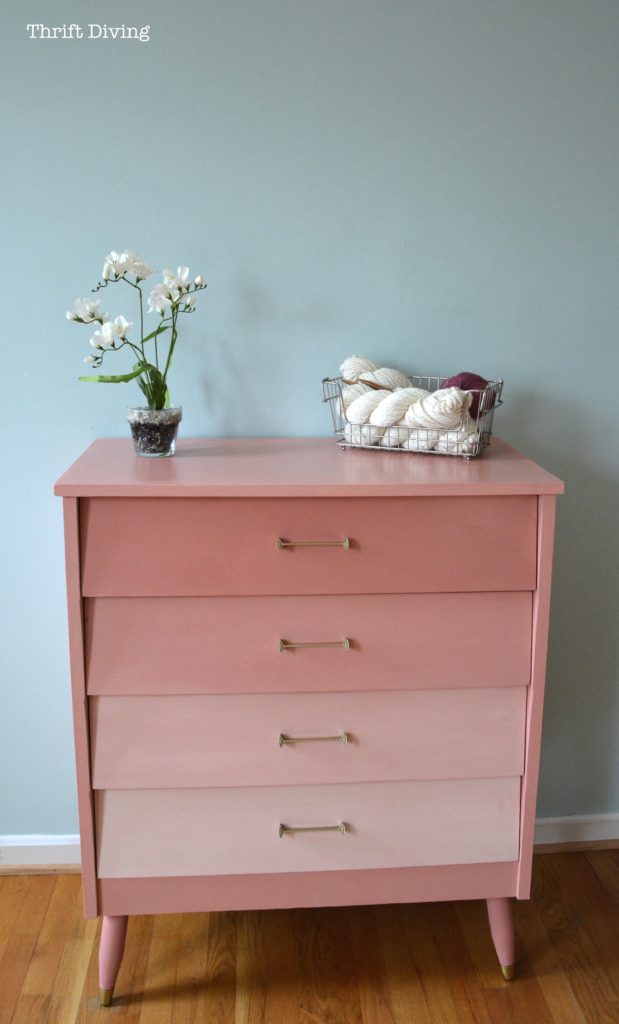
The mid-century modern dresser below was in pretty bad shape because of some worn areas of the wood. But you can also see that it had a slight pink color. I didn’t realize at the time that the white paint I was attempting to paint would become stained with pink!
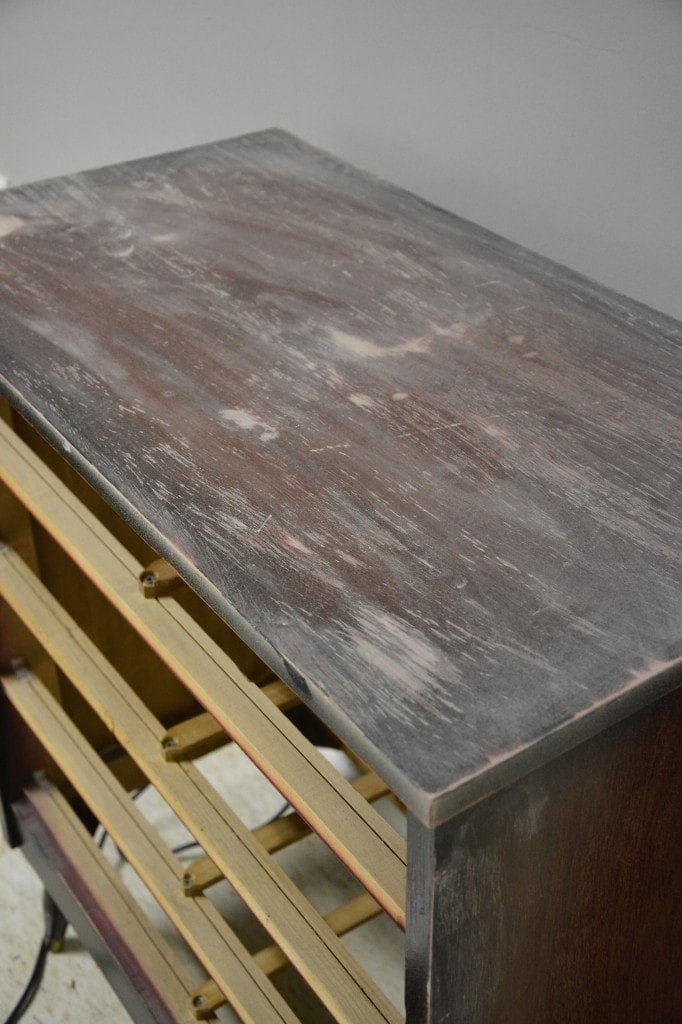
When I noticed that this was happening, I was too inexperienced at the time to figure out what was causing it, or how to fix it. Instead, I decided to just paint it pink. HA! If you can’t beat ’em, join ’em, right? 🙂
I really liked how this mid-century modern pink ombre dresser turned out. What a pleasant mistake and cover-up! But not all projects end so well. If you’re prepared for the “what-ifs” you can tackle them head on with less frustration than I had felt when I painted this. 😉
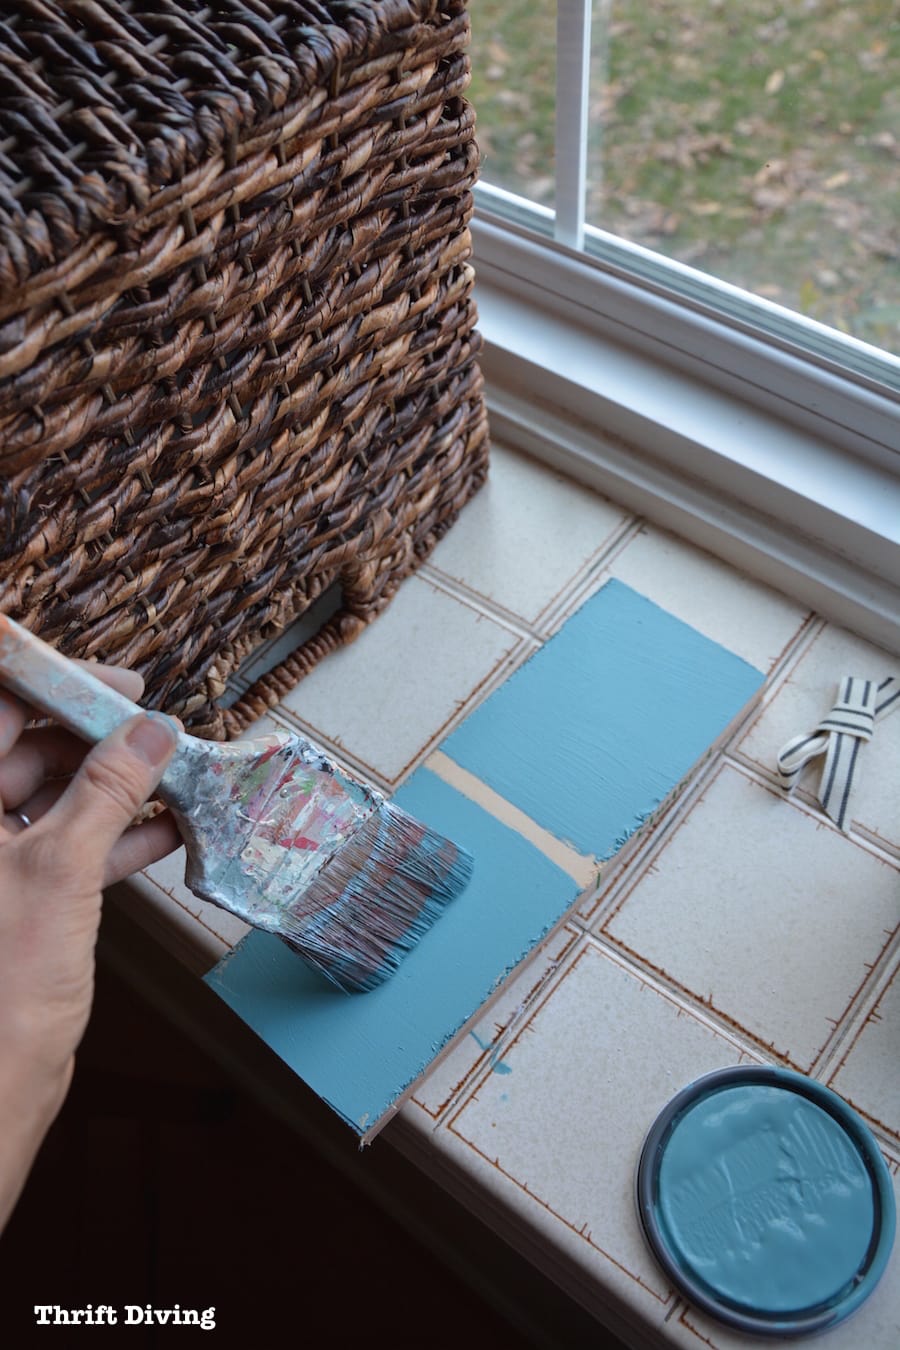
TIP: Create a Color Combo Test Board
Another important aspect of the “test” phase of your prep work is to create a color combination sample board to see if you really like the colors you’ve selected.
I like to take a piece of scrap wood lying around and use some of the colors I am thinking about. Or if there is a certain stencil that I like to use. Will the color combos with the stencil look nice? Better to find out on a test board than to “ruin” your project and have to start all over from the beginning.
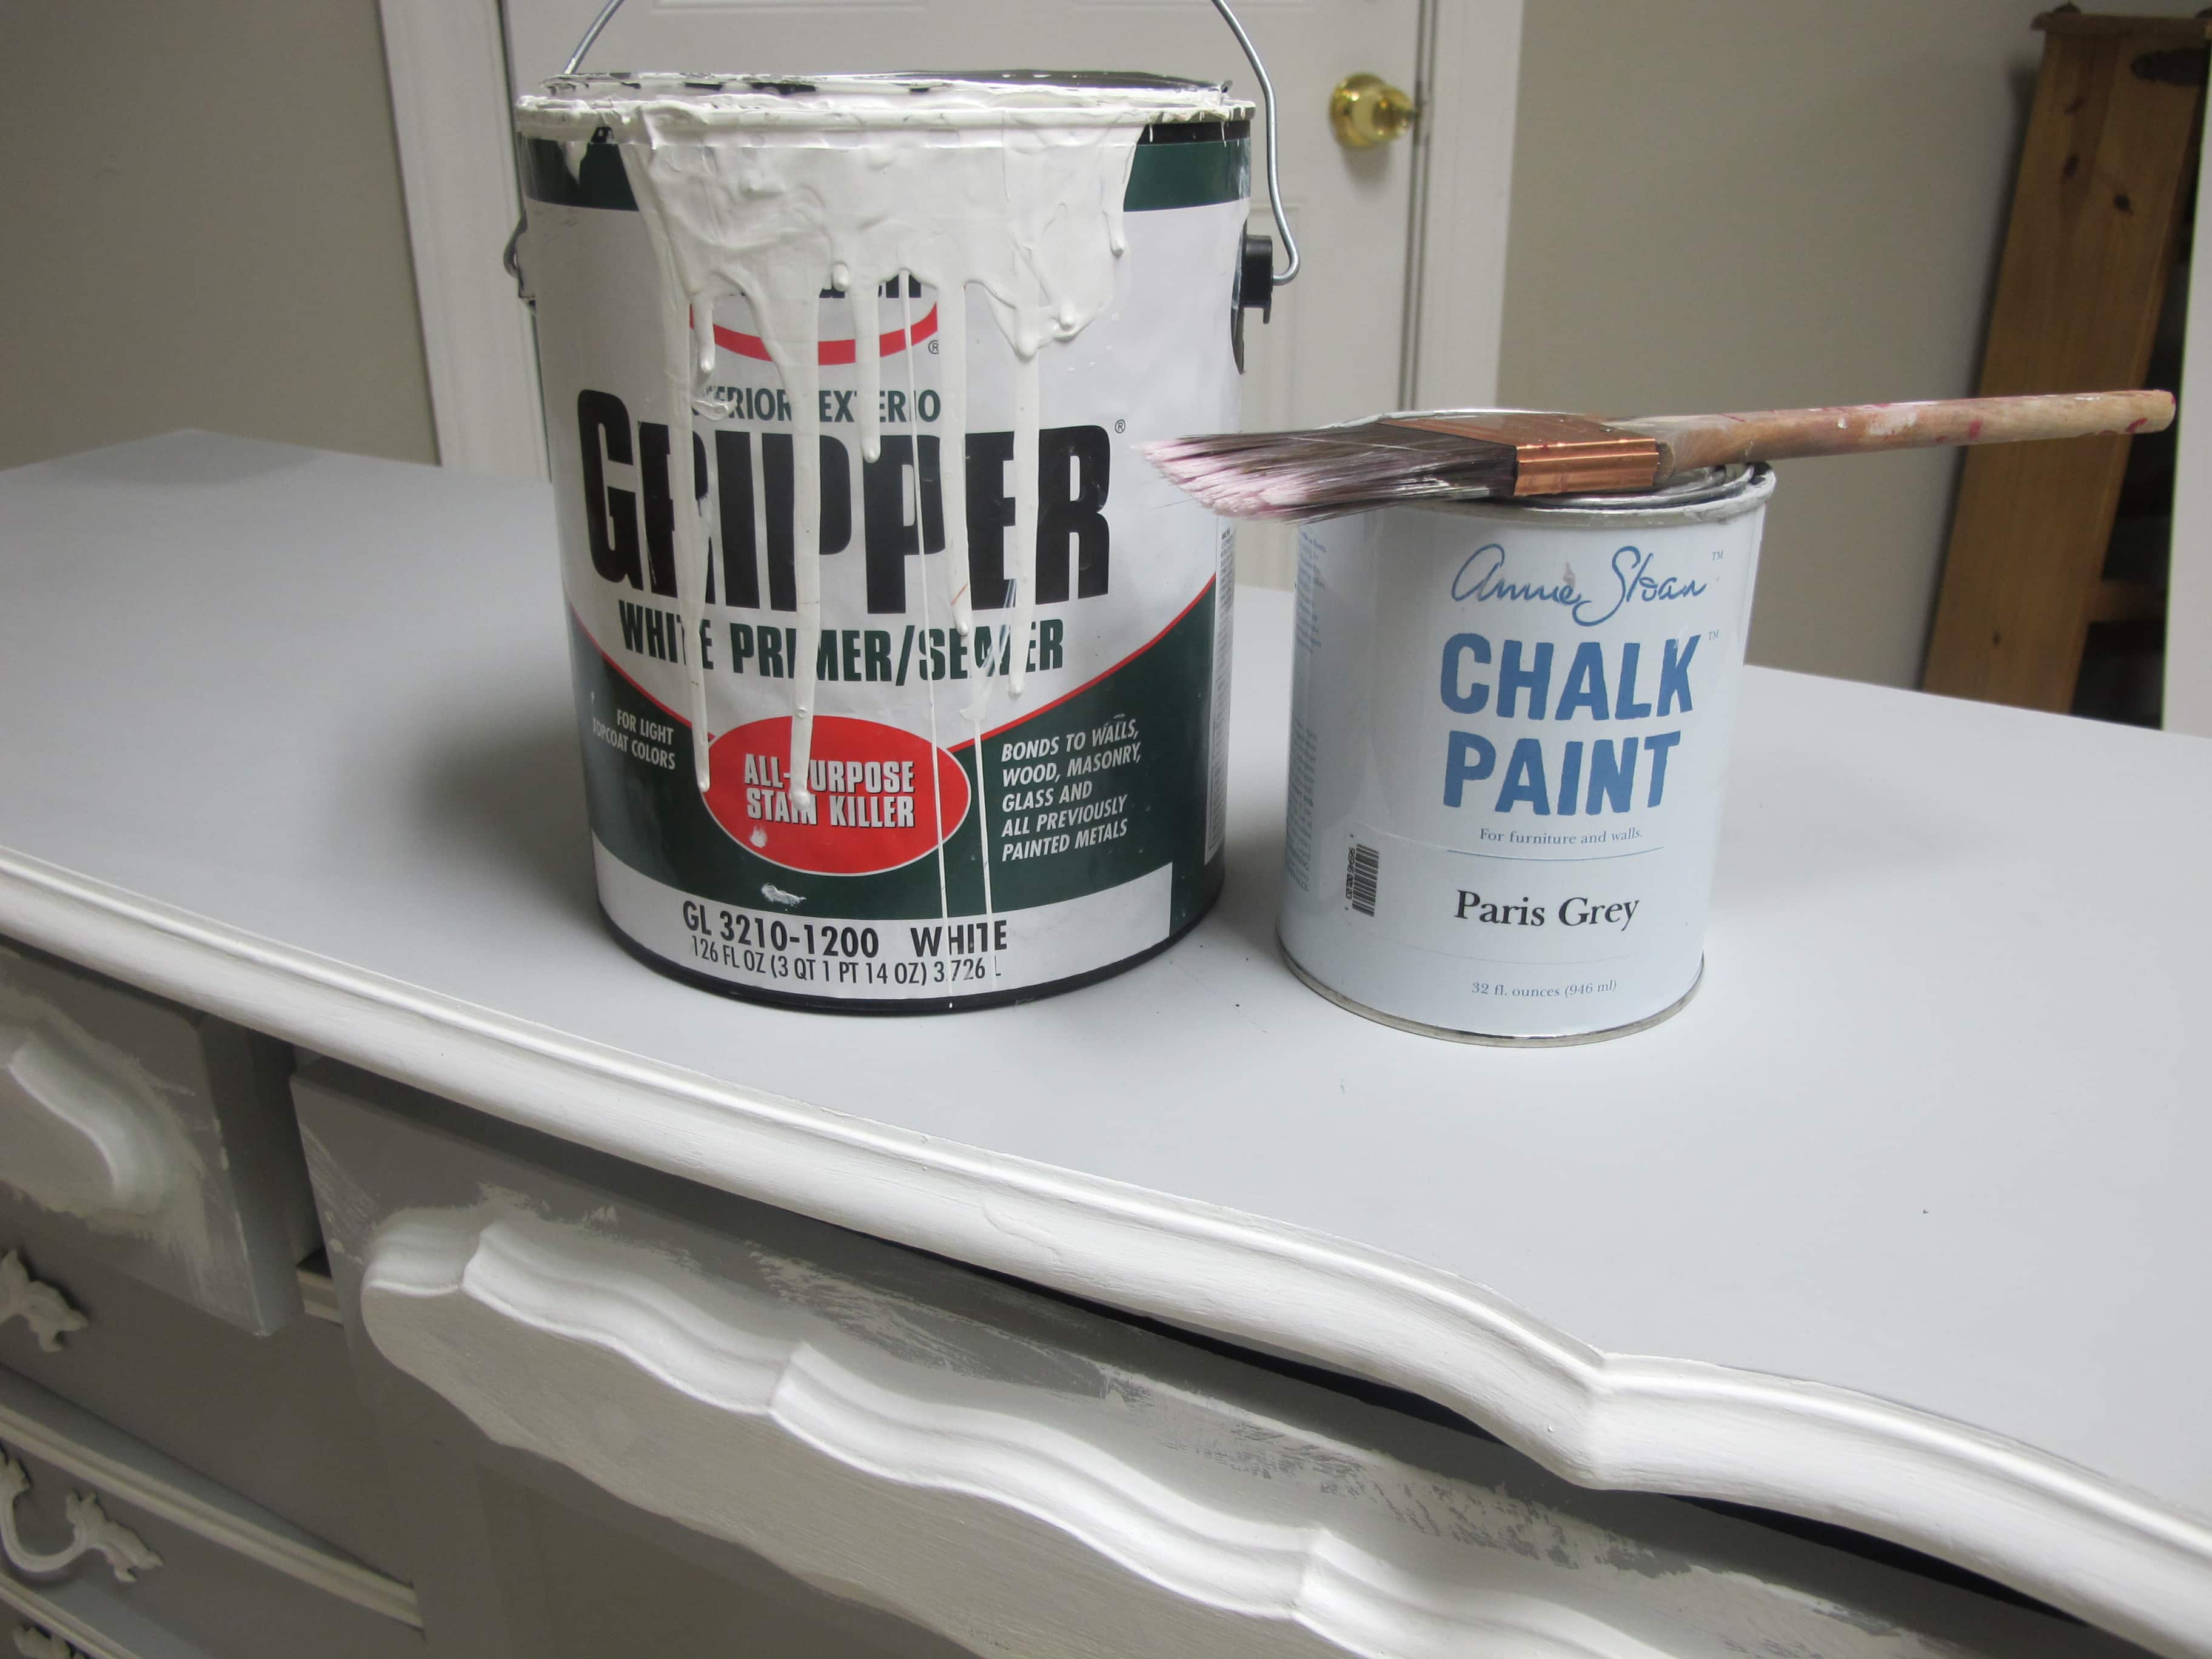
Yes, But Can You Skip Priming Furniture Before Painting?
And here is where some people say “yes” and others say “definitely not.” I am from the camp that says, “MAYBE.”
Years ago, I would tell people that they could skip priming because that’s what all the furniture paint brands market to you; that their brand of paint requires no priming. However, here are the times when I think you CAN skip priming and the times when you SHOULDN’T.

Yes, You Can Skip Priming Your Furniture Before Painting If:
- The furniture will be used in an area that won’t get a lot of things set or dragged across it, such as a TV console, decorative shelves, side tables, or a decorative chair without a lot of use.
- There is no bleeding through when white or light-colored paint is applied to the wood and it doesn’t discolor.
- You’re using a quality furniture paint (like one of these) that was made especially for furniture as it’s more “hearty” and is formulated to stick well to wood, laminate, plastic, particle board, and more (latex wall paint from the paint department of a big box store doesn’t work this well).
- You’re painting furniture that is light-colored and your paint covers it well in two coats. (One coat only isn’t recommended. Two coats provides better coverage).

No, You Shouldn’t Skip Priming Your Furniture Before Painting If:
- Your painted furniture will get a lot of high-traffic use, like a dining room chair, dining room table, coffee table that will get a lot of wear and tear, dresser that will have lotions and perfumes or other objects set down on it frequently.
- You’re using regular wall paint from the paint counter of the big box stores. These wall paints don’t work well directly over furniture. You’ll need to lightly sand, prime, and then paint. Don’t use semi-gloss paint because it will always feel “gummy” and “tacky” and will peel, particularly if it’s a high-traffic piece of furniture.
- The furniture you’re painting is very dark and you’re painting it white or a light-color. It could take several coats of expensive furniture paint to cover dark woods or colors. Less expensive primer can do the job better and you save your furniture paint for the final two coats. 🙂
Prepping Your Furniture for Painting Doesn’t Have to Be Difficult
As you can see, prepping is pretty simple when you follow the rules of Clean, Inspect, Repair, and Test. Don’t skip any of these steps when working on painting furniture, and you’re off to a better start than the next person that just jumps in with a paint brush and a vision and no plan.
Loved this post?? Click here to SAVE it on Pinterest here!
![]()

Download the 5 freebies!

Thrift Diving inspires women to decorate, improve, and maintain their home themselves...using paint, power tools, and thrift stores! Use these 5 printables, checklists, and ebooks to get started!


This post was a keeper! I’ve been painting for a few years, but there’s always more to learn and you were quite thorough. Congrats on the 400K YouTube subscribers! That’s a great milestone!
I didn’t see most of the paints that I have used in the past. I am excited to try some that you suggested. The only one of all of them I have used is Annie Sloan and she is pretty much the Queen of Chalk Paint, IMHO. 🙂 Thank you for an updated outline on how to prepare a piece to paint and for the list of paints you like. I always feel when I read your posts that you are a real person, and a nice one.
My best to you and your family-
Sue Schneider
Hi Sue! Great to see your comment! 🙂 What brands of paint have you used? There are soooo many of them now. I think it can get confusing for people to know which one to select. But we all have our preferences, so it does help to try different ones. 🙂 So glad you enjoyed the post!! Thank you!
Absolutely…it takes much more in-depth treatment to kill mold. People often wrongly think bleach or other household cleaners will do it, but no, those don’t do the job.
I’ve always been leery of buying used furniture because of the potential discovery of termites or mold. I’m going through kitchen mold remediation and rebuild right now. Our mold inspector told us about the highest risk areas for discovering mold, and antique furniture is one of those. It just makes cleaning any furniture that much more important…and using a good Kilz product specifically for that.
Oh no, sorry to hear about your mold remediation! Good to know about the mold in antique furniture. If there is mold in the wood of antique furniture, even just cleaning it out wouldn’t work because once the mold compromises wood, it would be much more to remediate than to wipe with bleach and water. That doesn’t kill mold. Thanks for pointing this out, Kathy! Good luck on your mold clean-up!
Is it necessary to clean furniture even when we are going to sand it anyway? Won’t sanding get rid of the the surface dirt, grease, etc…?
Thanks for your reply.
Julia
Hi Julie! I think it’s good practice to clean furniture regardless of whether you’ll be painting or sanding it. You figure if you sand it down while it’s dirty, all that grit can clog up your sand paper, too, shortening its life. Plus, it’s just a good habit to clean everything you bring home, AND inspect it! 🙂
Very Good Post! I am an “old hand” at woodworking, but I learned a few things from this post. I clicked the link to your “What’s the Best Paint For Furniture?” blog and was surprised that you did not list a single paint from the big box stores there. I will definitely follow your advise on that!
Question: I want to paint a piece of furniture, but I want to leave it so that it can be returned to the original finish in the future. What is the best way to prep the surface so that paint or primer does not bleed int the wood? Will a sealer do the job?
Thank you. I read all your posts, and enjoy them.
Hey there, Michael! My thoughts on there being a single best paint for furniture is that that doesn’t exist. There are soooo many brands now, some of them really good, others maybe not as good. But I think it depends on what you try and what you like. Since writing the post on “Best Paint for Furiture” I did try the Rustoleum Chalked for a project and I really did like it. It sanded down really smooth, too. I do plan to add it to the original post. But the list isn’t all-inclusive. There are too many brands to list! As for your question, the best thing to do is to add a coat of shellac over the original finish and THEN paint it, if you think you would want to return it to its original finish. A professional restorer told me that he will do that for pieces that people think they might want to return to the original later down the road! 🙂