Can I Save This Mid-Century Modern Chair Makeover? PART 1
There’s this unspoken rule that you just don’t paint Mid-Century Modern furniture.
Well, you can, sort of like how I painted my son’s Mid-Century Modern dresser drawers white and stripped and stained the body.
But it still looks like an authentic a MCM style piece (at least, I think so).
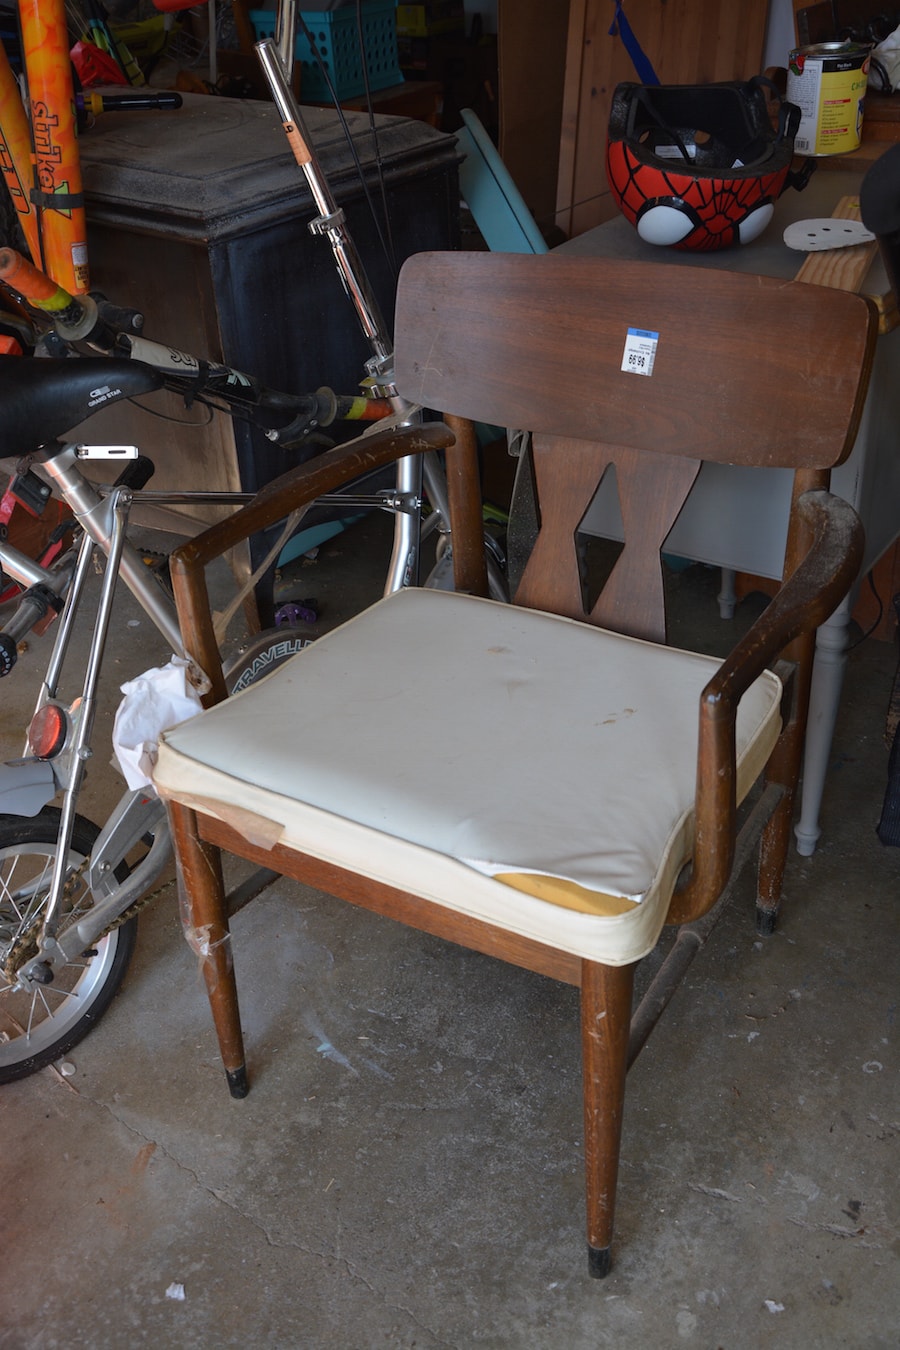
So you can imagine my frustration at the thought that I might have to paint this entire $6.00 thrifted mid-century modern chair.
I really did try to restore it.
It just didn’t go as planned!
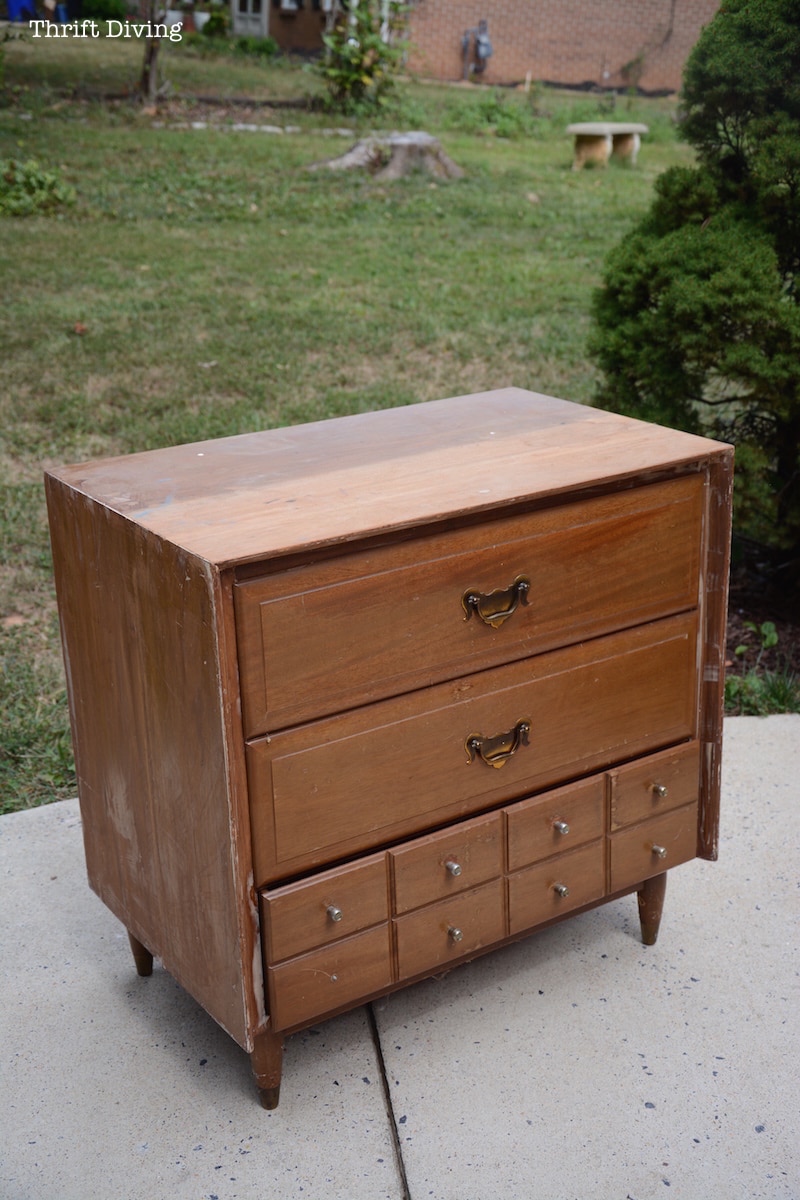
BEFORE
AFTER
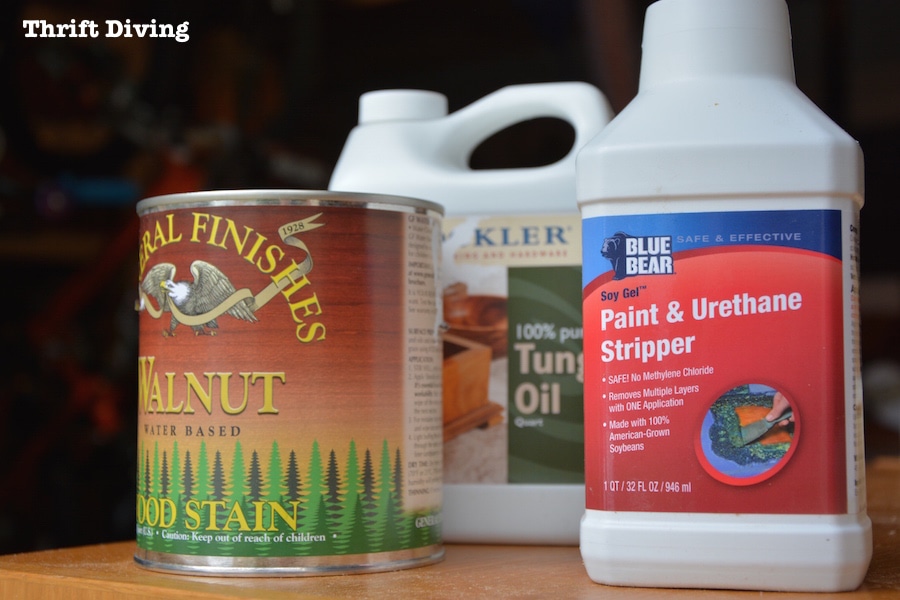
I had shown you how I started this Mid-Century Modern chair makeover last month, but I still had some spots that needed stripping. So I applied some Blue Bear Paint & Urethane stripper on it, in hopes of removing more of the old finish. I wanted to try this stripper because it’s soy-based and is supposed to be low odor.
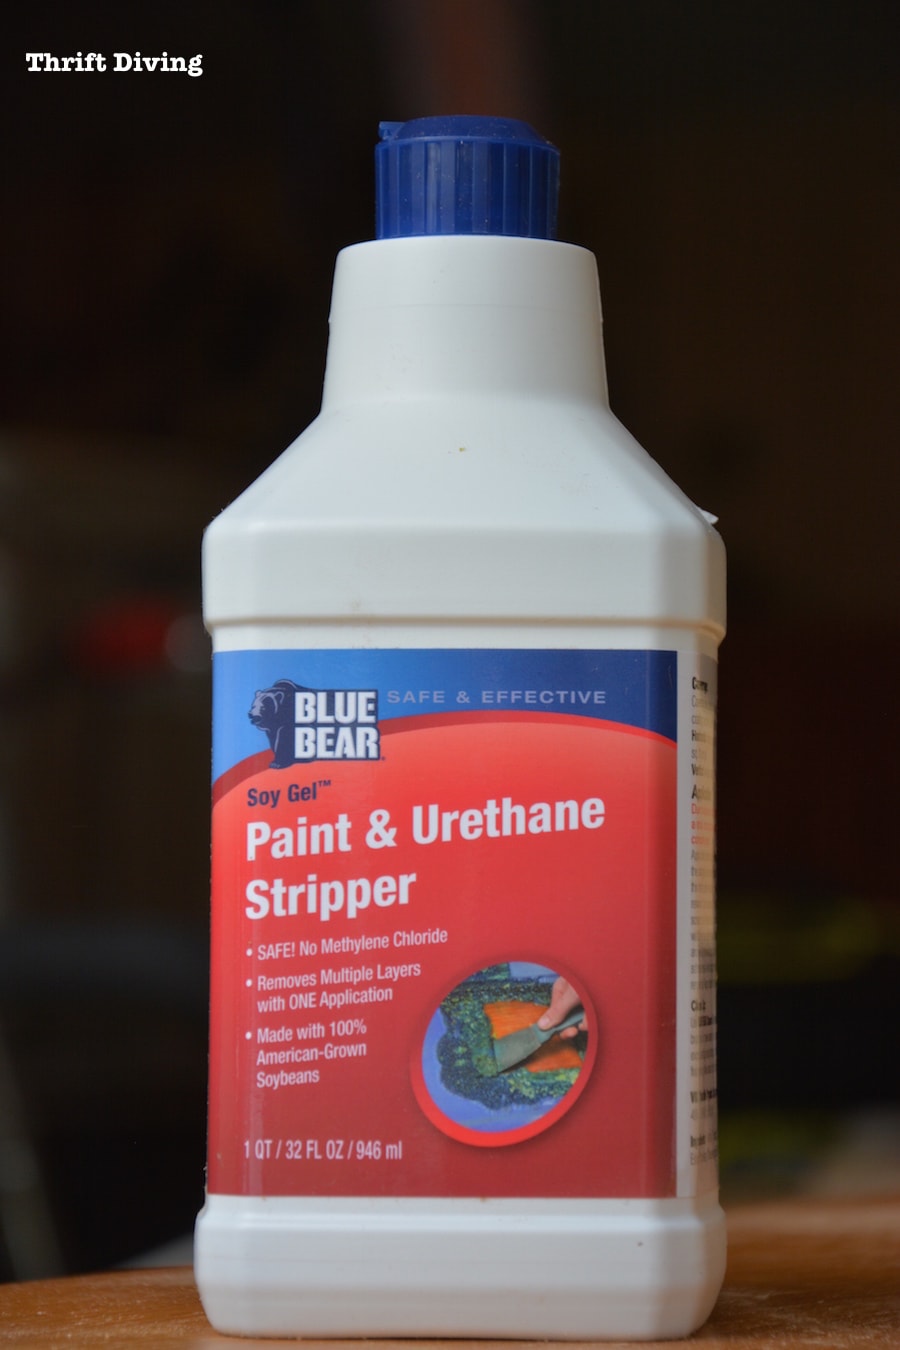
I couldn’t believe how non-smelling it was! You can even use it inside if you’re working on a stripping project indoors (especially in the cold months).
It kind of reminded me of sugary syrup! Like honey, almost.
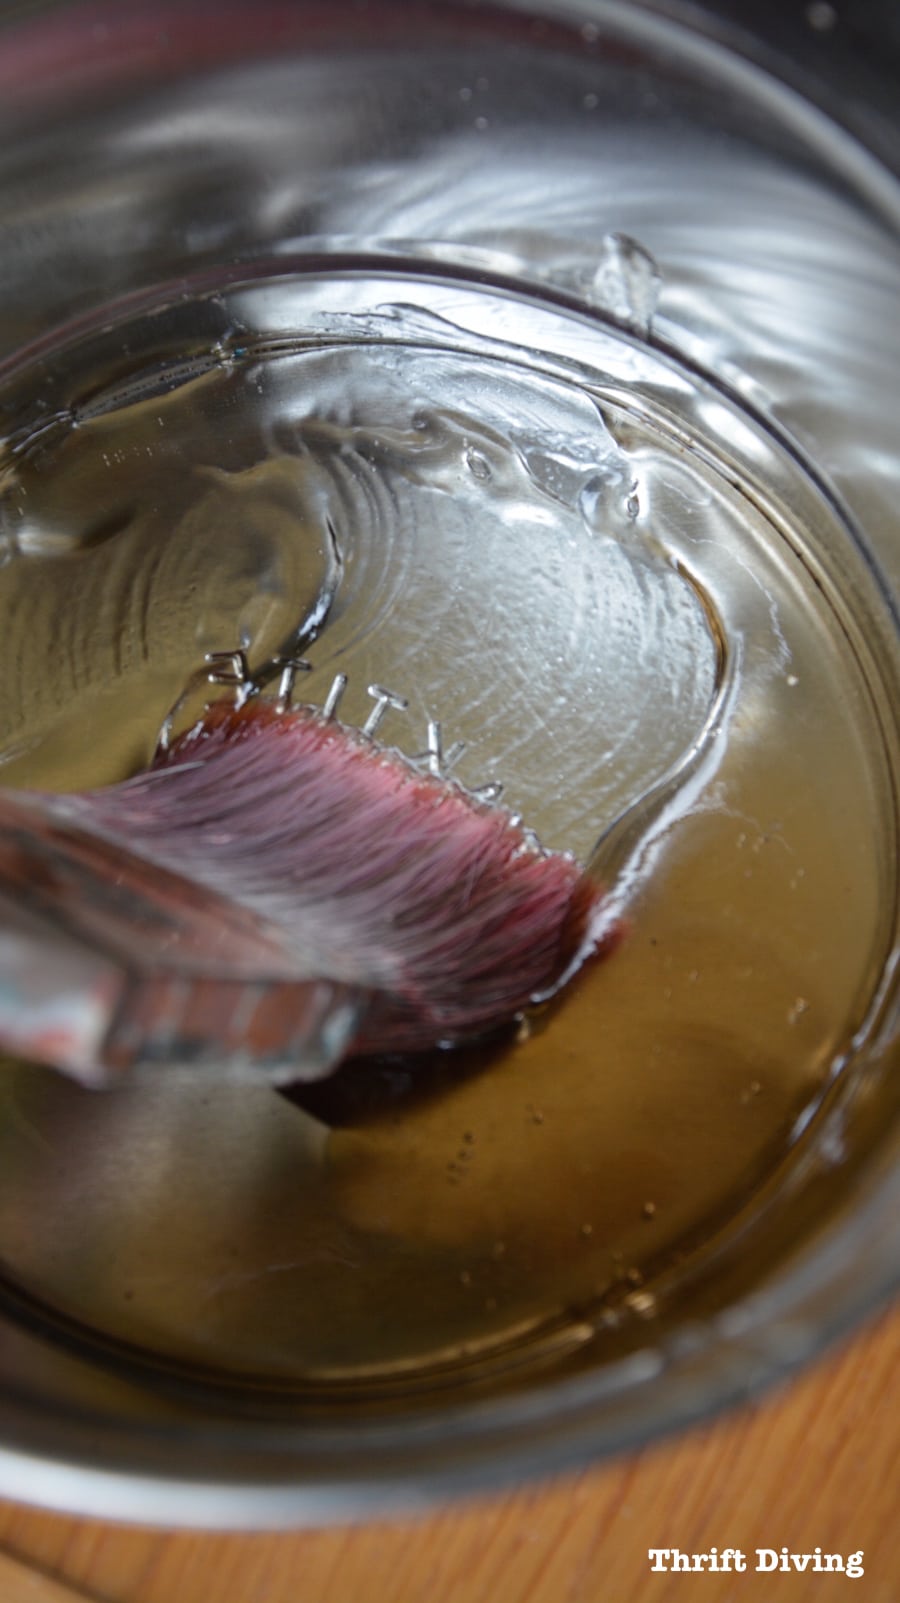
I slathered it on and waited about 10 minutes or so to start scraping off some of the extra GUNK I had left on last time!
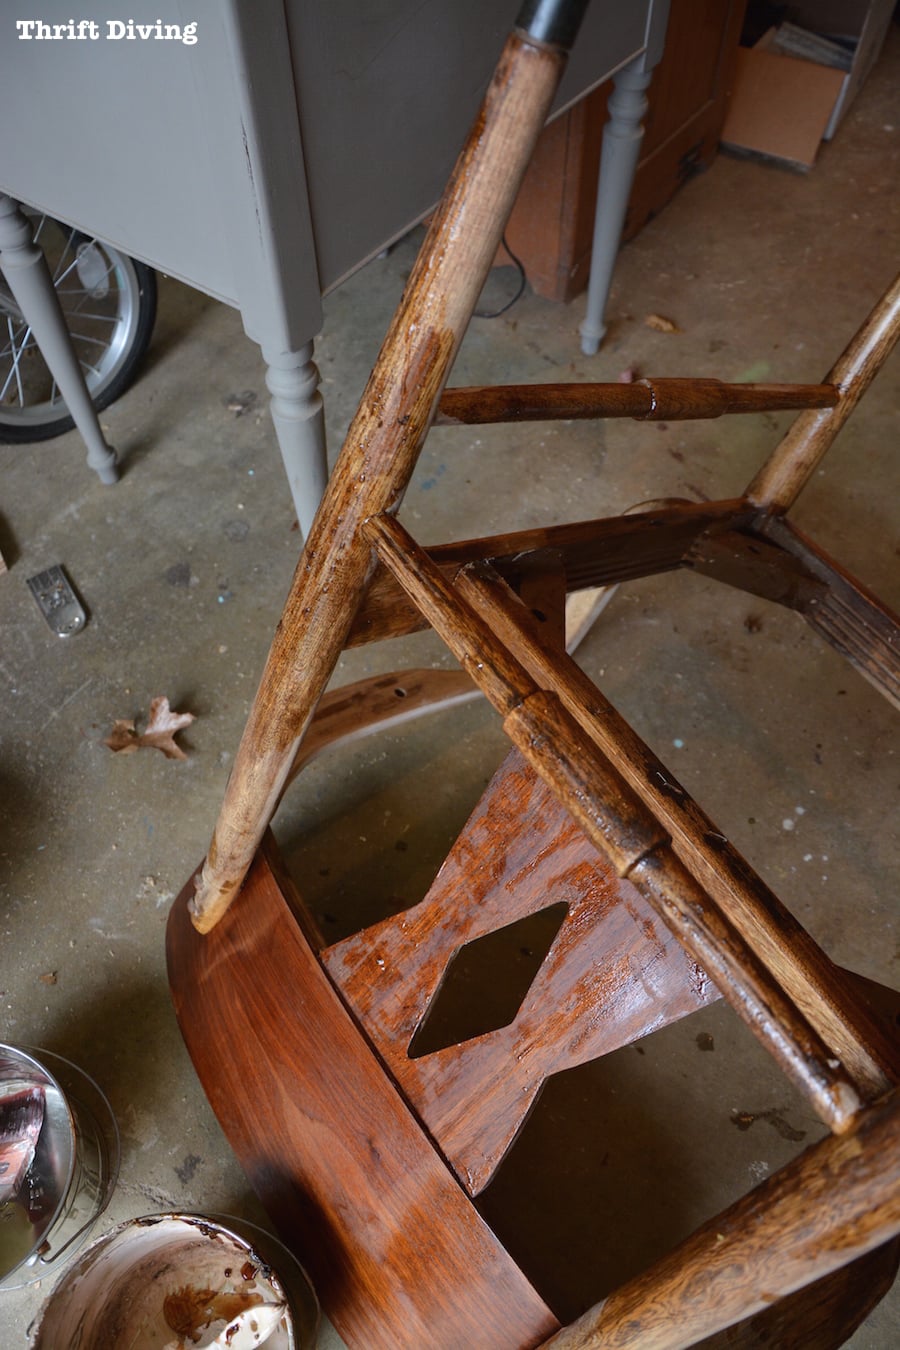
When I was done scraping I scrubbed everything down with water to remove the residue.
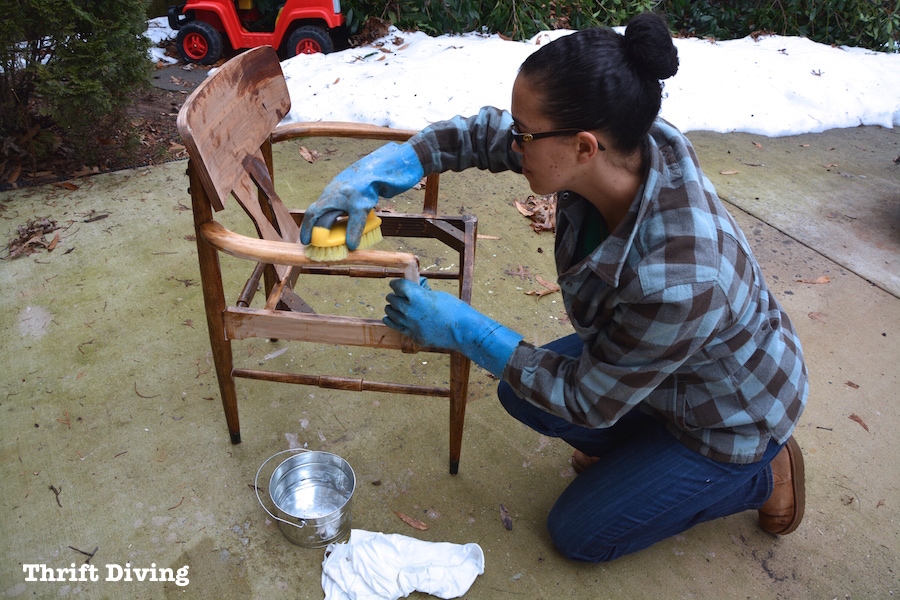
But let me tell you….Stripping a chair is HARD, yo!
And I’ve never given this kind of advice before….but….I wouldn’t recommend stripping a chair! LOL
Especially when you have all those round surfaces and you have to figure out how to get a FLAT sander around a CURVY leg.
Result?
A crappy sanding job.
And crappy sanding jobs lead to crappy finishes.
That’s exactly what happened with this chair!
This chair is painful to look at. LOL
I had such high hopes for a restoration of this chair, but it was just not the right project to try stripping!
Stick to flat surfaces where you can easily apply stripper and can run sanders over said flat surfaces, like table tops, dresser tops–any flat surfaces.
Curves?? Don’t do it to yourself. Trust me!
(P.S. I have heard there are “dip and strip” companies where you can have furniture dipped into stripper and it’s waaaaay easier to start from scratch when you do that!)
But I was pretty excited about the sanding job I had done… (little did I know, LOL)

It looked pretty good…..
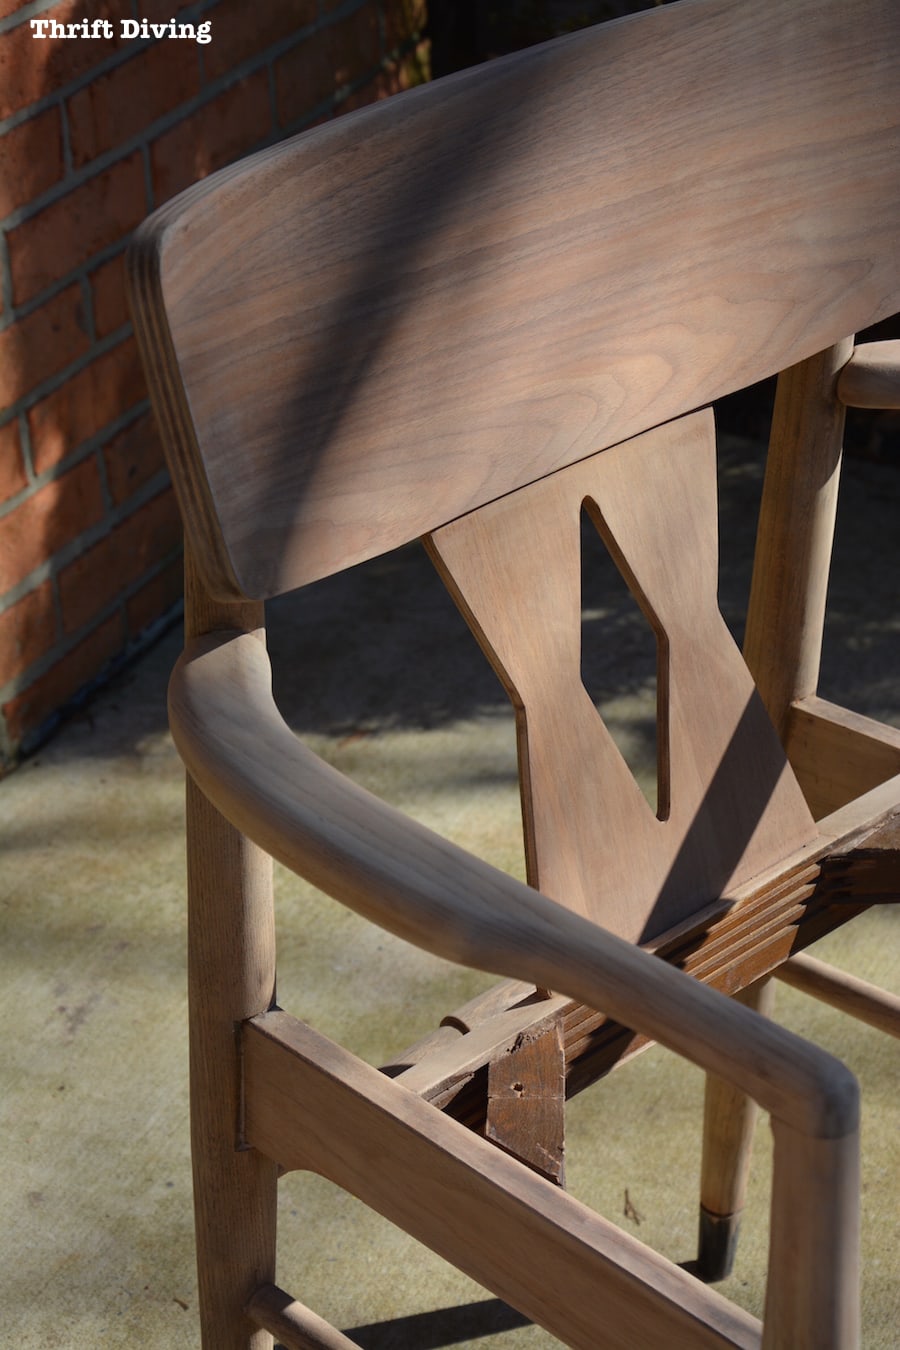
I thought I had removed as much of the previous stain as possible.
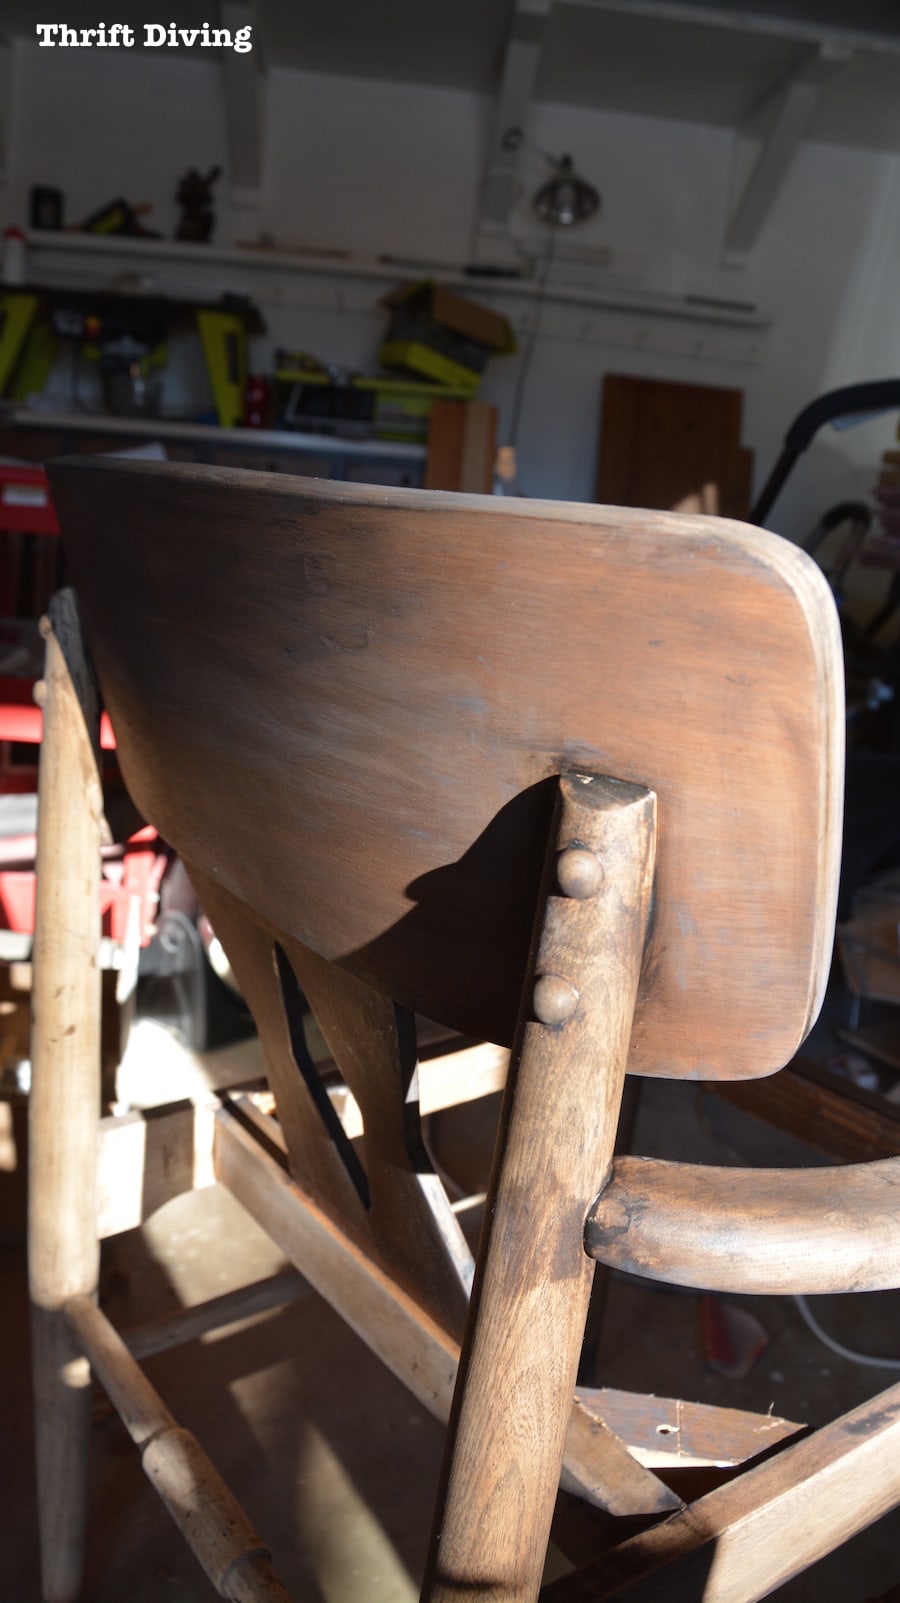
One thing I had noticed is that the wood on the back of the chair was different than the wood on the arms and side. The arms and sides looked like oak, yet the back was a composite of something else…..
I suck at wood identification, but my best guess would be….??? {insert blank stare here}. LOL
Regardless, it was pretty grain, and I was going to attempt to keep it!

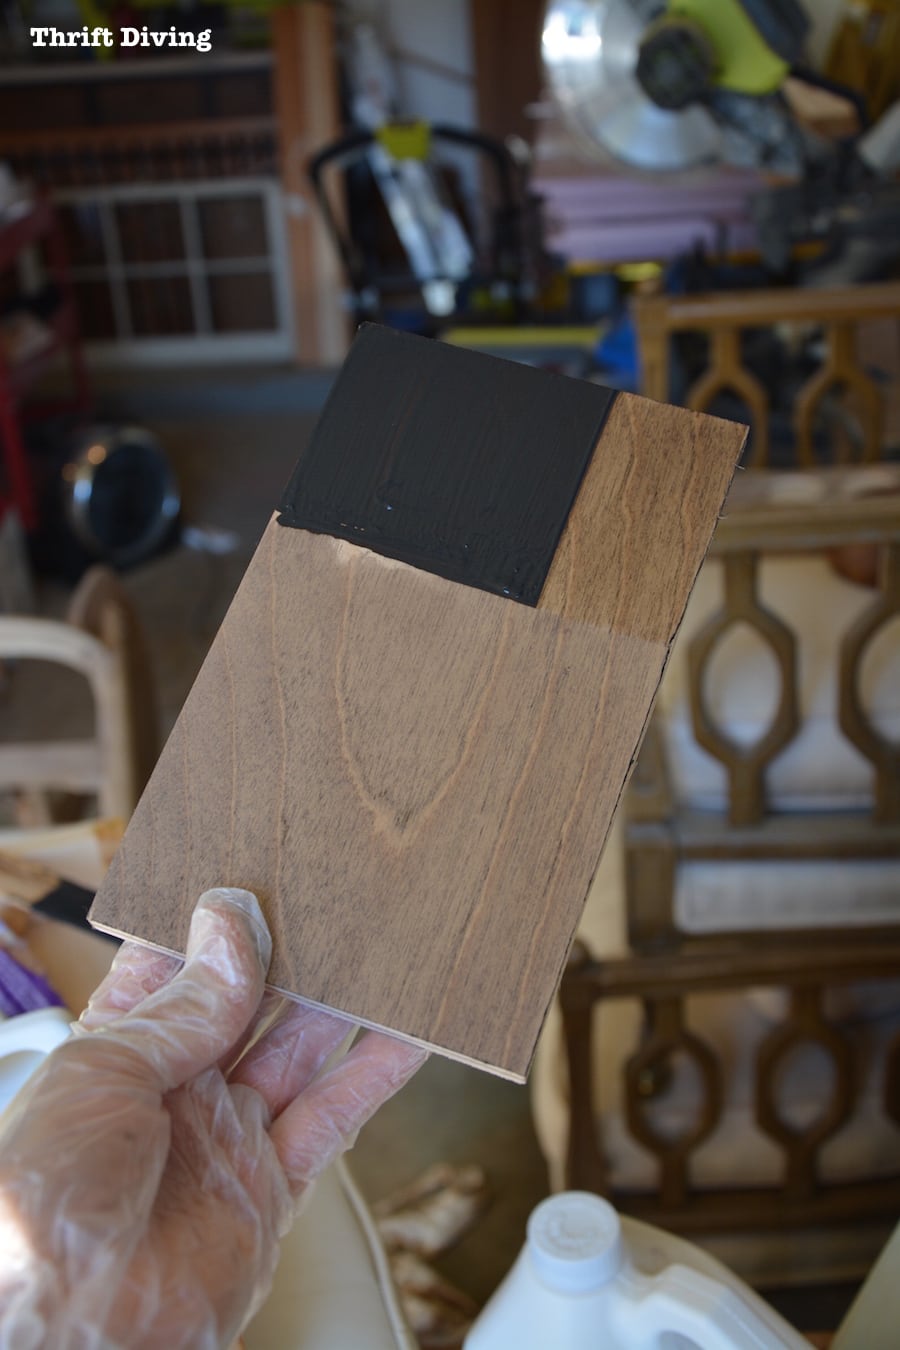
I’ve been thinking a lot lately about the safety of DIY products we use, so along with the gentle stripper, I wanted to try the General Finishes Walnut stain which is water-based and earth-friendly (and even safe for kids toys!).

I had only ever used other brands that are oil based and “watery.”
This one, however, looked like a grainy-looking paint.
I was curious…..
But the one thing I noticed–OMG!–it didn’t smell!
You know how nasty oil-based stains are??
This one smelled like practically nothing! Ahhhh……I hate getting staining headaches when I’m staining something, so this was a real treat! 🙂
I definitely wanted to do a test first. I had hoped the color would be darker, so I left it on for various amounts of time to see what I’d get.
I left it on for about 4-5 minutes. Not sure if that is “allowable” but it seemed to be the only way to get the rich color I wanted.
Yep, about 4 minutes was the look I was going for!
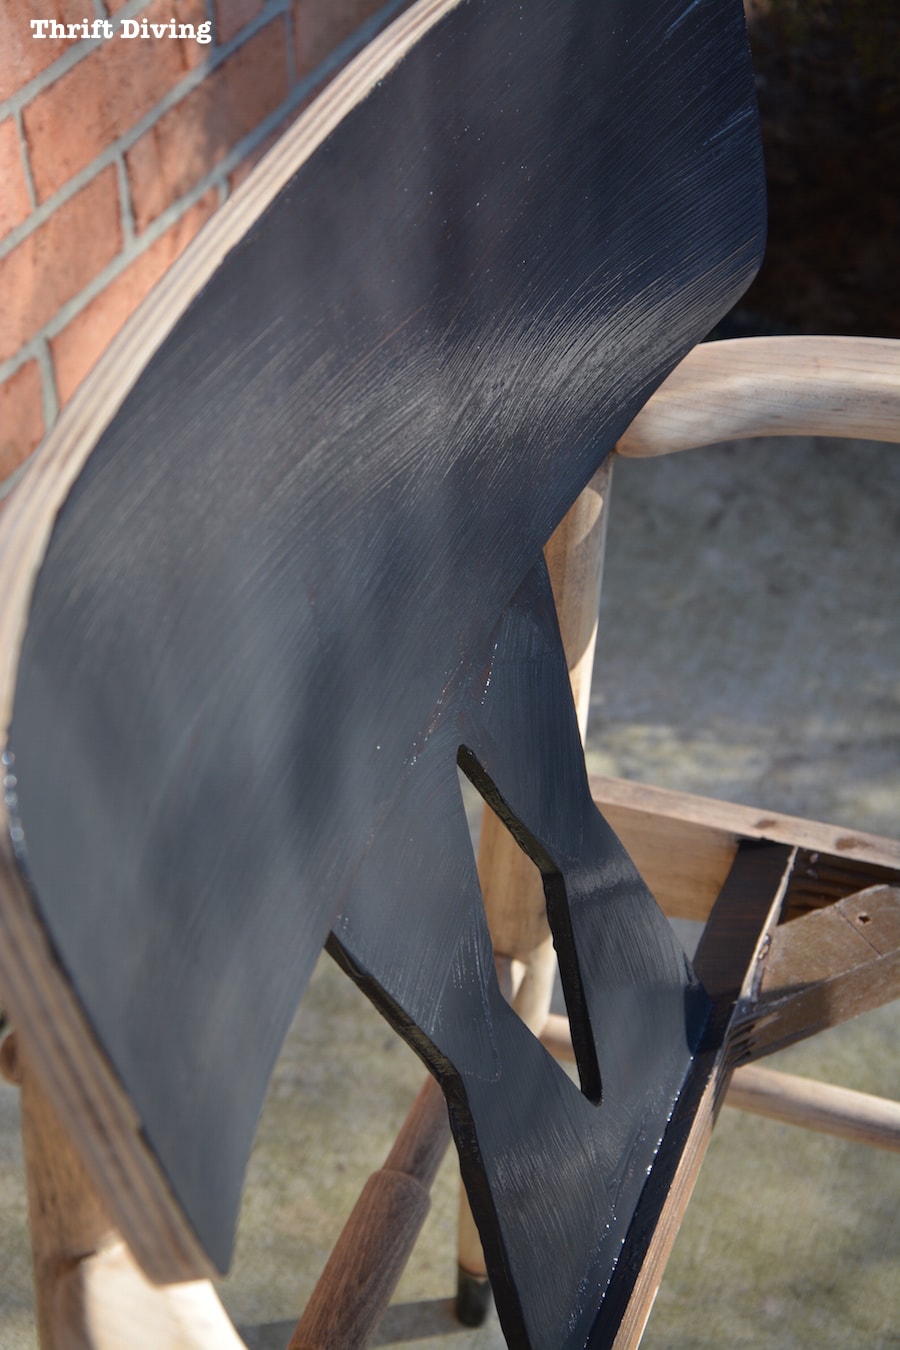
The instructions say to only work in sections at a time, so I did.
I started with the back, using a brush to wipe on a bunch, then giving it a few minutes to darken, and then wiped it off with a towel, going in smooth directions with the grain.
This is Where Things Started Going Wrong
First, my camera battery died, unbeknownst to me, so what I thought was recording me wiping on and wiping off, didn’t capture everything. So unfortunately, I don’t have an “after” picture to show you what the first coat looked like! Crap!
The other thing that was going wrong was that every time I would move to a new section, the towel would graze up against the finished parts, and I would be left with little blotches on the freshly stained sides! Totally my fault since I should have had a bigger supply of clean towels! Plus, smaller towels are a great idea so there’s less chance of a big towel flinging stain to other finished parts.
Trying to wipe up those blotches creates a muddled mess. UGH!
And the legs…..
Those were the worst!
Whatever crappy sanding job I had done was pretty clear now!
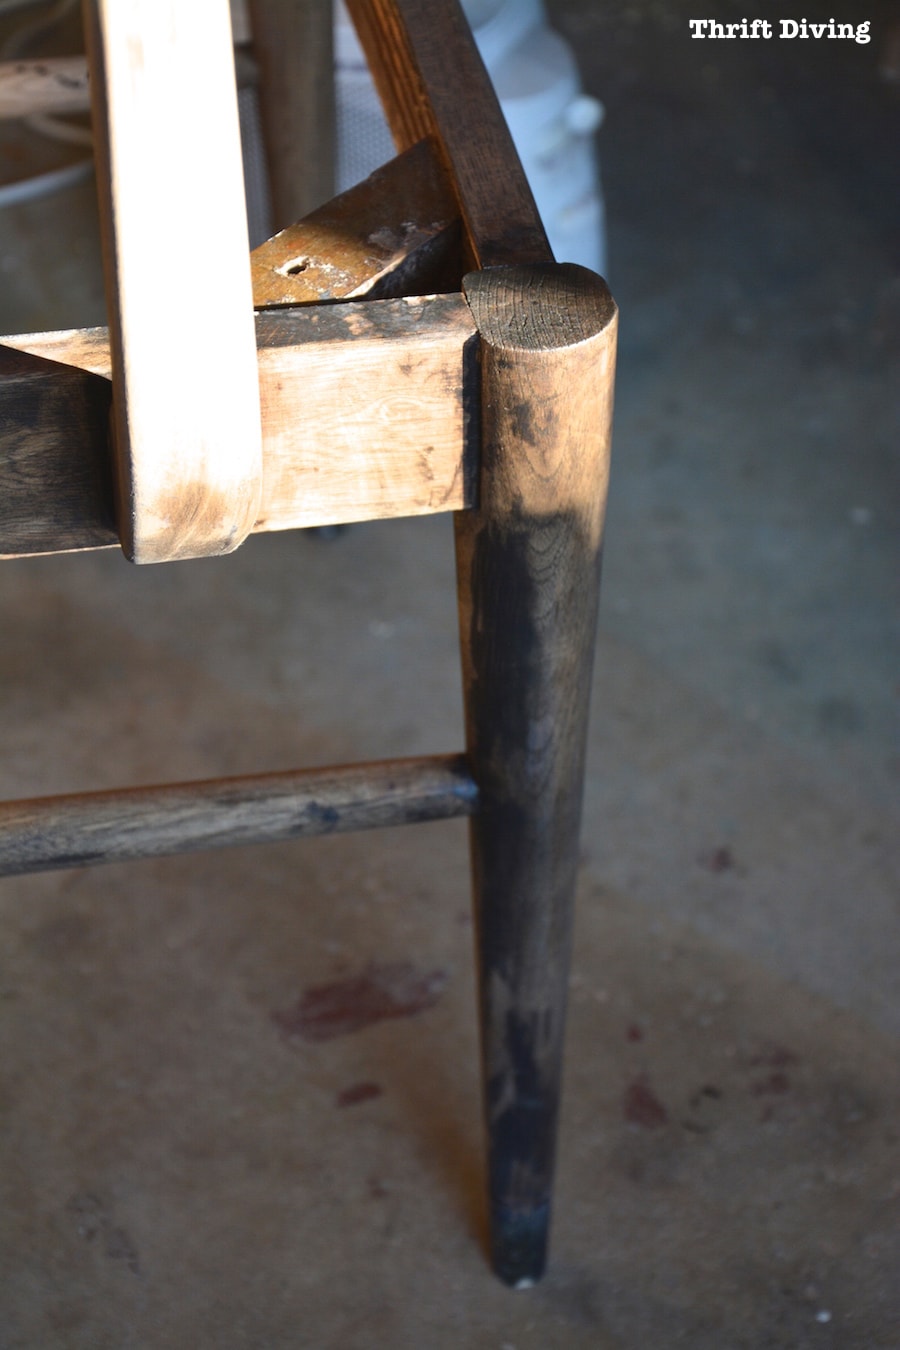
Blotchy, dark, and so uneven that I just put down my towel and just walked away before I screamed. LOL
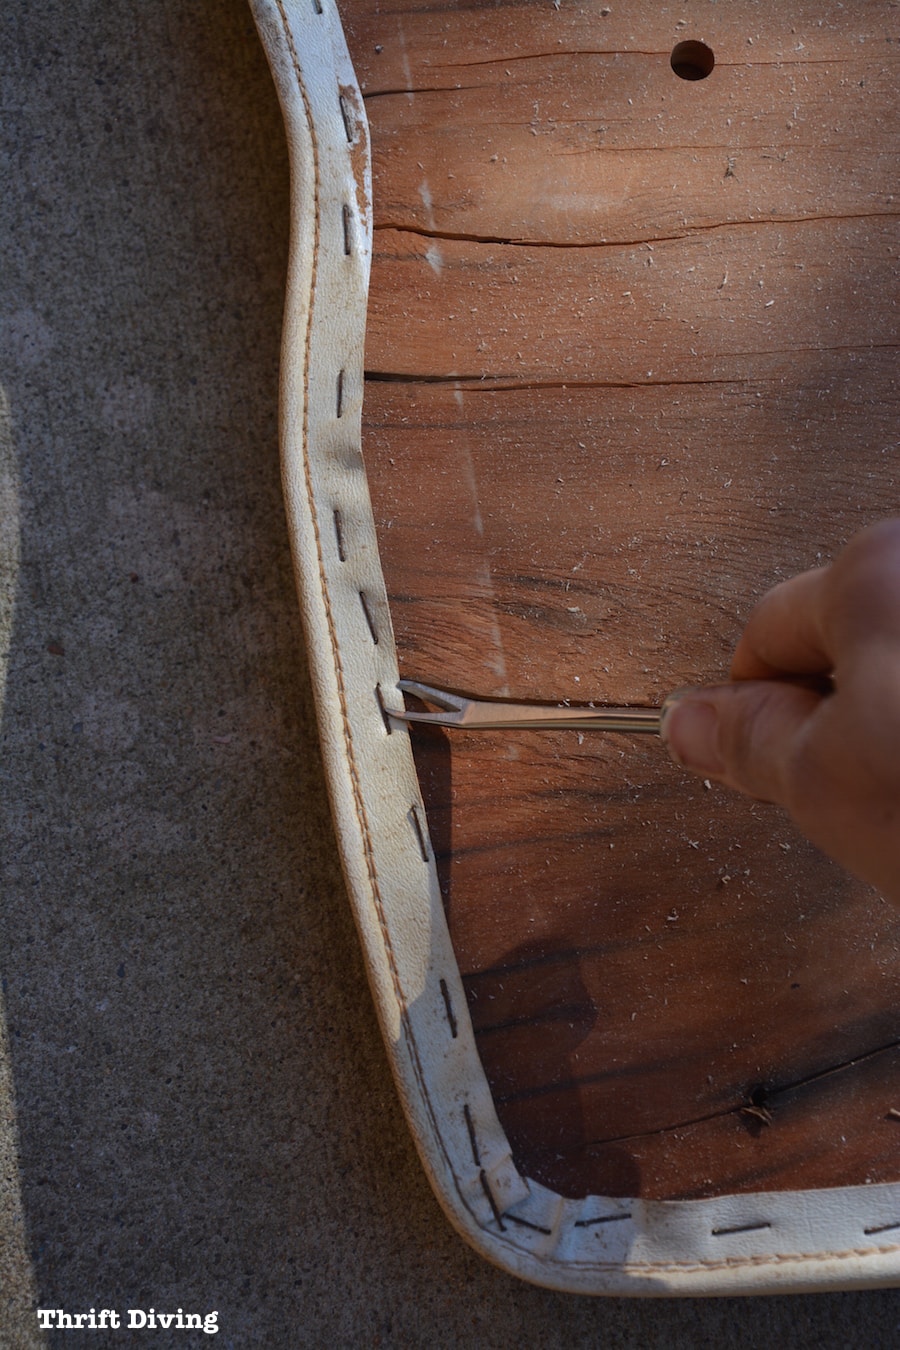
I wasn’t even able to make it to the fabric store for new fabric for the seat (I’ll tell you about that in the comments section….).
All I could do that day was start to remove the staples of the old fabric.
Getting Creative
Sometimes I love to find myself in this predicament.
You know, failed project = creative genius.
I’m going to turn this project around this week one way or another!
Most likely I’ll have to re-sand and attempt to re-stain the back of the chair (since I love that wood and would never want that painted). But I’m going to have to paint the body of the chair. There’s too much variation in color.
Seriously, wish me luck!!
UPDATE: Click here to see how the chair turned out in Part 2 of this chair makeover!

Download the 5 freebies!

Thrift Diving inspires women to decorate, improve, and maintain their home themselves...using paint, power tools, and thrift stores! Use these 5 printables, checklists, and ebooks to get started!


You know, failed project = lesson learned.
How many times can I thank you for sharing the good the bad and the I laughed out loud.
Anyone who has done DYI and is honest has been there and done that.
Take care,
MW
I HAVE to share the bad! You all are the only ones who will sympathize with me about it! LOL 🙂 Plus, hopefully I’ll learn something that others will learn from me. Pass on the knowledge! 🙂
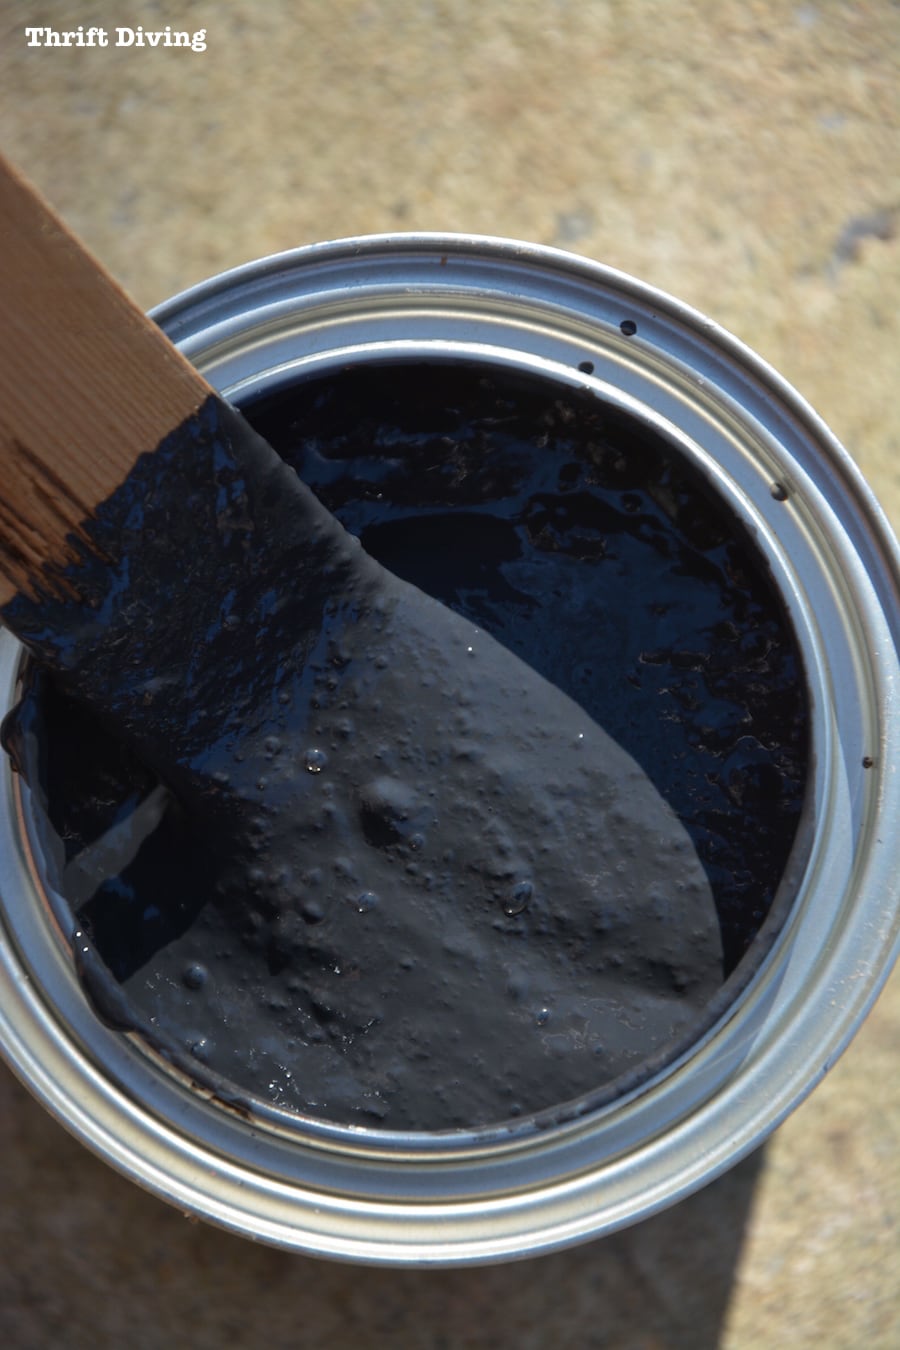
P.S. I painted the body black and I’m not digging it at ALL. Looks weird with the two tones. I think I may have to paint the whole thing black. Or….maybe switch to white! SIGH….. lol
So frustrating! I have a couple suggestions that I didn’t see mentioned yet. I discovered the beauty of using steel wool for tough sanding spots when stripping. Maybe give that a try? It’s much finer than sandpaper and its easier to get around curves. Also, since you said you really liked the wood on the back, why not stain just the back and paint the arms and legs? Two tone with stain and paint is such a cool look! You’ll pull off this project beautifully, Serena, no matter which route you take.
I’m so sorry you’ve had such a bad time with this chair. I’m sure it will look terrific when you are finished.
A hint on sanding — there is a liquid sanding product out there that might help in small and round corners. I can’t think of the name but I remember using it years ago when I was doing a few projects.
Ask at your local store they might be able to help. AND good luck with all projects.
Betty, thanks a great tip! I just researched it, but it sounds like it might be highly toxic, which I’m trying to start find stuff that’s not as toxic. I’ll keep checking around for some options! 🙂 Thanks, Betty!
Your continued efforts to refinish that chair are impressive. Think by now I’d have kicked it to the curb. Good luck getting it finished.
Well, I have always been a tenacious little somebody, so we’ll see how it goes! This morning I have painted the body a nice black and am going to leave the back part stained nicely. So we should see how that goes!! 🙂 Thanks, Margaret!
Actually, I told a lie about kicking the chair to the curb. I never let go of furniture easily. But it would sit in my garage because I haven’t yet developed your tenacity. But I admire it. You may inspire me to finish that red chair that’s half finished in the garage. A friend finally told me that red takes a few layers to look good. Here I go.
Go for it, Margaret! You can do it. After all, it’s paint. We can just do layer after layer and change the color if we decide we don’t like it! That’s what’s awesome!
If nothing else, I seem to recall that you have a fireplace!! (I’m kidding … don’t throw things at me!) lol
I’m sure you’ll work your magic and I’ll be envious … again.
I’m liking the sound of your no-odor products.
Good luck!
LOL, Linda! Yes, it would make good firewood if needed! LOL
And yes, you should definitely try the low-odor stripper. Game changer!
I am so sorry it is not turning out like you wanted but I know that you can do it and whatever you decide to do it is going to end up fabulous!!!! (Keeping fingers crossed!!) Good luck!
They’re crossed reeeaall tight, Lou Ann! 🙂 I’m going to work on it tomorrow and see if I can turn it around! WHEW!
Hi, Serena Bless you, I can just see you sitting there smiling when all you want to do is scream and cry! As much as you’d like to complete perfect jobs on every project, that would not be real life. And you know . . . as hard as that is for you, it truly is a blessing to the thousands (maybe millions?) of us followers. We’d never “really” learn that it is okay to fail if everything turned out perfectly, nor how wonderfully imagination applied with a little elbow grease can truly the save the day, and sometimes the budget! So even though you may feel like you failed, you are still a great teacher.
Something that I experienced many years ago, seemed to make a nice difference and you might want to play around with it a bit on scraps or small projects to see what you think. The instructions for the unfinished pedestal table I bought for the kitchen said to apply Tung oil to the wood evenly, wipe off and let absorb overnight before applying stain. I fooled about a bit with some scraps and it really did make a difference in how evenly the stain went on. That was way back when golden oak was quite popular and the table turned out pretty nice and we used it for years before upgrading to a bigger one.
Since you seem to have at least two different types of wood, it might not work very well, but it also might be worth a try. I also don”t mind hand sanding and that’s what I would be doing on a chair like that (to me, a small project!) Anyway, I do hope you can turn it into something that you will really enjoy, but it isn’t a failure, even if you have to toss it, because you will have learned all kinds of things that you can apply to future projects! You go, girl!
Teckla, you are always full of wise words, my friend. 🙂 I love the idea of using Tung oil FIRST and THEN to stain! I’ll play around with that and see how it works for me on some scraps! 🙂 Thanks, girl!
I feel your pain, Serena! After all my years (over 40) refurbishing furniture, I’ve come to the conclusion that some pieces were made with the intention that they could be replaced, rather than re-done. For me, the tip-off is when I sand off the old finish and find there are multiple woods involved. That is an economy move by the manufacturer. These pieces can look hodge-podge when a re-staining is tried. My thought would be to sand off any rough spots, then paint the chair. I would concentrate on finding a gorgeous piece of fabric for the seat and let that get all the attention. I also replace the old seat padding with firm, new product. I feel that a chair needs to be comfortable as well as pretty.
Gracie, you hit the nail on the head! The wood on the back was so beautiful, it had to have been a cheap move to use something cheaper for the arms, sides, and legs. How disappointing, because that wood was soooo pretty on the back. I’m with you–painting the chair and keep it moving. I’ve got some fabric that MIGHT work, but I’m almost thinking that a nice faux leather would be nice. I’m trying not to spend much money, so let’s see what I can come up with!! 🙂 Thanks for your comment!
I am sorry but this post had me laughing really hard! Partly because I have been there! In addition, I can literally hear you saying the words You posted. Too funny!!!! Yes, walk away for a bit and come back to it with fresh eyes, fresh patience, and little memory of having to strip and sand it…..for the second time.
And *I* am sitting here laughing at YOU laughing, Monica! HAHAHA You should have seen me on Friday at 3:30 when the bus was coming. I was like, “Uh huh, I am done!!!!!” LOL I will save this chair, I know it. There’s no option for failure! LOL
I had the same issue when I decided to redo 10 mid-century dining chairs. I gave up early and painted them a flat black. There was no way I was going to fight that battle 10 times !
AGH!!!! 10 chairs?!?! Debra, you’re killing me just thinking about it! Seriously LOL! I can’t imagine!!! That’s exactly how I’m going to do mine. But I’m going to try to leave the back the stained color (once it’s fixed up) and do the flat black. WHEW! What did I get myself in to?? HAHA