The Makeover of the Juliana Dresser
I’m going to go ahead and admit that THIS vintage dresser makeover was the hardest furniture makeover project I have ever done.
EVER.
In retrospect, I can honestly say I learned a lot working on this piece and wouldn’t change the experience!
(Nothing like a project to kick you in the butt to make you grow your DIY skills, huh?)
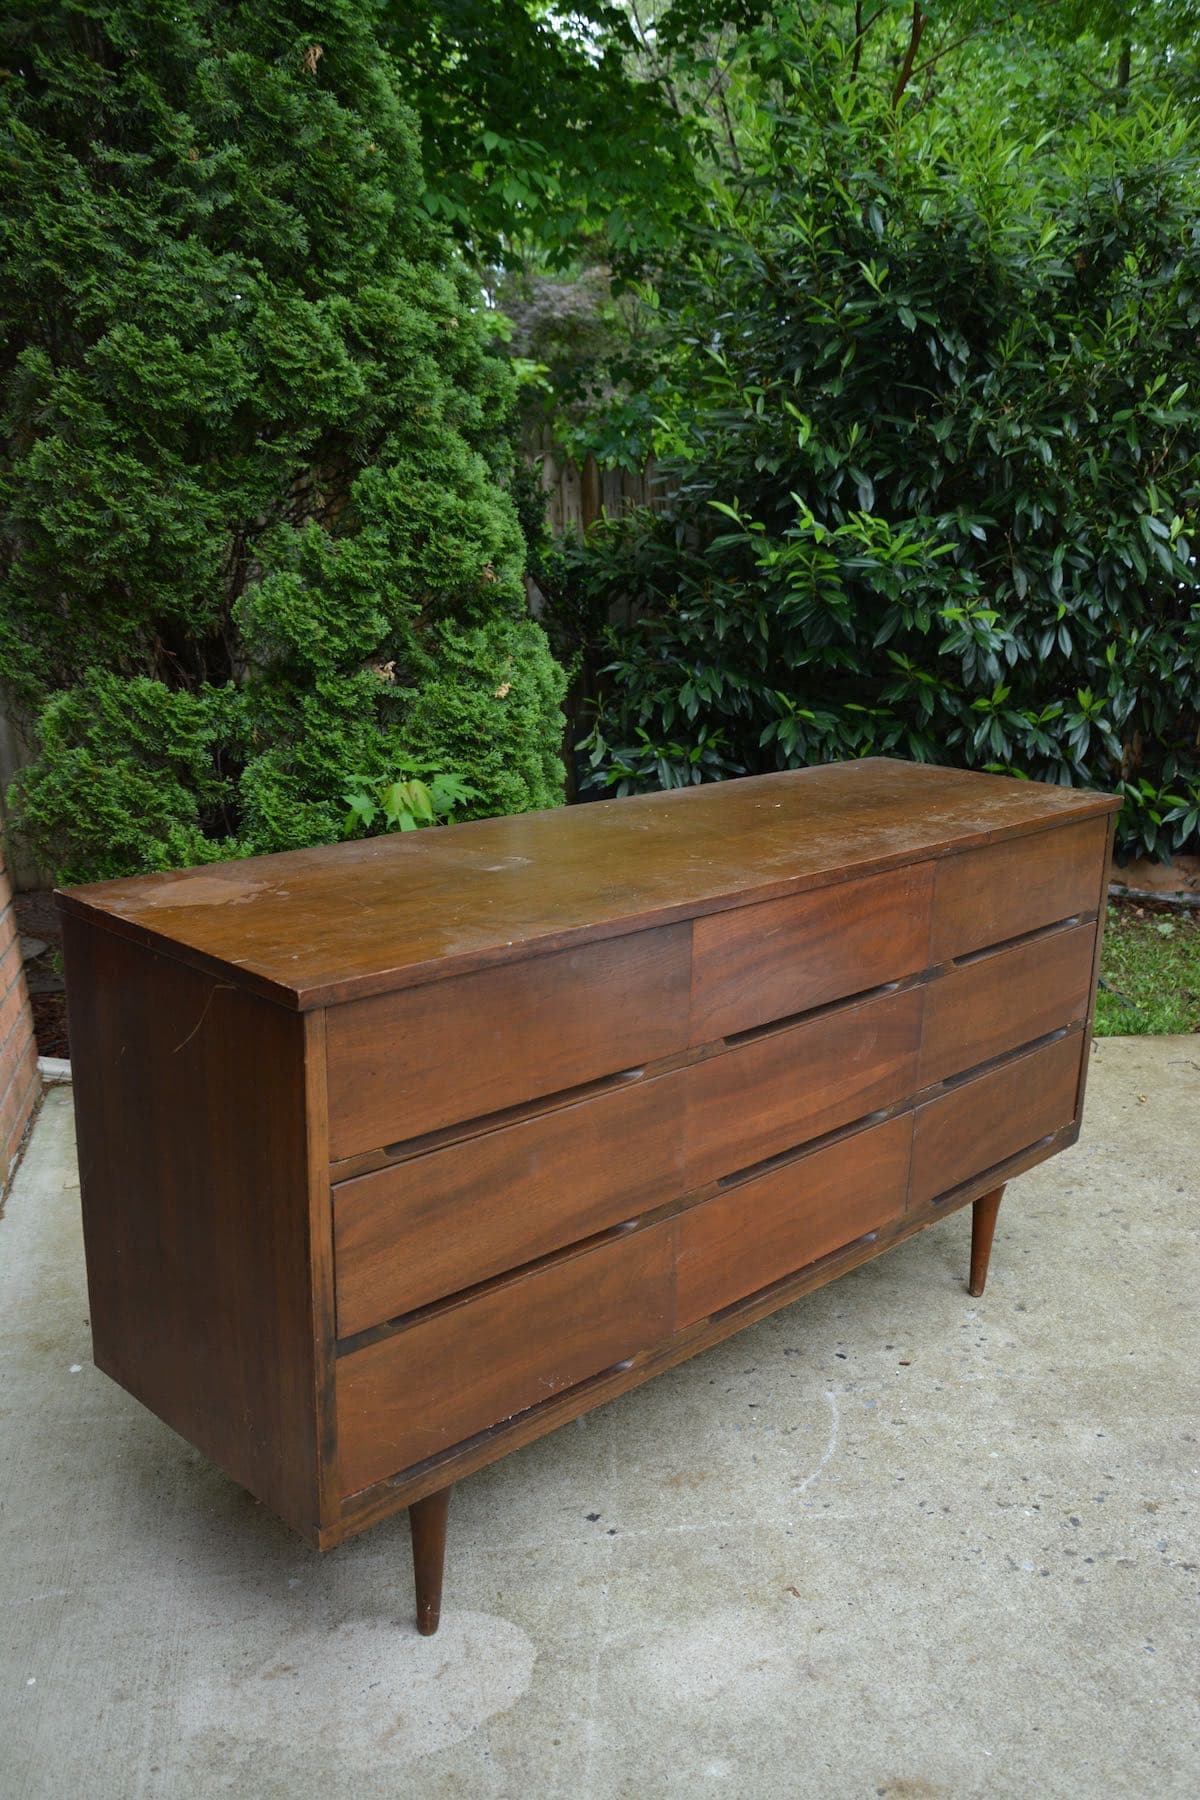
Enter: the Juliana Dresser….
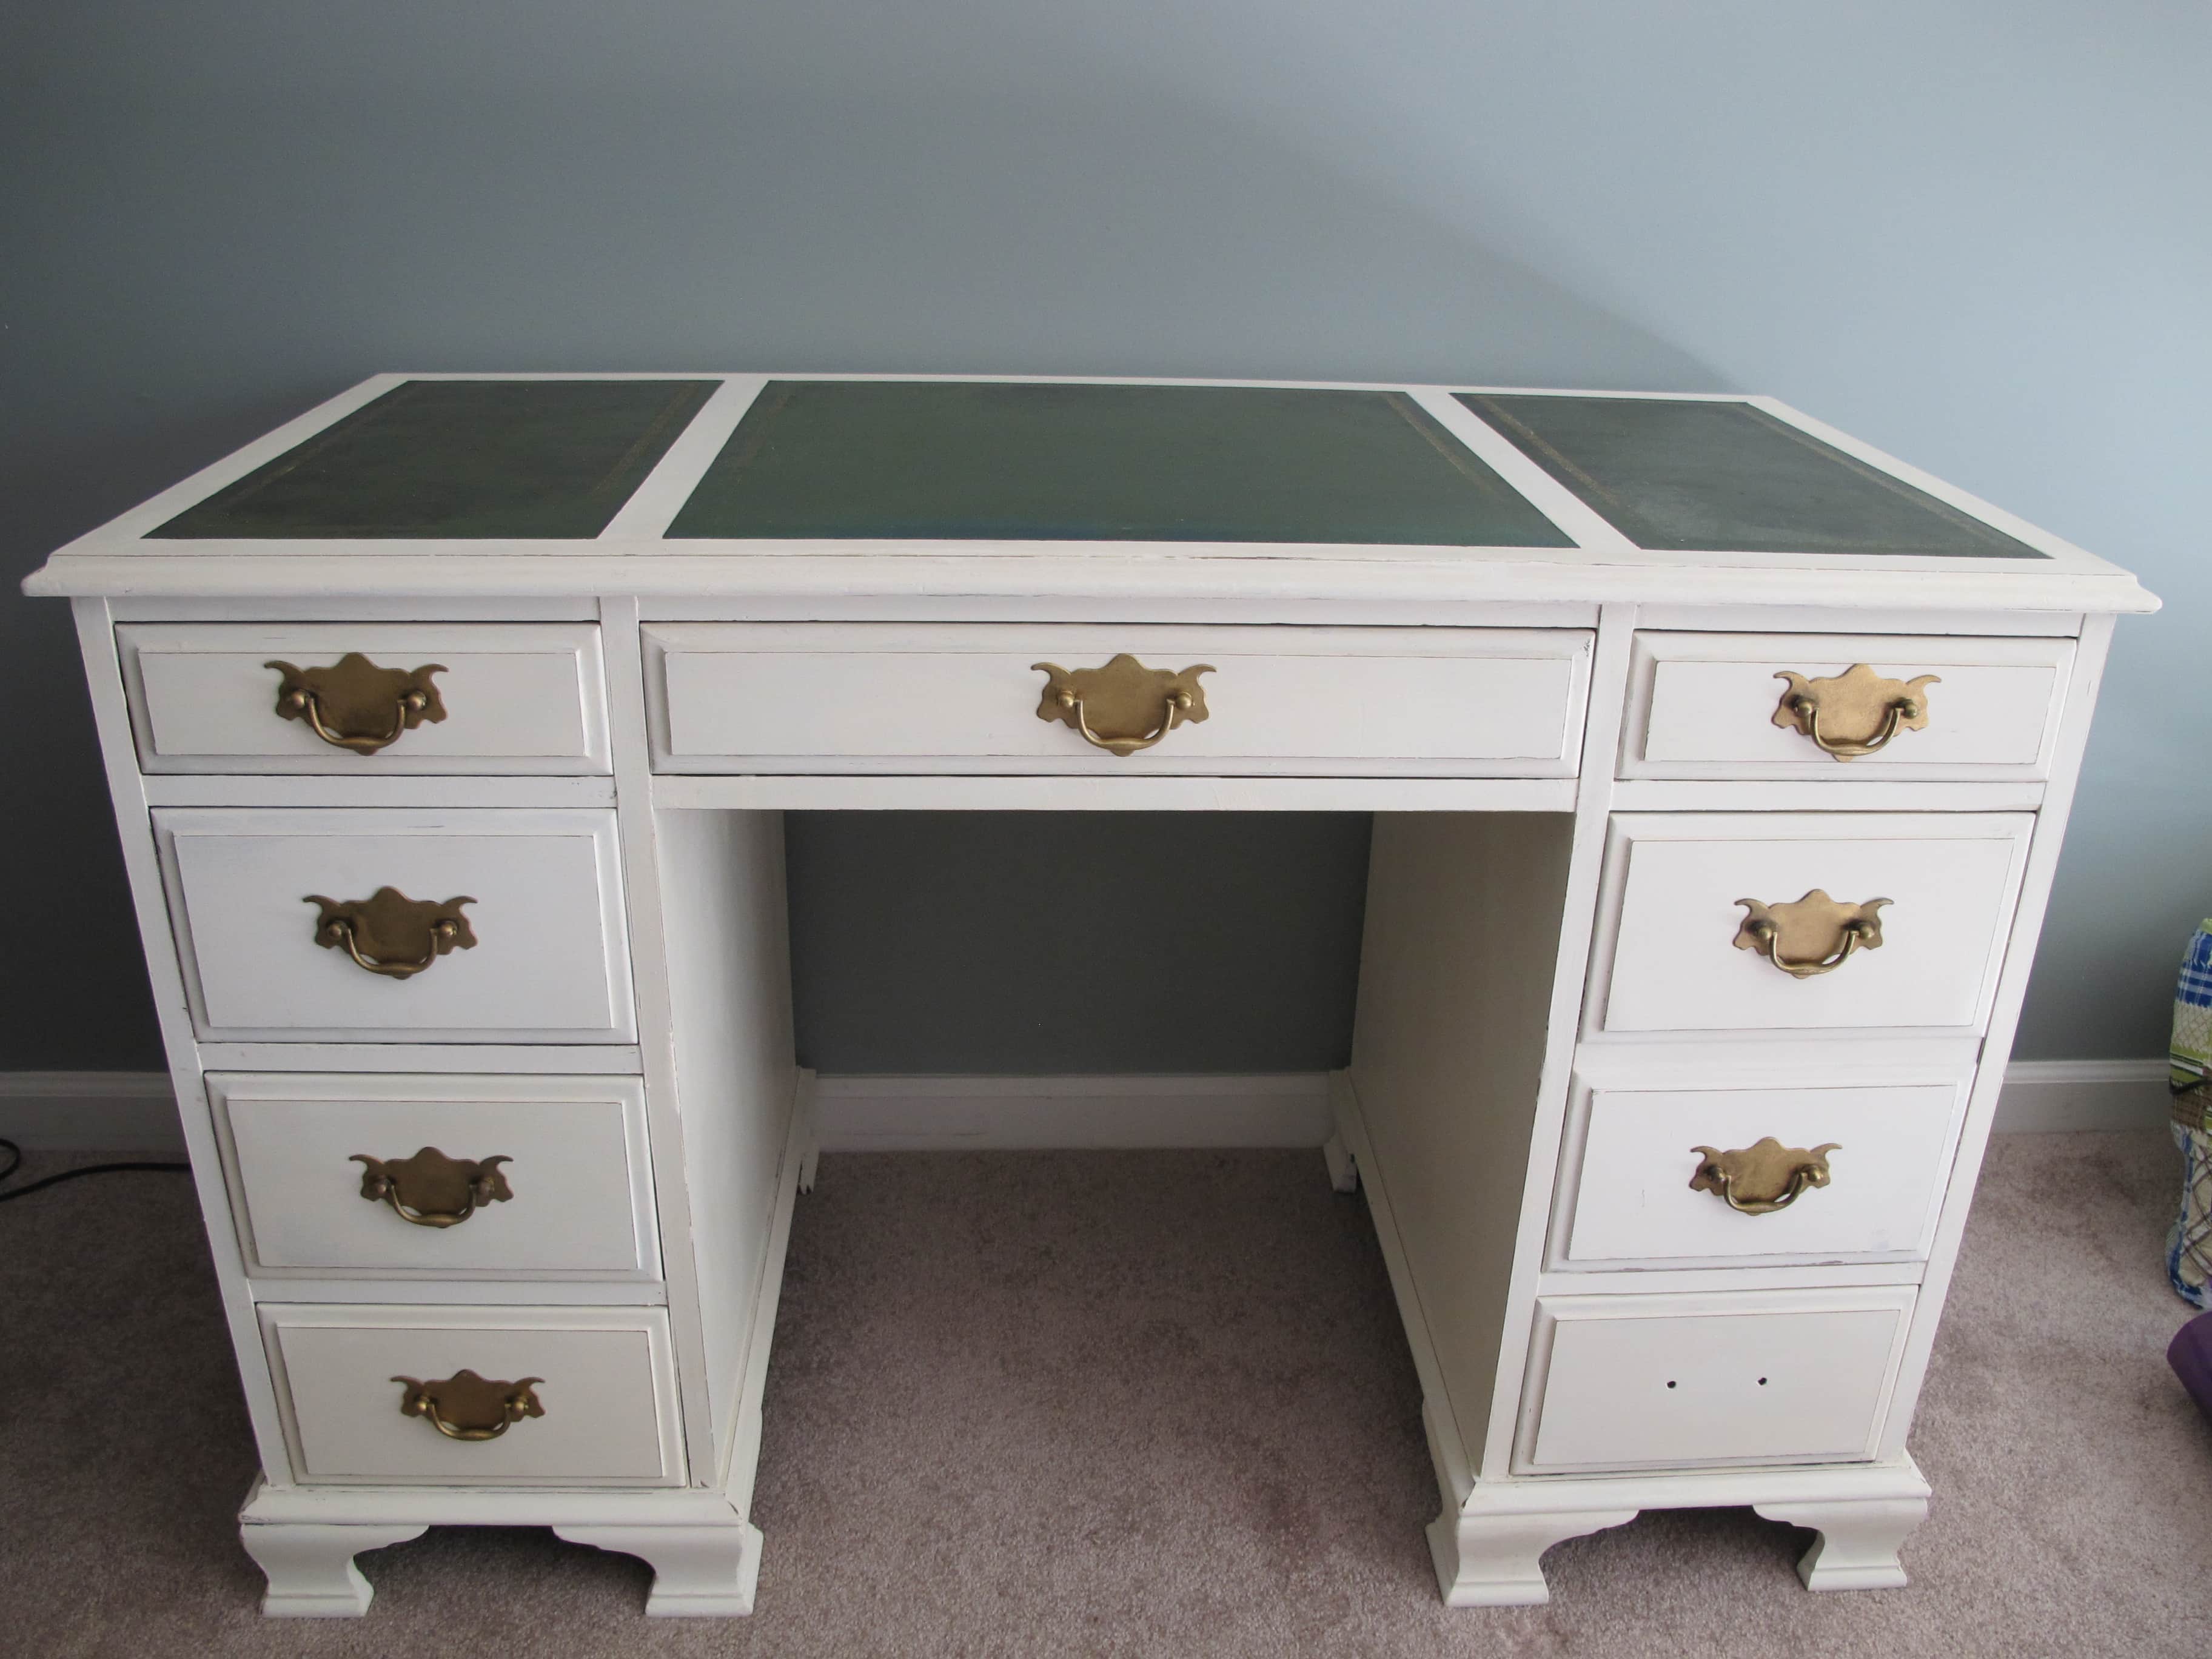
BEFORE – Vintage Dresser Makeover

AFTER – Vintage Dresser Makeover

My First Custom Vintage Dresser Makeover
I have never liked the idea of doing custom paint jobs for people. I’ve always had this fear that they’ll expect one thing and then I would deliver another. It feels more freeing to just paint something and then if people like it, they like it…if they don’t, they don’t. But custom furniture makeovers like this dresser makeover, it’s more personal and the expectations are higher, I think.
Juliana reached out to me after a mutual acquaintance told her about my furniture refinishing skillz. She had this dresser that was her mom’s when she was a kid and wanted something fresh to jazz it up, for her guest bedroom in her new house. In its “before” state, it didn’t go with her decor, and plus, the top was badly “pocked” with indentations, along with discoloration.

It’s funny because when I picked it up from her, Juliana was like, “So, you’re going to have to do a lot of sanding, huh?” Instantly I told her, “Nah….The type of paint I use doesn’t require sanding!” I said this like I knew what I was talking about. I mean, chalk paint rocks, right?? No sanding! YAY!
Au contraire mon frere….
I hadn’t looked too closely at the dresser upon pick up (duh!) until I pulled the dresser out of my garage when I was ready to get started on it.
OH MY….
So I grabbed my orbital sander and spent the next 2.5 hours sanding down to the bones:

(I’ve got a budding photographer in my 2-year old who took this pic)
I couldn’t get over how amazing it looked and felt after sanding! It was worth the extra effort!

Some parts, like the back, were in very poor condition, but I didn’t sand that. After all, who looks at the back, right??

Freshly sanded and ready for paint:

The reason I sanded the whole thing is that Juliana had decided she wanted a white wash finish on the dresser. I’ve seen whitewashes done on pieces that weren’t stripped down the bare wood, and I never liked that look. I figured getting out the discoloration and starting from “scratch” was the best option.

Knock Off Vintage Dresser Makeover??
Another thing I usually don’t do is knock-offs. I just don’t copy someone else’s inspiration because then if it doesn’t look exactly like theirs, then you feel crappy like you failed on the creativity spectrum.
But Juliana fell in love with this Apartment Therapy dresser online and wanted her dresser to look exactly like it.
I figured I would give it a shot. After all, how hard could it be???? {{insert eye roll here}}
She really liked the way that the wood grain was still visible, but with pops of color. Creating this was hard because 1) Annie Sloan decorative chalk paint doesn’t make a color this bright yellow without it looking greenish, and 2) it’s hard to do a wash on the drawers because, in order to get the white so bright, you have to layer on more paint. But layering more paint meant also not being able to see as much of the wood underneath.
I tried custom mixing to match it as best as I could, but I couldn’t ever get it such a pop of yellow. I eventually used a CeCe Caldwell paint, and tried to mix in a little orange, without it looking too “orangey.”
You see my challenges?
I can’t tell you the number of times I mixed and washed and wiped and sweated over trying to match the colors and get the texture right.
Missing Handles??
I removed the existing hardware, in search of something GOLD and more modern.

(I participant in the Amazon Services LLC Associates Program and other affiliate advertising programs designed to provide a means for me to earn fees by linking to Amazon.com and affiliated sites).
And although I had found the Anthropologie handles that Juliana liked, we decided that it would be easier for her to just go to Anthropologie herself and get the handles and add the Rub n’ Buff herself. This is what it looks like when I delivered it to her.
Related: 5 Ways to Use Rub n’ Buff

UPDATE: Juliana sent me pictures of the dresser in her guest room, and I love it! I’m so glad that she was able to use her mom’s old dresser for years to come! 🙂 YAY!!
The handles she picked out were perfect!

Do you like this vintage dresser makeover? Save it for later!
![]()

A Few Other Dresser Makeovers
If you liked this dresser makeover, you might enjoy these, as well!
See how this mid-century modern dresser looked after I stripped it down and refinished it back to its original glory!
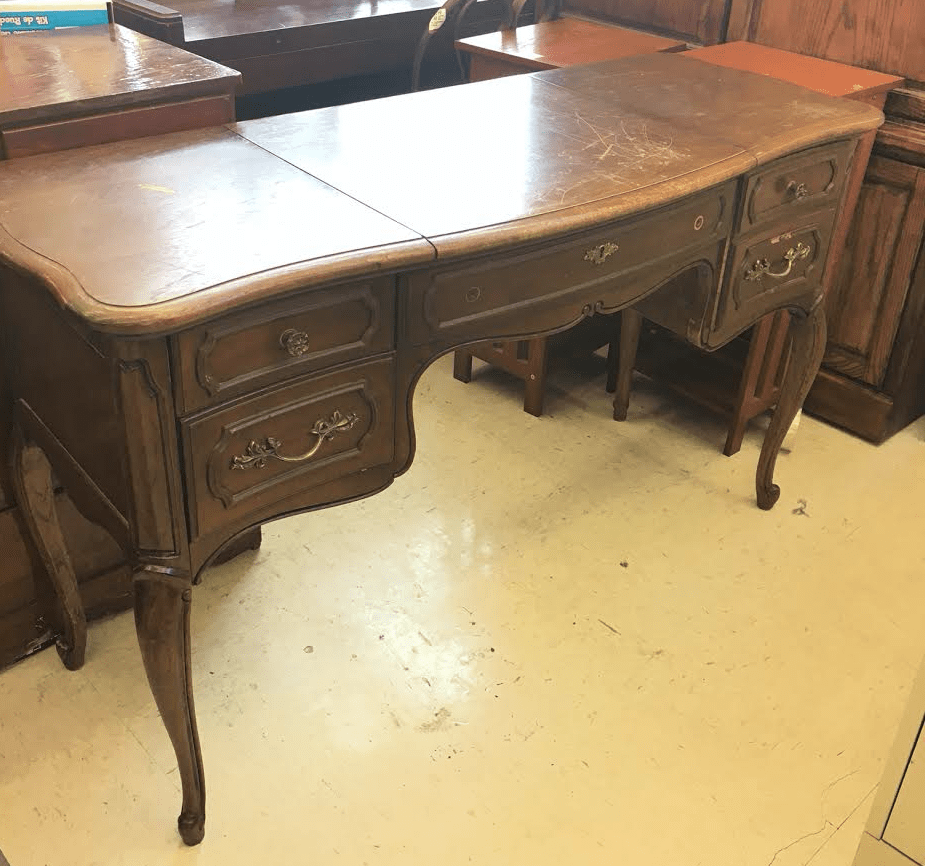
Hard to believe this French Provincial dresser makeover was only $40 at the thrift store! See how it looked after I was done painting it for my mother-in-law!

I love giving new life to something that you once thought was DONE with its usefulness! 🙂
So what do you think of this 3-toned vintage dresser makeover I did for a client? Have you ever had to overcome a difficult DIY project? Leave a comment below and add to the discussion!

Download the 5 freebies!

Thrift Diving inspires women to decorate, improve, and maintain their home themselves...using paint, power tools, and thrift stores! Use these 5 printables, checklists, and ebooks to get started!

What color did you use for the main body of the dresser? And did you dilute it with water?
Hey Tracey,
Sorry so late for responding! For the main body I used Annie Sloan Chalk Paint Old White.
Difficult DIY projects? Overcome? Readjust my vision.
Sewing: rip out and start over
Painting: use paper towels to sop up extra water on a watercolor painting
No $ for vision: improvised. It looked better than my original plan
Want to quit? I’ve given up on some
Want to quit? Talked to a friend who encouraged me
Accept compliments. Do NOT point out any flaws!!! Be gracious accepting praise.
It’s okay to do something again to perfect the process!!
Read instructions
You did a beautiful sanding job!
Thanks Anna! It was awesome seeing it look so fresh, all the “scars” removed! 🙂
This is great! I think it’s very close to the inspiration and your client should be thrilled with it! I have thought while doing pieces for myself that I wouldn’t like to do custom work as so often what I plan to do and what I actually end up doing because of circumstances beyond my control are two totally different things. Keep up the great work,
Julie
She wrote me afterwards and she said she loved it!! So I’m happy! She said she was going to refer people to me. LOL
The dresser looks great. I’m sure your client is thrilled with your work.
I do woodworking as a hobby, and I’m not dependent on earning money for my work. I just want someone to pay for the materials I use so I can continue to cut wood and build things. I know that might not be the case for most of you, but maybe you can adapt my spiel to work for you! Here’s what I tell everyone who asks me to build something for them. “I would love to create xxx for you. You just need to pay me for the material up front. When you pick it up, you can pay me something extra for my time, if you feel like it. But, whether you love it or hate it, you’ve got to take it!”
Works for me. I usually make a bit of money for my time, I get to do what I love on someone else’s dime, and usually, thank goodness, people are really happy with the results.
Hey Sue, sorry for the delay in responding! Just got back from San Diego, and then with the 30-Day June Room Challenge, I’m rushing to get my laundry room done! Sounds like you have a really good system in place. Sometimes I feel like that’s the way it is for me, too. By the time I put so many hours into my projects, I am pretty much working for free 🙂 LOL.
wow, you really turned that into something so cool! great job!
Thank you, Denise! I have developed a new love of washes! I have a table I am about to start in my laundry room and I’m thinking of doing a wash on it, too! 🙂
your efforts paid off, it is the perfect shade of yellow 🙂 As a side job, I used to do portrait commissions. I had so many orders I had to turn people away because I was also teaching full time. My clients were great, except for one. She wanted a portrait of a deceased family member and that came to mean that she wanted every detail as she remembered — of course, it is hard to know what someone’s memory looks like. I thought I had done a really nice depiction, but she was so disappointed in it that despite the many many hours I spent on it, initially and the reworkings (in watercolor, mind you, which is NOT easy to do) I did not charge her; she did give me 50 dollars instead of my standard 200. I could have done three commissions in the time it took me to do that one (and earned at least 600 instead of 50). So now my rule is I only paint commissions of people I actually meet, because relying on a photograph and/or someone’s memory is not the best way to go about it! Lesson learned.
Hey Beth! Sorry for responding late! 🙂 It’s all a learning experience, huh? I would love to see some of your work! Do you have any pics? That’s awesome!
You did a fantastic job – it looks great. Don’t be so hard on yourself.
Thanks, Debbie! My client emailed me and said she loved it, so I am convinced I did a good job! 🙂 Thank you for commenting!
It looks fantastic Serena, but I hear you on the custom job thing! As I discovered (more than once I might add – slow learner?) the pressure of custom jobs combined with the stress of finding unexpected flaws, damage etc, the work taking longer than expected, the materials needed to complete the job being more expensive or hard to find/match, have had me concentrate on creating my own pieces for now – the enjoyment factor is so much higher when I can create at my own pace with no ones expectations to meet but my own. And YELLOW – omg, that was the color of the last custom piece that nearly sent me around the twist. Getting just the right bright golden yellow that the customer wanted was nearly traumatic – lol.
Tracey, you are so right. It’s definitely added pressure. But I do have to say that my skillset grew a LOT just from this project! I have actually grown to love the white-washed look, and I think I will probably incorporate it into some of my personal pieces (and pieces that I tried to sell). I probably would have never done it before because I didn’t realize I liked it so much. So that’s great! And yeah, what’s up with that yellow??!!! LOL Sorry you couldn’t find an easy match, too!!! 🙂 I think in the future I will have to point out that I use only Annie Sloan paints, and here they are–this is what I can create from these colors. It helps to manage the expectations, you know?
Oh yes – when this particular customer contacted me, I told her I did everything EXCEPT high gloss – and of course she wanted high gloss – that’s where I should have said sorry, can’t do it. The fact is, I got it done (beautifully) but the stress in this case really wasn’t worth it. I know I will eventually go back to custom jobs – she was just a very, very pushy customer – so as well as getting more comfortable with a high gloss finish, my skillset also grew in that I am now much more comfortable to say no if I feel a particular job is outside of my range, or to quote more appropriately for the time it will take. That is where things tend to come unstuck a bit for me, especially if the piece is in poor condition. The time it takes to repair and prep the piece before I even get to the painting stage really makes some custom jobs cost prohibitive – I need to be clear about charging appropriately for my time.
I am also keen to try a washed look – I have some “beachy” styled pieces with basket drawers that I think this will work nicely on – especially in a grey tone, to give a driftwood type of color.
So what do you think?
Hi! A while back you were having trouble with color from the wood coming up through the paint color. I recommended, I think, Kilz primer. ????? However, I have just learned about a product that should work. Here’s the quote from Paint Couture! TM webpage.
FYI: If you are painting on new wood that is Red Oak, Yellow Oak, Cherry or Mahogany there are tannins that can leach out. In this case, add two or three coats of Mylands Sanding Sealer to prevent the tannins from leaching out. Let your work dry 12 hours before proceeding. We recommend and use Mylands Sanding Sealer. Not all Sanding Sealers are the same.
I will be selling this product in July for anyone interested. I don’t have the price right now, but can let you know. You may want to look into Paint Couture! TM. I’m a new distributor for them and LOVE their paint. It’s acrylic paint and can also be painted on just about anything without sanding. Lots of glazes, gilding wax, embossing medium, etc. to make your painted items fabulous! 🙂 You may delete my plug if you like, but I did want to let you know about the sanding sealer.
P.S. Paint Couture!TM also has lacquer finish you can put on their paint and chalk & milk paints in matte, satin, semi-gloss and gloss. Reading about your customer wanting gloss made me think that you could have painted with chalk paint after all and applied this Glaze Couture! in gloss for the look she wanted. Sorry, can’t help myself to let you know about these choices out there. 🙂