Installing a Staircase Handrail at My Basement Stairs
This post on installing a staircase handrail in my basement is brought to you by The Home Depot.

Since moving into this old 1973 house nearly 10 years ago, I’ve done a ton of do-it-yourself home improvements and repairs along the way that I have been very proud of. But my latest project (installing a staircase handrail along my basement stairs) is one that I am both proud and ashamed of. Let me explain.
I had been a fool for unsafely putting my family, friends, and service workers who came to my house at risk of falling simply because I didn’t have a handrail along my basement stairs. I simply warned people who came into my home (and the kids, too): “Be careful here, there’s no handrail.”
The original handrail had been taken down when contractors removed the old brown ugly paneling to install drywall, and they never reinstalled it (some contractors!).
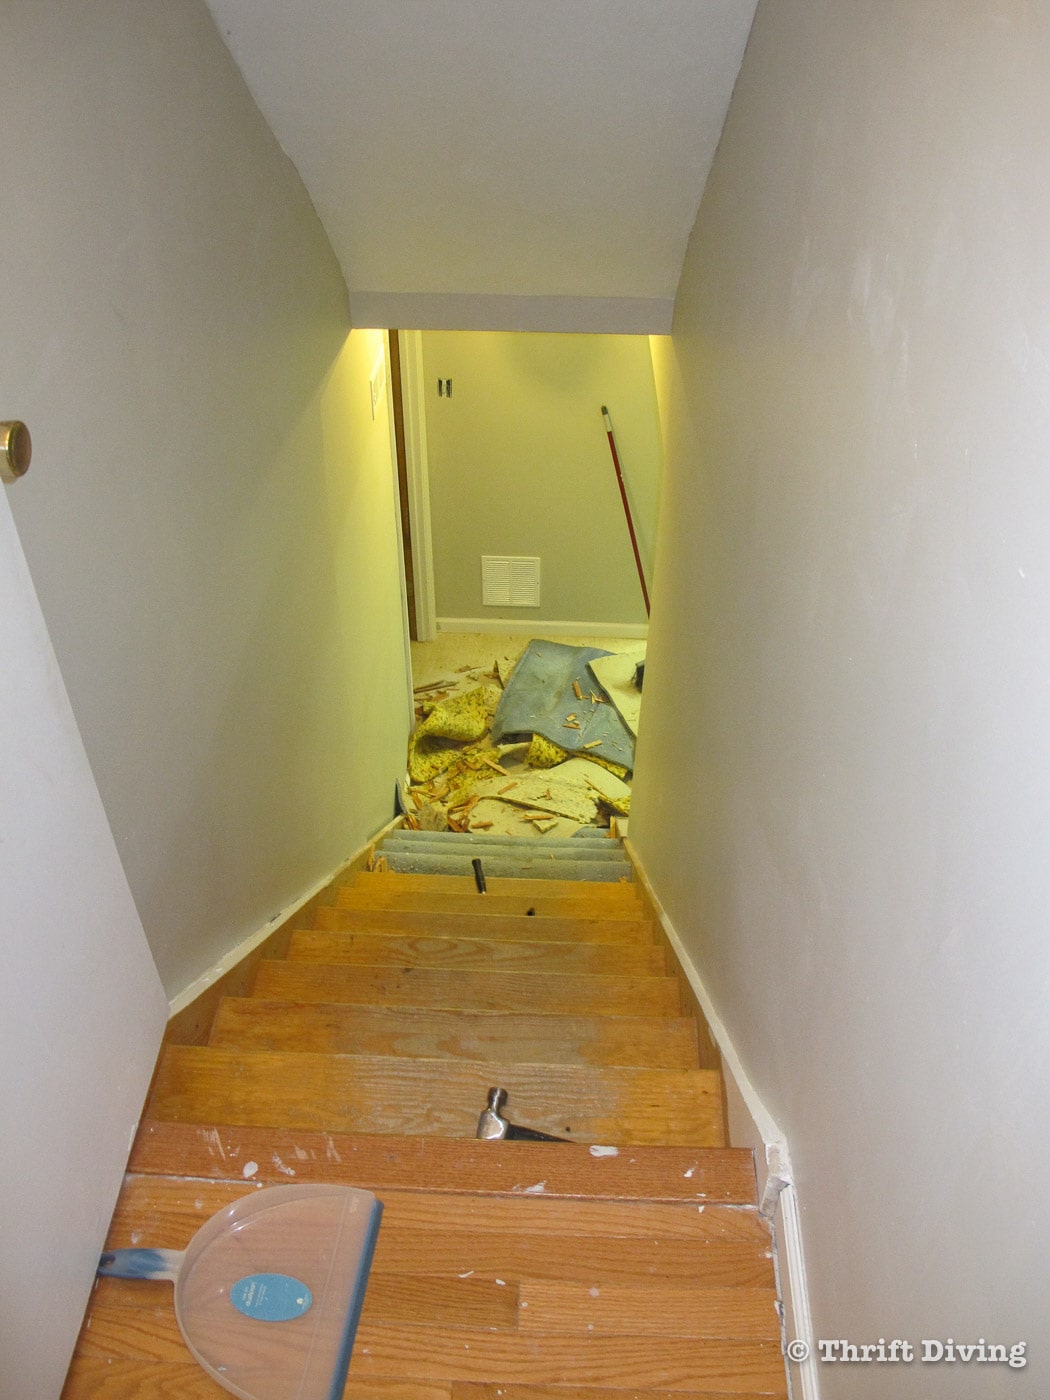
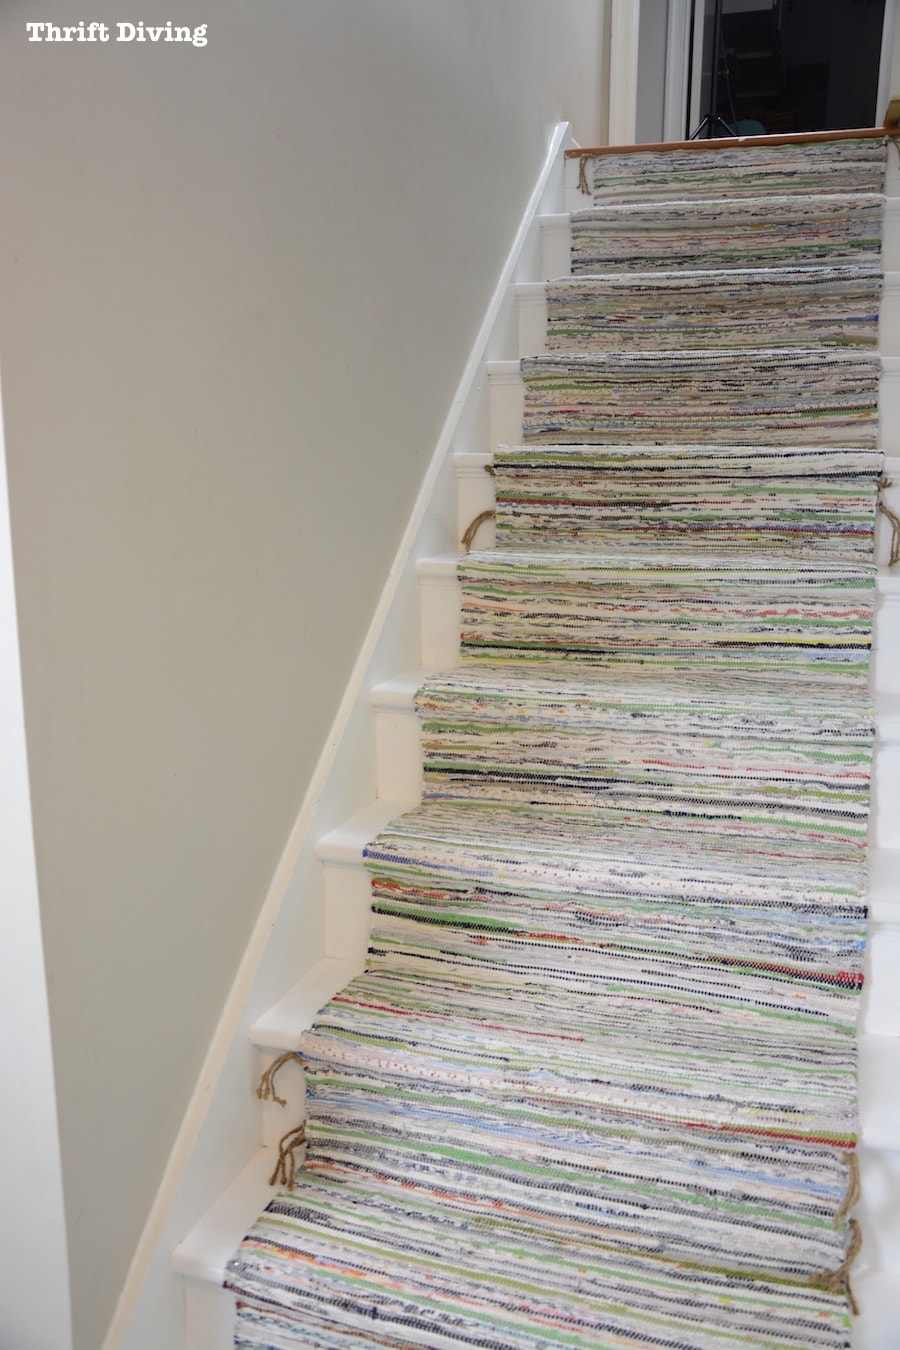
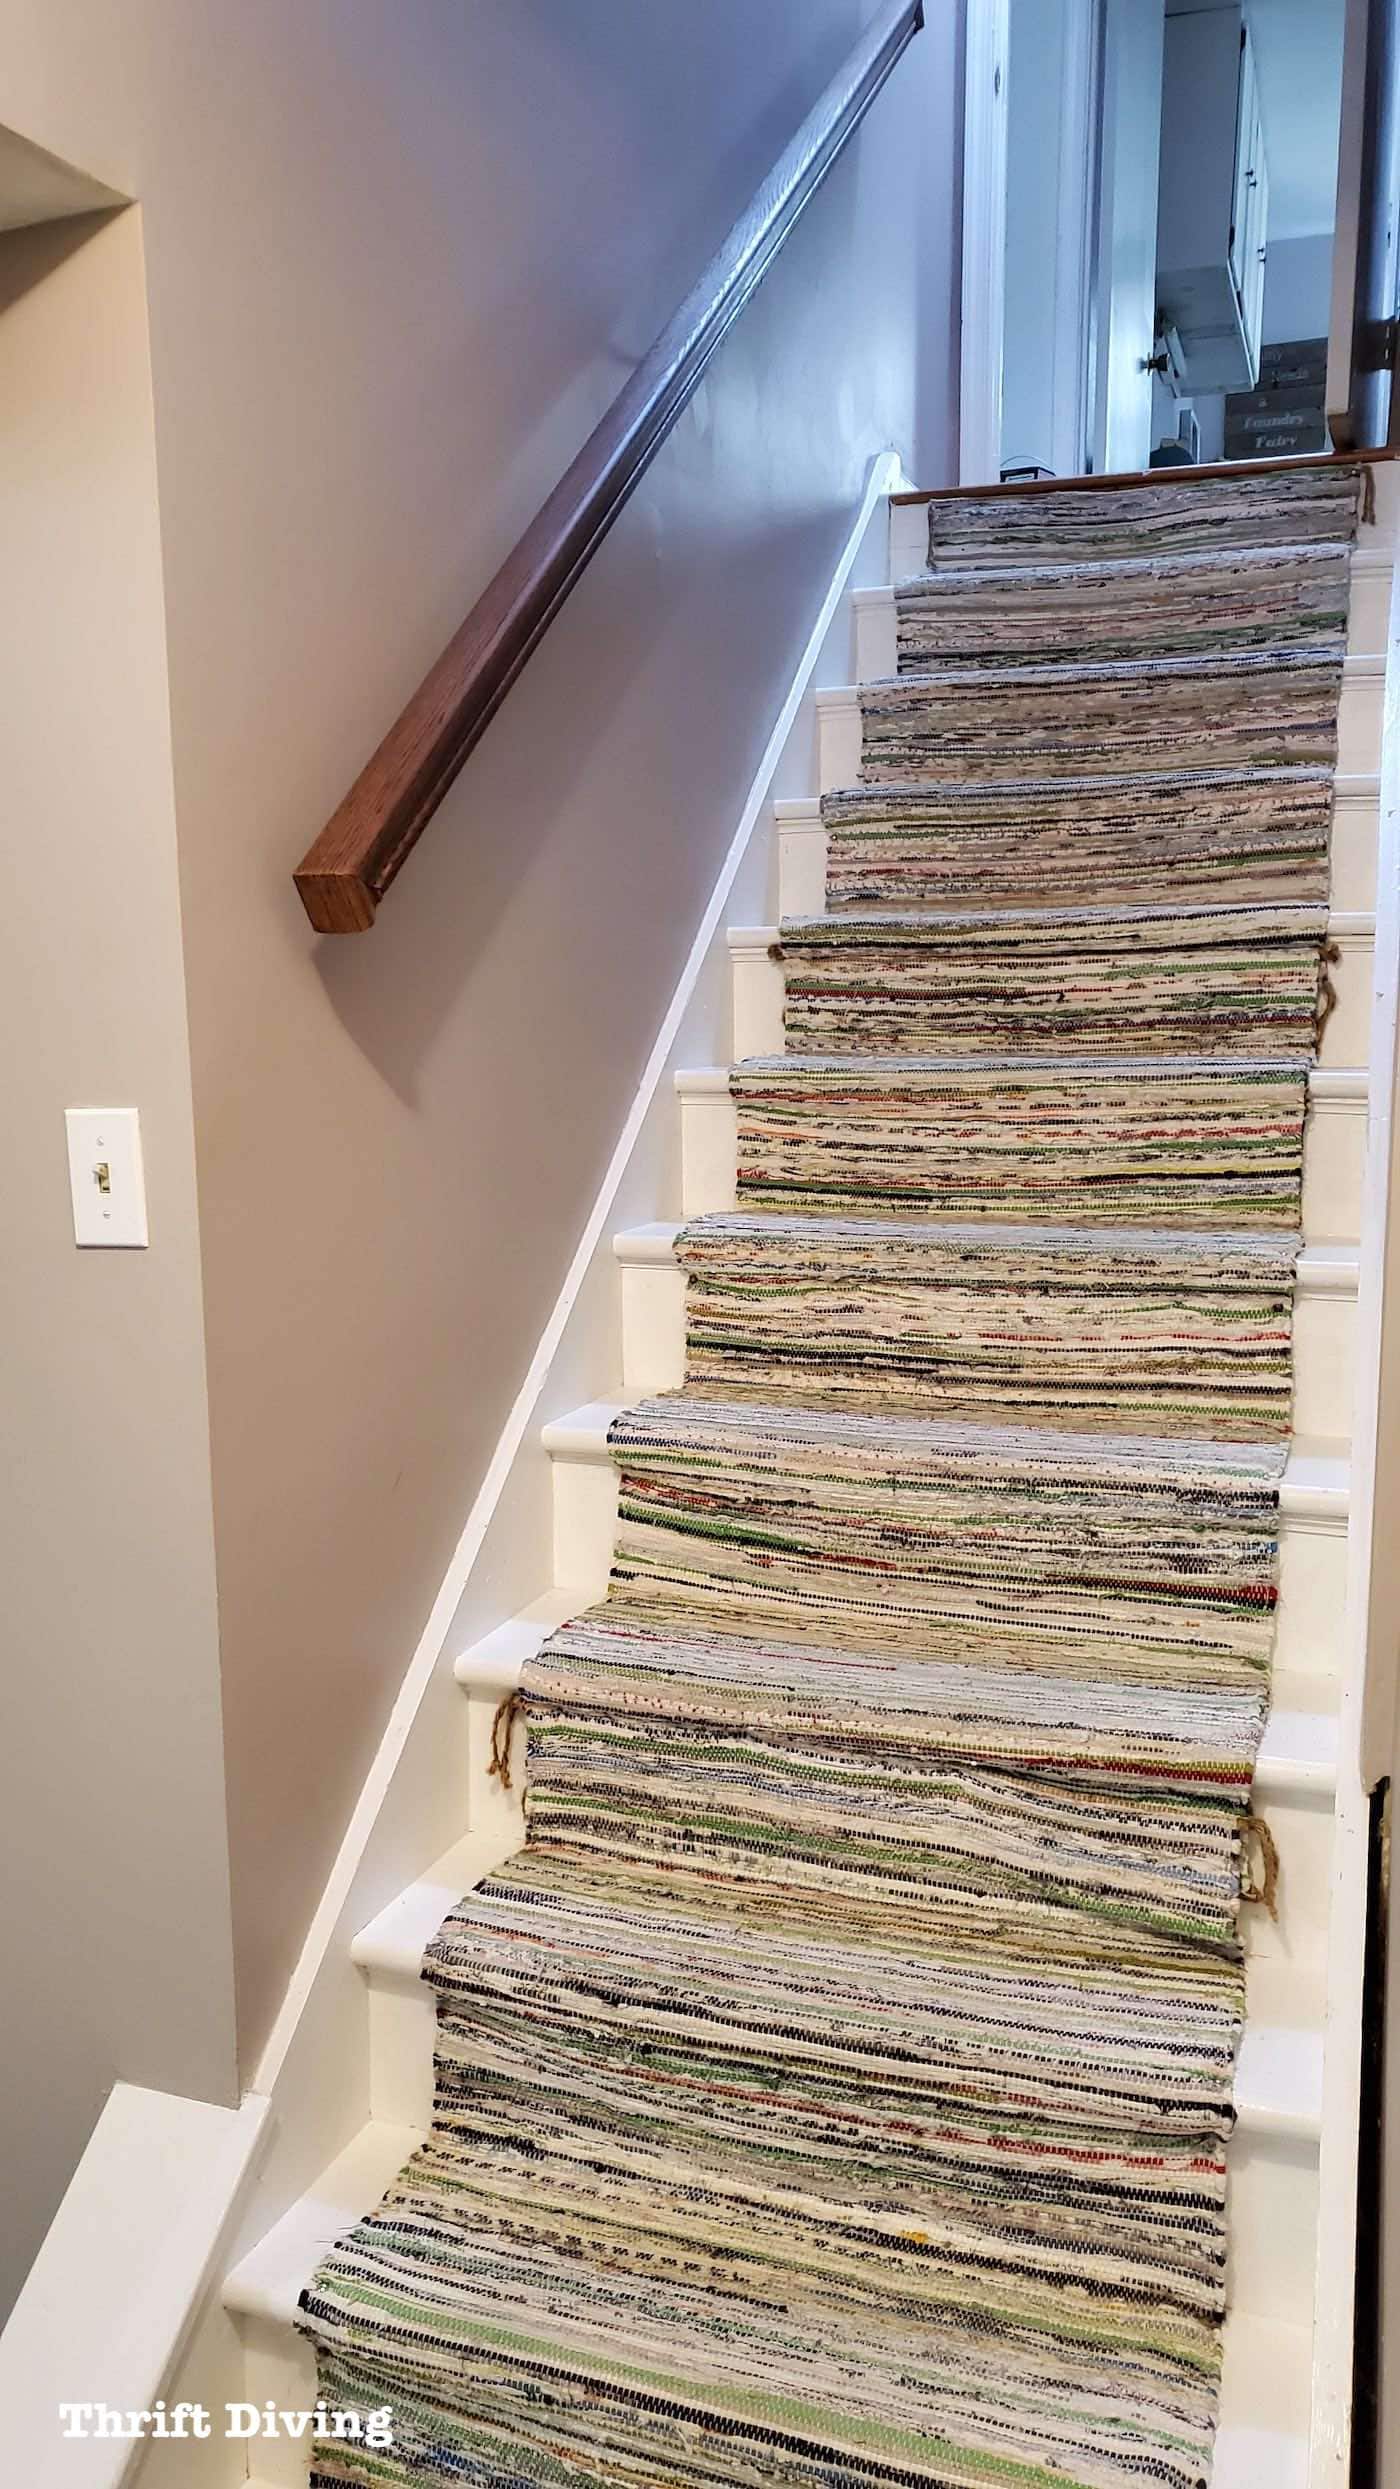
Years later, I had painted my stairs and made my own DIY stairs runner using inexpensive IKEA rugs. It looked fantastic, but one thing you’ll notice is that the stairs had no railing.
A very concerned blog reader emailed me and was adamant that I install one immediately and conveyed the dangers of not having one, using her own nasty fall and lack of handrail as an example of warning. I hurried my tail to Home Depot, bought a rail, and did a quick (but shoddy) installation. Later, when I repainted, I removed the rail and let it sit for–gasp!–an entire year after that.
As a homeowner, I did understand the important of a handrail. As a carpentry student now, I definitely understand the importance of a handrail in terms of code compliance. It was time to correct this problem once and for all with a proper and sturdy installation of a handrail at my basement staircase.
The Rules of Handrails
Last semester I took a class called Building Codes at my community college at part of my carpentry degree I’m pursuing. And while in class, I learned about all the ways my own house would fail inspections according to today’s standards, but that’s a whole ‘nutha discussion…). But let’s talk about what the International Resident Code (2018) says about handrails:
- Handrails must be provided on at least one side of each flight of stairs with 4 or more risers (those are the vertical parts of the steps; the treads are the horizontal parts that you step on).
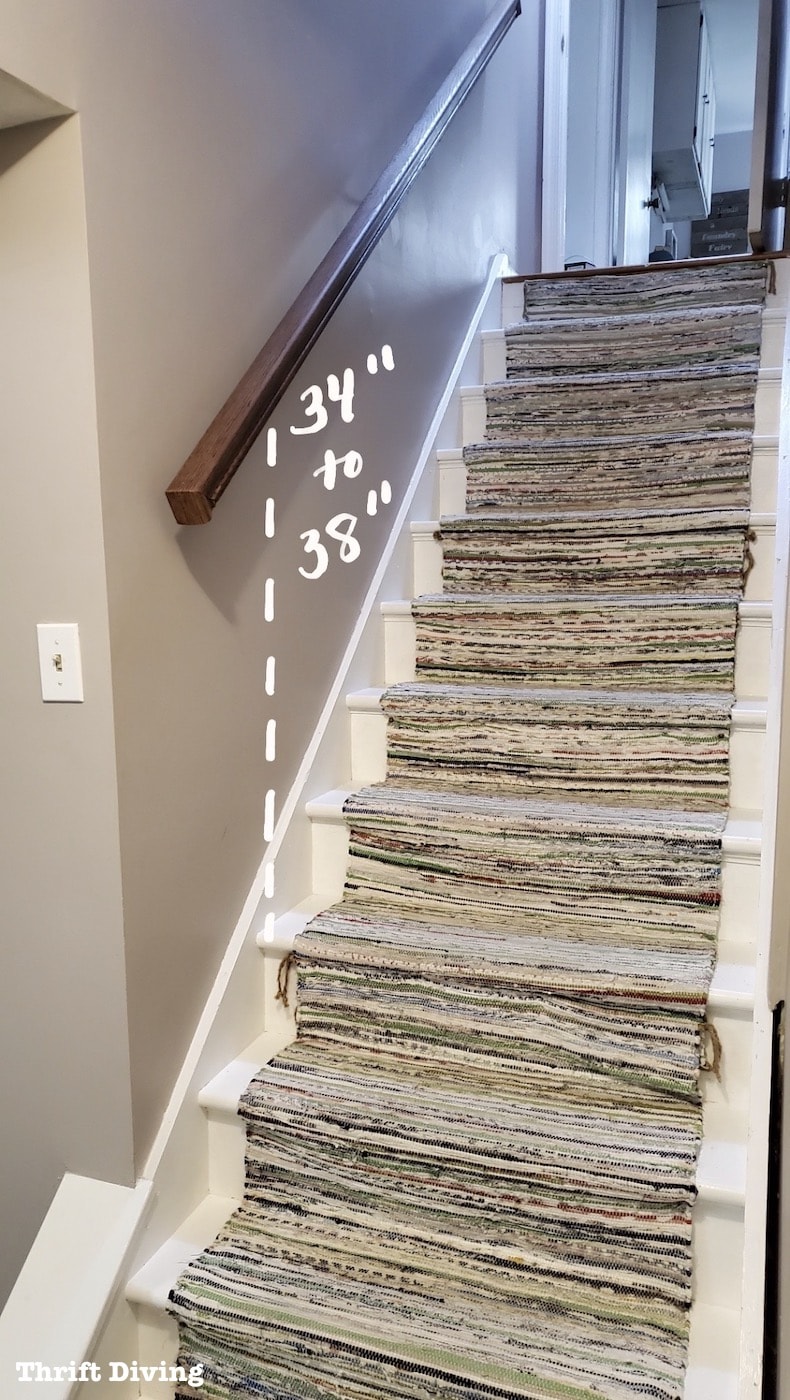
- Handrail height must be between 34″ and 38″ from the “sloped plane adjoining the tread nosing or finished surface of the ramp slope.”
- Handrails should not project more than 4 1/2″ on either side of the stairway (see IRB R311.7.8.2 for exceptions).
- Handrails should have at least 1- 1/2″ space beween the wall and handrail (if you’re using handrail brackets, this shouldn’t be an issue).
- Handrails should be continuous the entire flight of stairs (in other words, don’t make it too short; it must start at the very top and end at the very bottom of the stairs (see IRB R311.7.8.4 for exceptions).
Of course, there are a bunch of other building code rules about handrails, but if you’re installing a basic handrail like mine below, those rules above are more than sufficient.
Buying a Staircase Handrail
I actually went to Home Depot to buy the handrail last year when I did my basement makeover. I don’t even know if I photographed the process, so I’ll walk you through what I did as best I can without complete step-by-step pictures.
I did stop over to HD to see what other options they had and noticed that they had a couple of options in the bay: solid pine and red oak, and thin and thick. They’re priced per foot, so before you go to buy a handrail, be sure to measure the run of your stairs: from the top of your staircase to the bottom, where it will be installed. Add on an additional foot to account for the end caps that will need to be cut and attached.
And remember that code rule about being long enough to run continuously (unless you’ve got a landing or a turn; then of course, the rules allow for an interruption).

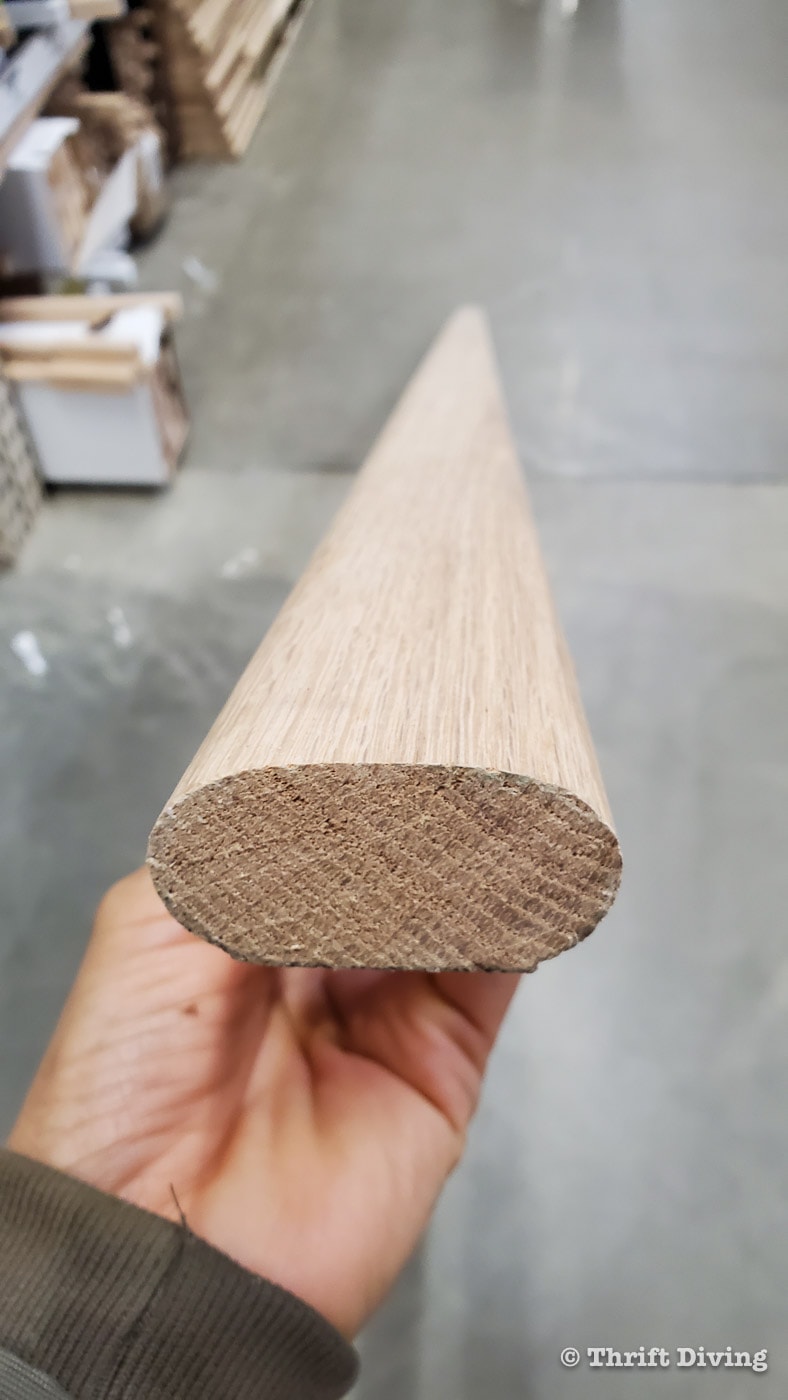
The more affordable option is the handrail that is flat and oval. I think of the options they provide, this one is the least “fancy” and basic.
The more expensive option is the solid red oak. If you know your measurements, they will cut it for you to the length you need. But keep in mind that you’ll need to finish off the ends of the staircase handrail for a finished look, which I’ll cover below.
Materials and Tools Needed to Install a Staircase Handrail in My Basement
There are a few things I needed to have on hand in order to install the handrail along my basement staircase. This will depend on where you’re installing it. Since this is my basement, I needed a couple of different tools in order to drill into the poured concrete behind the drywall on a couple of the handrail brackets.
- Solid wood handrail (pine or red oak)
- Handrail bracket
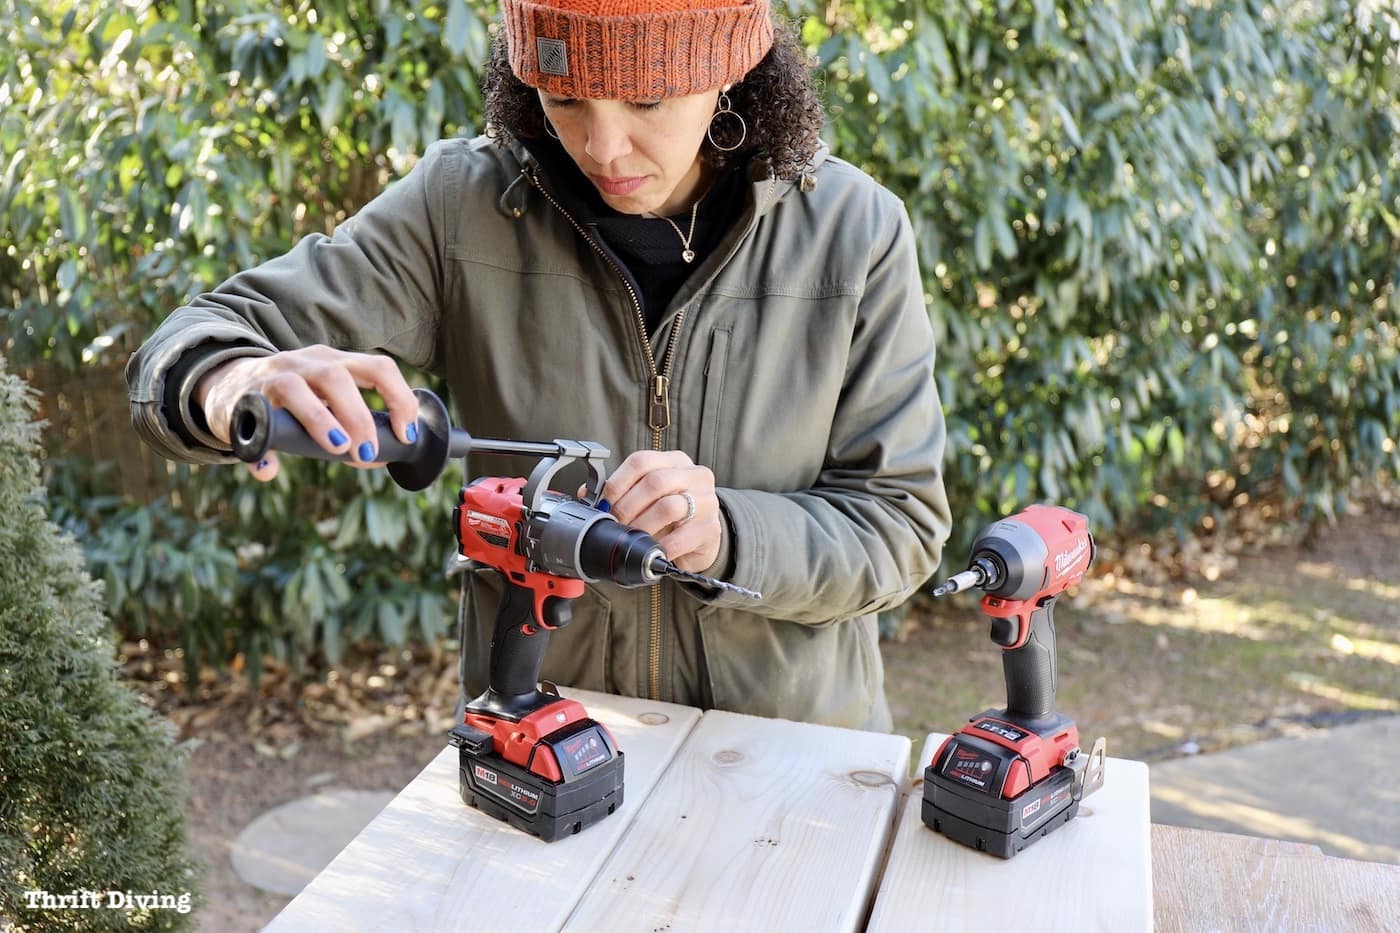
- Milwaukee Hammer drill
- Impact driver (buy the Milwaukee hammer drill and impact driver kit from The Home Depot)
- Miter saw (or ask Home Depot to cut for you)
- Brad nailer
- Wood glue
- Drill bits (follow instructions on wall anchors for choosing types and sizes of drill bits needed)
- Stud finder
- Tape measure
- Toggle bolts or other drywall anchor if you’re not using studs
- Concrete anchors (optional unless installing into concrete)
- Medium 150-grit sandpaper
- Your favorite stain
- Rags
How to Cut and Install a Staircase Handrail
I should start this tutorial off by saying I’m in no way an expert in handrail installation. However, from my experience, I learned a few things worth of passing on to you.
STEP 1: Measure the run of the staircase.
The “run” is the length of the staircase from the top to the bottom. This will determine how much handrail you’ll need. It’s typically sold by the foot, so when you go to Home Depot with a measurement, you can ask them to cut it to size, if necessary.
STEP 2: Cut and Attach the End Cap
I apologize for not having process pictures to explain this step. I had constructed the handrail some time ago and didn’t snap pictures. But you can get a good visual from these pictures of my basement handrail!
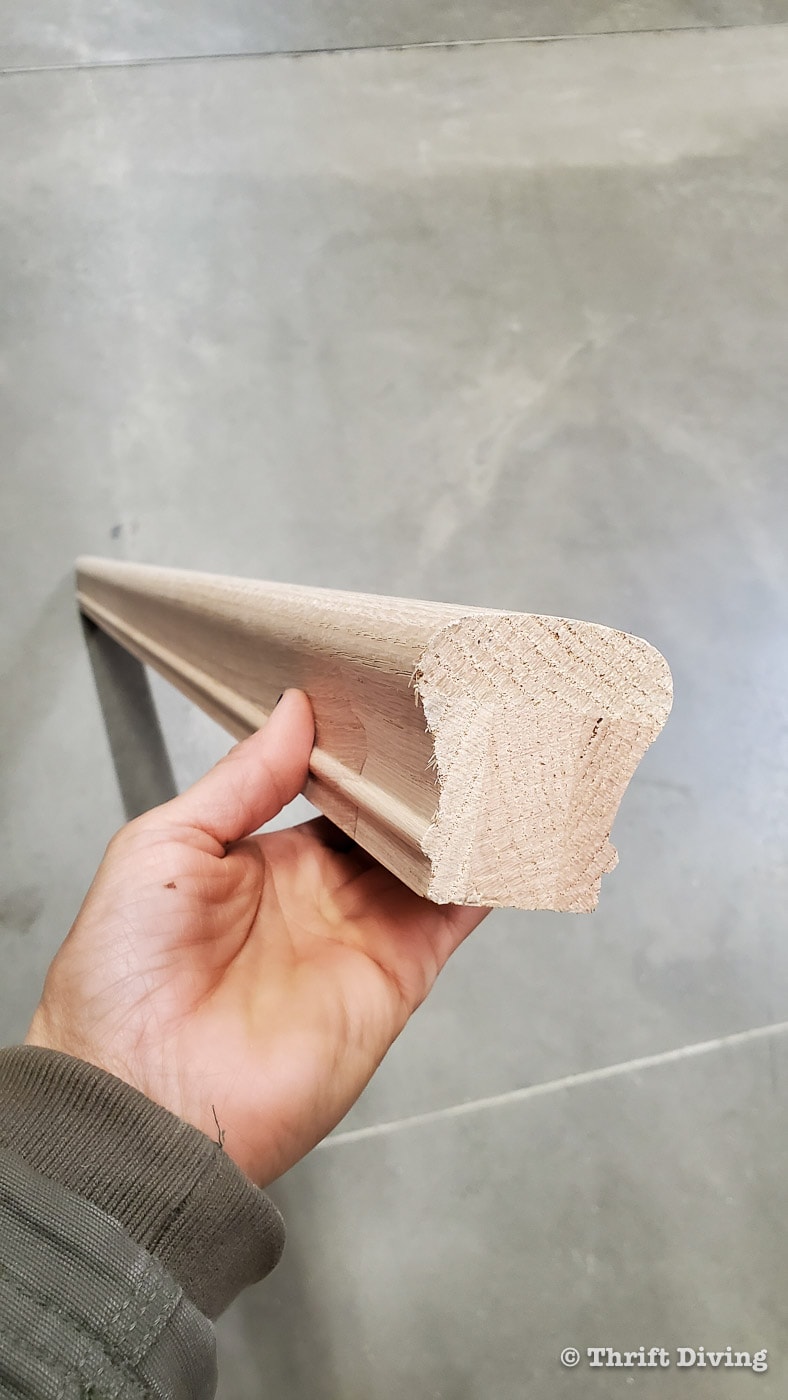
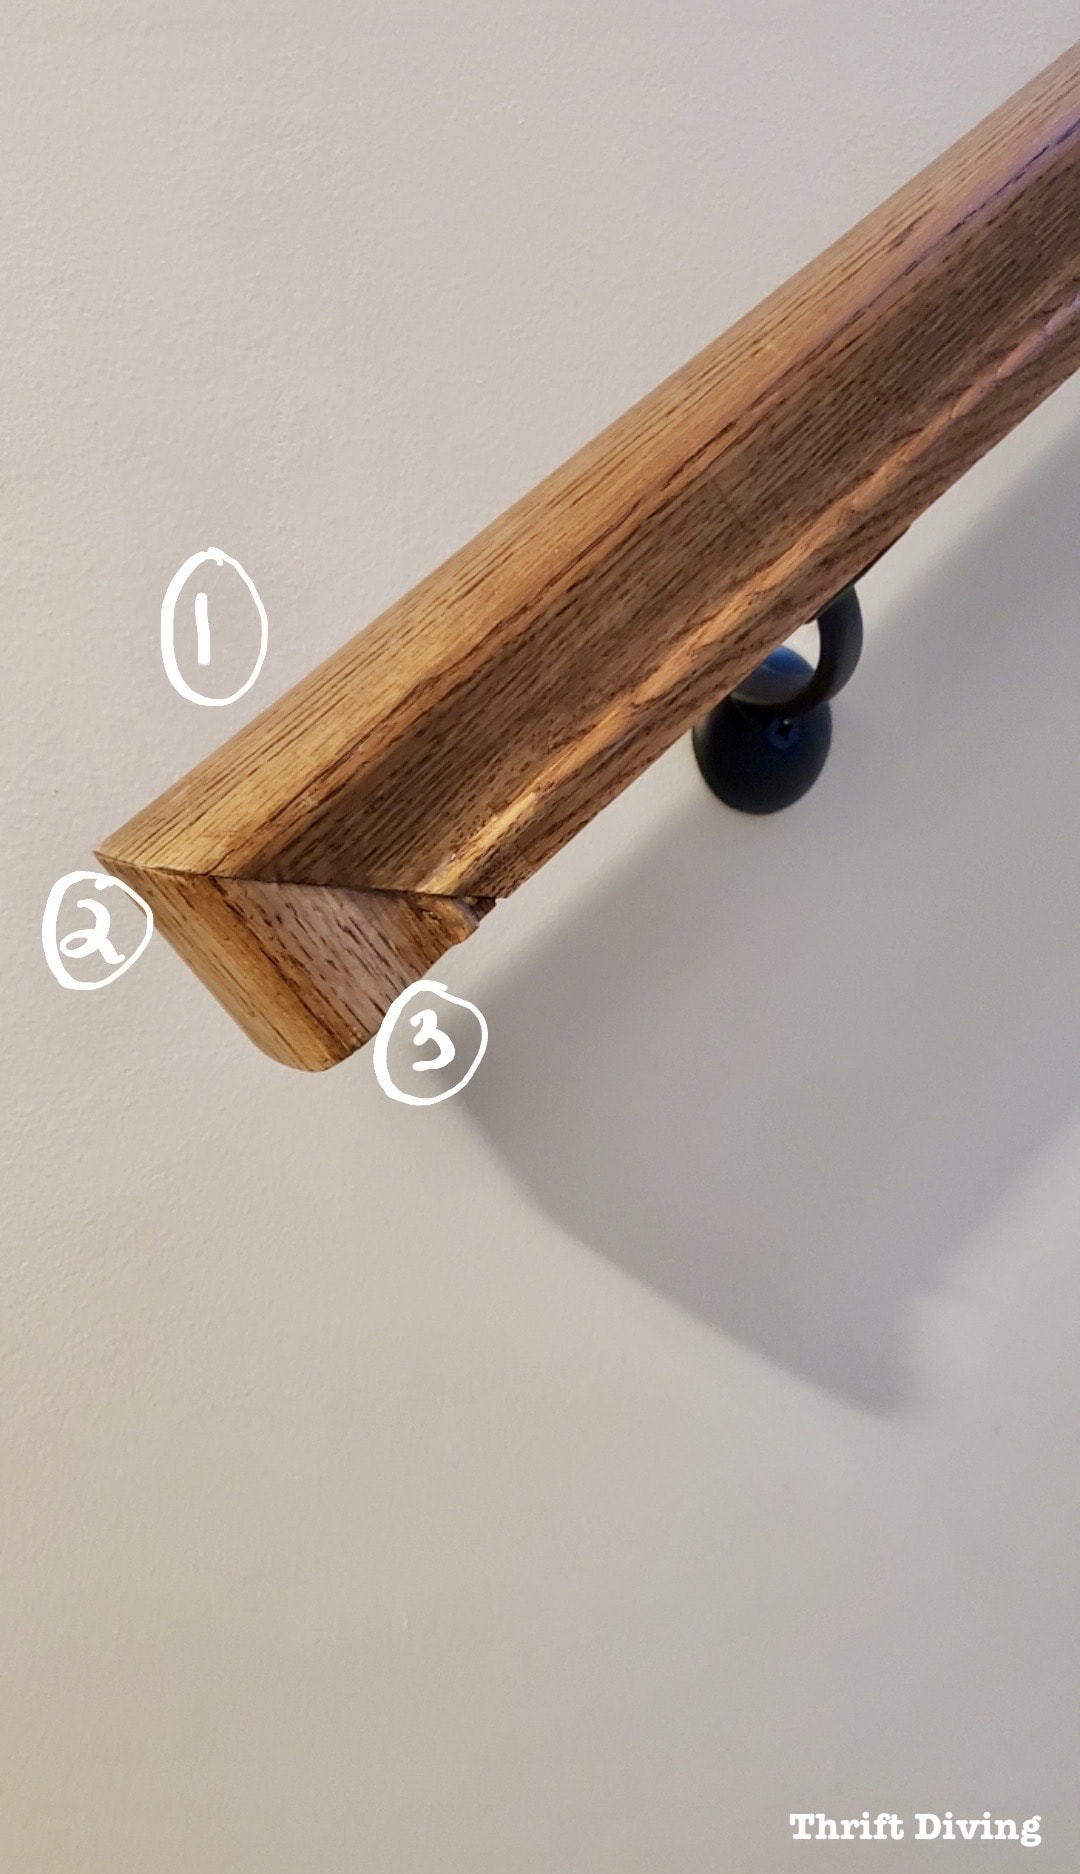
This is what the handrail end cap should look like (using the thicker handrail). You will need to make three cuts to achieve this look:
1 – Cut the long piece of handrail at a 45-degree angle using a miter saw.
2- Cut another piece of handrail at 45-degrees in the opposite direction using a miter saw (this is why it’s helpful to buy a foot or so more than the length of your stairs.
3 – Make a 90-degree cut on the other end of the smaller piece of handrail, taking care to try to match up the details of the railing.
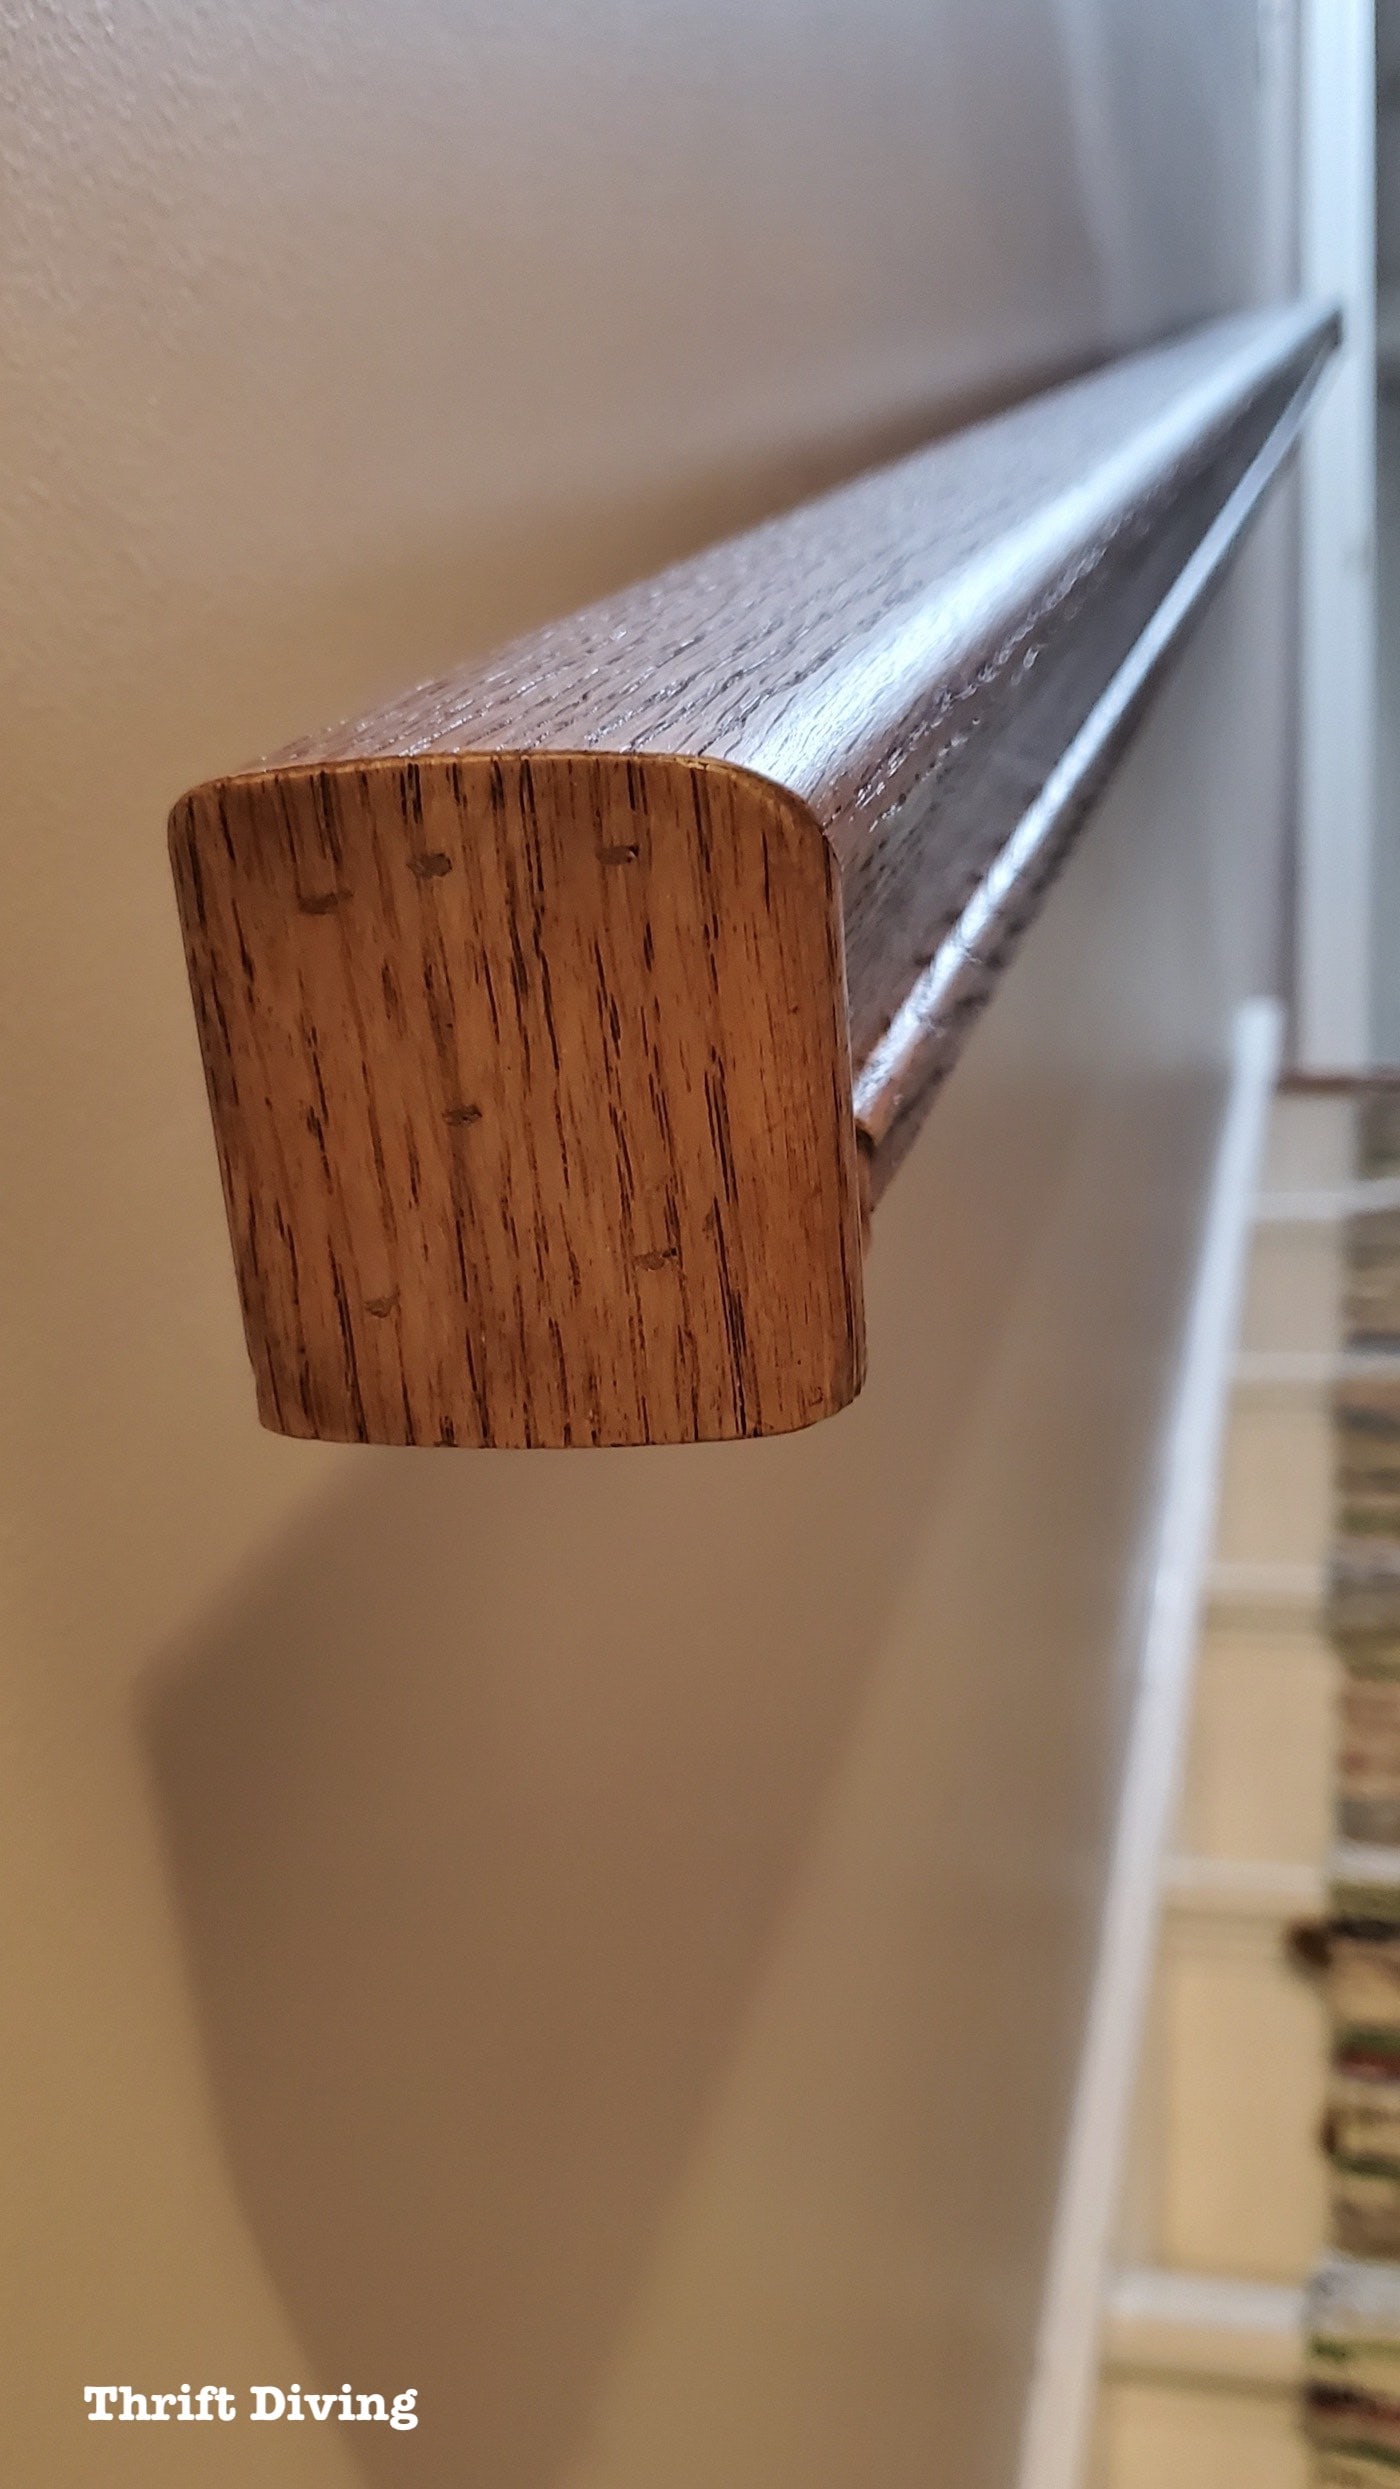
You’ll do these end caps on both ends of the staircase railing. Once the end cap pieces are cut, use wood glue and 18-gauge brad nails to attach it. You’ll be using wood filler to fill the brad nail holes before staining. Be sure to wipe off any good glue that seeps out or else the stain won’t penetrate the wood where the glue lingers.
STEP 3: Sand and Finish the Handrail With Stain
I have found that it’s best to sand and finish the handrail before you install it (but if you have to, you can try to sand and finish after it’s installed, but it’s harder to do). Originally, when I bought my handrail, that’s what I did. I sanded it with 150-grit sand paper so that the pigment stains could settle nicely onto the wood. Wipe off the dust when you’re done sanding so that the dust doesn’t ruin your finish (and wear a mask and gloves, too, of course). Then wipe on the stain with lint-free rags.
WARNING: Be sure to thoroughly let your stain-soaked rags dry by spreading them flat and outstretched individually. Once they’re completely dry, you may throw them away. If you do not let them thoroughly dry before tossing them, they may spontaneously combust and become a fire hazard.
STEP 4: Attach the Handrail Brackets
This oil-rubbed bronze heavy duty handrail bracket is what I bought for my handrail. I bought 3 of them to fully support all parts of the handrails evenly. What I didn’t anticipate is how difficult it could be to install the included mounting hardware into the solid red oak.

So here are a few tips when mounting the brackets to the handrail:
- By 3 bracket sets to support the handrail near the top step, bottom step, and middle step (if you’ve got a full staircase like mine).
- Use a drill bit to drill a pilot hole before driving the screw to attach the bracket.
- Use an impact driver if you have it instead of a power drill for driving the hardware into the solid wood.
STEP 5: Measure How High Your Handrail Should Be
According to the International Residential Code (IRC), handrails should be between 34″ – 38″, as I said before. It will depend on what feels most comfortable to you. I set mine to 37″ from the top of the tread nosing (the rounded part of the tread). I’m 5’10” tall, so I like mine being a little taller. But it’s not too tall so that the kids can comfortably hold it, too.
This is where you’re going to need a second person to help, or maybe even two people! You’ll need to keep this same distance from the stairs all the way up the stairs. So you’ll need to mark the walls. With the hardware mounted, I was able to use a pencil and mark the center of the handrail bracket.
STEP 6: Find and Mark the Studs
Depending on how high you want your handrail between 34″ and 38″ and the location of your top and bottom stairs, you may be able to install your handrail to one or more studs. Studs are generally 16 inches from center of stud to center of stud. (Some homes may have 24″ spaced studs, though). Mark your stud locations and see if you’re able to fit any of the mounting brackets on the studs while staying within that 34″ to 38″ range. If you can, your handrail will be all the more sturdy.
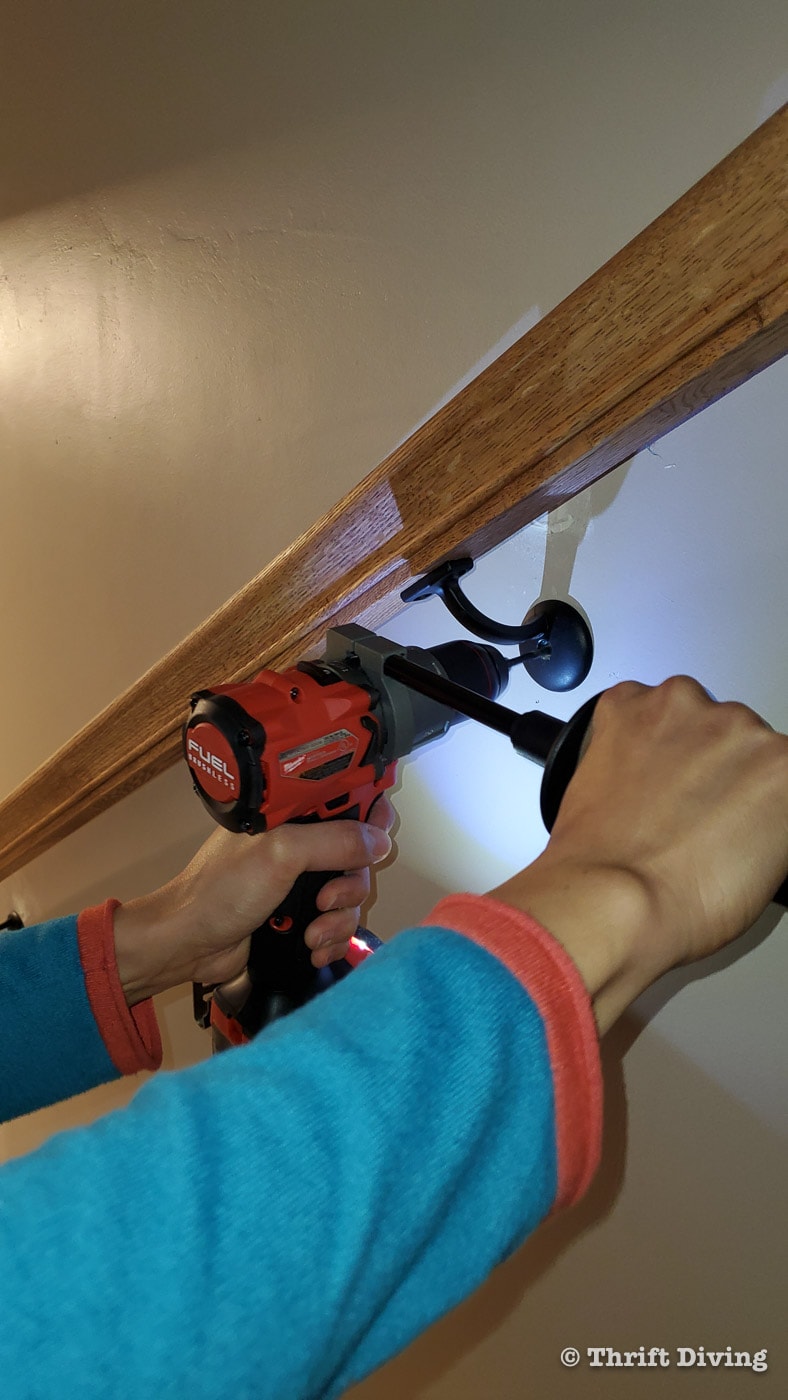
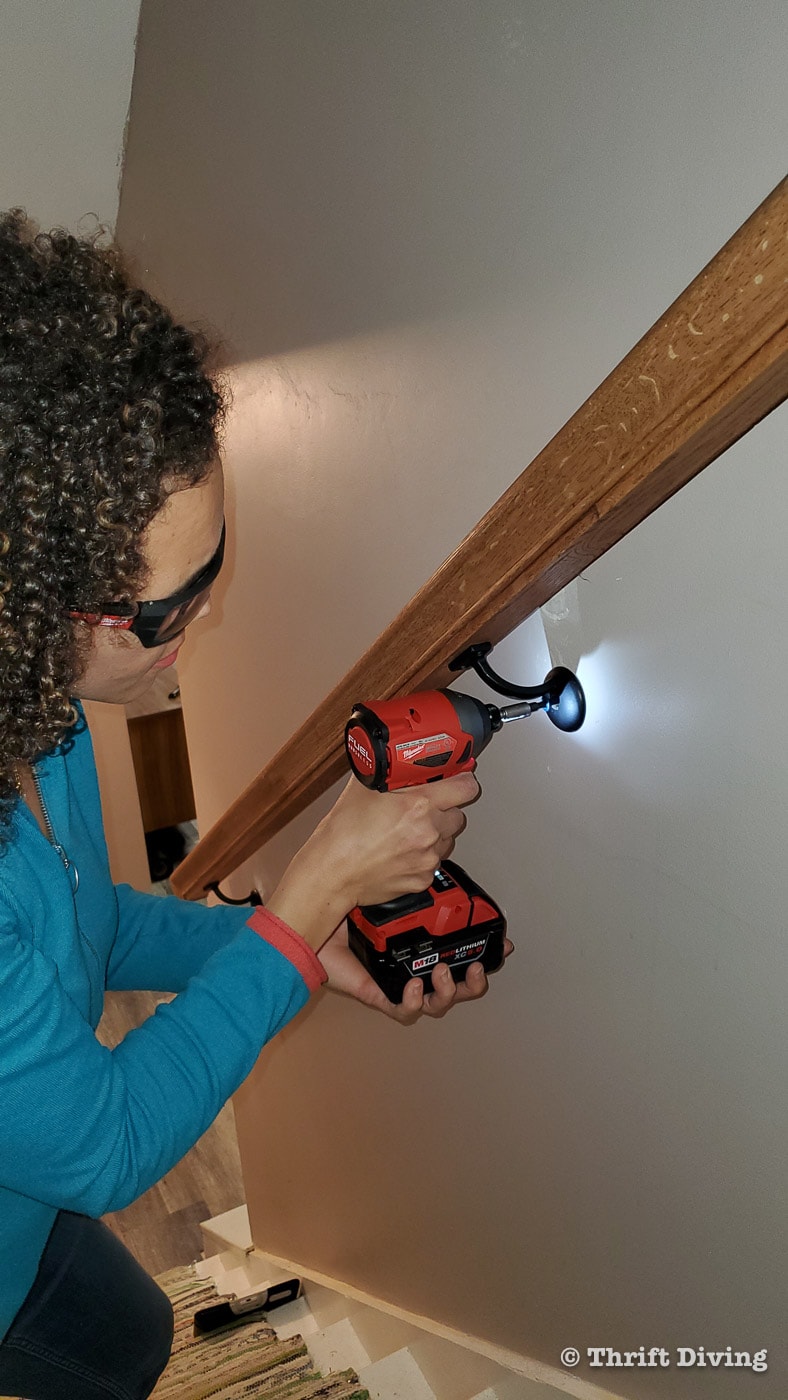
If your house is like mine, though, I actually found–gasp!–poured concrete behind the drywall, which required some special tools: a hammer drill, concrete screws, and an impact driver.
For this part of the project, Home Depot supplied the Milwaukee M18 FUEL 18-Volt Lithium-Ion Brushless Cordless Hammer Drill and Impact Driver Combo Kit in order to attach the handrail into the basement poured concrete walls. I appreciated that the kit came with two 18V batteries (and a 5-year tool and 3-year battery warranty).
I also used some drill bits that were specifically for drilling into concrete, which you can read about over in a related blog post: How to Drill Concrete and Brick.
The bottom handrail bracket was easy to drill into with a concrete, then using the impact driver to drive a 1/4″ x 1 -1/4″ concrete anchor. The middle bracket was super tough to attach. It took a lot of power, but with the right concrete drill bit, plus the powerful Milwaukee hammer drill, I was able to get the concrete anchor secured.

STEP 7: Adding the Extra Finishing
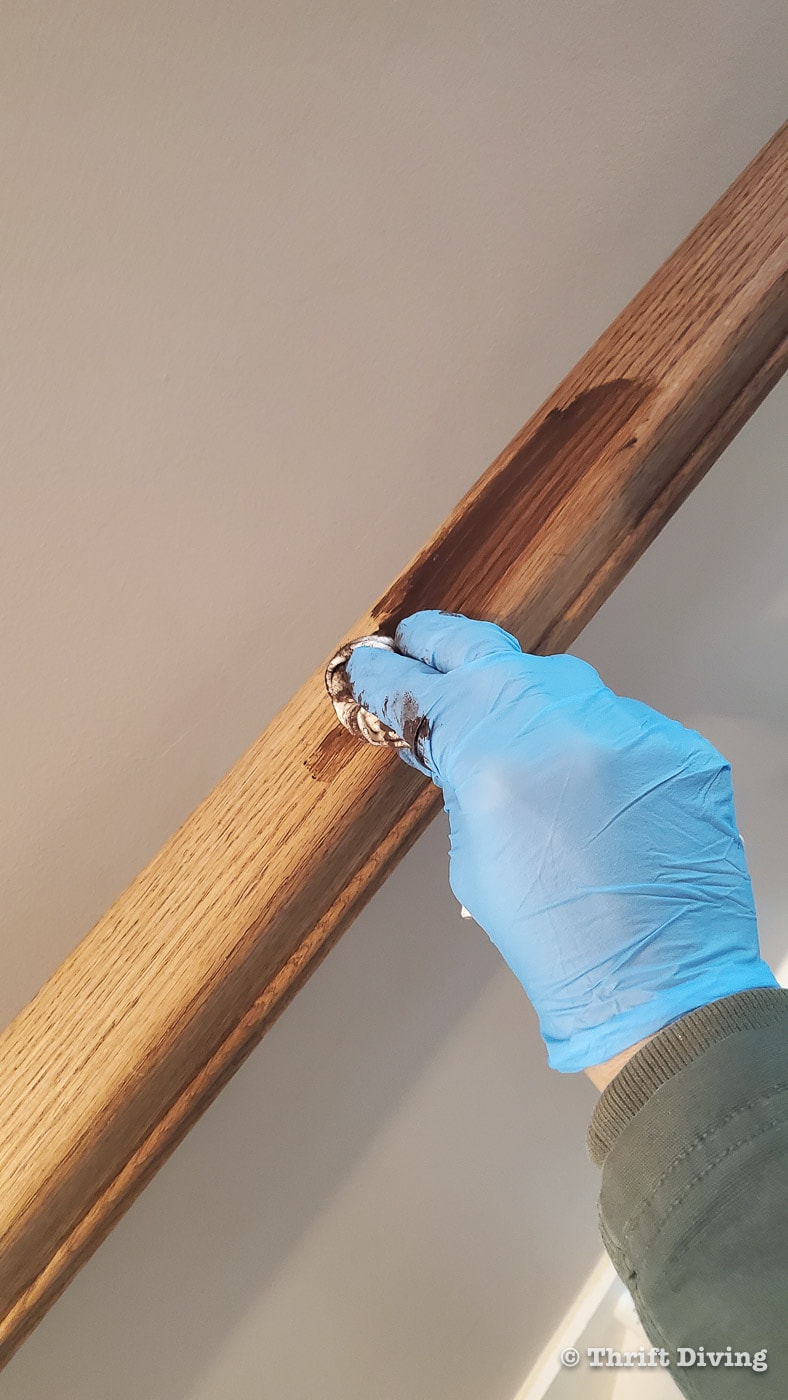
Typically, you shouldn’t be staining while your handrail is already in place. But as I mentioned in my case, I had never properly prepped and installed the railing in the first place. Remember, it had just been sitting for a year on the floor, getting scratched up, etc. So after the staircase railing was in place, I used some gel stain to wipe on a darker coat over the lighter stain I had previously used. I wiped it off and when it was dry, I added a water-based top-coat.
Before
Leaving a staircase without a rail is just plain stupid. I regret doing so for so long, because I should know better (being a carpentry student and all…). But I am thankful that no one got hurt. If you’ve also procrastinated on doing this project because you weren’t sure how to do it, hopefully this post either helps you accomplish it yourself or at least inspires you to hire a handy person or contractor to get the project done for you!
In Progress!
Now that I’ve a staircase handrail up, I’m even more inspired to re-do the stairs with an upgraded stairs runner. I’ll be doing that DIY project soon, so be sure to subscribe to my blog and subscribe to my Thrift Diving channel on YouTube so you don’t miss out!
And if you have found this tutorial helpful, click here to save it on Pinterest!
![]()
How about you–are you installing handrail in your staircase, too? Leave a message below and let me know how it goes for you!
Download the 5 freebies!

Thrift Diving inspires women to decorate, improve, and maintain their home themselves...using paint, power tools, and thrift stores! Use these 5 printables, checklists, and ebooks to get started!

I have been working on my stairs and railings in my home. For reference, I live in Ontario, Canada.
There are a few issues with this tutorial to meet current (2023) building codes in my area. IT may be similar in your area, so be careful. First, the mounting brackets used here have only one screw into the wall. Two #8 wood screws penetrating no less than 1 1/4″ into solid wood is the minimum requirement. Second, the ends of the railings must be terminated in such a way so as to not create a hazard. Leaving them open like in the tutorial creates a clothes hook hazard and does not meet code requirements. That is, a purse strap or loose clothing could become caught on the end of the railing and cause a fall. The usual way around this is to return the end of the railing to the wall.
There are even more requirements if the railing is not in a house or single dwelling unit (such as a rental unit or commercial applications.)
Building codes are updated and change regularly, so check the code in your area or consult a building inspector or professional contractor if you need to. Liability is a big issue as far as stairs and railings are concerned. If you DIY this and it’s not right and someone is injured, then you could be on the hook for a big payout (not to mention someone will have been hurt).
With this said, I still found this post useful. Thank you for posting your experience.
Used this guide to install a railing for my in-laws. I could have used more directions on how you did the end caps. Luckily I was able to figure it out on my own. Most online videos have the ends going to the wall and I was trying to match their other railing.