How to Tile a Table Top With Your Own Ceramic Tiles
Sometimes a project comes along that makes you wish you could hide your head in the sand and just forget about it. Do you ever have those projects, too? Because that’s how this project started. I procrastinated like you wouldn’t believe because I wasn’t really sure how it was going to turn out. So the easiest solution was to not start so that I wouldn’t have to find out ;). LOL
But what good would it do to run from projects that test your skills??
None!
So you must tackle that project which causes you the most procrastination and angst!
March is “Adding Style With Tile” over at Ryobi Nation, and I’m excited to have been asked to participate! You can find all the step-by-step details of this project on Ryobi Nation!
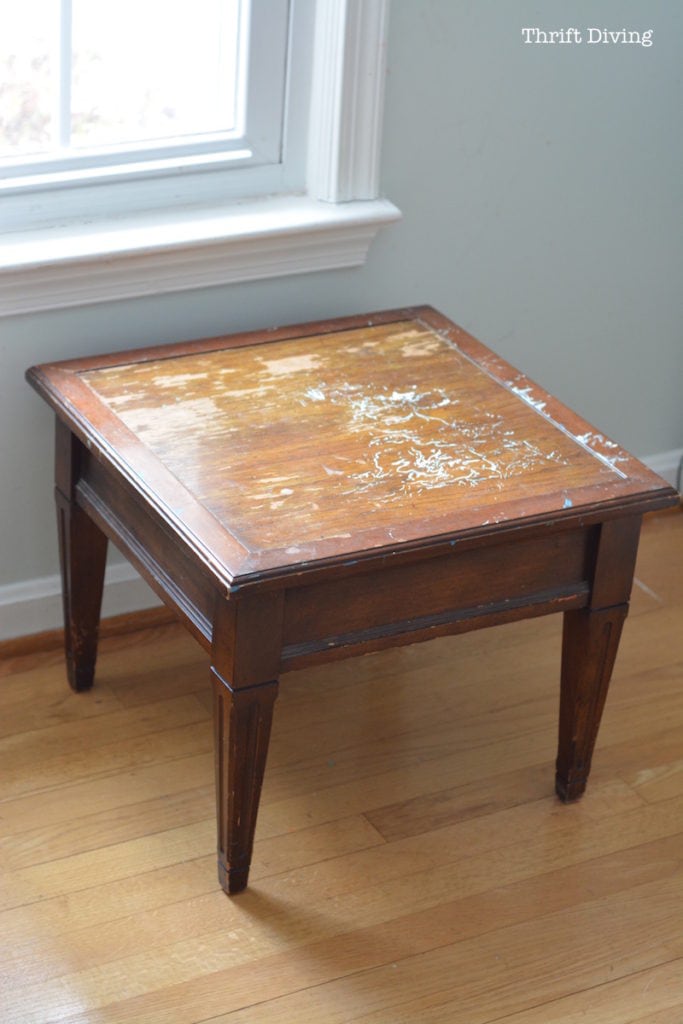
This poor little side table has history. My grandfather (a.k.a. Pappy) gave me this table a couple years ago. It sat in my garage (surprise! surprise!) for all that time because I just didn’t know what in the world to do with it. It’s short, for one…..what do you even PUT on a short side table?? Secondly, there was only one…. what am I going to do with just one short side table??
Then I realized, it doesn’t matter if I don’t know how I’m going to use it. What mattered was challenging myself to do my first “real” tiling project!
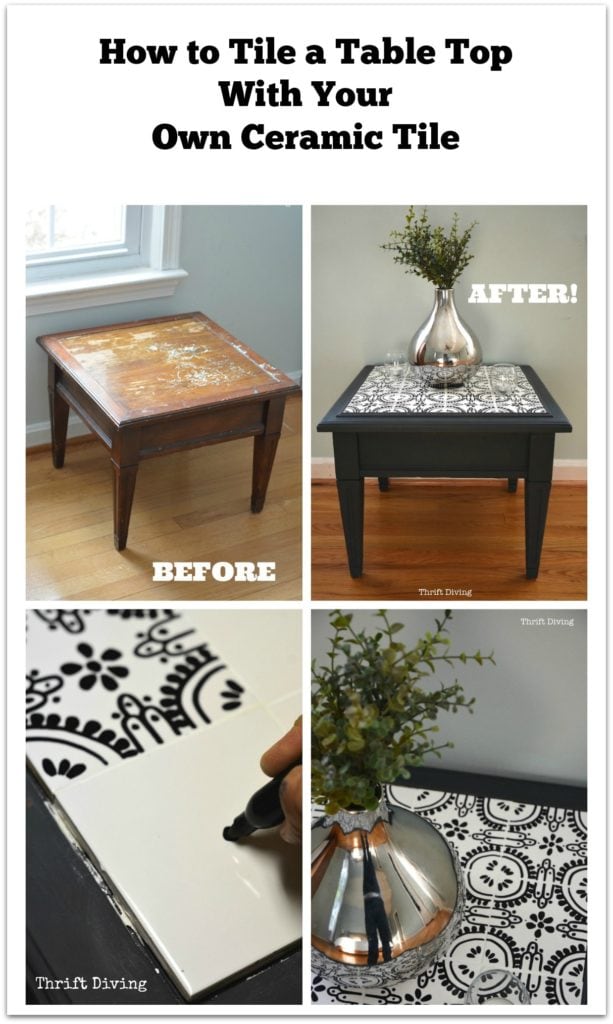
BEFORE
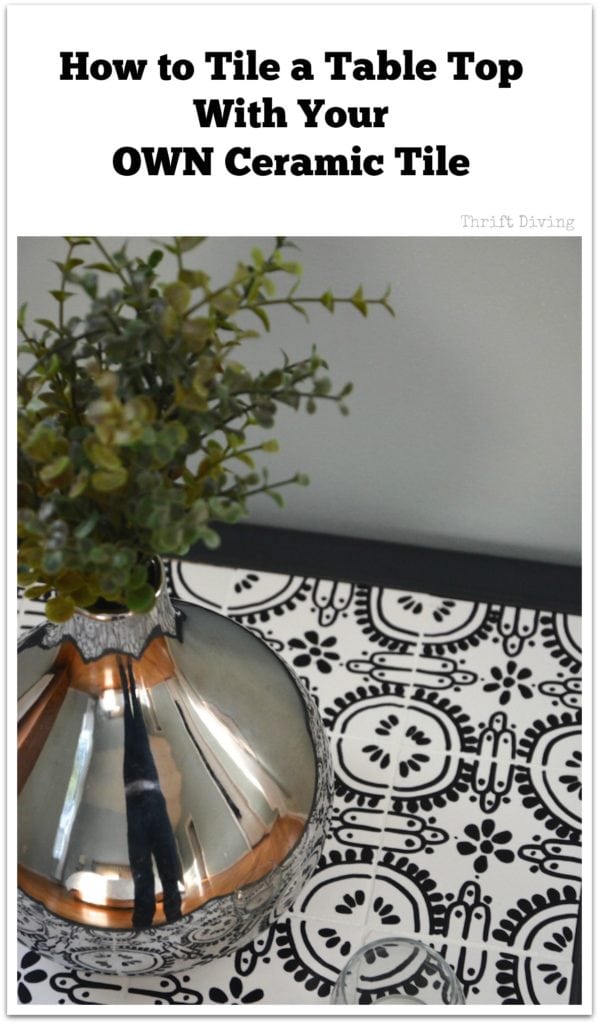
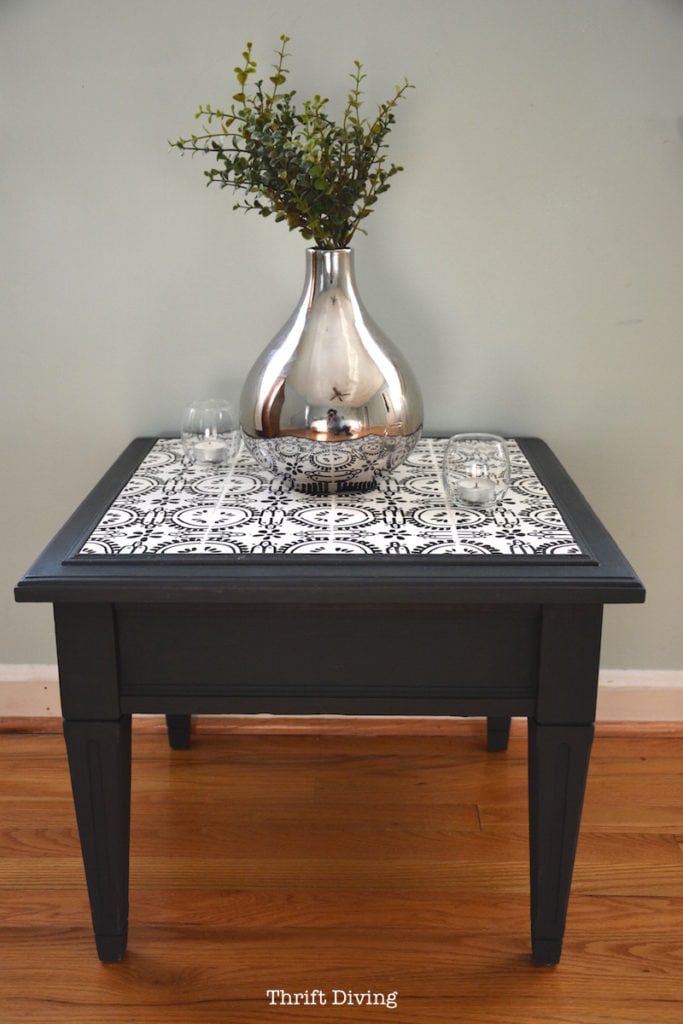
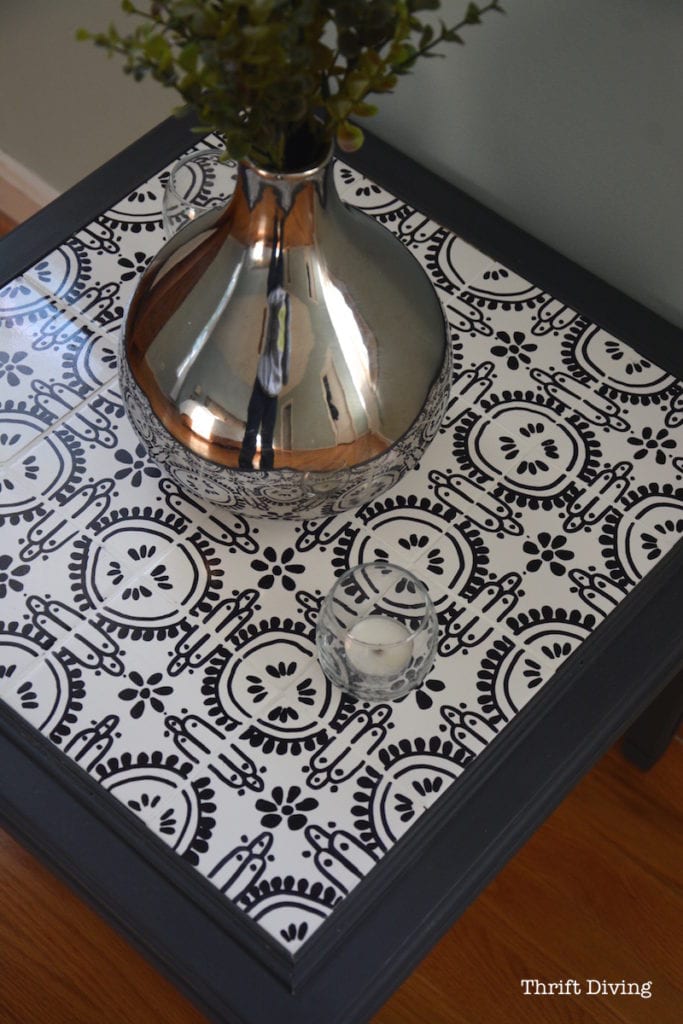
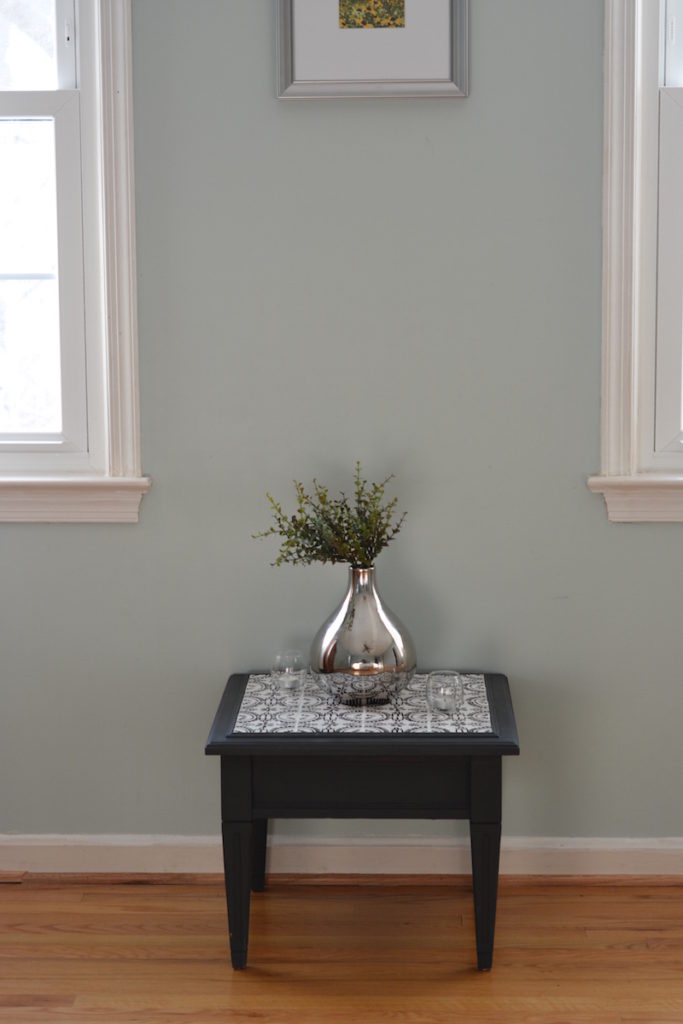
AFTER!
The Inspiration to Tile a Table Top
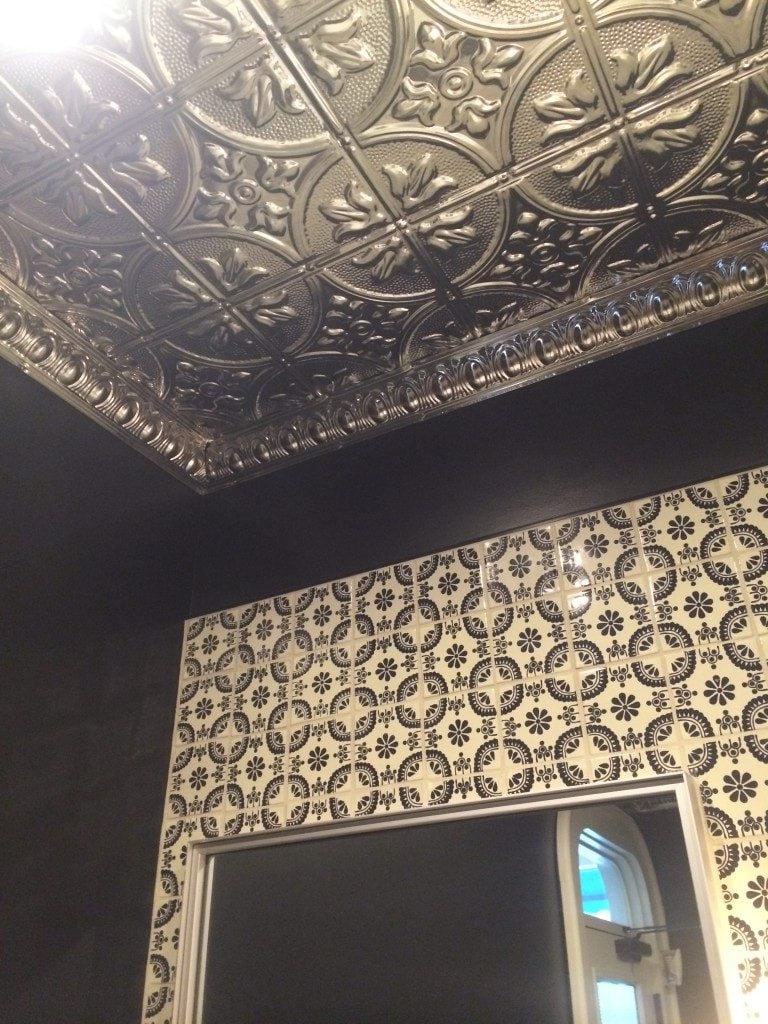
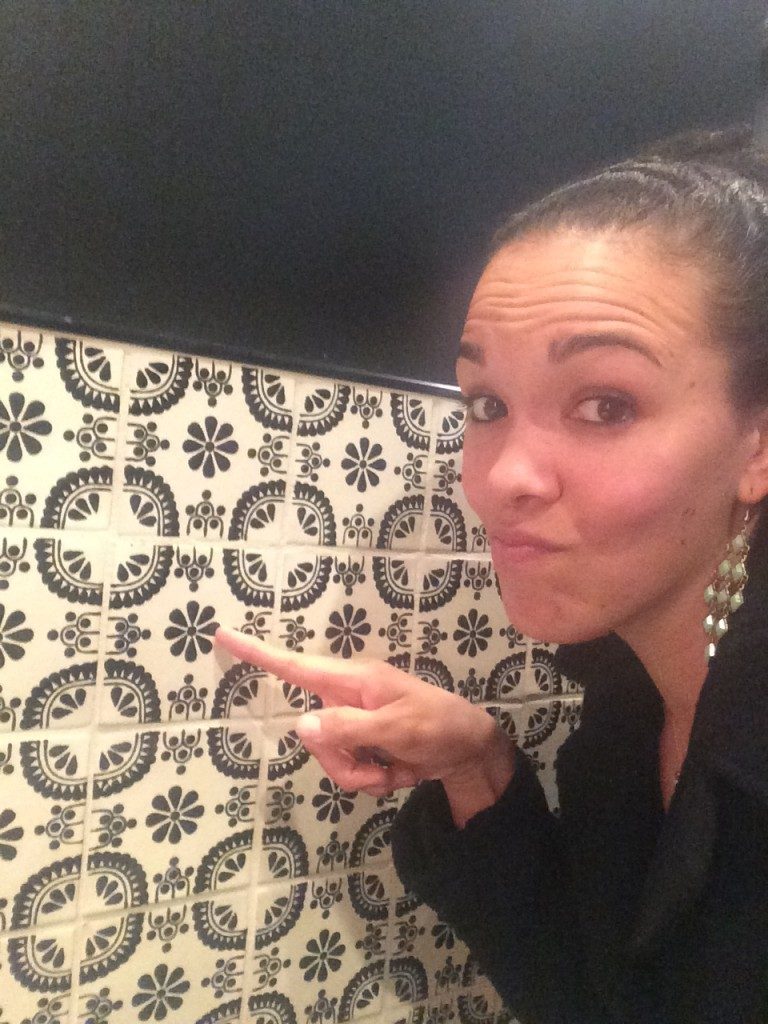
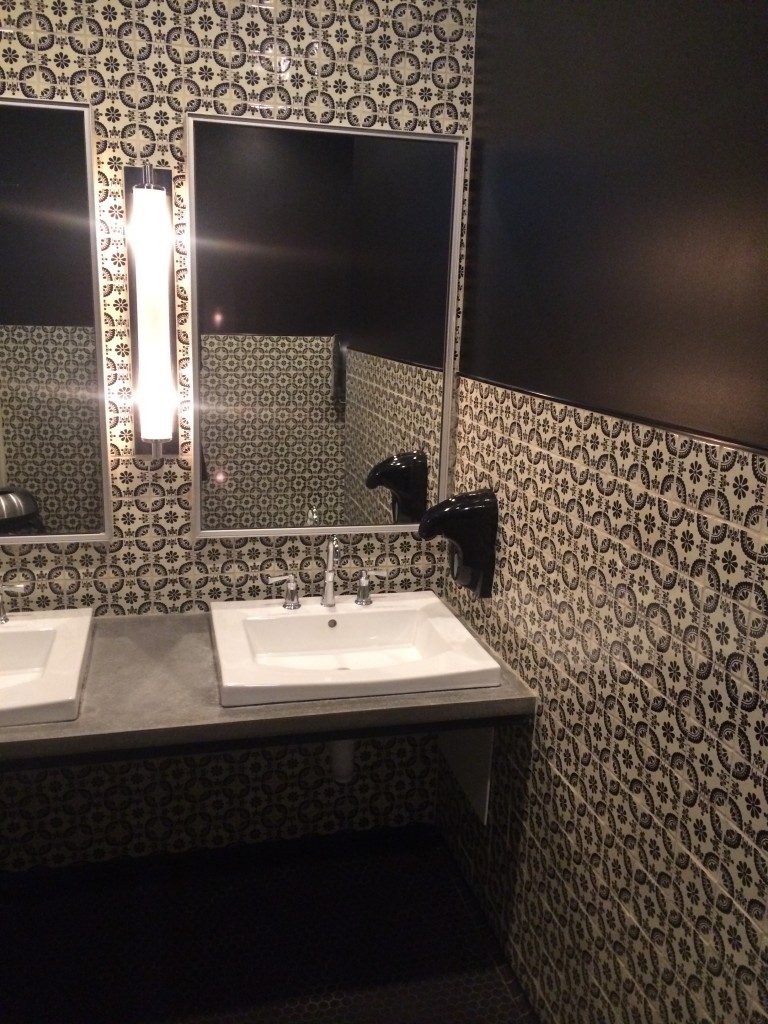
Some of you may remember a post I did last year about Finding Decorating Inspiration in a Public Toilet. The women’s bathroom at this Latin restaurant near my old job spoke to me the moment I saw it.
Actually, it shouted: “You’ve got to re-create this look!”
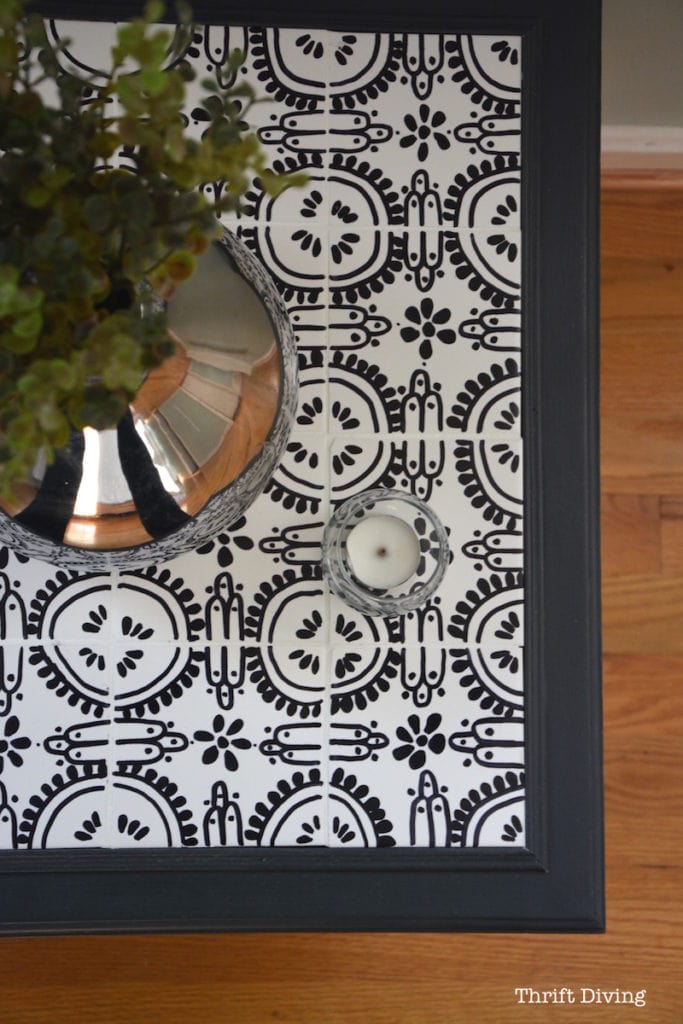
I loved the tile, and figured I could re-create it with permanent marker somehow. I just didn’t know when and where I would do it in my house or on what piece of furniture.
Yes, On This Table Top!
This little side table was perfect! It already had a little inset on the top where the tile would sit nicely. And then I could put this silver vase on top (that I already owned), inspired by those awesome silver from the tin ceiling tiles!
Yes!
I Did Everything Backwards
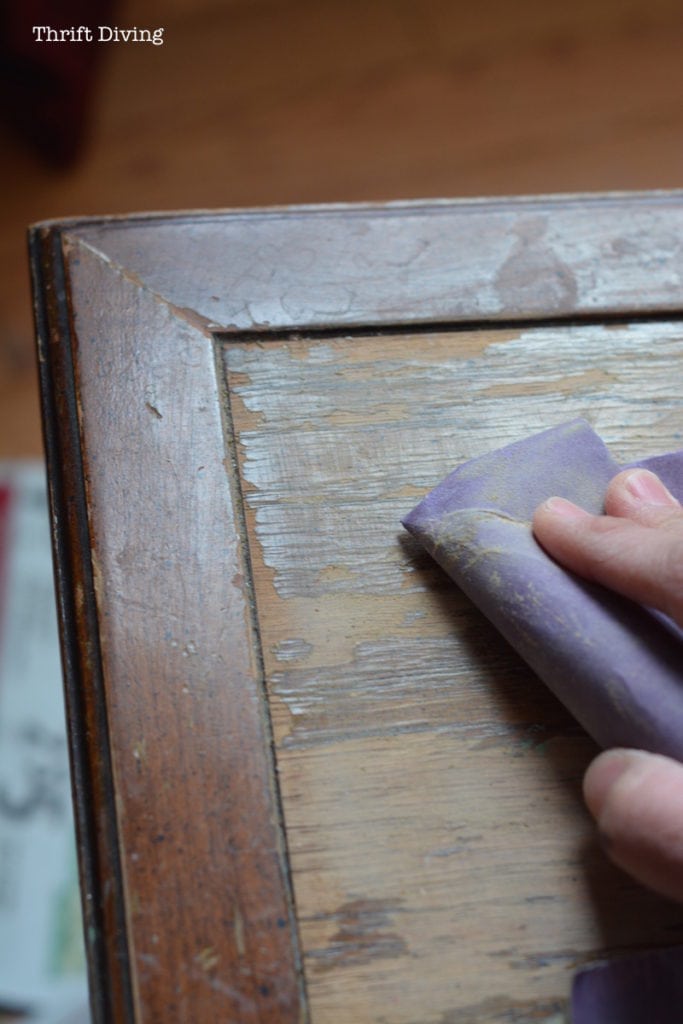
The only thing I got right in this project was prepping and painting the table first. LOL.
Normally I don’t sand, but when a table is chipping like this, you just want to smooth things out first, so I used fine sandpaper.
Then I turned the piece upside down and started painting from the bottom up.
I noticed the little metal tag on the bottom and wanted a closer look.

Wow….I couldn’t believe that this piece was actually from our hometown, where my grandfather has lived all his life! This really was a special piece. I better not mess this up. GULP
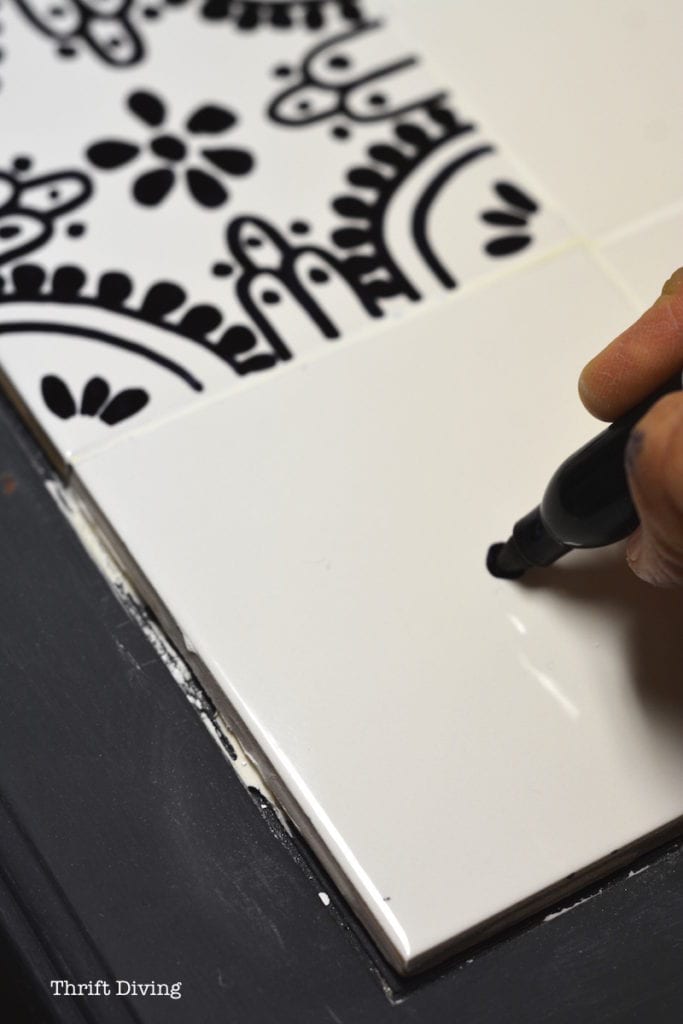
My Not-So-Genius Move
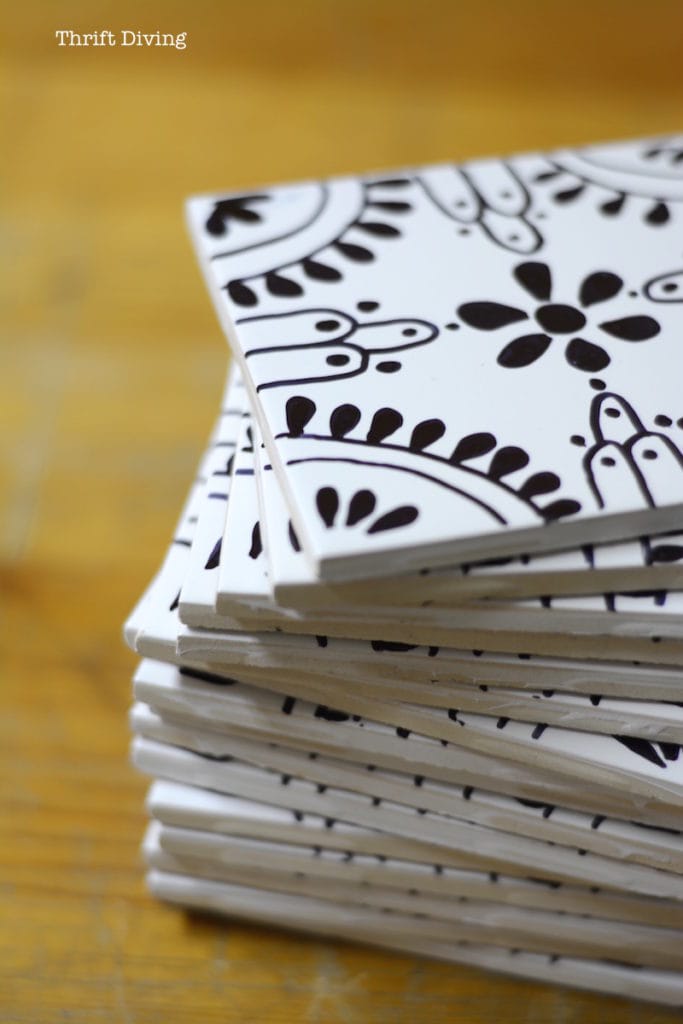
Why did I think it would be a good idea to doodle out the pattern on all the tiles BEFORE I cut and adhered them? {{{insert palm slap here}}}}}
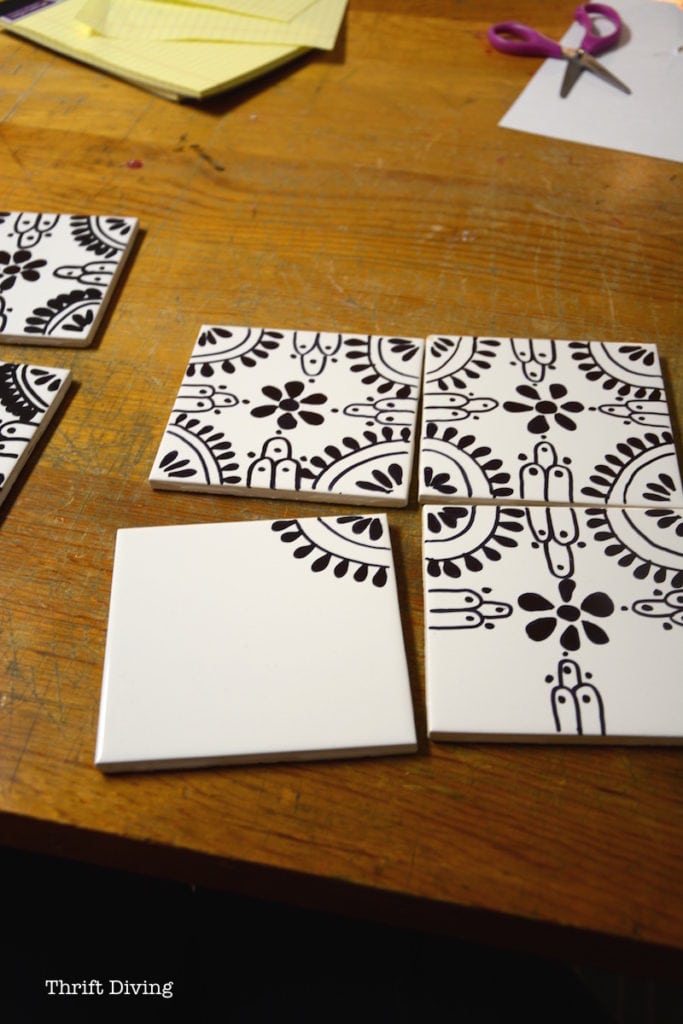
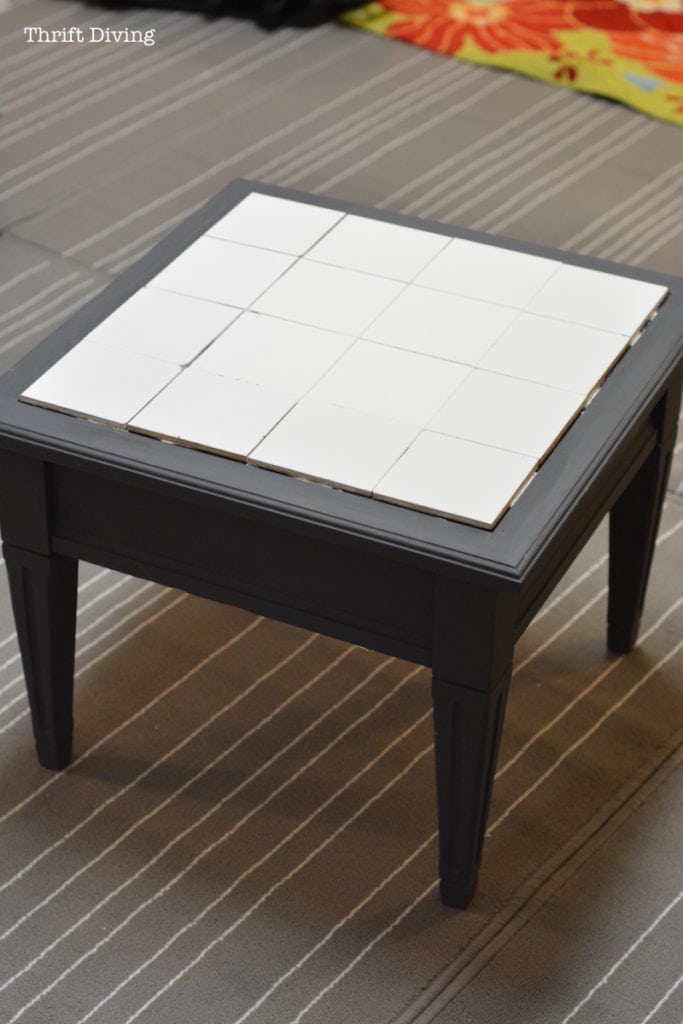
I had a nice stack of about 20 tiles, all prettied up and ready to go.
When I laid them all out, they wouldn’t all fit on the table. There was about 1/2″ overhang off one side.
I have never doodled anything on tile before. Nor have I paid much attention to blogs that have. That’s my mistake. I figured I could just seal the top with sealer. Even so, I should have waited until they were cut with my 7″ Ryobi wet tile saw first. Because I didn’t realize that everything that touches the permanent marker rubs off.
Especially water.
Sometimes permanent really doesn’t mean permanent. 😉
EEK! Guess I didn’t plan this out properly, huh?
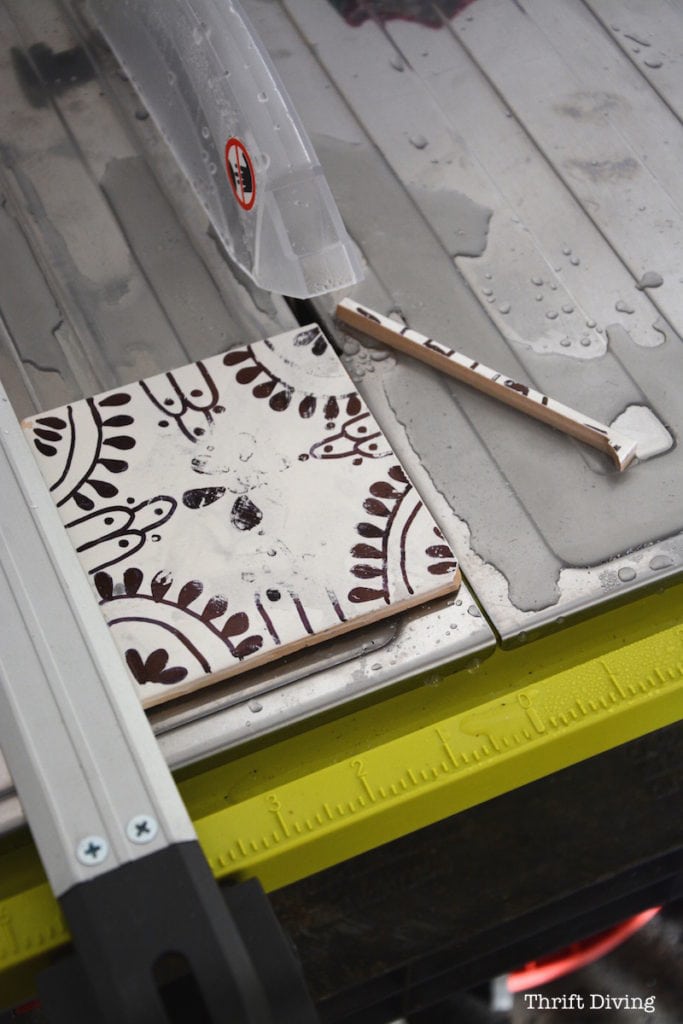
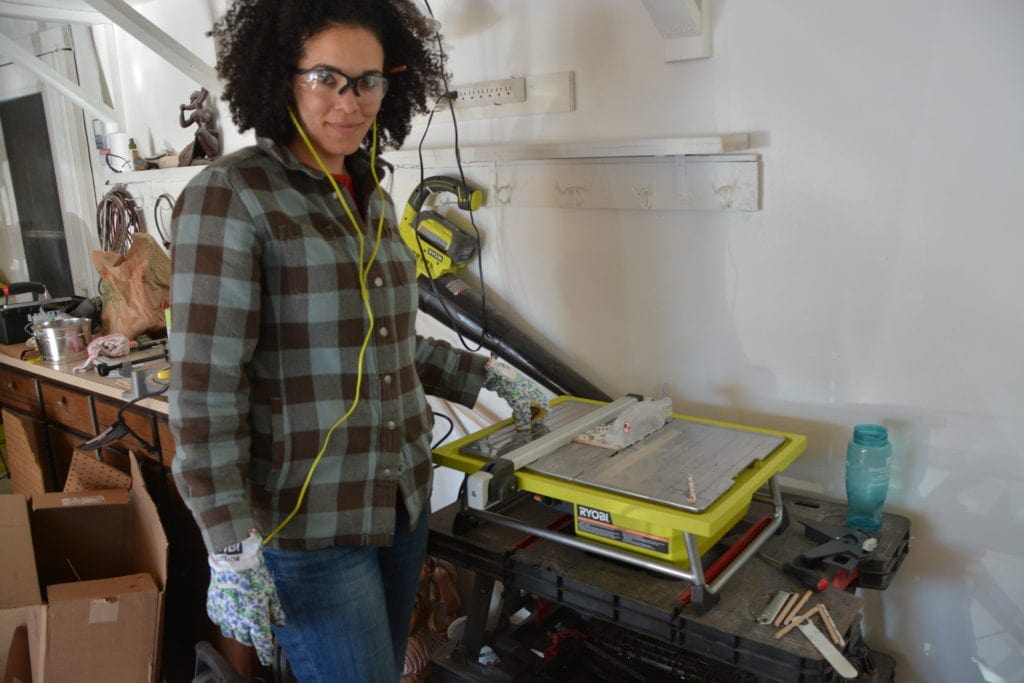
I probably could have use tile snipers, but honestly, I really wanted to try my new wet saw. 🙂
The only previous time I had used a wet tile saw when during a demo at the Haven Conference last year. I was ready to face my fear of using it alone (with safety gear, of course! I made sure I was wearing safety goggles, long sleeves, no jewelry, work gloves, and ear protection, like these Ryobi Phone Works Noise Canceling Headphones).
You can imagine my dismay when I laid all the freshly cut and freshly smudged tiles on the table after trimming them, only to see that there was no way to salvage these designs.
I was going to have to start over.
Starting Over….GROAN
There was no turning back now! I had already come this far.
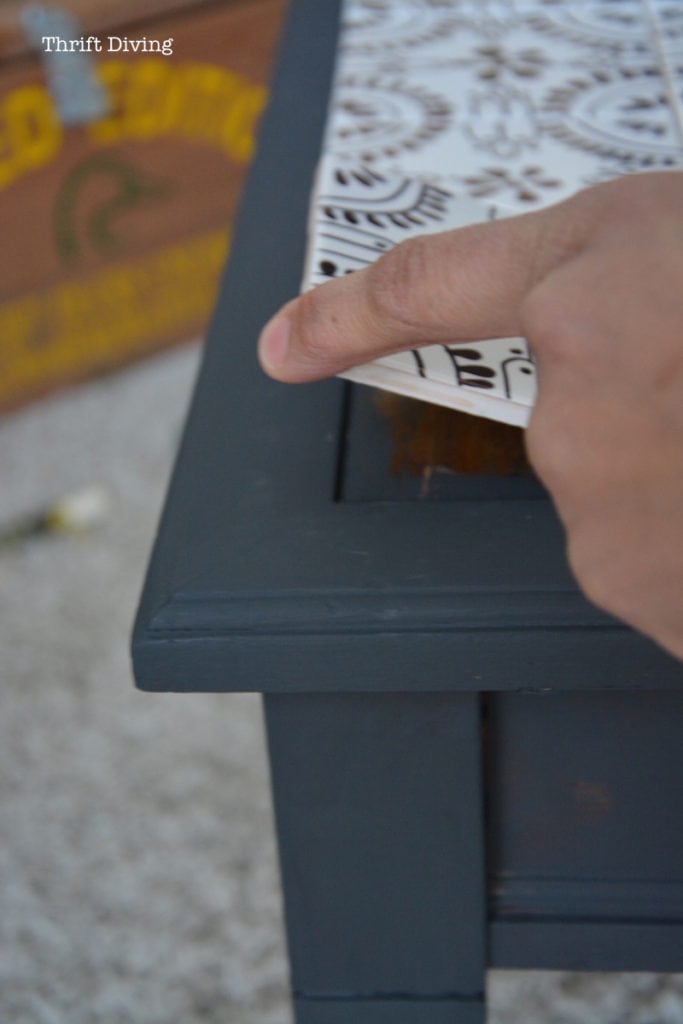
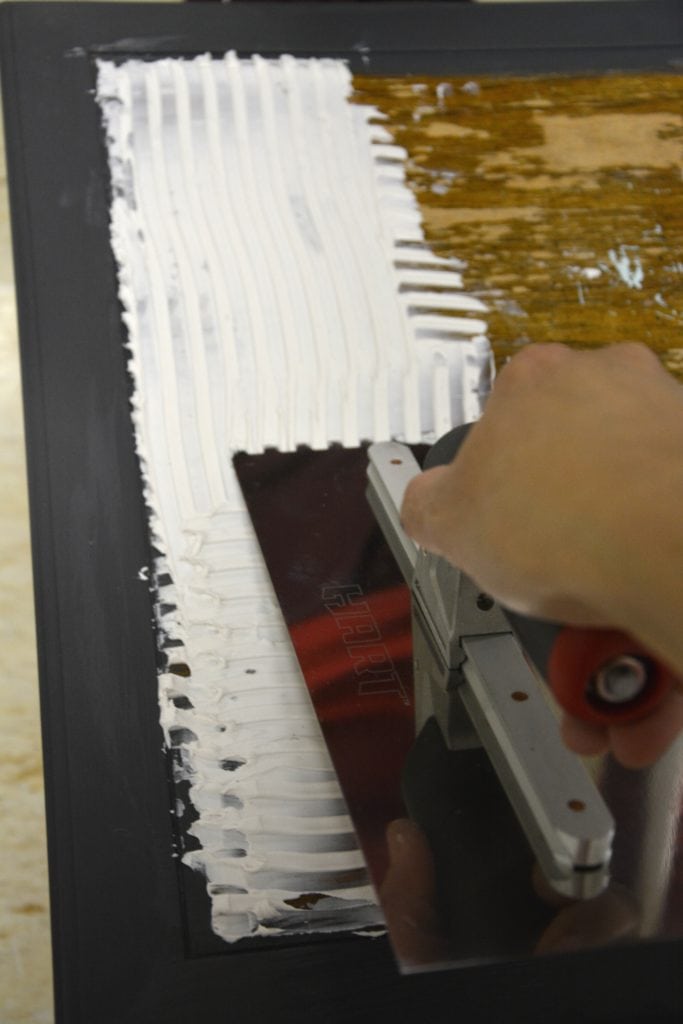
So I went ahead and spread on the tile adhesive, AcrylPro, and placed the tiles, then wiped off the rest of the marker so I could start over and prepare to grout. Because these were the smaller tiles, I didn’t need tile spacers. I just set them all together and tried to make sure they were even set and flat.
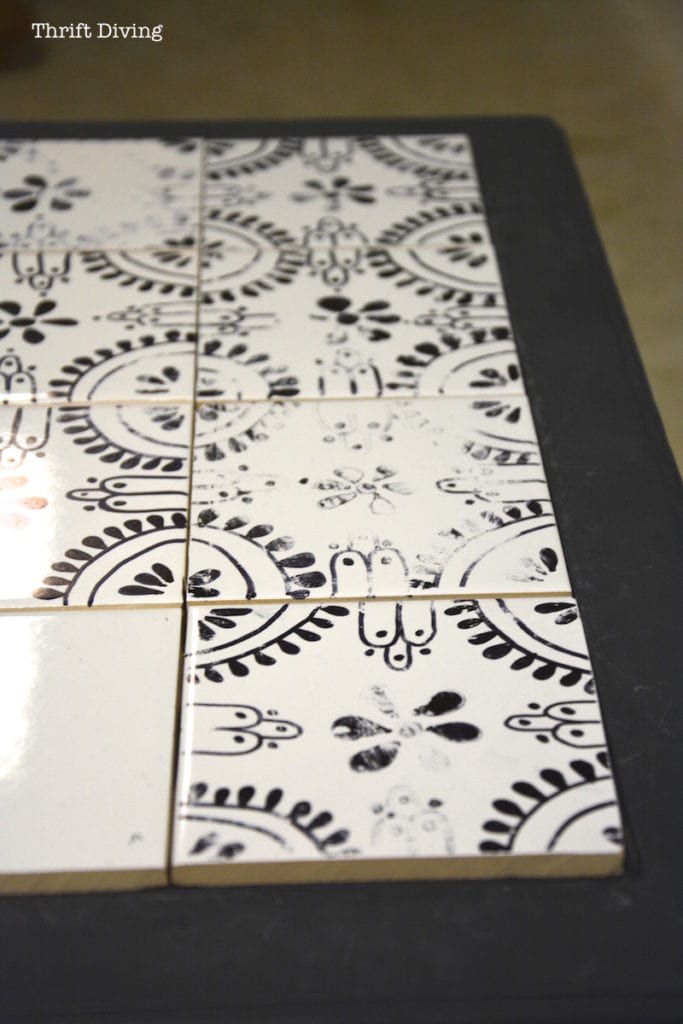
All set with no grout yet.
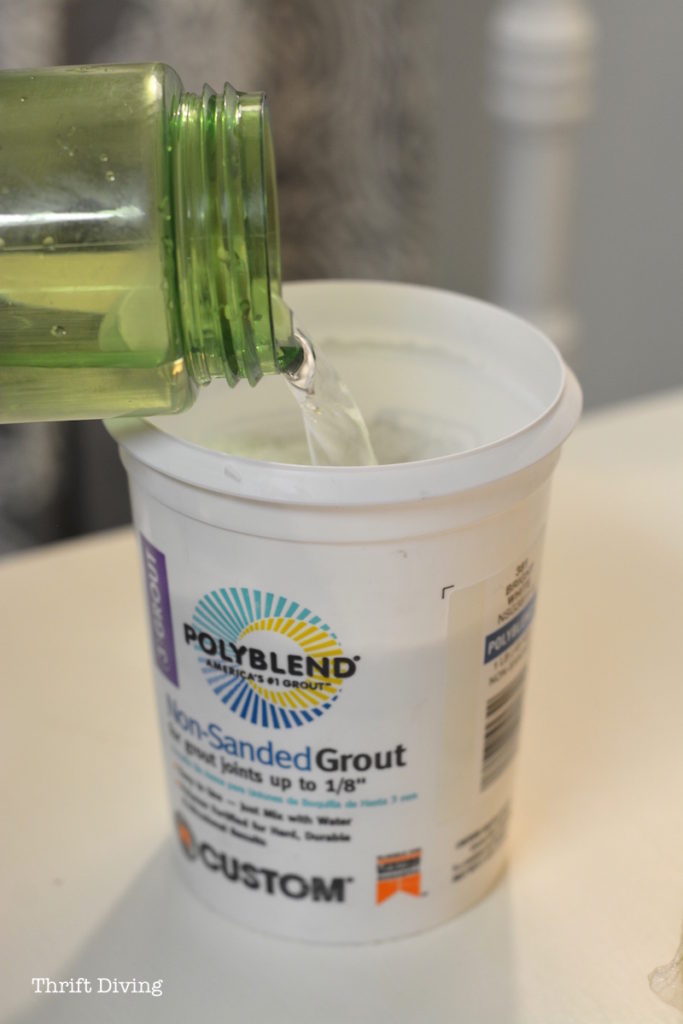
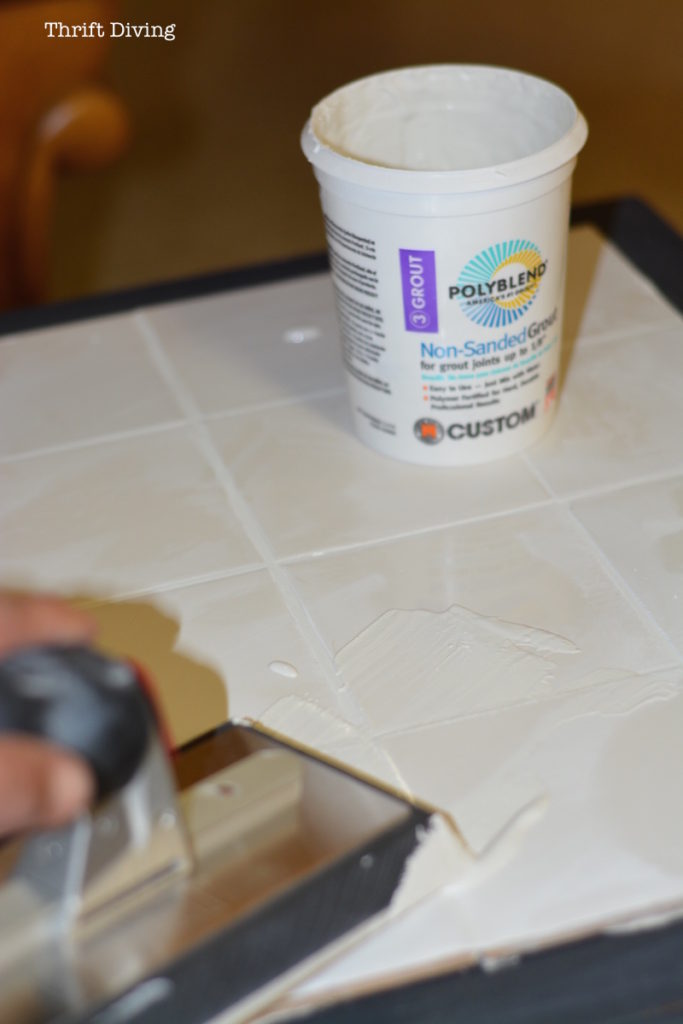
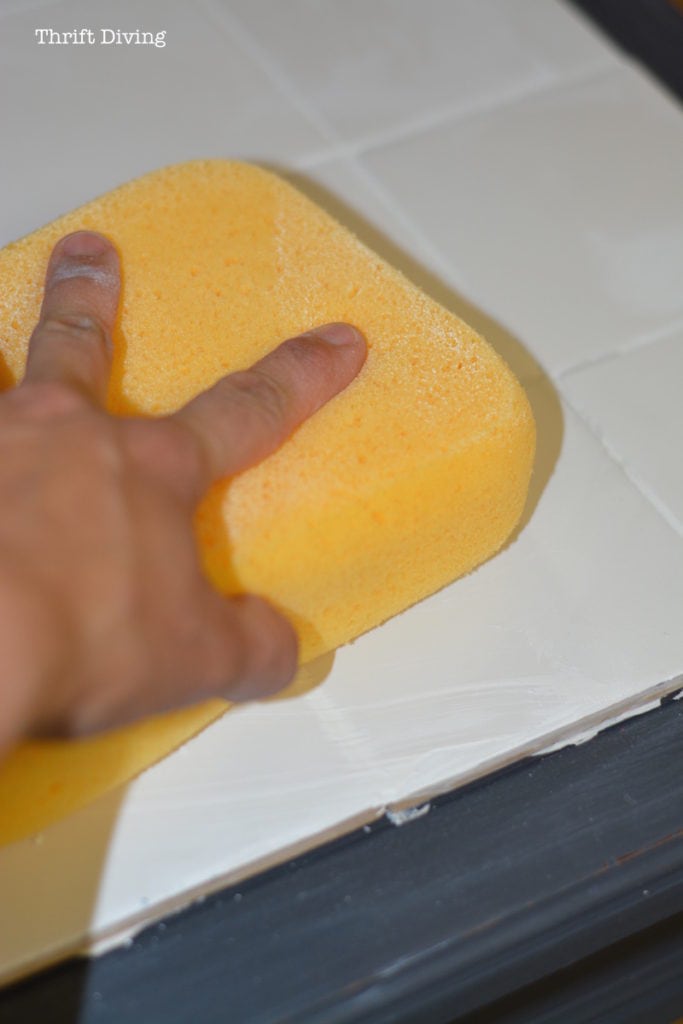
Next, I added some water to the non-sanded grout, mixed it up according to directions, and used a grout float to push the grout into the grout lines. When it dried a bit, I used a grout sponge to wipe away the excess. It will leave a haze. Just use a clean towel to wipe it away.
Then I got started with yet another round of hand doodling the design. SIGGGHHHH….. LOL

Watch a Quick Clip!
I Almost Ruined It TWICE
I’m totally NOT kidding! I almost ruined this piece twice!
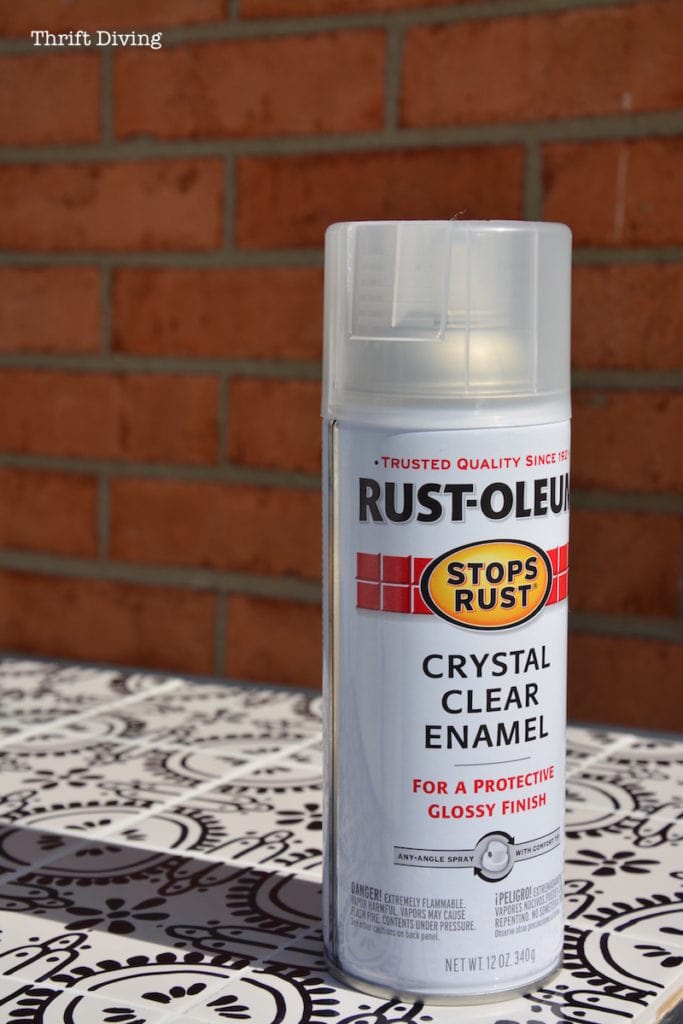
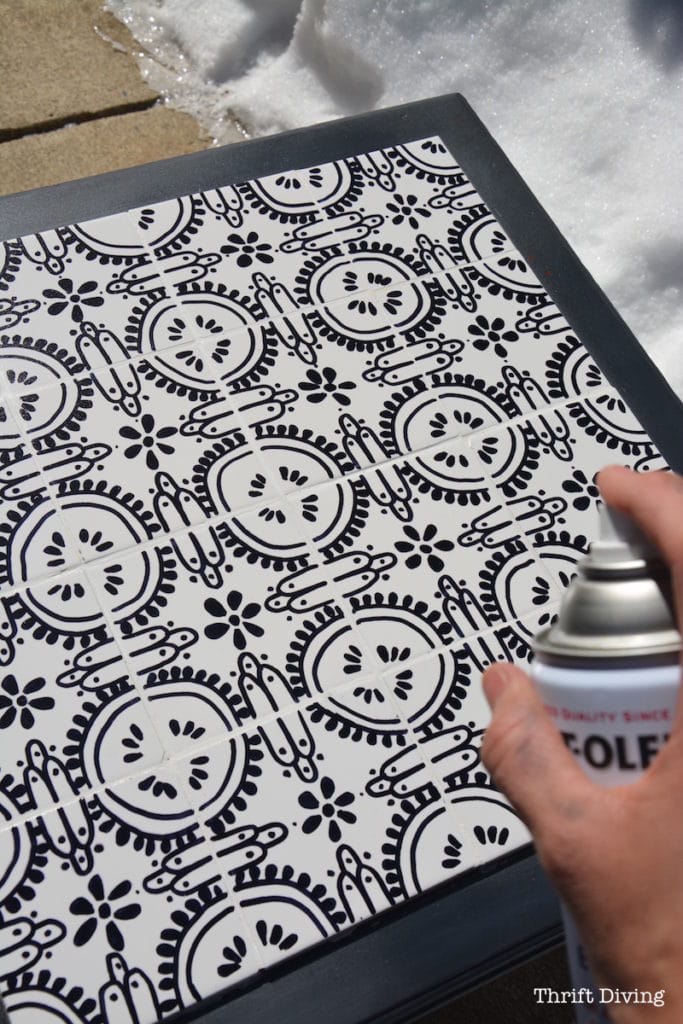
I decided to use this crystal clear enamel to “set” the marker design. I got a little “happy” in some spots and left sopping puddles, at which parts the design started to slightly run. Uh ho!! Thankfully, it was minor.
If you’re using enamel, just be sure to use light coats.
If you’re baking your tile (the recommended method of setting permanent marker), I’ve read that you should set the tile in there before the over gets warm, and then leave it in the oven to cool down when the oven is off. Set it at 350 degrees for 30 minutes. I’ll try that next time!!! DUH….
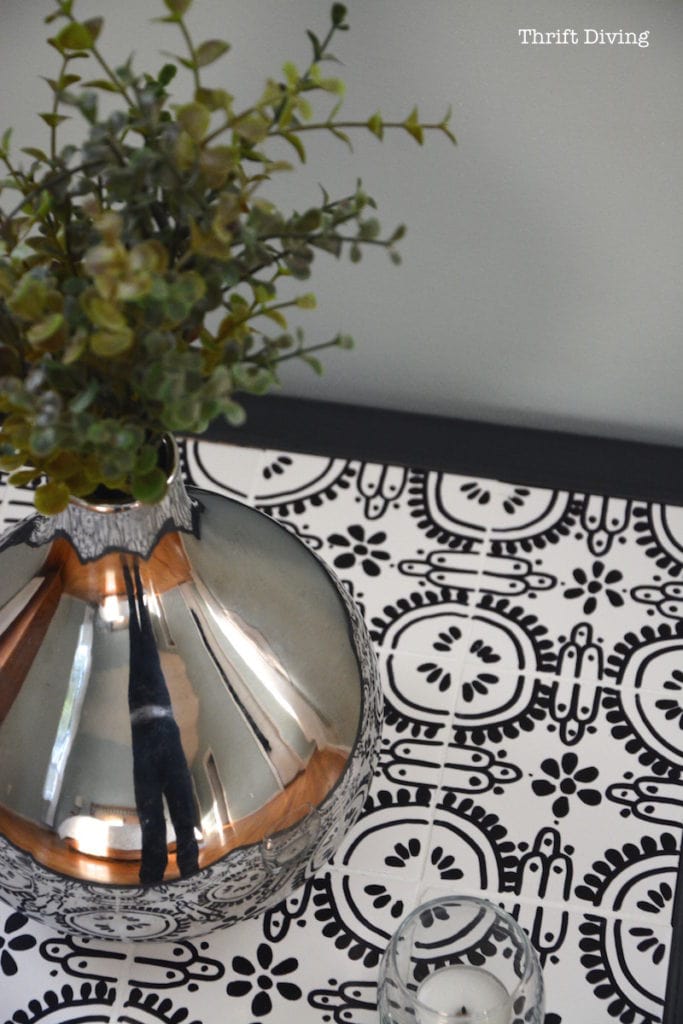
I needed something to hide the edges of the tile that were exposed. This wood trim molding from Home Depot was perfect, for about $1.50 a piece!

I painted the trim and used my Ryobi brad nailer to adhere it. I used a miter box saw to easily but the corners (see this post on more info about how to use a miter saw box to join corners of trim at 45 degree angles). You can also use Gorilla Glue to hold these trim in place. (Watch my video HERE on how to use Gorilla Glue). If you’re using the brad nailer, use wood filler for the tiny holes.
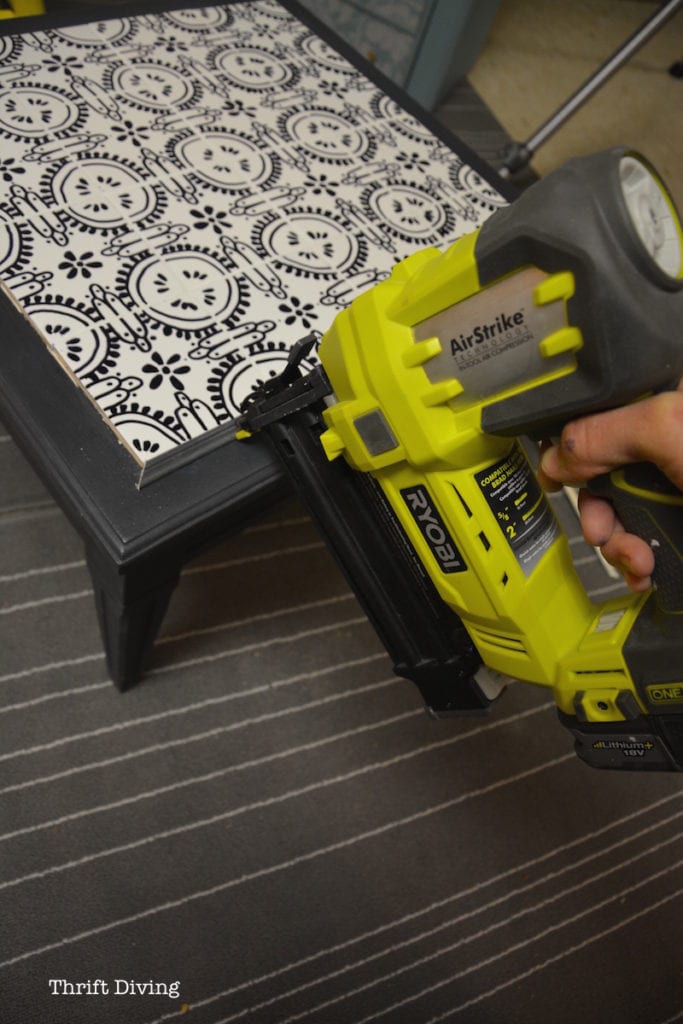
Once in place, it looked so nice and was just what I needed to hide the gaps!

It’s Pretty! YAY!
Woo hoo! I’m so happy that it ended up turning out okay! I was worried there for a minute…or more like 1000 minutes….. But I love the black and white together, especially with that silver vase, that reminds me of the awesome tin tile on the bathroom ceiling!
My Funny 5-Year Old!!
He had neeeeevver paid any attention to this vase before when it was in the family room. But now that it’s sitting out, he couldn’t help but make funny faces in the funky reflection.
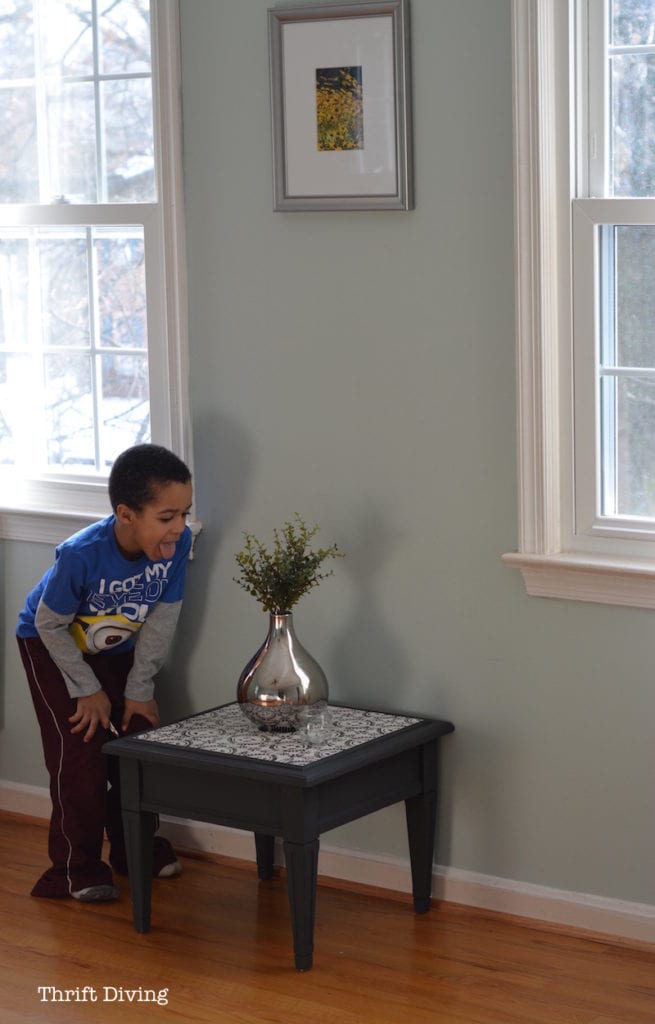
And of course, if your tongue is big in this reflection, what must it do to your hind parts?? I caught him doing THIS, big boots and all! lol.
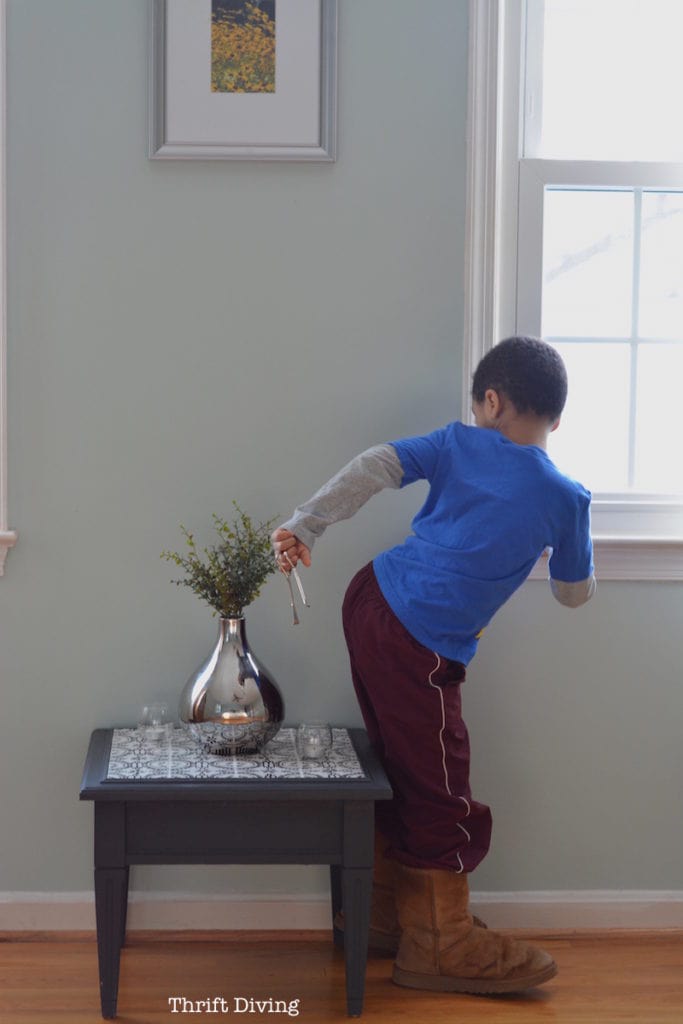
Overall, I’m totally stoked about this piece and can’t wait to show it my grandfather! I don’t think he’ll think it’s the same piece!
So have you ever been inspired by something off-the-wall and then created something with that inspiration? Leave a comment below and add to the discussion!

Download the 5 freebies!

Thrift Diving inspires women to decorate, improve, and maintain their home themselves...using paint, power tools, and thrift stores! Use these 5 printables, checklists, and ebooks to get started!


I loved this piece.
Just look how much you learned about the tiles.
Oh, I know, right! As horrific as some projects can be, the learning experience makes up for it! 🙂 Thanks for commenting!!
I came across your blog on a friend’s FB page. I love DIY projects, but sometimes lack the motivation and/or time to get started. I have several projects sitting in the garage. Your blog has lit a creative spark. Thanks!
Hey, Tracy! I feel your pain! If it weren’t for my blog being my career, I may lack motivation to do some projects, too! 🙂 I’m glad you stopped by and commented! I hope to see you around the blog more often! 🙂
Perfect timing! I just bought a little end table at a garage sale for $1, and have been looking for ways to freshen it up. Love your ideas!
You always do such beautiful work and this is no exception – however, it this particularly gorgeous! I’ve been wanting to do some tile work but I swear – it freaks me out as much as making yeast bread – and that’s a lot! 🙂
Kelli, I felt the same angst! It’s just scary tonise blades if you’ve never done it before. But after you do it and see how easy it is, it’s totally awesome! I’m actually giving away a wet tile saw this month on Ryobi! I am going into the post today to update it with links and stuff so you’ll be able to go enter!
Hi, just saw your table. Wonderful. I’ve been in the hospital with the NEW flu that the flu shot doesn’t work on. Back to you. I’m so glad I found you you drip talent. Would love to diy a project with you. Stay happy. Stay creating from your heart.Your friend Robin
Oh no, sorry to hear you’re in the hospital! When do you think you’ll be able to go home? Get well!!! Lots of rest and sleep will do wonders.
I love the tile top! Do tell, was the wet saw amazing?
Hey Sheri! YESSSSSS, I loved the wet saw! I was scared to use it at first, but I couldn’t procrastinate on the project anymore! Hey, by the way, I may be giving one away in April! This project is part of the Ryobi “Add Style With Tile” campaign over at Ryobi Nation, and as a prize, I’m trying to see if I can give one of the wet saws away! WOO HOO!
Thank you for being brave and showing us that someone who does this professionally makes mistakes!
What a lovely little table you’ve created with your free-handed motif! And you’ve staged it just perfectly–especially with your son as the shot model!
Cheers for you!