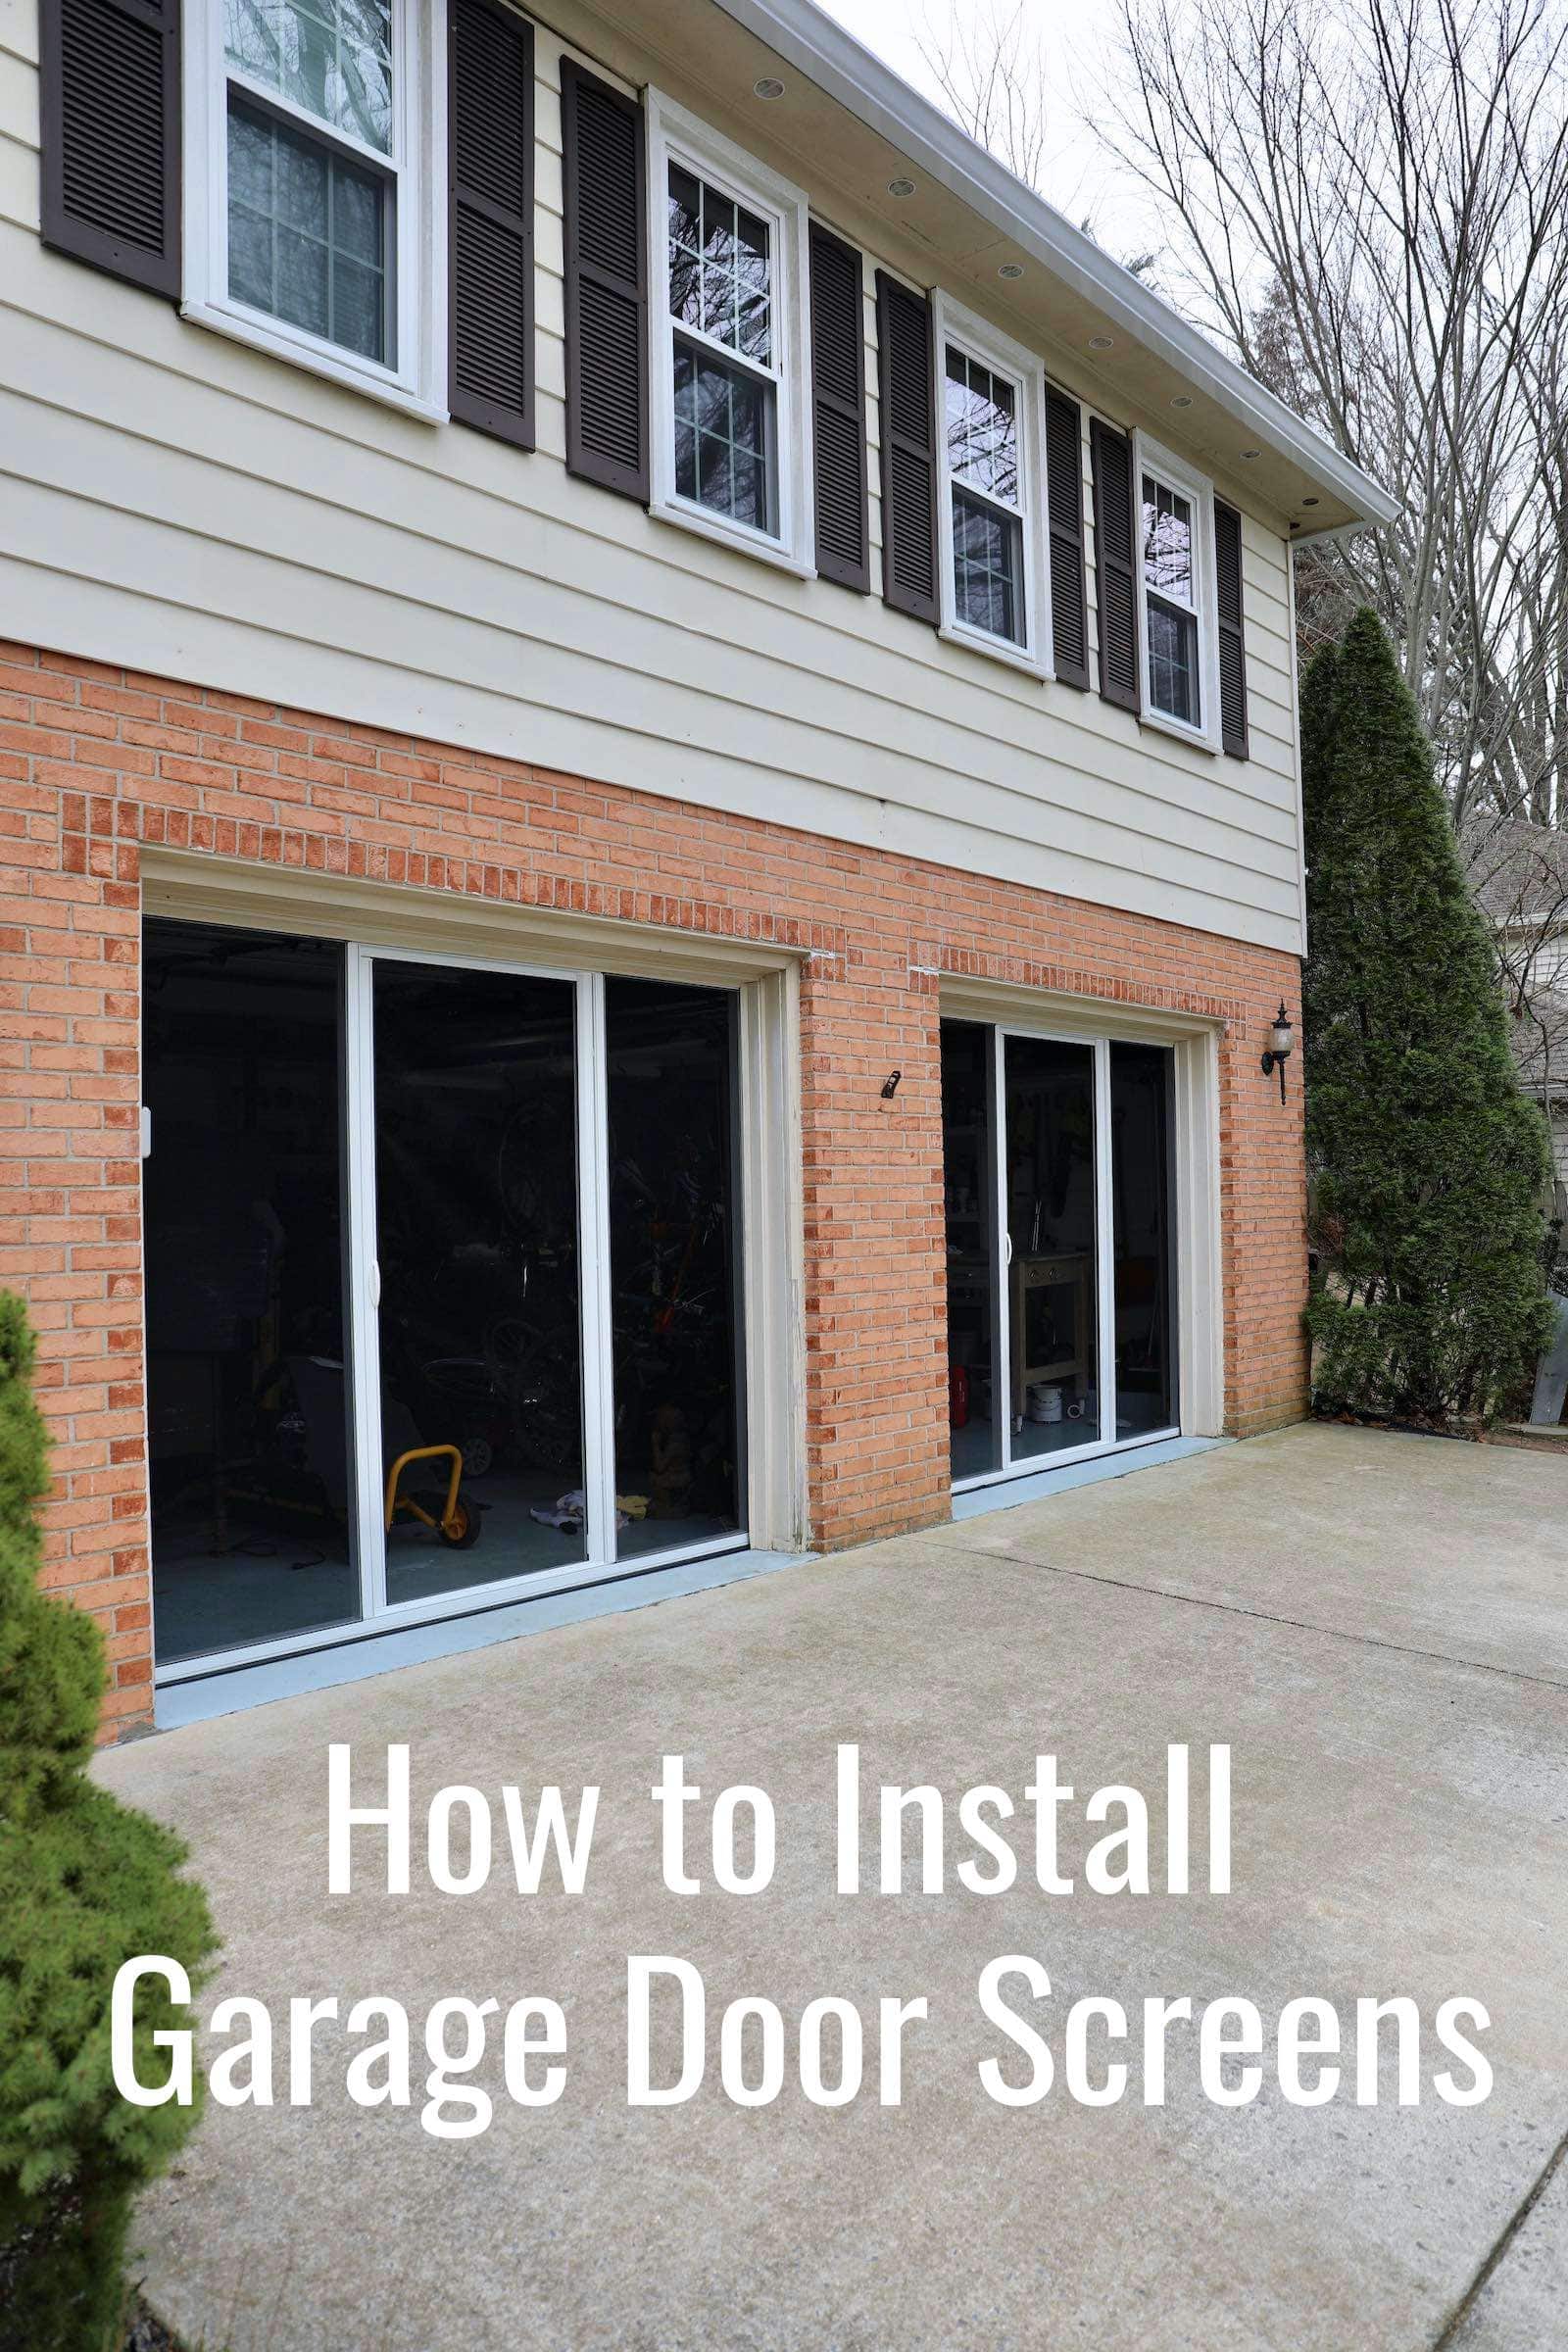
How to Install Garage Door Screen: Assemble Tracks – PART 2
This tutorial (PART 2) on how to install garage door screen is sponsored by Maryland Screens.
In Part 1 of this series on how to install a garage door screen kit yourself, I showed you how to unbox and complete the prep work for installing the screen. In this PART 2, I’ll be sharing step-by-step how to assemble the tracks (both the vertical and horizontal track pieces).
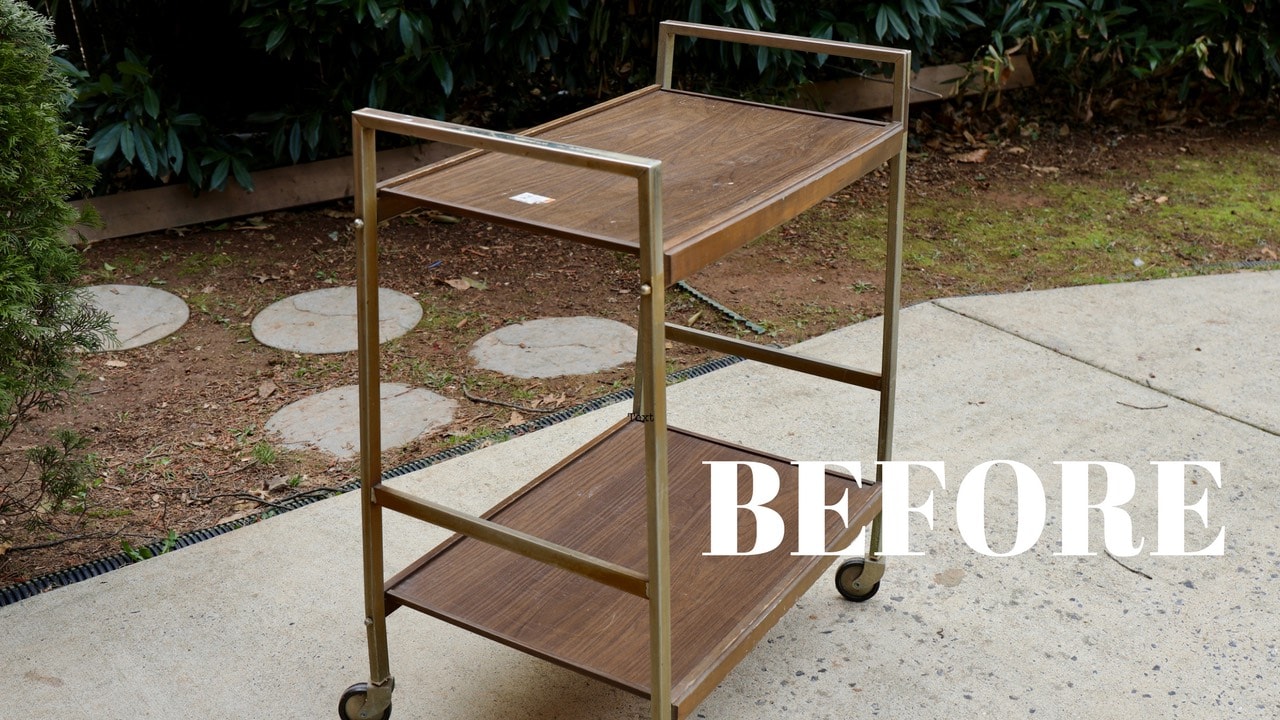
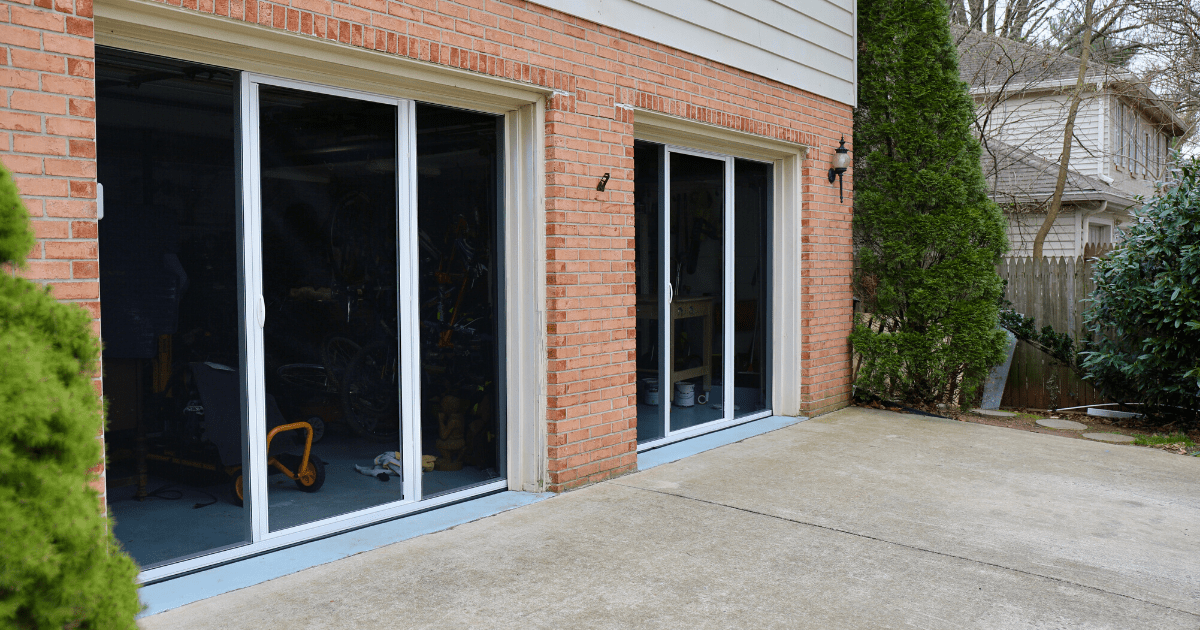
Here’s a reminder of what my original garage door screen looked like. While the garage door screen looked amazing and performed well, after a couple of years, the screen began to slightly tear from the wear and tear of run-ins with the lawn mower and other lawn tools that brushed against the unzipped screen when moving things in and out of the garage. Remember: this DIY garage screen screen was held in place simply with Velcro and had been hand-sewing with my sewing machine!
BEFORE
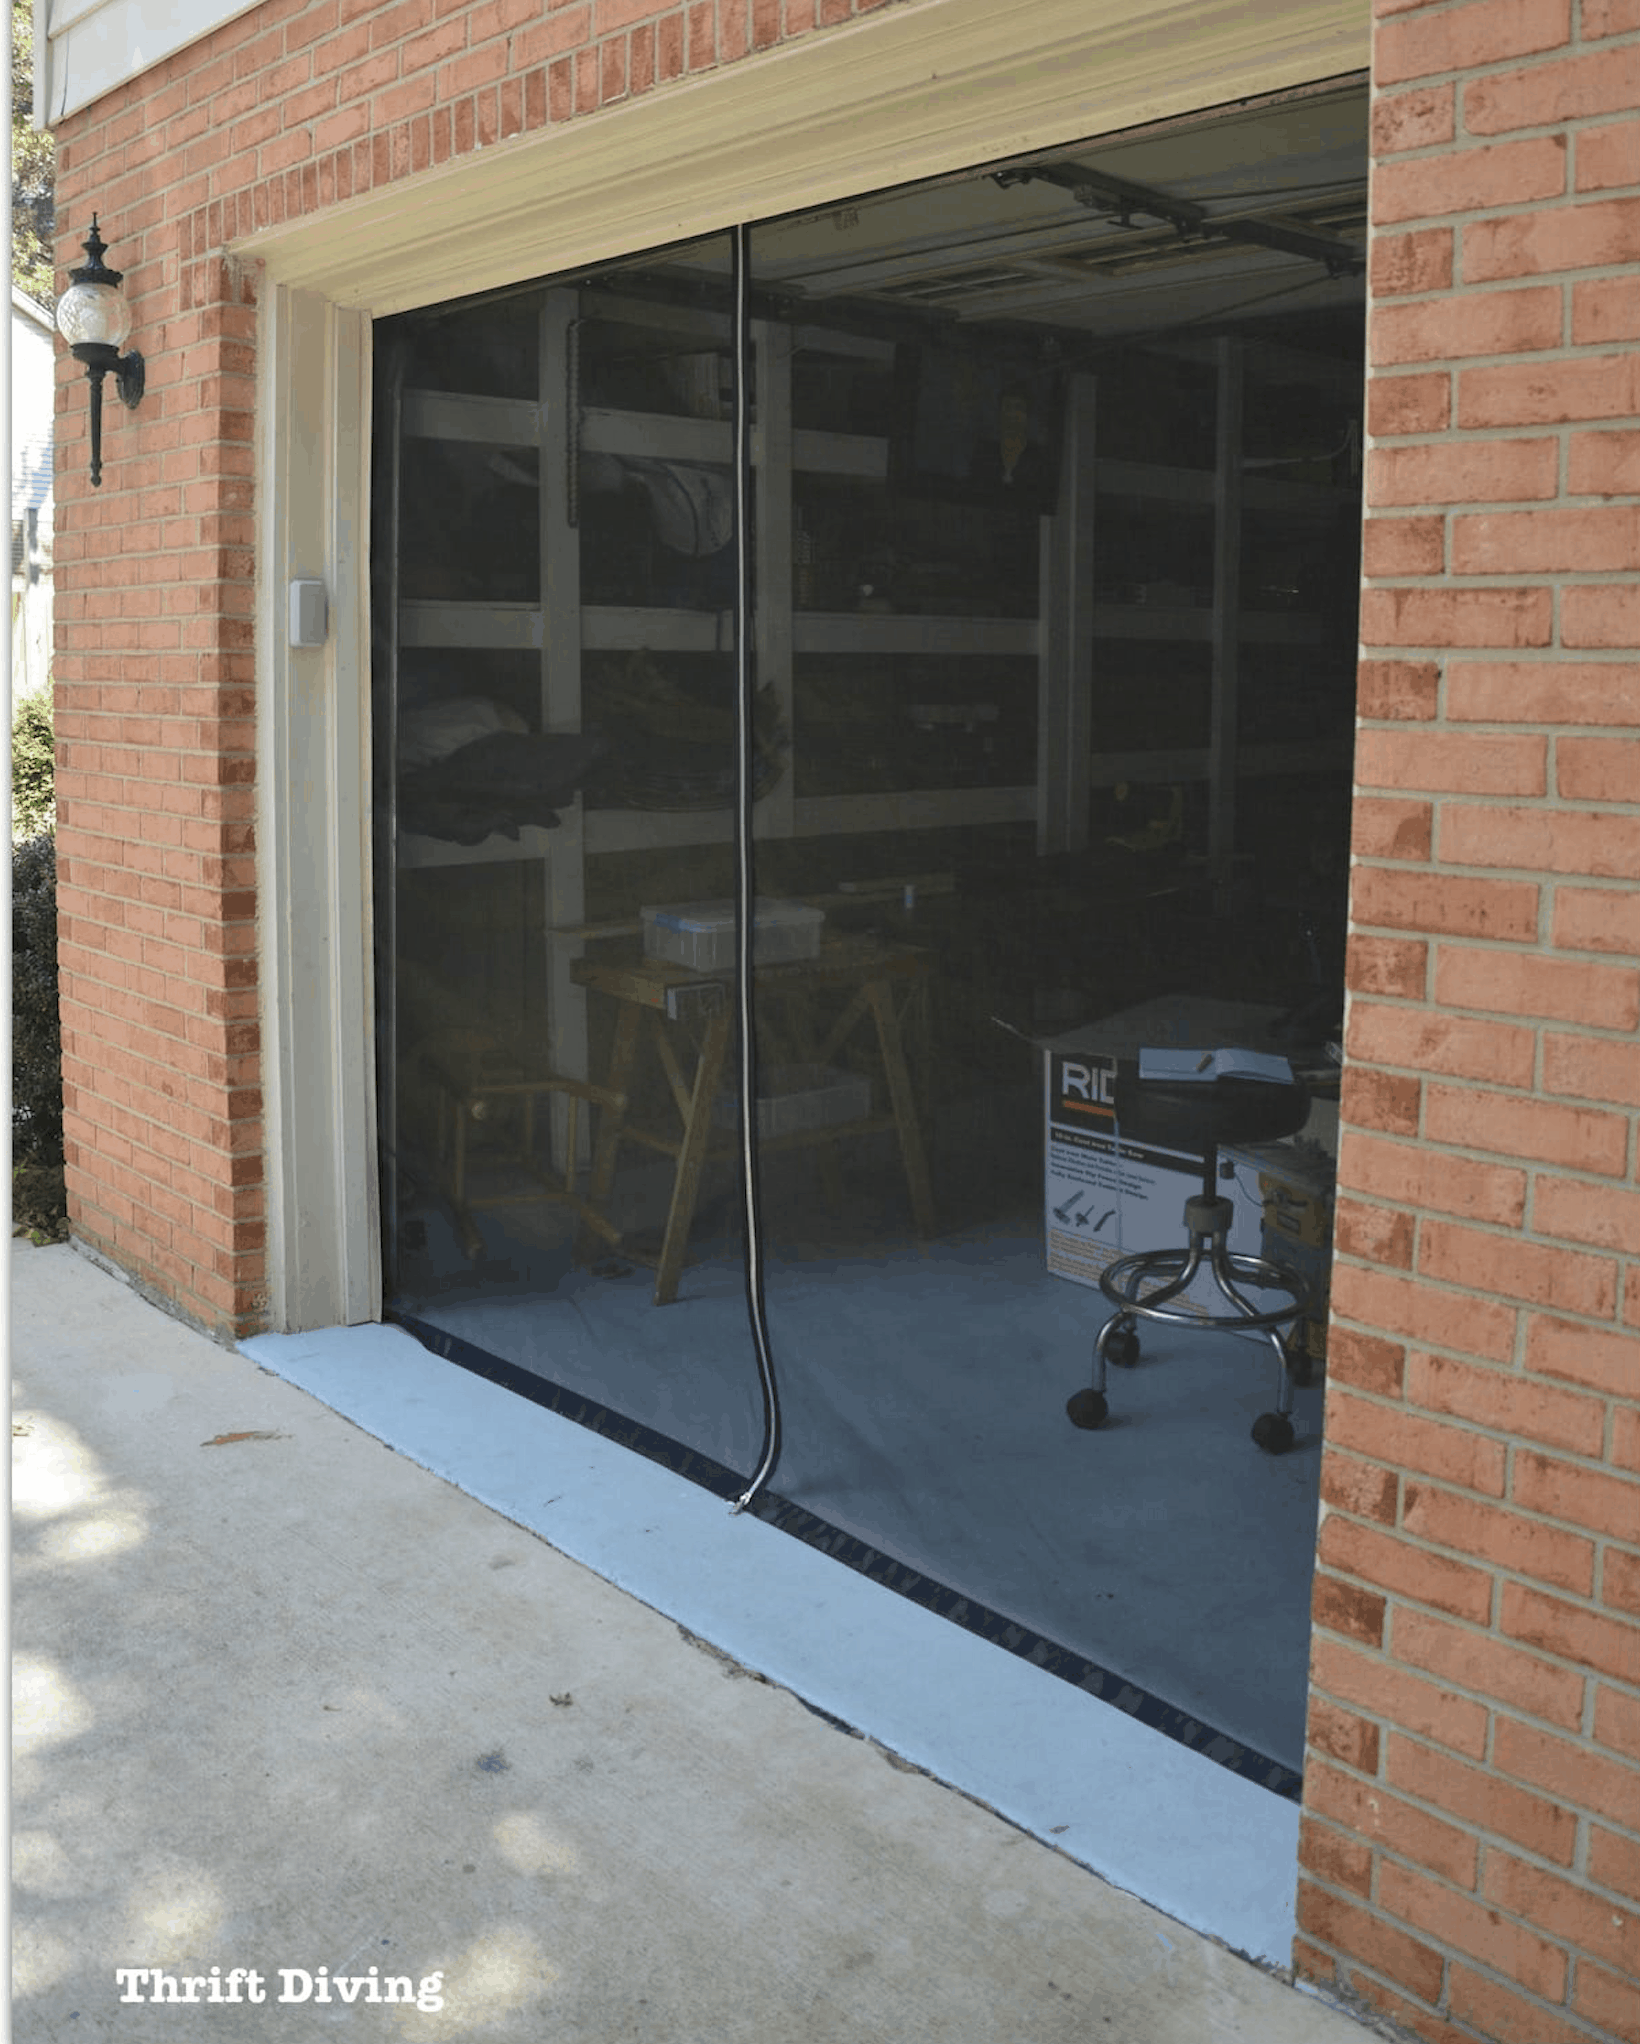
Mike Rose, however, owner of Maryland Screens, a full-service garage screen installation company located here in Maryland, reached out and asked if he could teach me how to install a garage door screen. If he could teach me how to install this non-motorized screen made out of a metal frame, then I could teach you how to install one. He would ship the garage door screen kit to you from Maryland Screens and these following instructions would walk you through how to install your very own screen. It looks amazing!
Click hear to order your own screen kit from Maryland Screens. Use code: ThriftDiving90 at checkout!
AFTER!

How to Install a Garage Door Screen: Assembling the Tracks
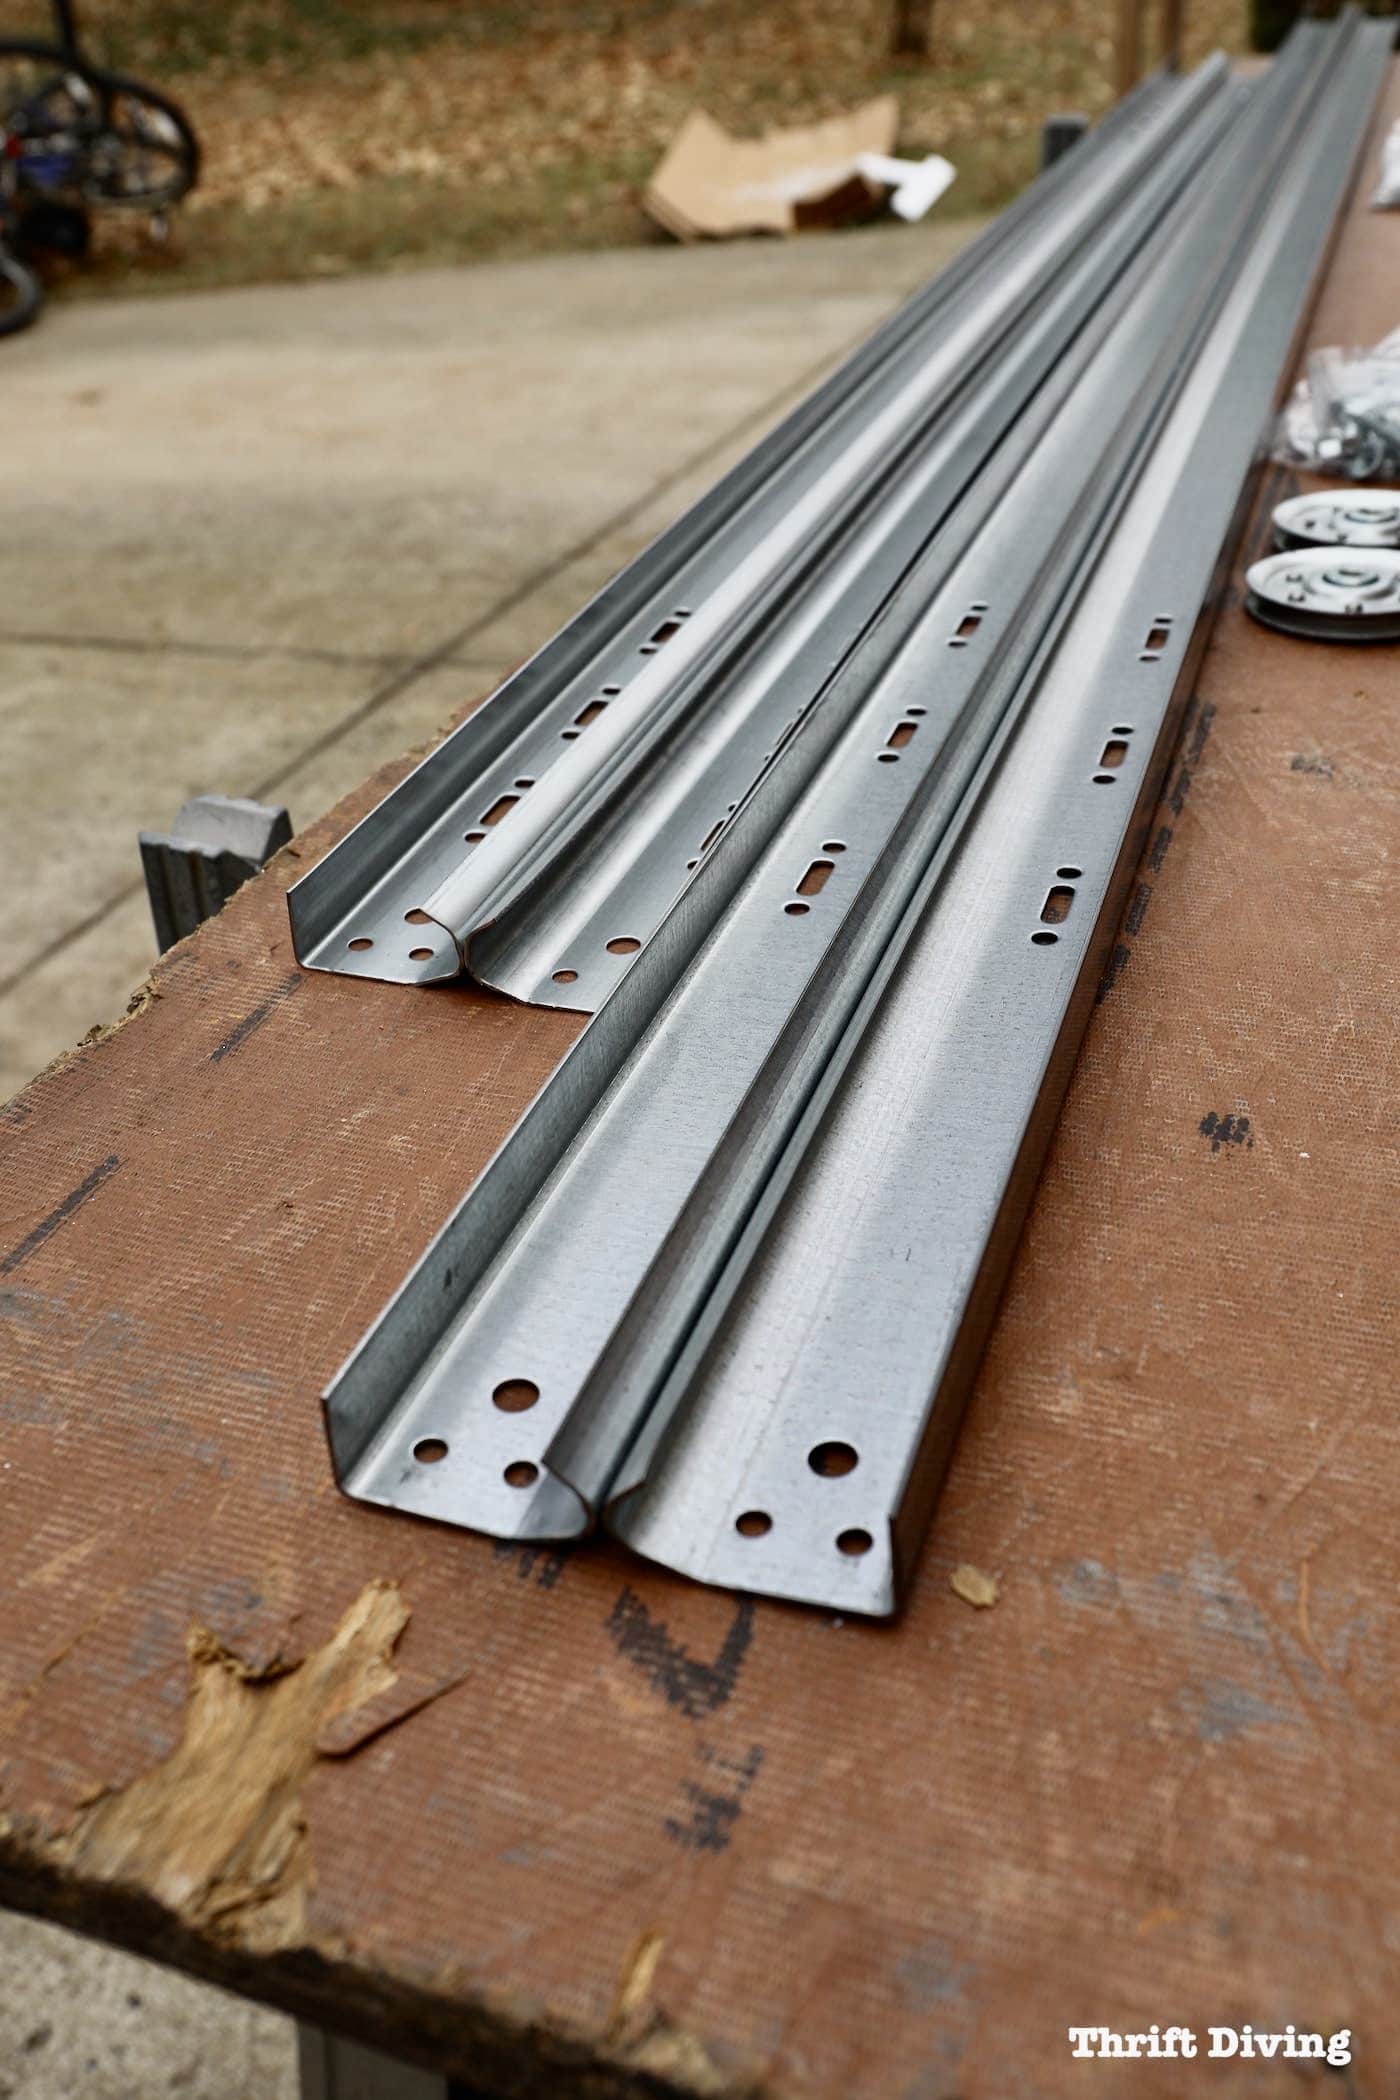
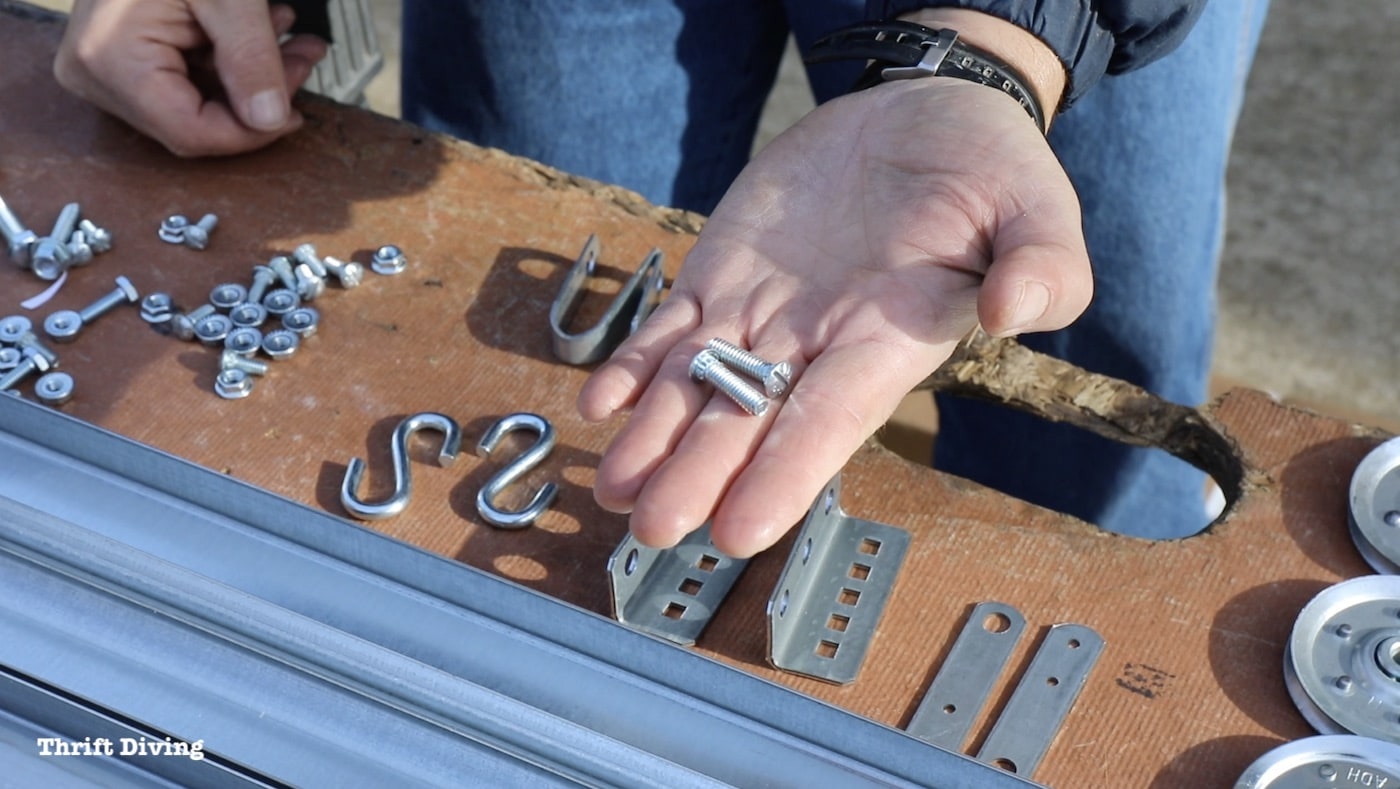
In one of the three boxes that will arrive on your doorstep, you’ll find 4 metal tracks that will allow you to pull your garage door screen up and down. These tracks don’t interfere with your current garage door since the screen is mounted to its own track that’s mounted alongside of your garage door screen. In this post, I’ll show you how to assemble the tracks.
And remember: the shorter tracks are the vertical tracks and the longer pieces are the horizontal tracks. They should be laid out with the curved edges together, side by side, on a long workstation (here, we’re using pieces of wood on workhorses but a workbench or even the driveway, will work).
Let’s start with the longer horizontal tracks first.
How to Assemble the Horizontal (Longer) Tracks
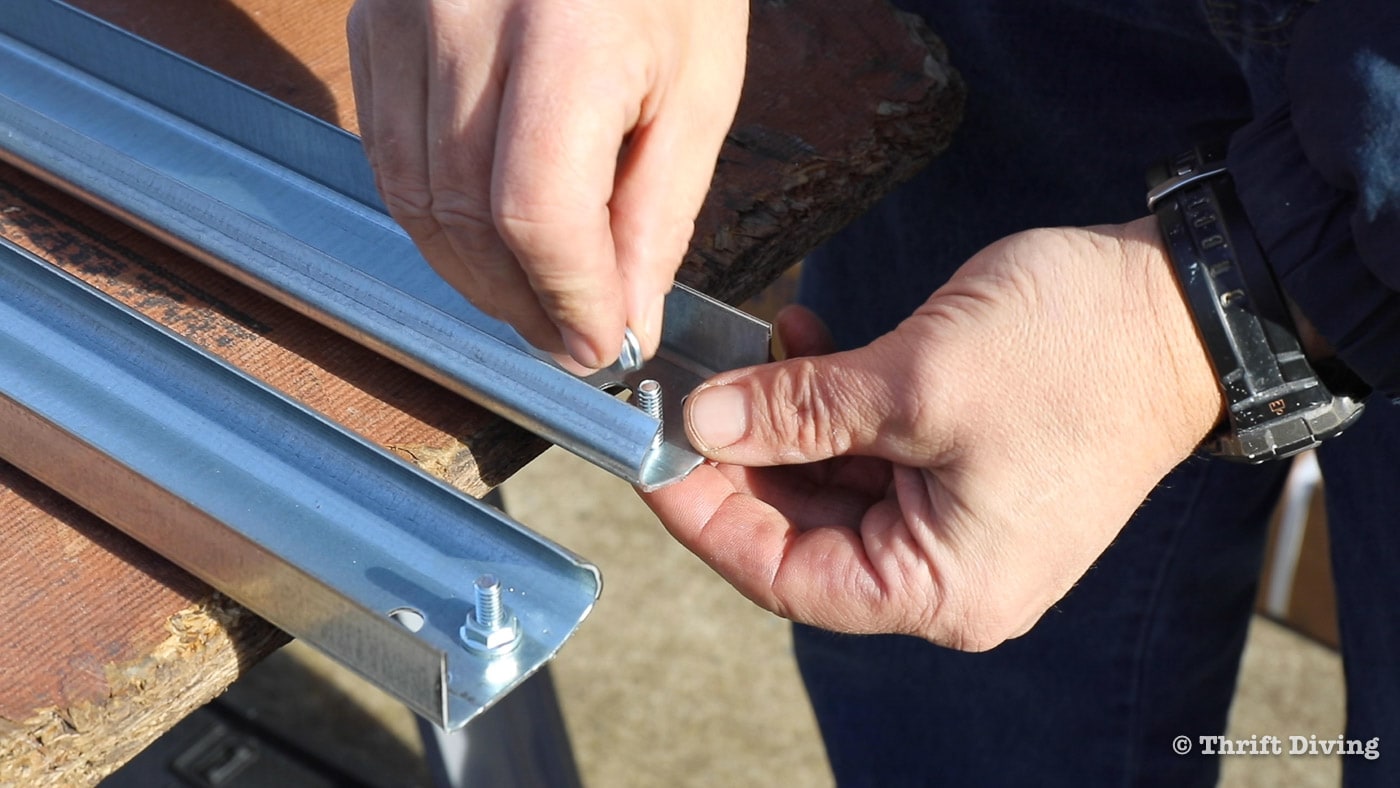
STEP 1: Add wheel stop bolts at the bottom.
Your garage door screen kit comes with two very important screws. These are your stop bolts that attach at the end of the horizontal tracks that prevent your screen from flying off the track when you lift it up. Super important! You only get two of these in one garage screen kit, so don’t lose them!
You’ll slide them through the bottom ends of the horizontal tracks (the end with 3 holes). Insert the bolt straight up through the bottom of the hole that is closest to the curve. Then add a nut and tighten with an impact driver.
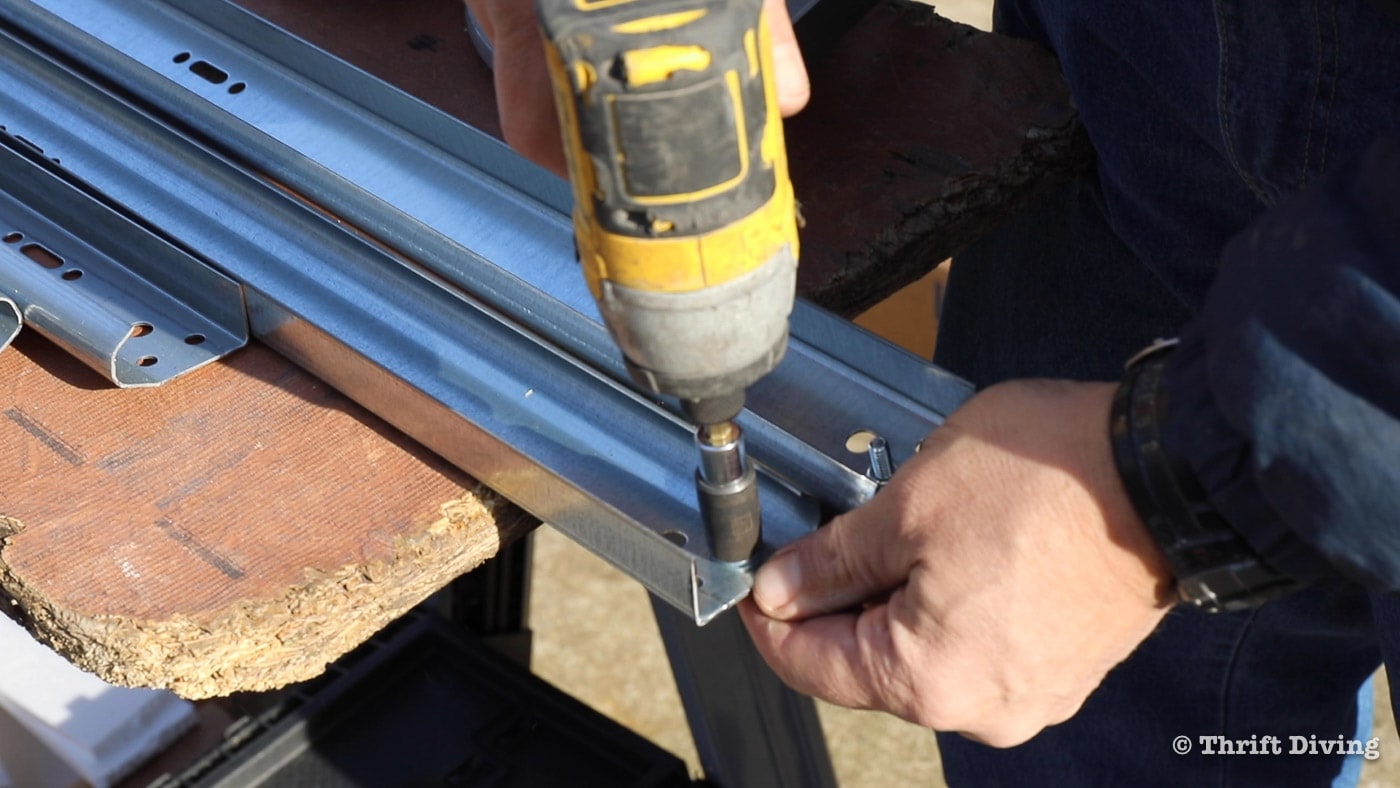
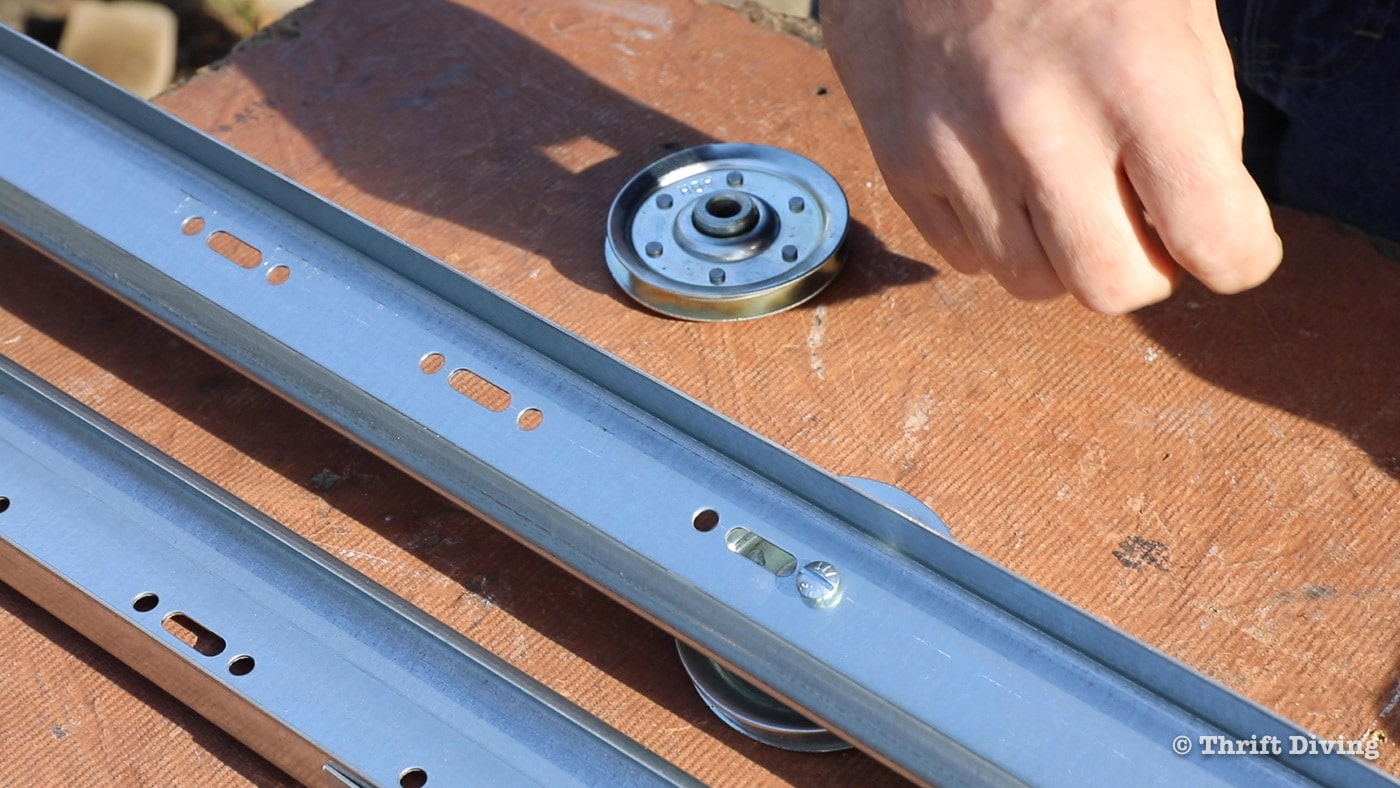
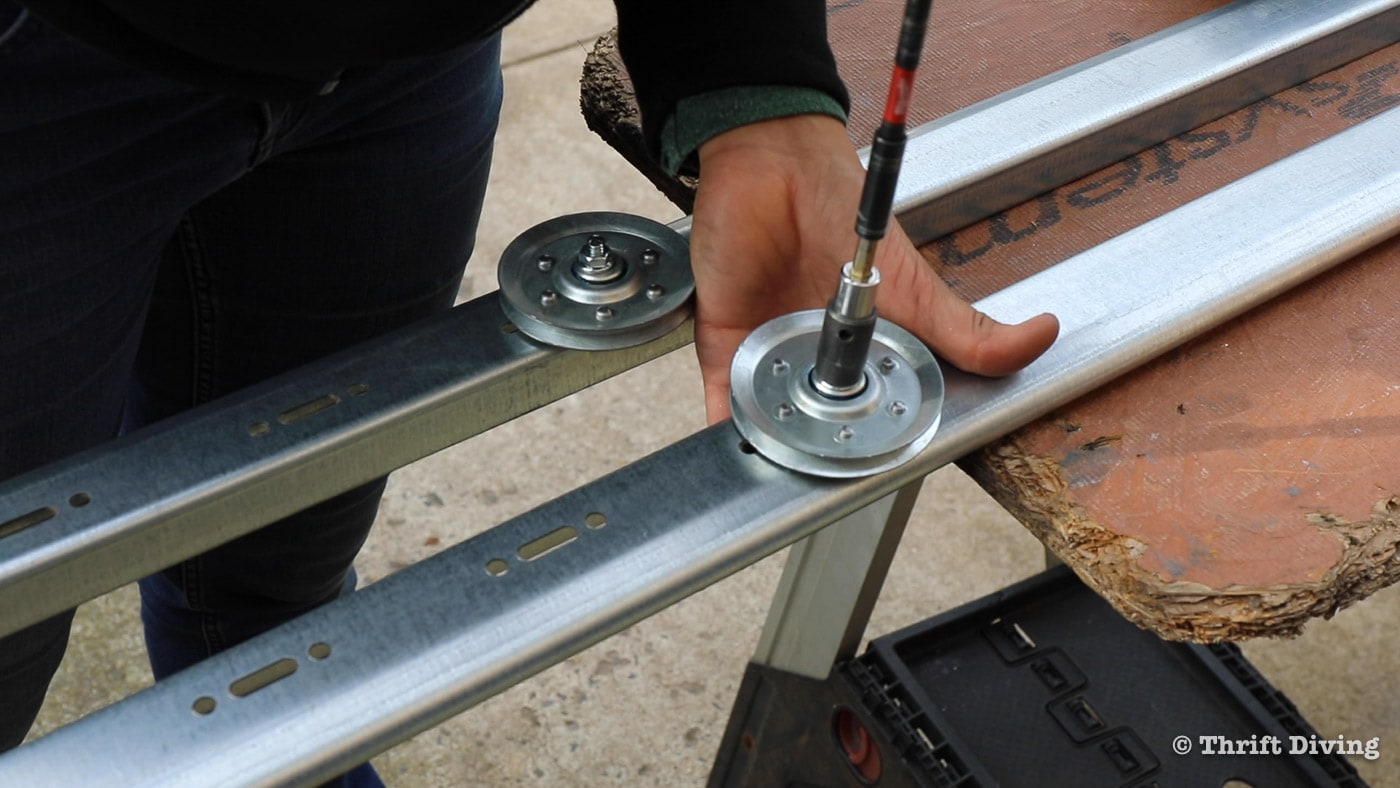
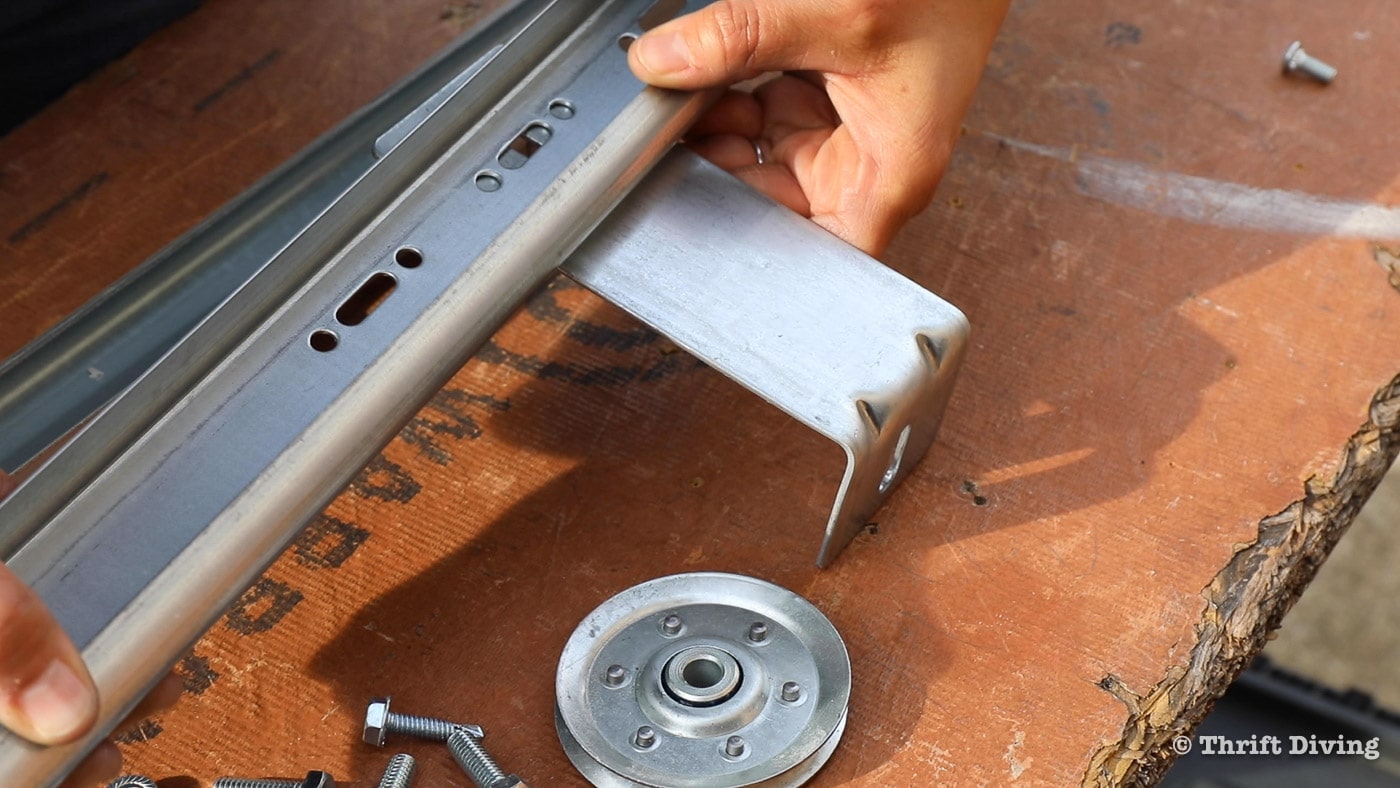
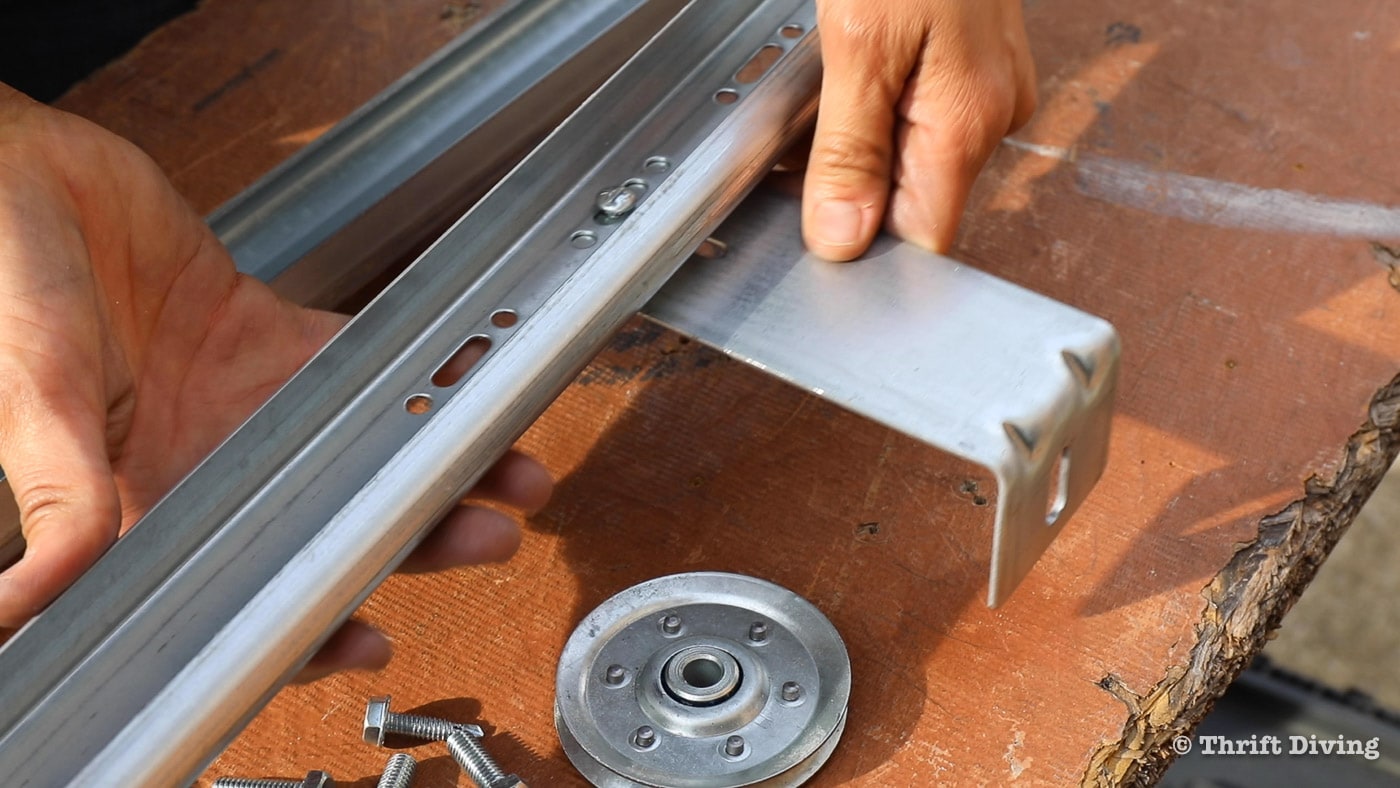
STEP 2: Attach a Wheel to Other End of the Track
On the other end of the horizontal track, next add a wheel. You’ll see a series of 3 groups of holes. You’ll add the wheel to the hole that is furthest from the end, securing the wheel on the bottom, with a bolt going down through the top, with a nut to hold it in place.
Flip the track over and tighten the nut with an impact driver.
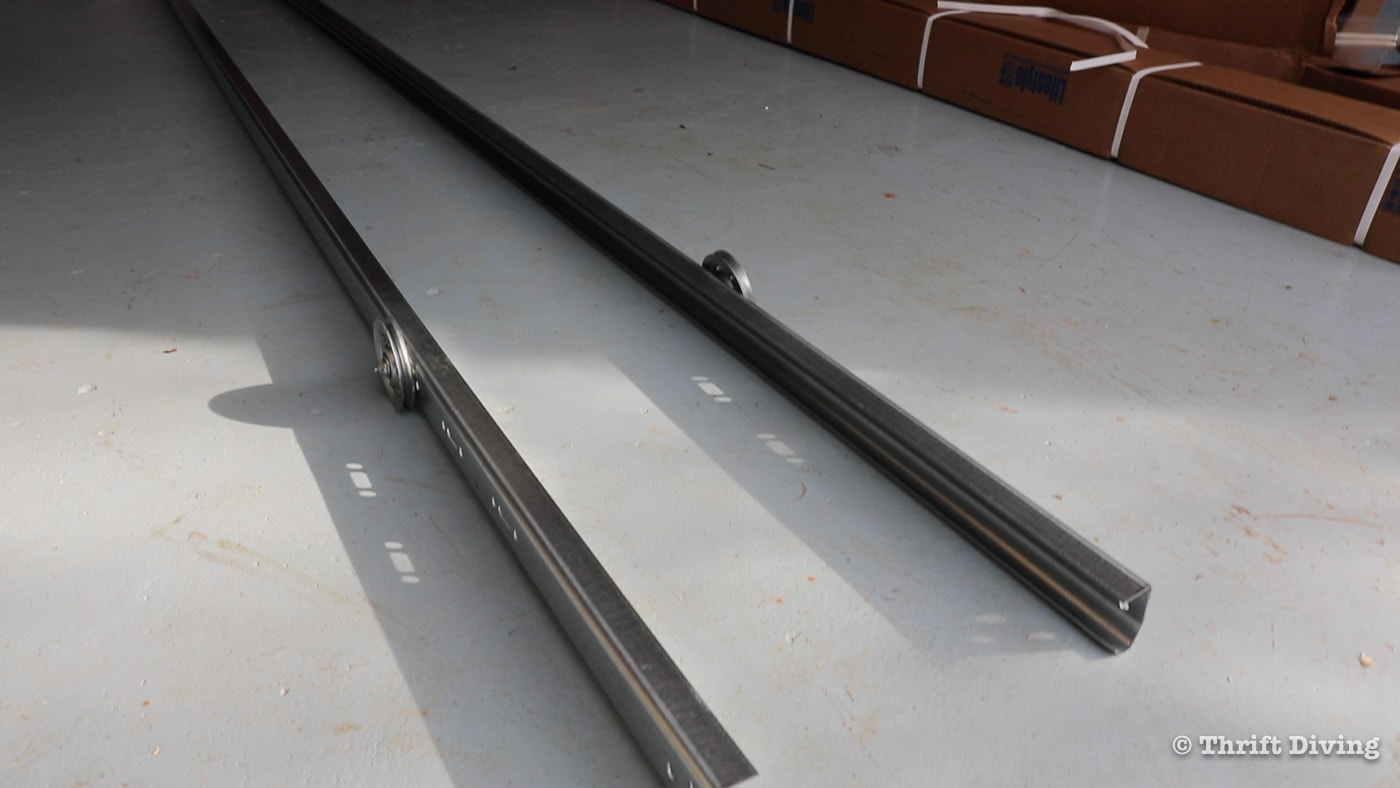
STEP 3: Lay the horizontal tracks at the garage opening.
Much of this garage door screen installation is about setting pieces prepped and into position so when you’re ready to install them, they’re already placed into position and are waiting to be installed. That is the case with these horizontal tracks. Once the stop bolts and wheels have been installed, just lay them at the opening of the garage for when it’s time to install them.
FYI…..The end with the wheels attached will be closest to the garage door.
How to Assemble the Vertical (Shorter) Garage Door Tracks
Assembling the vertical tracks is just as easy as the horizontal tracks. Here’s how you do it!
STEP 1: Punch out the photo eyes.
Each of the vertical tracks have a thin cover where the photo eyes will need to shine through. Use your finger to just push that through–wiggling it back and forth to remove it.

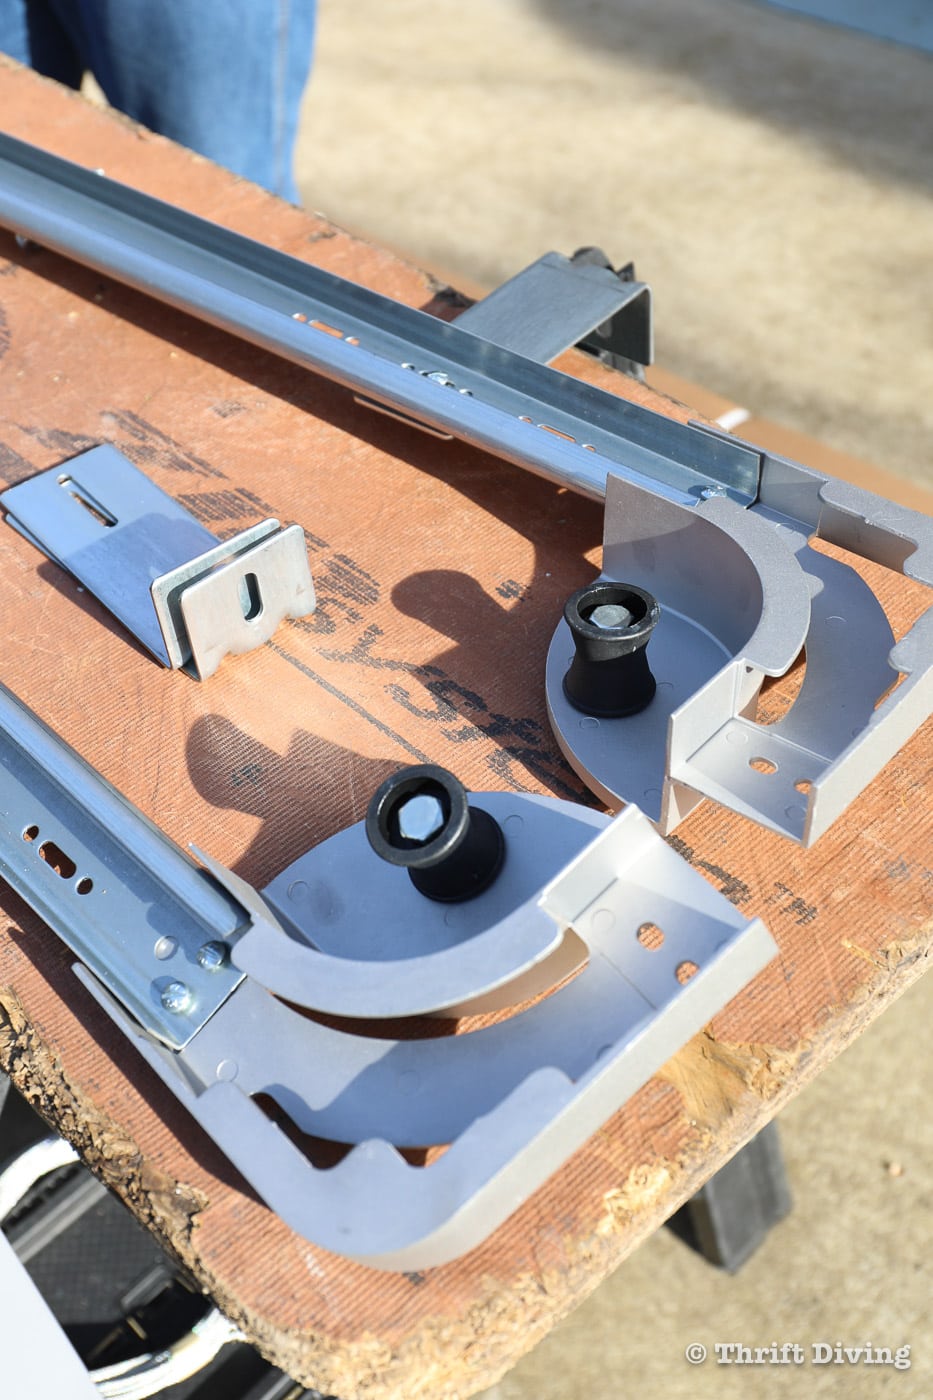
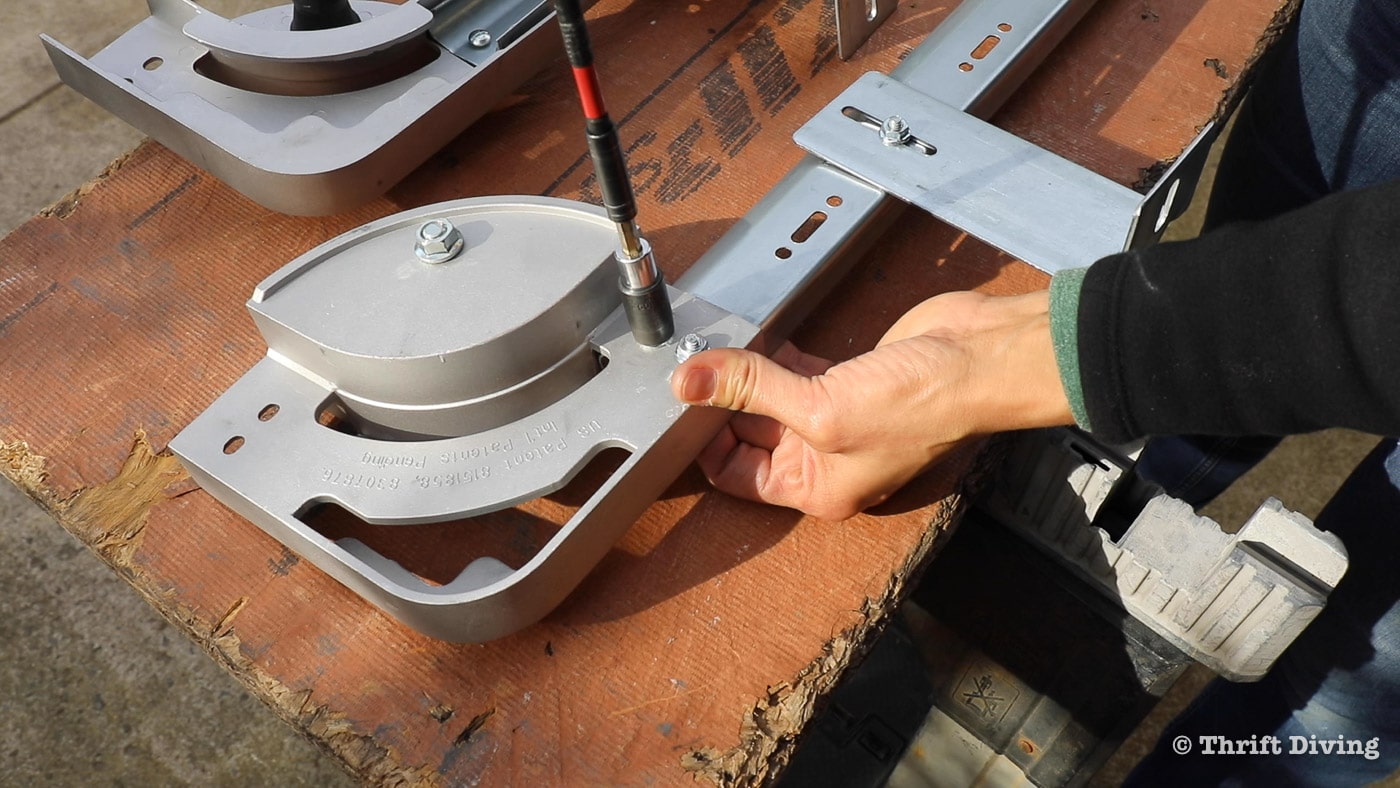
STEP 2: Attach curved edge to curved edge of track elbow.
I’m not sure if this is called a “track elbow” or not, but it looks like one. 🙂 The curved edge of the vertical track should be aligned with the curved edge of the “track elbow.” Just remember: curved edge to curved edge.
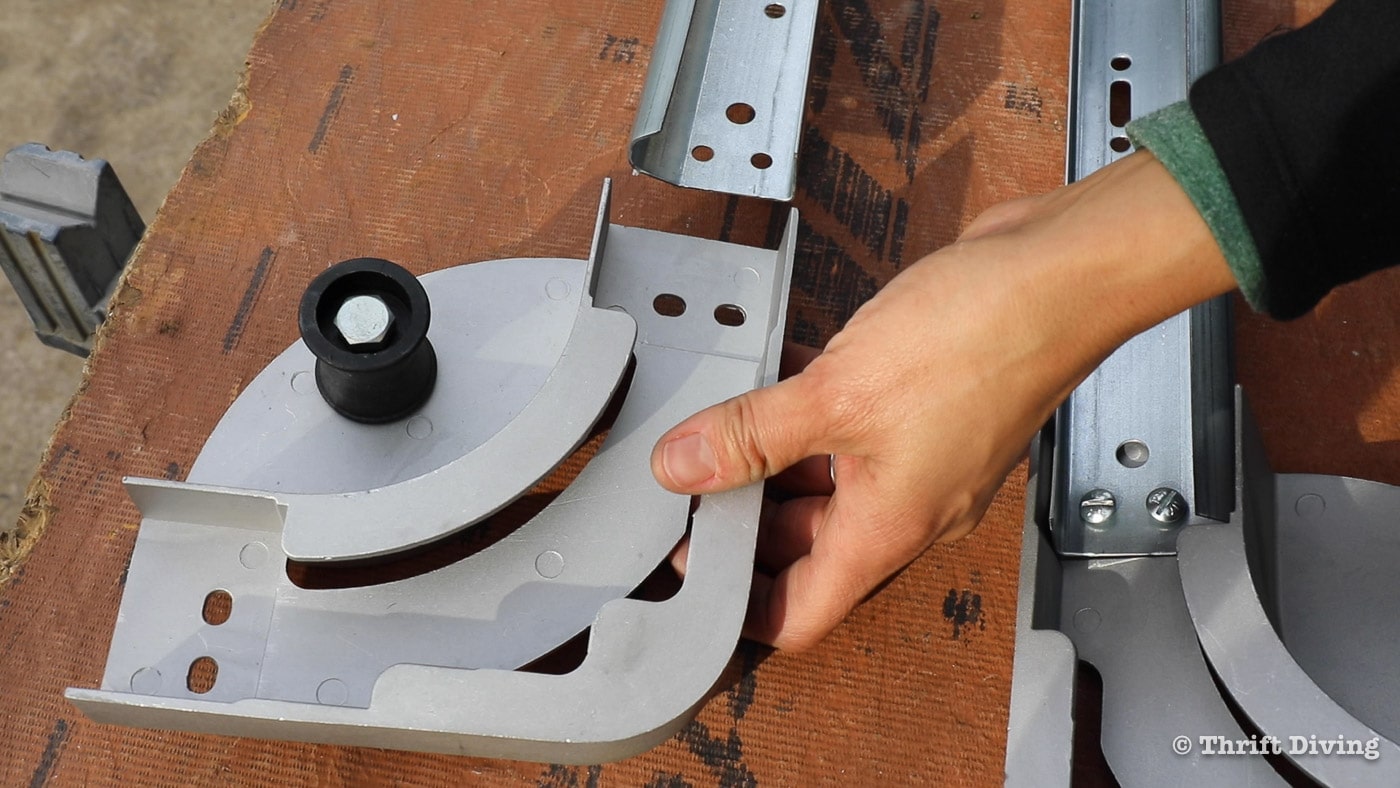
STEP 3: Add 2 bolts and finger tighten.
Add two bolts into the track holes and add nuts to secure them. Tighten these nuts with an impact driver.
STEP 4: Attach an angled bracket (finger tighten only!)
At the top of the vertical track, you’ll find a sets of three holes. Attach an angled bracket in the center of the group of holes in the middle, securing them with a bolt and a nut. Finger tighten these only! Do not use the impact driver on these bolts in the brackets right now.
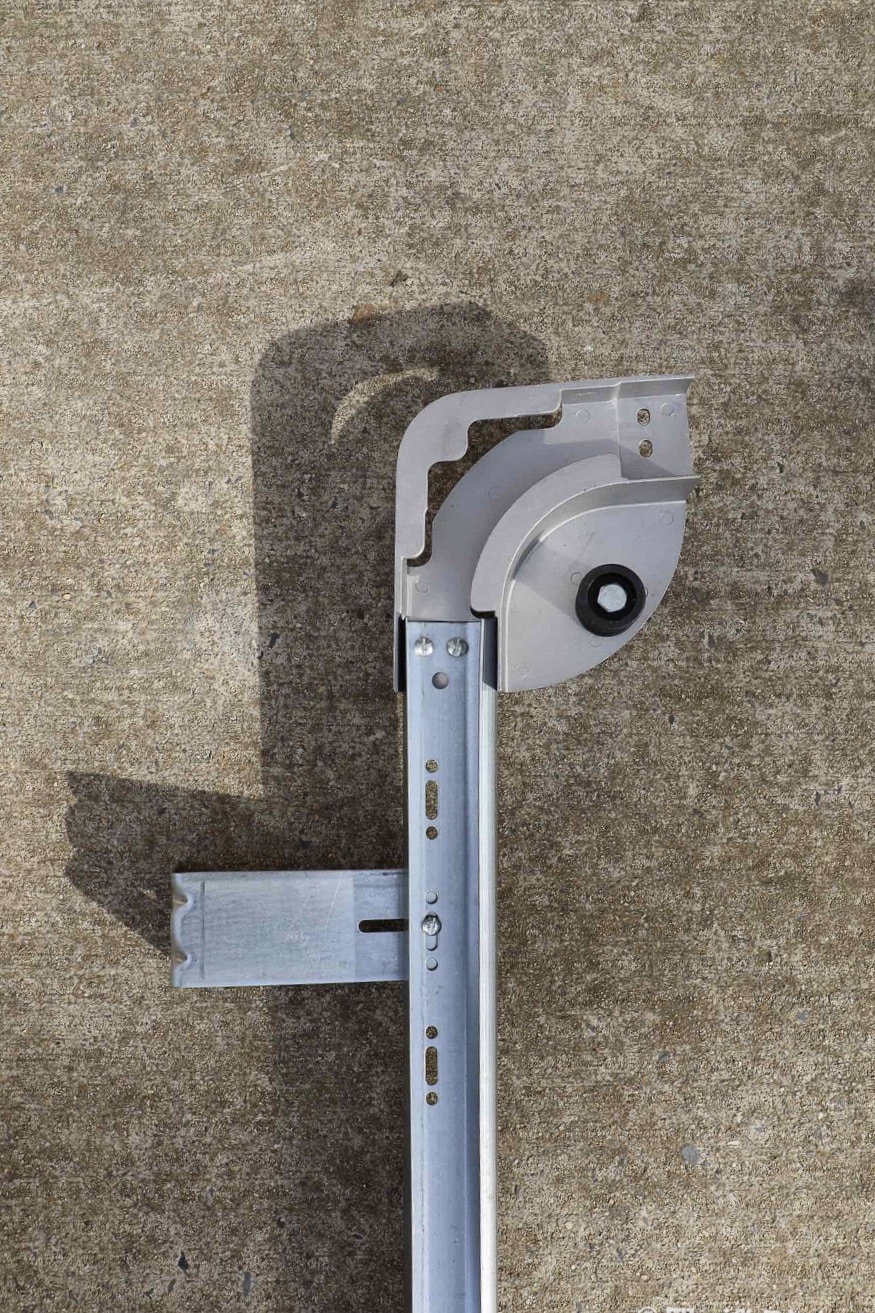
This is what the top will look like when properly assembled. Notice how the top track section is pointing to the right and the bracket is mounted to the left? This is correct position.
STEP 5: Attach the other bracket.
At the bottom of the vertical track, attach another bracket to the middle section of three holes. Again, only finger tighten these nuts.
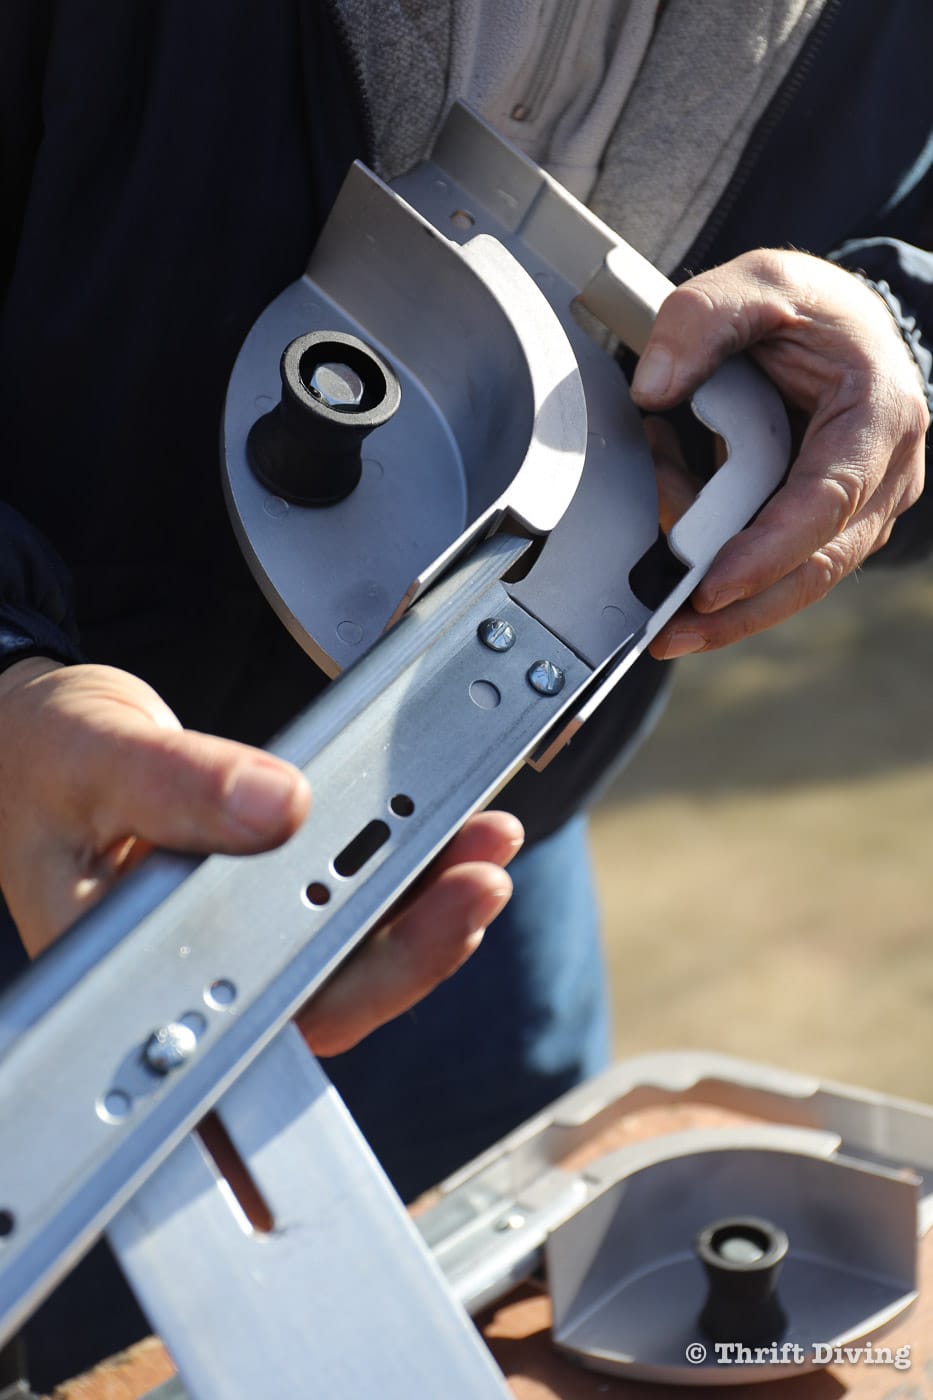
STEP 6: Tighten the “track elbow” with an impact driver.
Of course, you can tighten the “track elbow” nuts as you go, or you can assemble them and tighten them both at once. It’s your choice. But to keep the work flow moving, it’s best to batch your assembly and tightening at once. And remember–don’t tightening the nuts on the brackets yet. Those will get tightened when the tracks are installed.
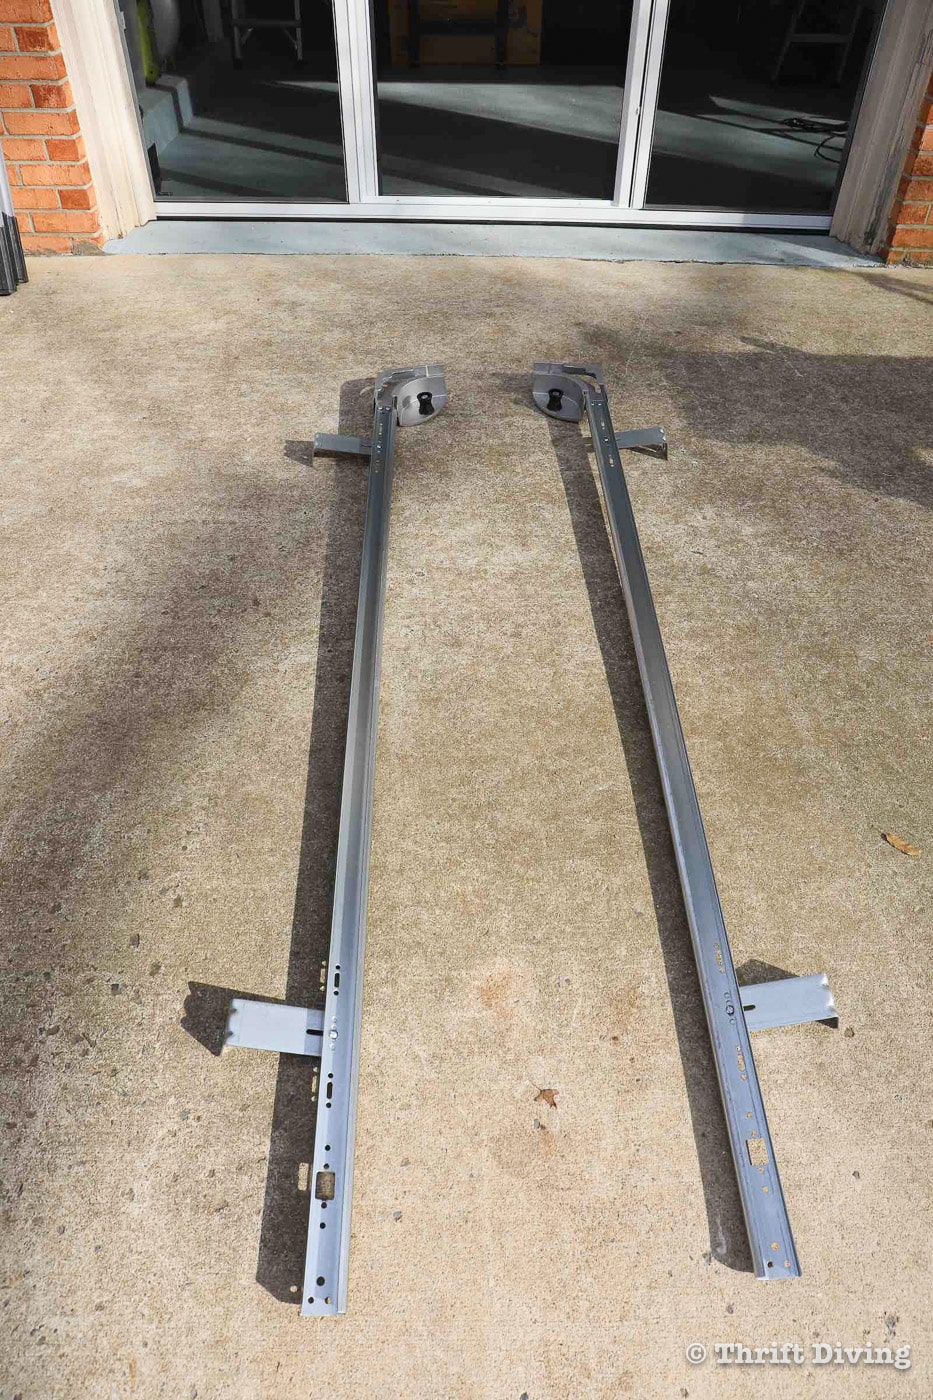
STEP 7: Set the assembled tracks near garage opening.
When the vertical tracks are completely assembled, it should look like this. These completely assembled pieces can now be placed near the opening of the garage for when it’s time to install the tracks.
Up next, it’s time to unbox and assemble the garage door screen frame! Let’s cover that in complete detail, which is PART 3 and PART 4 in this How to Install a Garage Door Screen Kit series!
PART 1: Measurement and Prep Work
PART 2: Assembling the Garage Screen Tracks
PART 3 and 4: Prepping and Assembling the Garage Screen Frame
PART 5: Installing the Garage Door Screen Frame
![]()
Click here to SAVE this tutorial series on Pinterest!

Download the 5 freebies!

Thrift Diving inspires women to decorate, improve, and maintain their home themselves...using paint, power tools, and thrift stores! Use these 5 printables, checklists, and ebooks to get started!