How to Install a Garage Door Screen Step-by-Step – PART 1
This tutorial (PART 1) on how to install a garage door screen is sponsored by Maryland Screens.
Some time ago I made my own DIY garage door screen with a zipper to keep bugs out of my garage. Since my garage is my workshop and I spend a lot of time there, I wanted a higher quality of screen that would last. I needed something that would allow me to do DIY projects without the distraction of mosquitoes trying to bite my arms while wielding power tools. Not safe at all to shoo away insects with spinning blades nearby.
While the garage door screen looked amazing and performed well, after a couple of years, the screen began to slightly tear from the wear and tear of run-ins with the lawn mower and other lawn tools that brushed against the unzipped screen when moving things in and out of the garage. Remember: this DIY garage screen screen was held in place simply with Velcro and had been hand-sewing with my sewing machine!
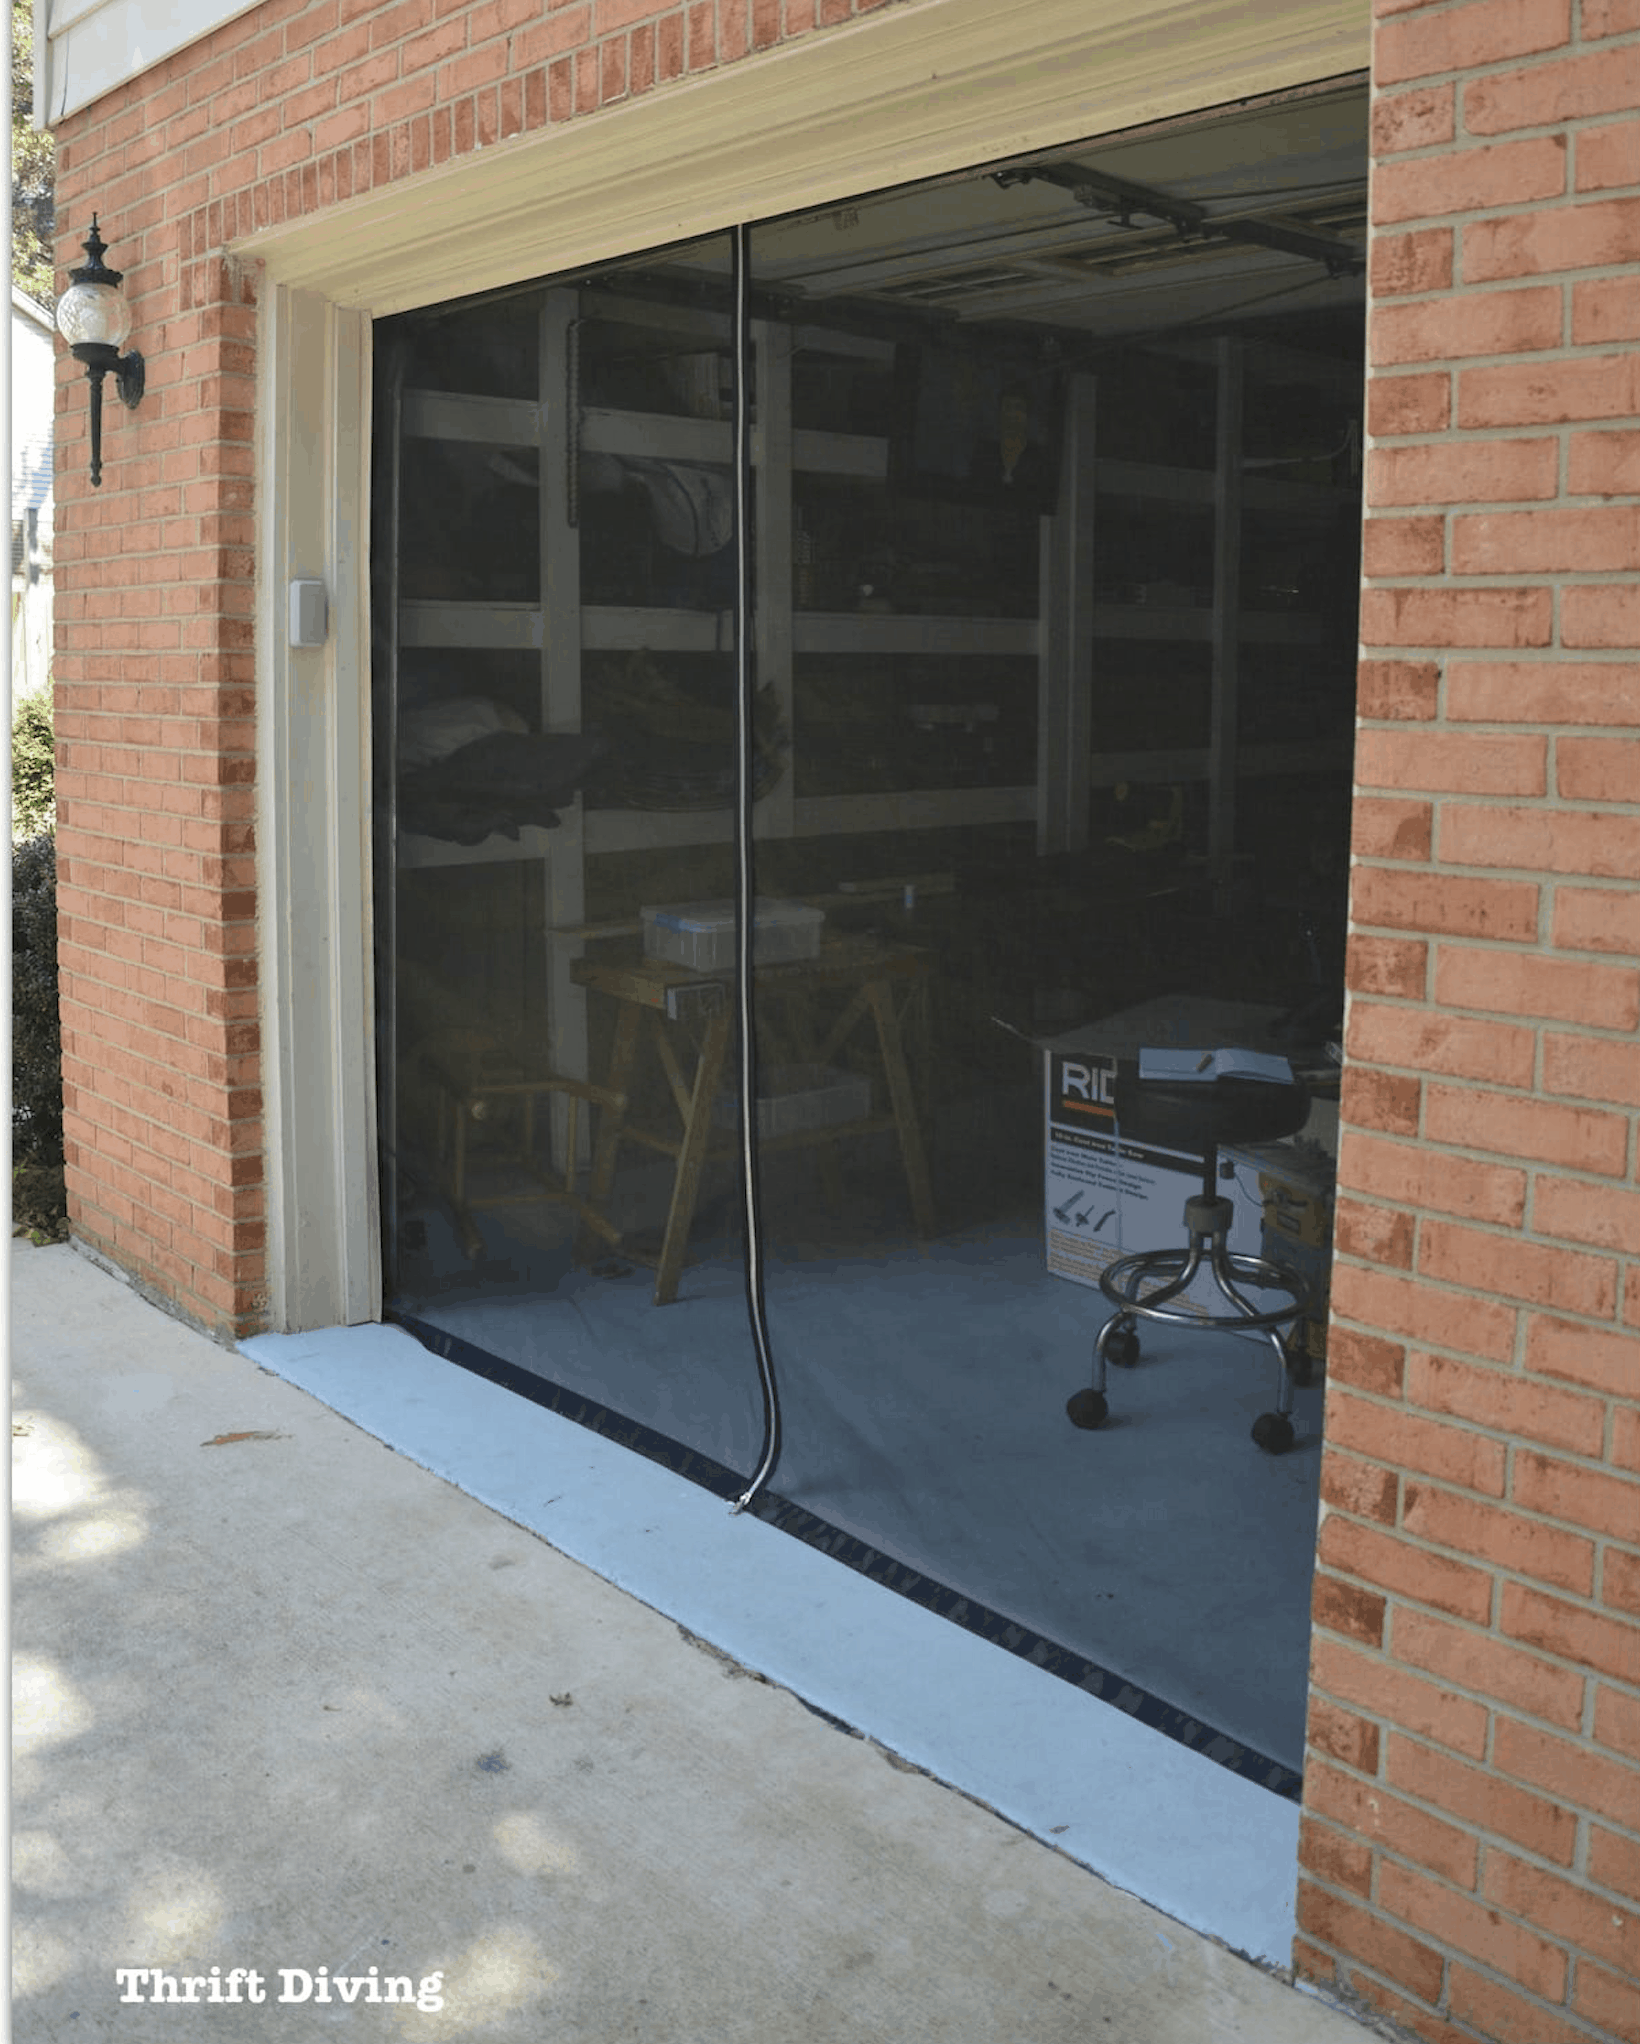
BEFORE
Mike Rose, however, owner of Maryland Screens, a full-service garage screen installation company located here in Maryland, reached out and asked if he could teach me how to install a garage door screen. If he could teach me how to install this non-motorized screen made out of a metal frame, then I could teach you how to install one. He would ship the garage door screen kit to you from Maryland Screens and these following instructions would walk you through how to install your very own screen. It looks amazing!
Click hear to order your own screen kit from Maryland Screens. Use code: ThriftDiving90 at checkout!
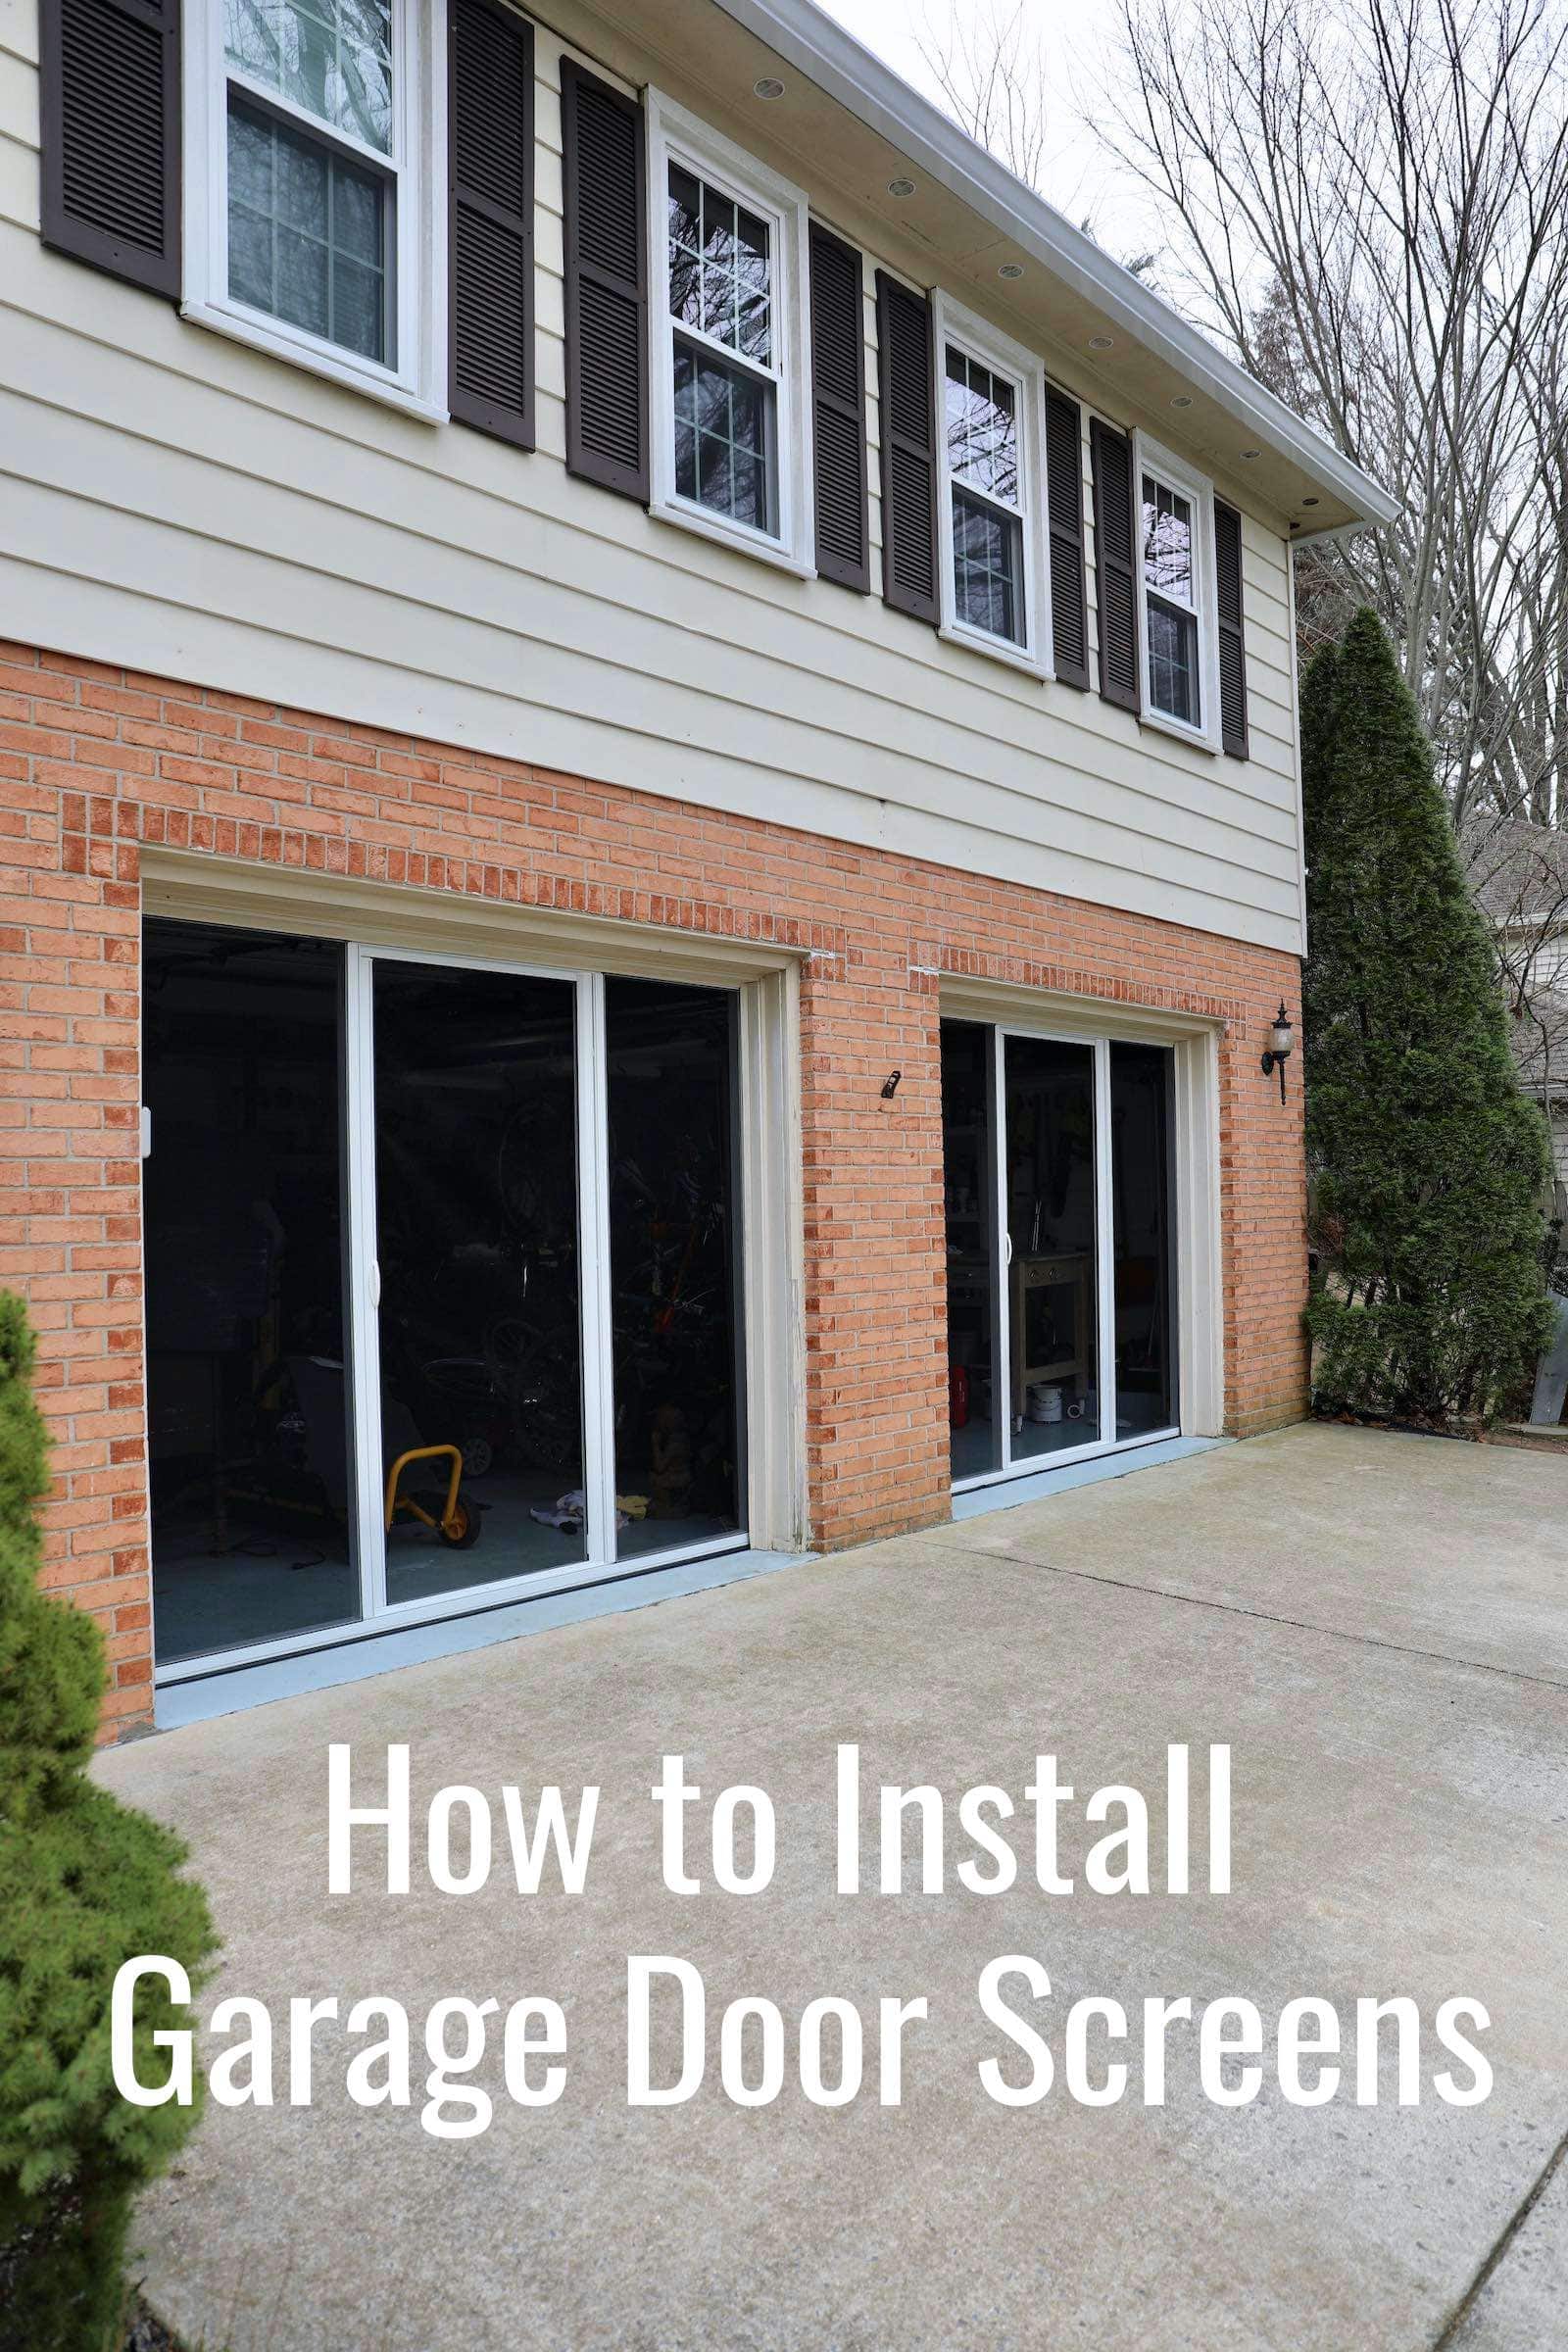
AFTER!

What’s different about this screen is that it has a retractable door, has a metal frame, and easily lifts up and out of the way when you’d like to close your garage doors. So let’s talk about how to install these screens! Be sure to check out the other parts of the installation: Part 2, Part 3, Part 4, and Part 5.
Watch This Project In Action
Click here to subscribe to my YouTube channel!
For all the materials and step-by-step instructions, keep reading!
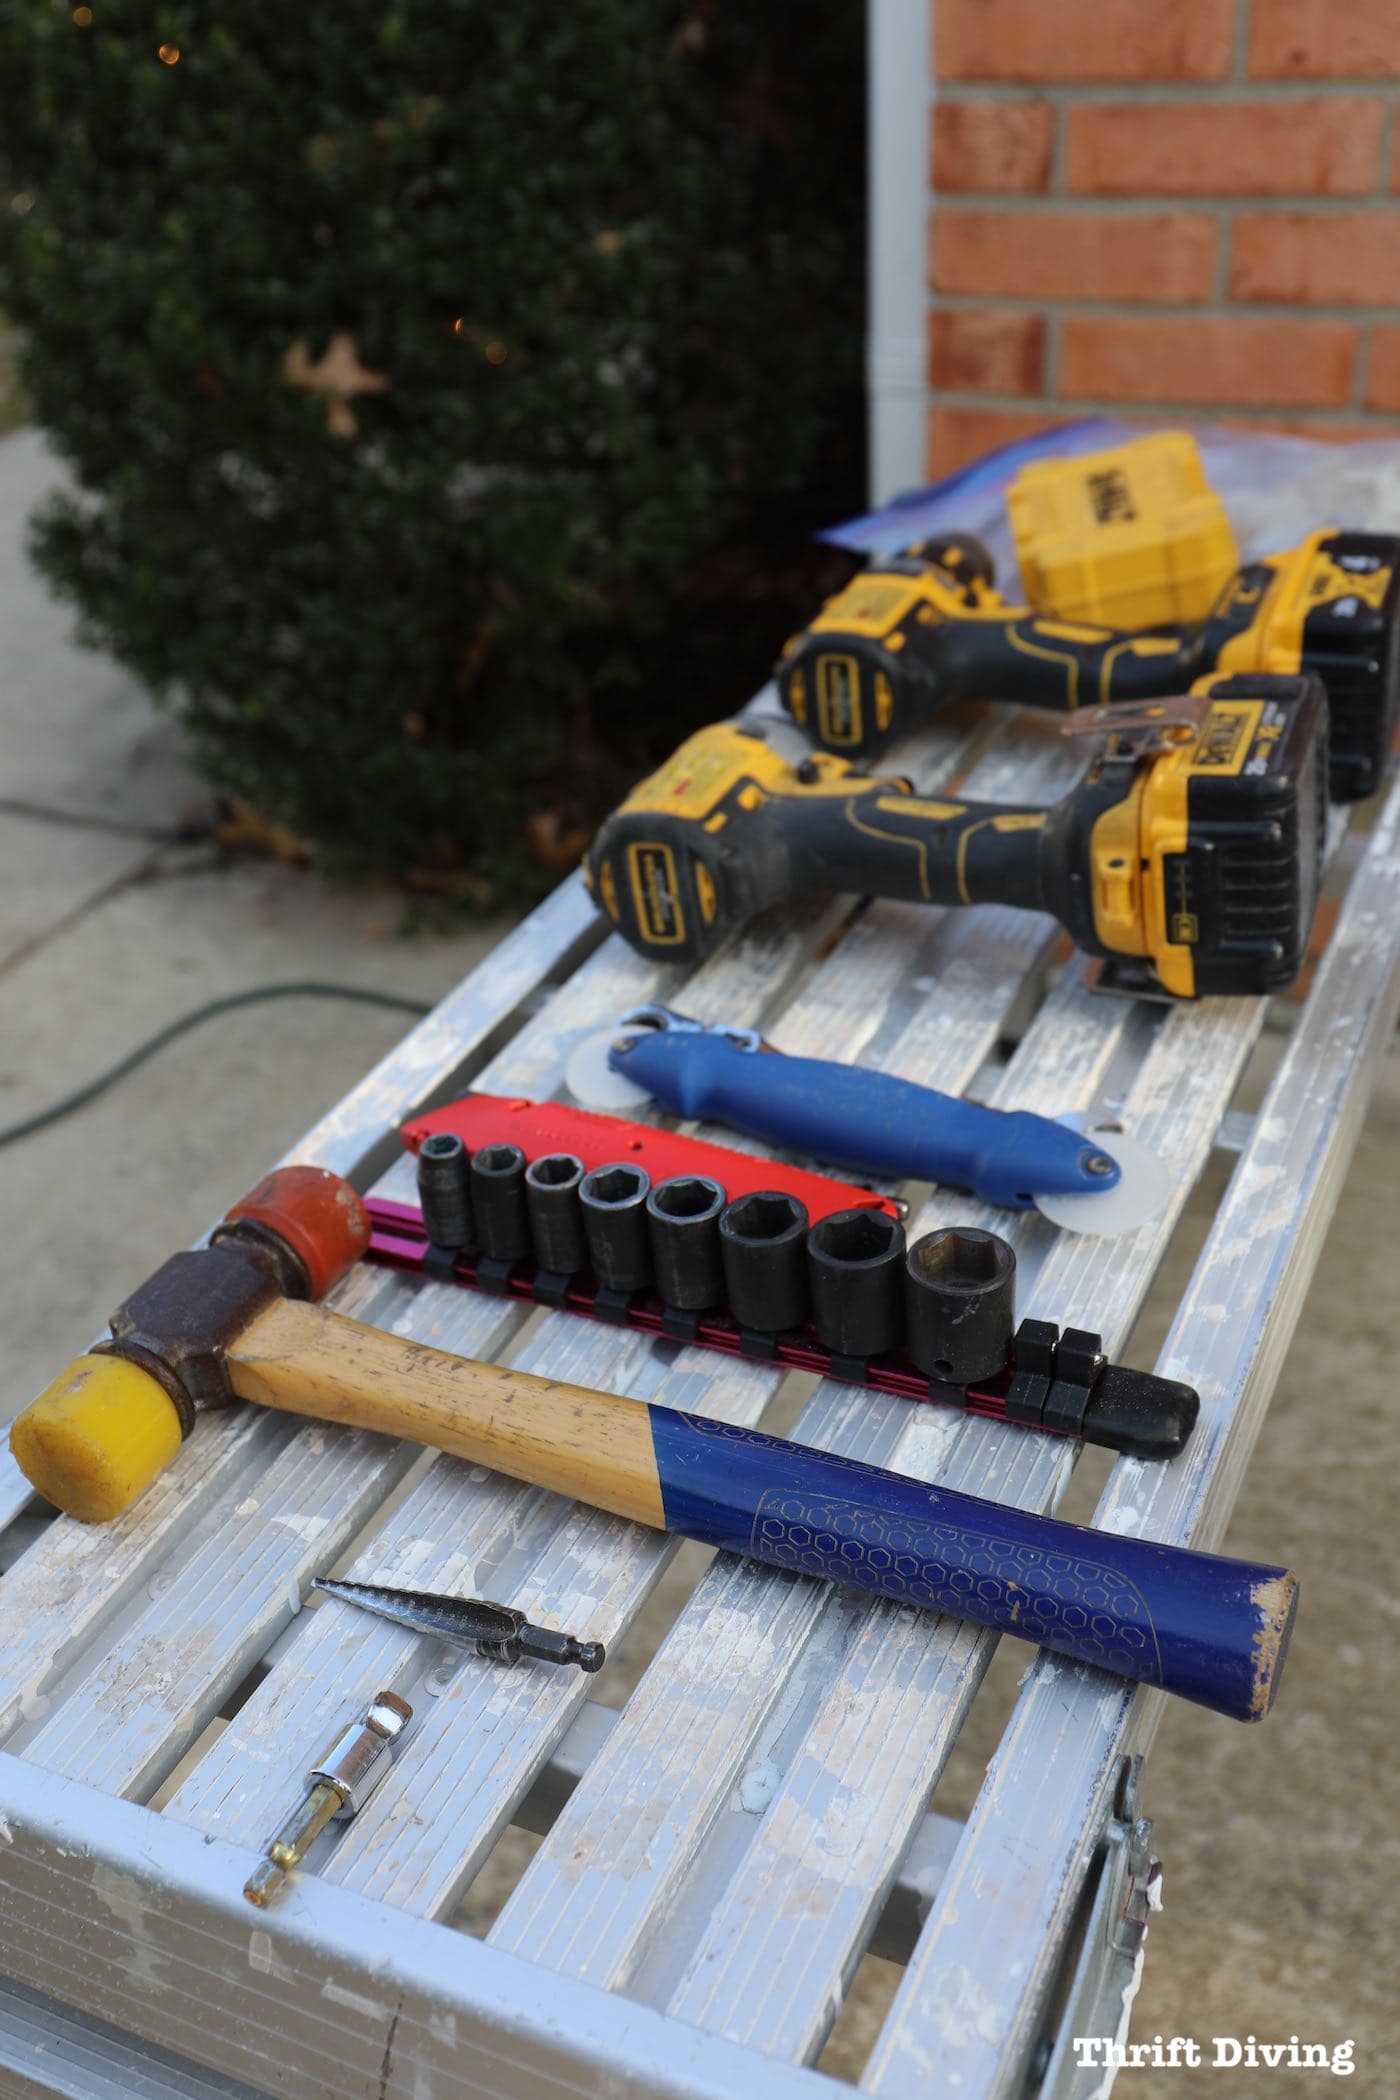
Materials Needed: Garage Door Screen Kit Installation
- Garage Door Screen Kit
- Tape measure
- Utility knife
- Impact sockets in the following sizes: 5/16, 7/16, and 9/16
- Impact driver
- Power drill
- 7/16 box end ratcheting wrench
- Rubber mallet
- Screen spline plastic tool
- Screen locks (must be ordered separately from Maryland Screens; they don’t come in the garage door screen kit)
- Step bit (optional)
- Set of drill bits (you’ll definitely need the 5/16 drill bit)
- Workhorses (for assembling the garage door screen frame)
- Ladder
- Table, workbench, or large enough surface to spread out parts.
Garage Door Screen Kit
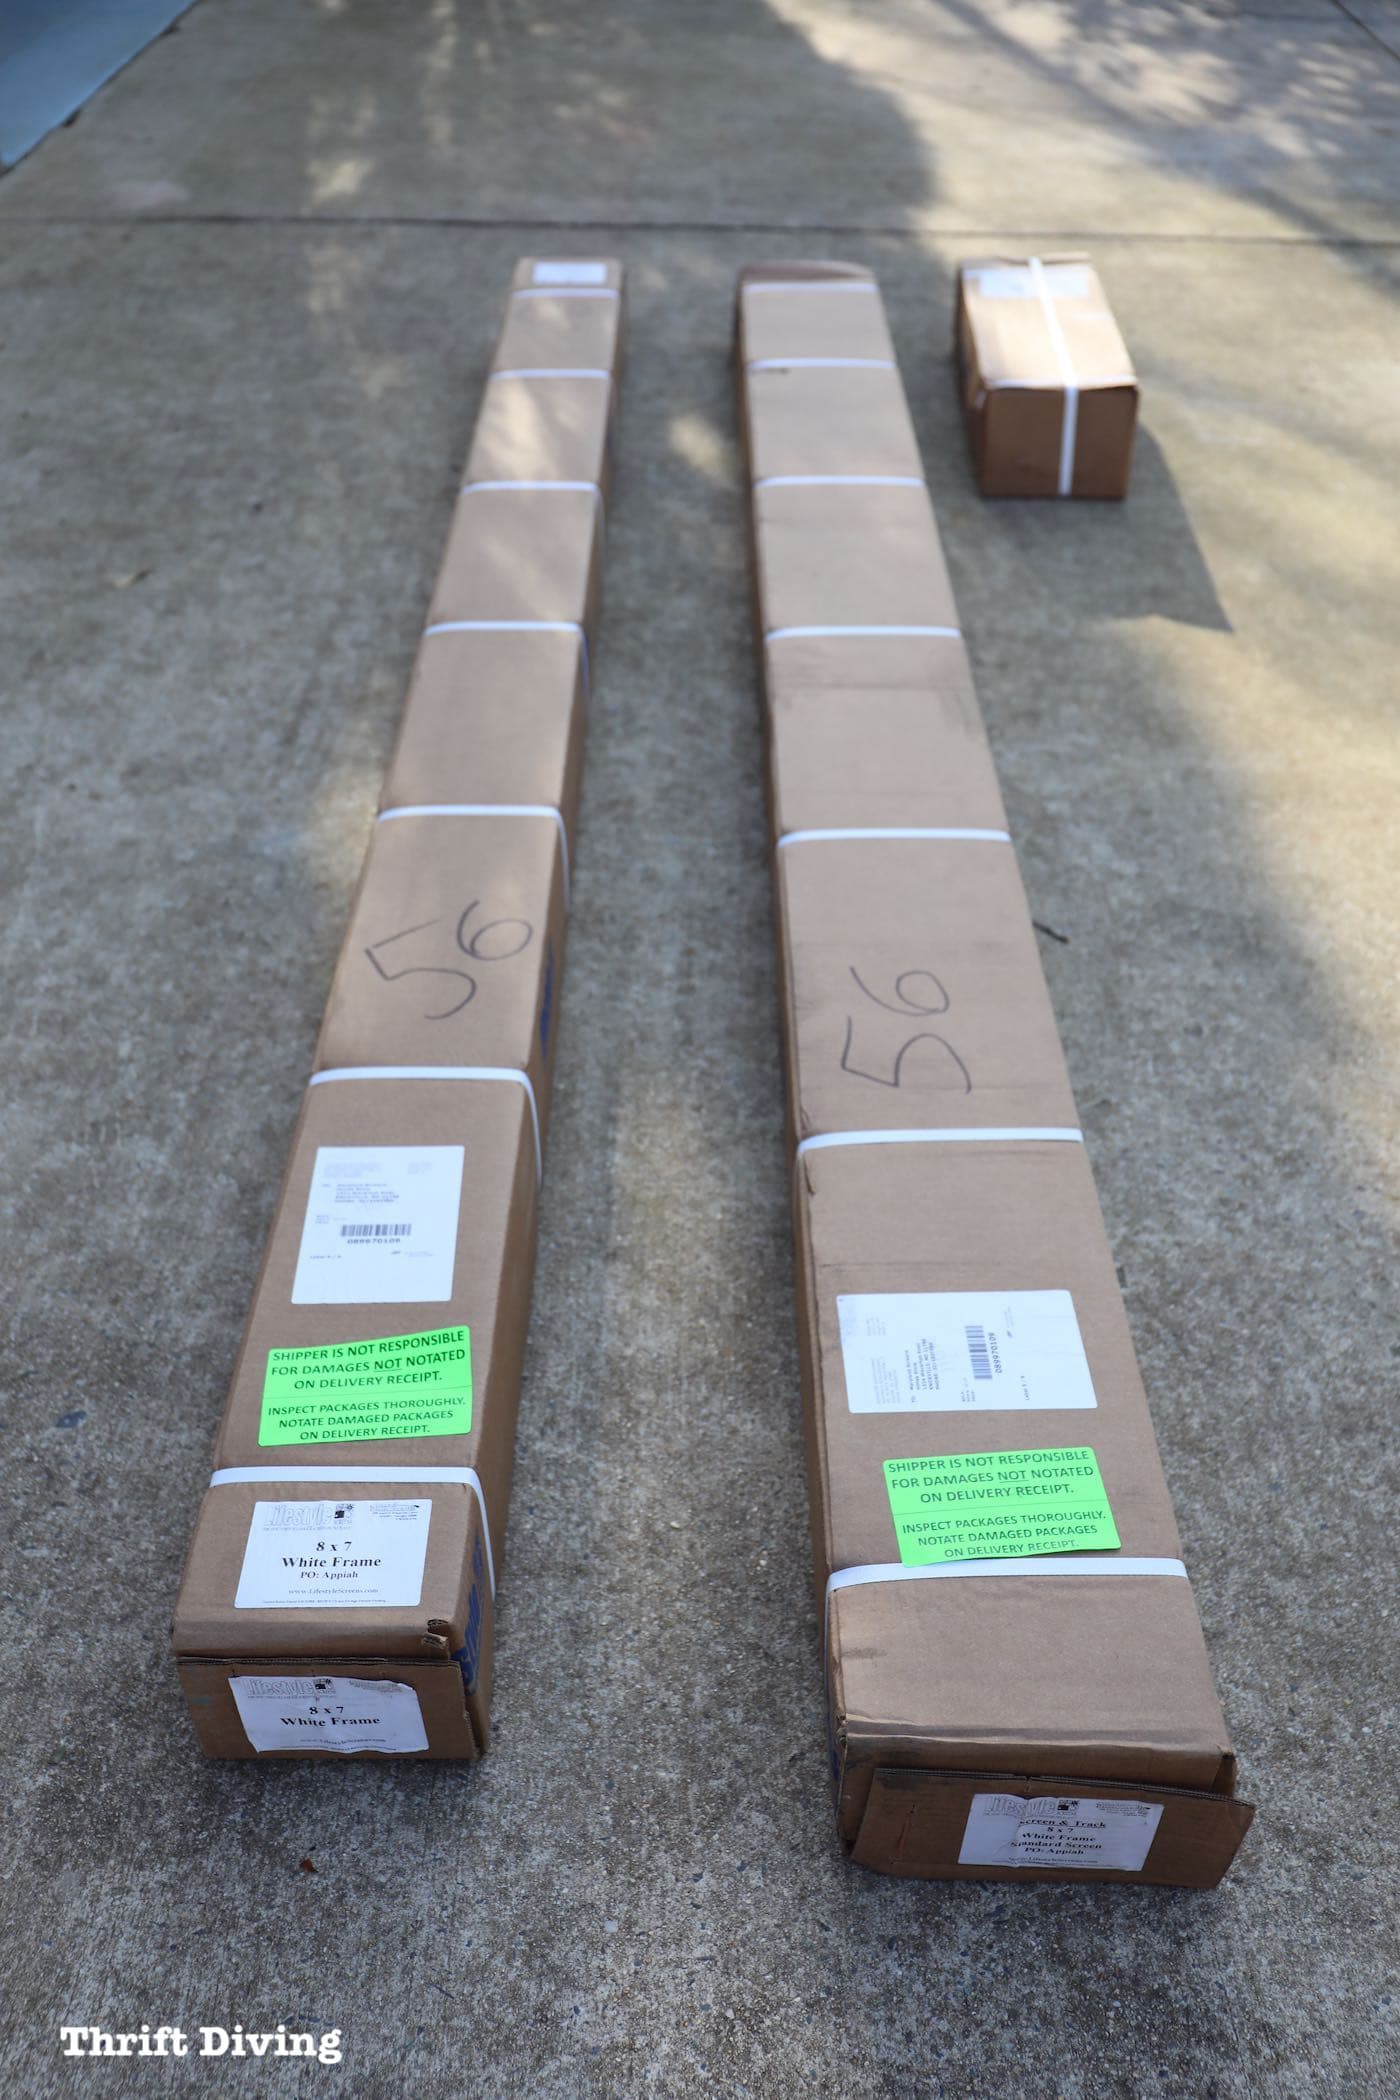
When you order your garage door screen kit from Maryland Screens, it will come with three boxes that look like this. It’s hard to believe everything you’ll need can come packaged so efficiently, but it’s all there. You’ll get:
- Garage door screen metal frame
- Garage screen tracks (both vertical and horizontal)
- Screen (available in several varieties when you place your order, including a privacy screen option).
- Hardware
The only items that won’t come in the box are additional garage door metal brackets (if you need them) and screen locks, which I will discuss later.
How to Install a Garage Door Screen Kit on Tracks: PART 1
So let’s dig into these step-by-step instructions on how to install a garage door screen kit that pulls down on tracks. From my installation experience, it wasn’t difficult, but there are a lot of steps. So I have each of the steps broken down into sub-steps to help you.
Measuring Your Garage Door
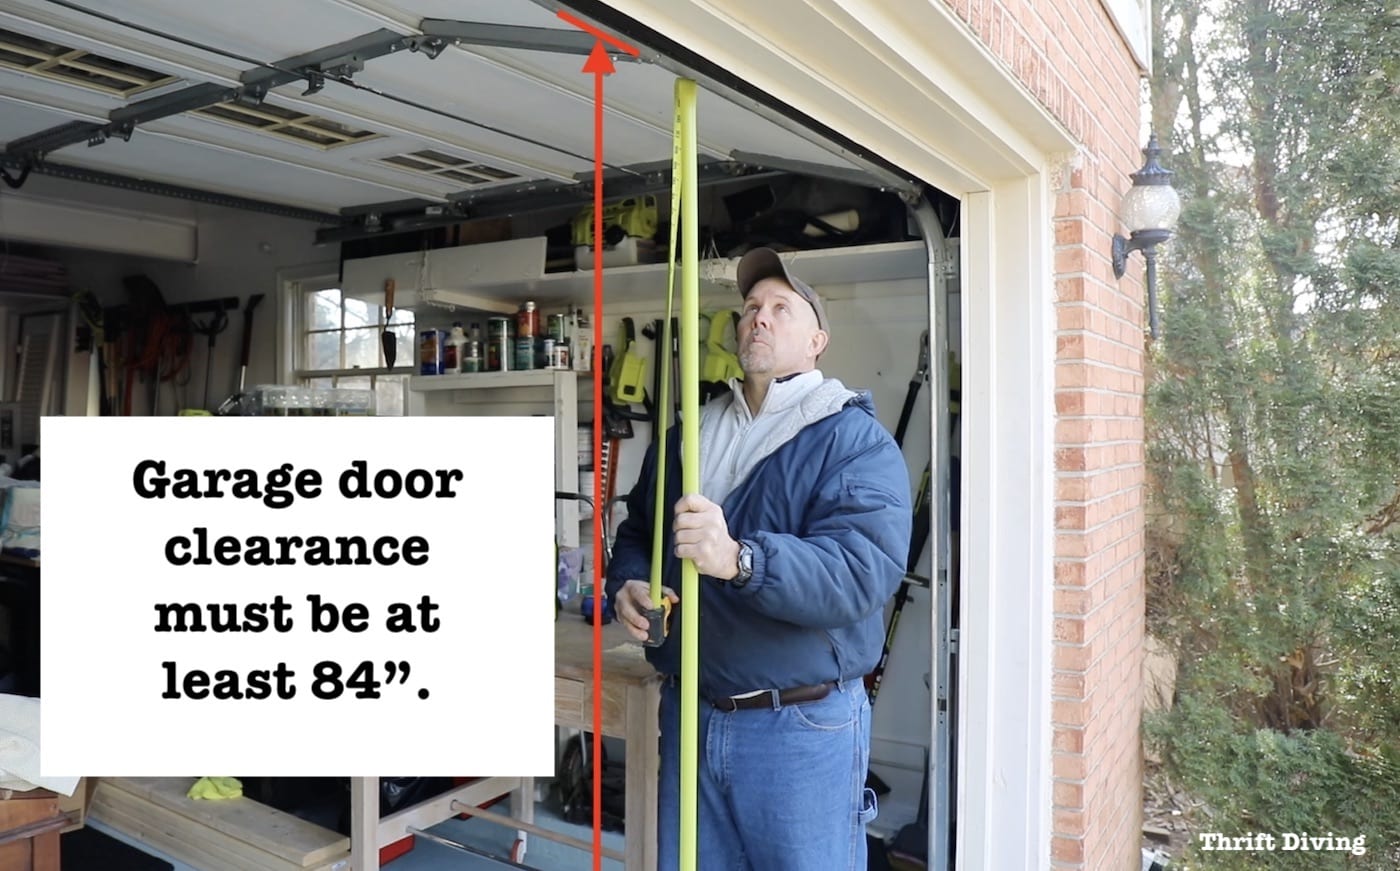
The most important pre-steps of installing a garage door screen kit that pulls down and has a retractable door is that you must:
- Measure your garage door’s width and length.
- Ensure that, when raised, your garage door is at least 84″ tall. The garage door screen is 83″ when installed, therefore to make sure there is proper clearance, measure from the garage floor up to the bottom edge of the door. If it’s less than 84″, check out your garage door opener manual for instructions on how to adjust the opening so that the garage door raises to 84″ when opened.
Unboxing and Setting Up
The key to successfully installing your own garage door screen kit is having a tidy work space with everything properly unboxed and grouped together. Surprisingly enough, having everything laid out in an organized manner (as I’ll show you below) makes this project a lot smoother.
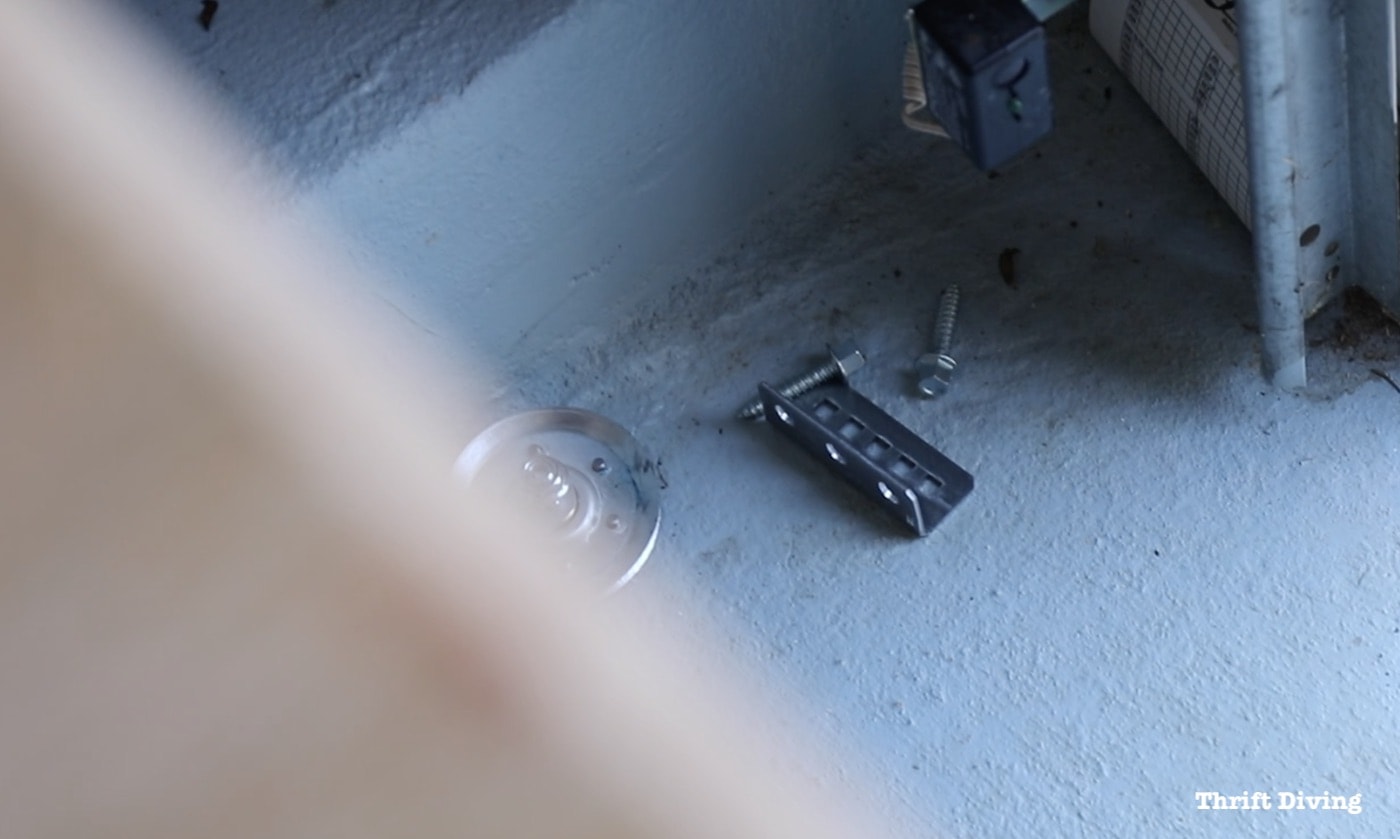
When opening your hardware, be sure that you DO NOT lose these two bolts, which are essential for holding your garage door on the track. If you lose either of these bolts, your garage door screen won’t work.
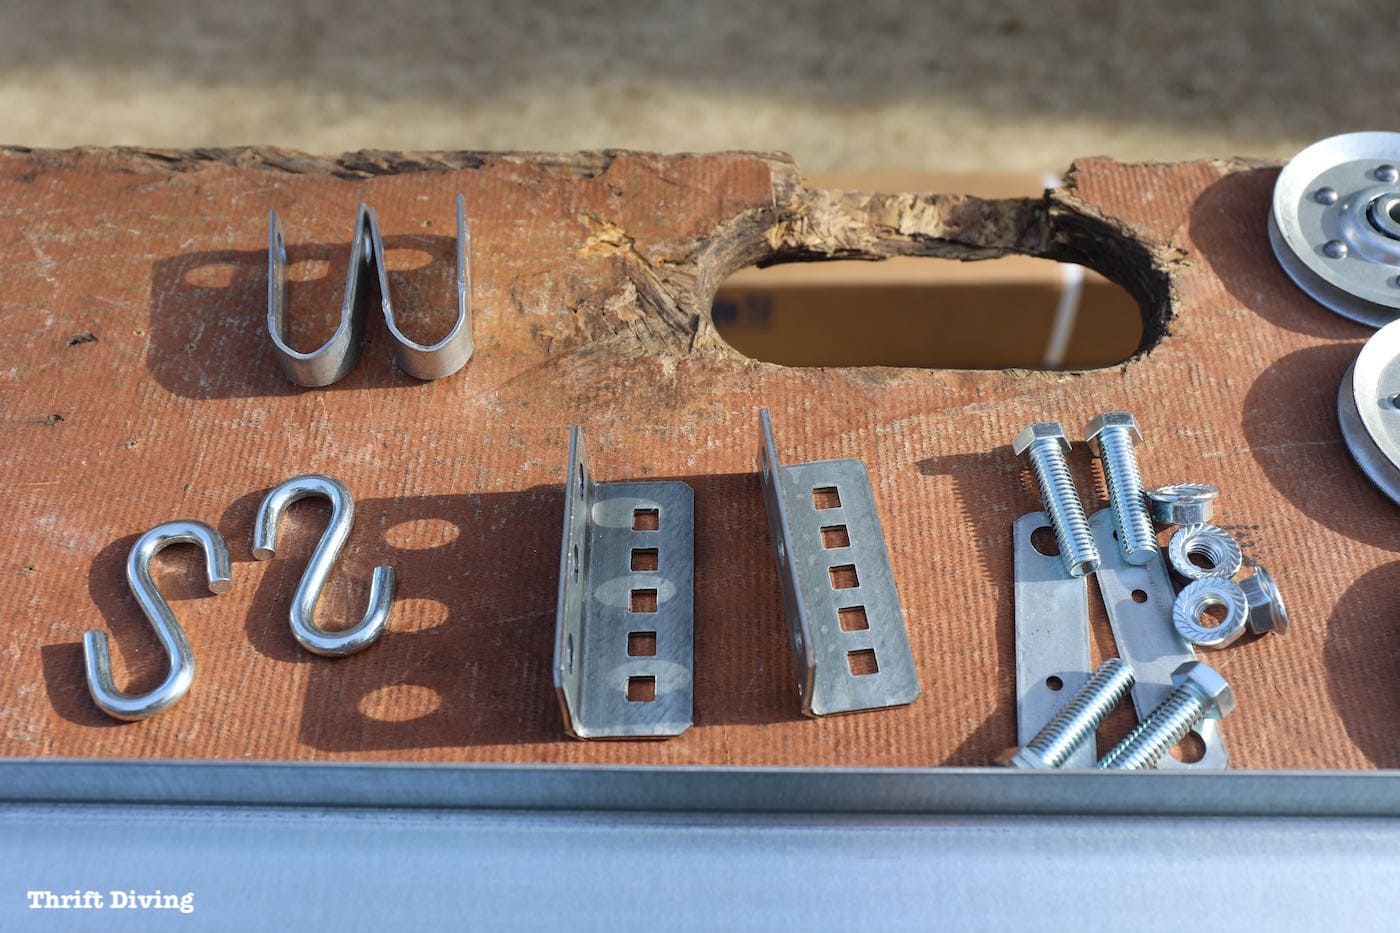
Of the three boxes that you’ll receive, you’ll receive the following items in each box:
- Box 1: Metal tracks (2 vertical, 2 horizontal, 1 roll of screen, 2 perforated angle brackets for hanging the track (12 gauge), 2 springs (located inside the roll of screen), 1 retractable door, 1 roll of screen spline, and 2 black woven straps.).
- Box 2: Garage door metal frame, and 1 roll of rubber weatherproofing.
- Box 3: Hardware
ne of the boxes will contain your tracks, the other box will have your garage door frame, and the smaller box will contain the hardware. Be very careful not to drop any of the screws or parts. There aren’t any extras included in the set. So let’s walk through what’s next.
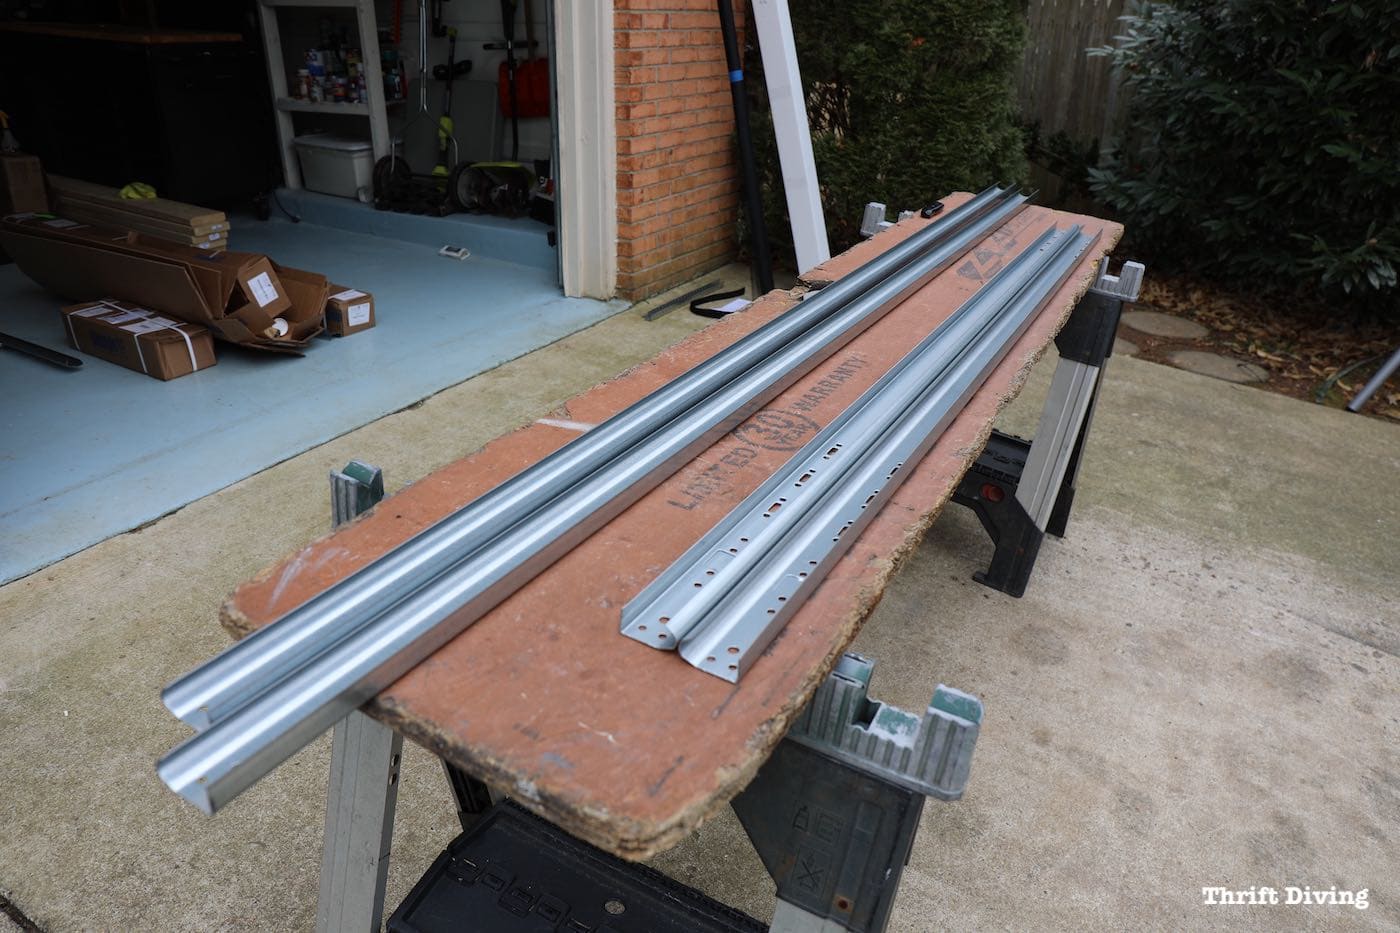
Assembling the Tracks
After everything in the garage door screen kit has been opened and grouped together on your clean workspace, the next step is to begin assembling the tracks. Keep in mind that there are vertical and horizontal tracks. You may start assembling either ones first, but it’s best to start with the tracks first before assembling the frame so that once the frame is complete, it can be installed immediately to prevent scratches or damage.
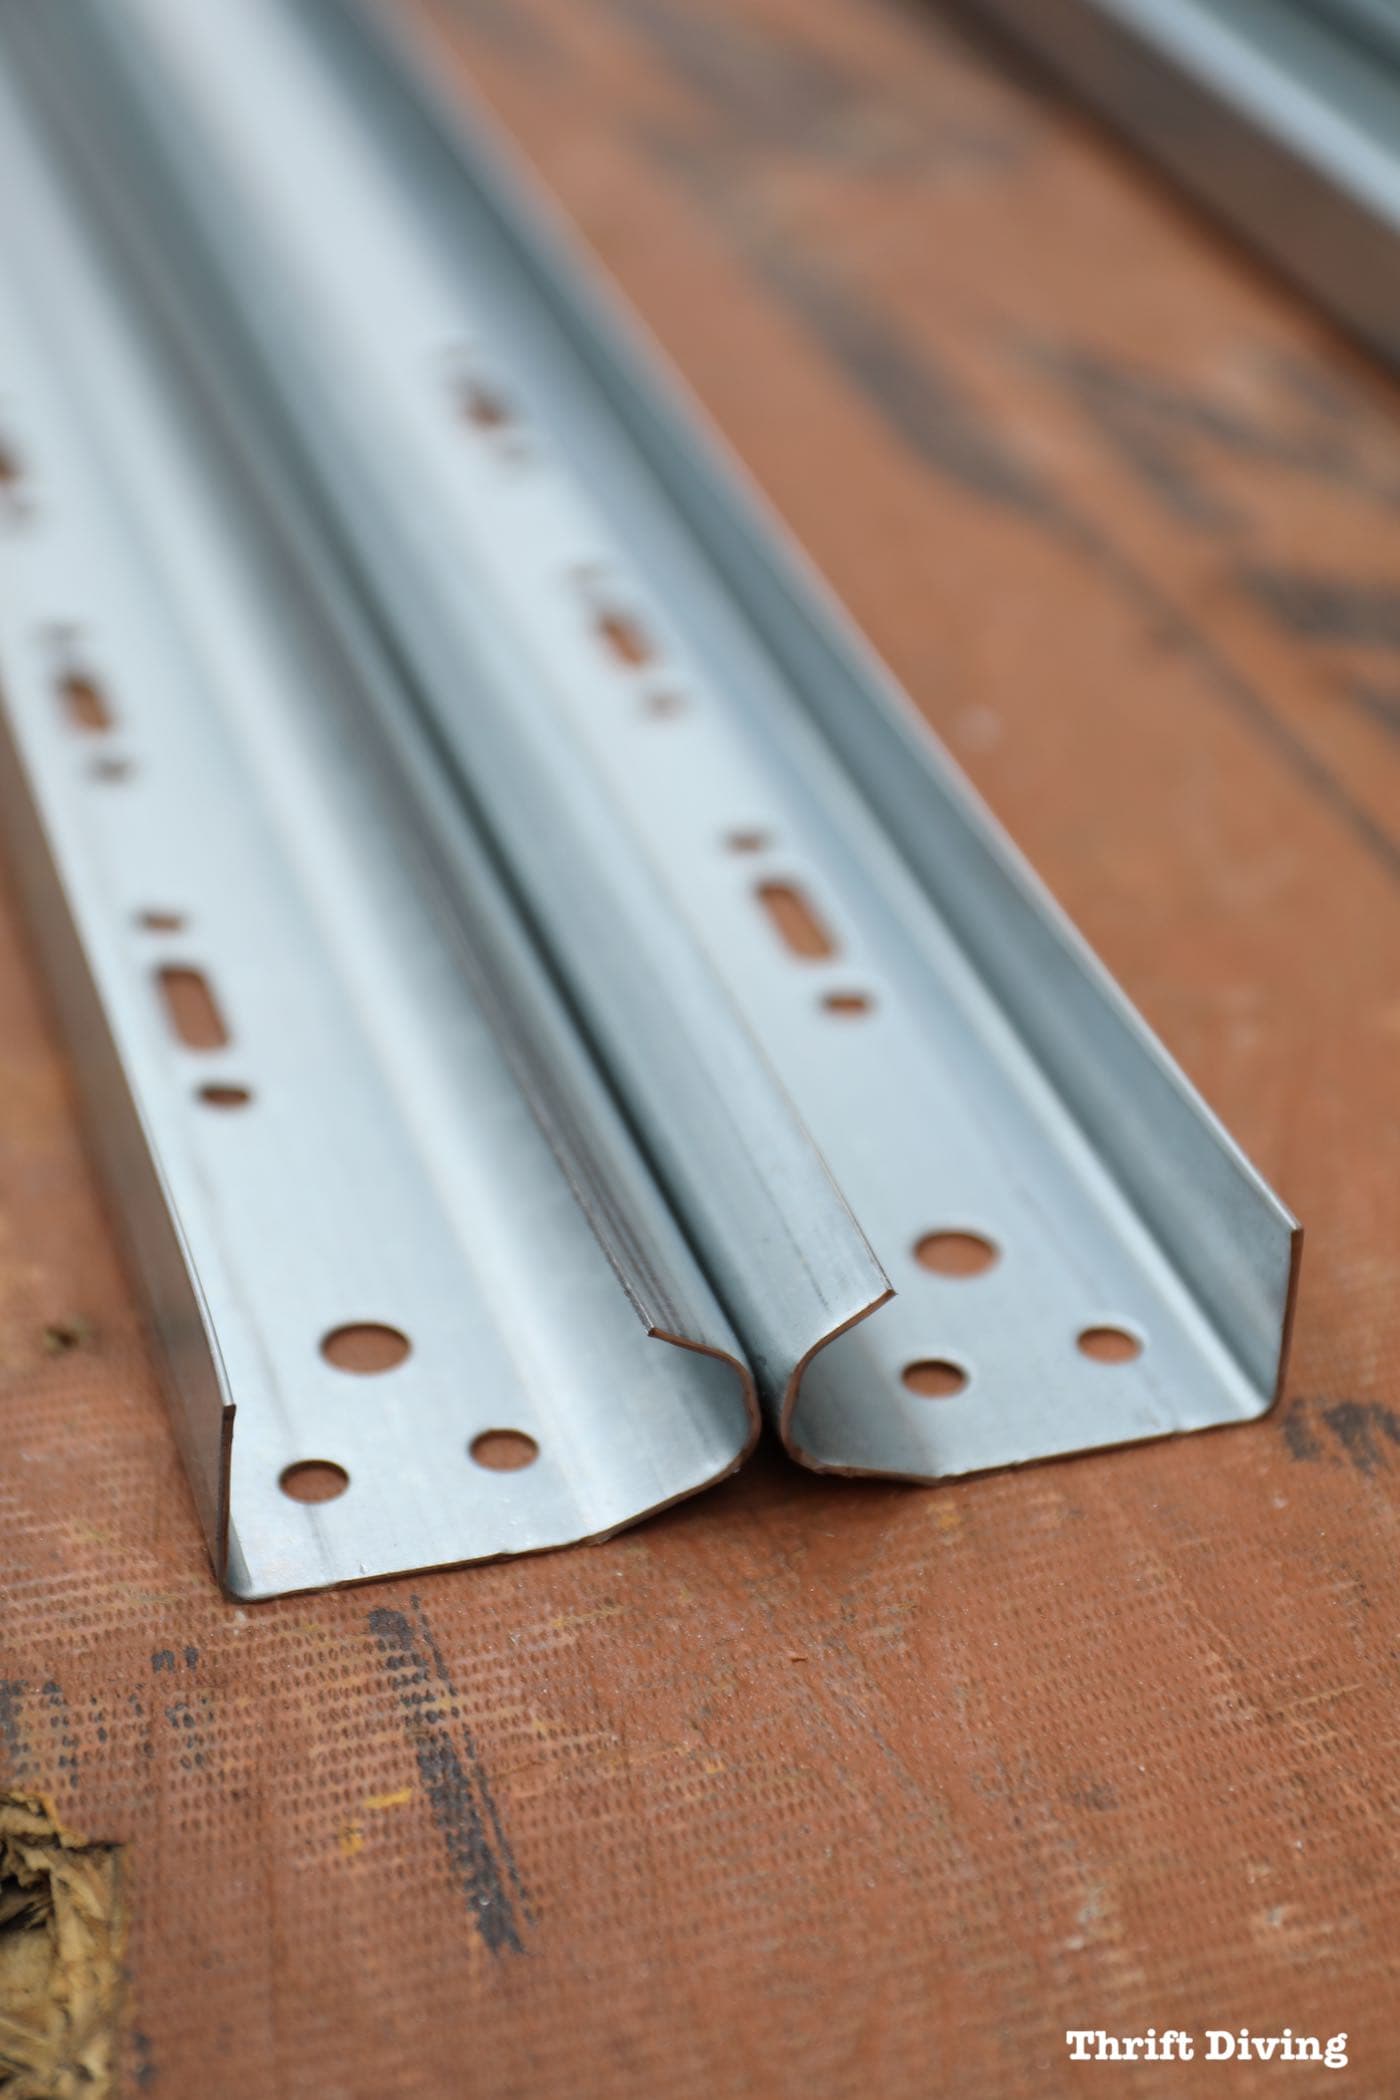
Step 1: Line Up the Curved Edges of the Tracks
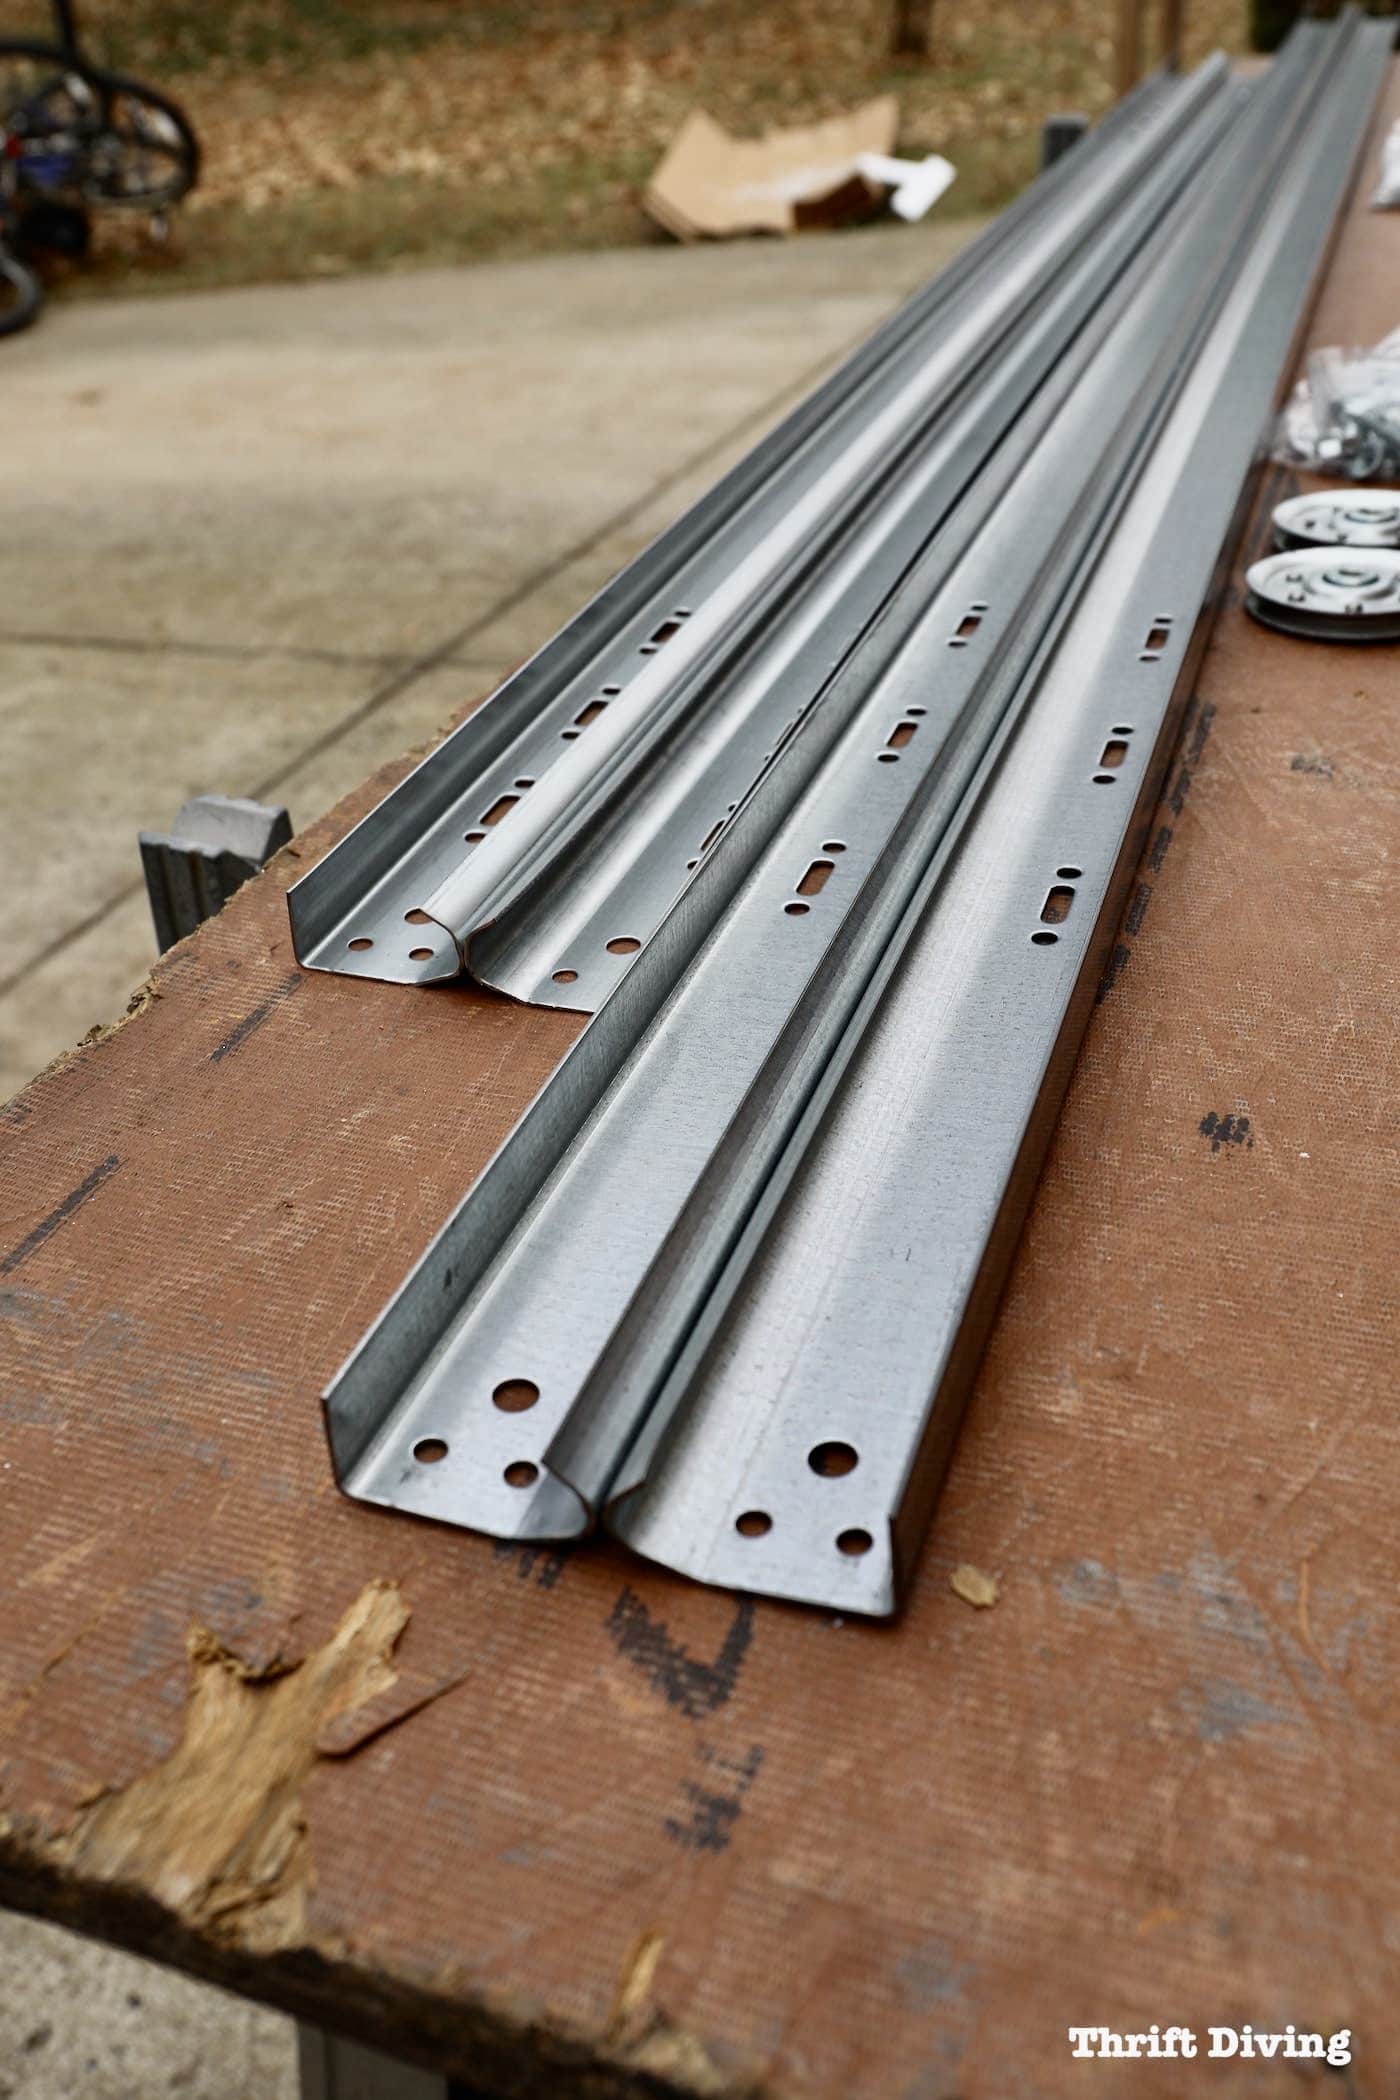
There will be four tracks: two vertical and two horizontal tracks. These are the tracks upon which your garage door screen will ride. The shorter two are vertical tracks which will be positioned vertically closest to your garage door. The other two will be horizontal and parallel to your garage floor, where the garage door screen will rest when not in use.
Once the tracks are unpacked, match up the vertical tracks and lay them side-by-side with the curved edges together (below). Match up the horizontal tracks with curved edges together, as well. The reason for doing this is so that everything is lined up. It’s hard to mess up the installation when “like” edges are aligned.
Step 2: Remove the Photo Eye Cover From the Vertical Tracks
On the end of shorter vertical rails, you’ll notice there is a rectangular shape of metal. Those are where the photo eyes will be located, which allow your garage door sensors to “talk” to each other so the garage door opens and closes. Go ahead and poke out those pieces of metal to open up the slot where the photo eyes will be located. It’s thin enough that you can just use your thumb and forefinger to wiggle it back and forth to break it off.
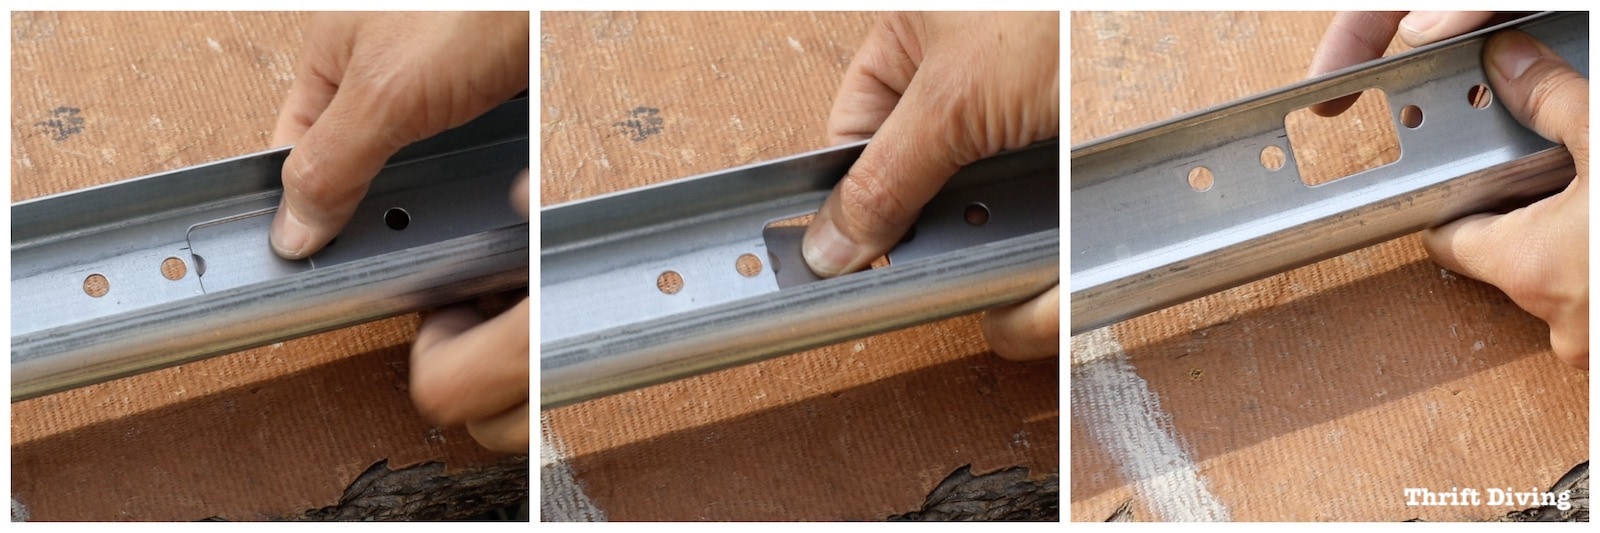
HORIZONTAL RAILS: The end with the 3 holes is the side that goes closest to the garage door. It gets hooked to the curve.
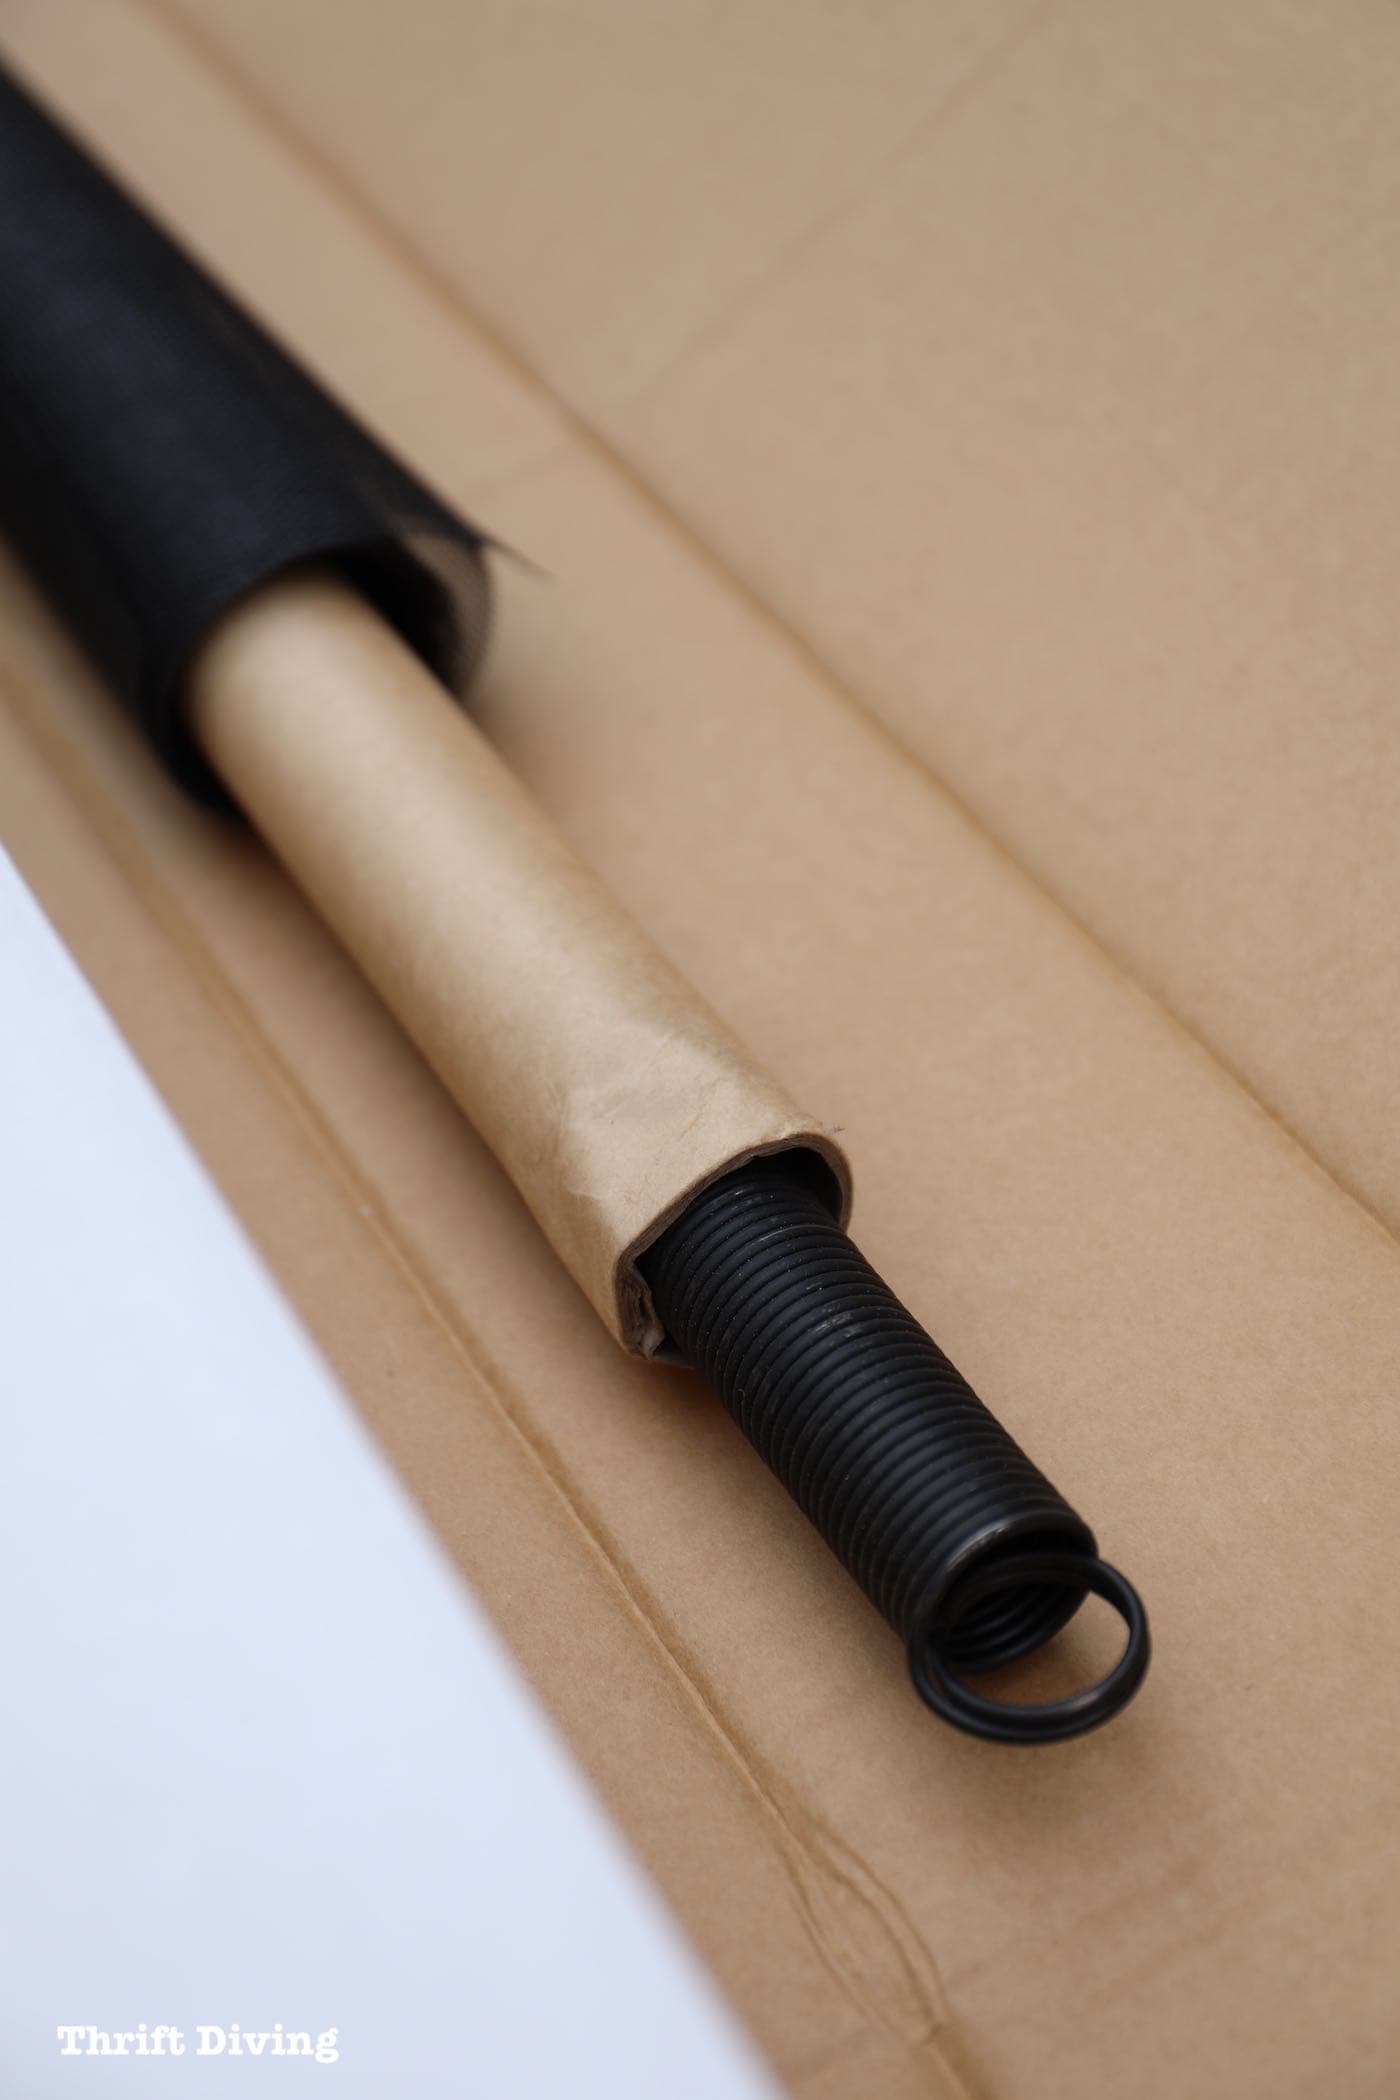
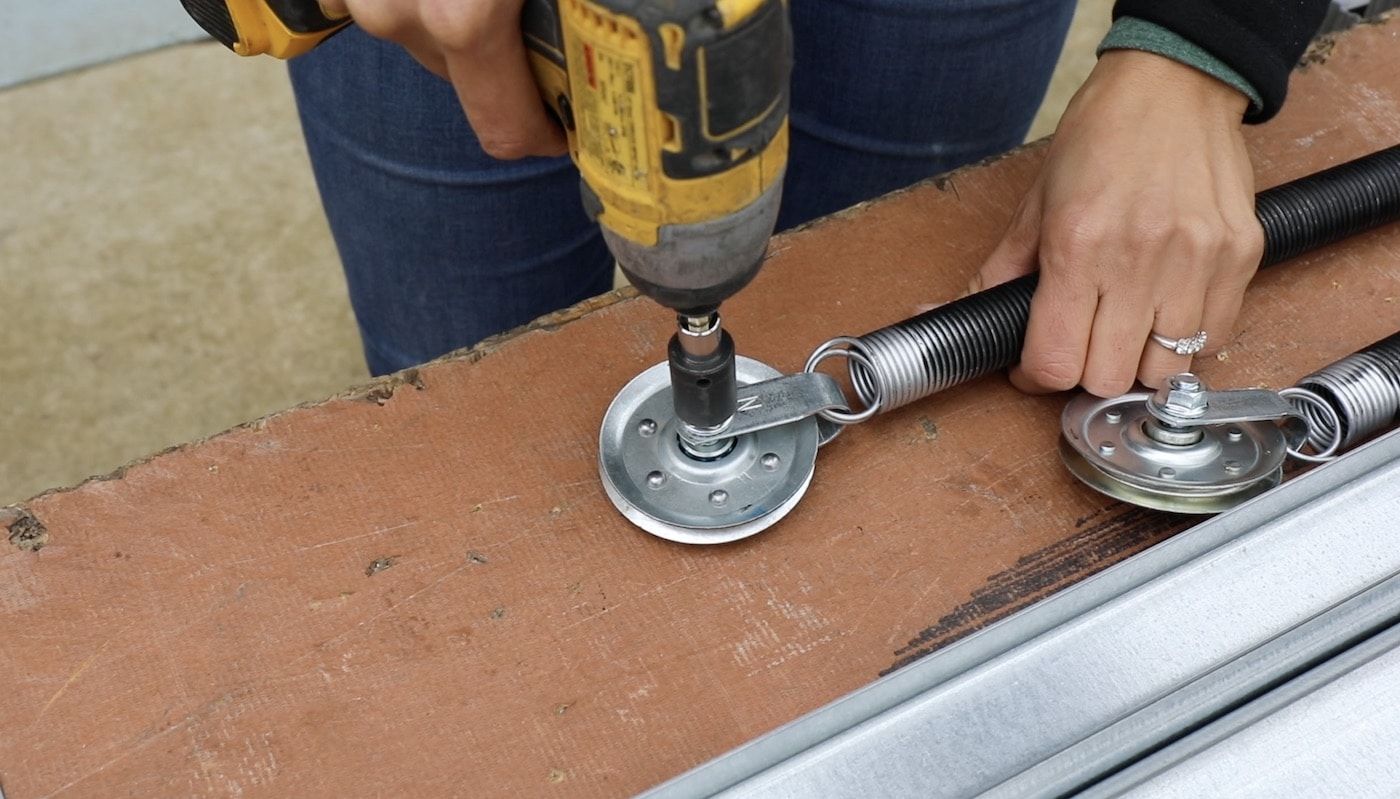
Step 3: Assemble the Springs
The next step is to assemble the springs with wheels. There are two springs are located within the cardboard tube of the roll of screen. Be careful–they’ll slide right out!
Slide a “U” shaped bracket through the loop in the spring, then slide a wheel between the bracket, securing with a bolt and nut.
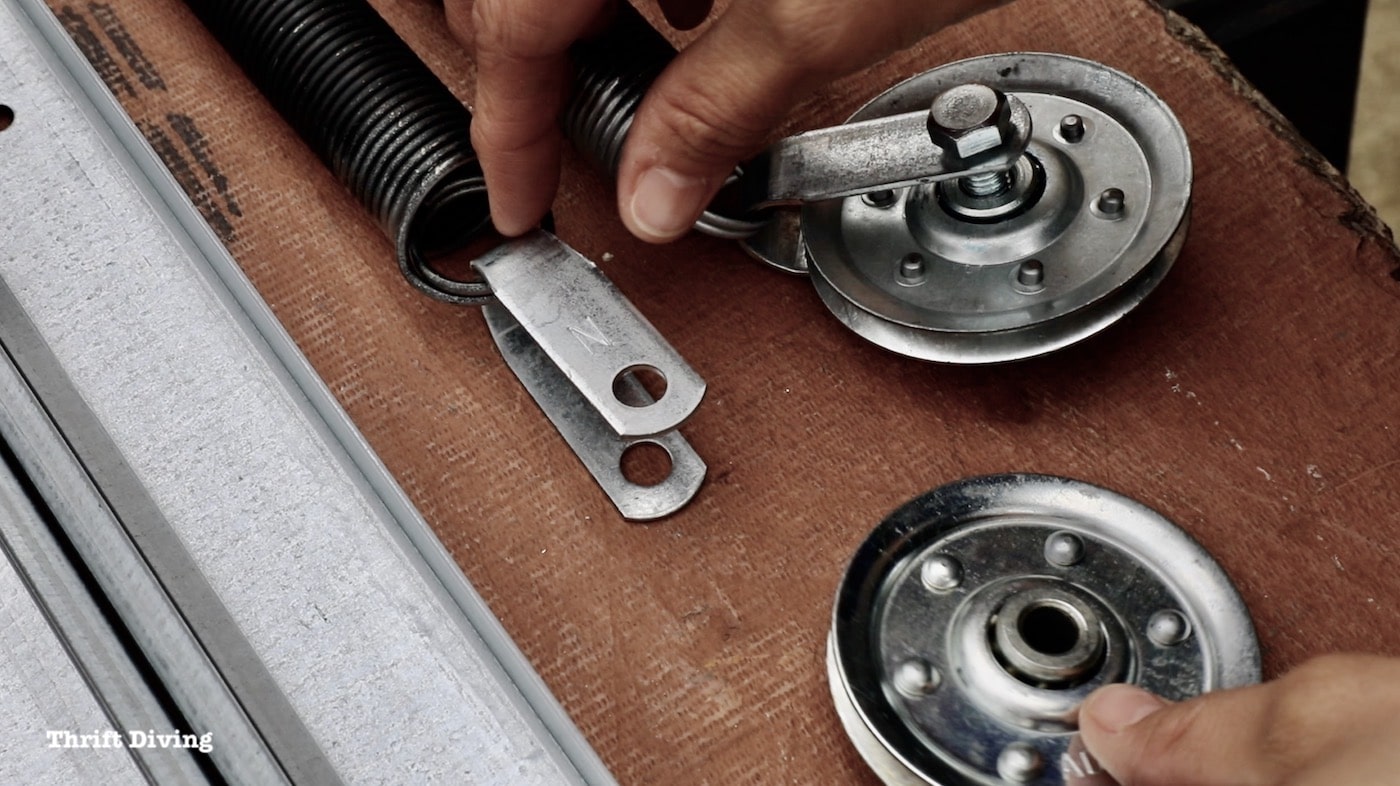
After the nut and bolts have been finger-tightened, tighten it up with your impact driver and a 9/16 socket bit. But be very careful. Hold on to the spring at least 4″ to 5″ away from where you’re tightening to avoid pinching your fingers in the spring.
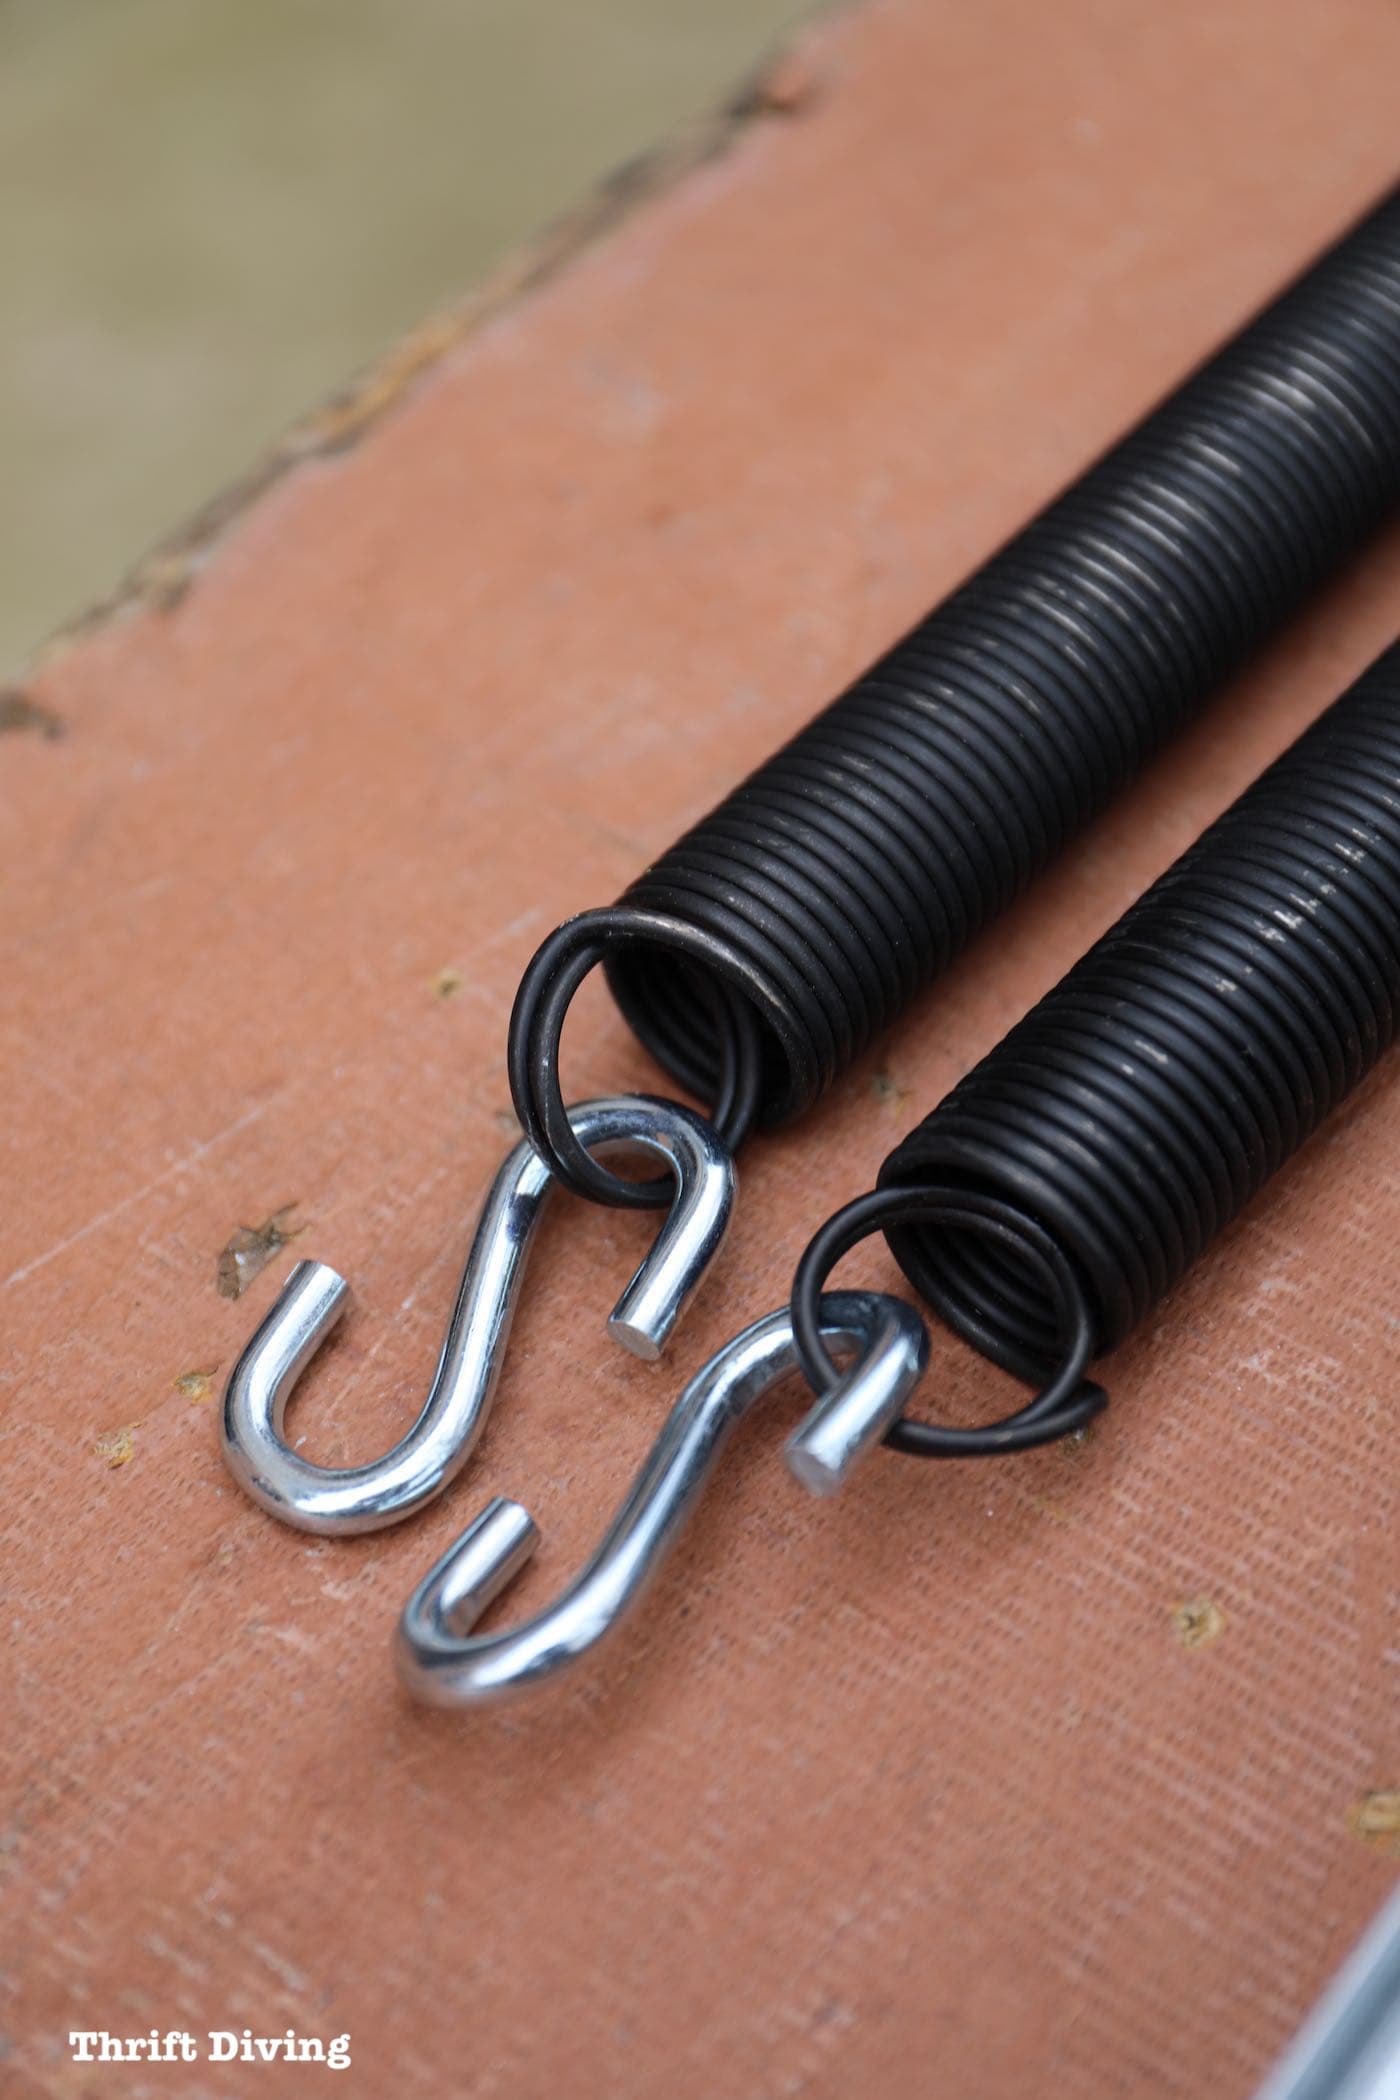
This is what each of the two springs will look like.

On the other end of each of the two springs, add an “S” hook to the spring. They’re now assembled, but you’ll need them later when you’re ready to install the garage screen door screened frame. Go and place one spring on each side of your garage door until you’re ready to install them. The more things you can assemble and get off the table, the better (and the neater your assembly!).
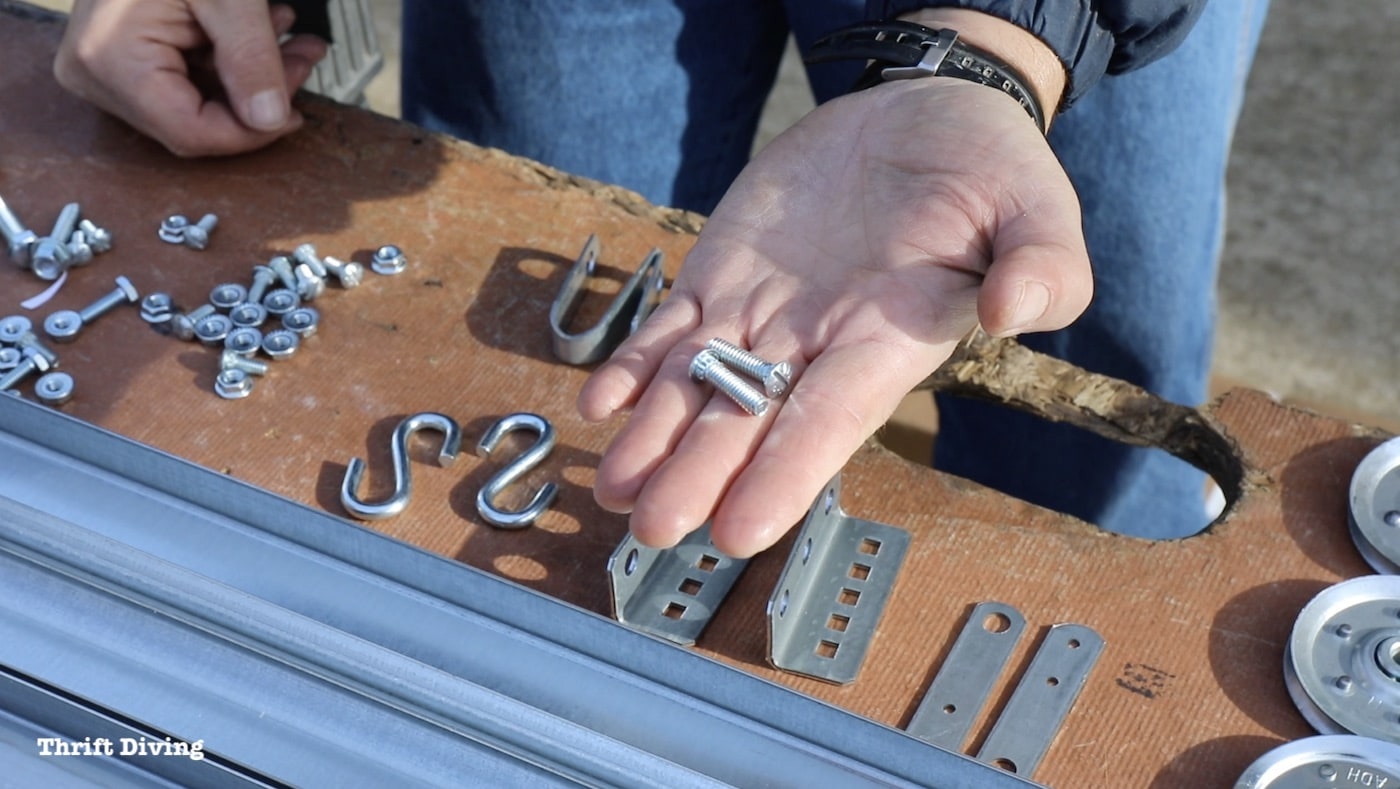
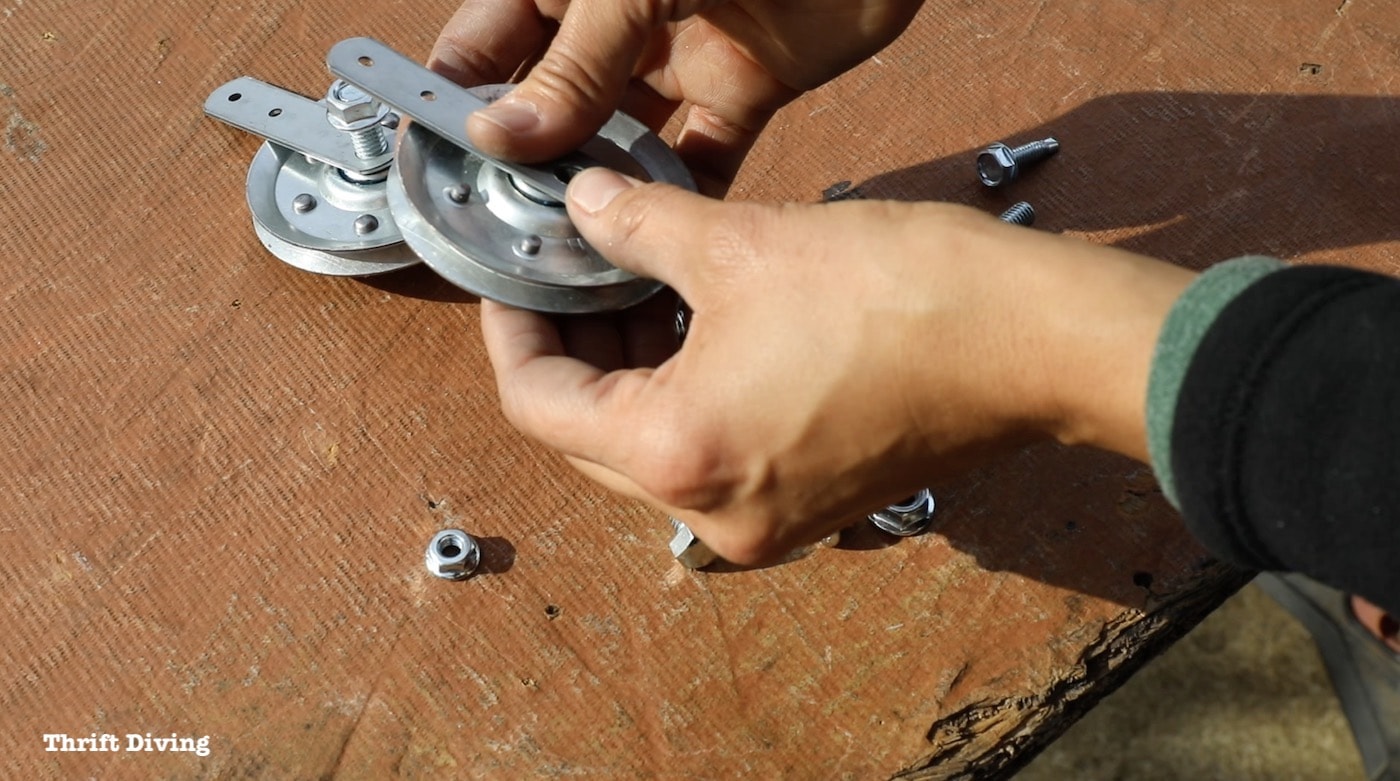
STEP 4: Attached Two Straight Brackets to Two Wheels
Now that the springs have been assembled, the next step is to attach two straight brackets to two of the wheels with bolts and nuts. Be sure to only finger-tighten these. Don’t tighten them yet with the impact driver.
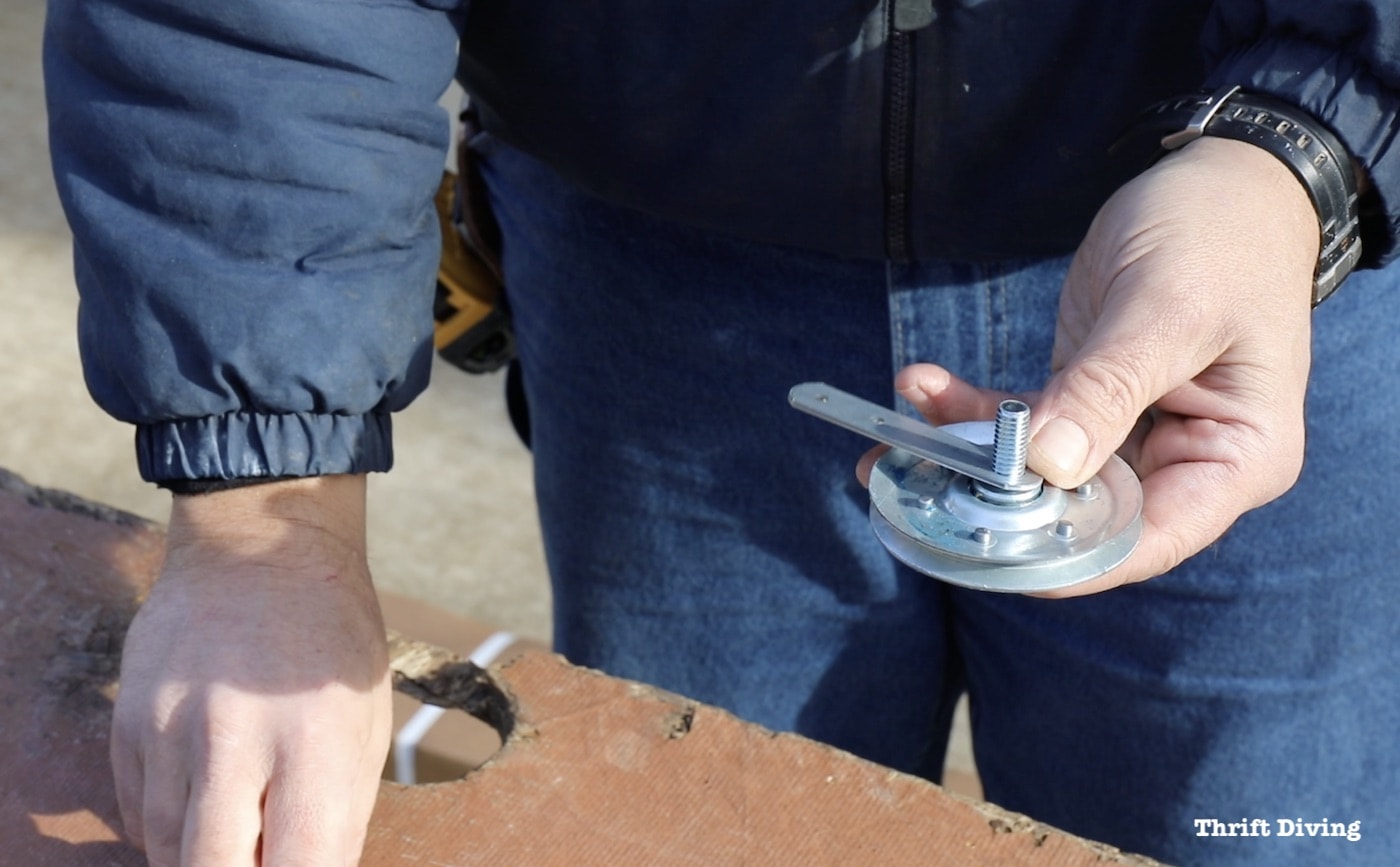
Step 5: Move Parts into Their Location
So those wheels you just finger-tightened the brackets to…? Those two wheels, along with the two right-angle brackets, and four bolts need to go and be set down at the location where they will be installed at the opening of the garage door, one set on each side of the garage door opening. Just set them down on the floor by the opening.
What I learned in this process of installing this retractable garage door screen is that because there are lots of steps and pieces, the key to successfully installing this yourself is to be super organized. When Mike taught me how to install the screen, he included steps that involved simply moving pieces into the location in which they’ll be installed so that they are there and ready to go. This prep work makes the installation much more efficient, which is why I am including it as “steps” in the process.
Now that all of the measuring, unboxing, and prep-work has been completed, it’s time to move on to the next part of the garage door installation process: assembling the tracks, which is PART 2 in this How to Install a Garage Door Screen Kit series!
PART 1: Measurement and Prep Work
PART 2: Assembling the Garage Screen Tracks
PART 3 and 4: Prepping and Assembling the Garage Screen Frame
PART 5: Installing the Garage Door Screen Frame
![]()
Click here to SAVE this tutorial series on Pinterest!

Download the 5 freebies!

Thrift Diving inspires women to decorate, improve, and maintain their home themselves...using paint, power tools, and thrift stores! Use these 5 printables, checklists, and ebooks to get started!


The finished screens look great! I bet you really enjoy using them compared to the original screen. Pinned. I’m visiting from Pin Junkie party.