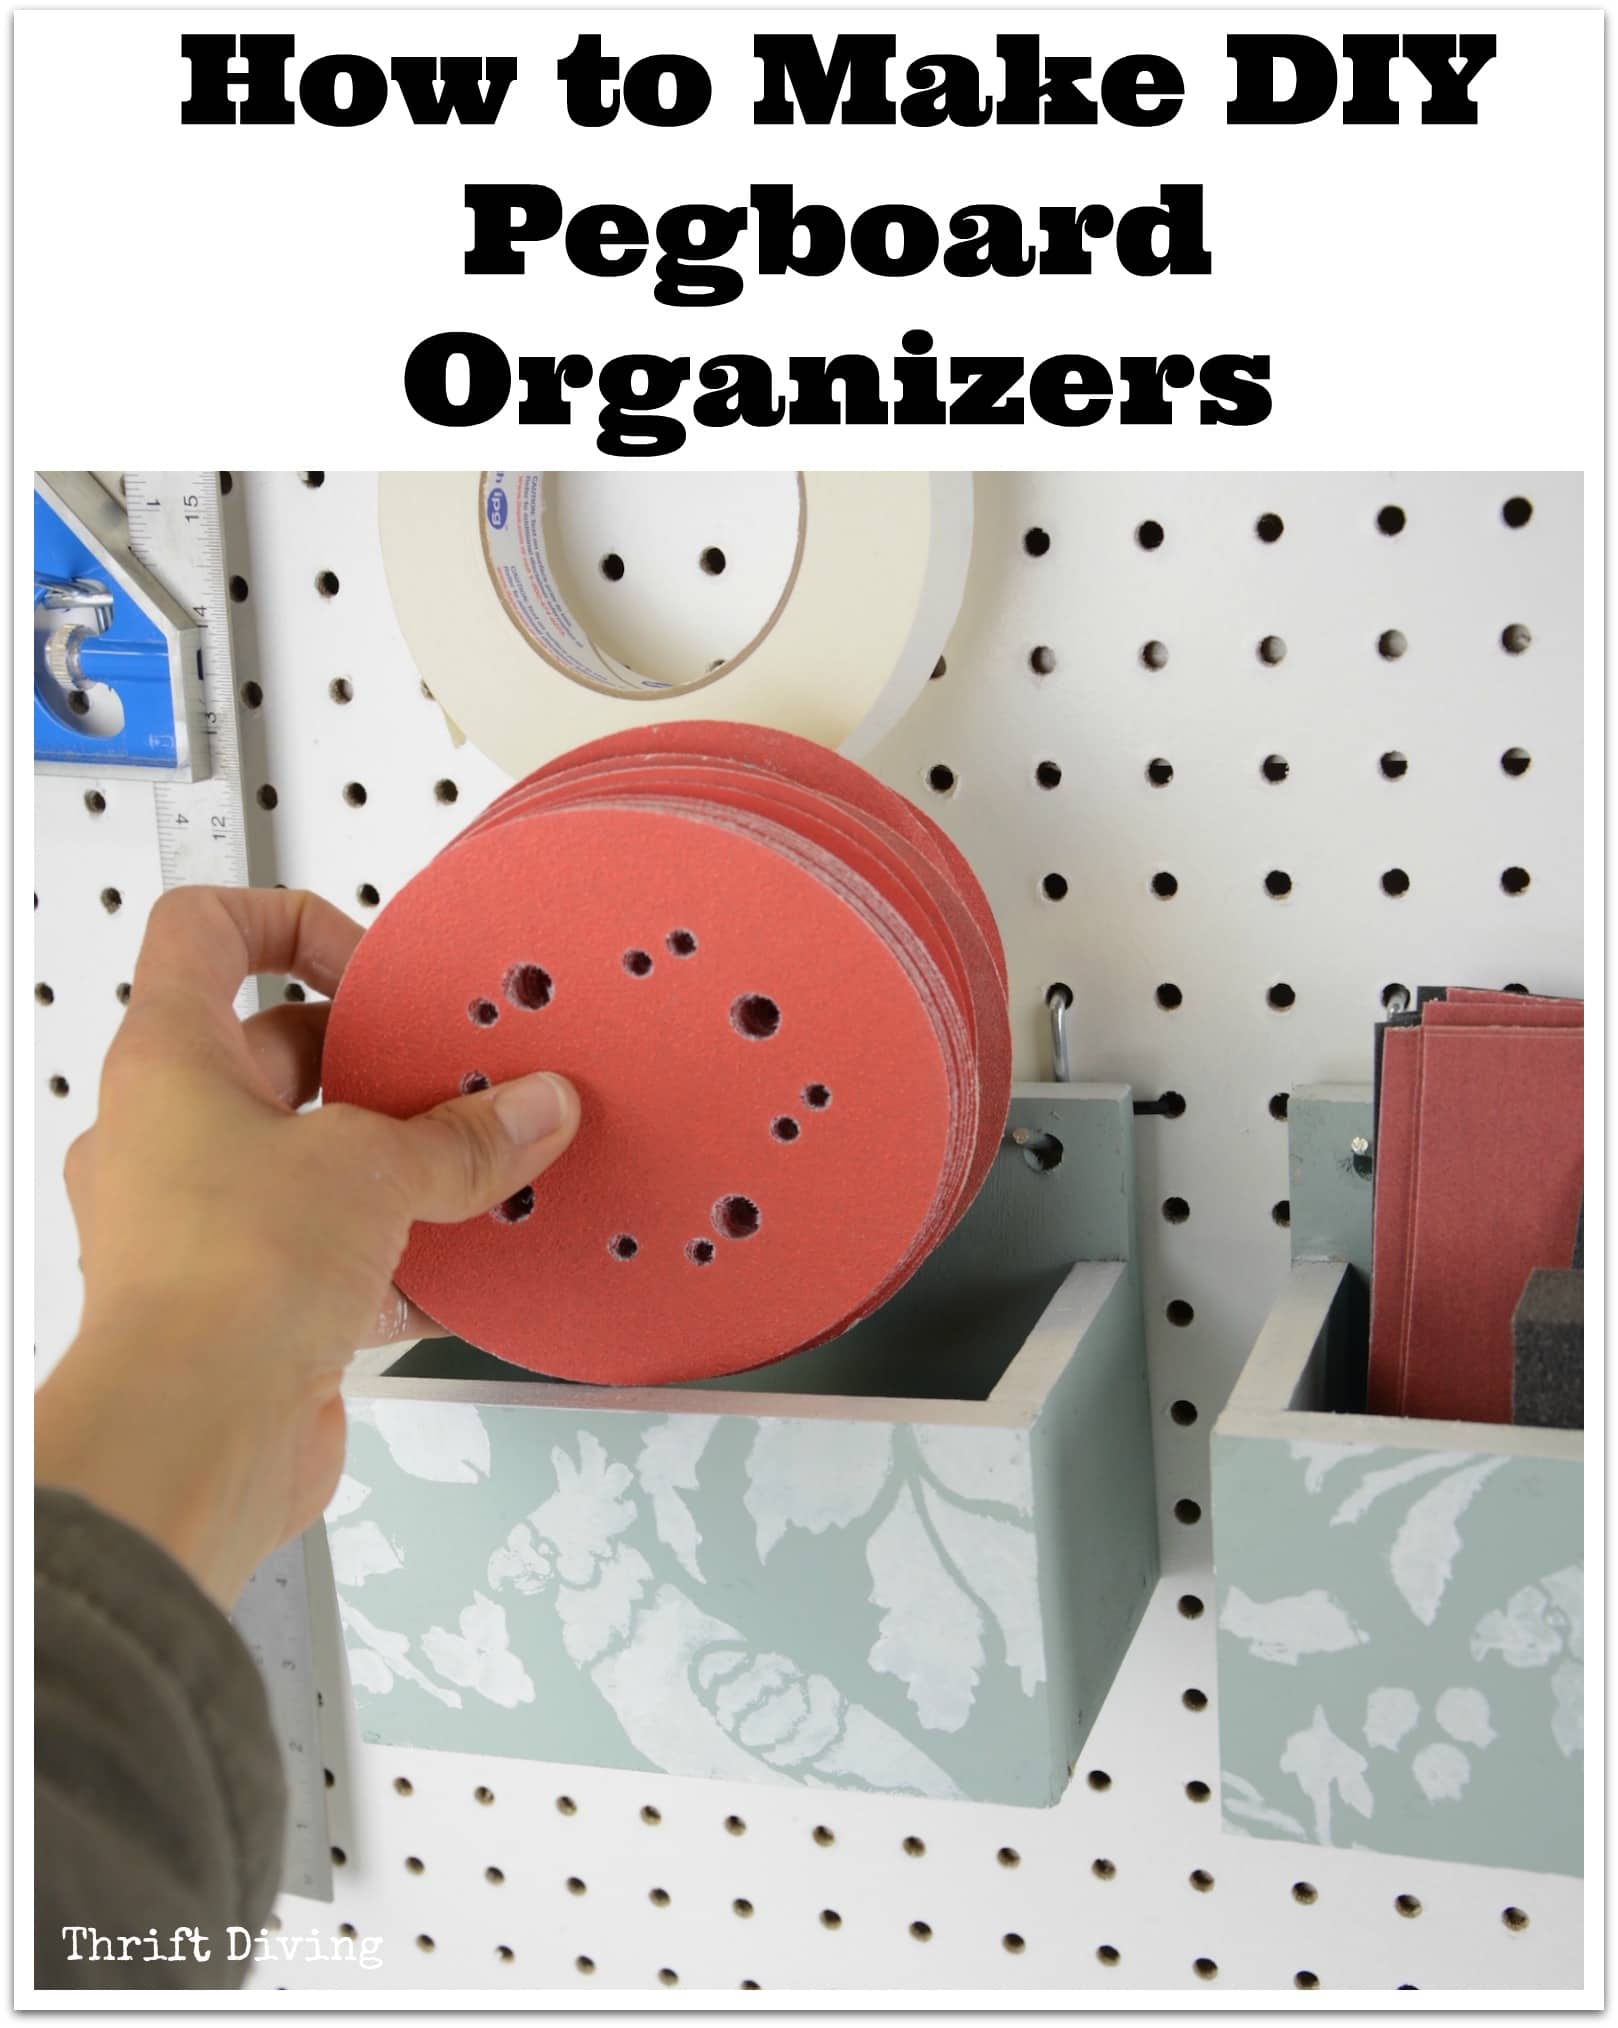
How to Make a DIY Pegboard Organizer
In the midst of all the bathroom makeover stuff going on, I decided to make DIY pegboard organizers.
HA! You didn’t even know that I was working on my garage at the same time, huh?
Oh, yeeeeaaahh….!
I’ll be sharing that “mini” reveal soon, but for today’s post, I decided to tackle something that’s been bothering me since I started working on my workbench: STORAGE.
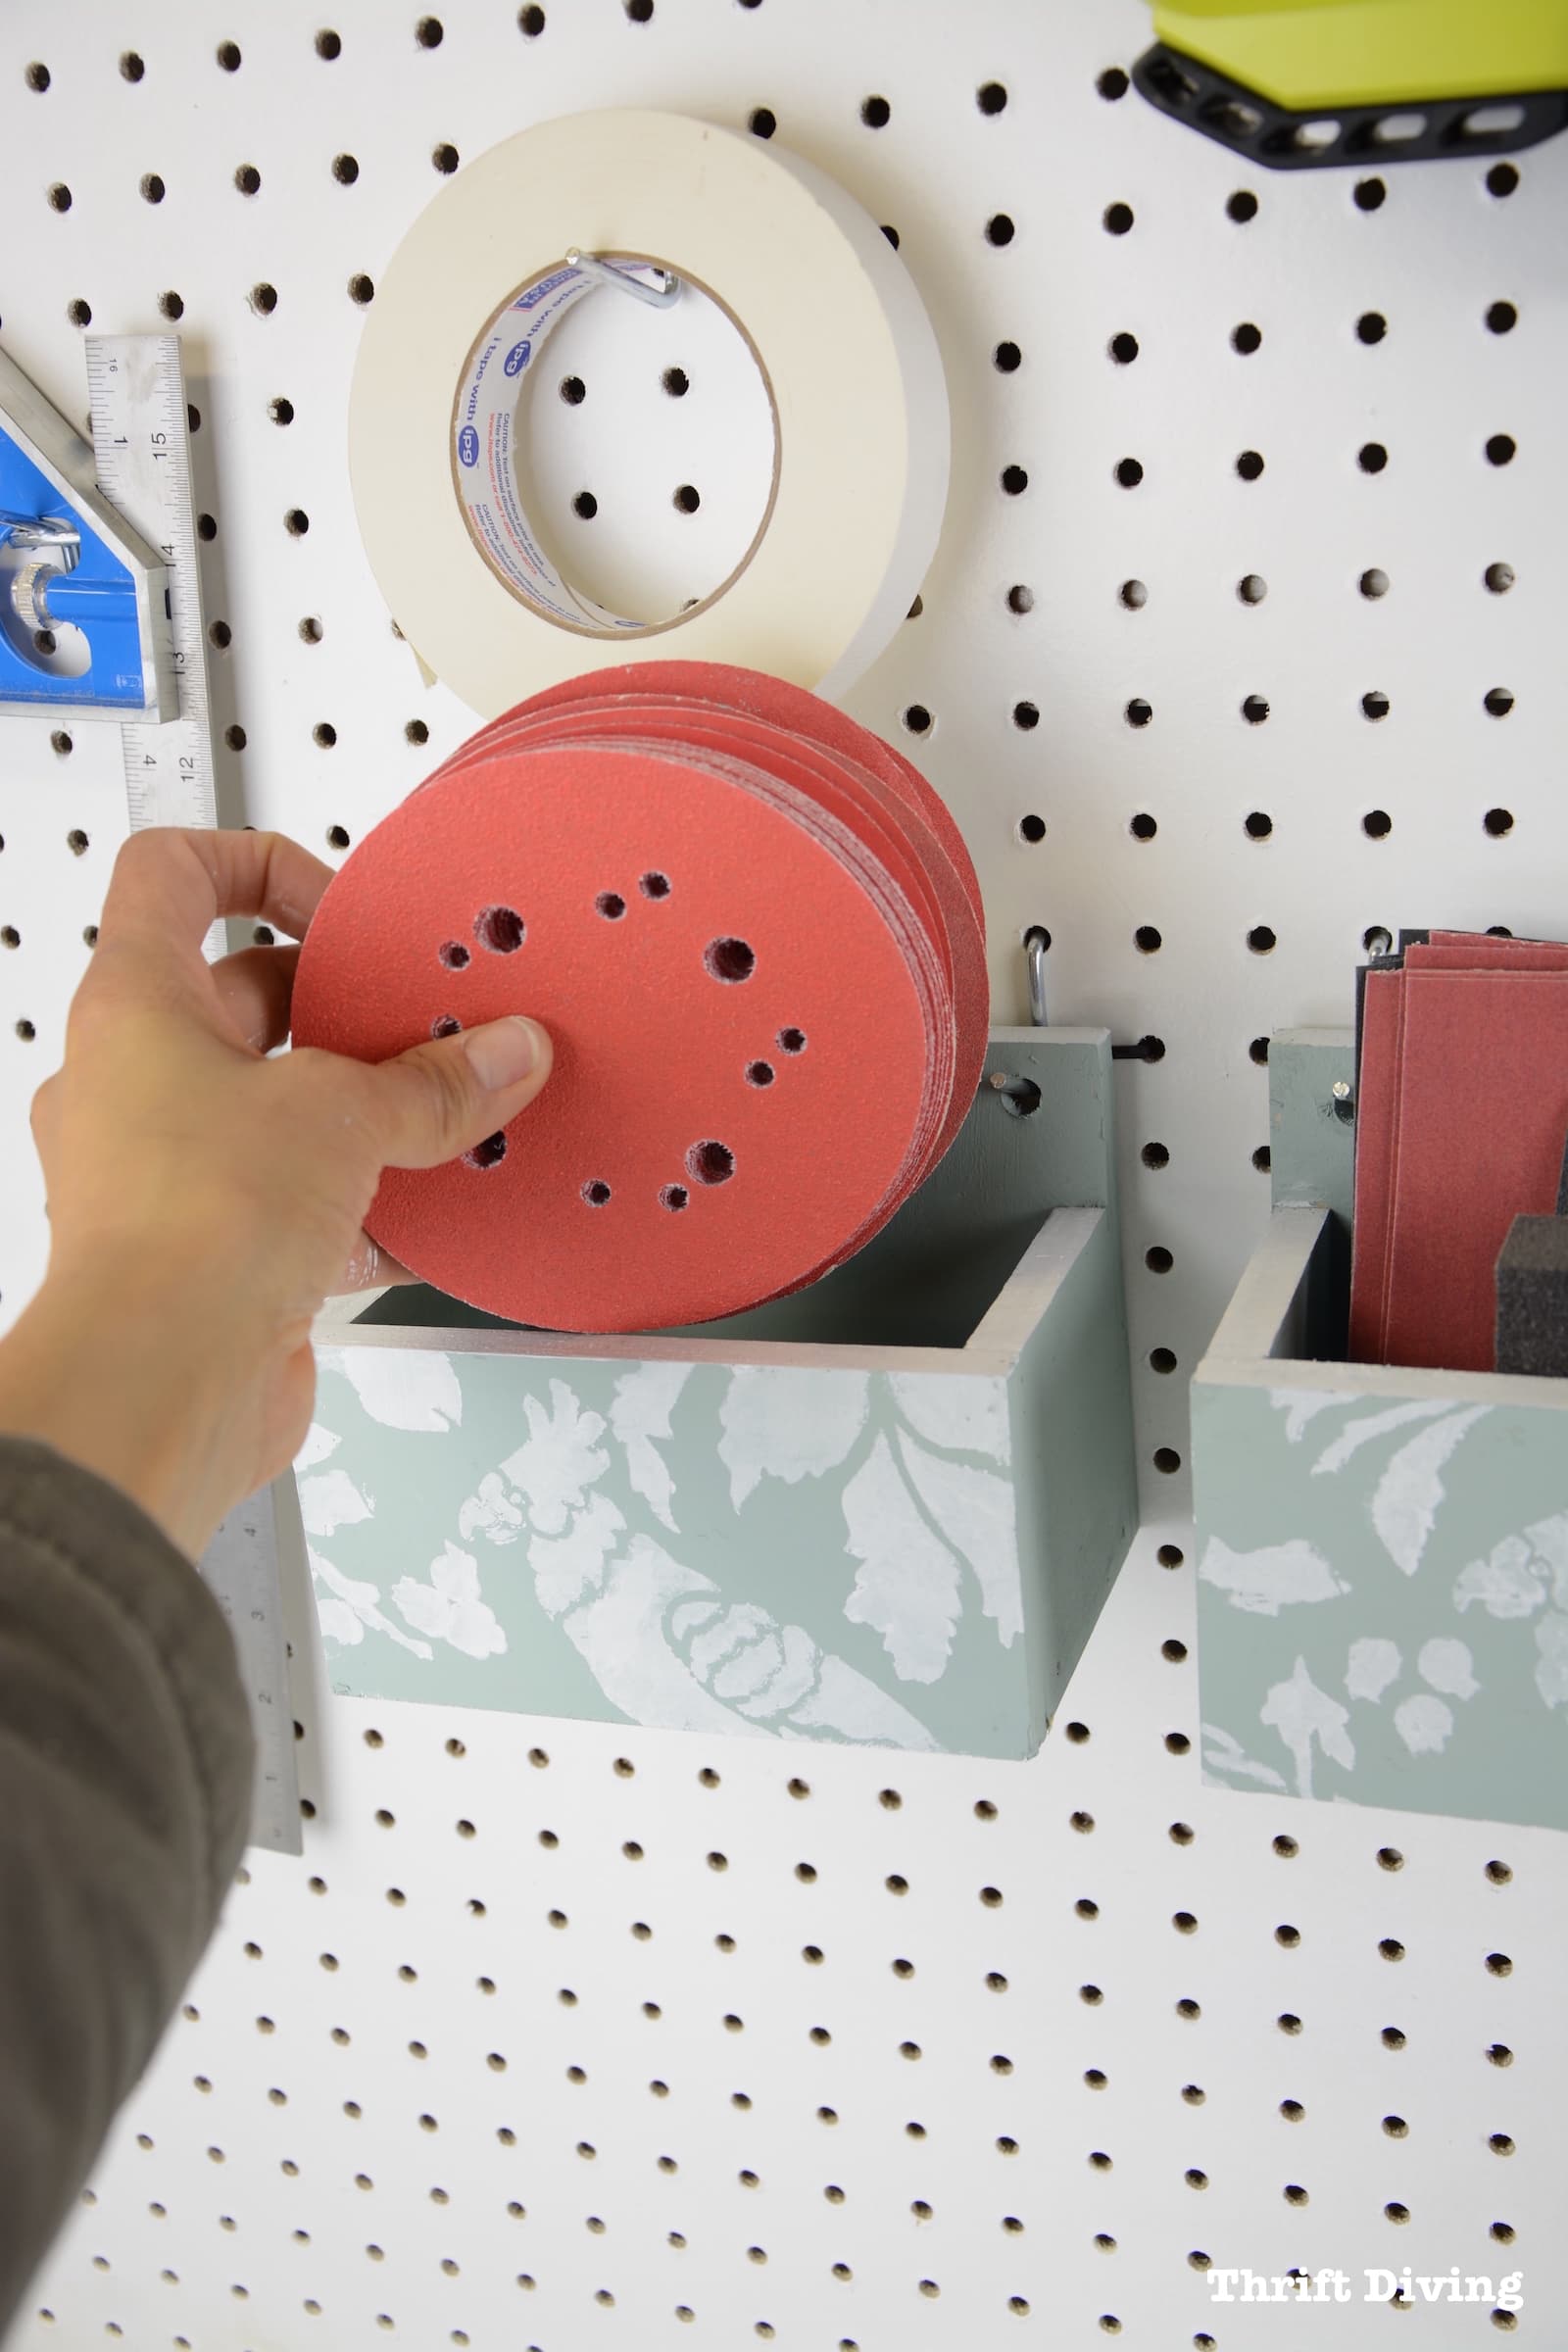
Admit it–the hardest part of doing DIY projects is having to find where all your supplies are and lugging them out! Seriously, it’s a pain in the butt. Since not everything in my garage has a “home” yet, I wanted to create some little DIY pegboard containers in order to keep some of the most used supplies out in the opener, like sandpaper.
This month I decided to team up with some fellow DIY bloggers to work on an “organizing” themed post and this project was perfect!
Keep reading (and watching!) to see how I organized my pegboard.
SKIP AROUND
No time to read this whole tutorial? No problem! Just click to skip around! 🙂
Video Tutorial
Materials Used
STEP 1: Measure Your Plywood
STEP 2: Cut Your Plywood
STEP 3: Drill Holes to Hang Your Organizer
STEP 4: Glue or Nail Pieces Together
STEP 5: Paint and Stencil
STEP 6: Hang It Up
Subscribe to Thrift Diving
PIN THIS PROJECT
Materials Used
- 1/2″ thick plywood
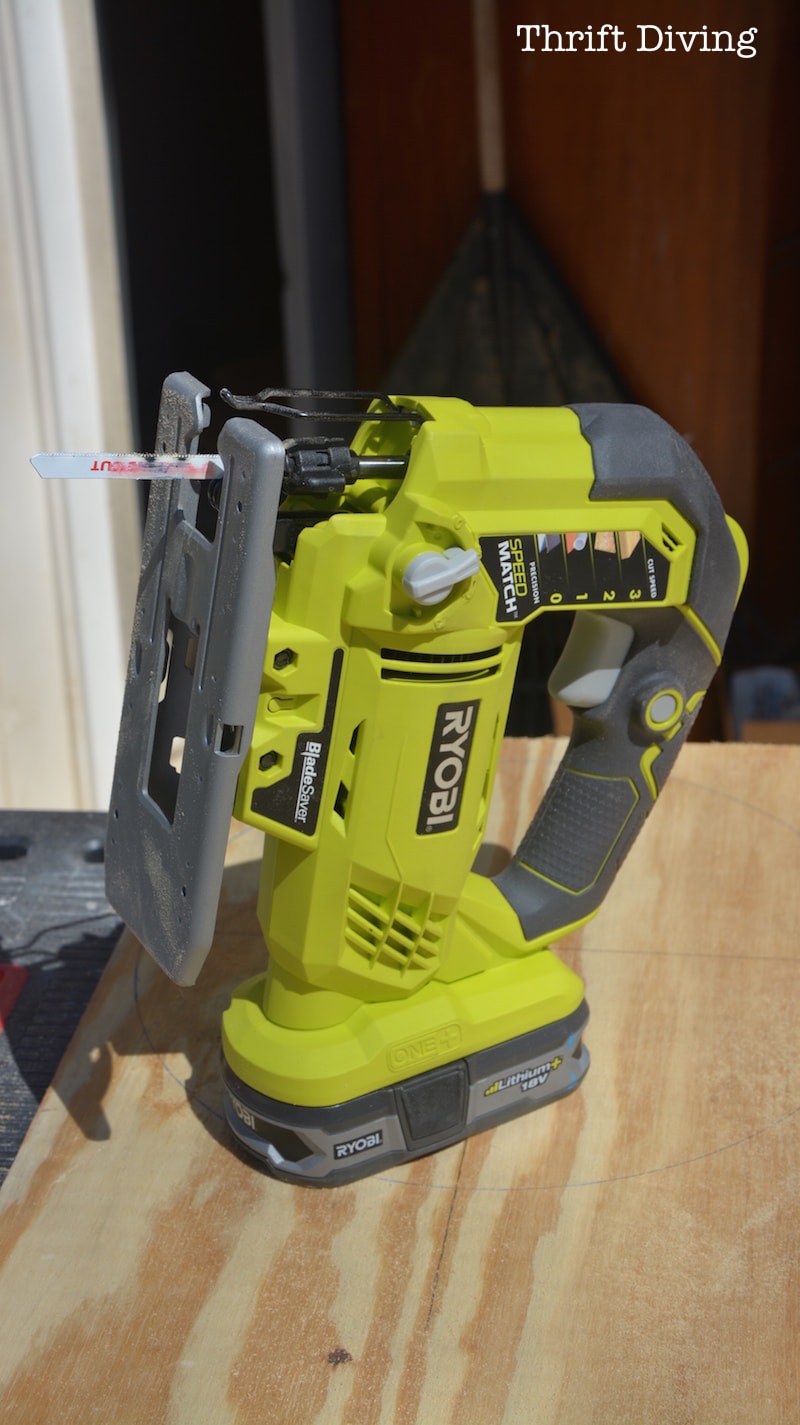
- RYOBI Jigsaw
- RYOBI Power drill
- 3/8″ drill bit
- Wood glue
- Clamps
- Speed square
- Chalked paint & paint brush
- Pretty Stencil (here’s my favorite damask stencil)
- Pegboard
- Pegboard hooks
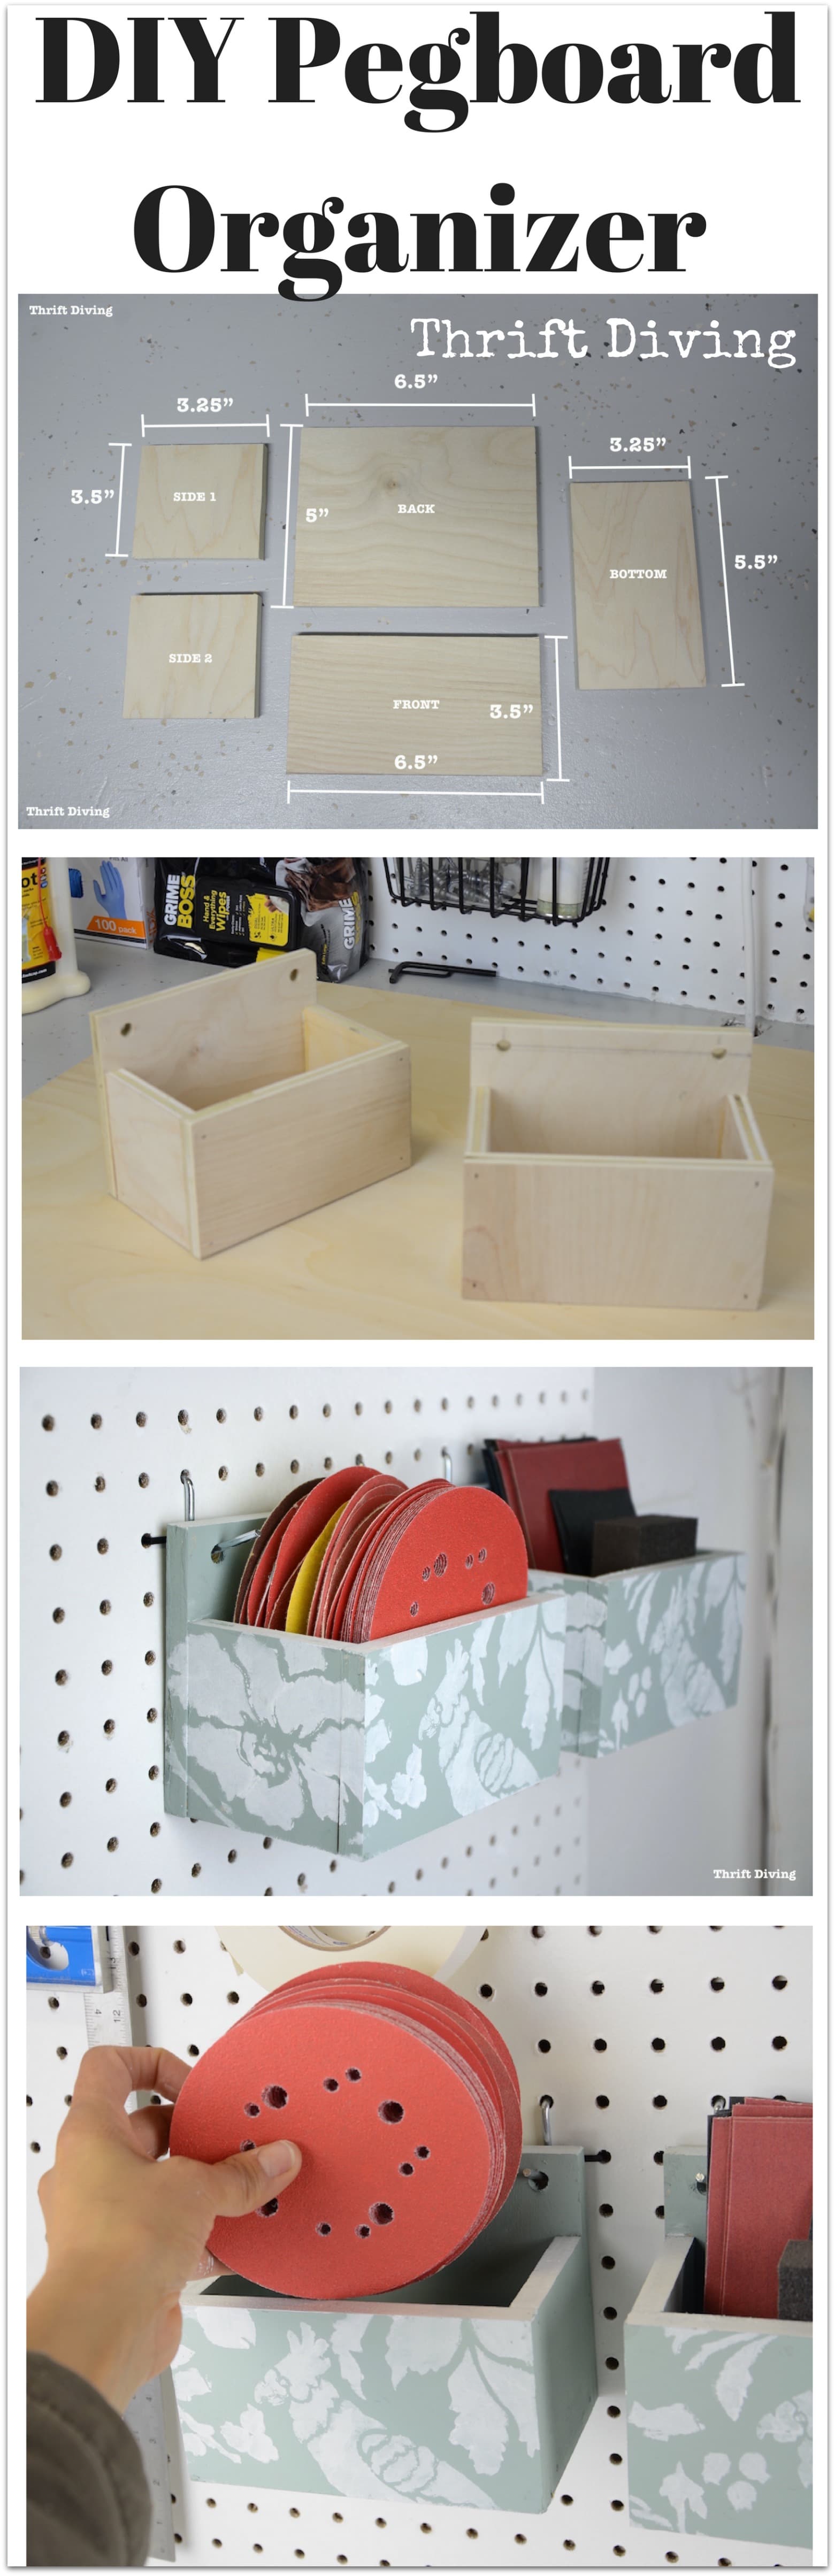
STEP 1: Measure Your Plywood
For this project, you only need 5 small pieces.
Don’t feel you have to go with my measurements! The beauty of these DIY pegboard organizers is that you can make them pretty much any size you want, depending on what you want to fill them with! 🙂
But if you don’t want to get too creative, just use these dimensions. I won’t mind if you copy. 😉
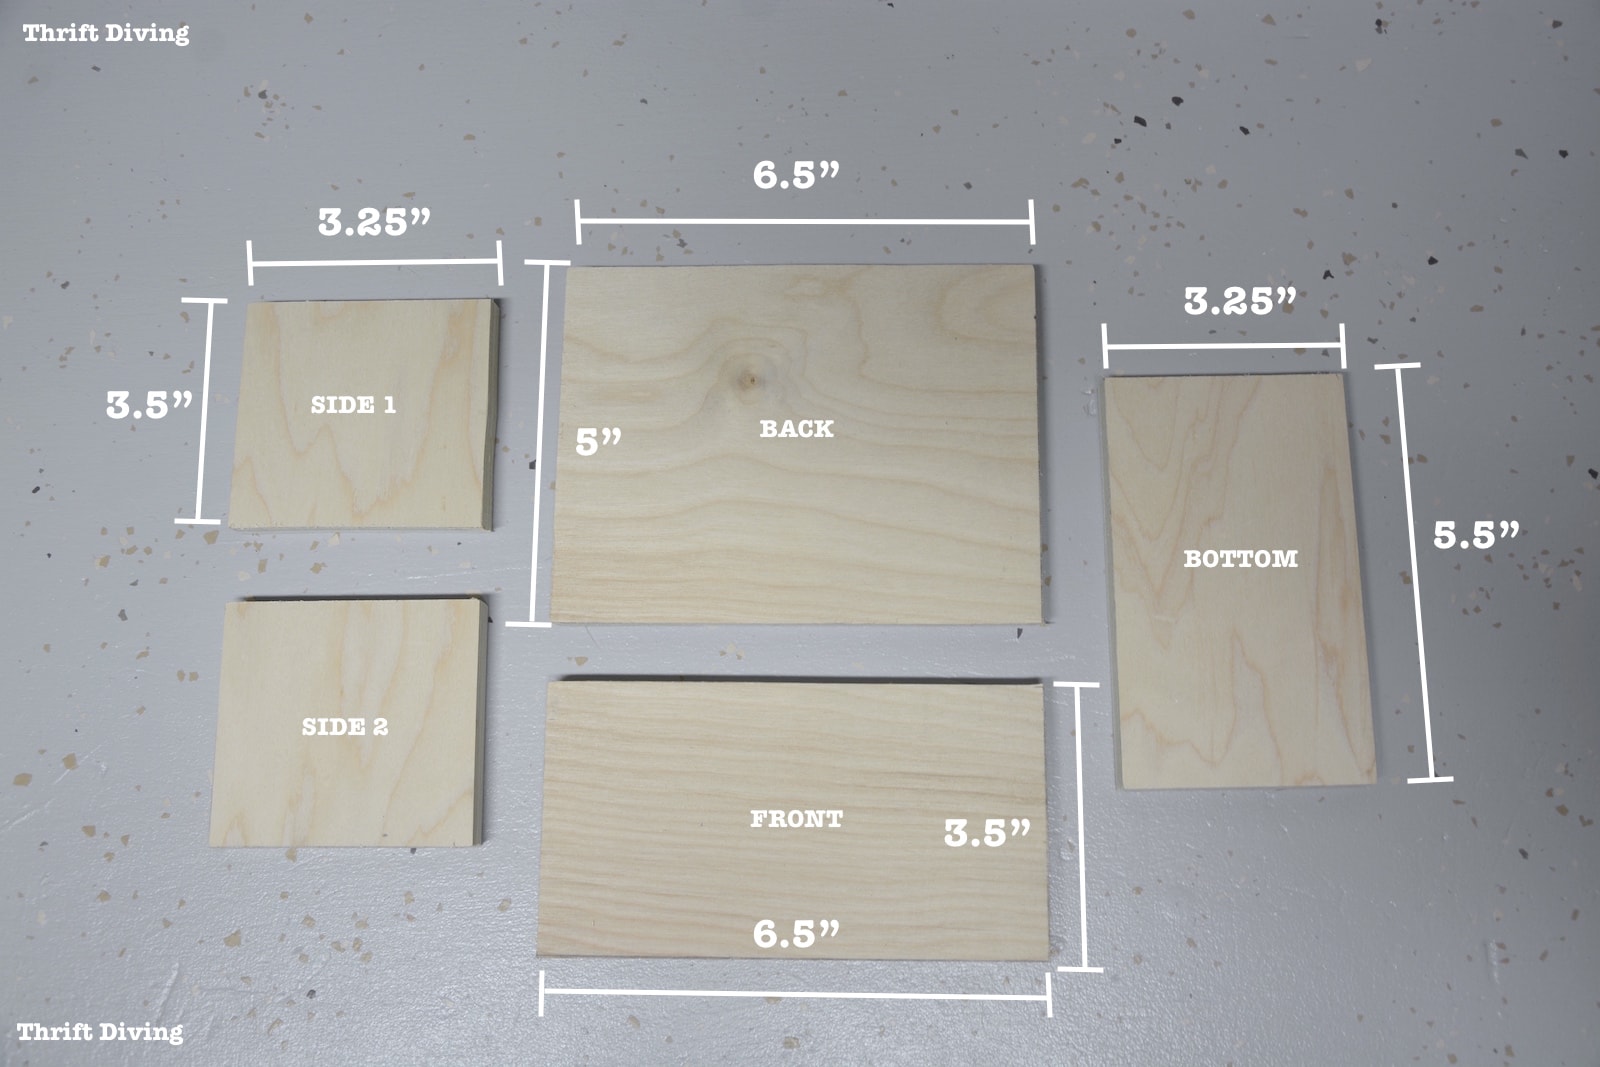
I transferred those measurements onto the plywood as straight as possible.
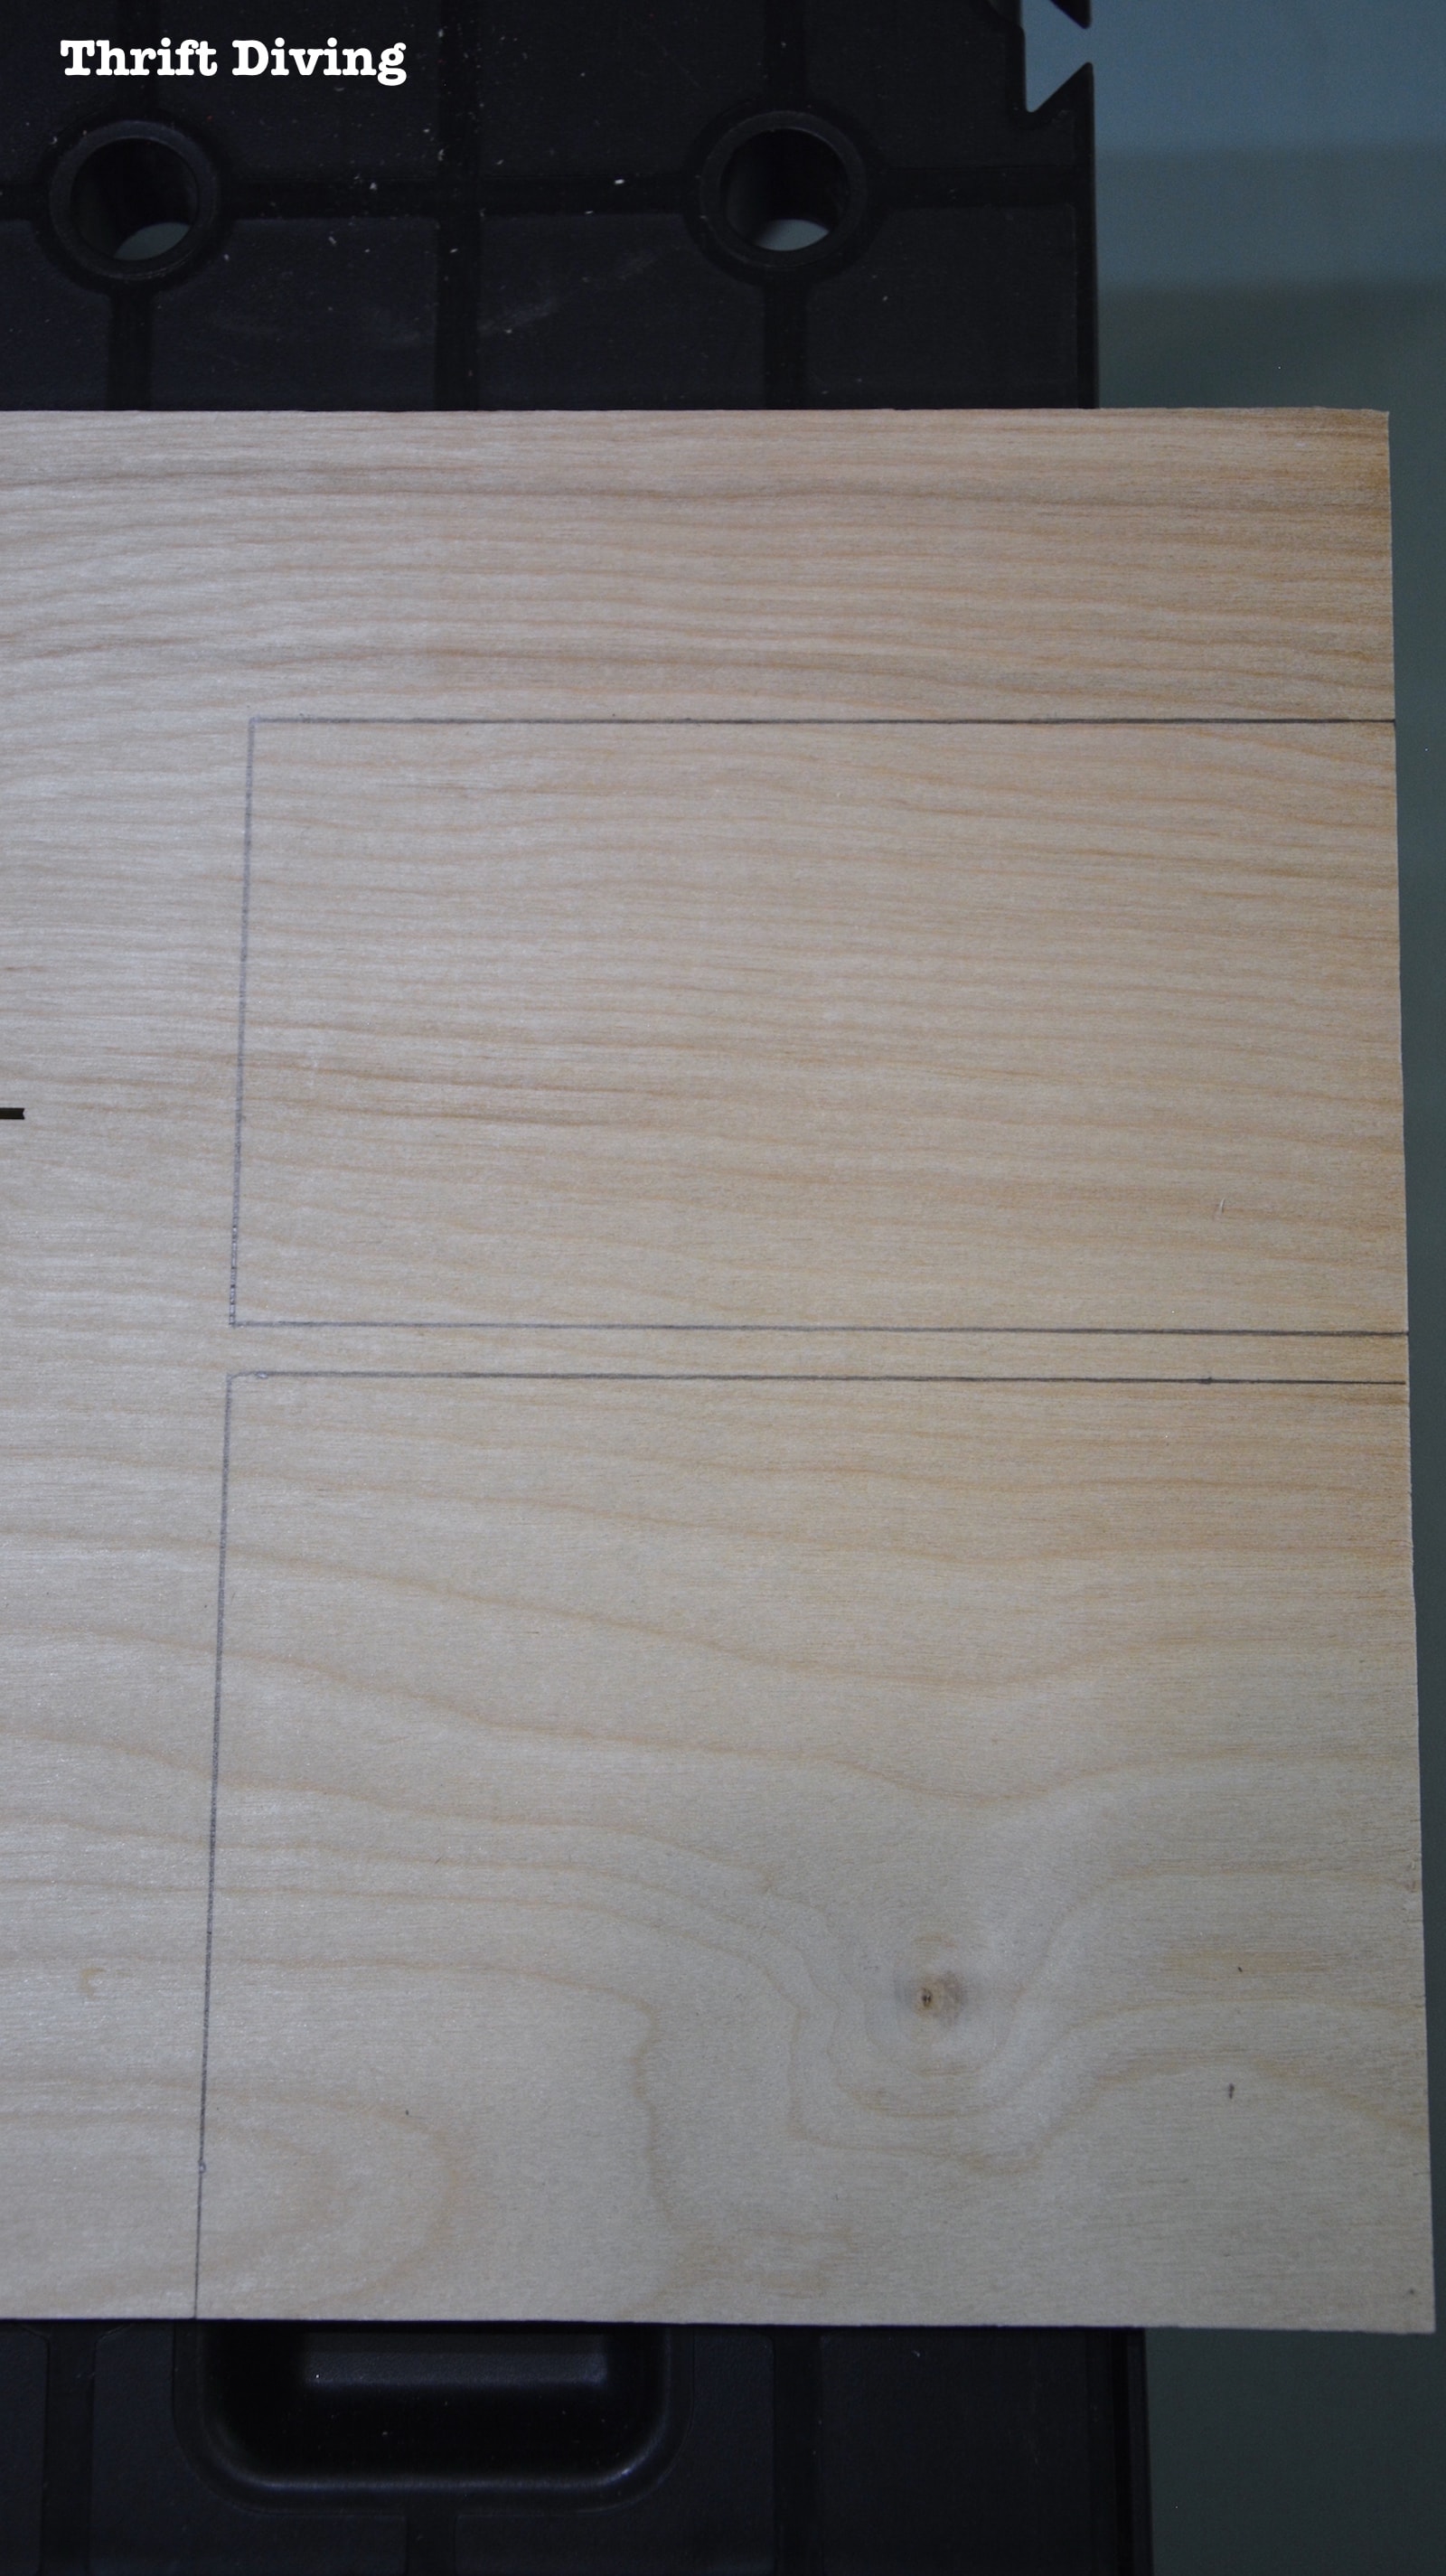
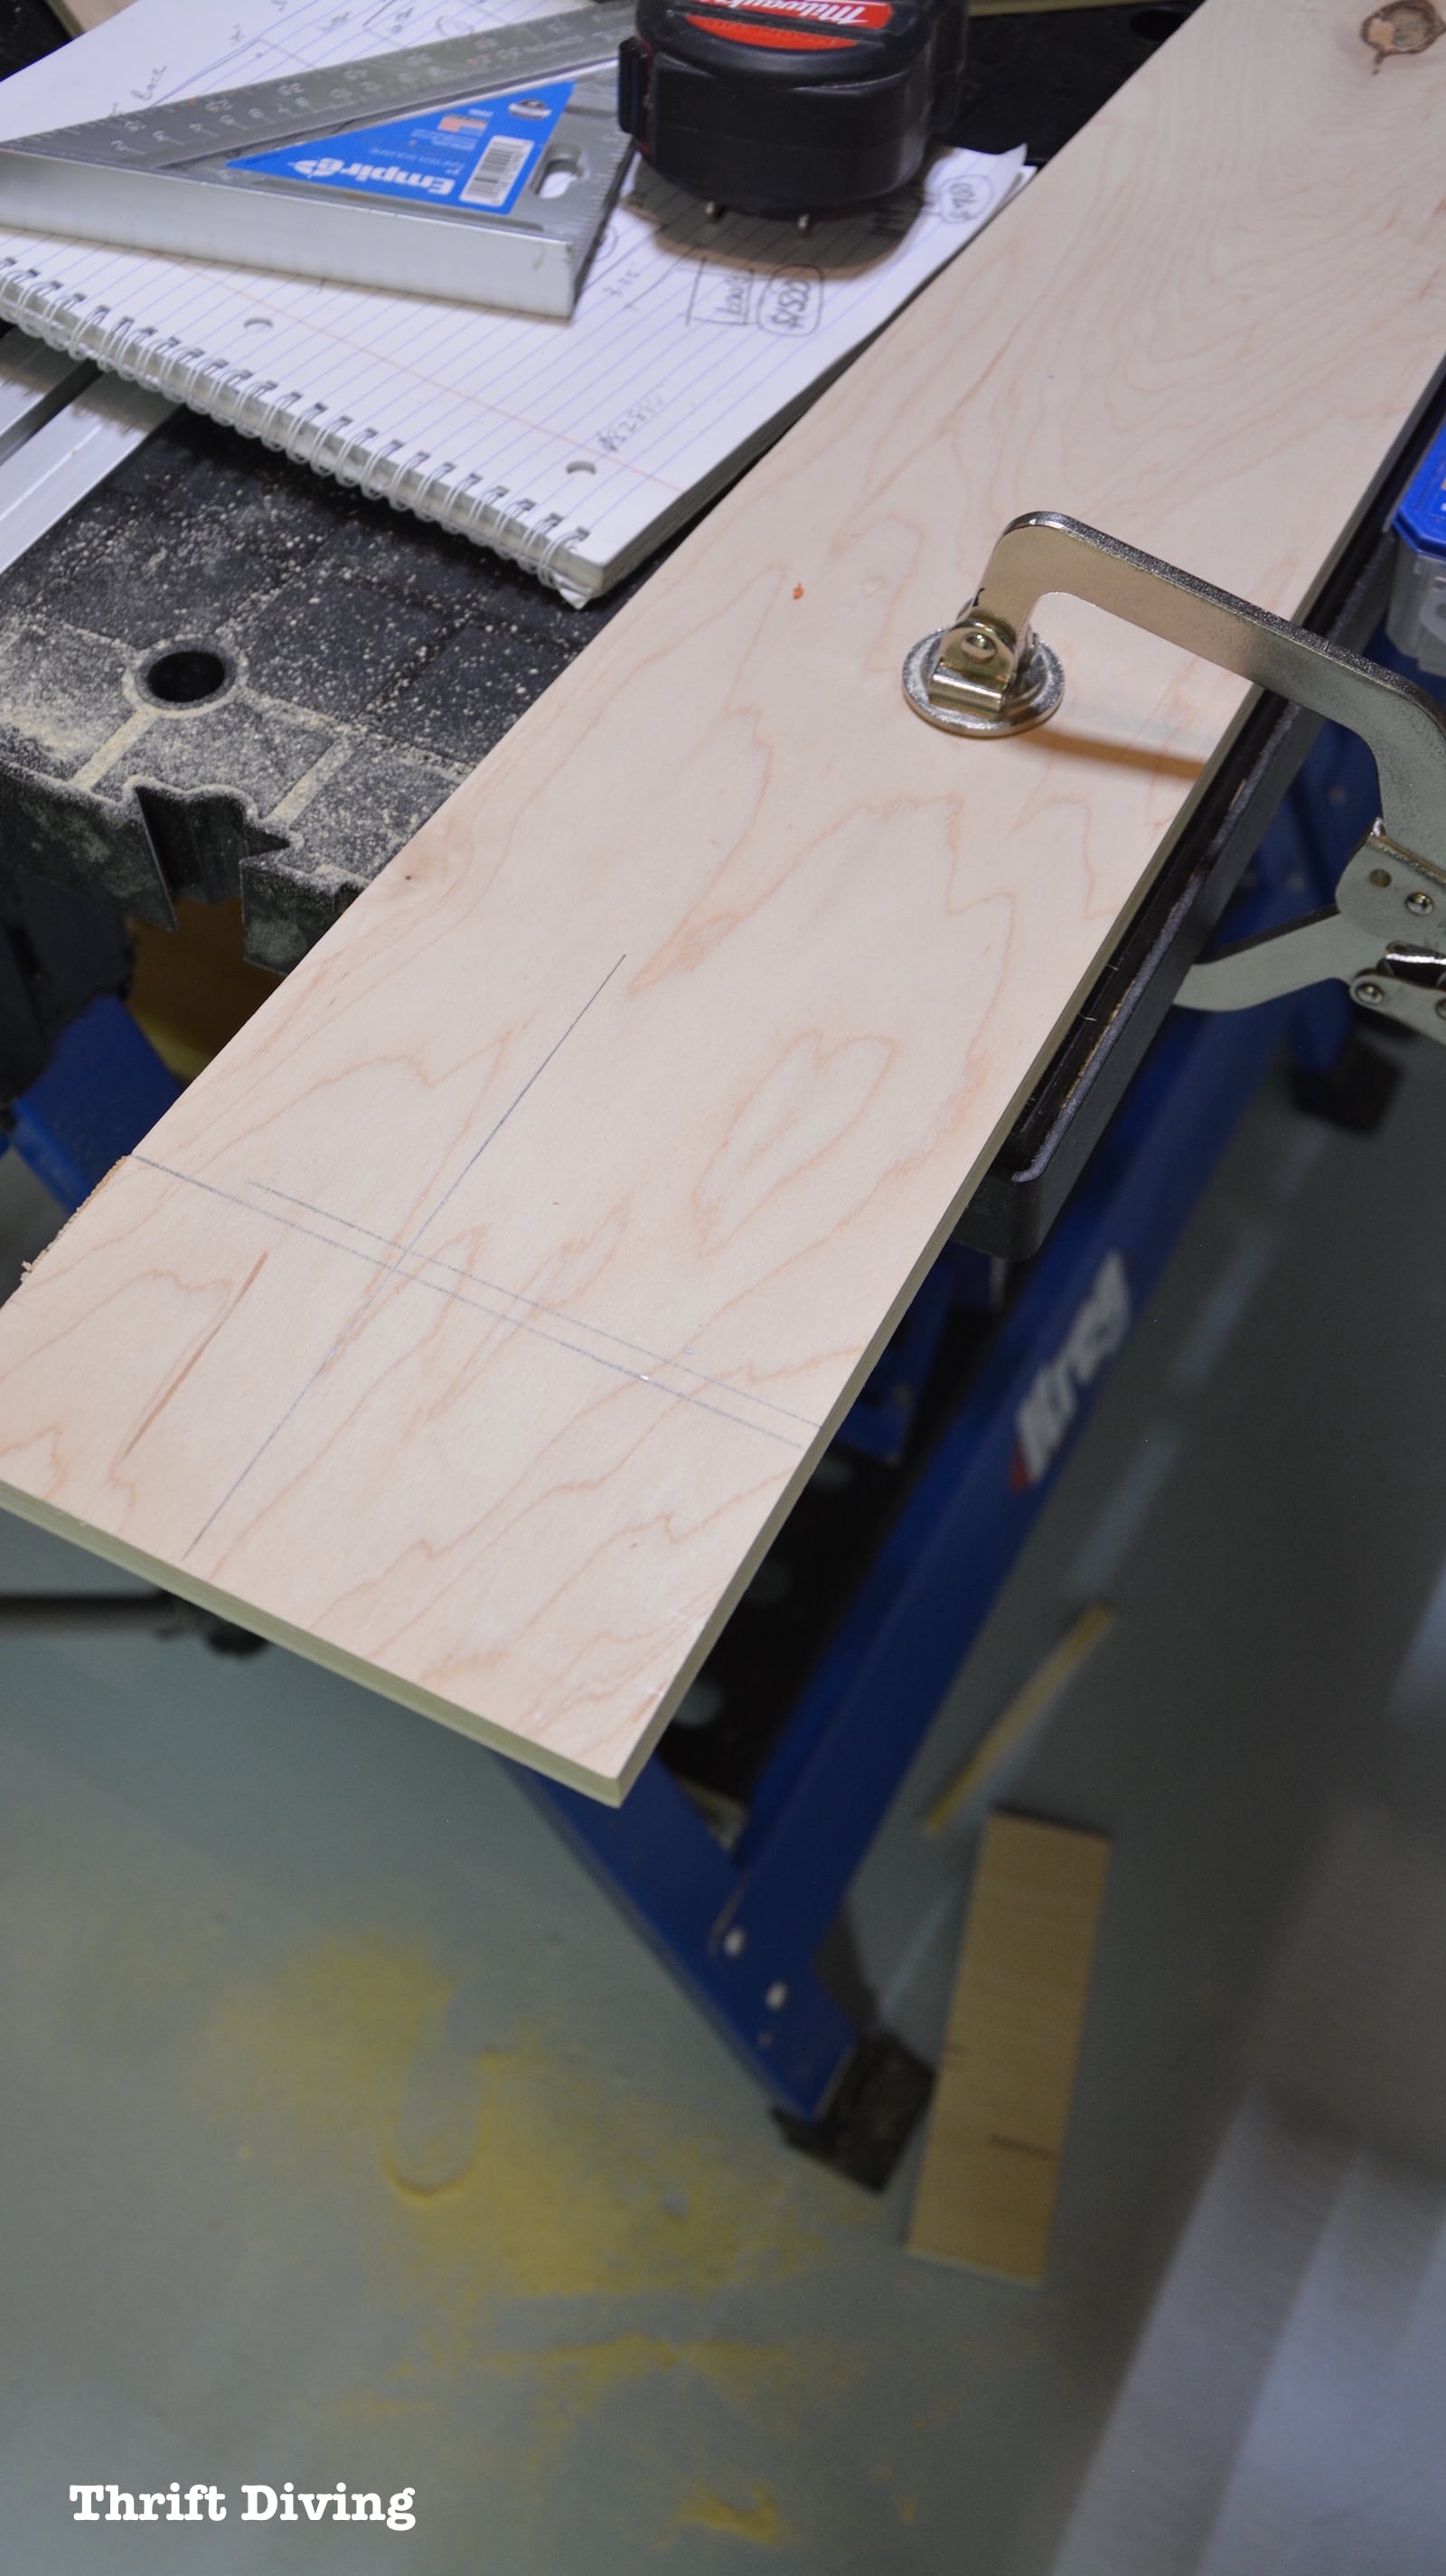
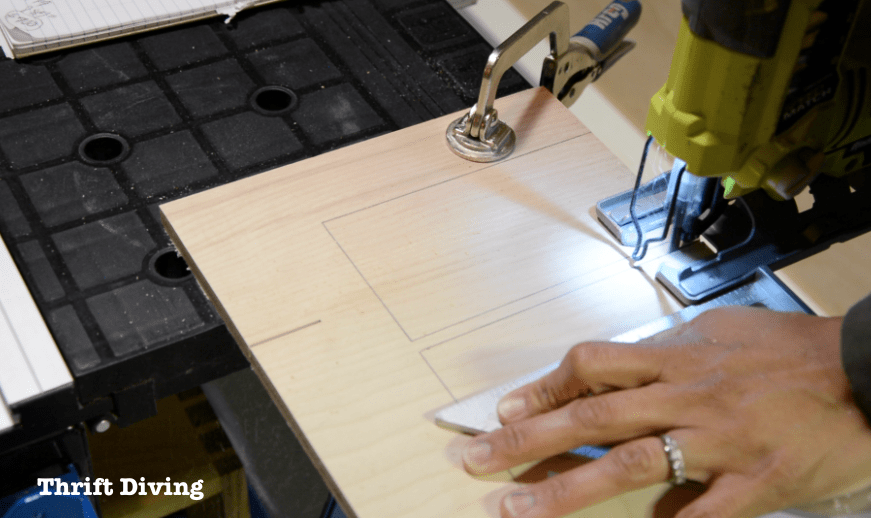
STEP 2: Cut Your Wood
I always tell my readers, “If you have to buy your first power tool, get the jigsaw!”
The reason why is because it’s so easy to use and very versatile. It can cut wood, plastic, metal–it’s a beast in a little power tool body. LOL
You want to have a secure place to clamp down your 1/2″ plywood.
Doesn’t matter if it’s the dining table or a workstation in your garage! Do what you gotta do, my friend!
TIP: When using a jigsaw, it’s super helpful to use a speed square clamped down to help keep your cuts straight and to mark straight lines. Works like a charm!
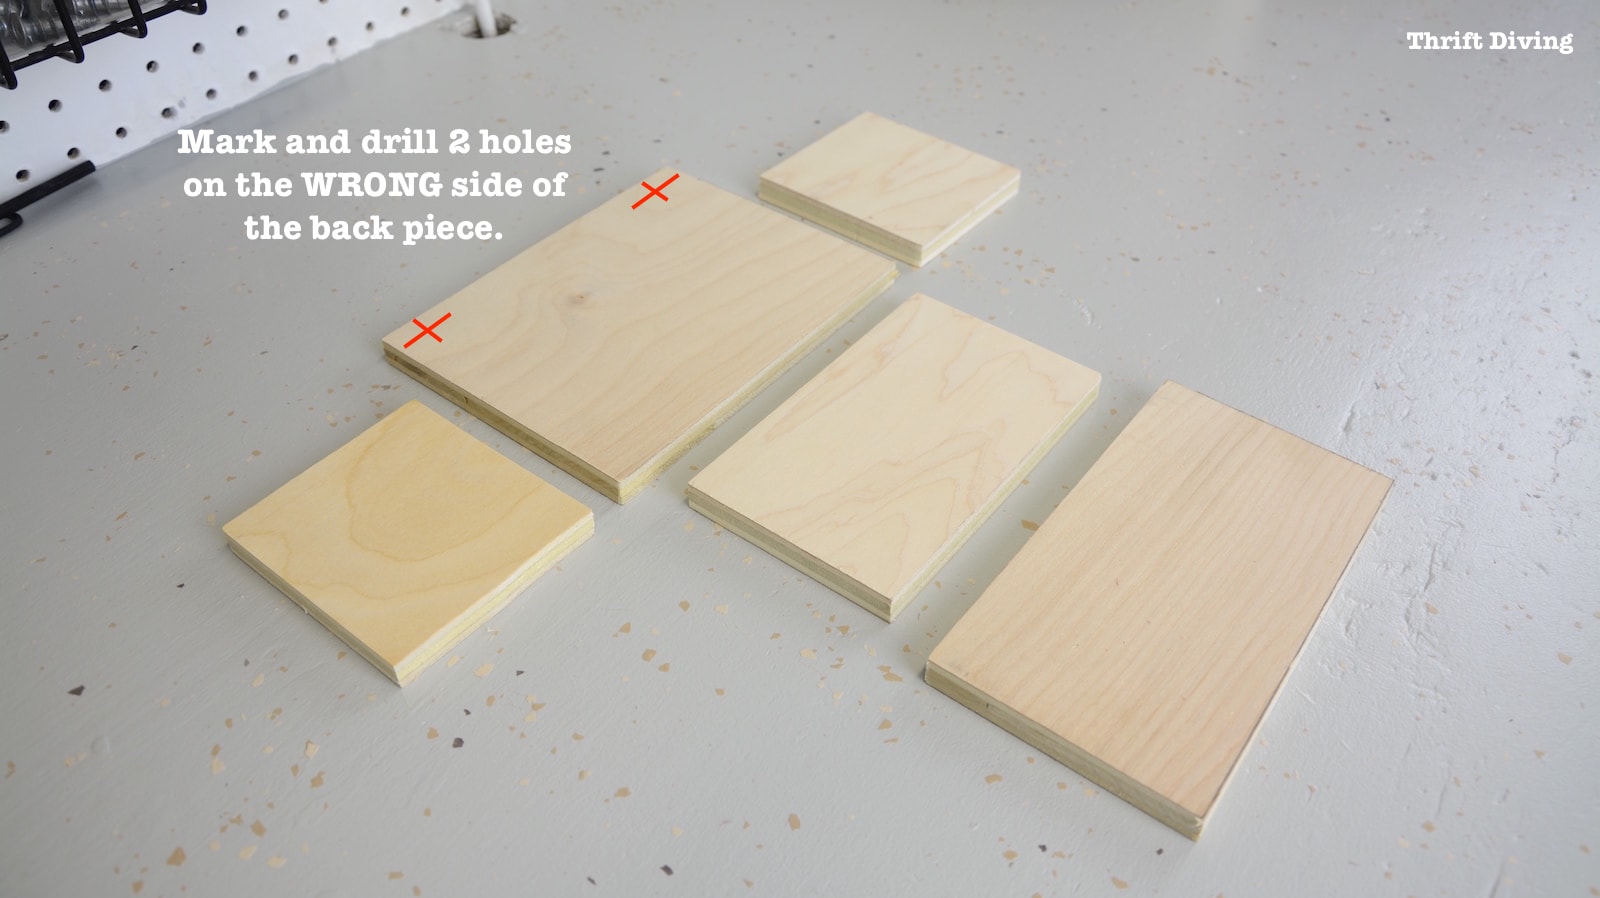
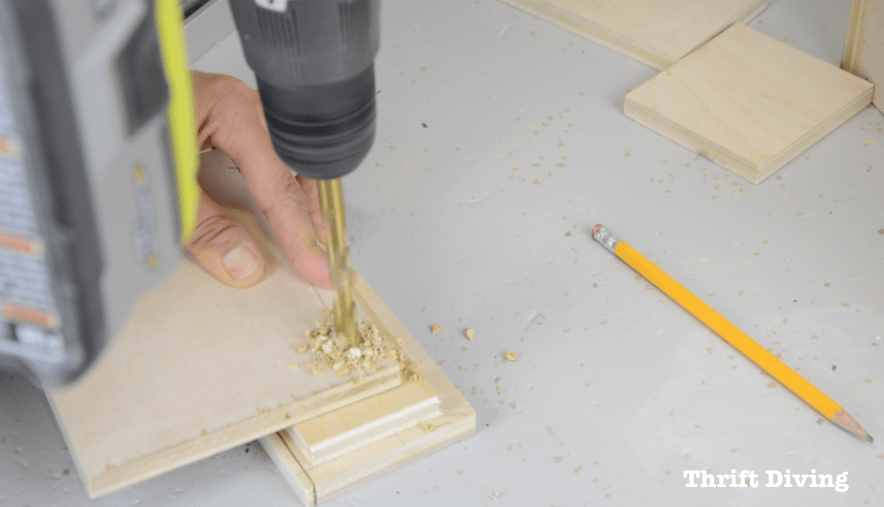
STEP 3: Drill Holes to Hang Your Organizer
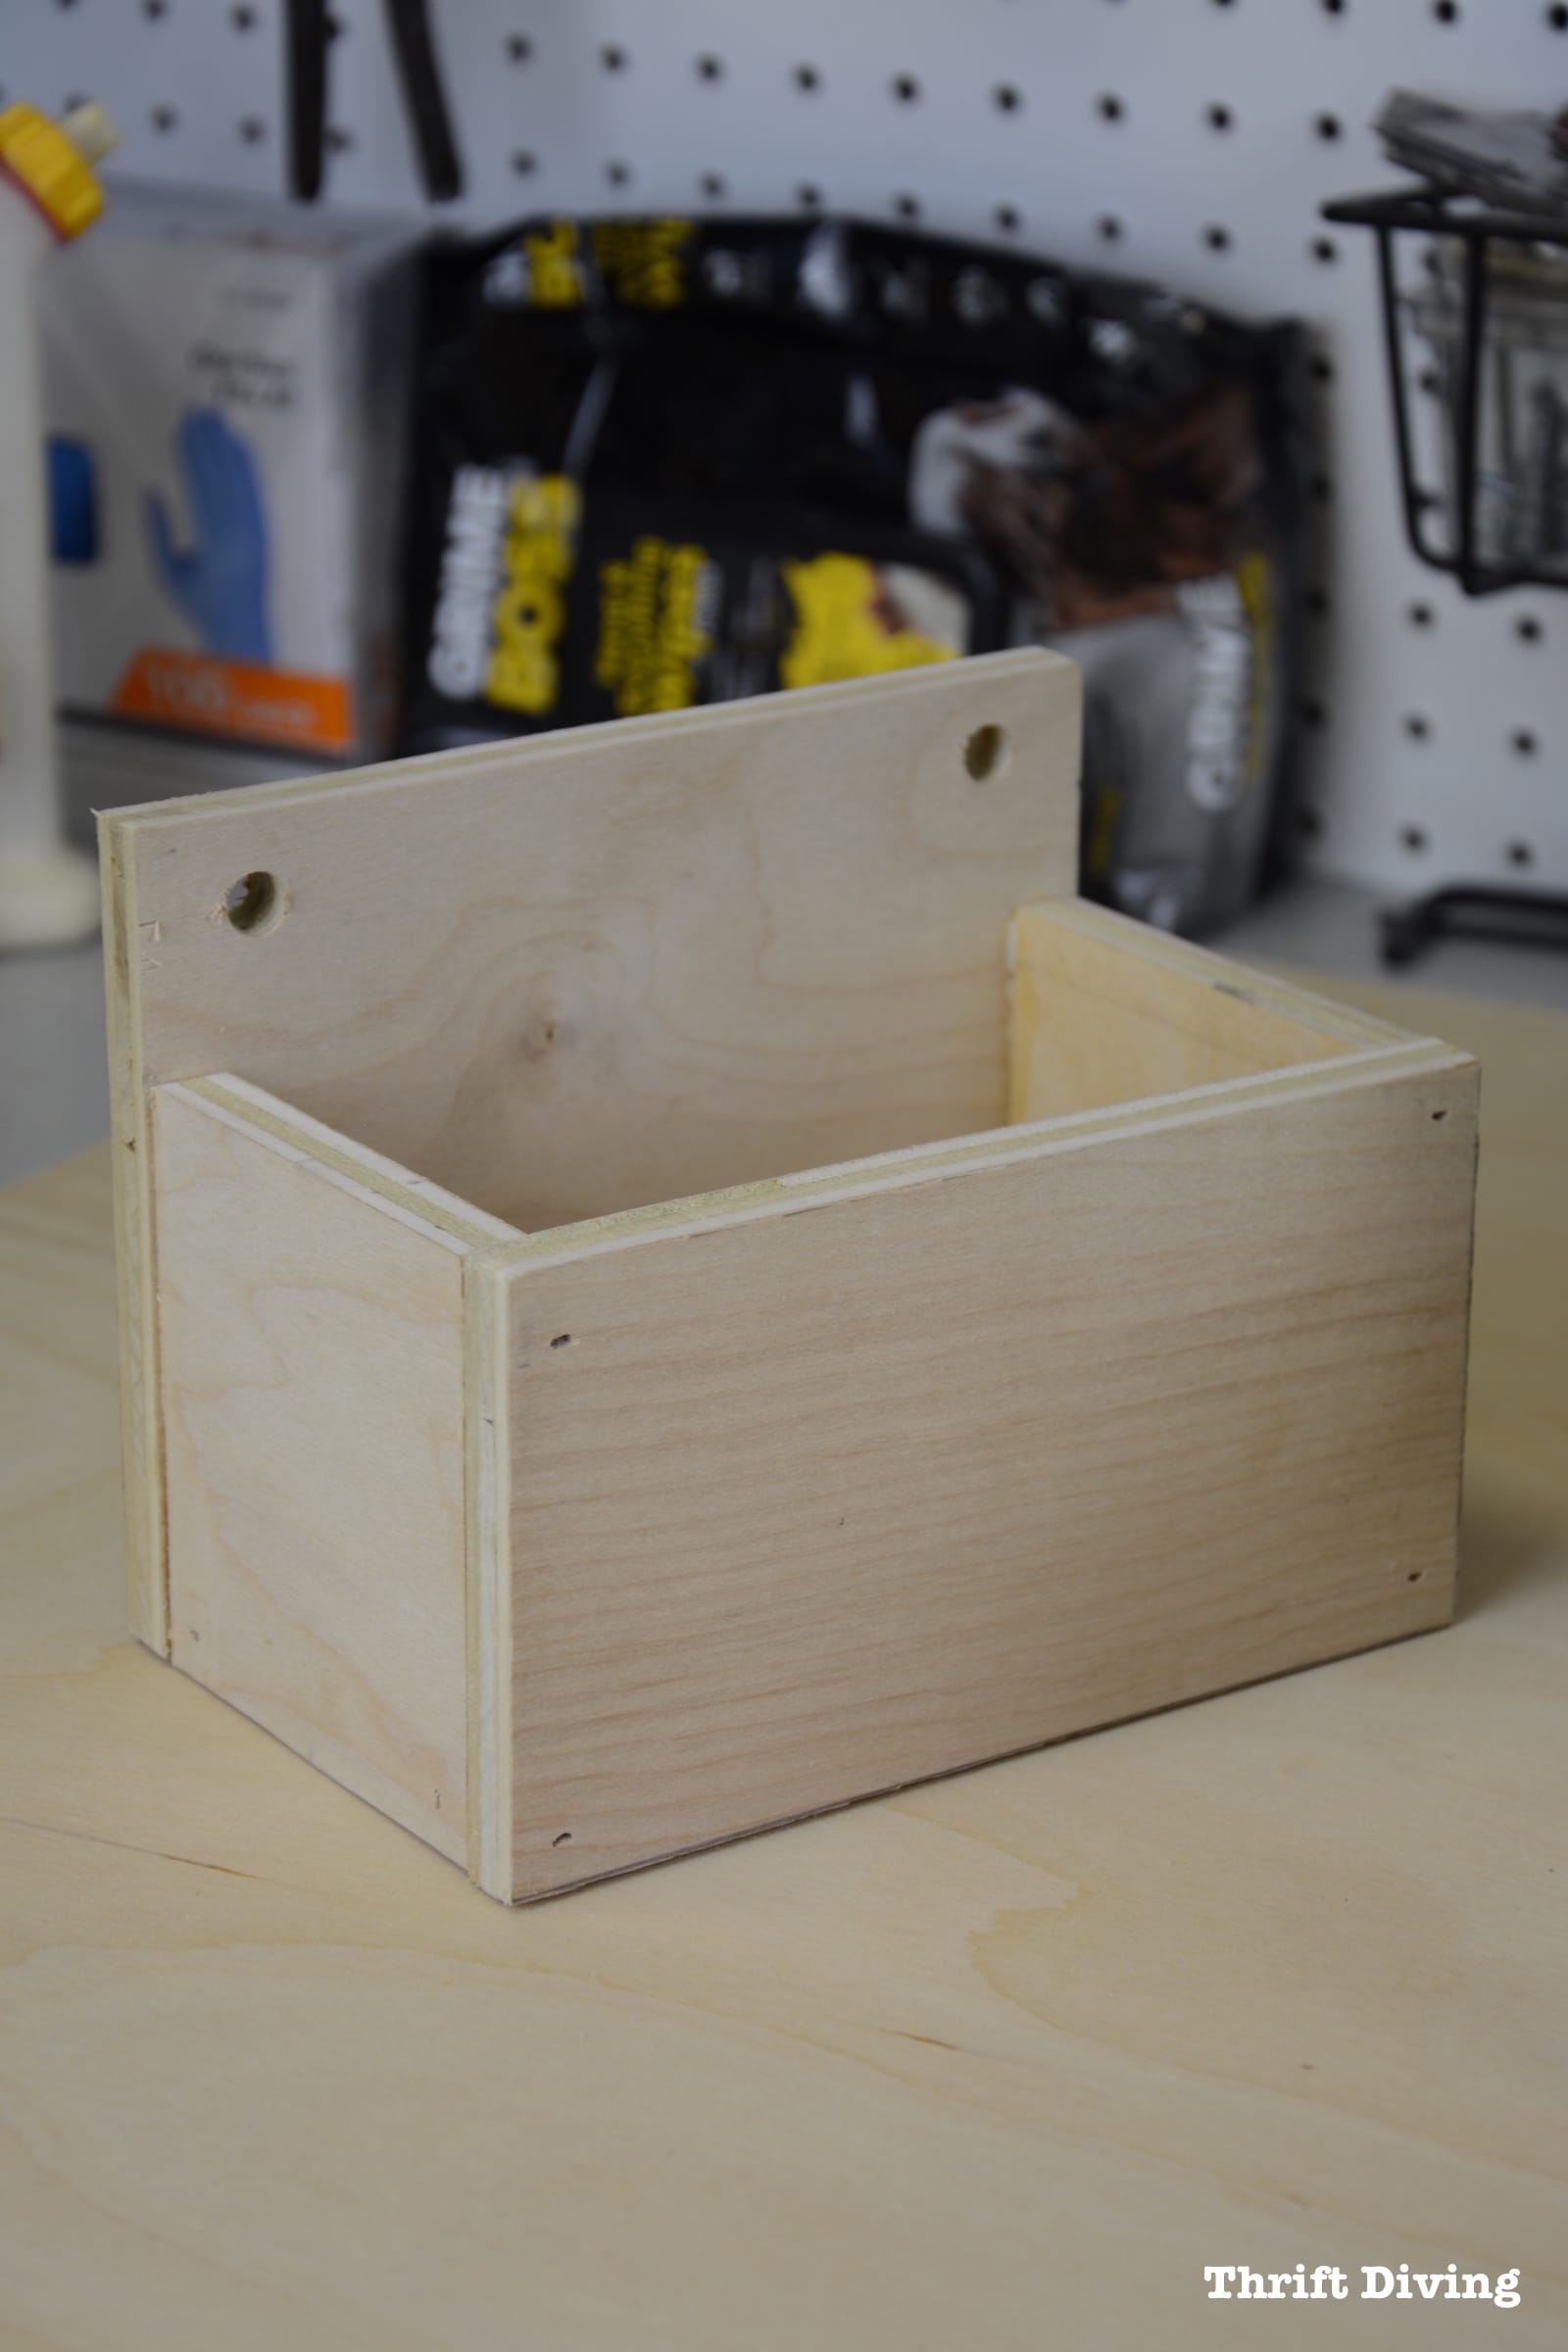
Before you start putting these cute little DIY pegboard organizers together, you’ve got to drill the holes in the back which will allow it to hang on your pegboard. Easier to drill when it’s not all put together!
Just turn your back piece over to the WRONG side and measure down about 1/2″ and measure in from the sides about 3/4″.
Remember: pegboard holes are spaced evenly apart at 1 inch. Sooooo…..if you need to, hold your piece up to the pegboard to see where your holes need to be. If you make one that’s a different size than mine, you’ll have to test it first. Be careful you don’t make a boo-boo. 😉
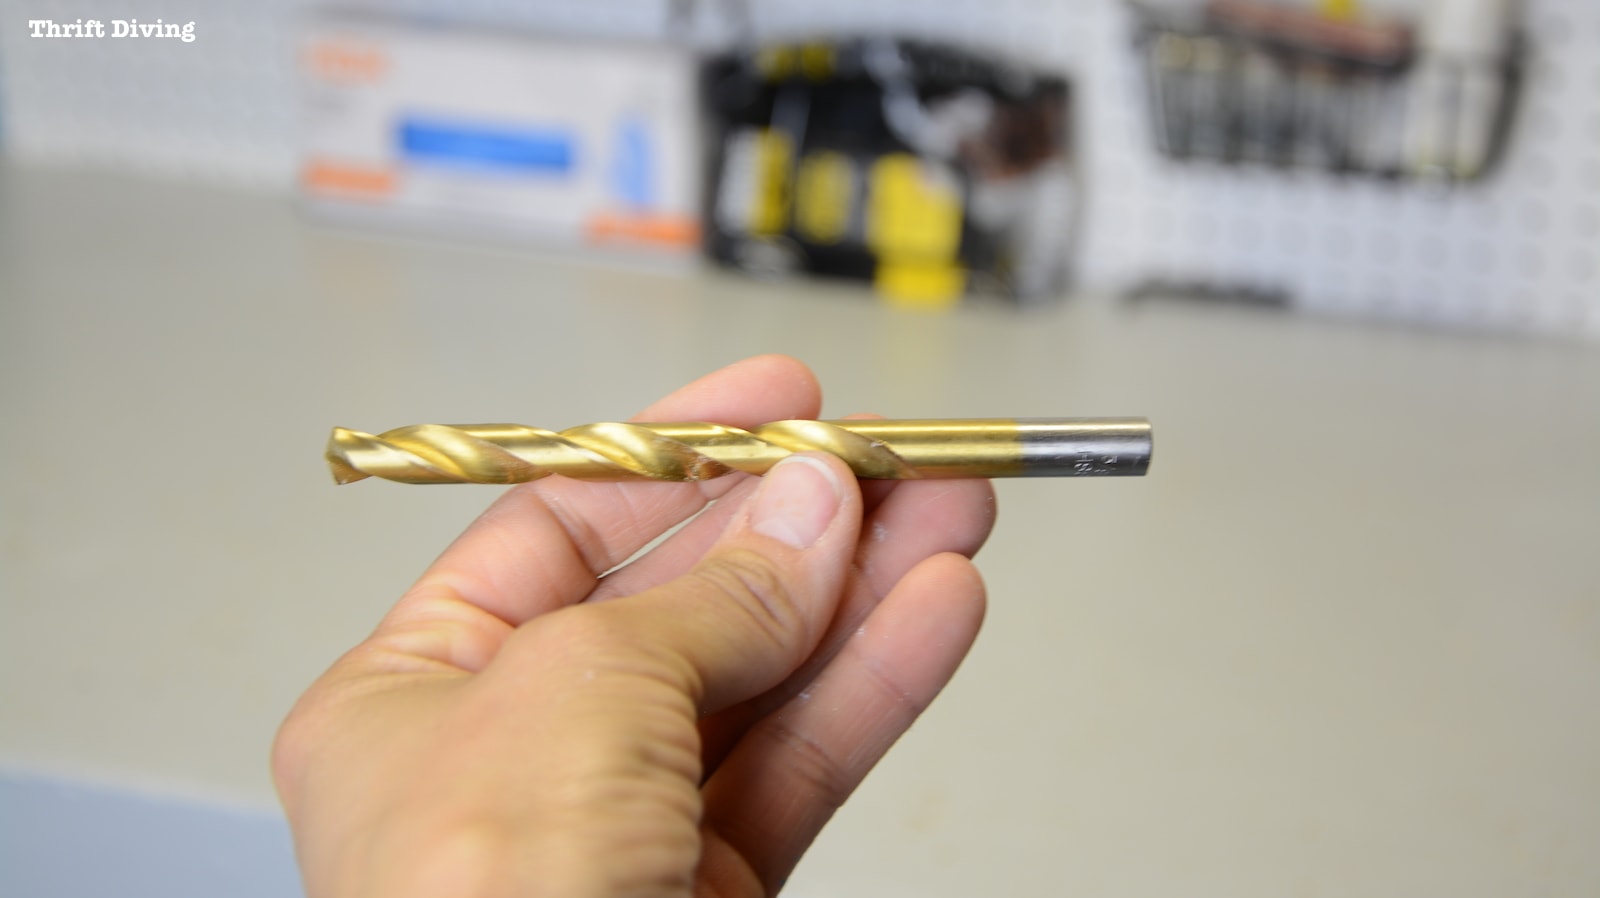
TIP: I learned a little tip from my friend Gail at My Repurposed Life: stack a piece of scrap wood underneath your project wood when drilling to help prevent tear-off on the back of your project board! This is seriously a project saver!
With both holes drilled, you should have a BACK piece that looks like this, which will allow you to easily hang your new DIY pegboard organizers. 🙂 Pretty simple, eh?
(P.S. Look at the other organizer. Do you see the tear-out on the back? I drilled that one without having scrap wood stacked underneath. You can see how horrible that one turned out on the reverse side!)

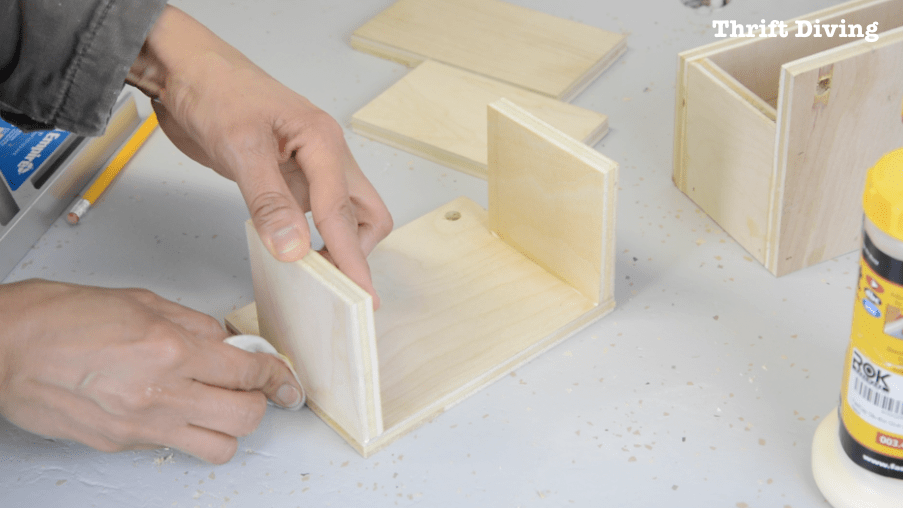
STEP 4: Glue or Nail the DIY Pegboard Organizer Together
Did you know that wood glue is stronger than wood?
Yep, it’s a fact.
Try gluing a joint…let it dry…and then later try to rip it apart. I bet you the wood would crack before that joint comes loose! LOL
The point here is that if you don’t want to nail your pegboard organizer together (or if you don’t have a nailer), no worries.
Just glue it…..clamp it….or hold it in place to dry, and keep it movin’.
First, glue SIDE 1…

Then glue the other SIDE 2…
Next, glue the BOTTOM on.
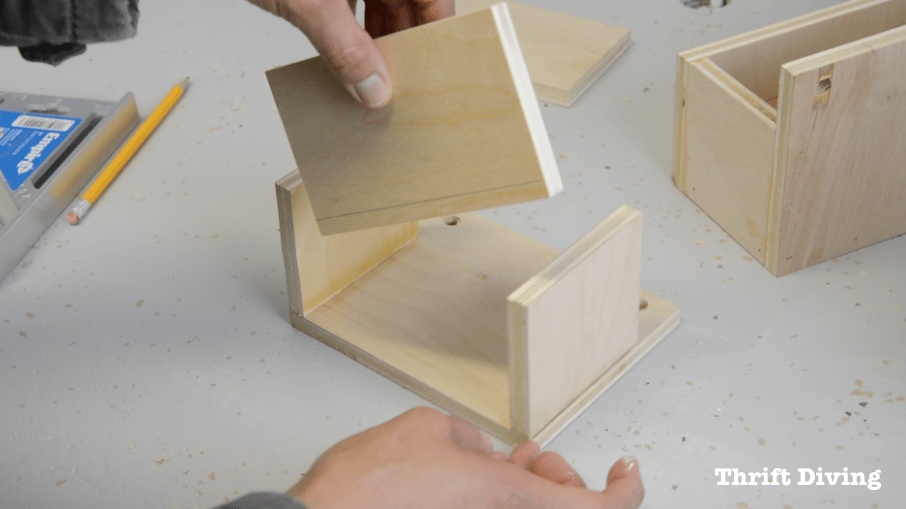
Last, you’ll glue the FRONT.
This is what they should look like when they’re all assembled!
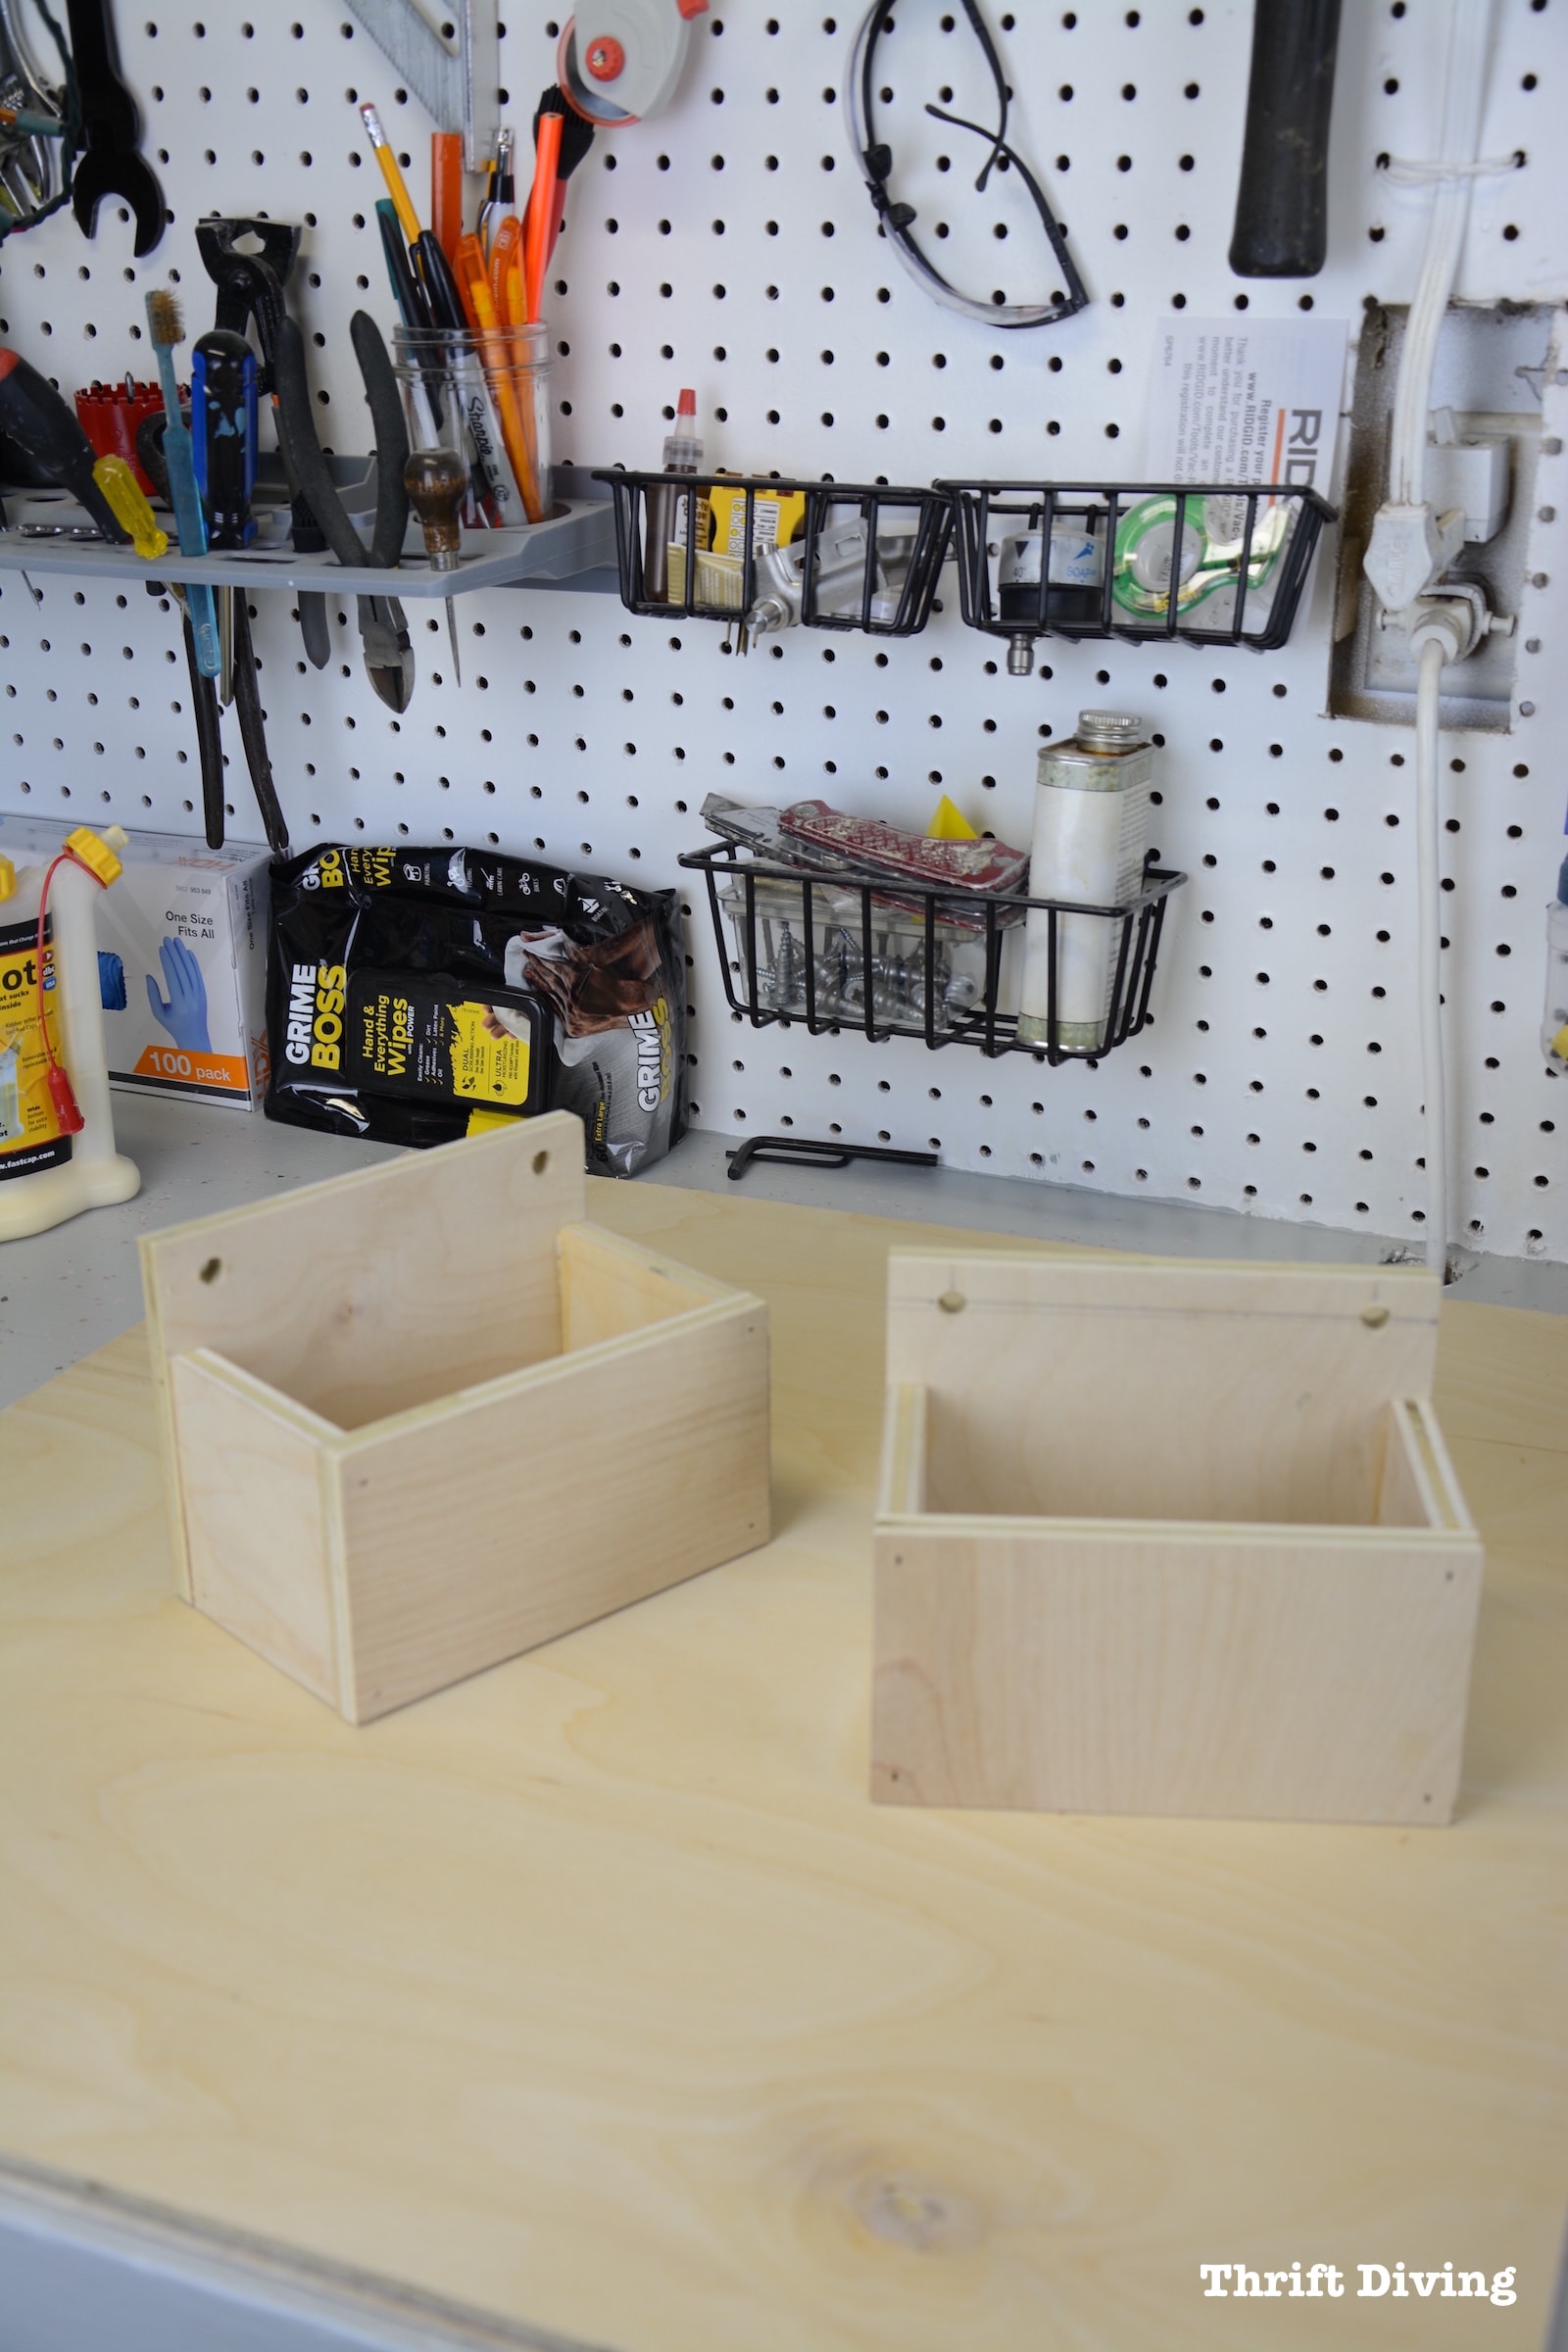
I didn’t bother filling my nail holes because I didn’t really care. LOL.
But if you want to fill them, just use wood filler.
STEP 5: Paint Your Pegboard Organizer
Well, you don’t have to paint it like me (plus, I stenciled it), but I love how quick and easy paint is.
Try stain, too!
I reeeeeallly wanted to do chalkboard fronts so that I could create wipeable labels, but I couldn’t find my black chalkboard paint for nothing! Grrrr…Don’t you hate when you can’t find supplies??
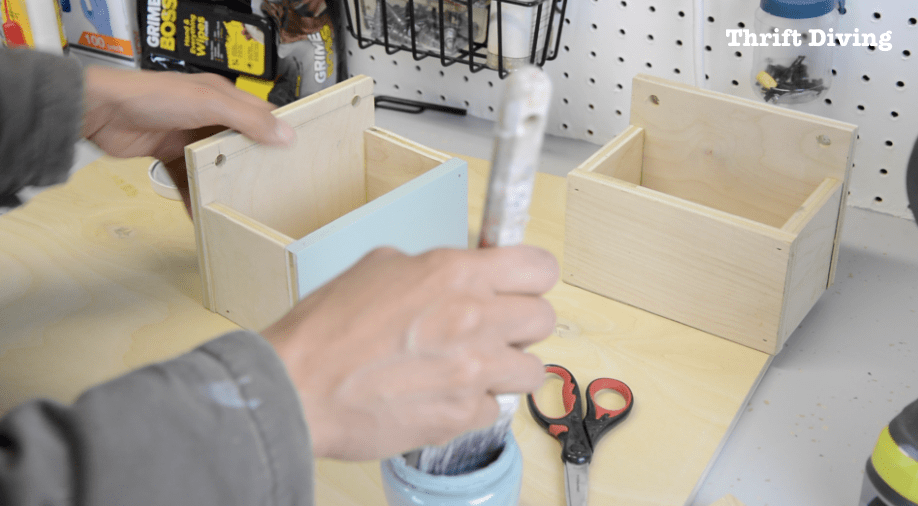
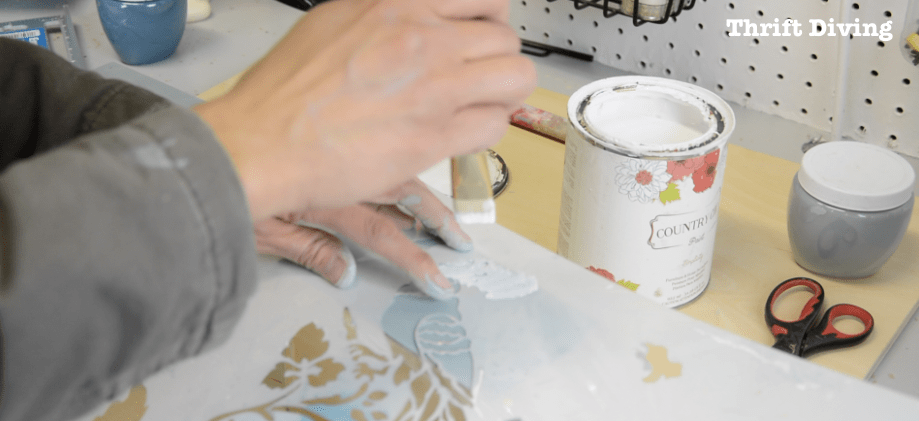
I used some chalk paint that I had lying around, in Duck Egg.
I decided to add some stencils, but I wasn’t using a proper stenciling brush or sponge, so it wasn’t the “cleanest” stenciling job.
Meh, oh well!
These pegboard organizers will serve their purpose! LOL
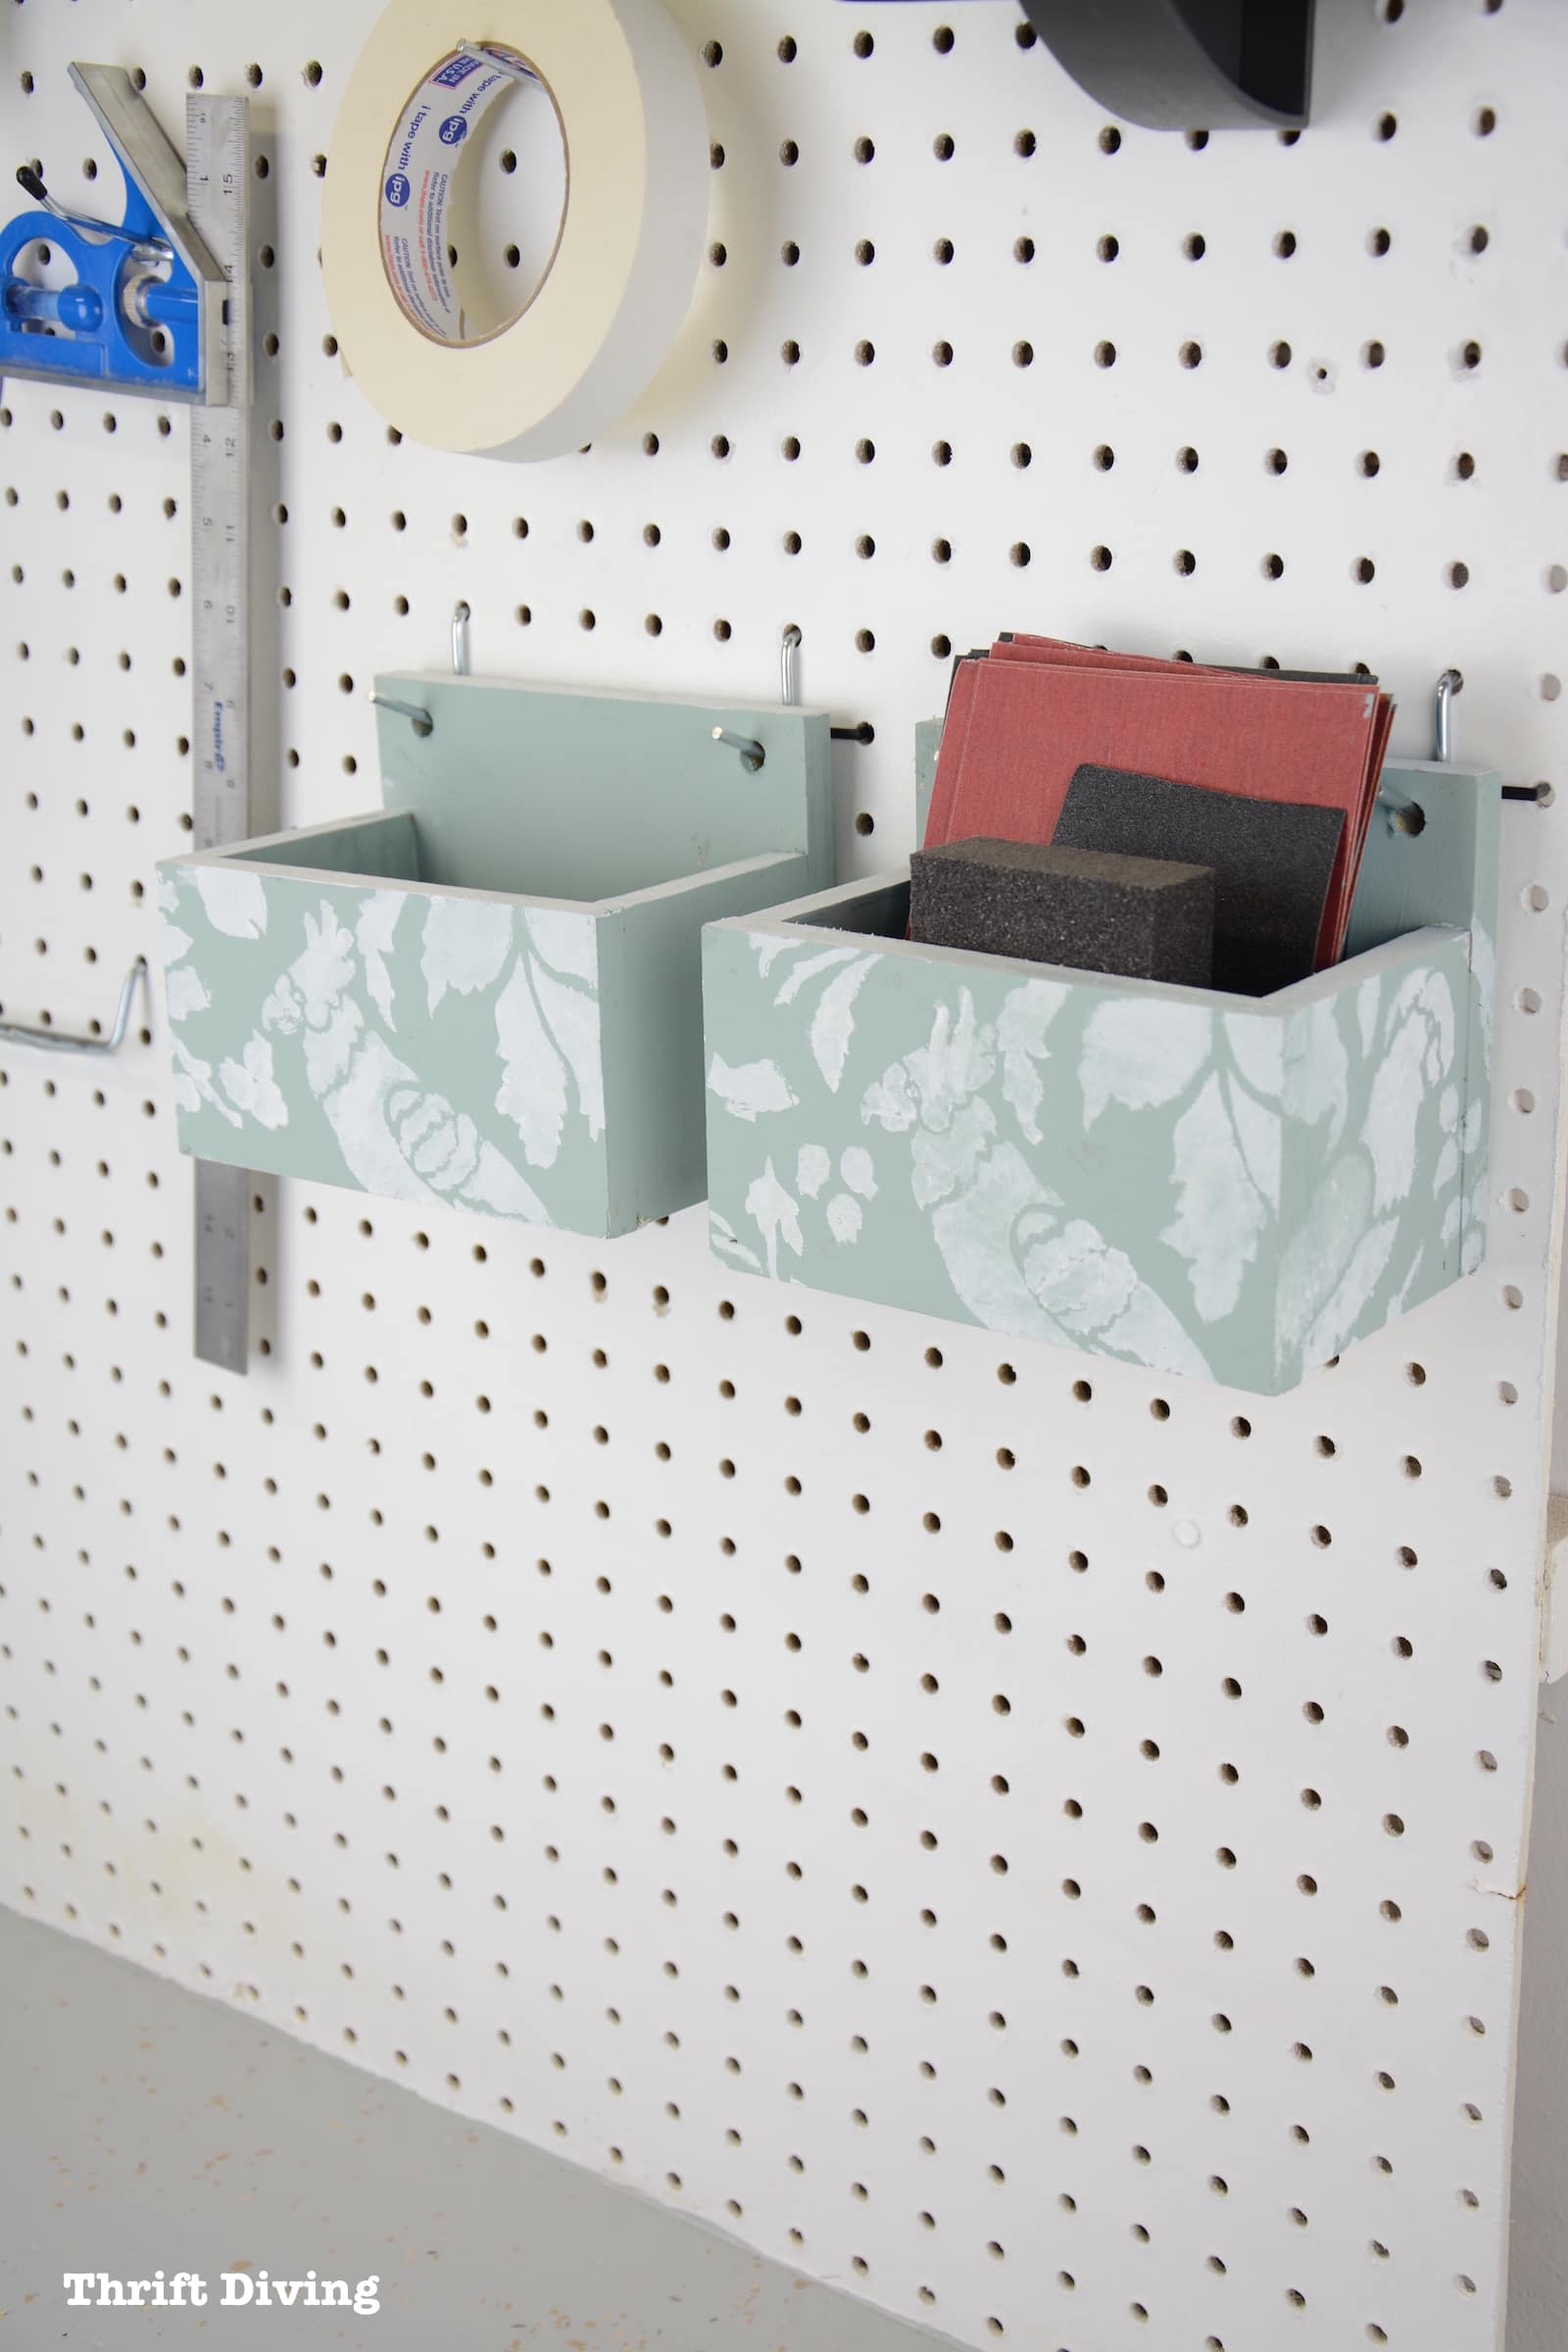
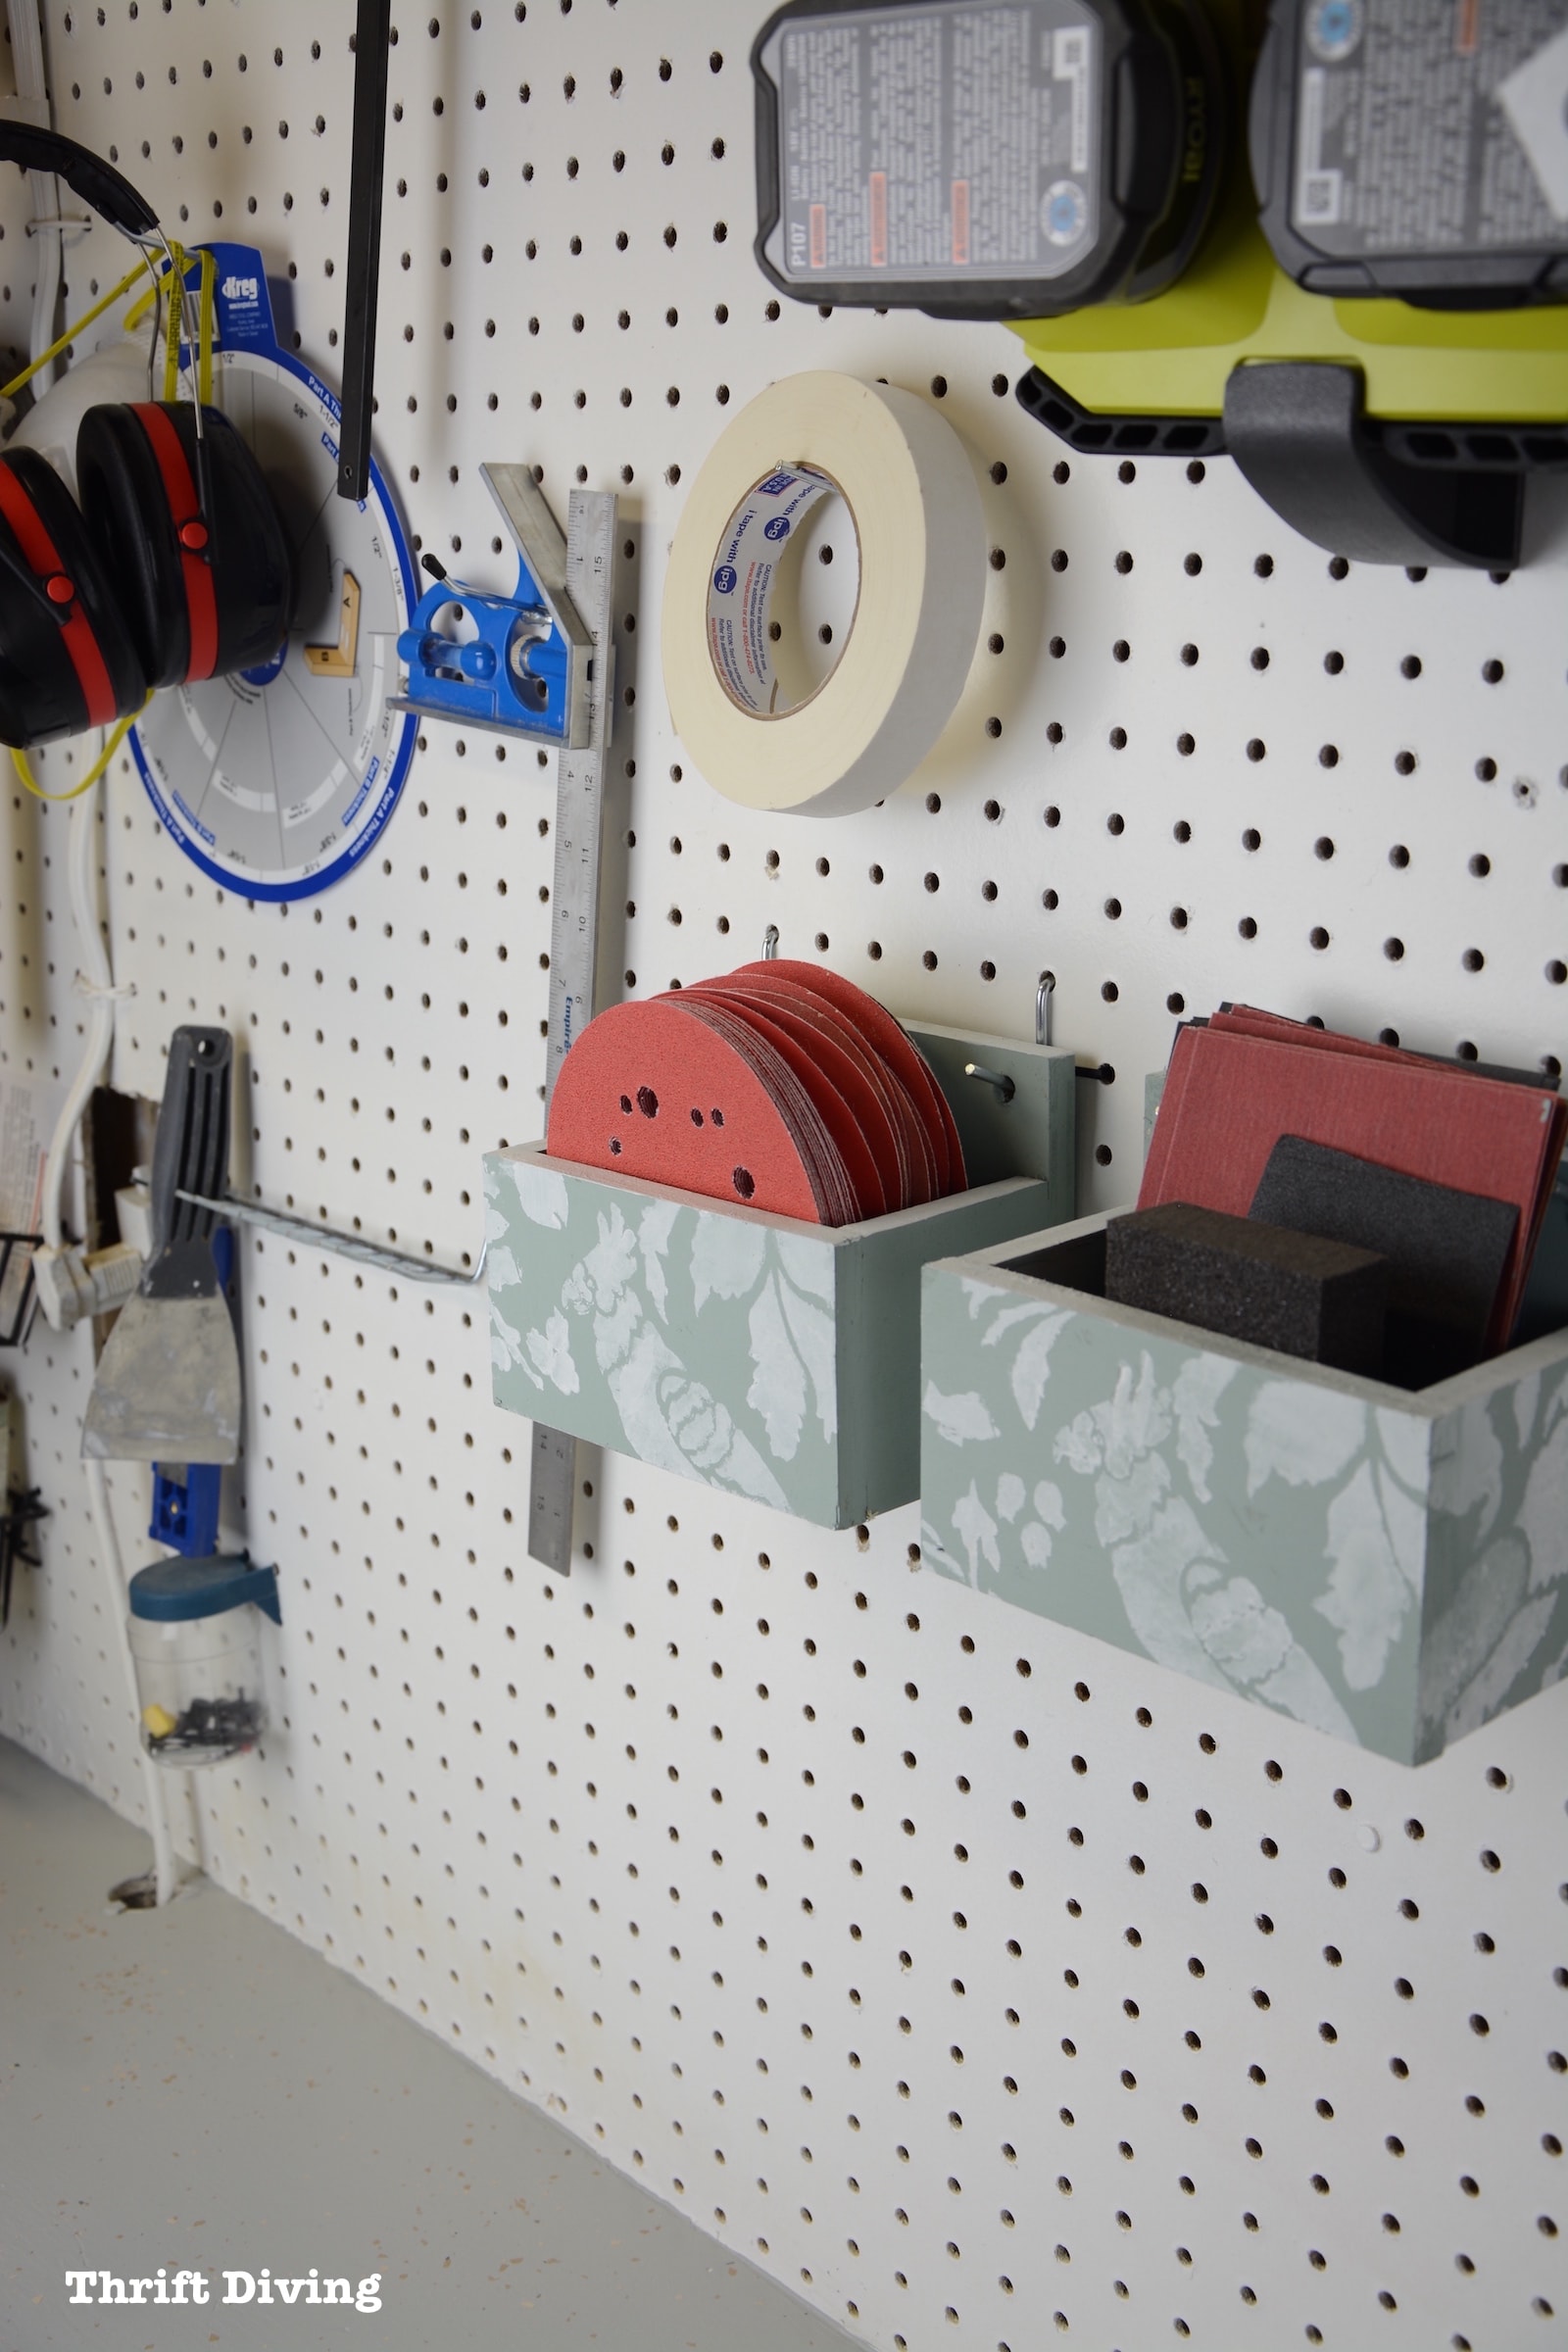
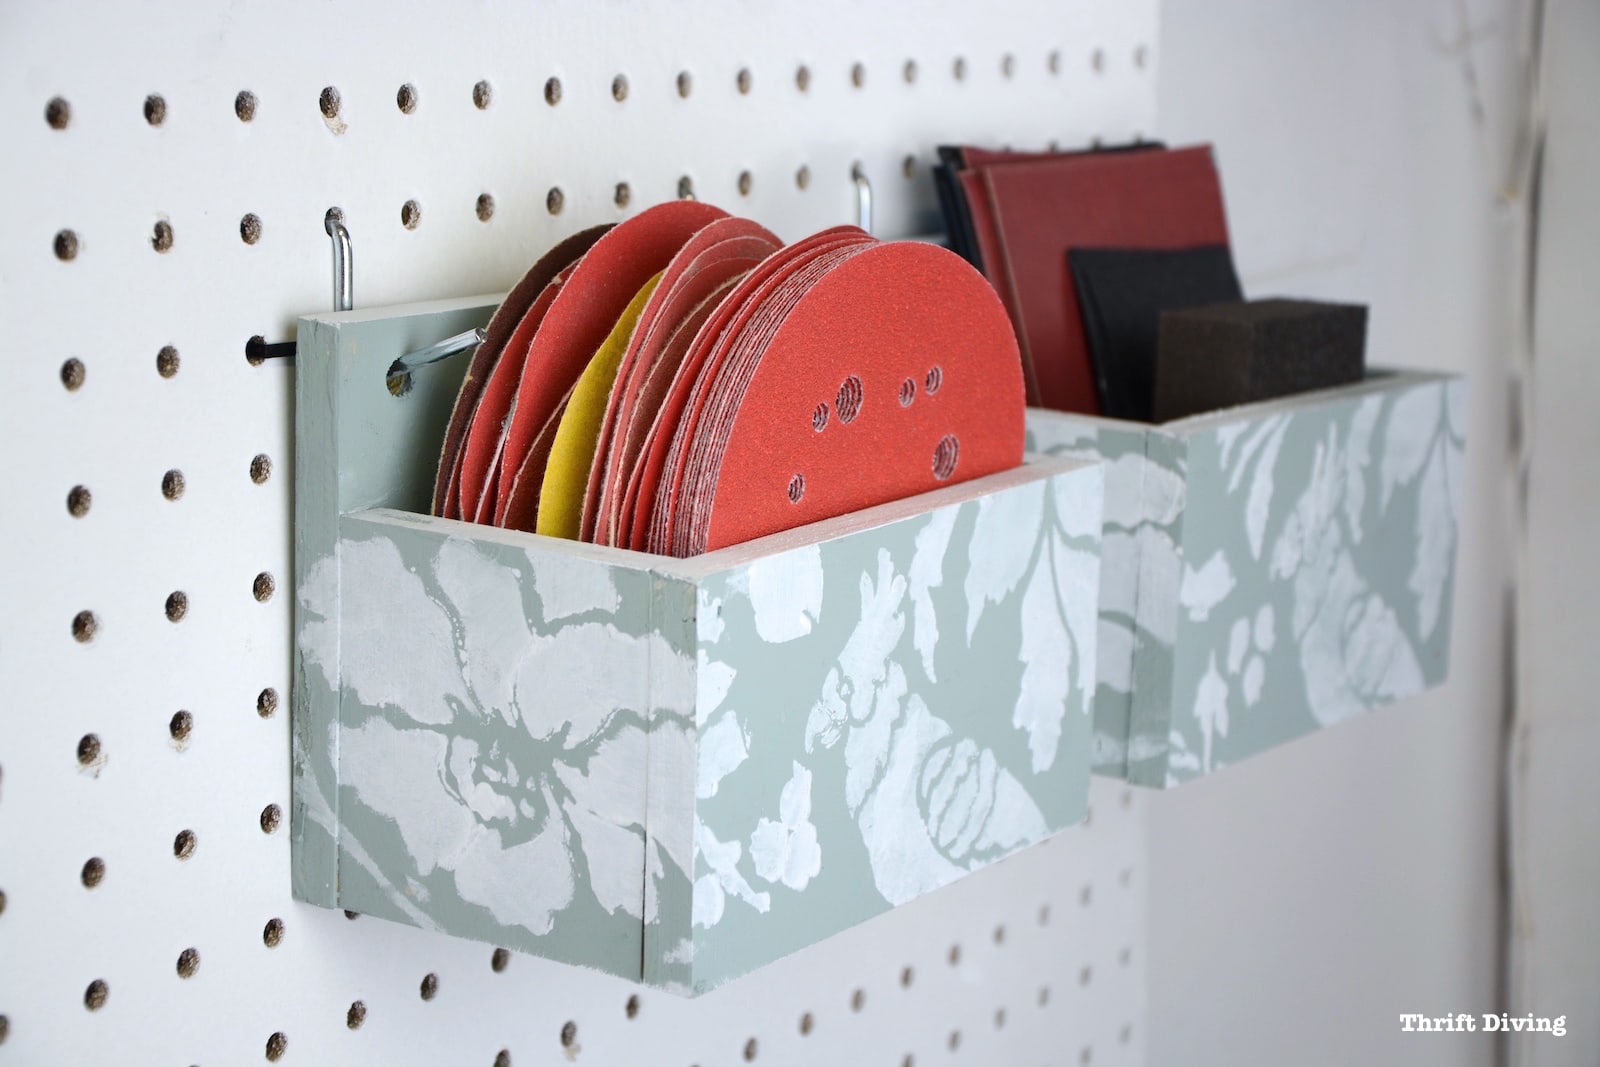
STEP 6: Hang It Up
This is the fun part–getting to see what you can store in there!
I used pegboard hooks and put black locking clips on the hooks so that they didn’t fall out easily.
Now, I’ve got my sandpaper close by, but I can’t wait to make more of these so I can put little things in them–things that would normally fall through the cracks of those expensive little wire baskets!

I can’t wait to make more of these!
Just imagine how you can customize them–wide…..short…..the possibilities are endless.
And they’re actually much cheaper, too! Plywood is pretty affordable stuff. 🙂
So what do you think?? Leave a comment and let me know!
Watch the Video!
Don’t forget to PIN this project for later!
![]()
Check Out My Friends’ Organizing Projects!
The Kim Six Fix – Under Cabinet Storage
My Repurposed Life – Repurposed Drawer Dog Toy Box
H2OBungalow – DIY Hanging Jewelry Organizer
Create And Babble – Pallet Wood Entryway Bench with Shoe Storage
The DIY Bungalow – Reclaimed Wood Shelves
Designed Decor – Repurposed Radio Cabinet Coffee Bar Drink Station
Domestically Speaking – Easiest DIY Drawer Organization
Refresh Restyle – Mudroom Storage Idea
My Love 2 Create – Drawer Storage Shelf
Virginia Sweet Pea – 2 x 4 DIY Shelving Unit Storage Shelf


Download the 5 freebies!

Thrift Diving inspires women to decorate, improve, and maintain their home themselves...using paint, power tools, and thrift stores! Use these 5 printables, checklists, and ebooks to get started!
What a great idea to help organize the peg board! I love the boxes you made and I love the stencil job too!
Why didn’t I think of that?!
Great tips! I need to organize our garage pegboard… love how these turned out.
These are awesome Serena! I am slowly trying to organize my shop, and a peg board has been on my list, I love how perfect these are. Great video too, did you put zip ties around the peg hooks to hold them in place? Genius, I hate how the hooks fall out of the pegboard in my garage every. single. time. I remove things from them! Pinned!!
What a great idea! We have tons of pegboard in our basement thanks to the previous owner of our house and a lot of it is empty. I can make a few of your organizers to hold small things for which I have no storage space. You come up with such good ideas and do such a great job of explaining exactly how to you executed your plan. And you made your boxes look pretty, that’s an added bonus. 🙂
What a great idea! There are so many things I want on my peg board but they fall out of the wire racks! I need to make a few of these! Its the simple things that make us happy!
What a great idea! I’m about to hang pegboard in my workshop shed, so I’m definitely going to build these for sandpaper discs and more. Great project!!
Yeah, what Jeanie said! so cute because not only can they be painted, little items don’t fall through like the wire baskets.
pinned your fab project Serena!
gail
Hi, Gail You had a great idea recently that I want to use in my all purpose room, too. You detailed how you made a cork board using thrifted picture frames. That was a great idea and one that I can easily make. Am on the lookout now for the frame and will check for cork board next time I’m at Lowe’s or Home Depot, unless I’m lucky enough to find a thrift source. Serena introduced me to your Repurposed Life site and I’ve been excited to see many of your small projects, too!
Teckla,
I’m happy you found My Repurposed Life through our friend Serena! Don’t be a stranger.
gail
Wow, you shared some super tips in your post! I’ve been using wood glue a lot more lately too. Your ittle boxes are too cute and so useful! I need some..and your well organized garage too!
Great idea Serena! I’ve got to make some of these for the big pegboard in my office/craft room. They look so much better than the wire or plastic ones bins. I can paint them to match my decor!