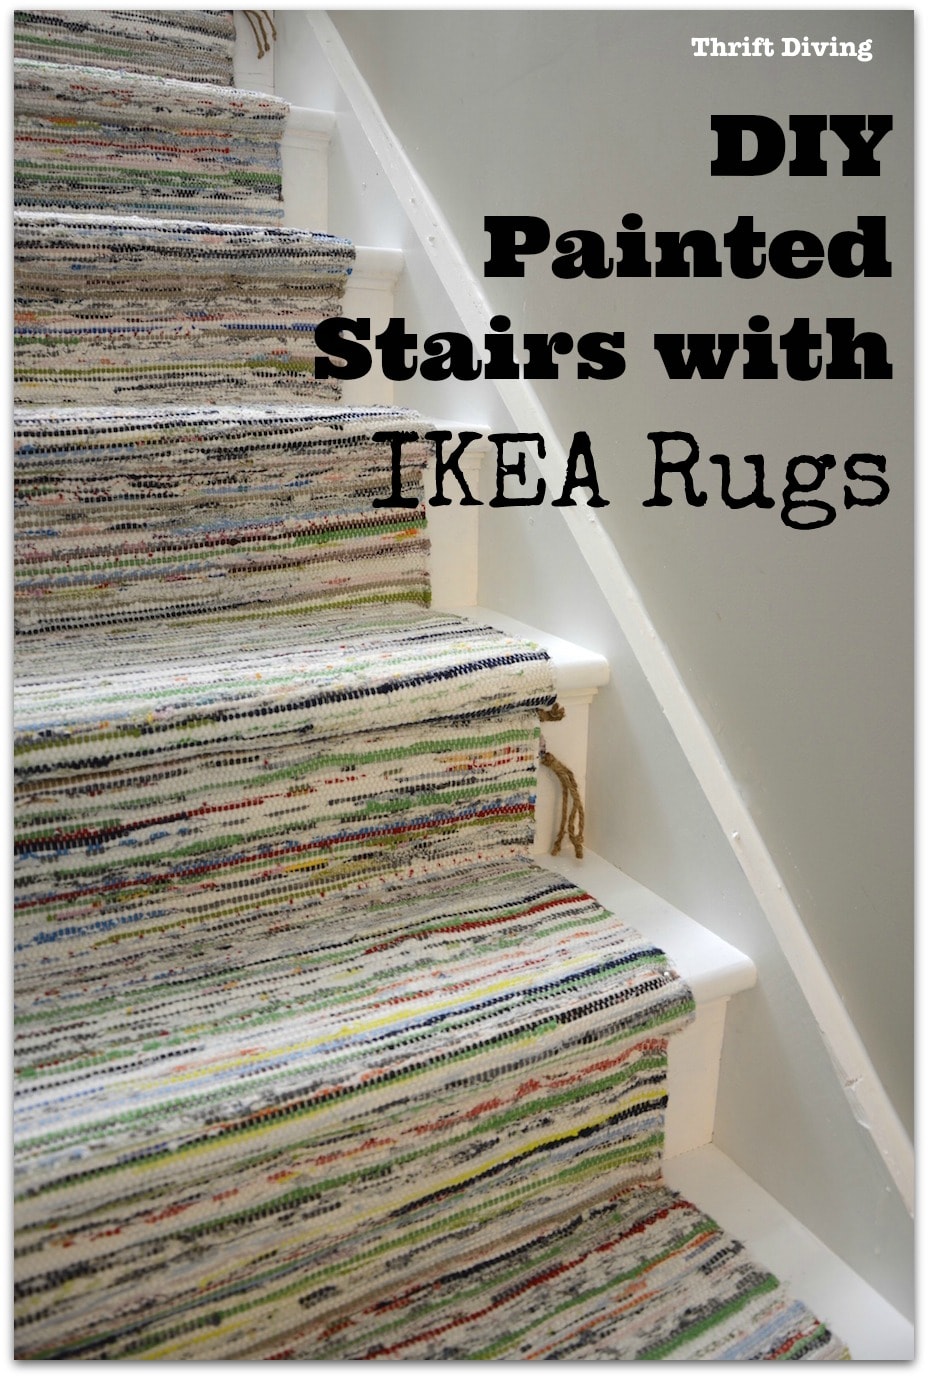
BEFORE & AFTER: DIY Painted Stairs Makeover
A couple years ago I saw a DIY painted stairs makeover that I bookmarked in a tiny space in the back of my mind and thought, “Whenever I get a free moment, I’m going to do my DIY painted stairs makeover the exact same way: with IKEA rugs and upholstery tacks!
Since this wasn’t my idea, I don’t get the Creative Genius of the Year Award. 🙂
But, since this is the second project I’ve done and posted in a week, I will take the Kicking Butt Award for productivity, thank you very much! LOL
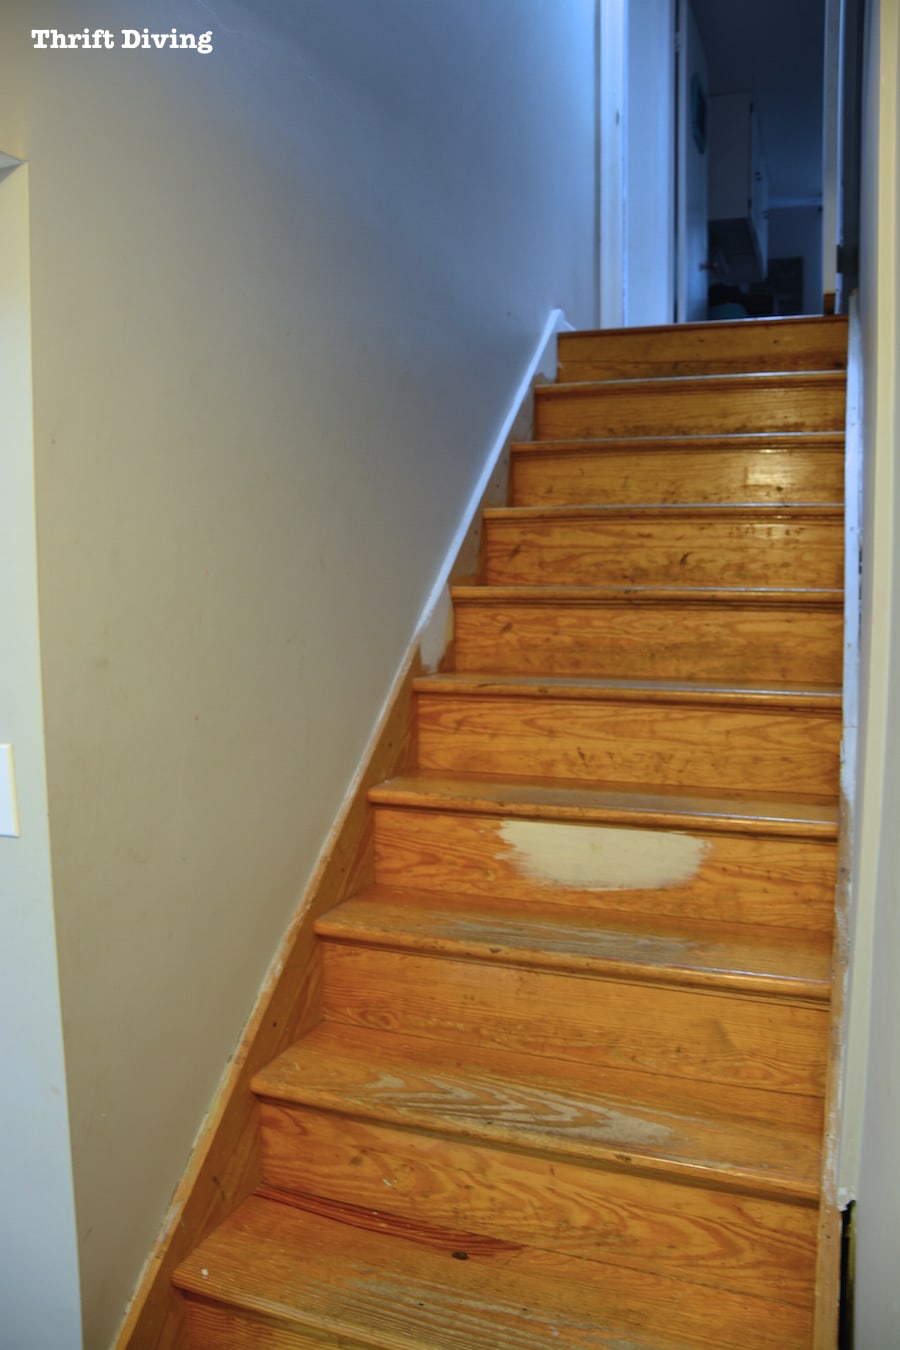
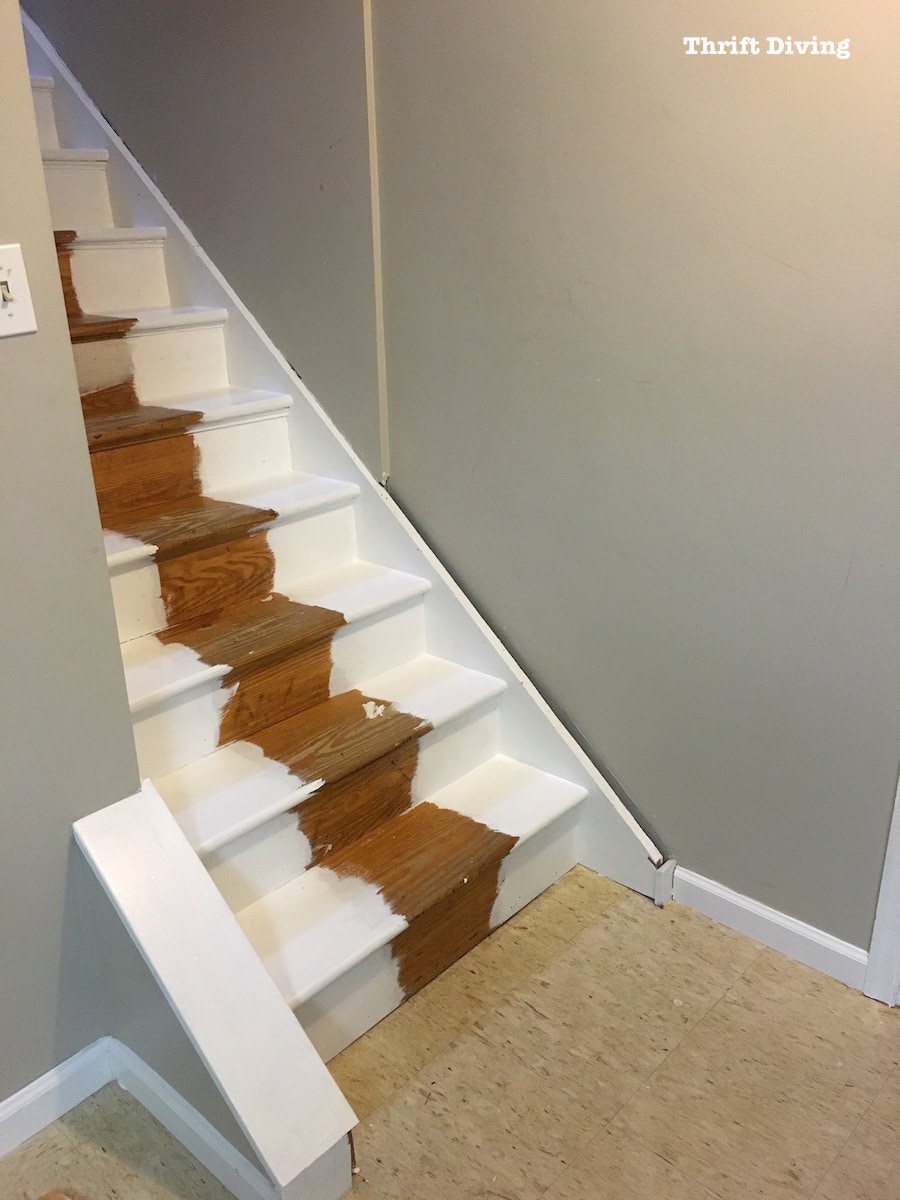
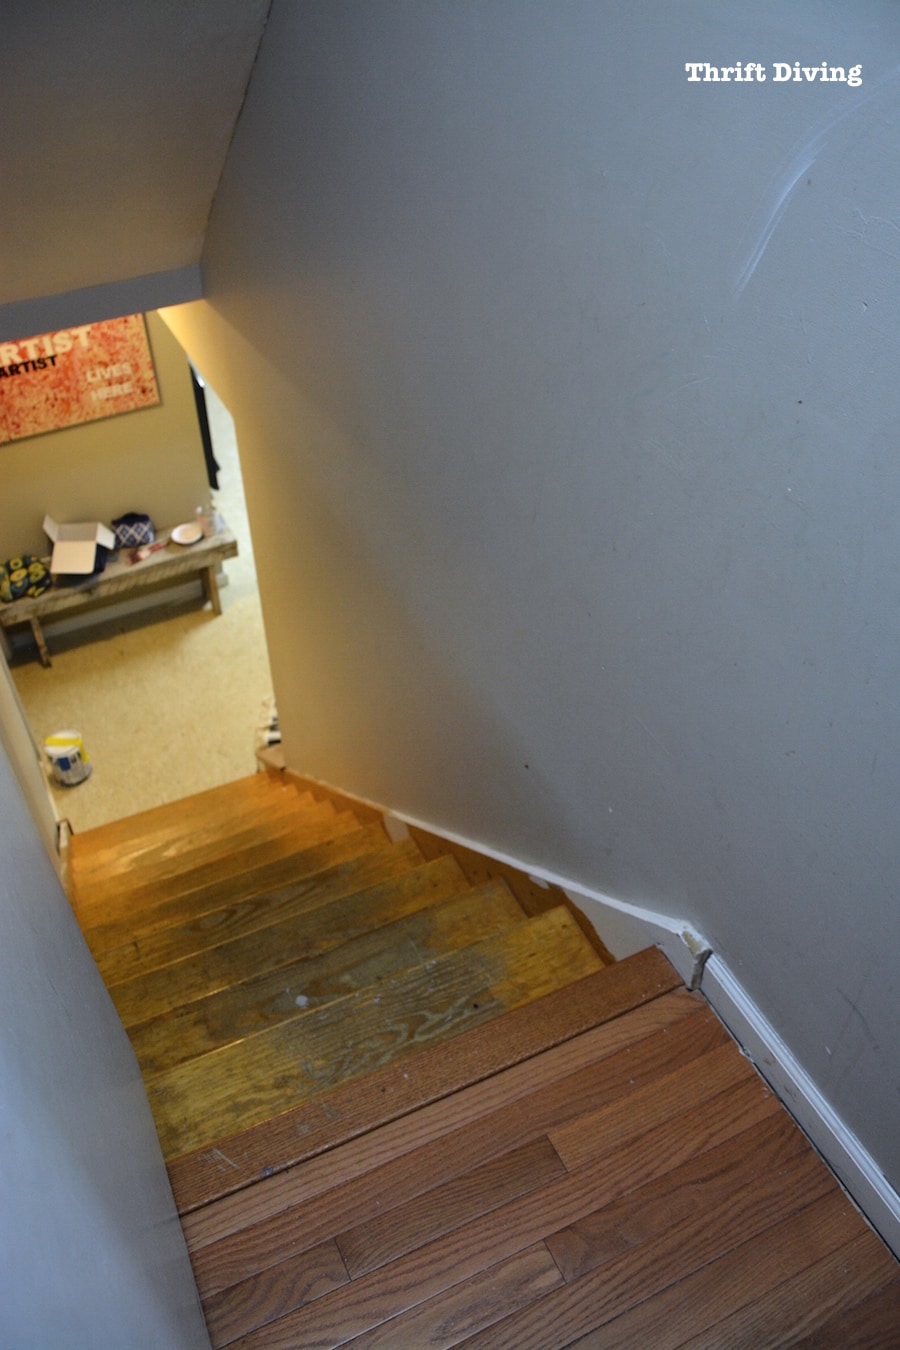
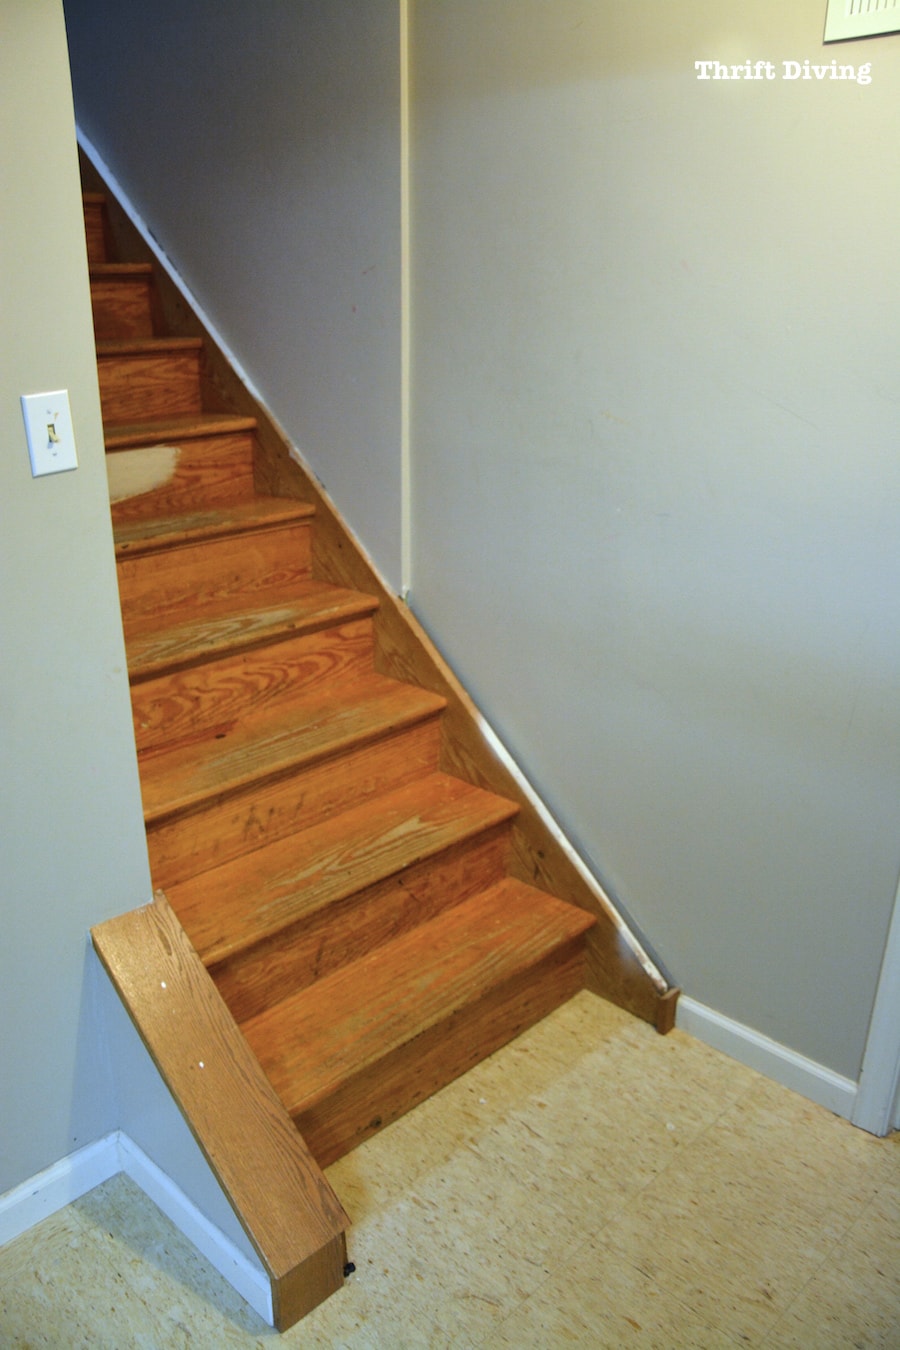
Here’s what my stairs looked like just 24 hours ago.
BEFORE
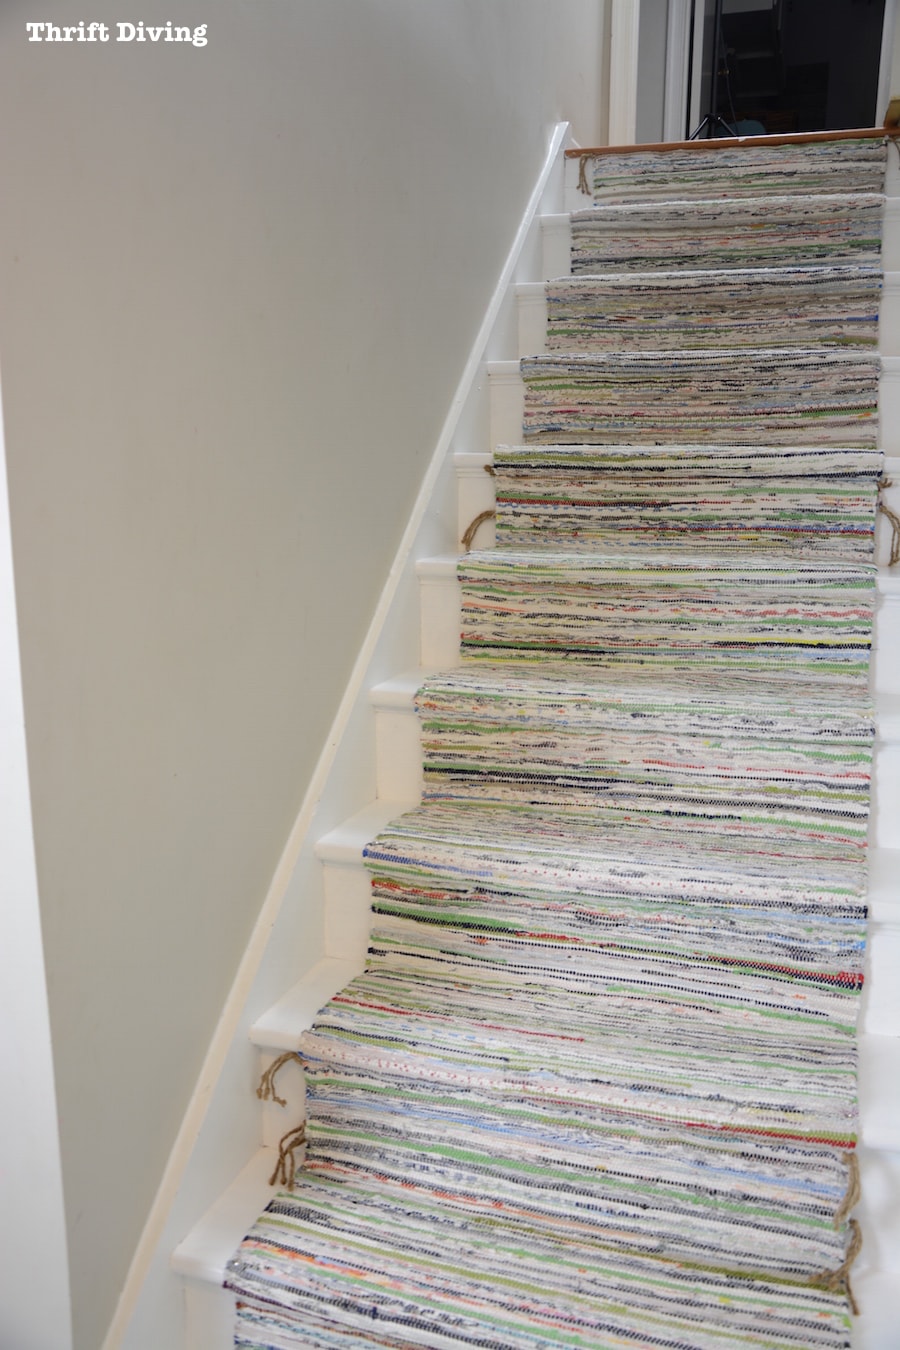
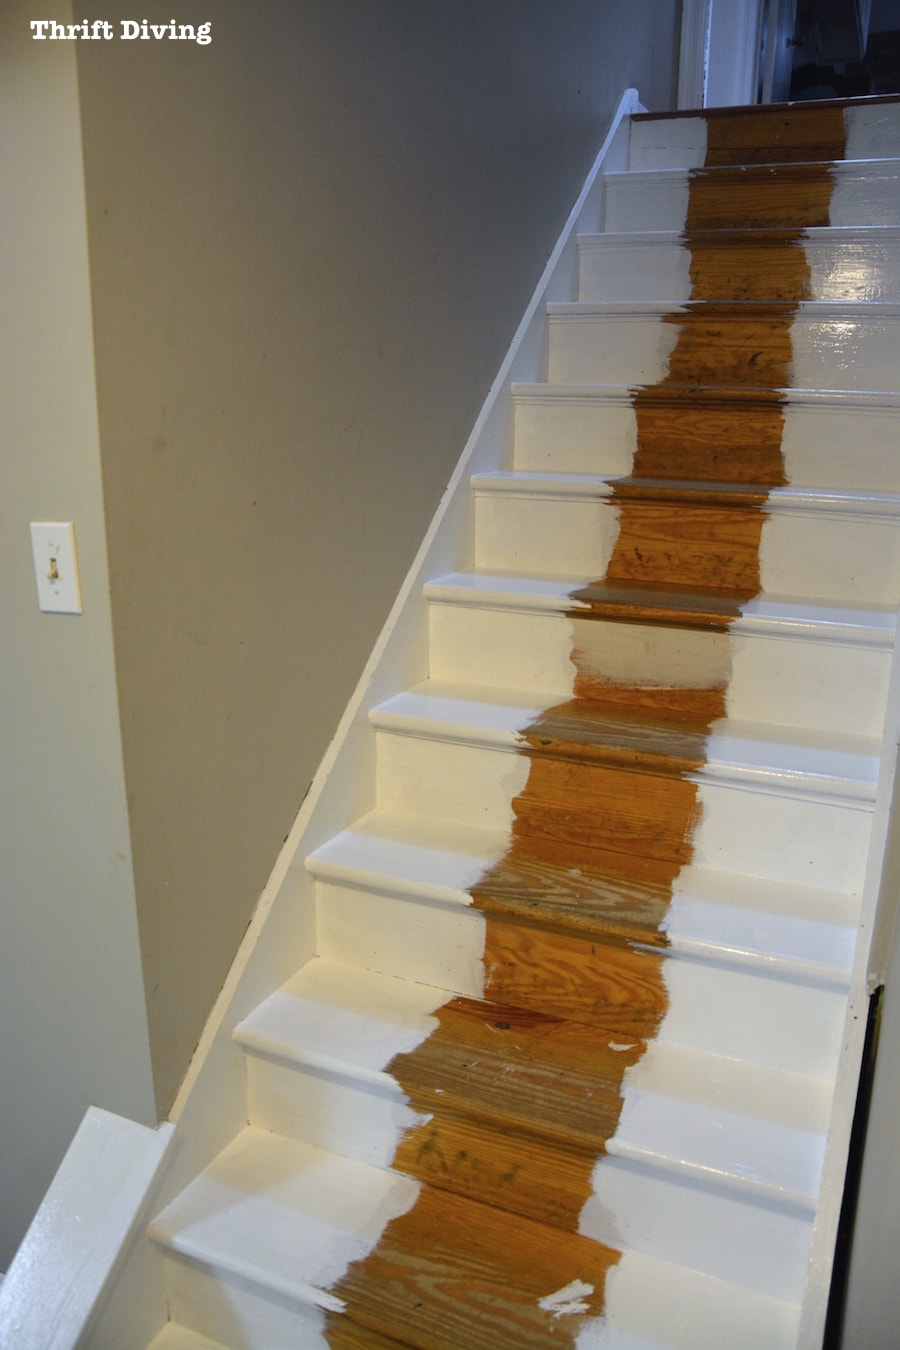
And by the end of the day, this is what it looked like.
AFTER!
(I’m not going to lie: I retouched the walls in iPhoto because they’re icky with “kid gunk” and I haven’t gotten around to painting the walls over yet).
Anyhow, my blogger friends and I do a monthly Power Tools Challenge and this month’s theme was Home Improvement.
It was the perfect challenge to knock this project off of my “Gotta-Get-Rid-of-the-Ugly” list.
It’s amazing how you walk by something every day but never notice how bad of condition it’s in!
These pictures are eye-opening!

If you’ve got stairs like this and you want to do a DIY painted stairs makeover with inexpensive rugs, it can be done!
Materials Needs for a DIY Painted Stairs Makeover With Cheap IKEA Rugs
- IKEA TANUM Rugs
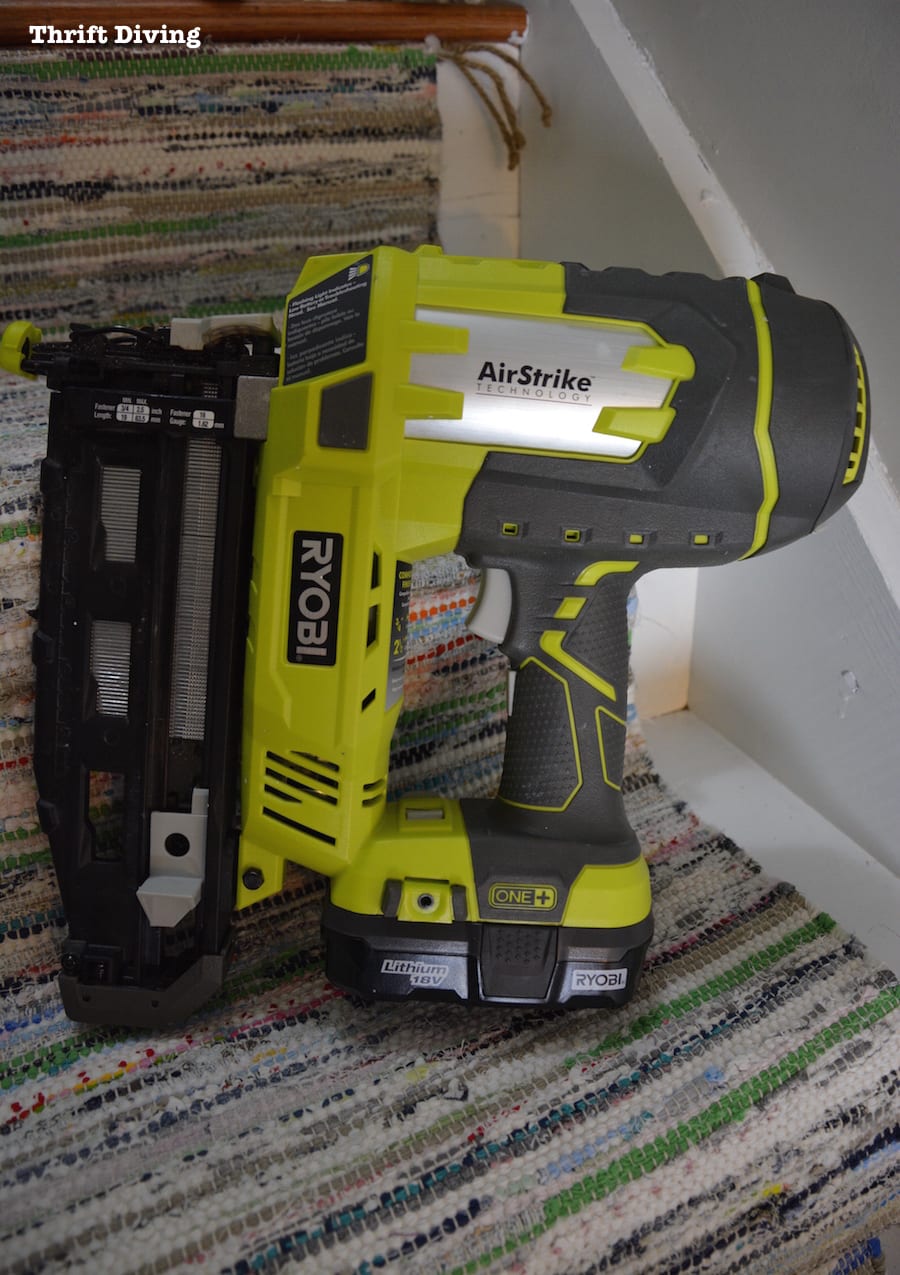
- RYOBI AirStrike 16-gauge nailer
- 2″ finish nails (16 gauge)
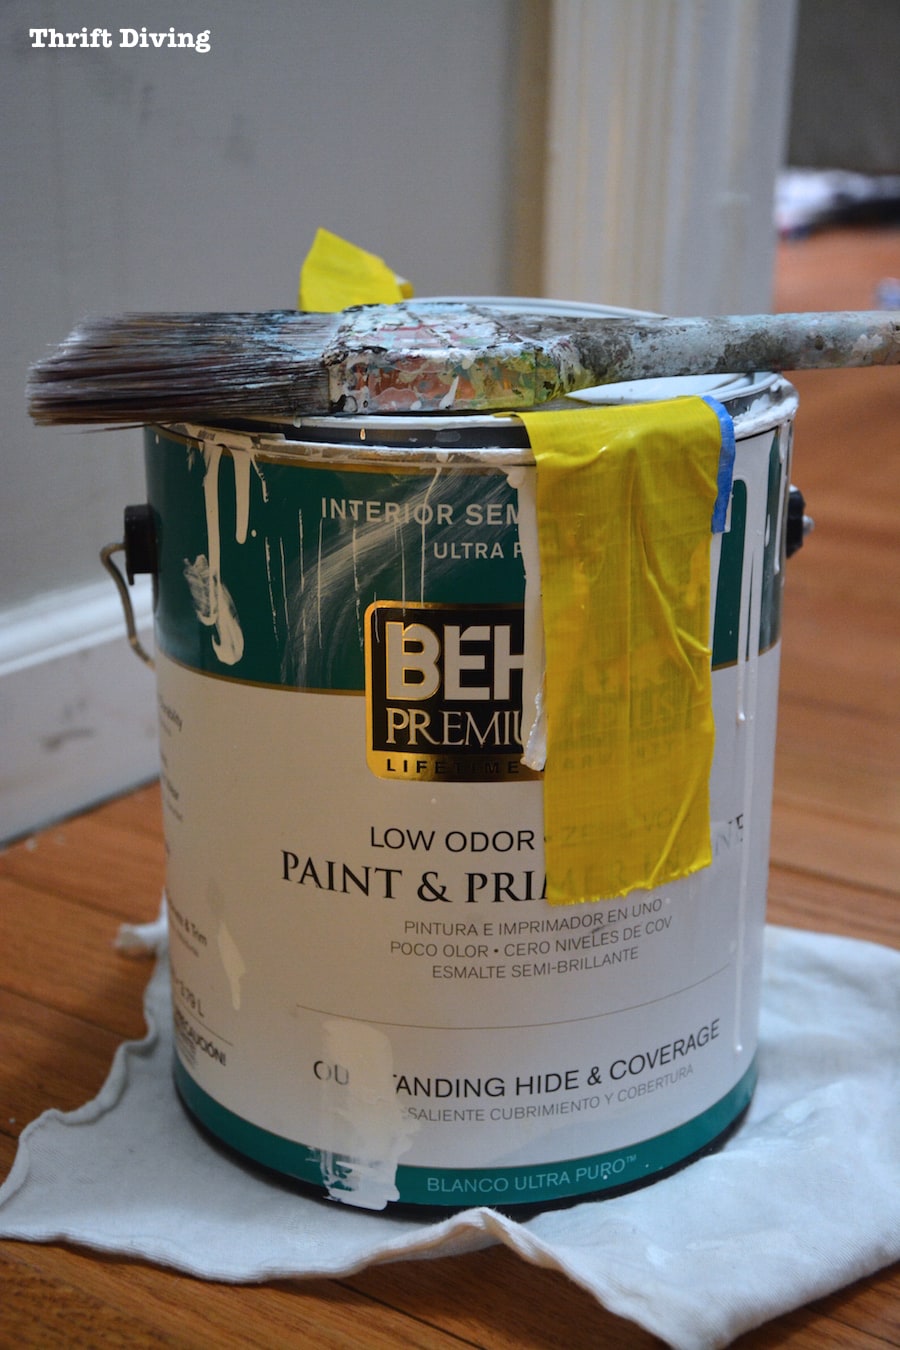
- Semi-Gloss paint & brush
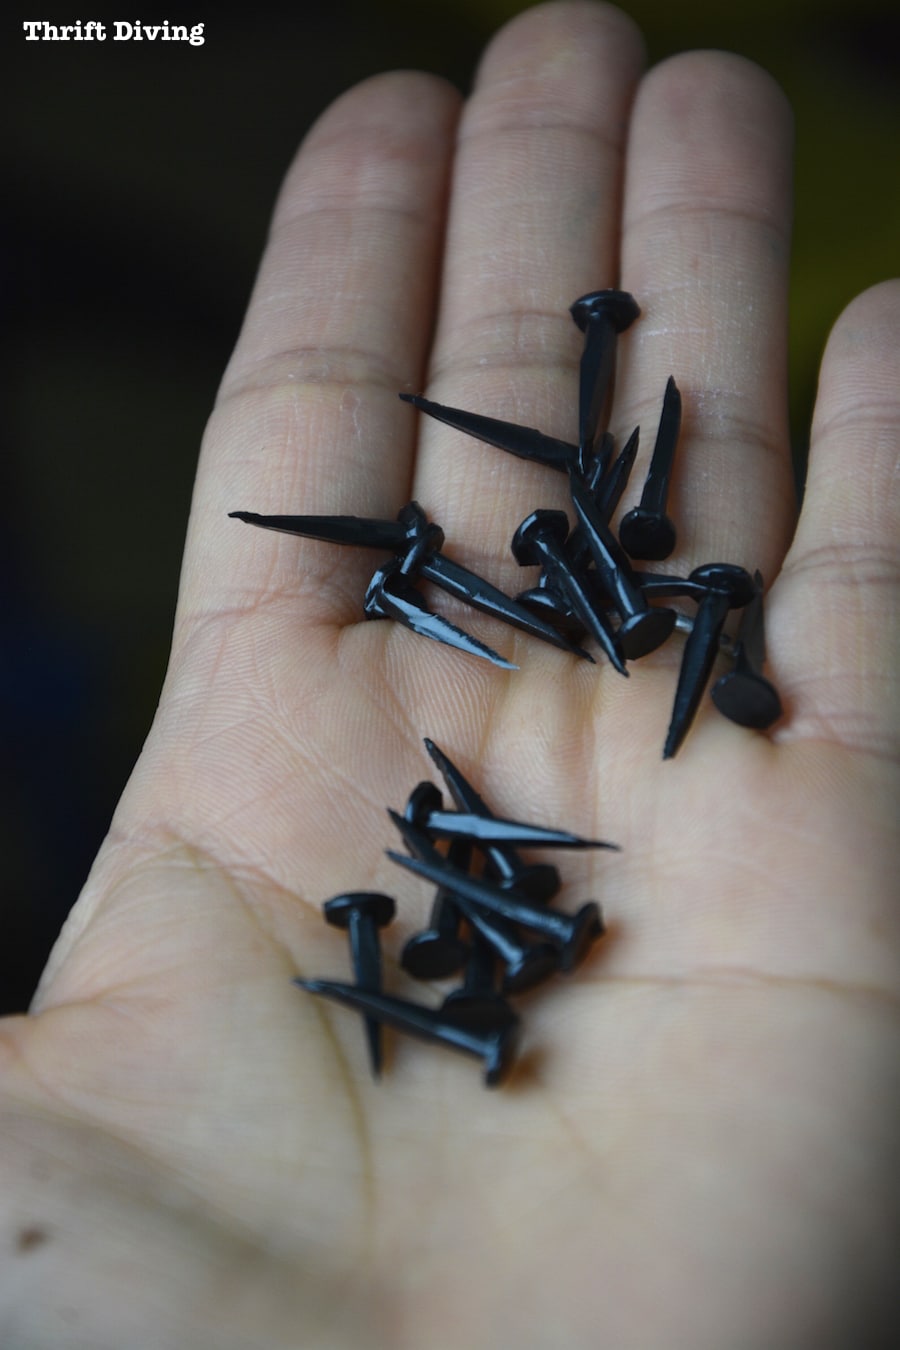
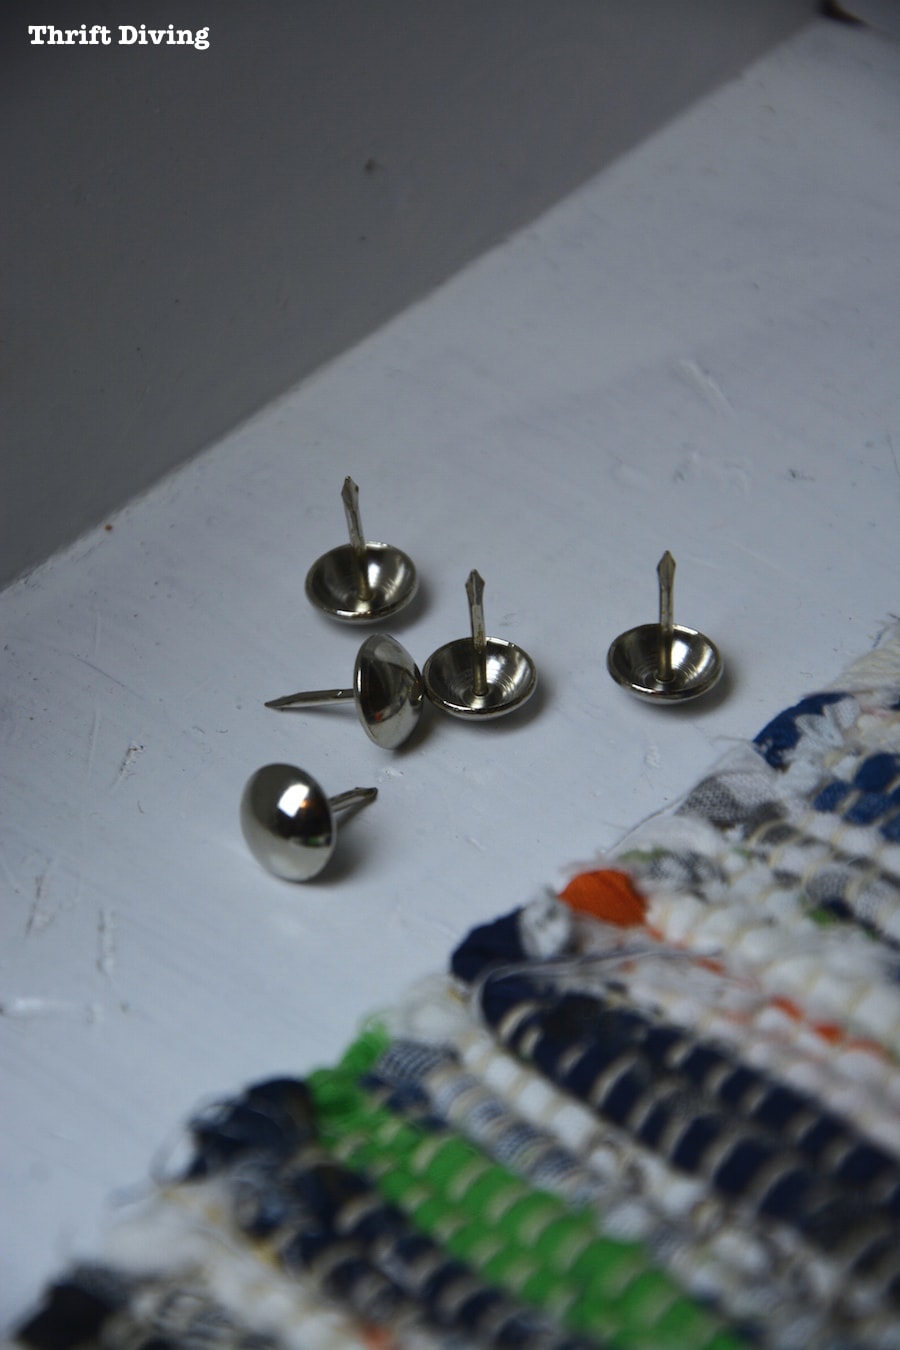
- Upholstery tacks (I recommend the pack of 100. They’re always good to have on hand!)
- Carpet tacks
- Simple Green for cleaning the steps first
- Caulk for any cracks
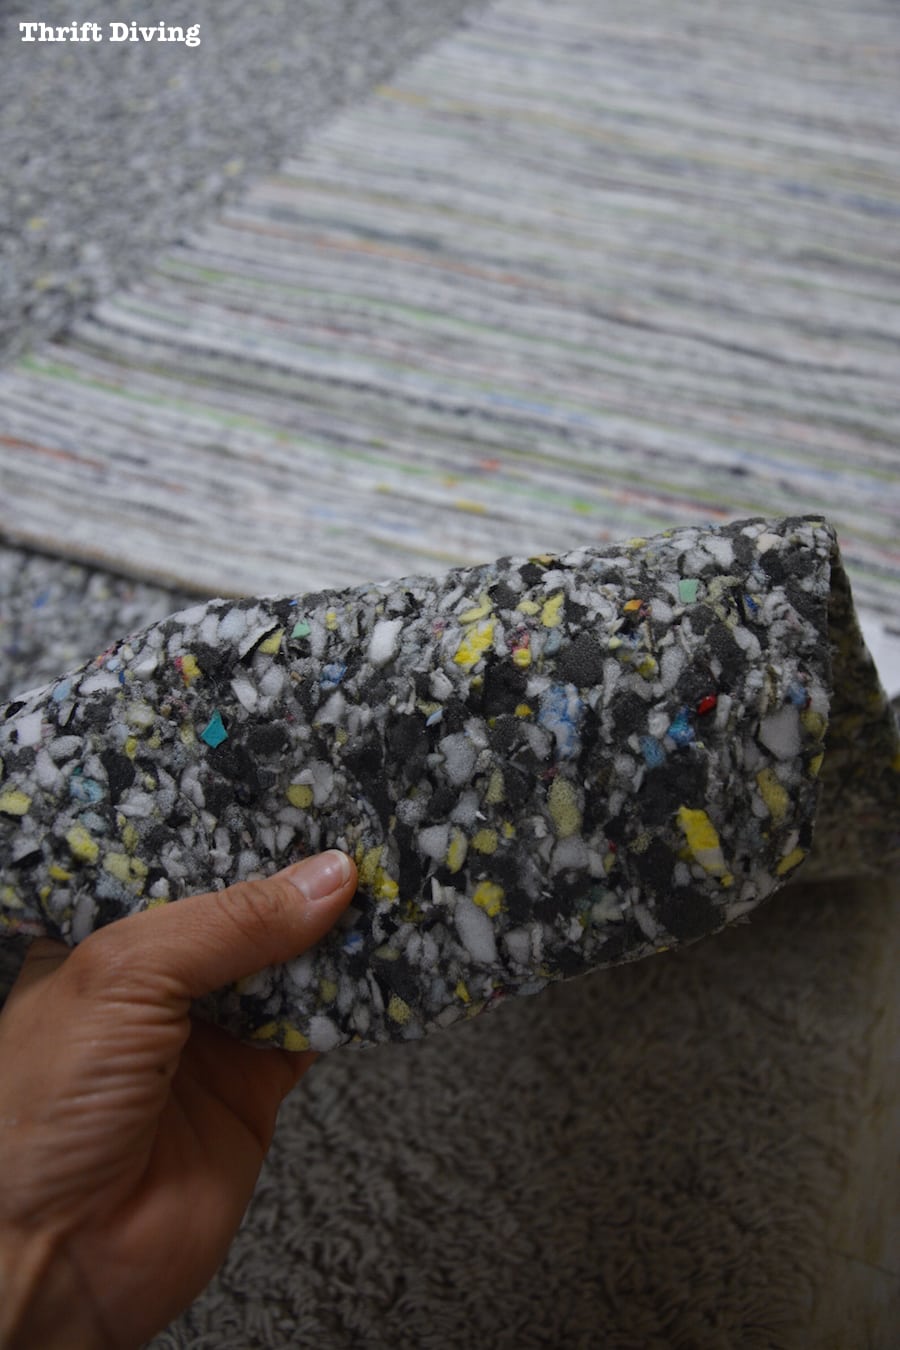
- Carpet pad from Home Depot
The “Oh-N0-Did-I-Make-a-Mistake?!” Fear
I have another confession: I waited until the last minute to get this project done in time for the monthly challenge because I had spent all my time working on my repurposed kitchen cart project earlier this week.
As a result, I was rushed, rushed, rushed, and decided to just skip any kind of sanding and just wing it with the left-over semi-gloss paint/primer.
I took to my Facebook page and asked for prayers. LOL
I was so nervous I would come back a few hours later with paint peeling everywhere.
Thankfully, it didn’t happen (although that’s no guarantee since I haven’t yet unleashed my 3 little boys onto the stairs yet….).
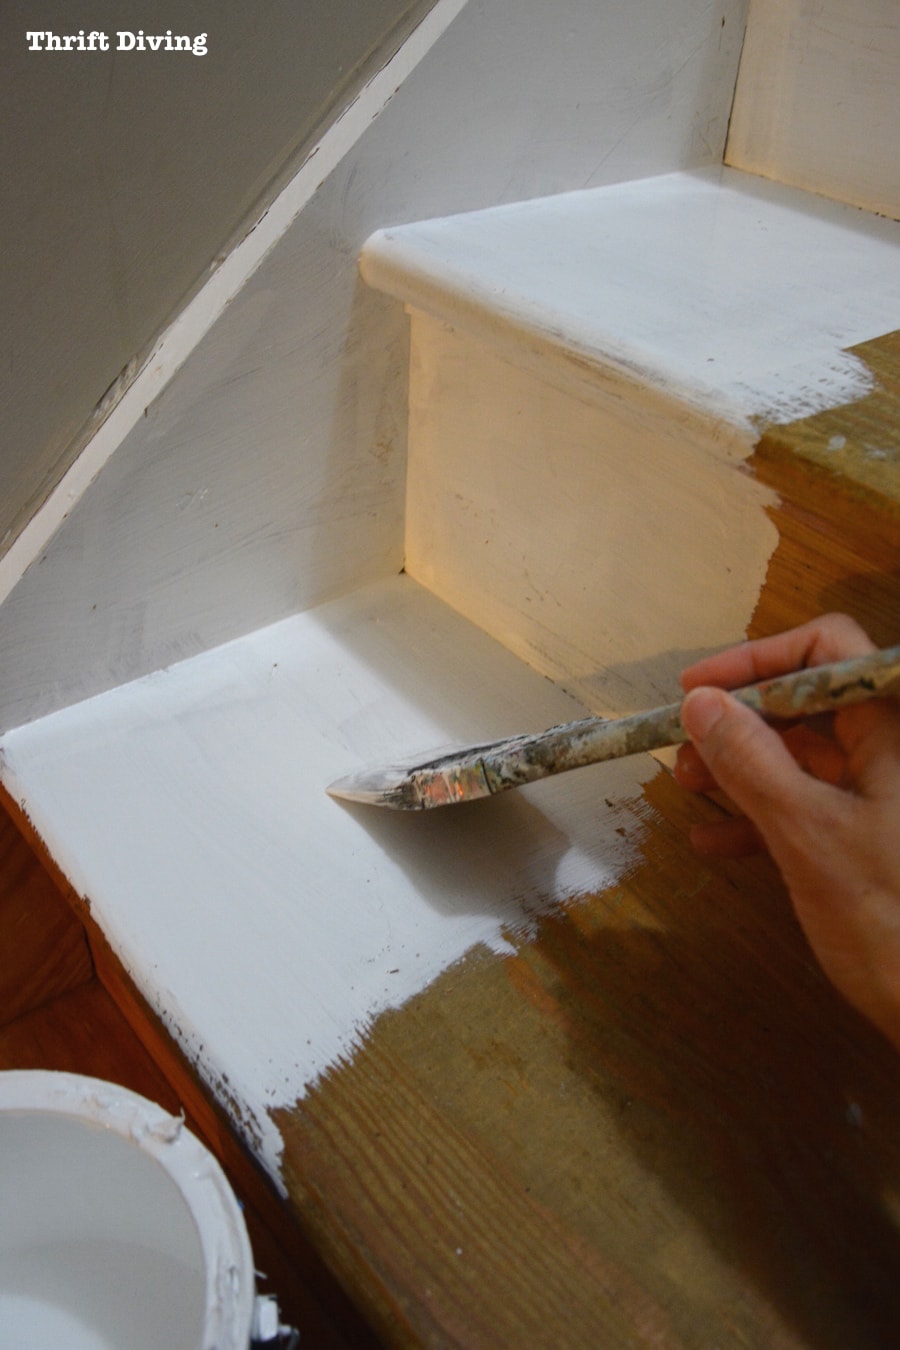
I slathered on two coats and skipped the middle section just to save time and paint.
Who’s going to see it, anyhow, right?? (notice the dirty walls, though?? UGH).
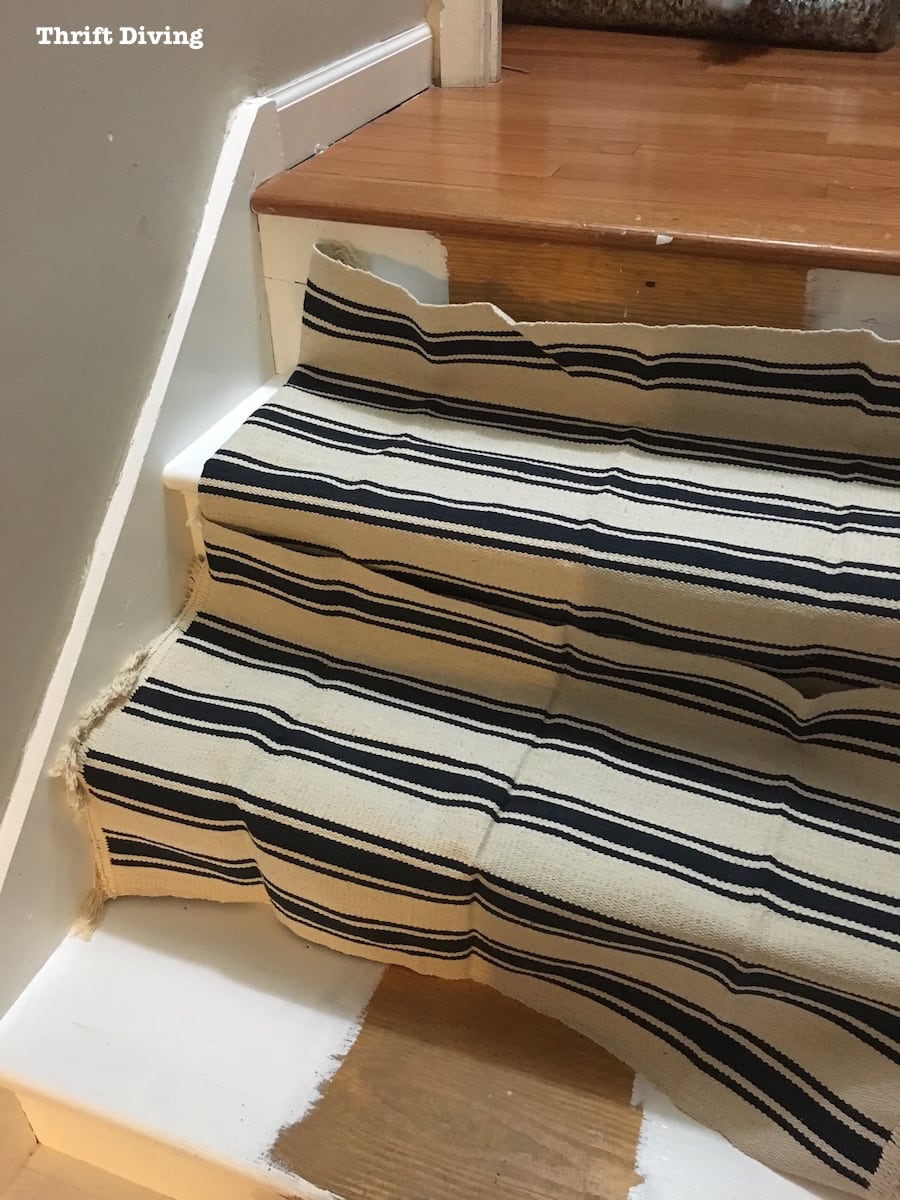
The IKEA Rug Debacle
So…..about a year ago (yes…that long ago!), I bought these little IKEA rugs for a few bucks each, thinking I’d use these for my DIY painted stairs makeover.
I loved the stripes, and the blue was awesome.
Only……after I laid them down on the stairs, it was like a landing strip: NARROW!
That wasn’t going to work.
I needed a Plan B.
I tried to get creative and turn them sideways, but no, no….that looked funny, I think.
It’s like trying to wear a horizontal striped shirt: it just doesn’t do anything for your shape.
Well, these rugs weren’t doing anything for my stairs, either. LOL
Not in that direction.
I definitely needed a Plan C.
Figuring Out Plan C
Plan C involved hopping into my van and heading to IKEA 30 minutes before they closed, hoping to get more of those blue striped rugs, so I could “make it work” as Tim Gunn would have told me.
You know…maybe stack them in such a way to make them wider.
I don’t know…
But when I got to IKEA–surprise!!–they no longer have my rug in stock. When have you ever heard of IKEA no longer carrying an item??
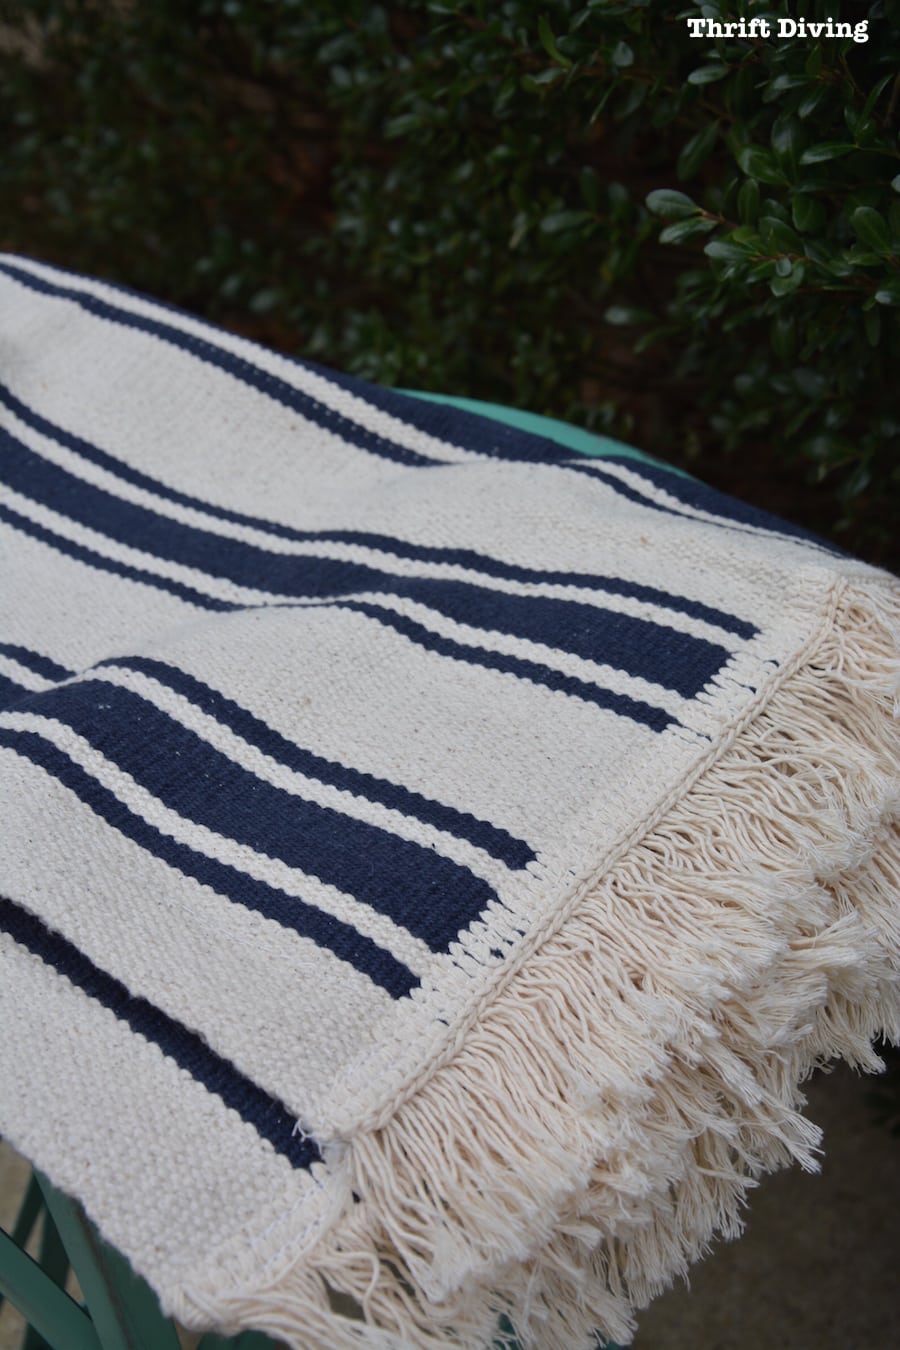
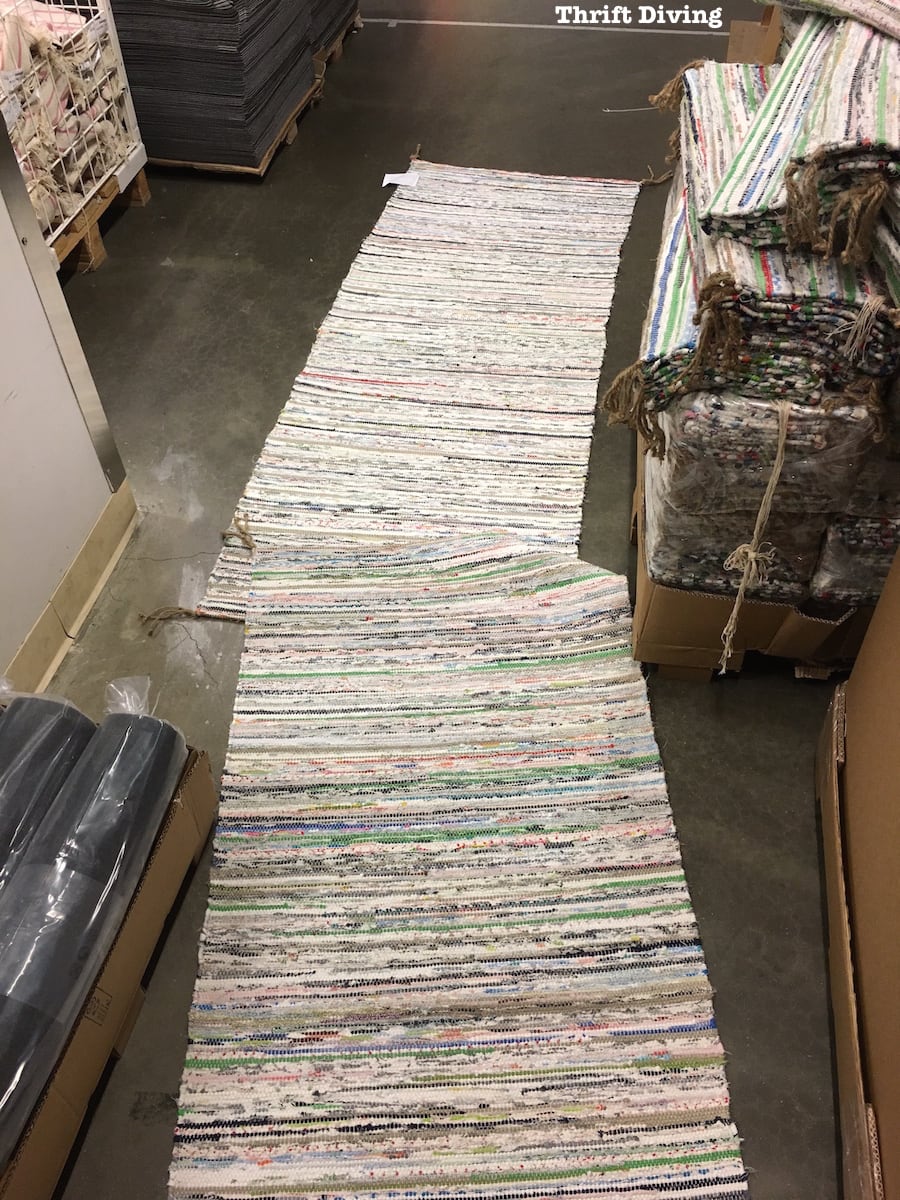
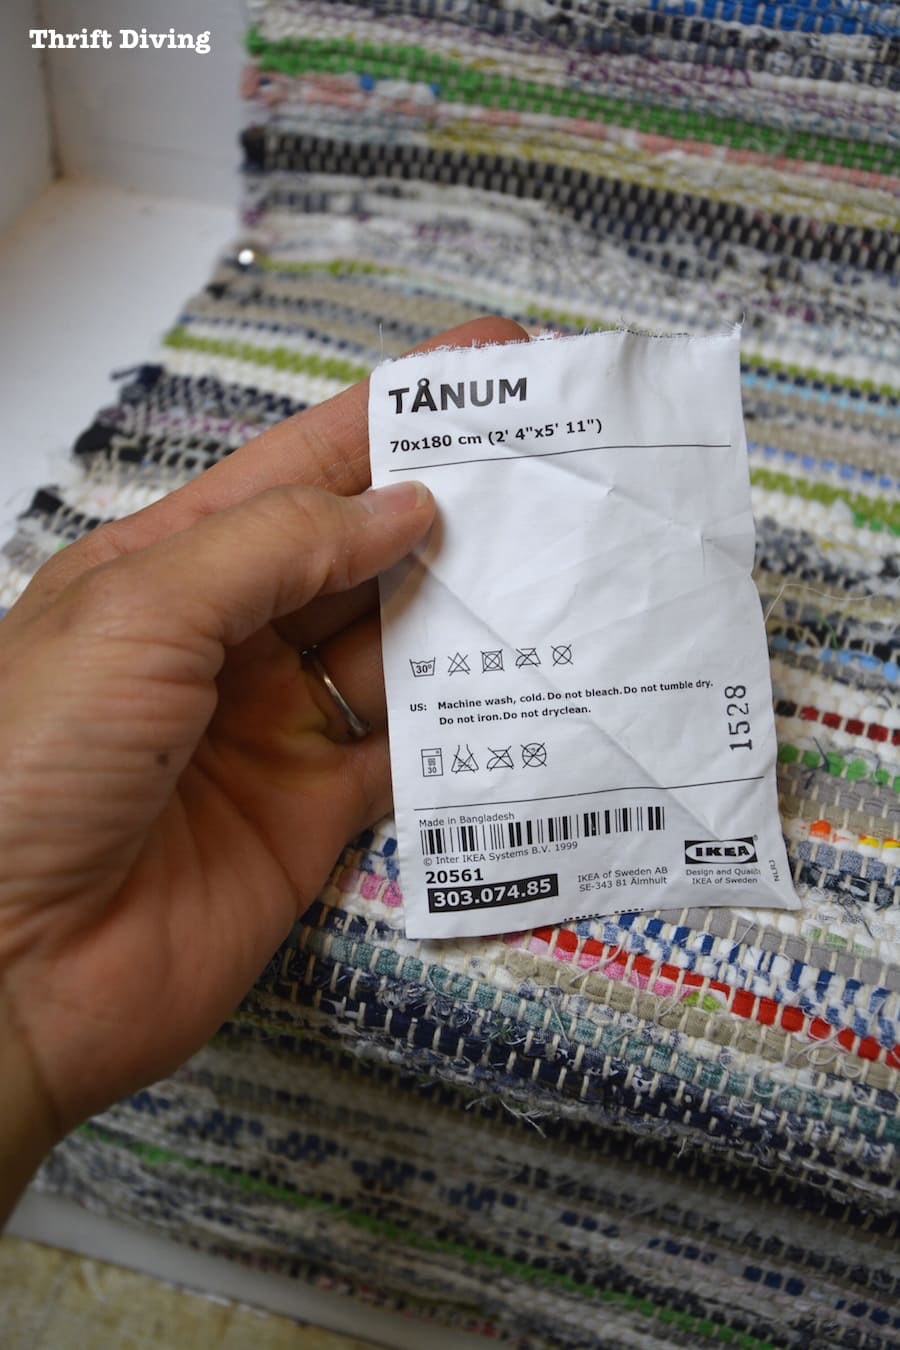
Then I saw these: TANUM rugs for $14.99.
They were not my style, but I was impressed that they were handwoven.
Totally uninspiring in style, though, but affordable and just the perfect size. Sometimes, money rules, not likes and dislikes. LOL
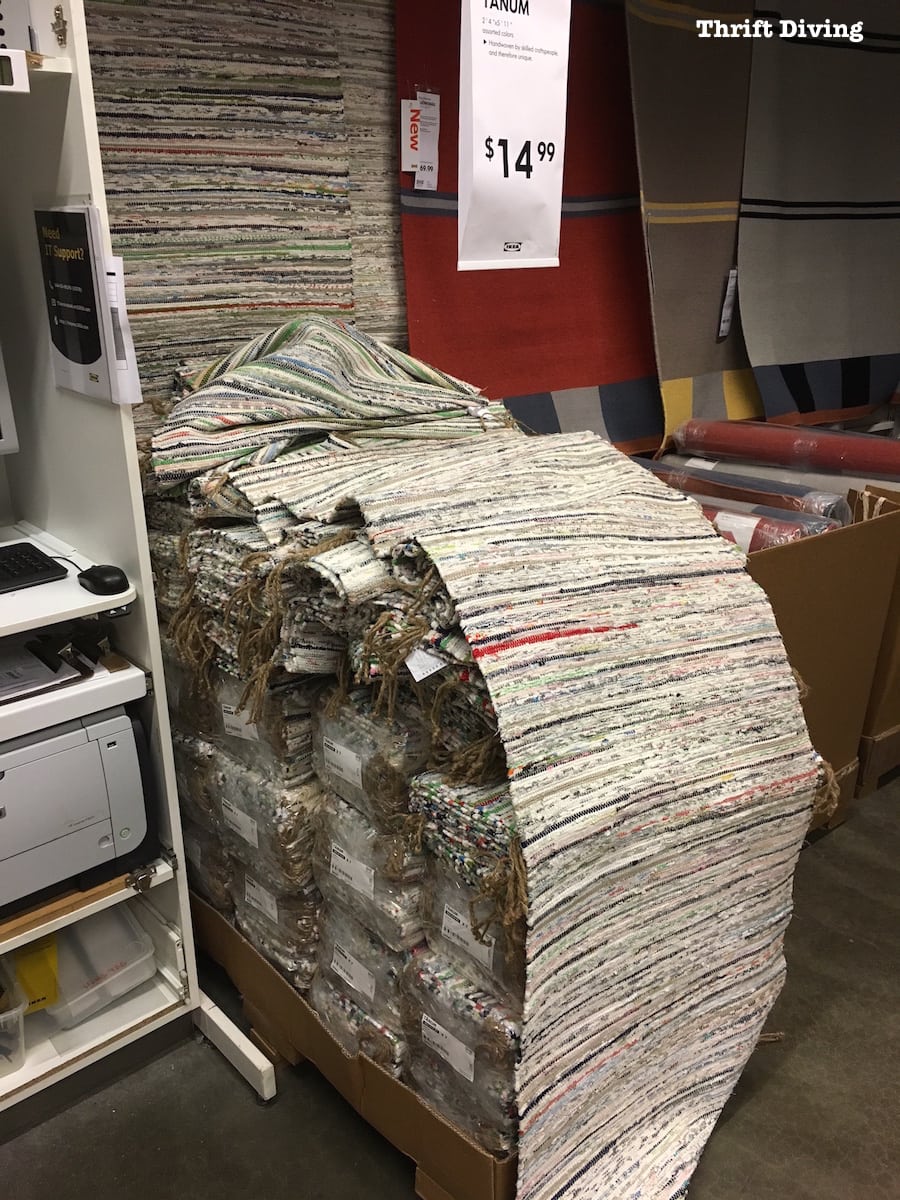
So for $47, I could get three of them and that would be a sweet deal!
I decided to be adventurous and said, “Meh, let’s try them.”
The optimist in me decided that there were sooooo many colors in the TANUM rug that I could match with colorful picture frames on the wall above the stairs. So yes, this was a good choice. I hoped. LOL
I just had to see the potential. LOL
I pulled out my RYOBI AirStrike 16-gauge nailer, which I planned to use to nail the rug in place under the tread.
But first, I had to add the rug pad.
I laid that down first and used carpet tacks to help it stay in place along the edges. I just used a hammer for this part.
I wasn’t sure if I was doing it right or not. I have never laid any kind of carpet, so I was pulling stuff out of my you-know-where to make this work. LOL
My main concern was to make sure no sharp tacks or nails were left poking out so we don’t cut our toes!
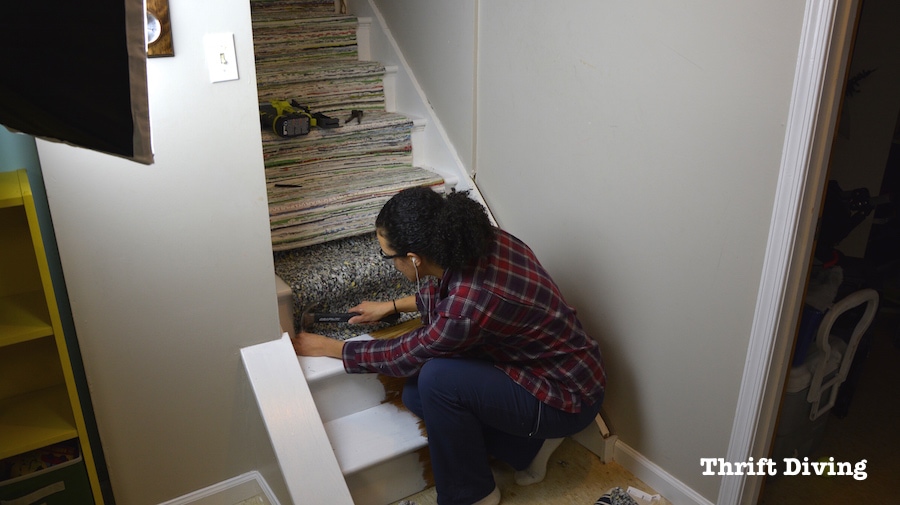
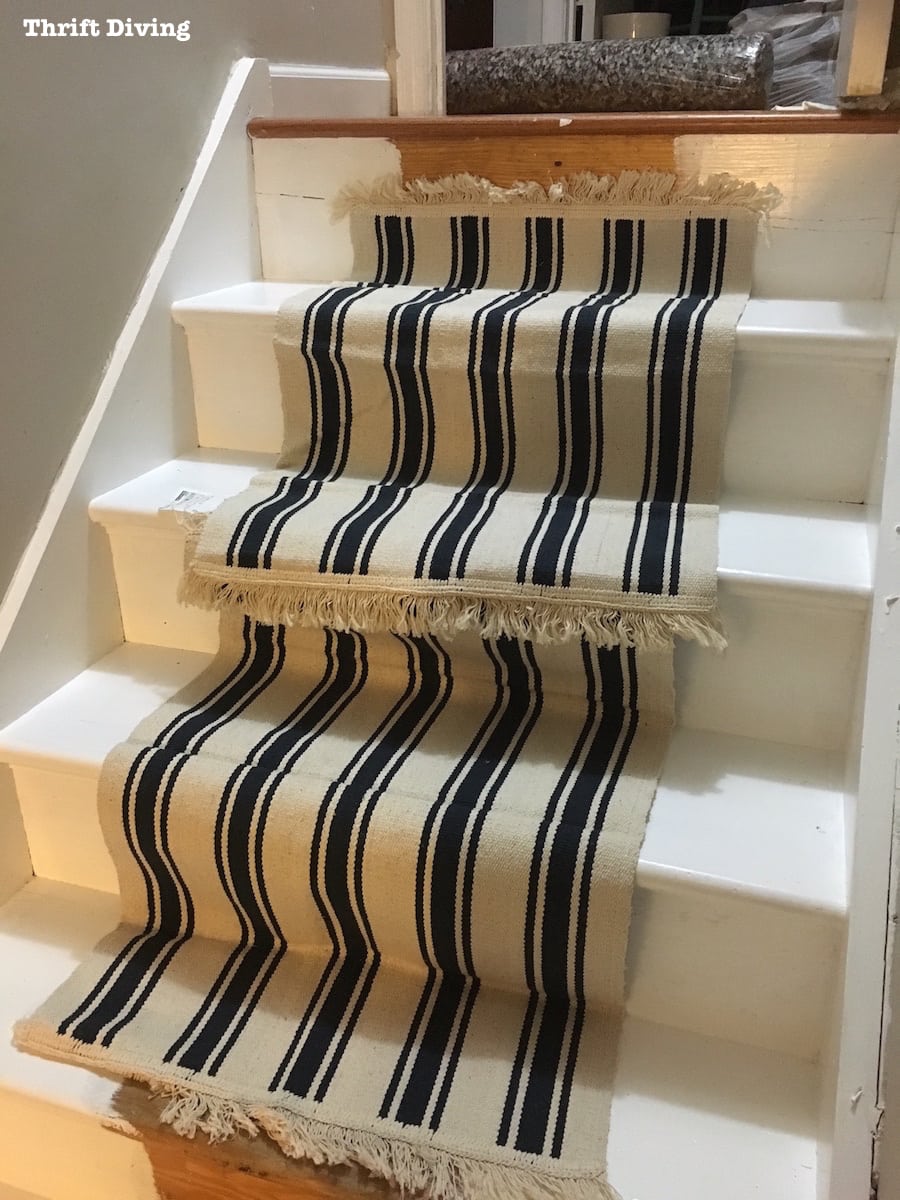
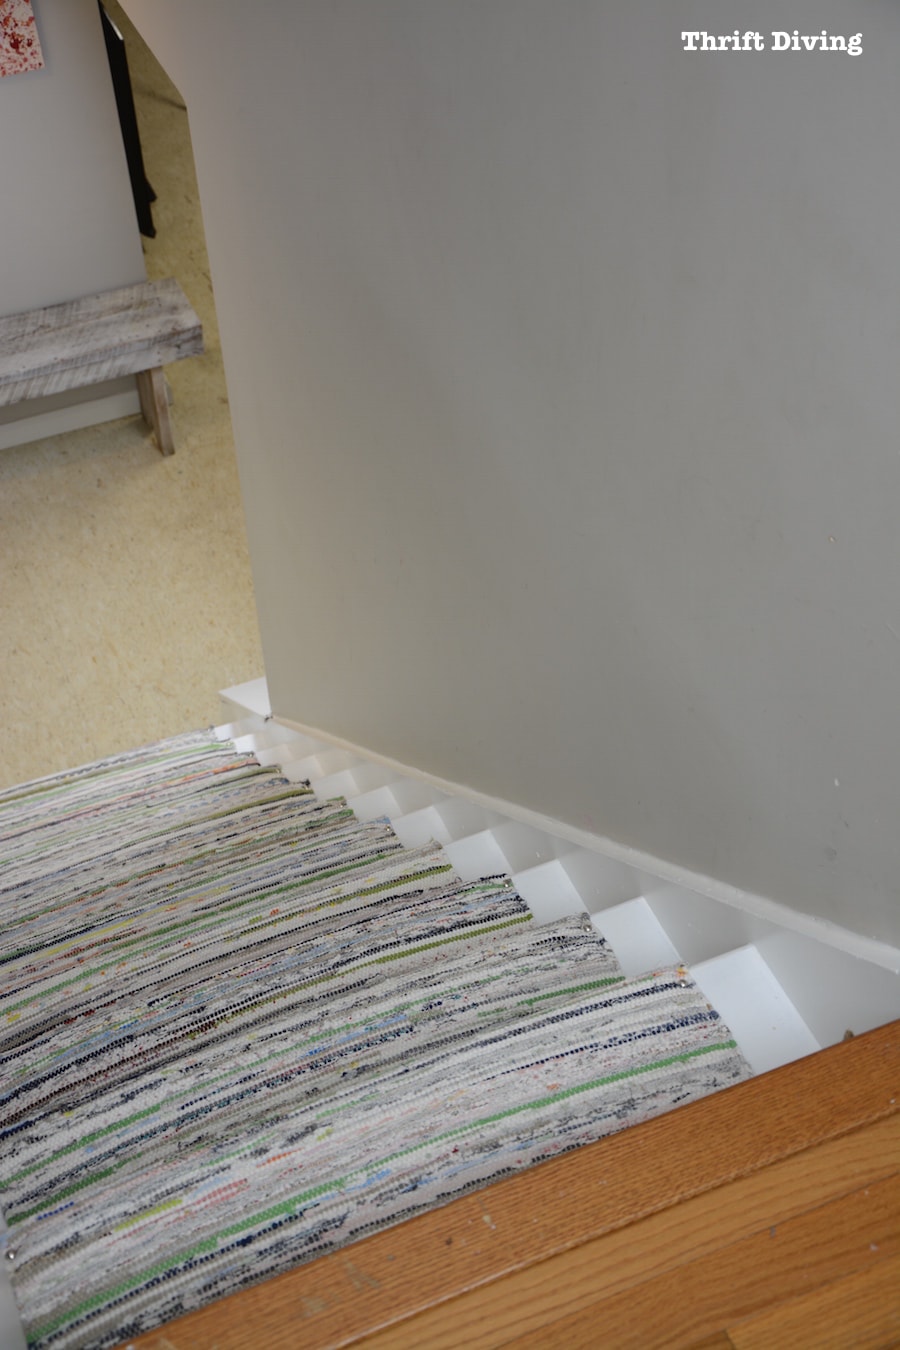
Then I laid the rug down over the carpet pad and used my nailer and drove nails along the underside of the treads.
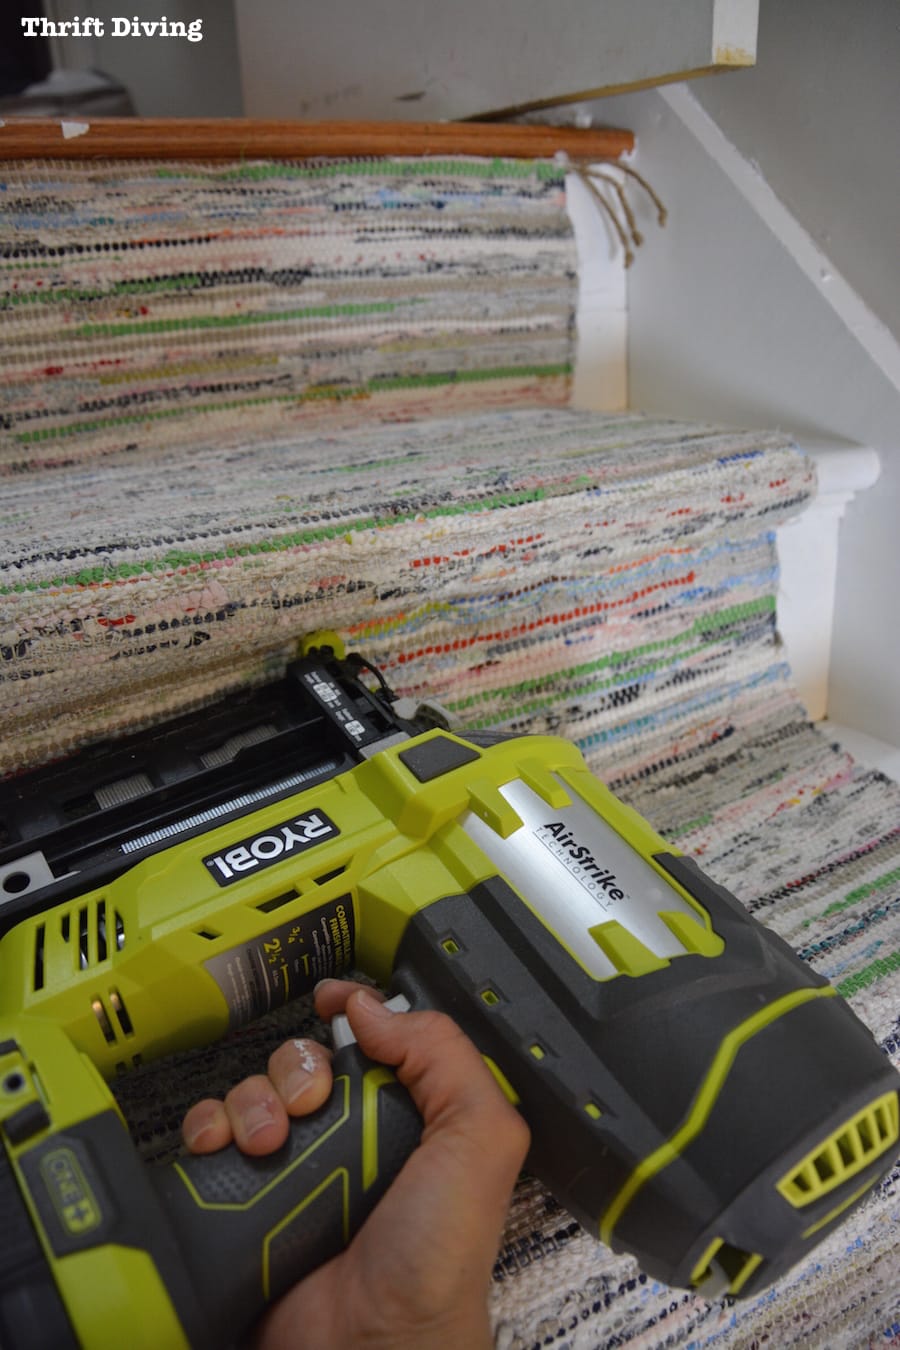
I really wasn’t sure it would work since it’s a woven rug. But thankfully, it worked!
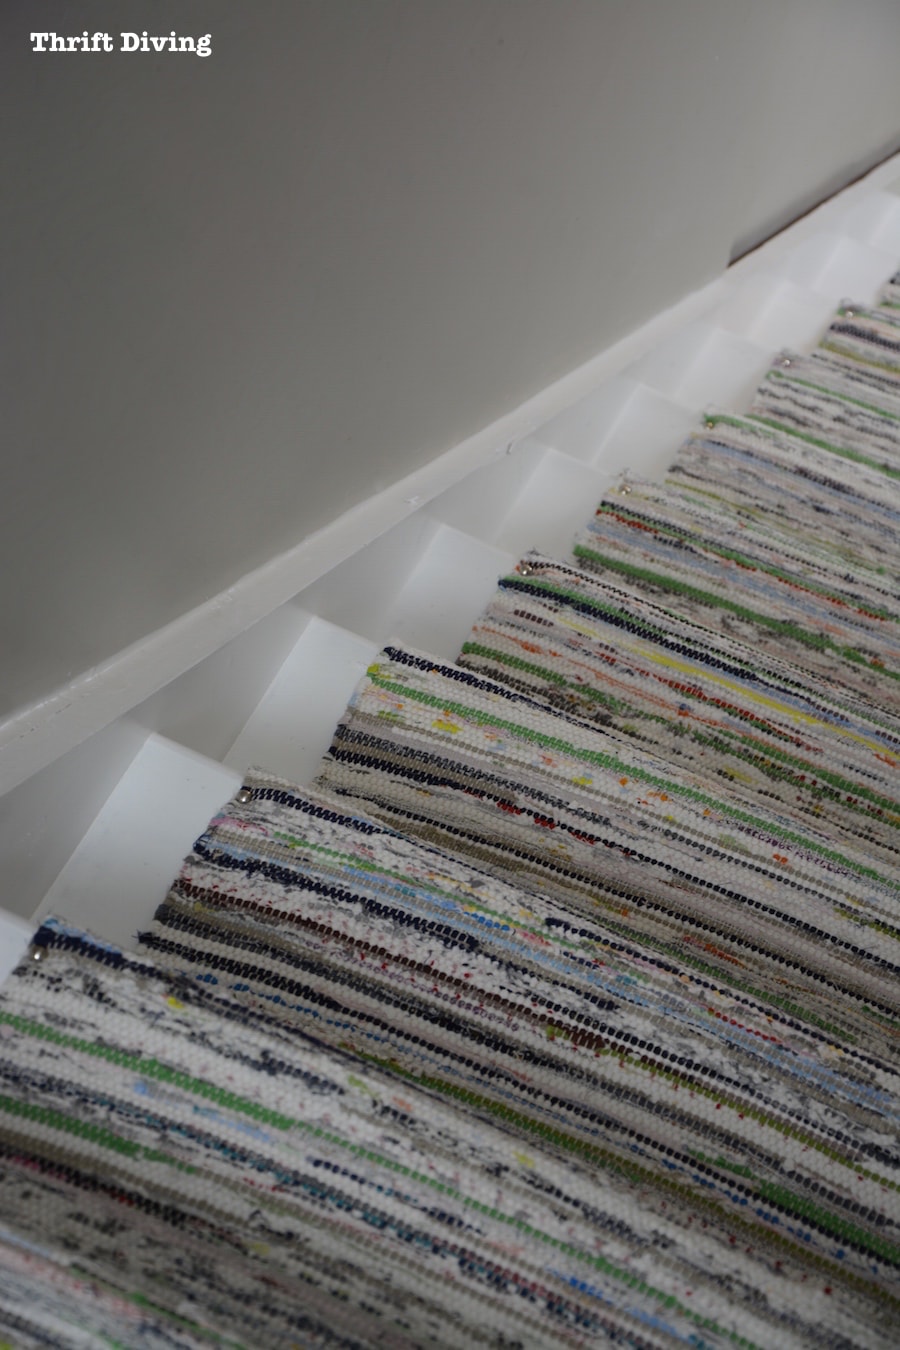
It wasn’t perfect because they are woven rugs. I was hoping since 16-gauge nails are thicker they’d hold up well. We’ll see how it does over time.
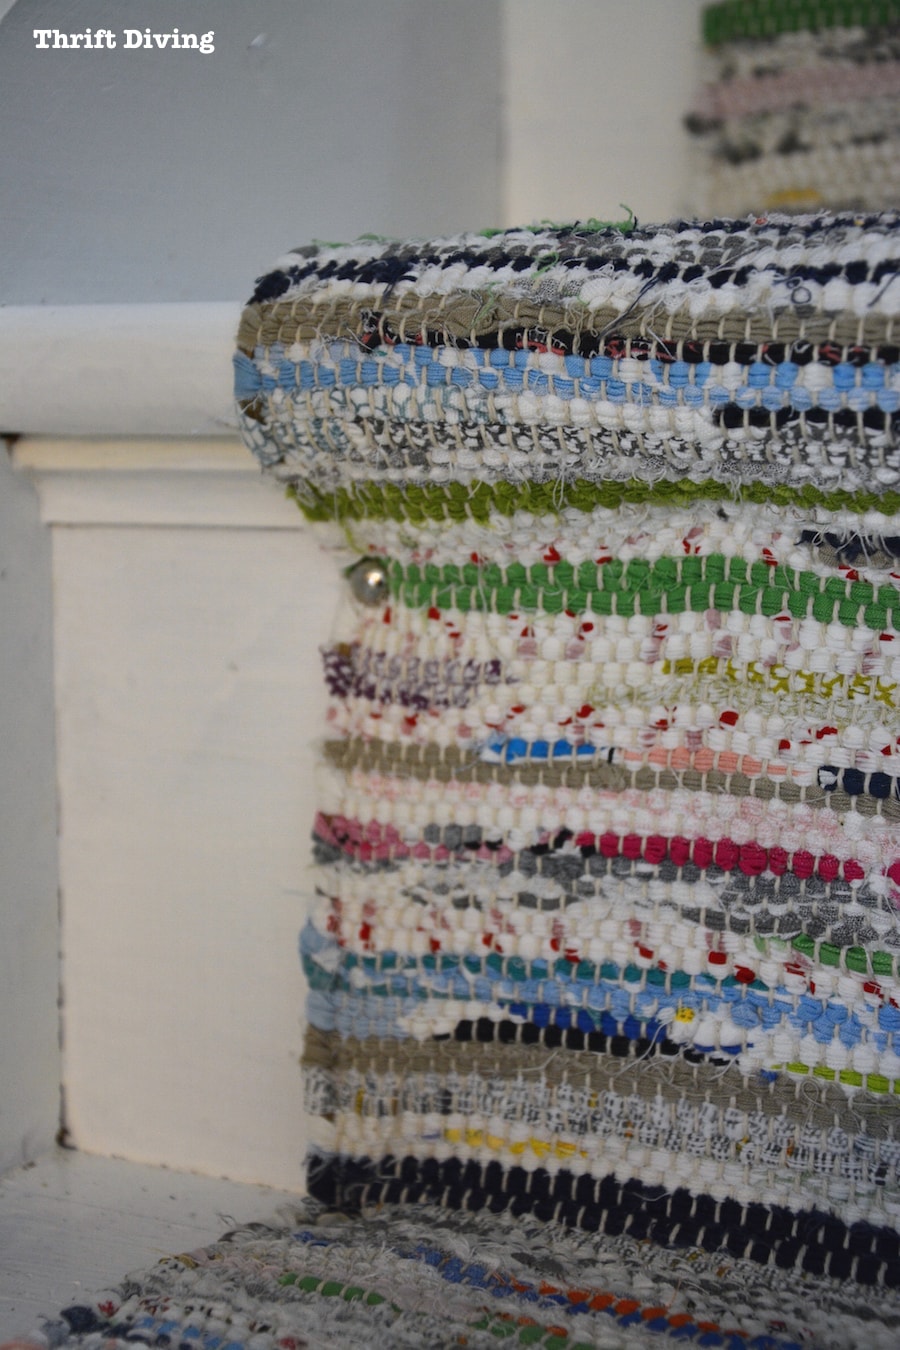
The upholstery tacks were perfect for keeping the rug in place, too.
I placed most of them along the tread, but a few of them I added to the risers.
I added probably about 10 or more nails along the tread underneath with my nailer, too.
And since I used 3 rugs, when one rug would “run out,” I would start the other rug right underneath of the tread where the riser started.

Since it’s a lot of patterns and colors, it’s not even noticeable. Score!
BEFORE
AFTER!
Oops! Looks like I may have missed a tack. 😉
My DIY artwork still makes me smile when I see it every day going into the basement. It’s true. An artist does live here. 🙂
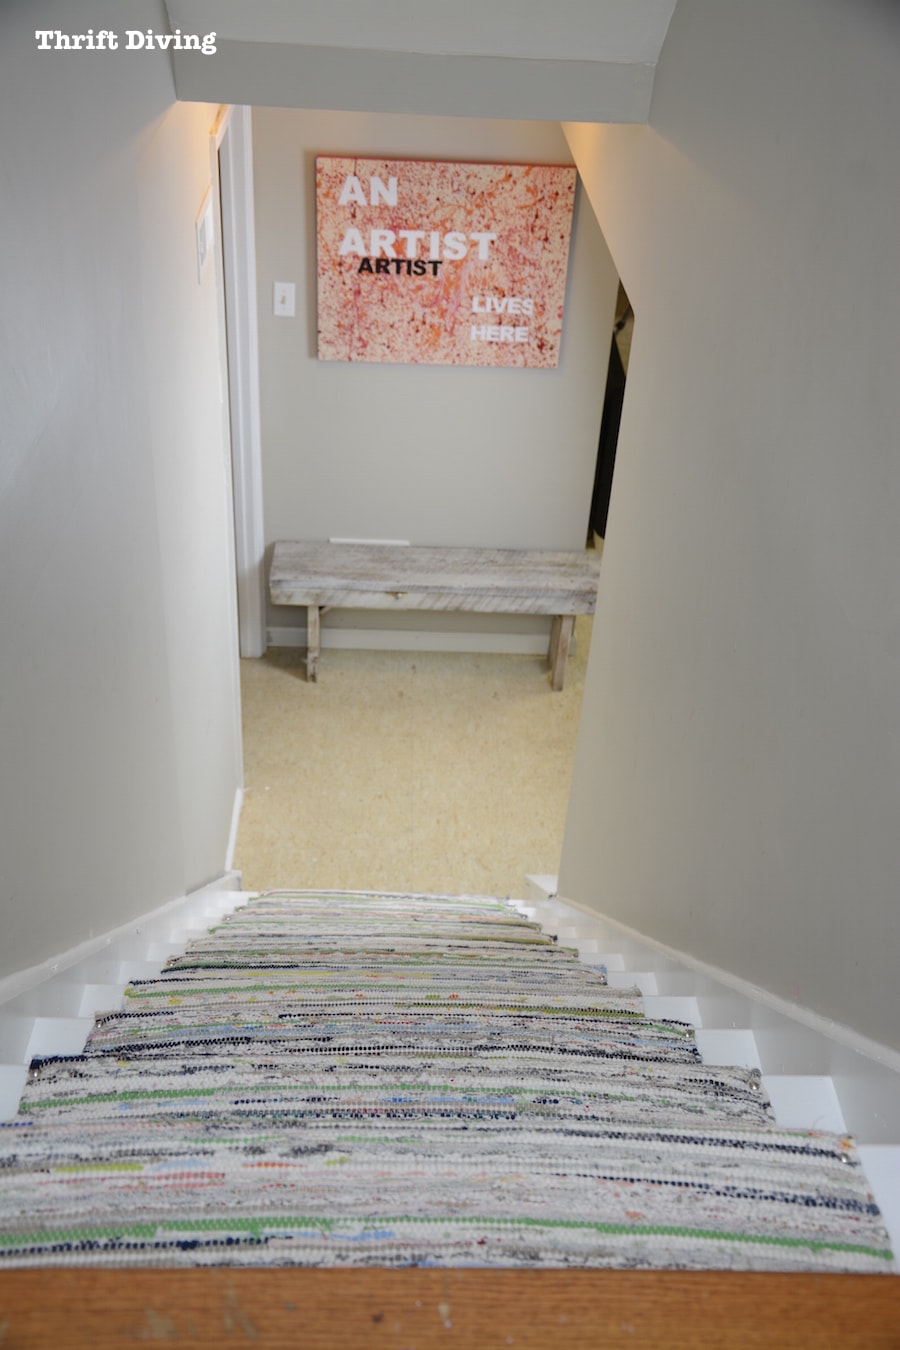
And although this wasn’t my first choice of IKEA rugs for this project, I’m super glad it was affordable and still makes my basement stairs look like an improvement!
BEFORE
Cost Breakdown
IKEA Rugs – $47
Paint – Already had
Rug pad – $27
Upholstery tacks – Already had
Carpet Tacks – $3
Caulk for the cracks – Already had
Nails for RYOBI nailer – Already had
TOTAL COST: About $77
Not too shabby, right?!
So what do you think!? 🙂
I actually really do like it!
We still need to get a rail….and to repaint the walls to freshen them up a bit. But overall, I love the way the basement is coming together!
Have you guys ever done a stair makeover? What did you use, and how much did it cost?
Let’s chat about it in the comments section!
And before you go, be sure to check out the other cool projects from my blogger friends!


DIY Shutters Create And Babble
DIY Fireplace Mantel Shelf Her Tool Belt
Industrial Paper Towel Holder by Virginia Sweet Pea
Blanket Ladder by Refresh Restyle
Cedar Hose Planter by Kim Six Fix
DIY Vanity Sliding Drawer by Interior Frugalista
How To Patch A Hole In Drywall by Designs By Studio C
Wall Mount Staghorn Fern by A Piece Of Rainbow
DIY Painted Stairs Makeover by Thrift Diving
DIY Modern Rustic Mirror by H2OBungalow

Download the 5 freebies!

Thrift Diving inspires women to decorate, improve, and maintain their home themselves...using paint, power tools, and thrift stores! Use these 5 printables, checklists, and ebooks to get started!
Ha ha I love your full disclosure AND that although you only had a few minutes before IKEA closed, you still took the time to take a photo…good blogger! I think it looks amazing and this pattern will probably be better at hiding what three little boys can do to it. Great job! XO
Christy, HAHA “good blogger.” YES! Everything is a bloggable moment. I think I may just have to make my next t-shirt with that saying: Everything is a bloggable moment.” Thanks for the inspiration!
Serena,
I painted stairs for my daughter once, it was so time consuming. They were dark brown and white. I felt like I kept getting the white on the brown, and the brown on the white.
Your basement stair runner is beautiful. Thanks for all of the great tips!
gail
Hey there, Gail! Yes, stairs are hard to paint! Did you do any sanding and prep before painting them? That’s part of the reason I wanted wider rugs, so that the kids weren’t stepping on the white painted part, which I did NOT sand OR prime. I didn’t do any chalk paint powder in it, either. Just a good ‘ole wipe down and “have at it” with semi-gloss that had primer in it. Hoping it holds up over time!
That looks really, really good!!! A lot of work, but you knocked it out of the park. Would love to hear how those rugs hold up – I have a couple rag rugs stashed in my basement. Anyway – contrats on another great project – it’s got to make you feel good to see it and use it. Keep ’em coming!
Girl, I can’t believe you pulled this one off – you amaze me! It was just on Saturday that I was watching your live video on Facebook while working on your cart and you fit this in the mix since then too. You do deserve an award! The stairs look great and I can totally see you pulling colors from the rug to DIY some fabulous artwork going down those stairs.
Really beautiful job! I love the rugs and all of the color in them – it seems to pop against the white! 🙂
Your stairs look amazing Serena… and great step by step instructions! And I have to ask – how do you keep your nails looking so darn good with all the projects you do…lol! I want your secret! 😉
That came out so great. And I bet it is so much quieter with the kids going up and down the stairs. (I’m also glad I’m not the only one with kid-schmootz on the stairwell walls!)
Serena, it looks great! And it probably feels nice when you walk on it too. I have a ton of those rugs. My grandparents used to weave them from scraps of old clothing so they do come in a variety of colors and fabrics. I think you did a a great job and it looks nice and fresh!
I LOVE it!! I also think the rugs you ended up with will hide dirt and stains much better than your first choice – even though I loved that one, too!!
And I had to laugh how you photoshopped your walls!! If only it were that easy!! 😉
Love how it came out! It makes the area look so clean & bright. What color paint did you paint the walls? I love it!