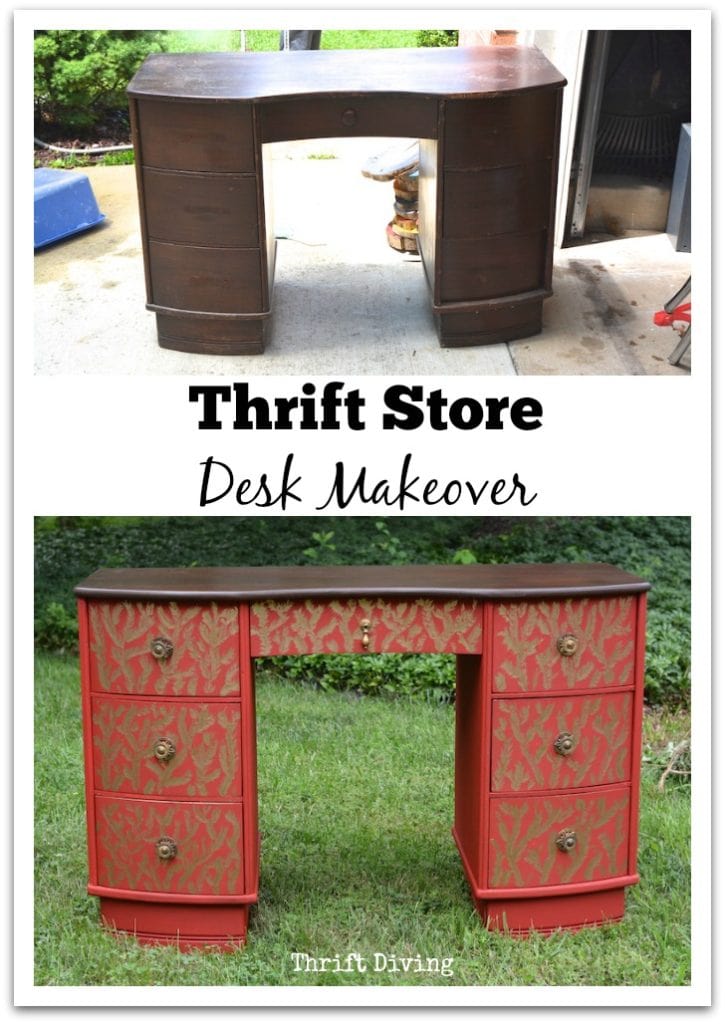
DIY Desk Makeover: A Thrift Store Makeover
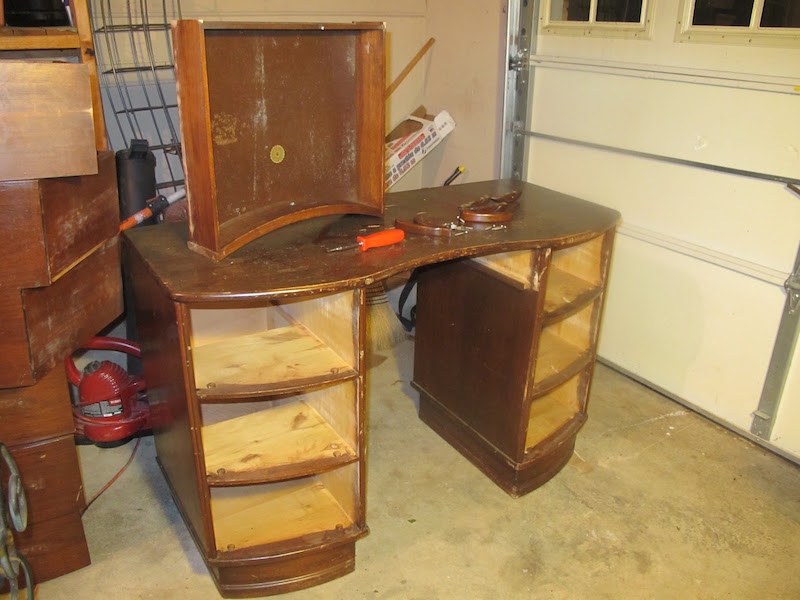
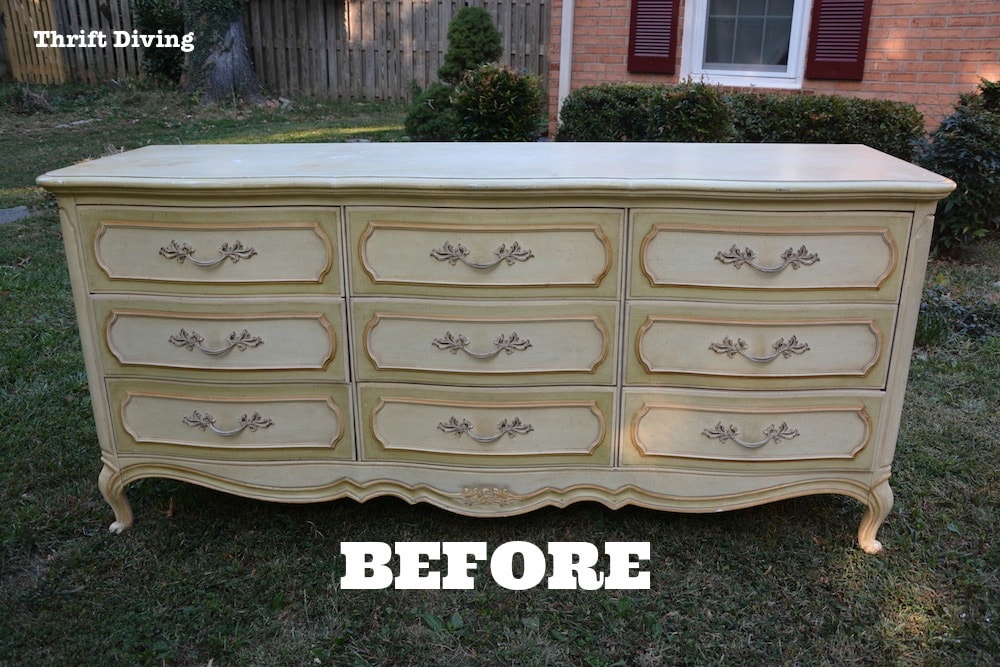
Every piece of thrift store furniture has a story to tell, especially this DIY desk makeover. I picked it up from my favorite thrift store about three years ago (that’s how long it’s been sitting in my garage!!!), and you won’t believe that it was just a mere $11.00. But when you see the BEFORE pics, you can see why it was so cheap:
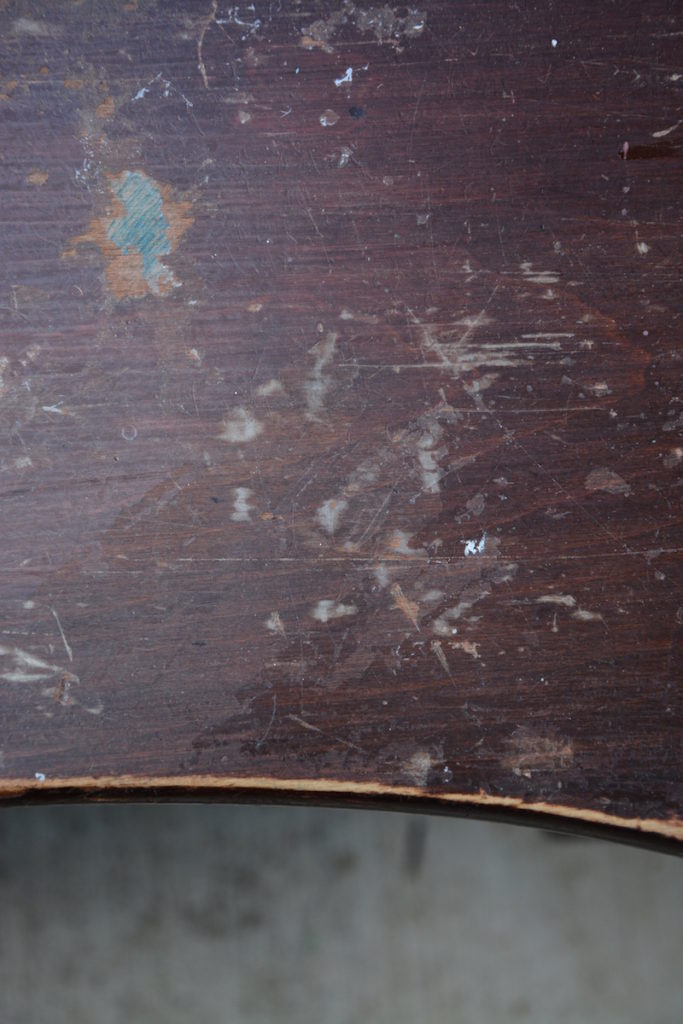
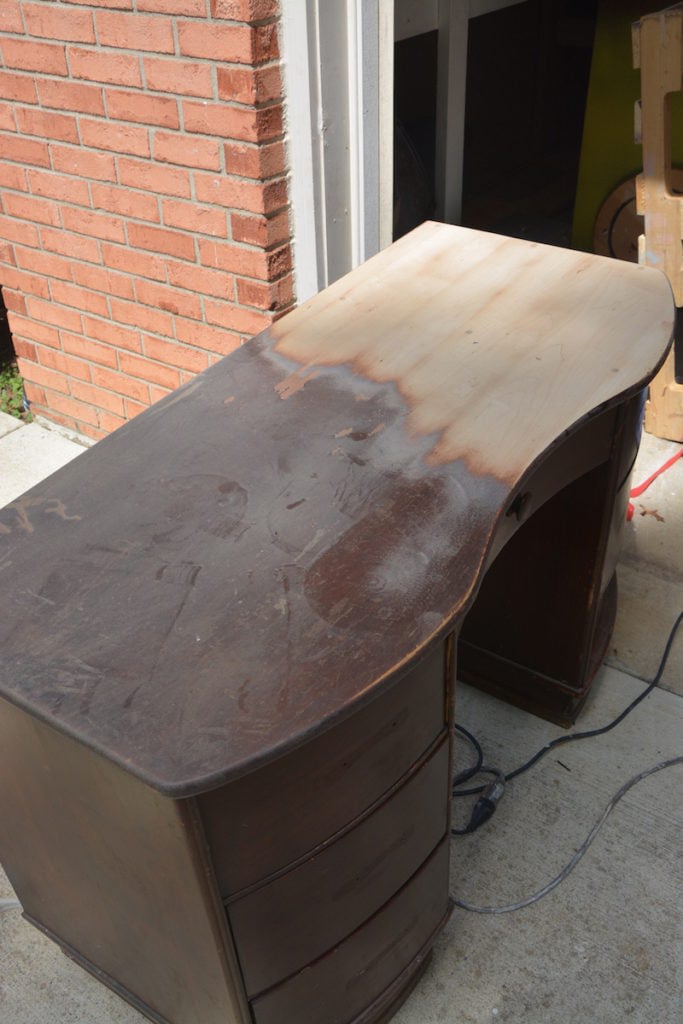
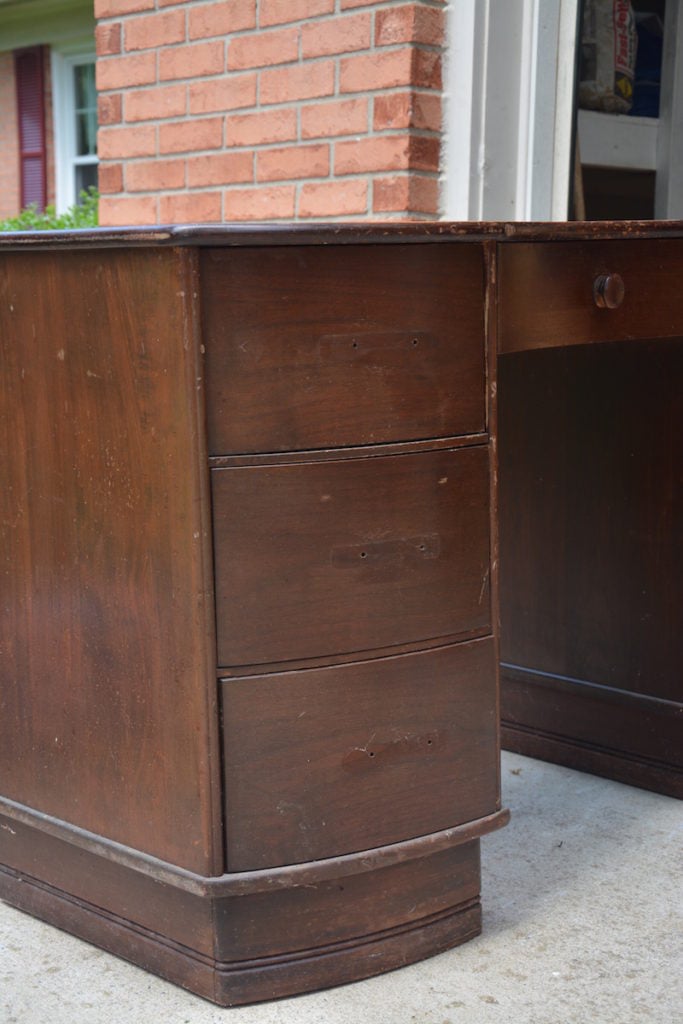
BEFORE

Clearly, nobody or their mama was jumping at the chance to buy it. The top was badly marred, and it wasn’t like it was an antique or anything!
But for $11.00, I couldn’t pass it up. Could you?? I saw its potential even if no one else could! I imagined a pretty vanity or something…

But it sat in my garage, collecting dust–a wonderful safe-house for spiders. LOL.
For this month’s Room Challenge, my readers and I are working on our 6-Week June Room Makeover Challenge where we tackle one space in our homes in just 6 weeks. I bravely elected myself to whip this garage into shape so I can get my workshop together. But I sort of forgot that I can’t possibly get a workshop in here until all this stuff gets made over and finds a new home!
[insert face palm slap here]
I don’t know what I was thinking. This is going to take at least three months to purge and pull together!
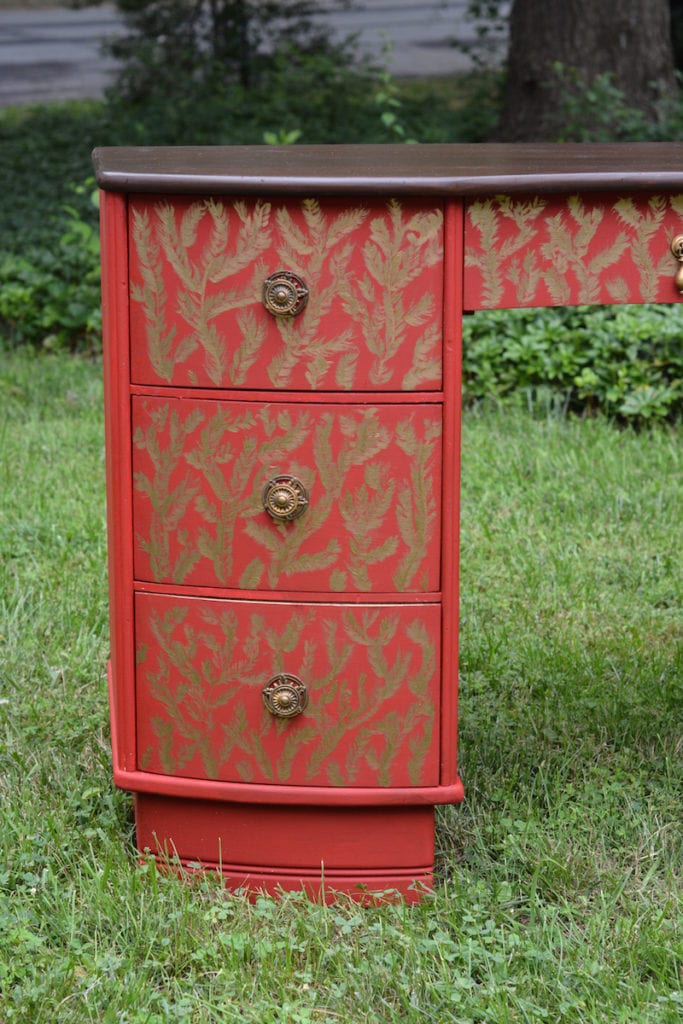
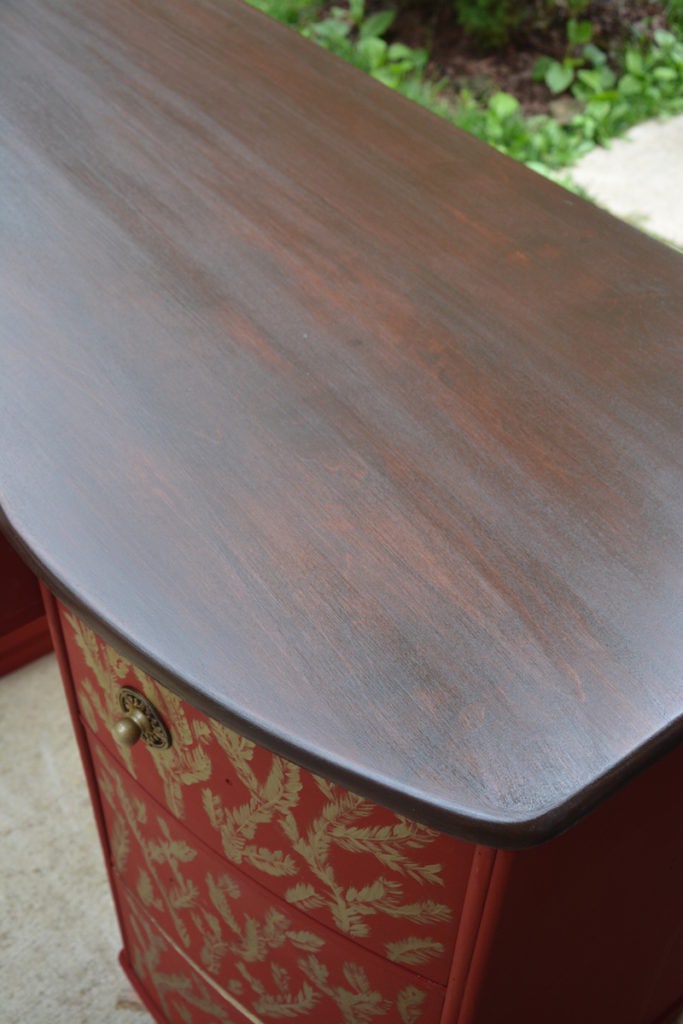
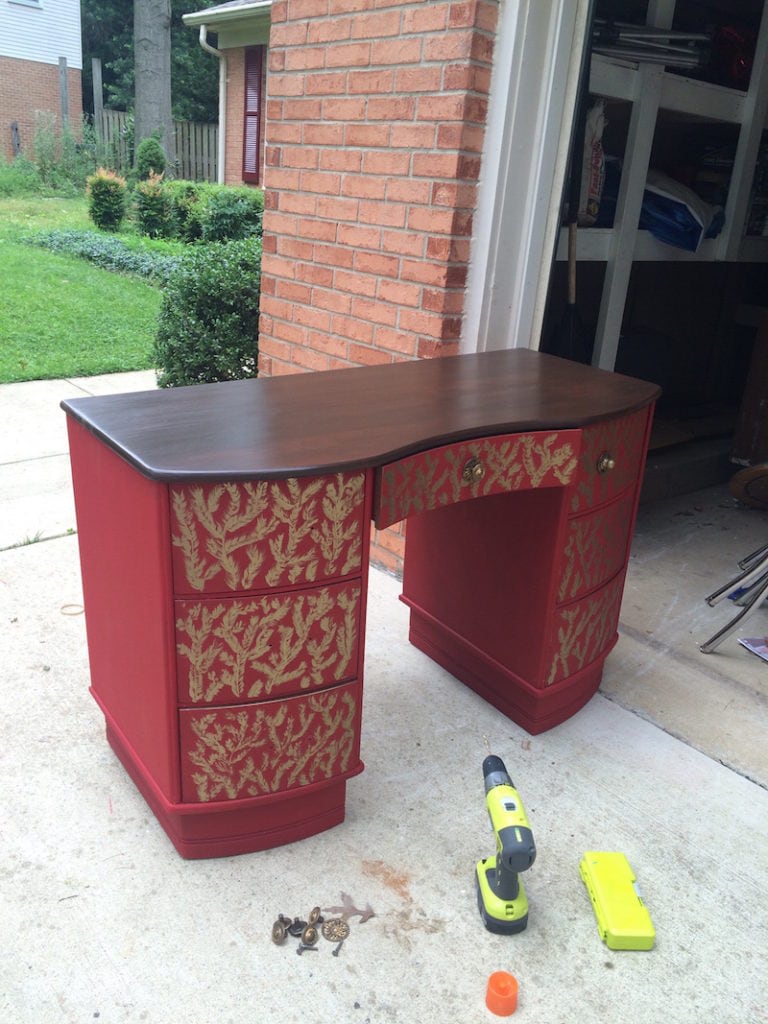
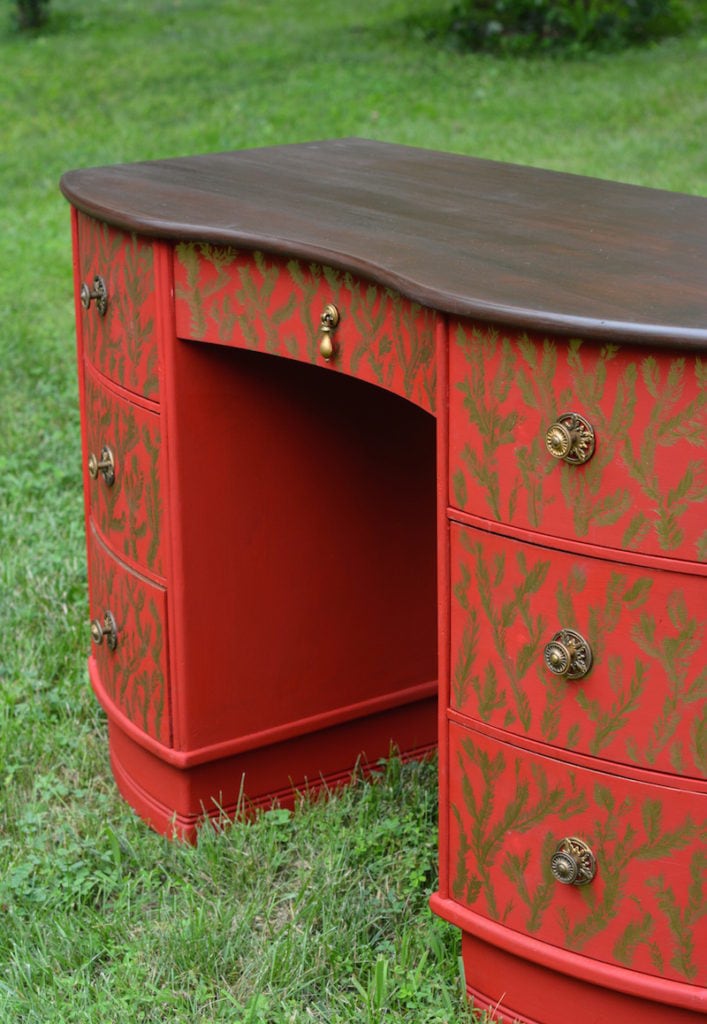
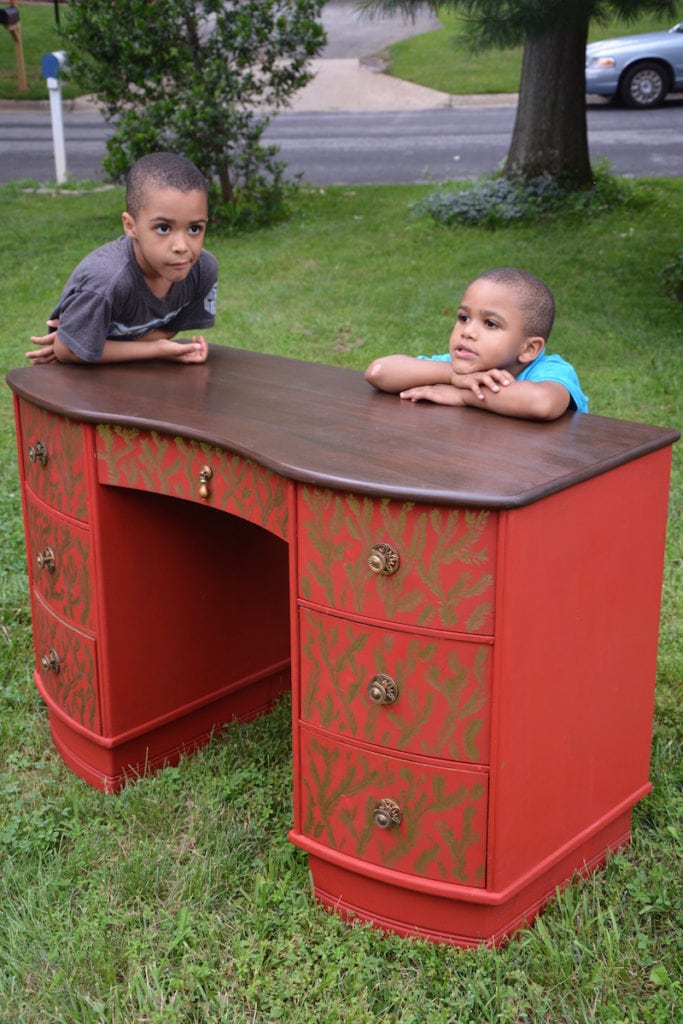
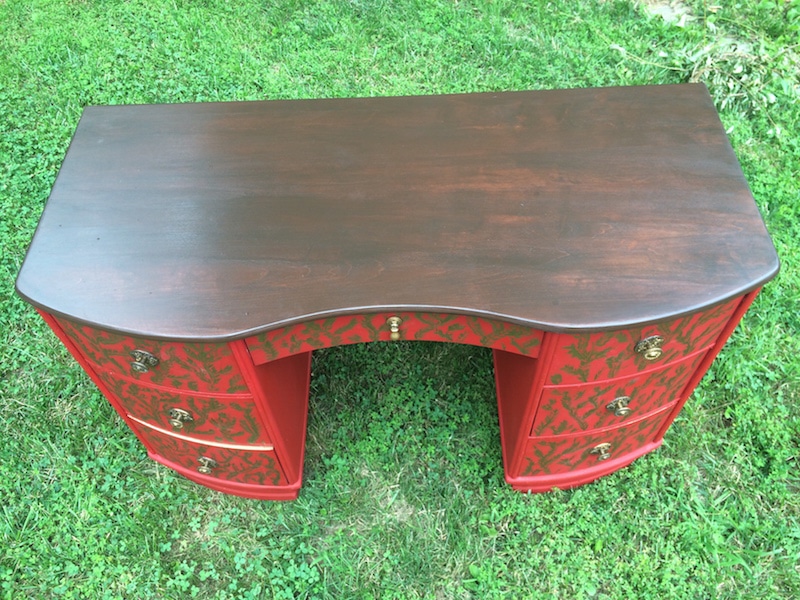
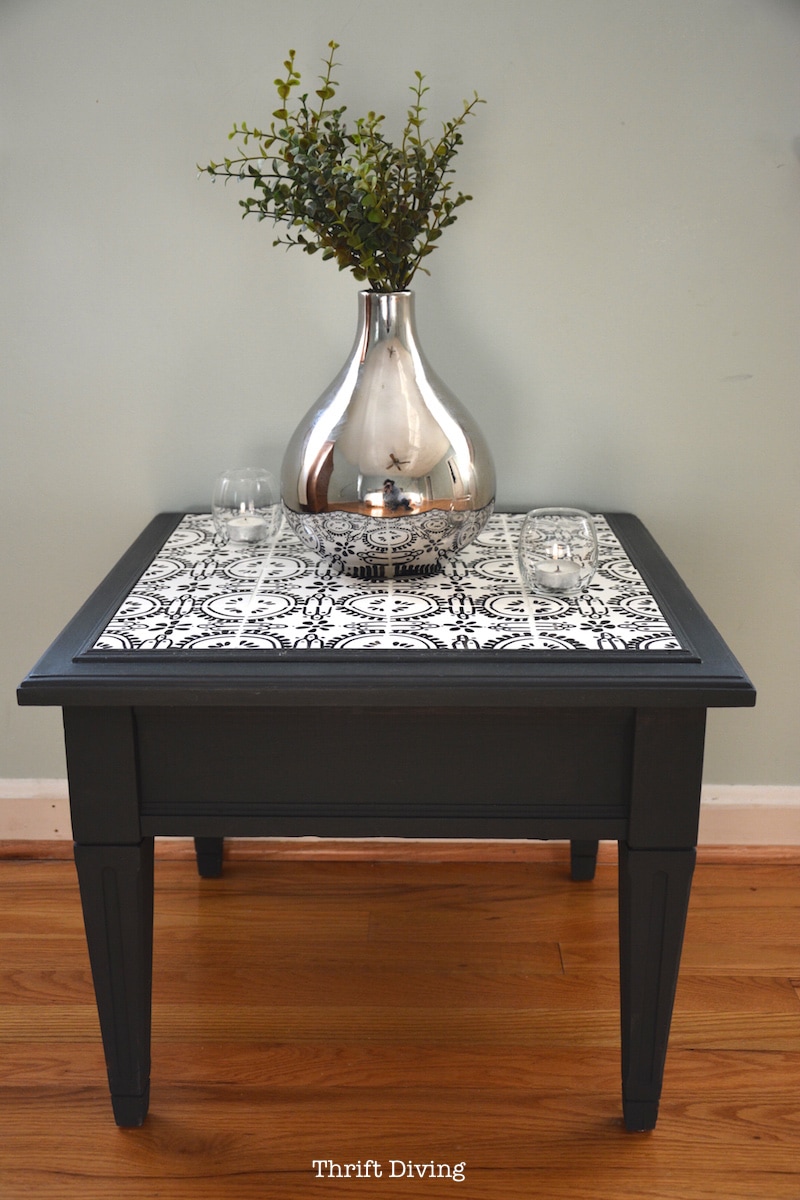
AFTER!
But I’m glad I had the vision that others didn’t, because I’m squealing inside with how much I love this piece! It looks like Chinese Silk!

The Story of This DIY Desk Makeover
My friend had recently bought a sewing machine and I had hold her that I would give her the desk, but if she could pay me to make it over, that would be great.
Well……she must not have had much faith in my DIY desk makeover skillz, because she was like, “Ummmmm, yeaaaahhhhh.” Actually, she didn’t respond at all when she saw it. That was a clue she wasn’t interested.
But can you blame her??
Most people can’t see past the damage and ugliness.
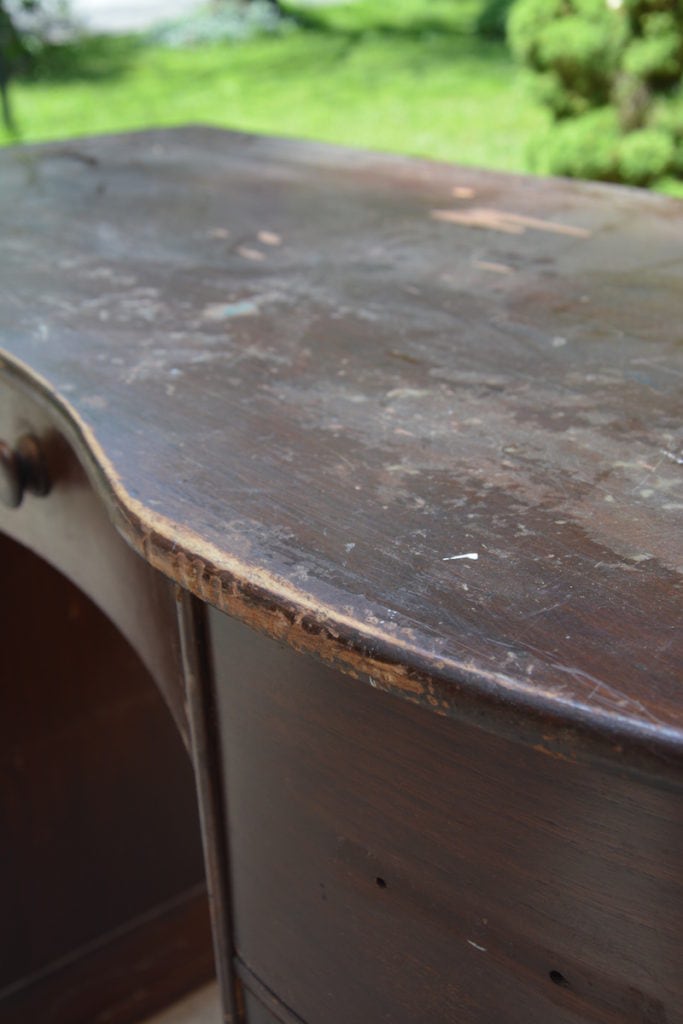
This is what it looked like when I invited her over to have a look (gouges and everything):
BEFORE
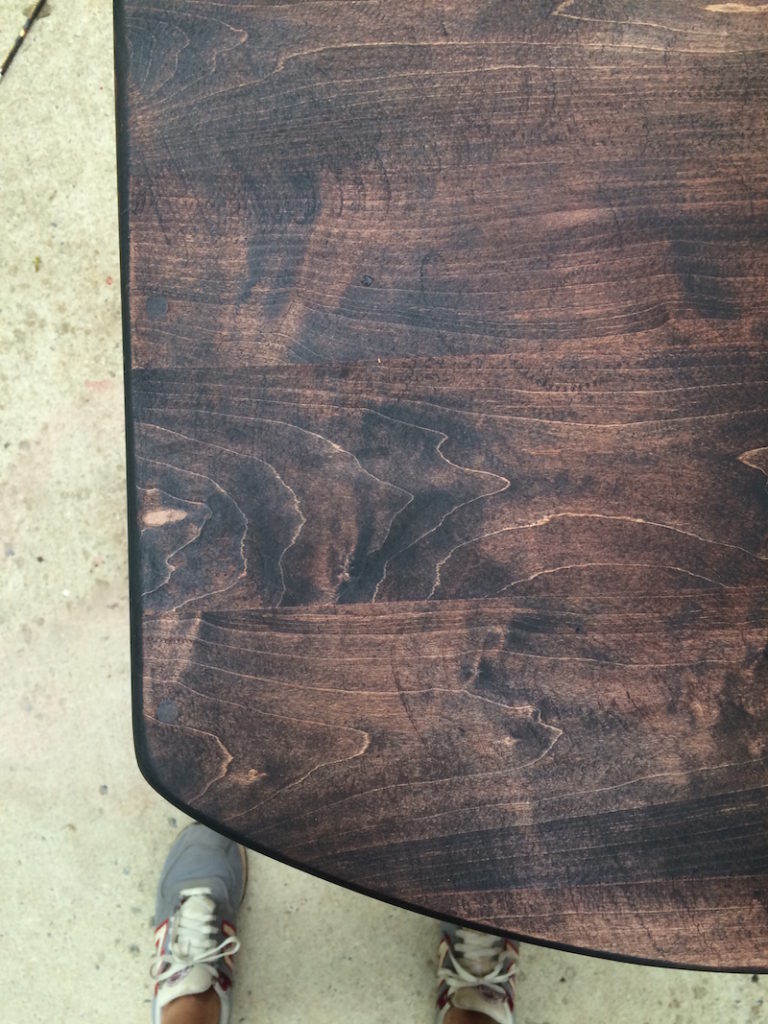
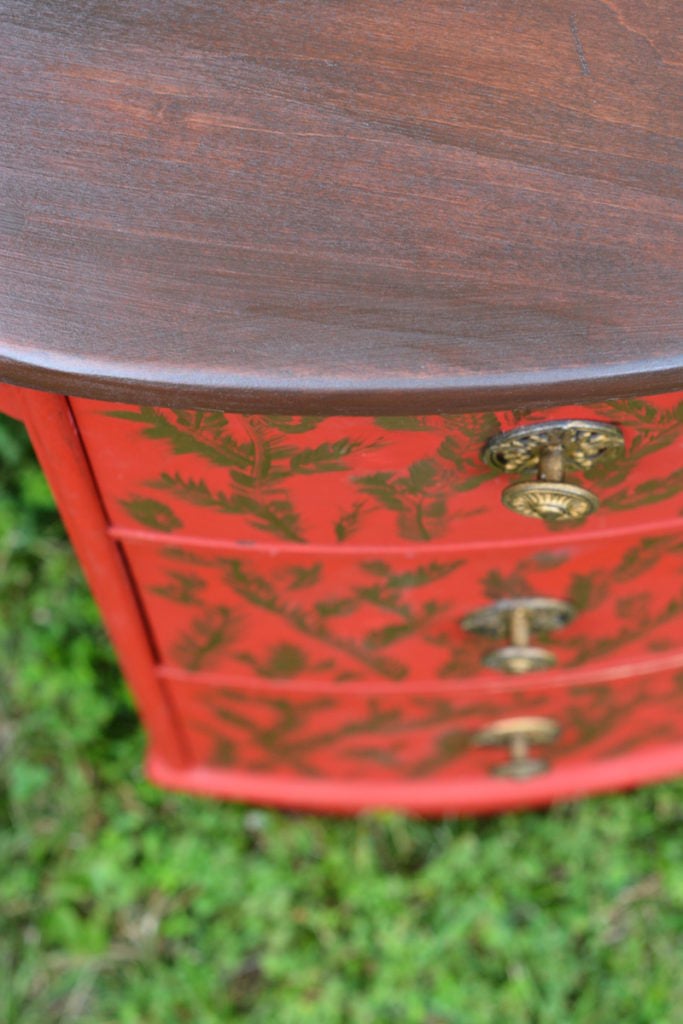
AFTER!
This is what the top looked like after I finished with it!
Materials Needed
- Paint – Annie Sloan Emperor’s Silk Chalk Paint
- Royal Stencil Creme – Aged Gold
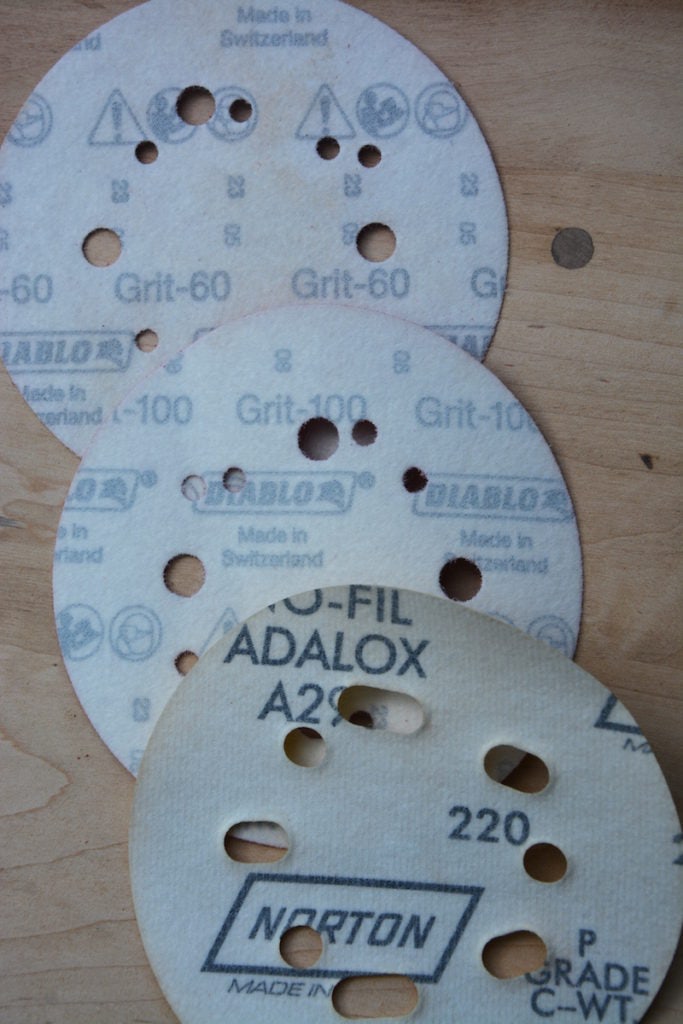
- Orbital sander from Amazon or Home Depot (use a dust mask, too)
- Sandpaper for orbital sander (60, 100, and 220 grit paper)
- Wood filler (if needed)
STEP 1: Get stripping.
As much as I actually like using chemical stripper to remove top layers of furniture, an orbital sander is sooo convenient to get the job done. It’s what I usually use. I don’t know if I love the results over using chemical stripper (orbital sanders tend to leave little marks; or maybe I’m just doing things wrong).
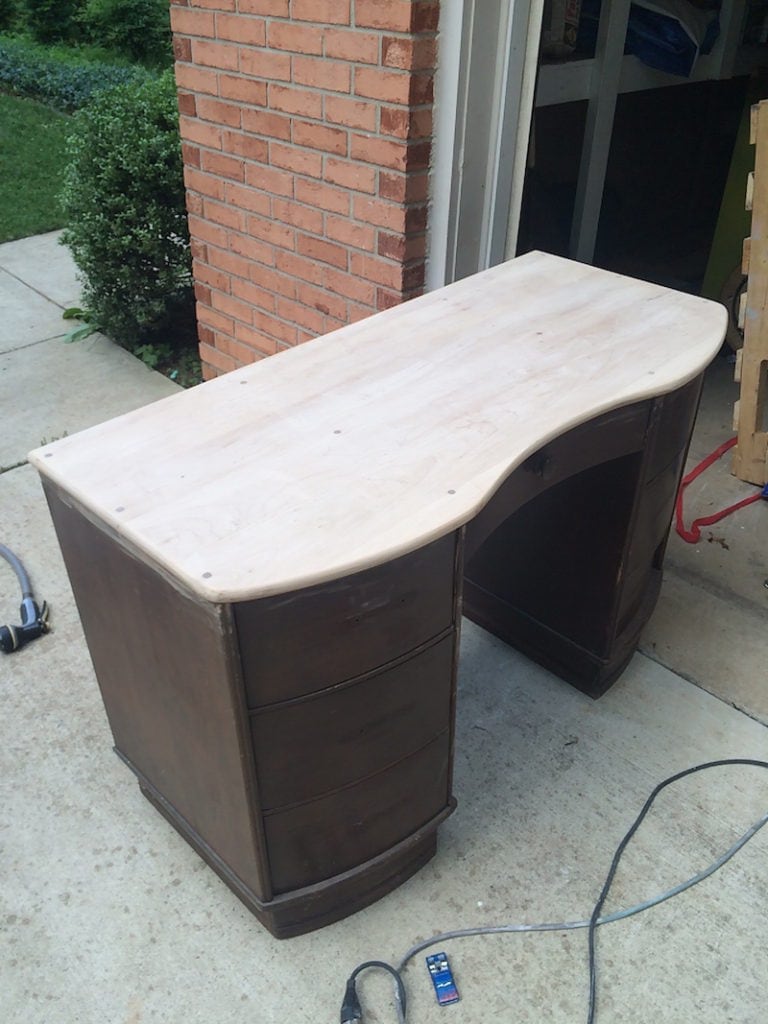
Be sure to use the 60 or 80 grit first….followed by the 100 medium grit…..and last, with the 220 grit.
STEP 2: Wipe on the stain.
This part was tough. I wanted to use what materials I had on hand. I could not get the right color. I didn’t want this reddish tone…
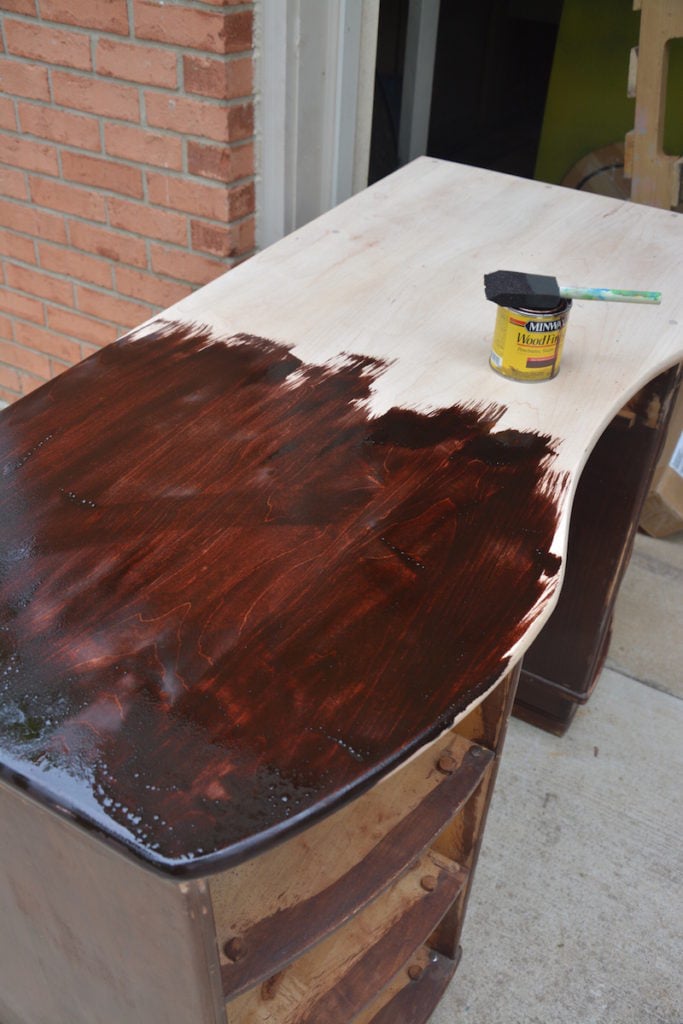
…and when I wiped it off, it was a little more rustic [read: spotty!!!] than what I was going for. I still wasn’t sure what color the body was going to be!!
TIP: To help your furniture stain be less spotty and more even, be sure to use Pre-Stain Wood Conditioner. Pre-stain helps to prevent the stain from soaking in too darkly in some spots.
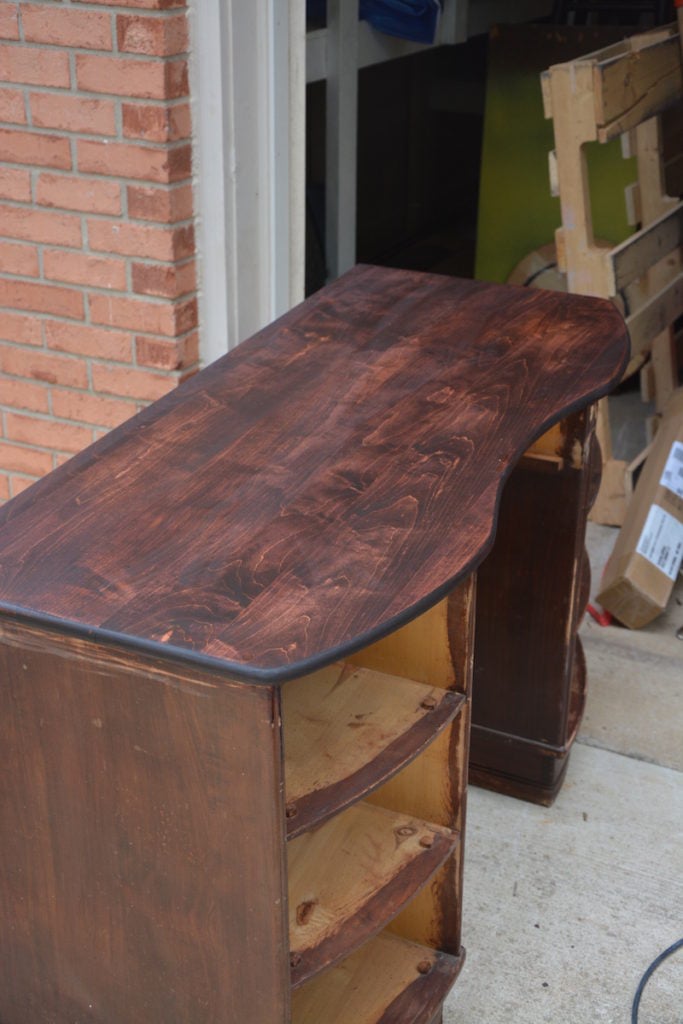
I tried adding some additional stains I had around the house, but I still wasn’t feeling this look. You can even see the swirly lines from the orbital sander. Rustic–yes, but not the look I wanted.
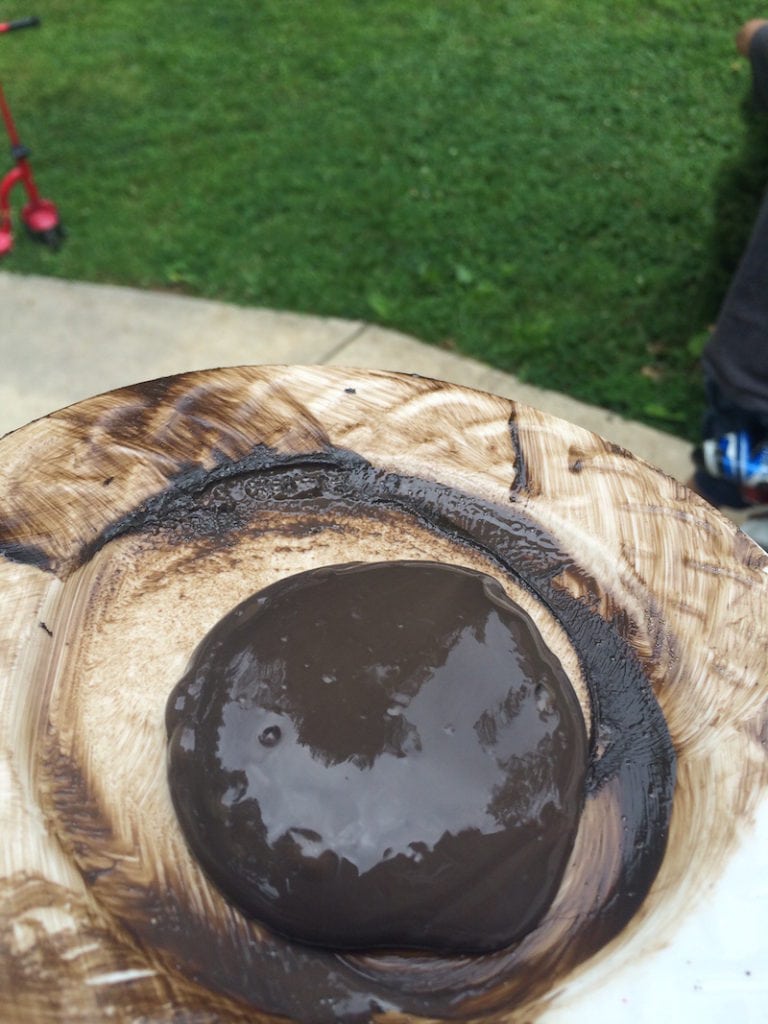
Towards the end of this project, I settled on some samples of Shabby Paints Gelato Gel stain (which is new–just came out June 2015). Apparently you can just go right over existing stains with this stuff, so that’s what I did. It just sponges on and has a sealer in it, so no need to apply another sealer. Woo hoo! (Excuse the gross looking plate. DIY gets dirty, yo!).
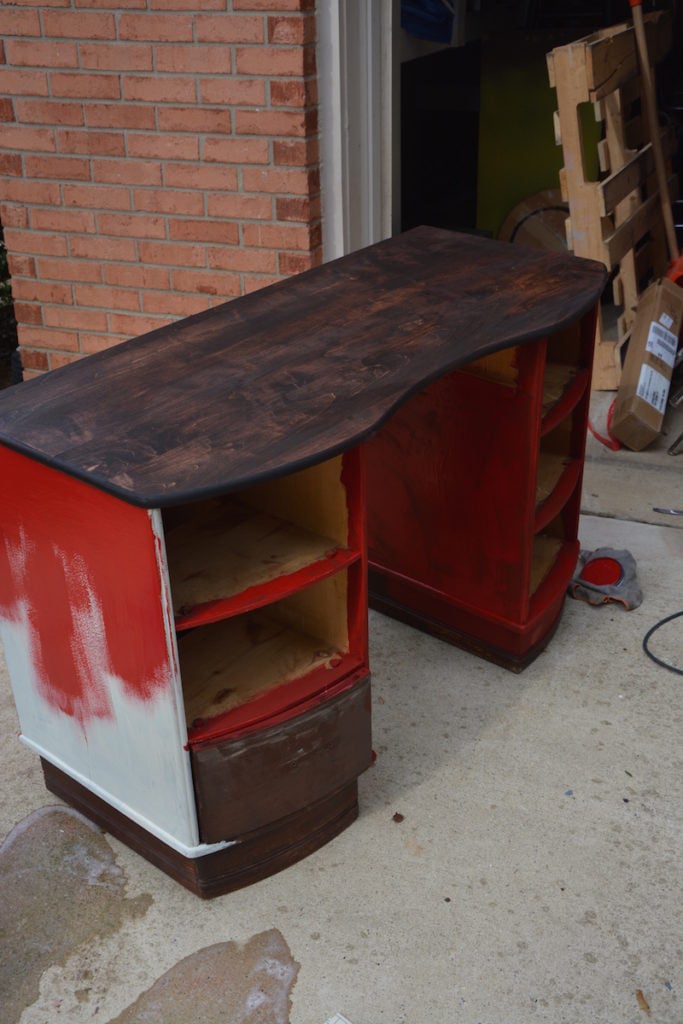
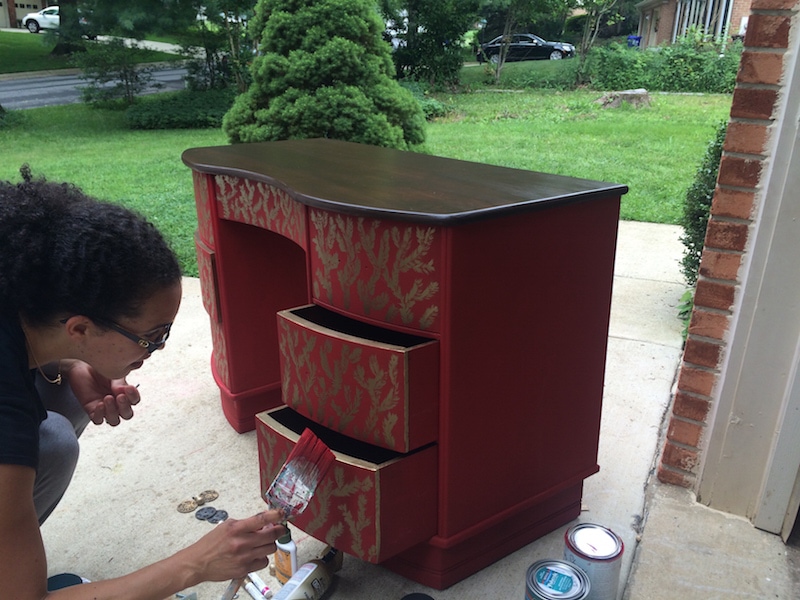
STEP 3: Paint the body.
Oh man, I was soooo not inspired by this desk when I started with it. I thought I would paint it white, but realized that was too bland, so I quickly covered the white test area. I didn’t want that. So I went with Annie Sloan Emperor’s Silk. TOTALLY not a color I have ever used except for when I painted my kids’ nautical themed wooden play sink. Otherwise, it’s a color that I have considered way too “loud” for me. I’m a turquoise kind of gal. I decided to try red since originally this was going to my friend. She likes red and deep colors. Sure, I’ll give it a try!
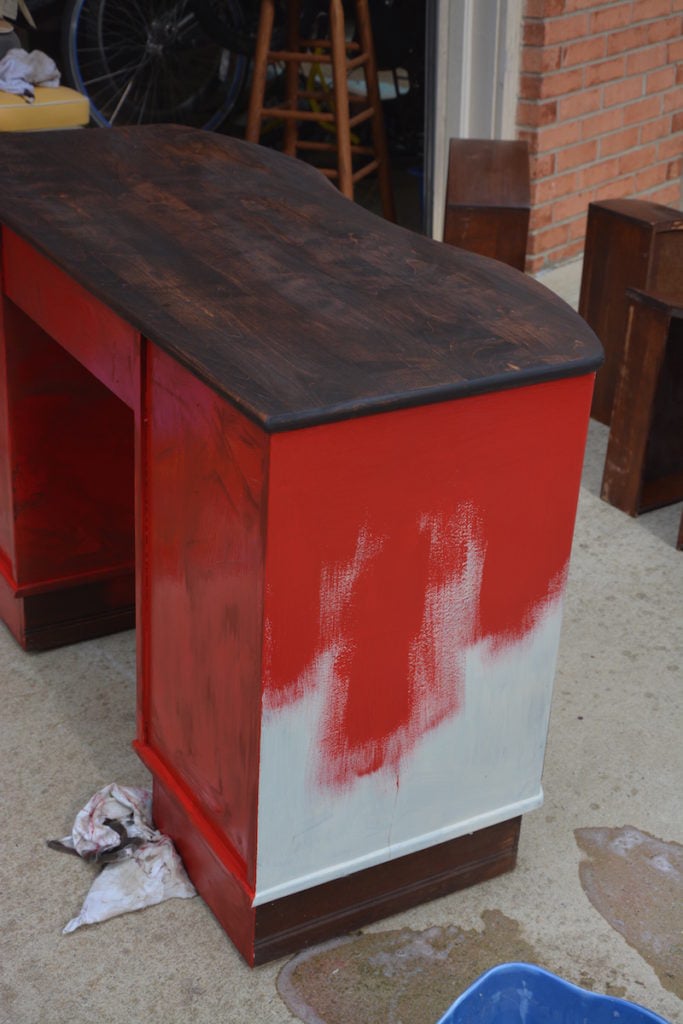
At this point, it was looking really rough and I just wanted to be done with the whole thing! LOL
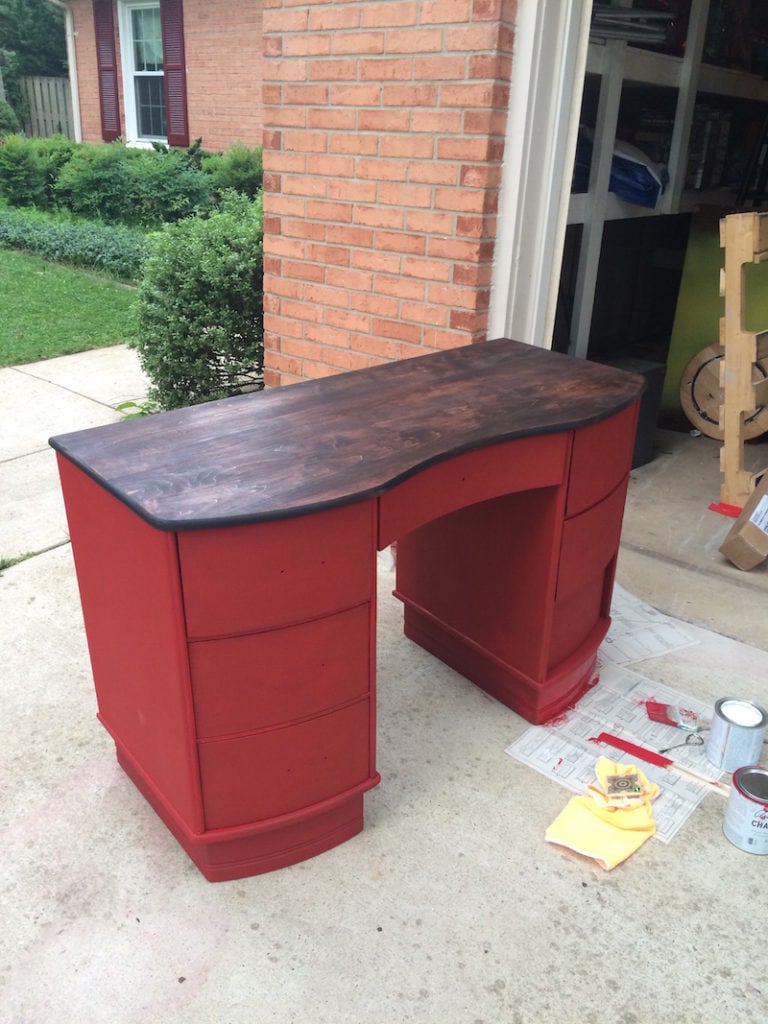
STEP 4: Jazz it up!
So at this point, I had two coats of paint on the body…the top was as good as I could get it at the time…but it needed something. I just didn’t know what. I realized that’s what I love about painting furniture: the details.
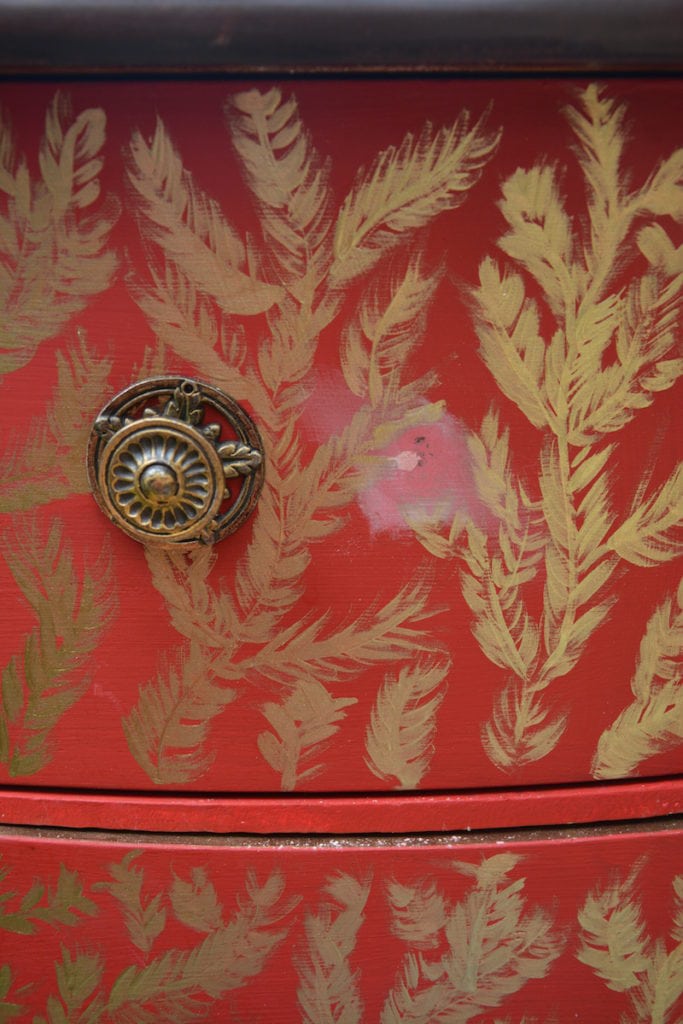
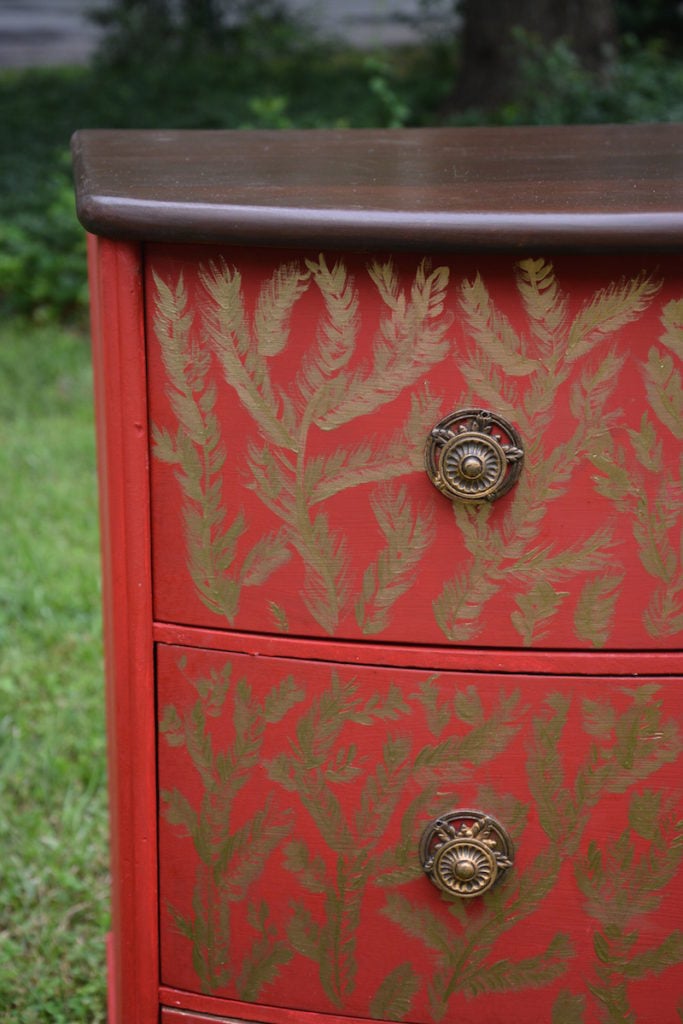
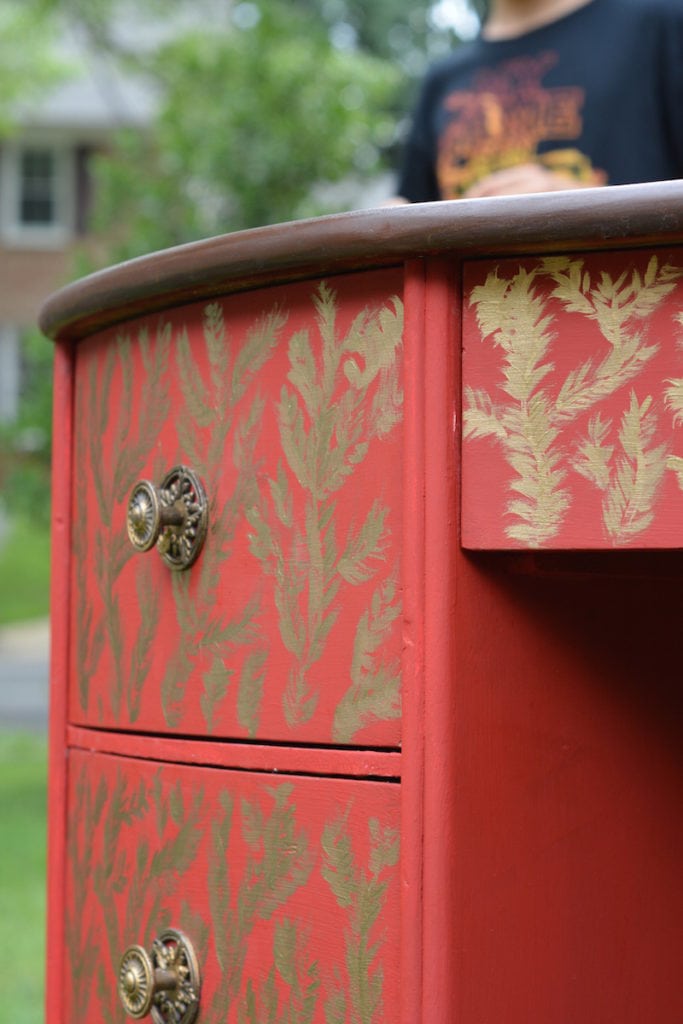
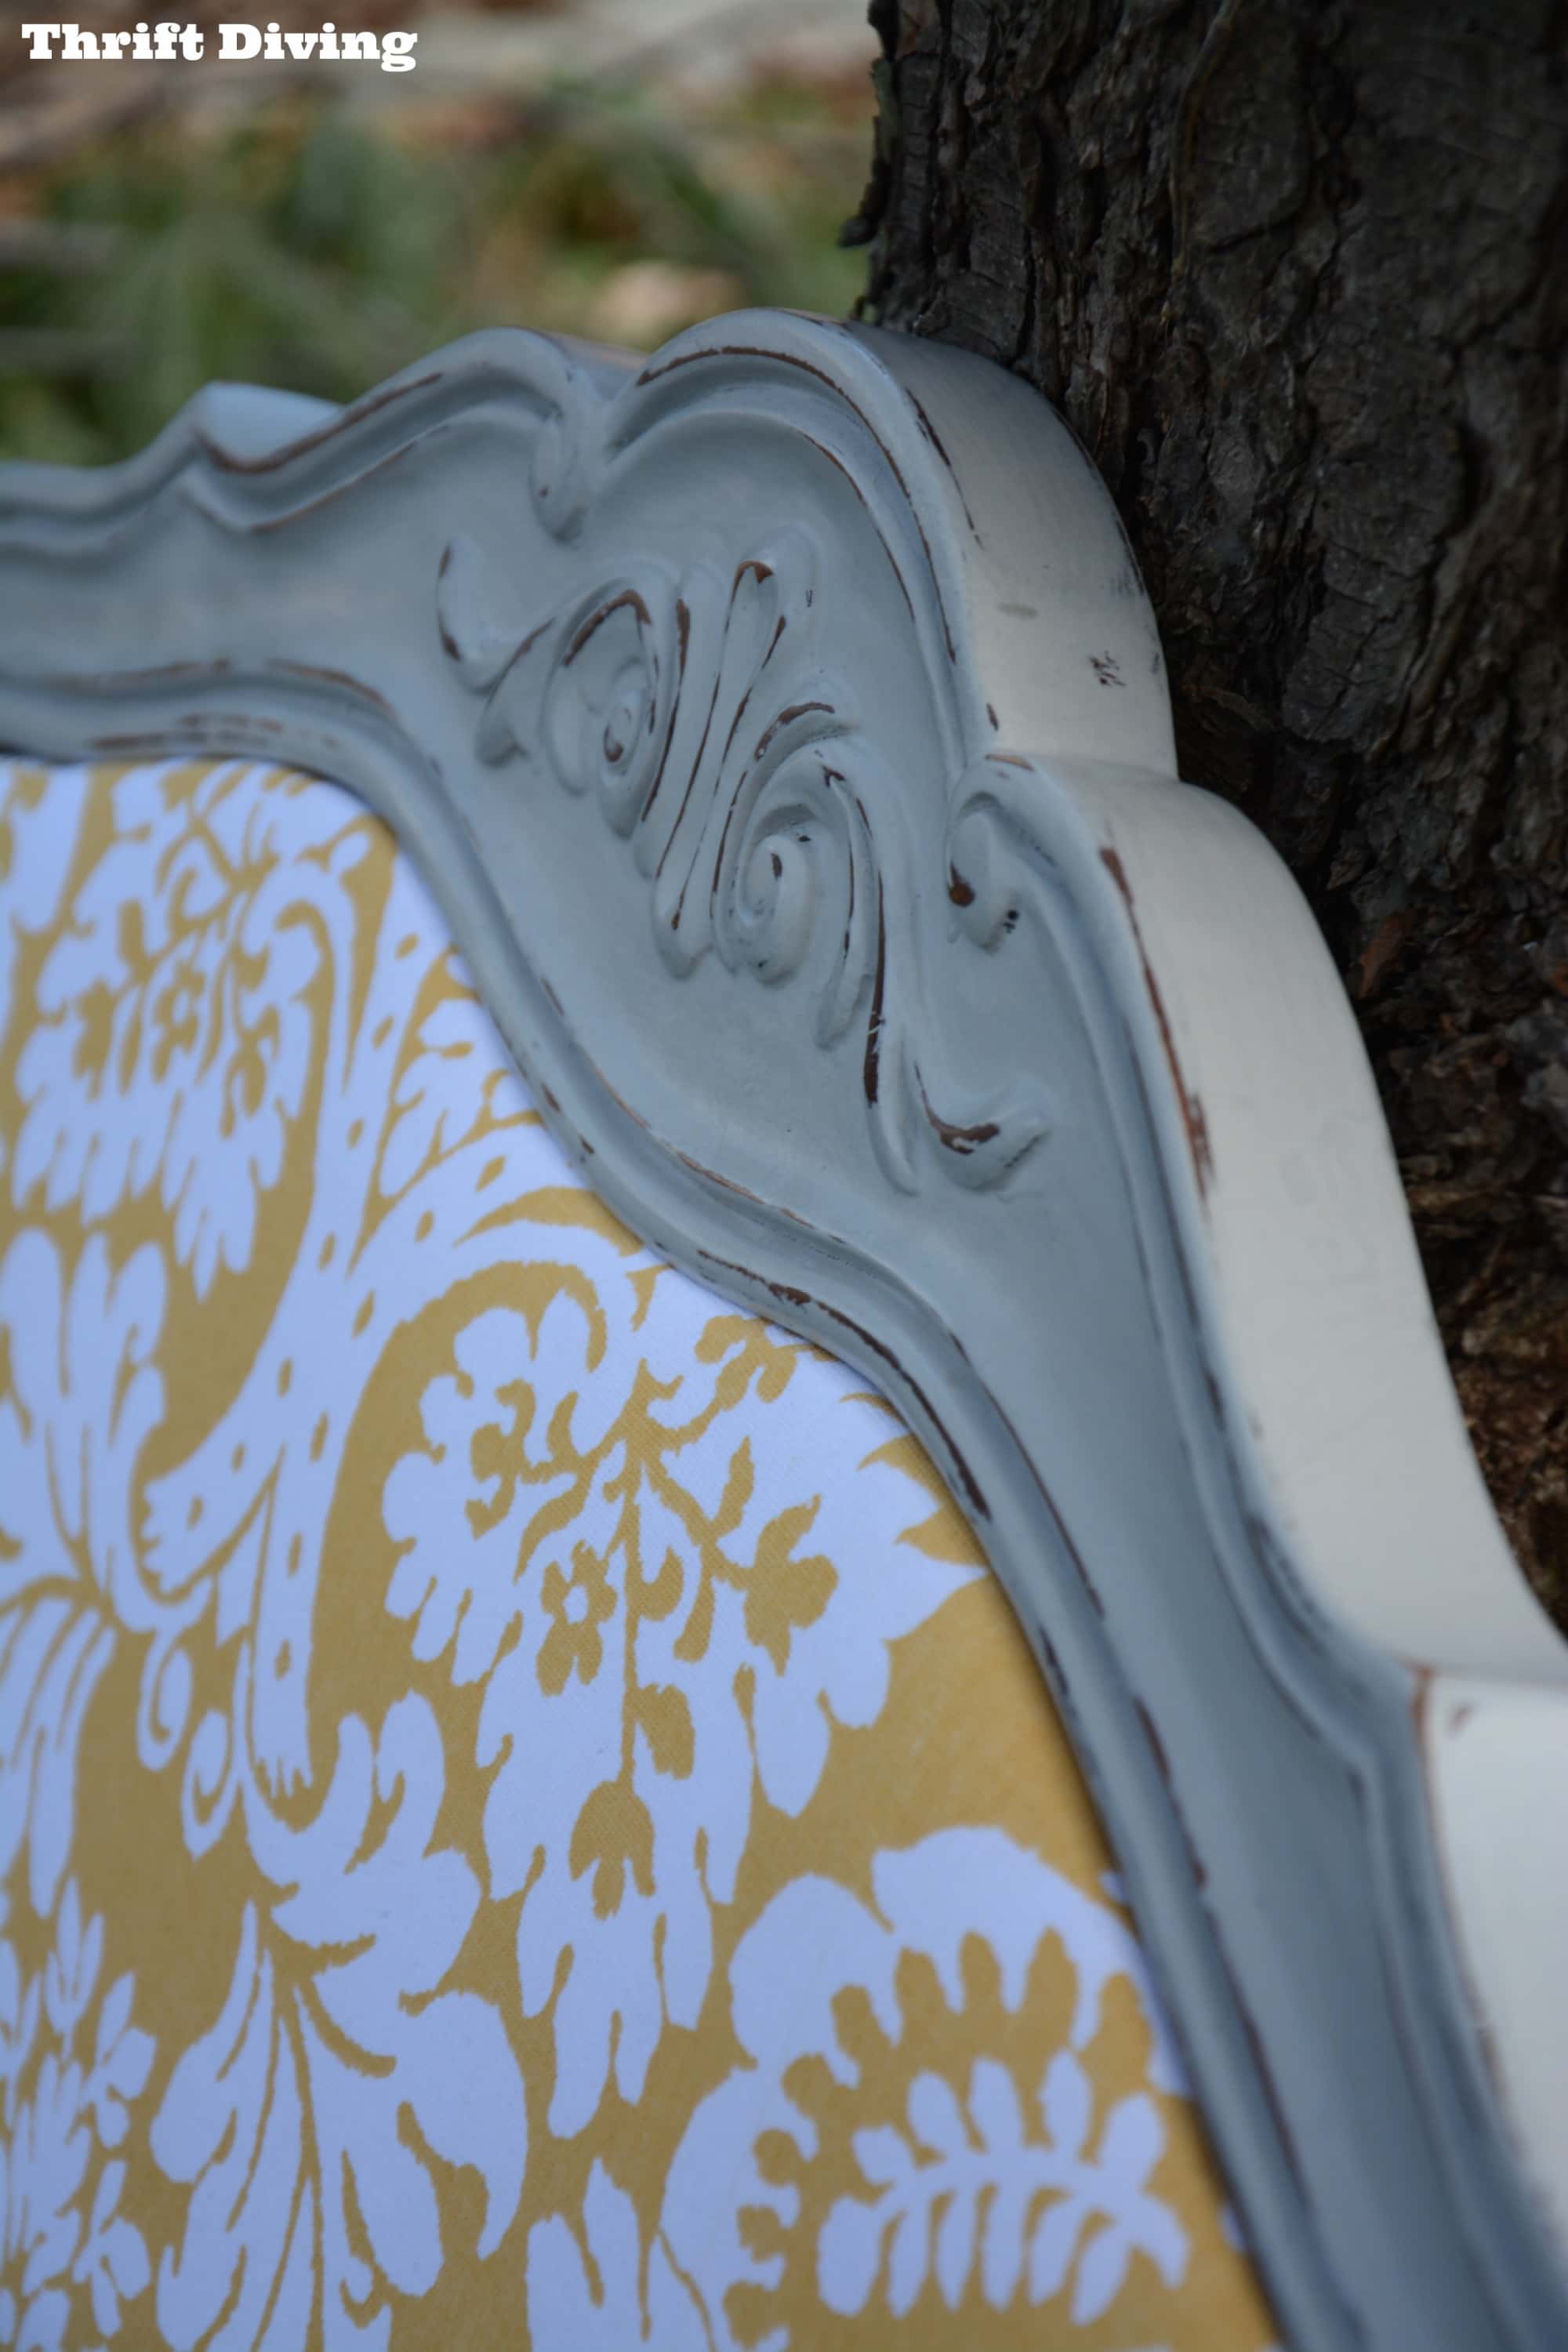
I decided to go with a free-hand gold leaf pattern!
You know what’s amazing?? This is the same pattern I used to draw when I was in 5th grade! HA! 🙂 I used to draw tons of trees with this same pattern. Heck, why not on furniture, too???

I used Royal stencil creme, which was a metallic dream!
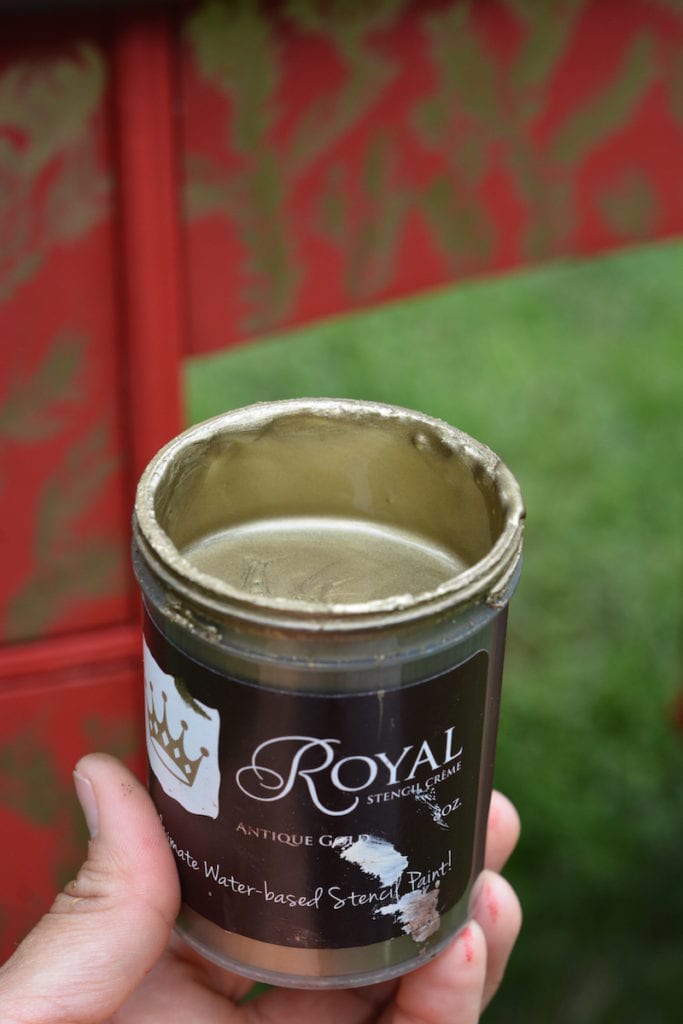
It reminded me of Chinese silk brocade!! Loved it!
WATCH THE VIDEO
Here’s a quick video (2:50 seconds) showing how I painted the gold leaves:
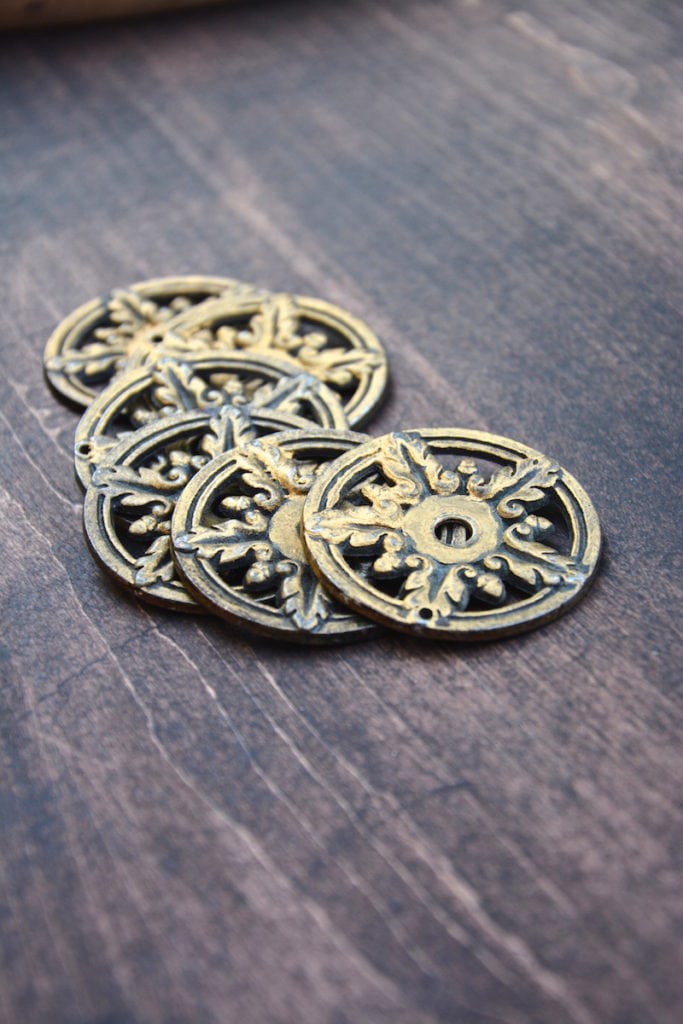
STEP 5: Get some handles.
I didn’t want to spend a dime on new handles, which would have been $15 – $20.
I had found these from that old pretty vintage buffet I refinished last year.
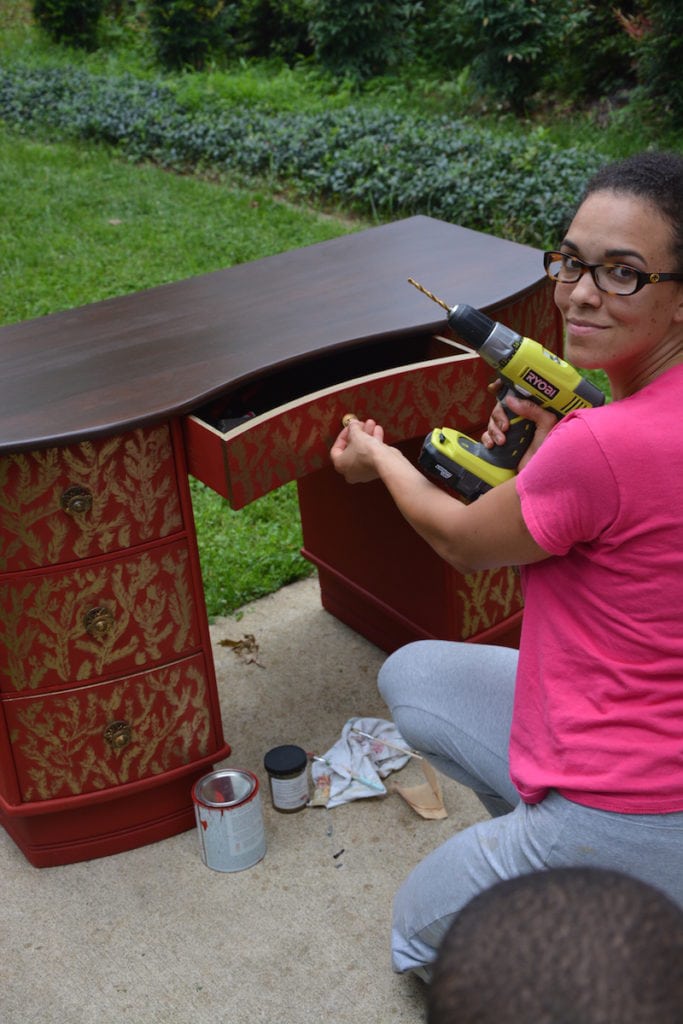
I had to drill new holes so that the pulls could be centered.
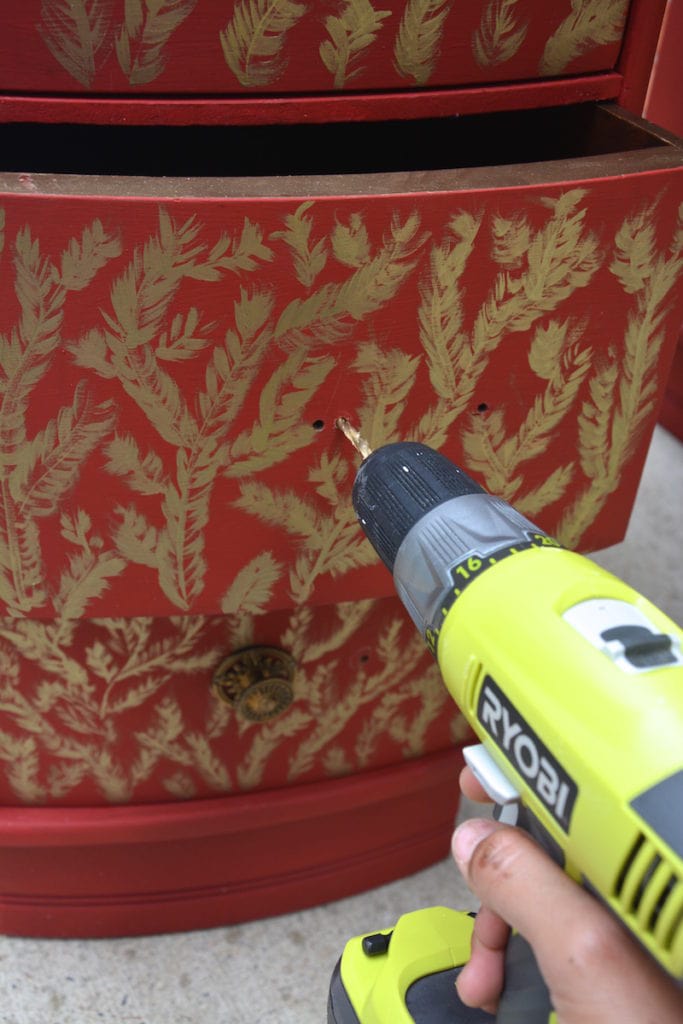
I added some wood filler to the old holes, then sanded smooth.
Notice how I did this AFTER I painted the drawers. STUPID! 🙂 A word of advice: plan your project better than me :).
I had to touch it up afterwards. LOL
I only had 6 pulls, so for the center one I used an extra pull left over from this super cute vintage dresser makeover I did. Glad I didn’t have to spend money on those!
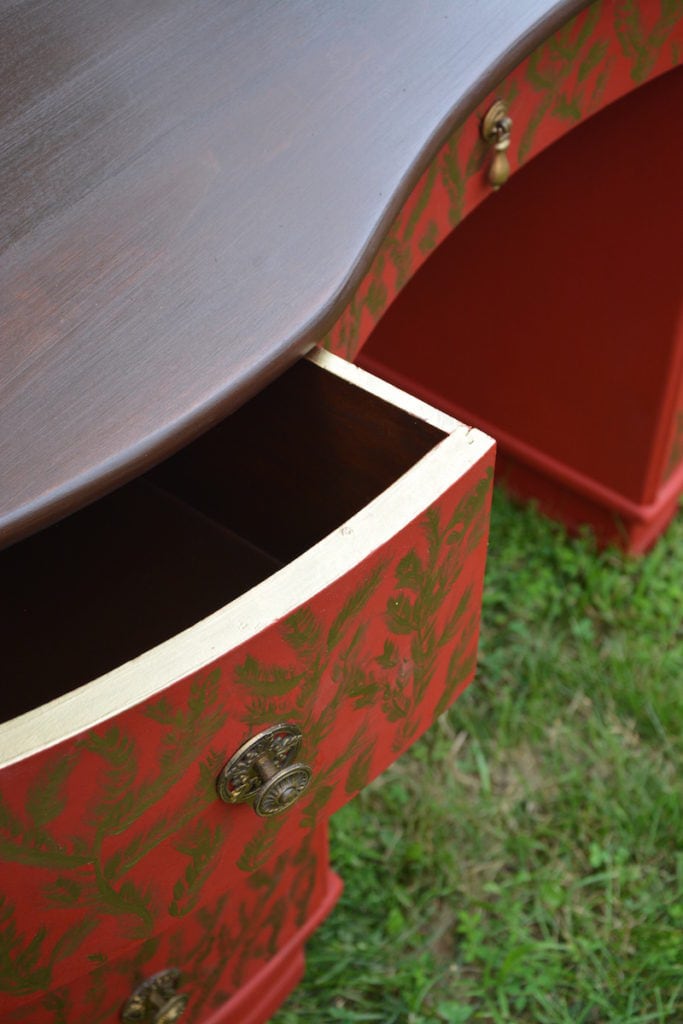
STEP 6: Gel stain the drawers.
I used the same gel stain on the inside of the drawers. It just added a layer of “freshness” to the drawers without them needing to be painted, which would have taken so much time!
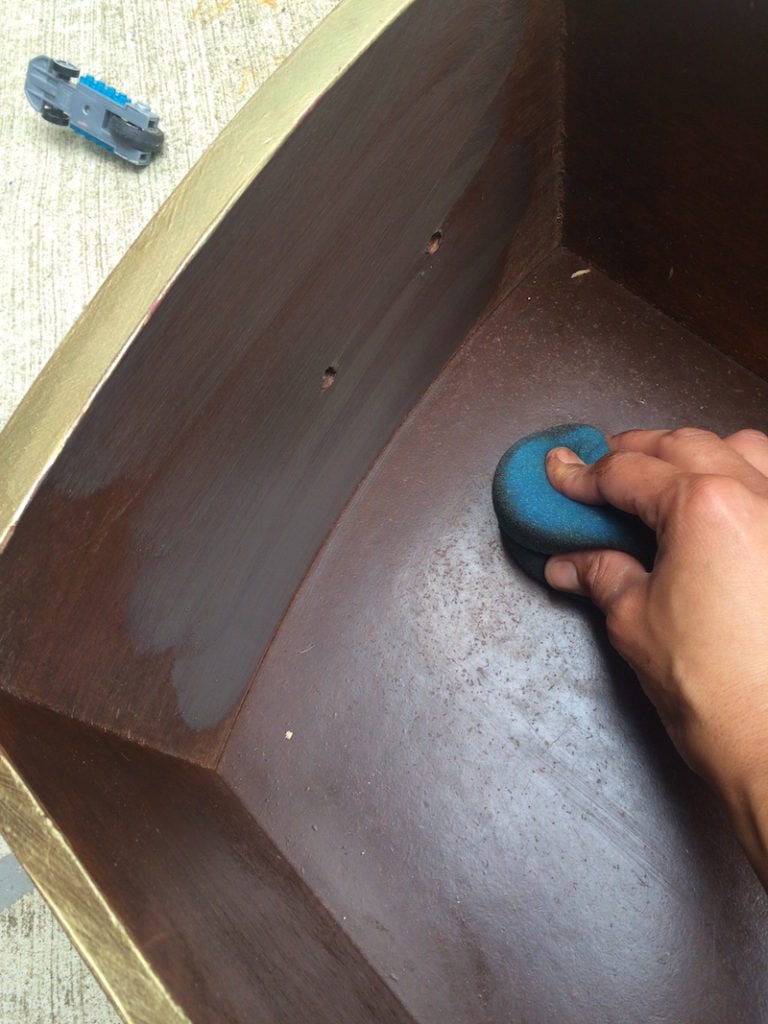
I went through and fixed up the edges, too, to make it clean.
Even the Family Liked It!
My husband isn’t one that doles out compliments often, but when he came outside and saw the “after,” he actually said, “Wow!”
YAY!
And my 8 year old son, Kwabena, told me, “That looks really good, Mommy. I really like how you took a lot of time to do the details.” Awwww…..hopefully it was a teachable moment for him, to always take your time and put in your best effort!
Ohene and Kojo really liked it, too!
BEFORE
AFTER
BEFORE

AFTER
I love this DIY desk!
I think I’ll be keeping it for myself, or selling it. My friend doesn’t even use her sewing machine, so I know this desk wouldn’t get any use at her house.
So what do you guys think?!?! Have you ever worked on a project that totally didn’t grab your heart until the end? Leave a comment below and add to the discussion!

Download the 5 freebies!

Thrift Diving inspires women to decorate, improve, and maintain their home themselves...using paint, power tools, and thrift stores! Use these 5 printables, checklists, and ebooks to get started!

I love the way you never give up. You have a vision, adjust as you go, open your mind and create one fabulous piece after another. I have not doubt that your boys will grow to appreciate your creativity. For now, they probably just think every mommy can do what you do. 🙂
I learn a lot from your posts, Serena.
I think my favorite part of all is you breaking out your fifth grade doodling skills. That will always make this an extra special piece.
Alys, you are so sweet!! I read your comment today and just smiled! 🙂 I think I’m going to have to find an old 5th grade doodle tree and let you see it! I’m pretty sure I have it in my closet somewhere!!! Great hearing from you, as always! 🙂
This is one of my favorite makeovers.
That makes me feel happy, Margie! I showed my friend the desk (the one I had planned to give it to), and when I asked her if she liked it, she said “You know, Serena… I don’t…” That’s the worse thing to hear after putting your sweat into a project! EEK! 🙂 I’m glad YOU like it, though!!
That desk is BEAUTIFUl!!! Great job. I have an end table I bought at an estate sale and don’t know what color to paint it. Can I send you a photo? You have a great eye for color.
Definitely! I’ll have a look at it. What colors do you love most?
It’s wonderful to see a “youngun” enjoying saving what others have discarded at Thrift Shops. I save my shower liners for my projects (husband thinks garage is his!). You certainly have an eye for all things beautiful. Being 70 I never tire of watching others! Job well done
Hi there, Linda! What a nice compliment! Sometimes I struggle with that “eye.” But in the end, I usually like what I end up being able to come up with! That’s the fun part: seeing where creativity leads you once you get started! 🙂 Thanks for reading!!!
The leafs remind me of the feathery leafs on a Mimosa tree. Great job !!
I had to Google “Mimosa tree” and you are so right! I had no idea! 🙂 That’s awesome. I’m going to start calling this my “Mimosa desk.” 🙂 Thanks for the right terminology!
Beautiful job! I have 6 pieces in my garage that have been waiting for me to get inspired! I get stuck on the whole color choice thing. I need to just “dive in” and do it!
Thanks for the inspiration! Can’t wait to see more of your ideas!
You can do it! I find that once I get started, I’m on a roll and I just want to keep working on more projects. It’s getting “going” that’s the hard part! 🙂 How about give yourself this next week to start on one?
Yes, it is the getting going that stops me!!! Thanks for your encouragement!
You’re definitely welcome!!
I like your branches, even before the leaves for a different look. Good job.
Hey, Terre! Yeah, I kind of like them, too! Maybe I should do a project with just branches this fall! 🙂 They’re super easy to do! Thanks for the comment! 🙂
This is the prettiest makeover I’ve ever seen. If there’s a contest out there, you should enter, because no doubt you’d win, Serena.
Aww….thank you, Vanessa!! That means a lot! It felt good at the end to step out of my Color Comfort Zone. LOL
This is absolutely beautiful! I especially love how you powered through the early steps when it wasn’t coming out the way you wanted it to. I’ve been known to give up at those points! 🙂 You do such nice work, it inspires me to keep trying. Well done!
Thank you, Della! That’s the hard part–sticking with a project after it starts giving you problems! It’s easy to walk away and let it sit, but I find that the true DIY lessons are taught when you tackle it head on! I never thought I would like it, but after I hand-painted the gold stems, it really started to resemble my favorite Chinese silk! I had to keep going! 🙂 I’m glad you like it!!
WOW! That is a STUNNING transformation!! I’m not typically drawn to red furniture, but that is beautiful!
Same here! I never paint red furniture! LOL I love turquoise and light colors. That’s why I was so stumped with this piece, but the gold really does something for it! Thanks!! 🙂