Mid-Century Modern Chair Makeover: PART 2
This project was sponsored by Rockler. All opinions are my own.
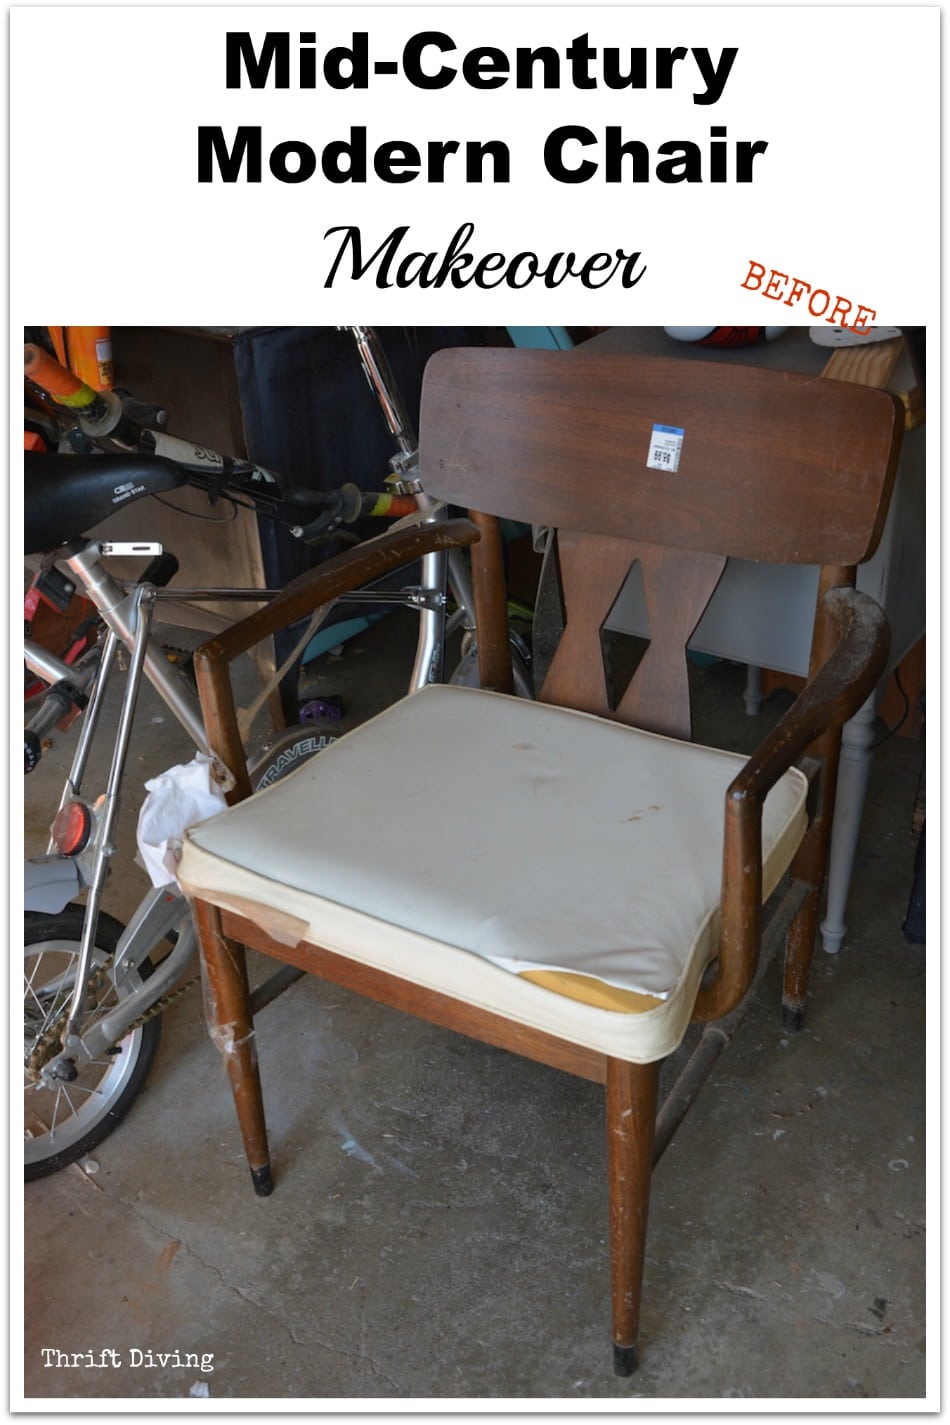
How could we forget this mid-century modern chair makeover…
You know, the one that I was ready to put a hammer to and (as one reader suggested) make firewood out of it. HA!
I had found it for about $7.00 one day at the thrift store, and for that price, I had to have it!
BEFORE

But it sat in my garage for so long, collecting dust, until recently I decided I was going to tackle it in hopes of working through a lot of the projects that I been hoarding in my garage.
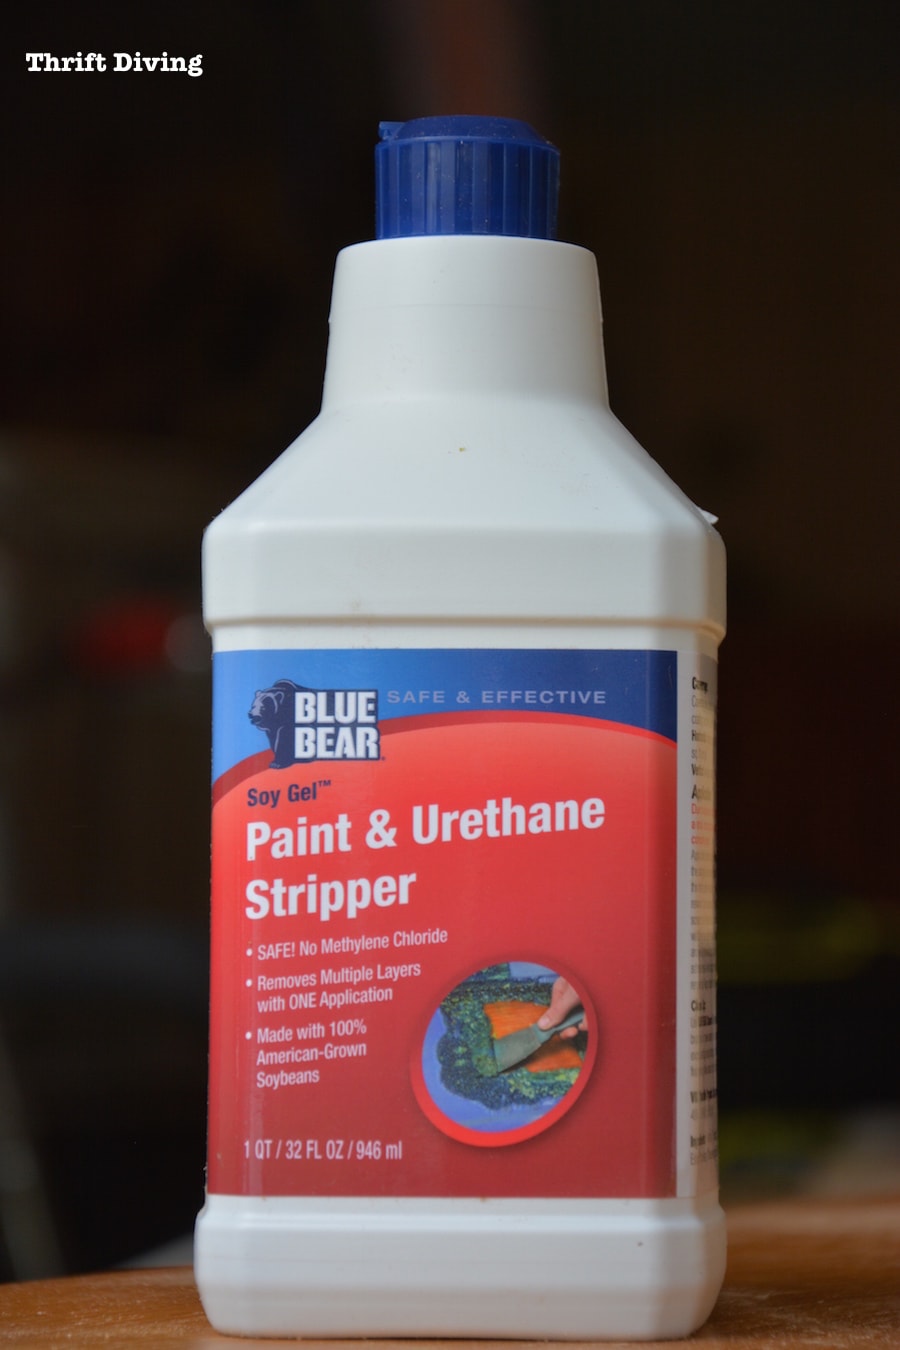
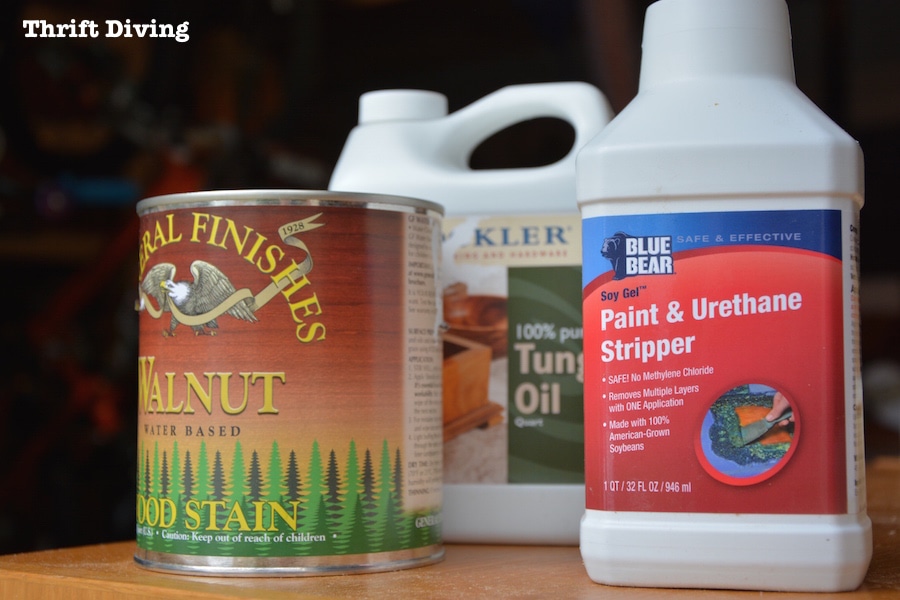
If you recall from Part 1 of this mid-century modern chair makeover, I had stripped the chair, most recently using Blue Bear Paint & Urethane Stripper from Rockler, which is a soy-based stripper (it has virtually no odor–LOVE LOVE LOVE).
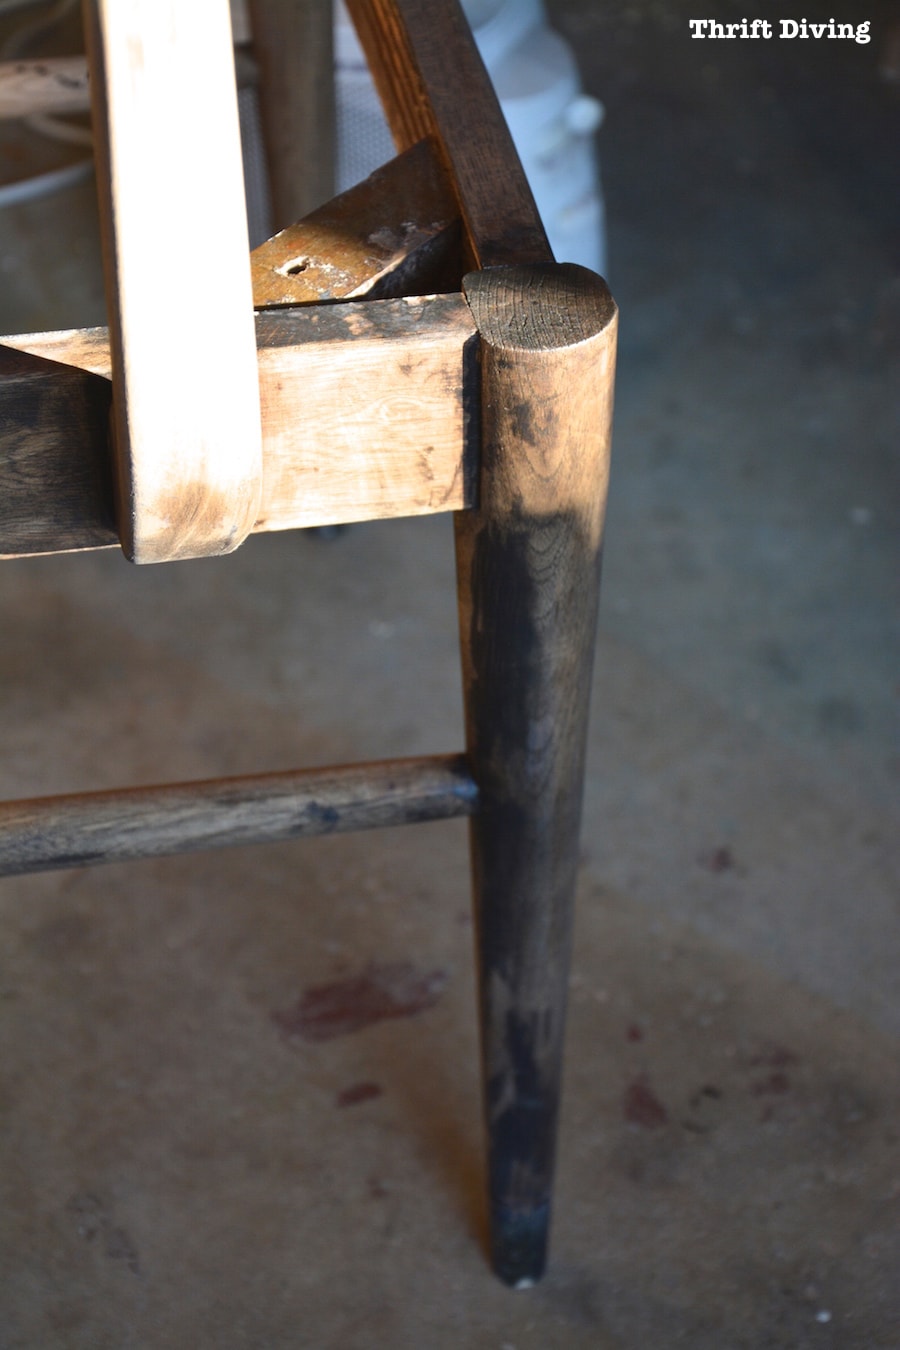
While stripping the chair, I learned that the wood on the back of the chair was not the same wood as the body of the chair.
You awesome readers informed me that this was often done by cheap manufacturers to save money.
(…for unsuspecting DIY’ers like me to figure it out after all that stain is stripped away!)


I had decided to keep going because you never know–even with different tones, maybe it would look awesome after it was stained! (ahem, cought).
I had to get that stripper off, so I used a bucket of water and a scrub brush to clean it.

I sanded it down as best as I could, thinking that I had done the World’s Most Amazing Sand Job on this chair (HA! Little did I know…).
And that grain….it was soooooo beautiful!

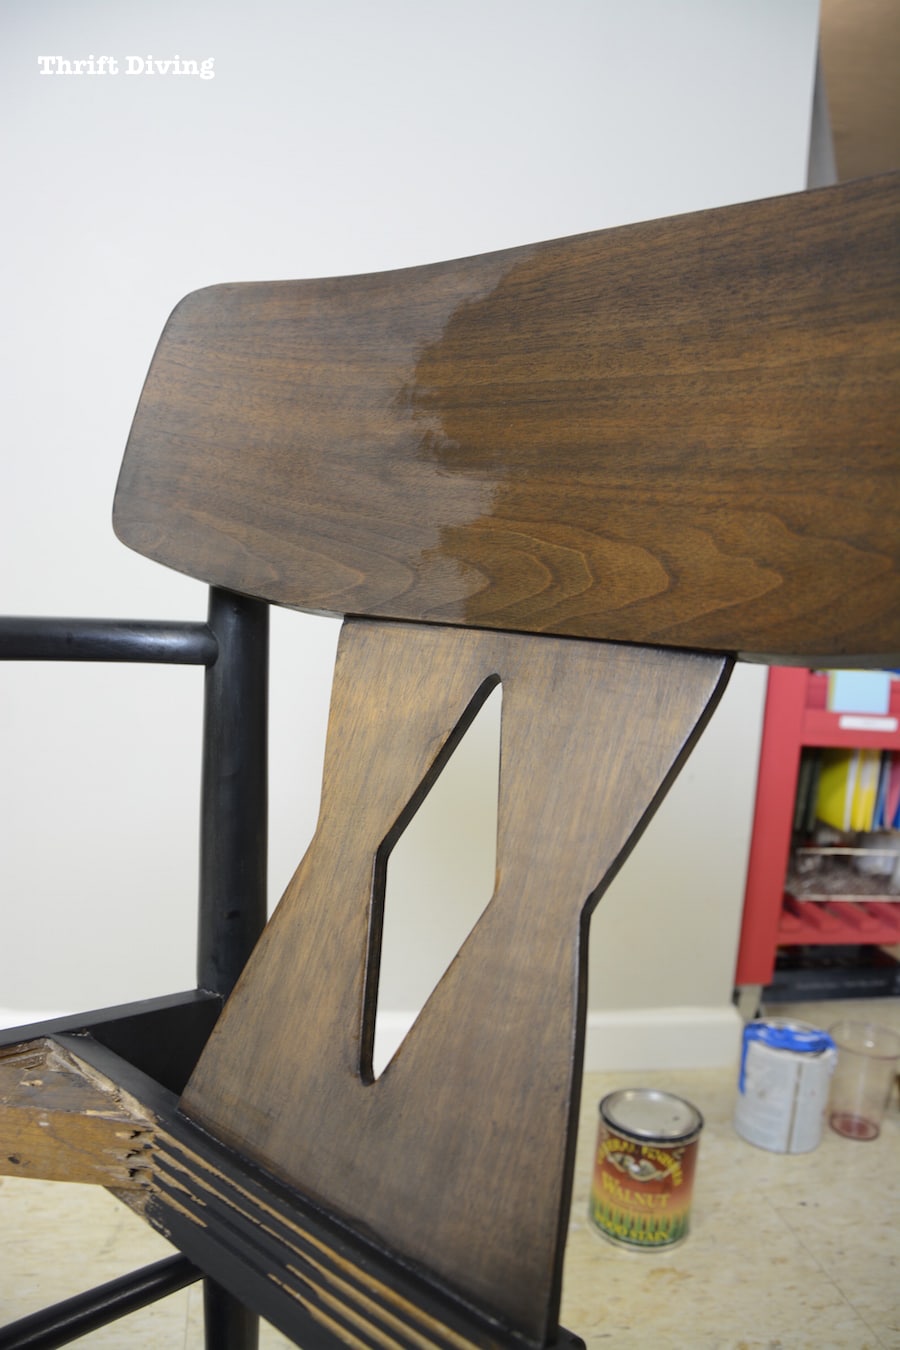
I applied the General Finishes water-based walnut stain. It’s much more natural than oil-based stain and you can’t smell it! If you’ve used oil-based stains, you know you’ve got to use that stuff outdoors and it’s pretty toxic.
I wanted to try it out to see how it would perform (and smell!) compared to the oil-based that I was familiar with.

The directions said you have to slather on a lot so that it’s easy to wipe off and get an even finish, so I painted it on and tried to wipe it off in even strokes.
But as I wrote in PART 1 of this mid-century modern chair makeover, it turned out an awful, blotchy mess because of the crap sand-job I must have done.
Plus, since this stain is more “gel-like” it requires a bit more carefulness. One wrong move of your cloth while wiping and you can easily brush stain again parts that are already stained. And that’s what happened to me.
The chair was a hot mess, all because of me.
As disappointed as I was, I had hoped I could salvage the chair.
I just needed to think about how I wanted to proceed.
This is how the chair looked when I walked away from it at the end of that day. Yikes.
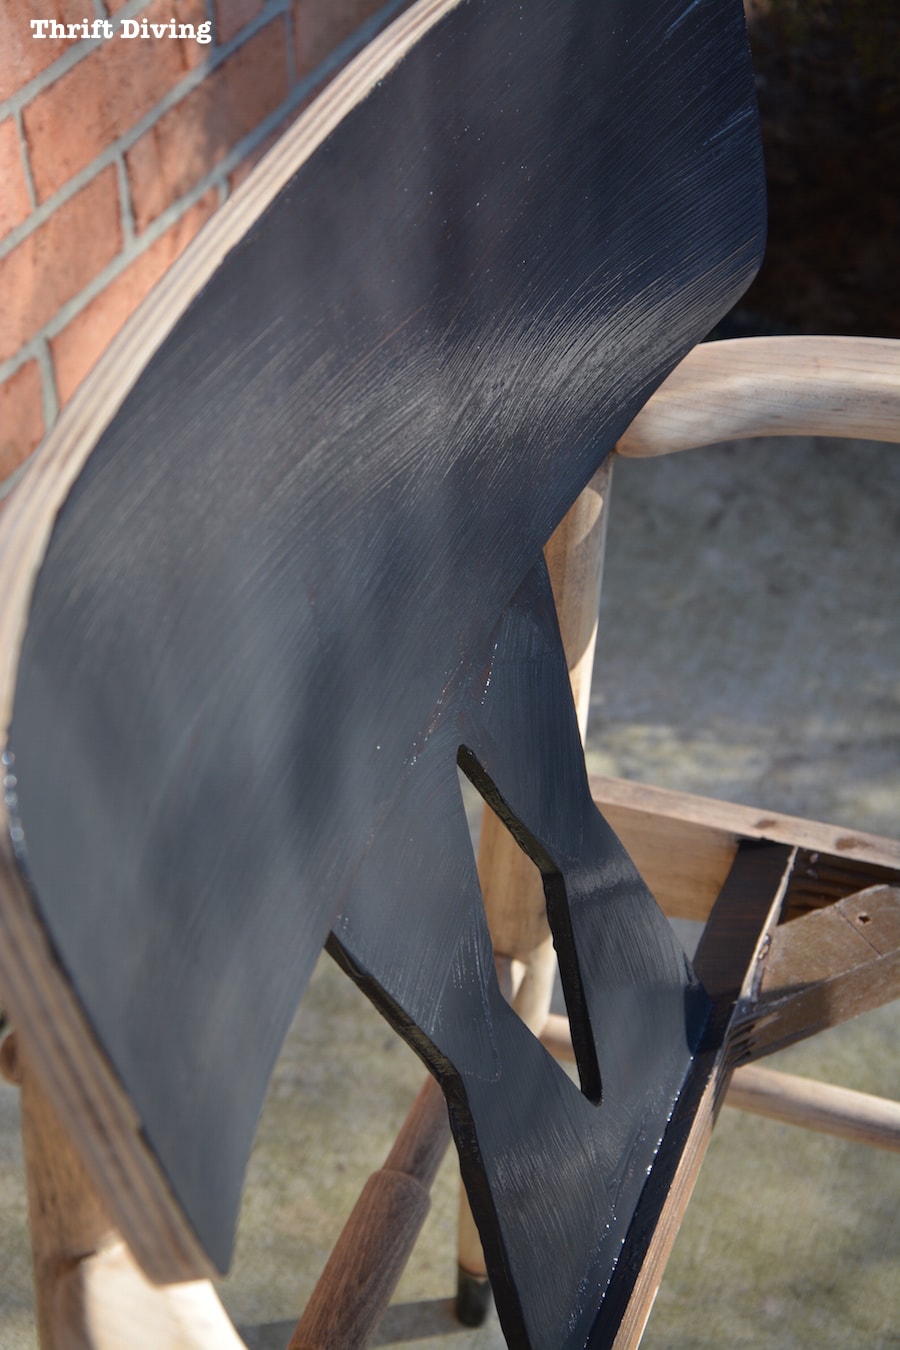
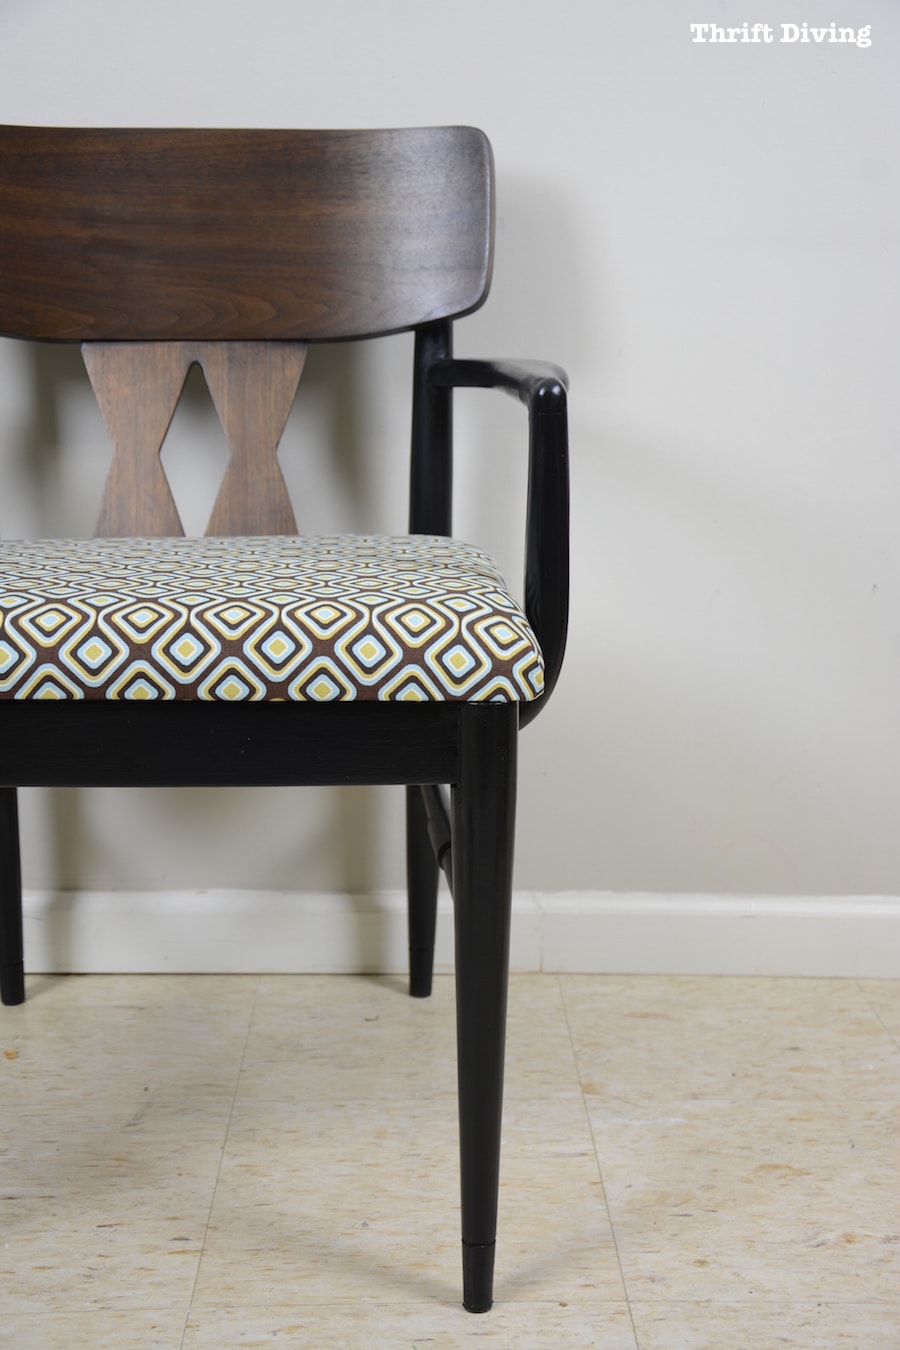
My first thought was to paint the body black while keeping the wood grain that I had stripped and re-stained.
So the body got a coat of black paint (I used Amy Howard–worked so well!), and I left the back wood-toned.
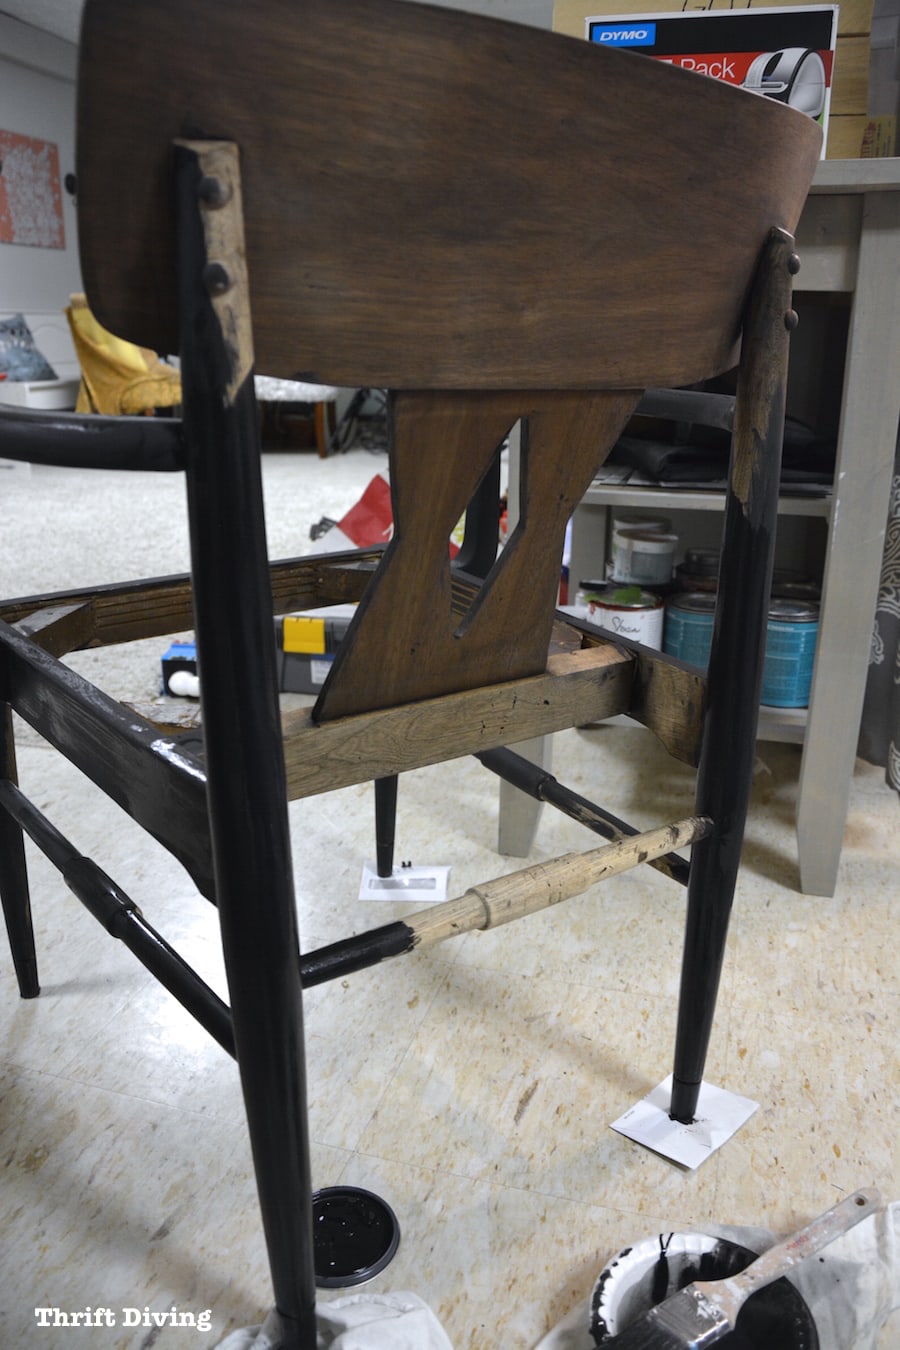
But I didn’t like the difference in painted wood and wood tones. LOL
Don’t you hate when that happens?? You get stuck and then have no desire to finish a project because you’re no longer inspired.
But I wasn’t going to let that happen. I don’t just give up on projects.
I use them as teachable moments and to train myself to think of solutions!
I decided to just keep going. It’s hard to say you don’t like a project when you haven’t even finished!
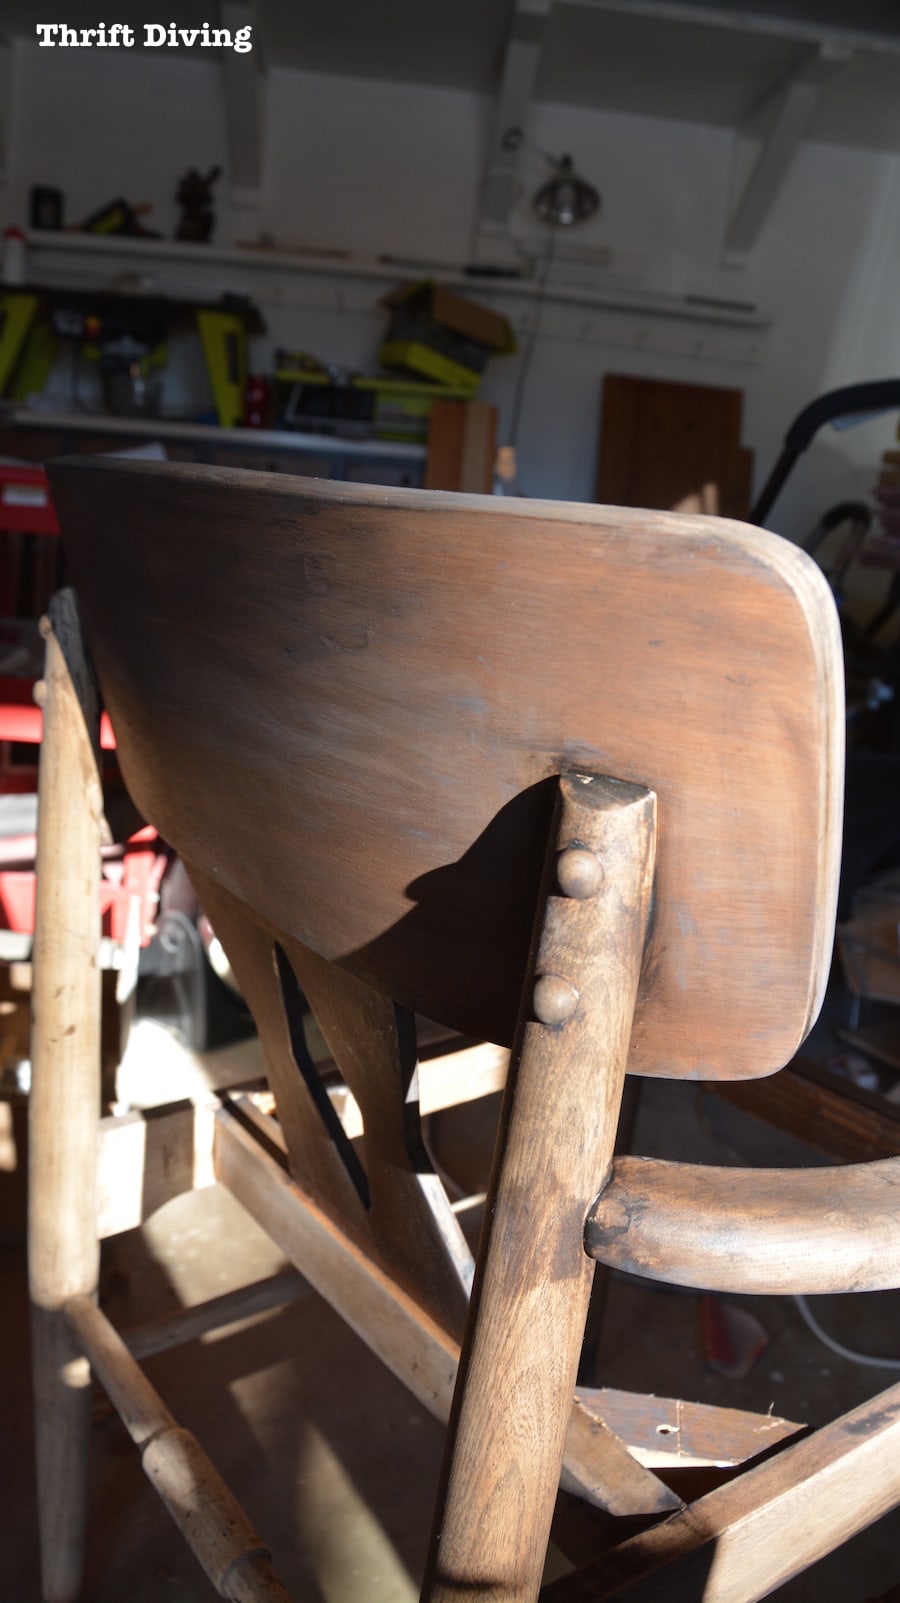
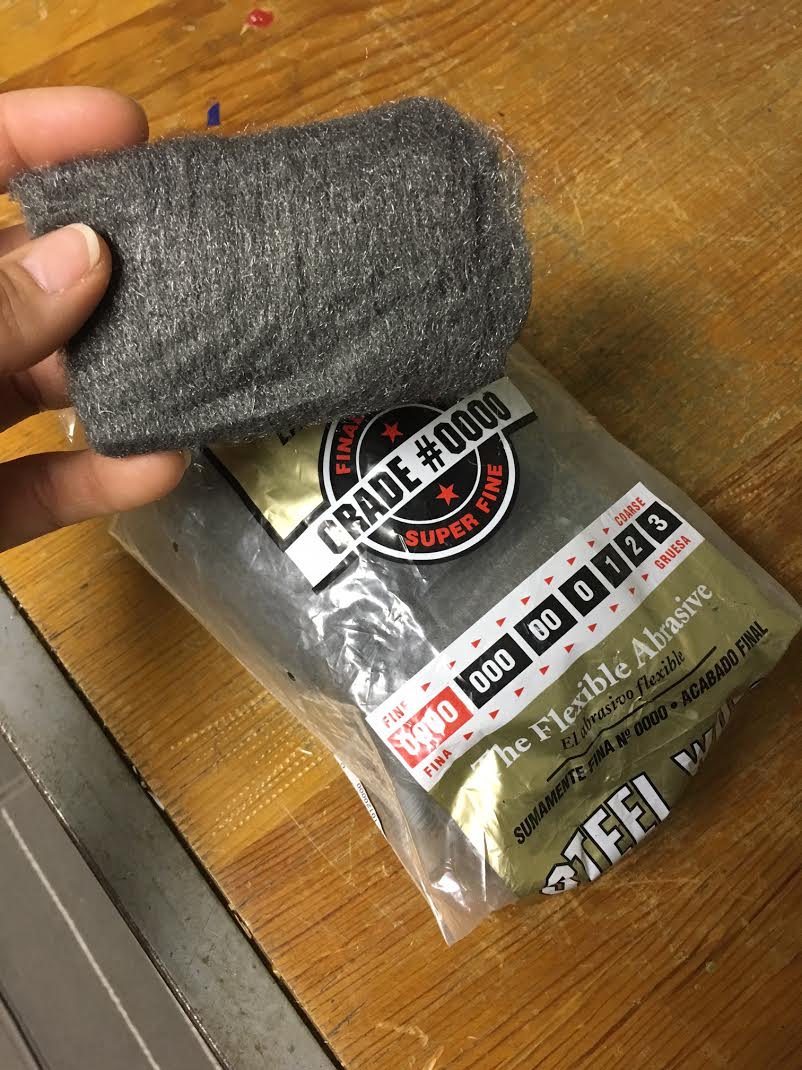
Someone in the comments section on Part 1 of this project reminded me about using steel wool, which is flexible and can work well on wood (especially rounded parts, like legs).
I actually have a ton of the stuff lying around and decided to use this really fine steel wool to smooth out the wood parts of the chair, which worked really well!
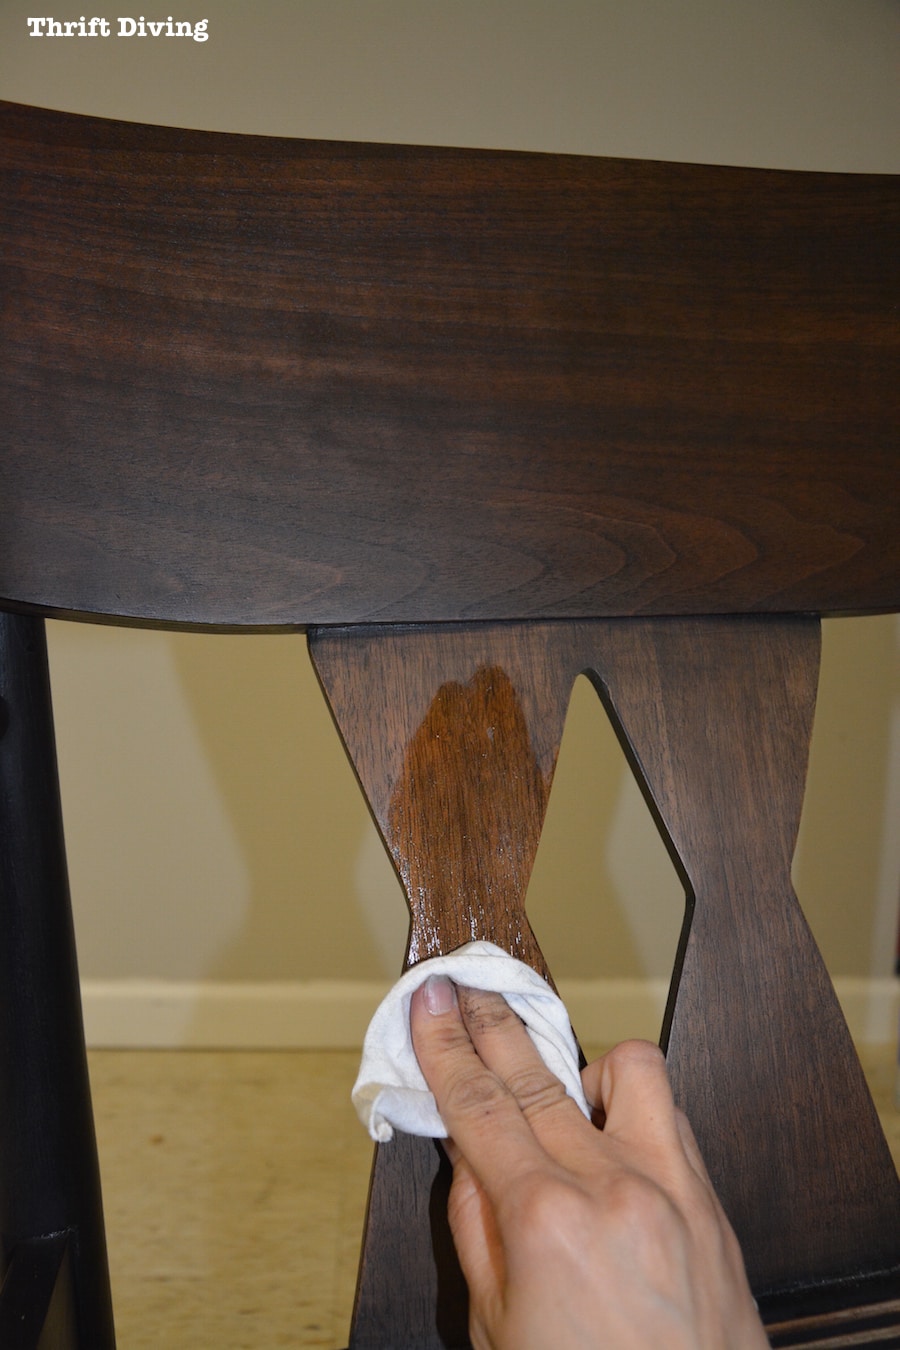
After a few passes with the steel wool, I wiped on some Rockler tung oil.
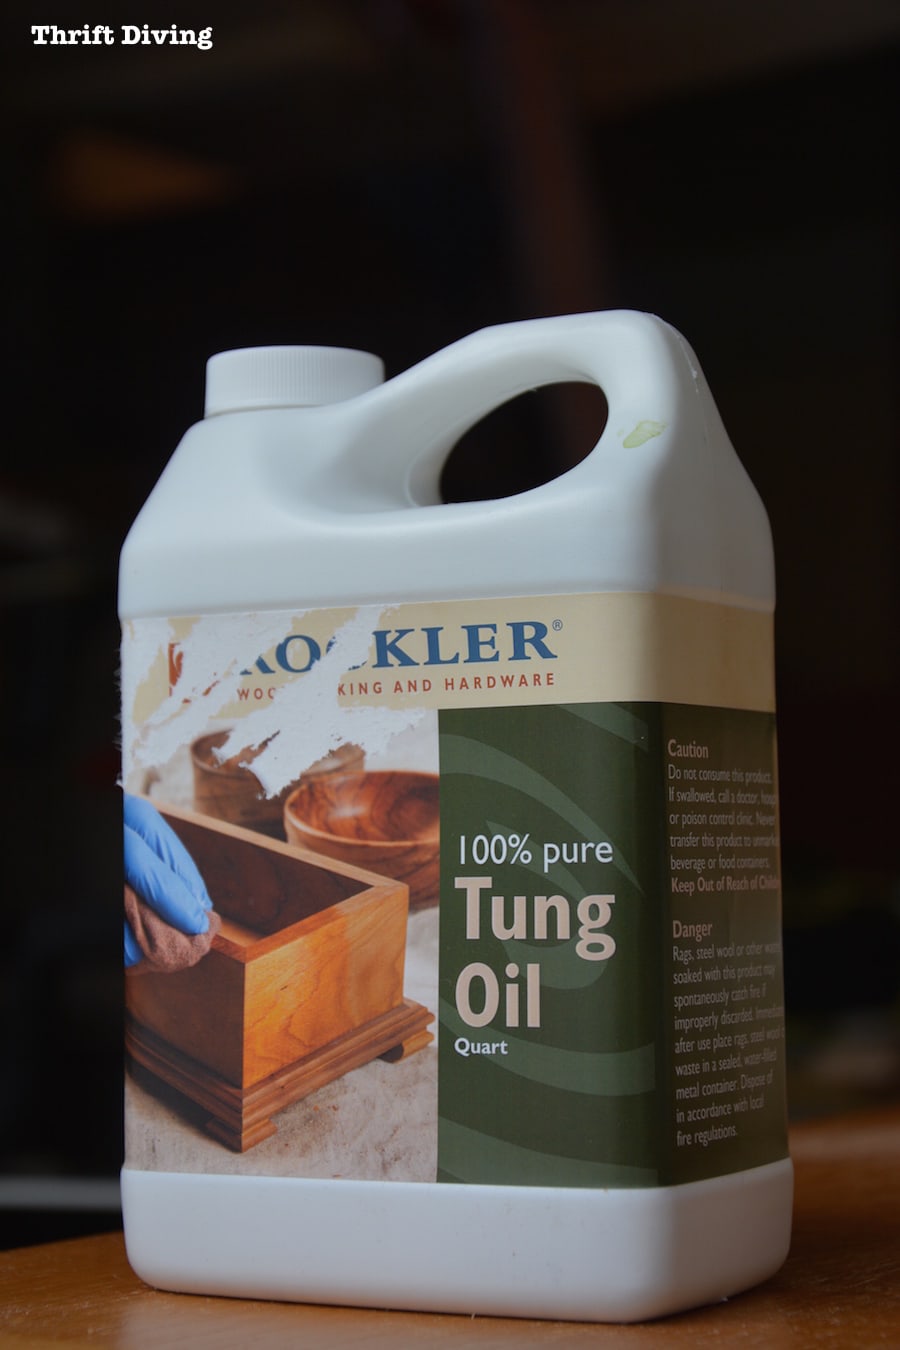
You can see how smooth the wood is after the steel wool, and adding that tung oil was like magic! The wood seemed to come alive!
It polished the wood so beautifully it made me wonder why I hadn’t been using tung oil sooner! (Thanks to the reader that put a bug in my ear to start using this!).
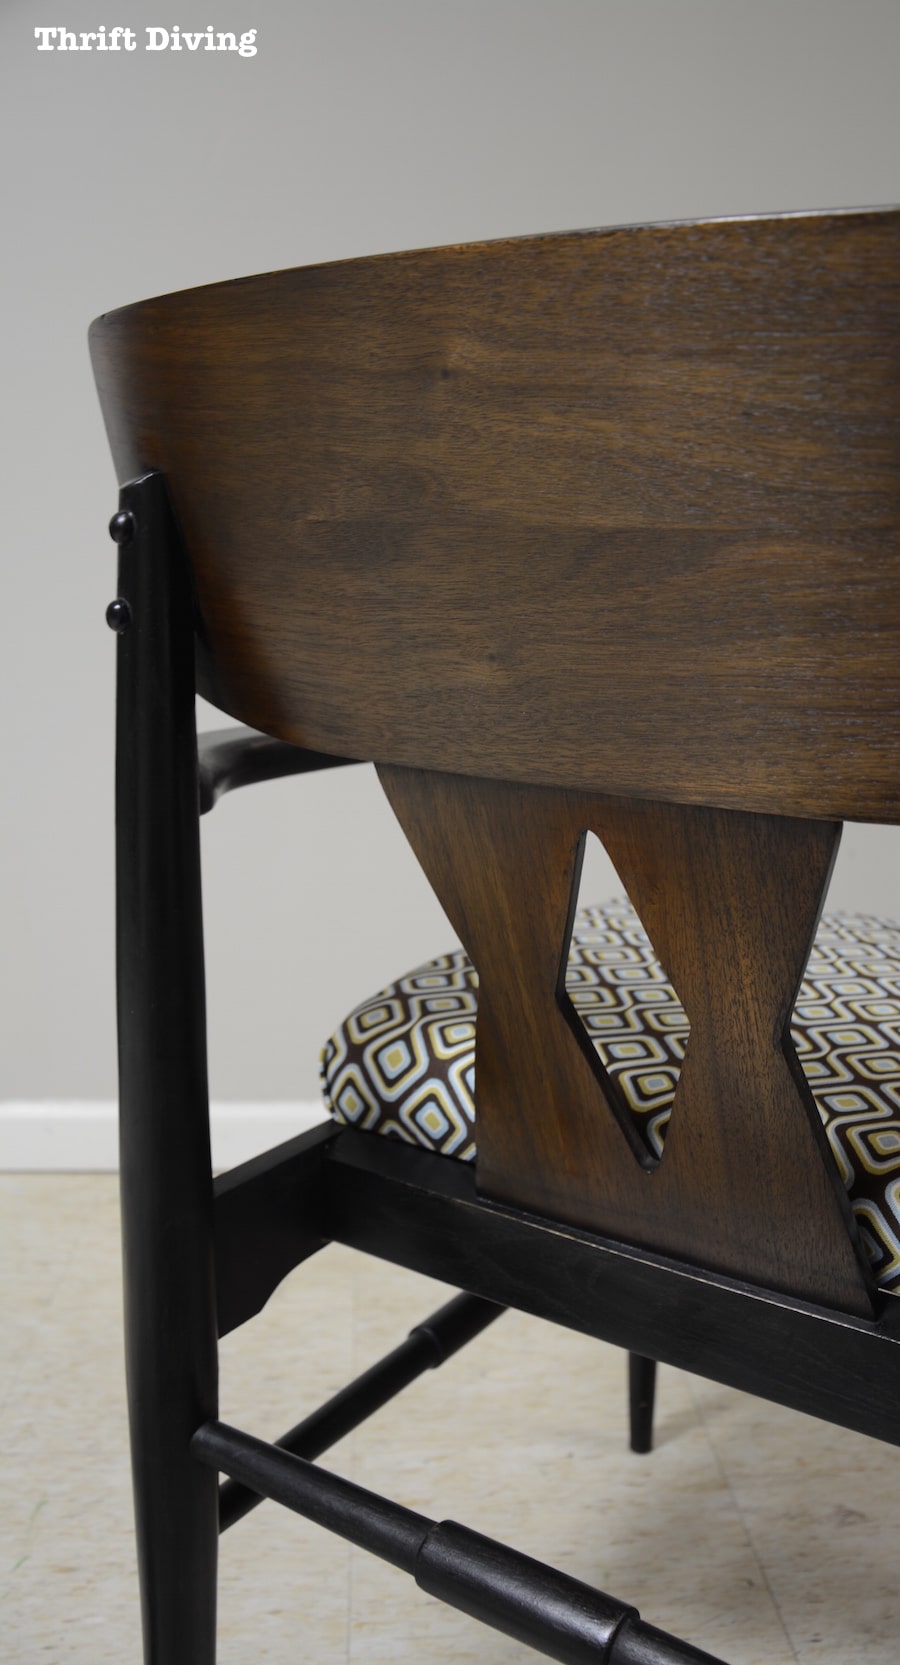
For the body of the chair, I used the steel wool on the black paint, too, and was surprised to see it begin to turn shiny, as if the steel wool was waxing the paint!
Once I added some Light Antiquing wax on the body afterward, it was turning into an amazing chair that I was actually proud of! And the way that black shined again the wood tones–loved it!
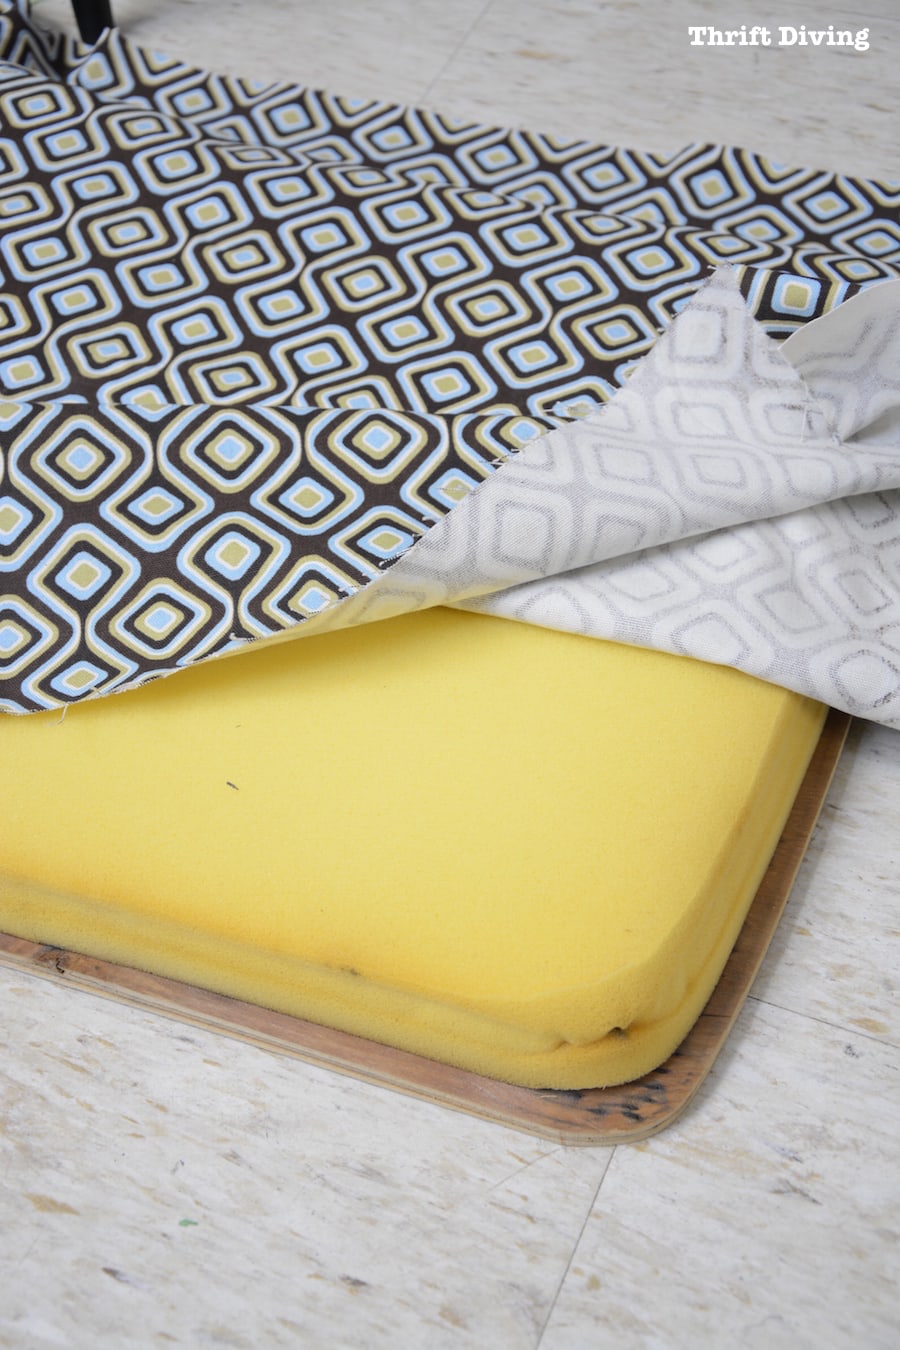
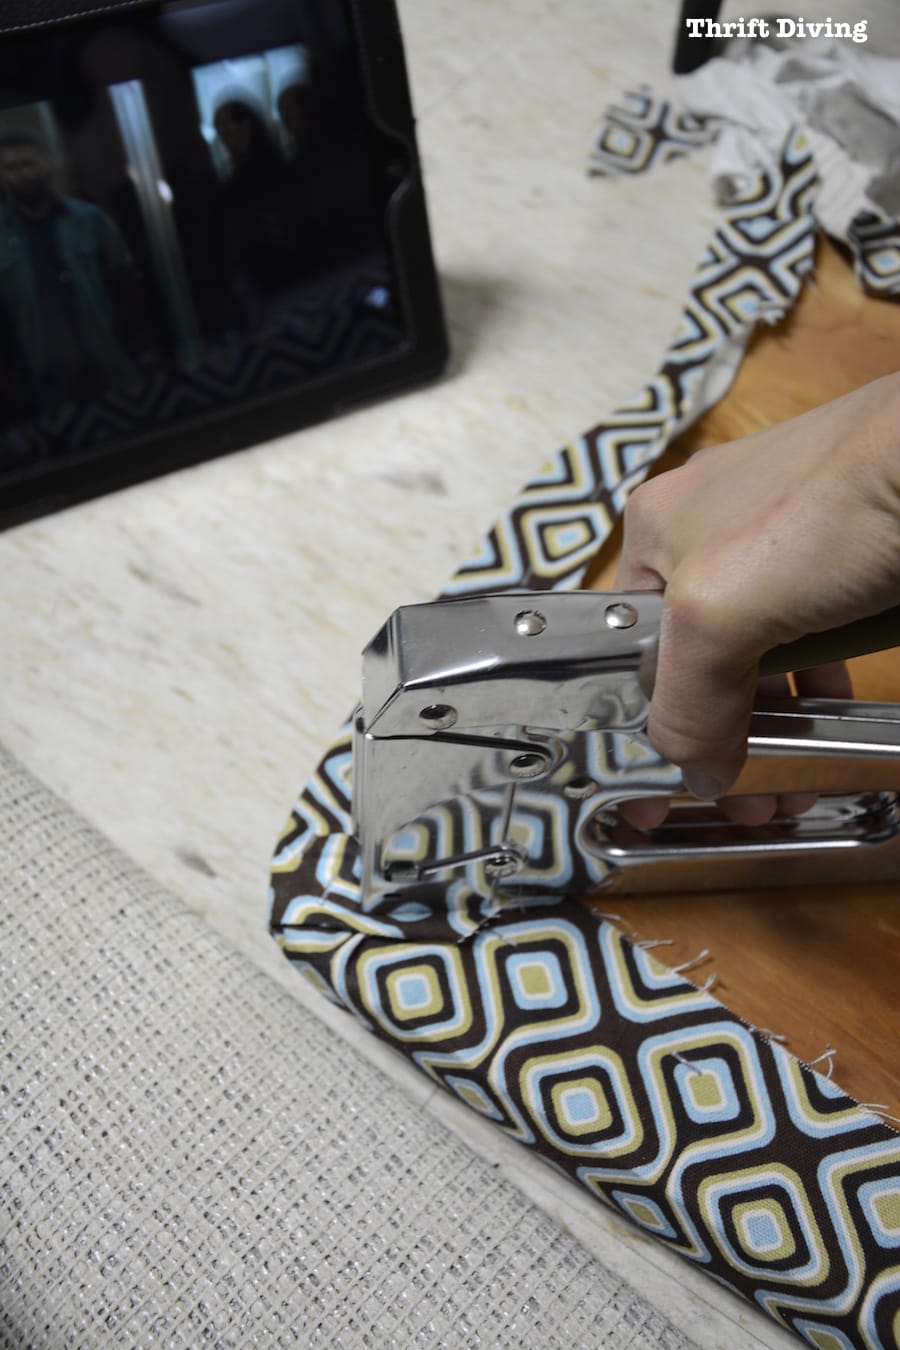
But the last thing I needed to do was cover the old seat by removing the old staples with a tack remover.
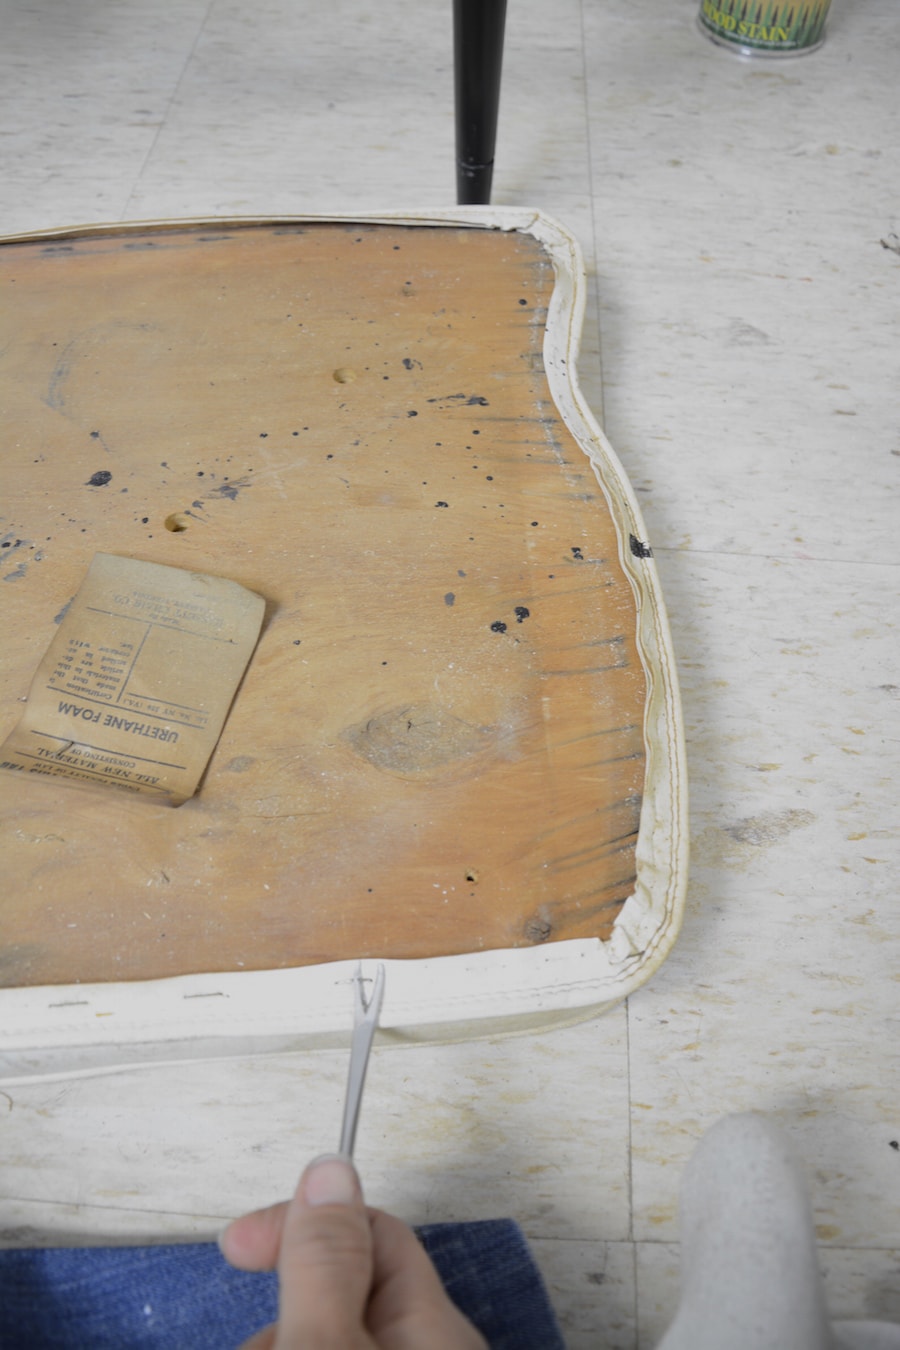
It was super icky!
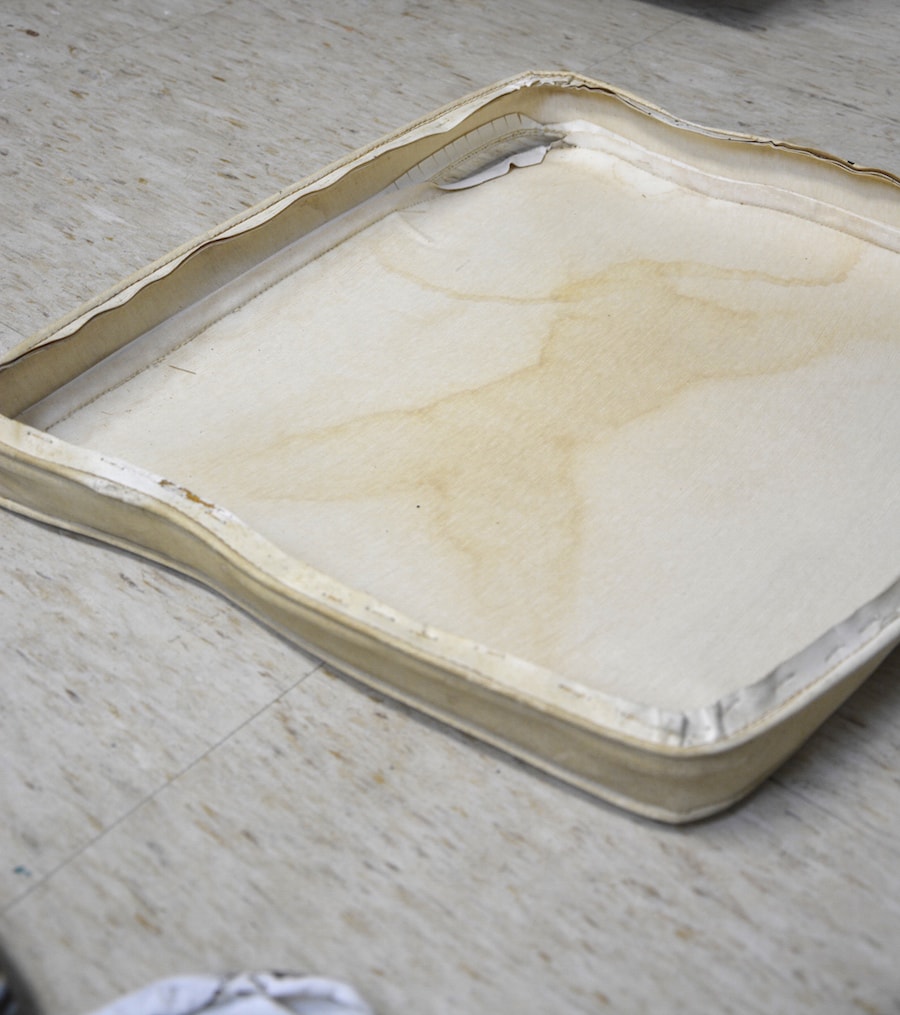
I was too cheap to go and buy a new piece of wood for the seat, which I may decide to do later since this one was a bit warped. But I just worked with what I had!
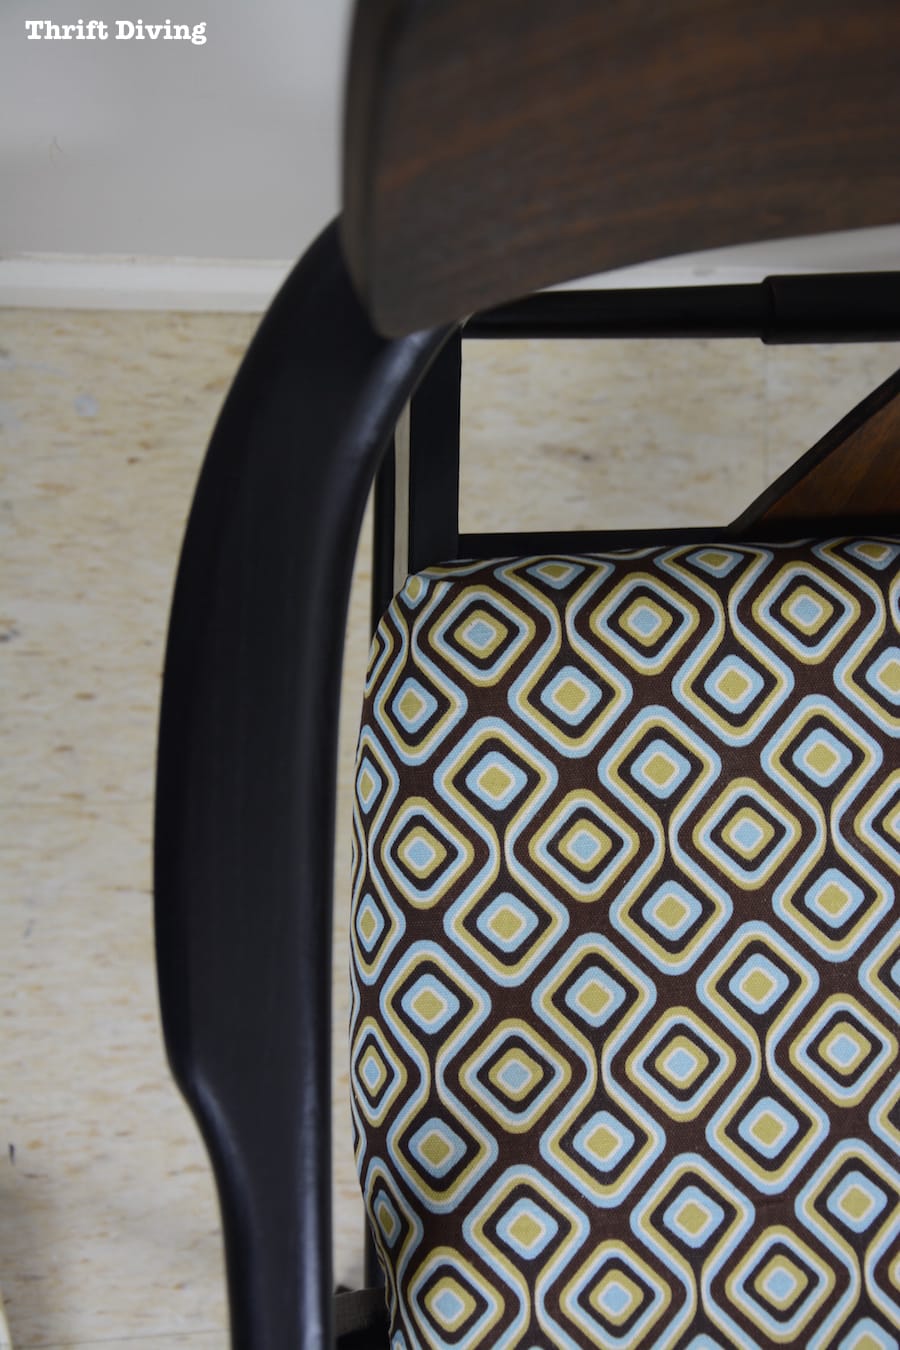
And I chose this fabric because 1) I already had it on-hand, and 2) I loved how the geometrical shape complimented the chairs diamond-shaped back.
(Don’t you love when you already have stuff on-hand?!?! I think it more than justifies the reason why we hoard craft supplies, don’t you? HA!)
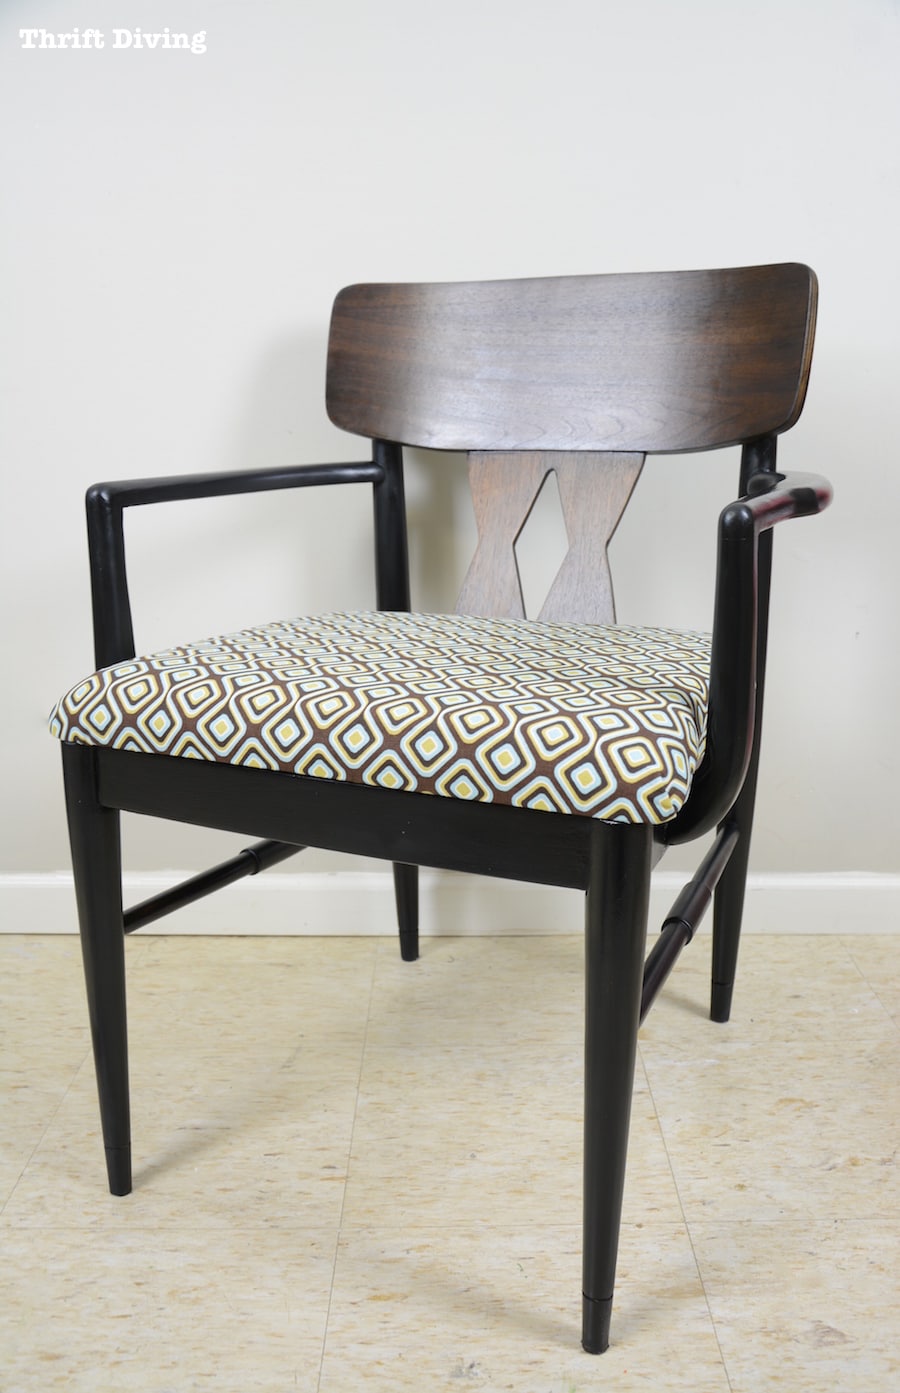
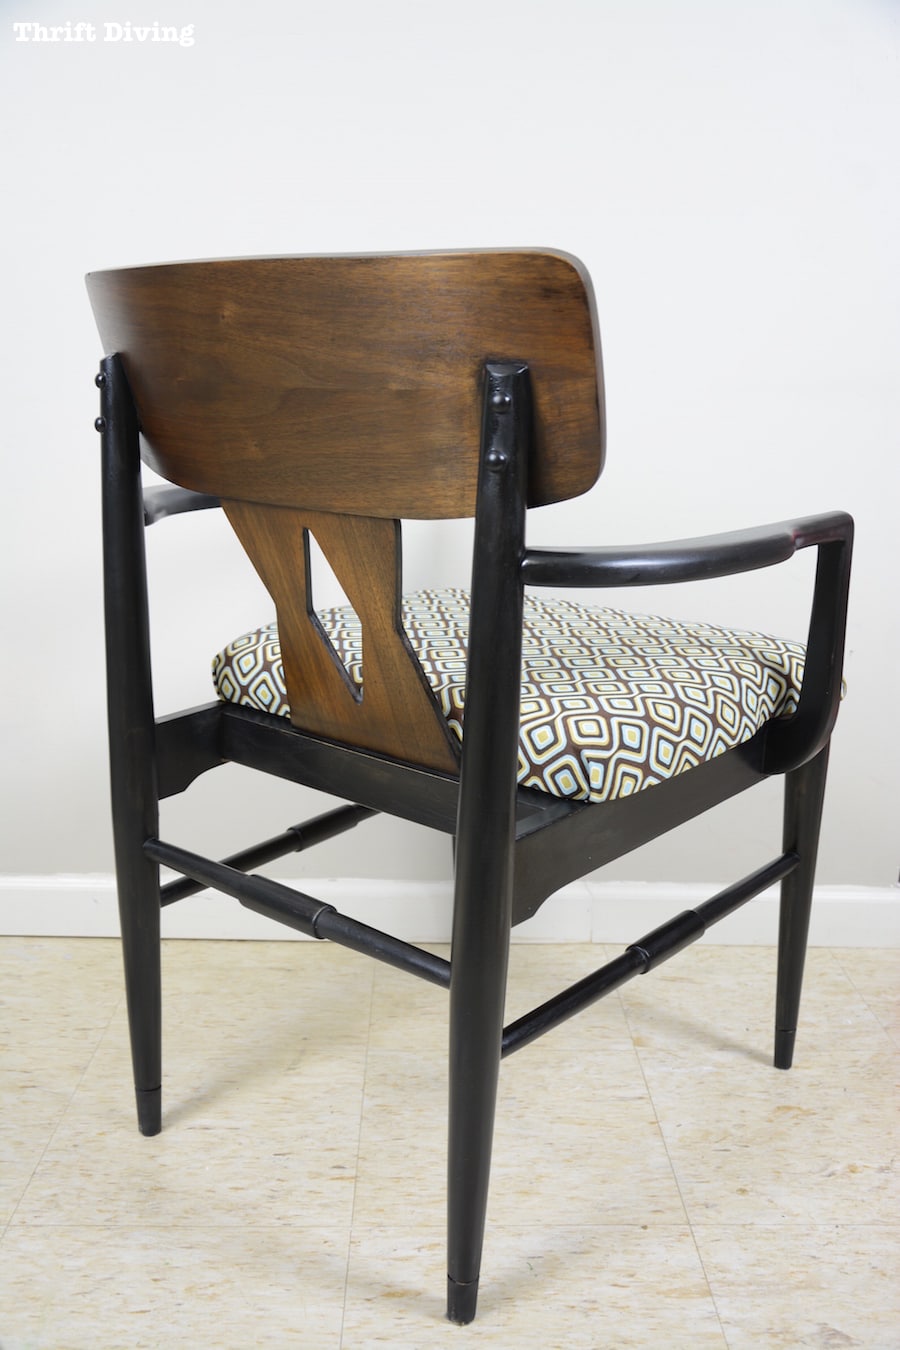
And while there are still a few issues, like the fact that I have to fix a wobbly arm, and there’s still some discoloration in parts of the wood’s diamond-shaped part, you know what??
This chair actually turned out pretty cute!
AFTER!
Remember how the back was looking after my horrible stain-job?
IN PROGRESS
AFTER!
Well, it looks like a whole new chair now!
Lessons Learned
This project was challenging. But it taught several lessons that I thought I would include:
- Never give up. Yep, I just about wanted to throw in the towel on this project after the PART 1 debacle, but I kept going! It’s normal to become discouraged after a flop, but if you just step away, regroup, and think about solutions, you can usually keep moving forward.
- Steel wool is amazing! It was such a gentle abrasion and smoothed out parts of the wooden back that fine sandpaper would have probably scratched up. Glad I have lots of it on-hand!
- There are safe products for stripping! I’ve always used toxic products when stripping and staining, but I love the Blue Bear soy-based stripper, the General Finishes water-based walnut stain, and the Rockler tung oil, which are all more natural and can be used indoors because there are no harsh odors! I’ll be keeping these products stocked on my shelf from now on! Go to Rockler.com and find some safer refinishing products, too!
So what do you guys think of my mid-century modern chair makeover save?? 🙂 Leave a comment below and let’s talk about it!

Download the 5 freebies!

Thrift Diving inspires women to decorate, improve, and maintain their home themselves...using paint, power tools, and thrift stores! Use these 5 printables, checklists, and ebooks to get started!

It came out beautiful—glad you didn’t give up. love your blog and your inspirations
Beautiful job on that chair. When I first saw you piece of fabric I wondered about it but seeing the finished chair it came beautifully. Getting inspired now to get going on an oak curio cabinet that needs to be refinished. Cost me only $50.
Wow, it turned out absolutely gorgeous. Great fabric too!!! I kinda had a “mistake” like that when I refinished my fireplace – and the mantle. Mantle ended up painted white except for the top that got left the original stained finish – one of my favorite mistakes…..BTW — you inspired my painting our brick fireplace which turned out awesome….will have to share a pic one day. It was originally that awful orange/red brick – painting it changed everything….anyway – the chair is gorgeous. Be proud!!
ooh, ooh, ooh love lines and style of your chair . Then fabric you used on seat, ooh again. To say I am loving your chair would be really big understatement. Never realized I was so interested in mid century furniture but have been seeing more pieces in that style and they are knock outs, such gorgeous wood.
Sure have to commend you for sticking with that chair, love that you used fine steel wool.
When we first starting making pieces and redoing pieces in MT, I was told at antique store where I sold about steel wool and tung oil. We might still have can of it somewhere. Have moved few times since MT so who knows.
Boy do I ever wish we lived close so I could take a class, could learn so much from you.
We live few miles west of Grand Junction, CO out in country. CO river runs along I-70 about 2 miles due south of us. We’re up on hill so have fantastic view of valley.
So impressed with your talents, bravo girl. Have great weekend
Beautiful.
WOW! That chair turned out absolutely stunning, sometimes when things go wrong they are just aiming us in the direction to turn them out more right then ever! Beautiful job!
Thank you!! I checked out your blog and I love those little side tables! Sorry to hear about your grandmas, but it sounds like it’s been your savings grace working on the house and those projects! 🙂
Yes, losing Grandma was very hard but having her home now to save and make beautiful again has been such a labor of love for us! Thank you so much for checking out my blog!
Wow, you did an awesome job that chair is beautiful.
Your chair turned out fantastic!!! I’m not a fan of stripping anything (hate the mess, etc.) but 33 years ago my husband and I stripped a little table we found at an auction and applied tung oil and it still looks fantastic- that’s without ever doing another thing to it!! Crazy, huh?
Such a an awesome save! I’ve never used tung oil but have heard it works great. It definately worked well for your project! Pinning!
Wow!! My jaw literally dropped when I saw the finished version! The difference before and after is amazing! Thank you for the lessons learned too. I can really use those insights and tips on my next project.