How to Install a Stair Runner: Step-by-Step Tutorial + Video
This tutorial on how to install a stair runner is sponsored by Arrow Fastener. Click here to SAVE this post on Pinterest.
I can’t tell you how many times my family has tripped, fallen, or slipped down the stairs because of this slippery wood. (The minute I hear any thump-THUMP in the house, I run to the stairs, expecting the worse). I had been wanting to install a stair runner for quite a while but if you’ve ever researched stair runners you’ll know that the really “high end” stair runners are too expensive. Thankfully, I found some modern stair runners that didn’t break the budget! (keep reading!).
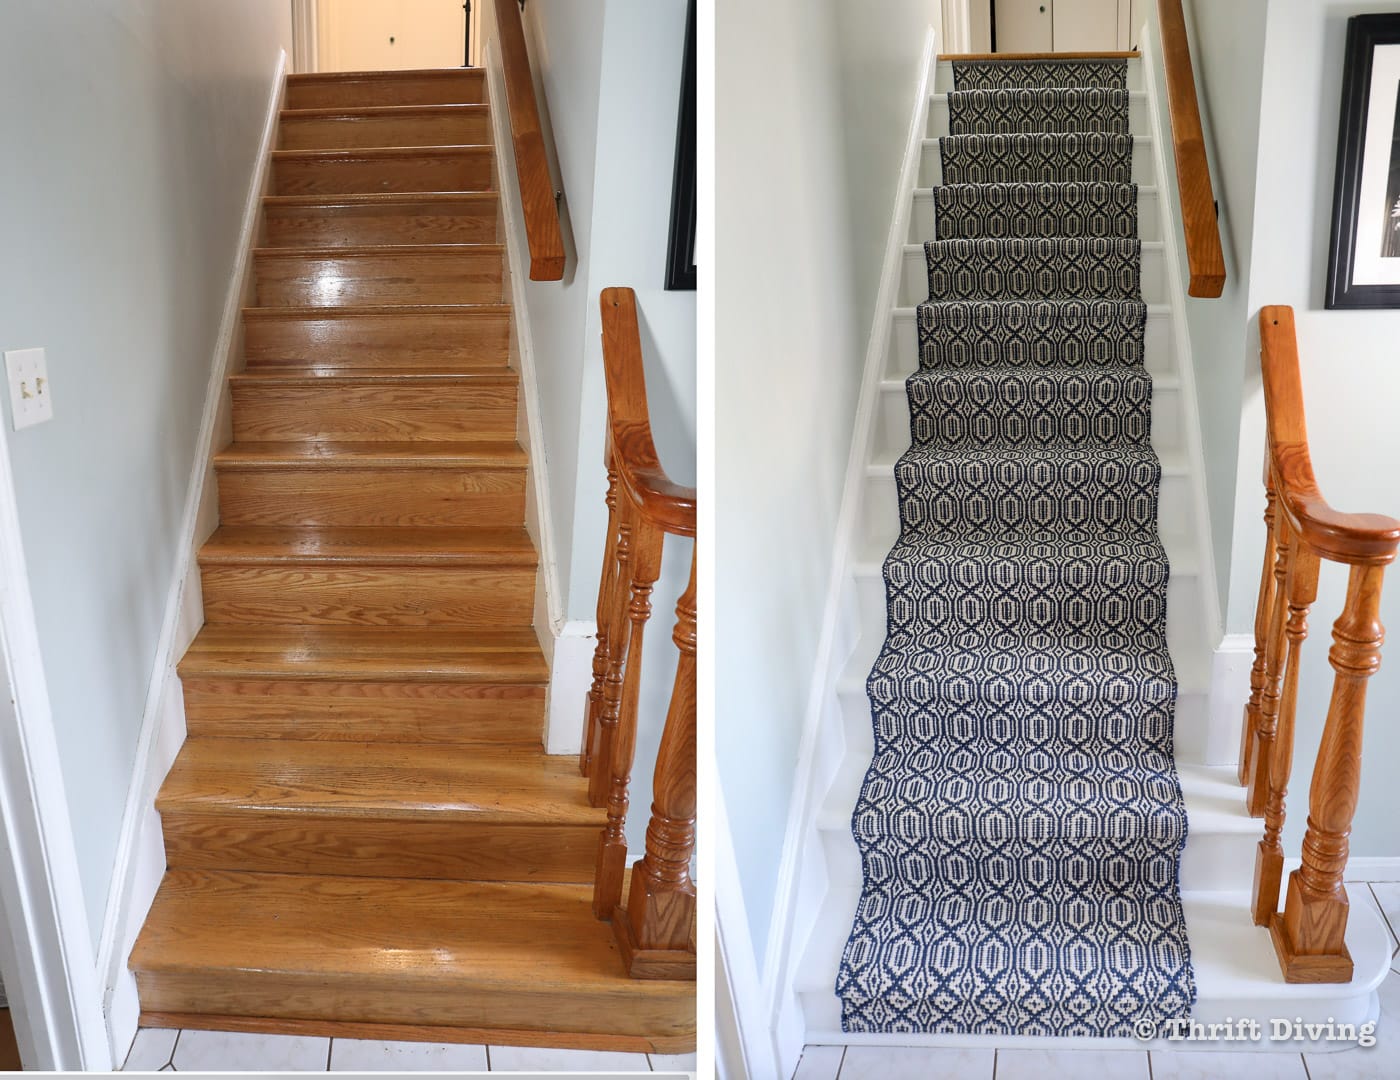
This is how my set of oak stairs looked before this makeover. I know…I know…pretty oak wood, you say.
But honestly, this set of stairs was not in style, worn, and felt really cold and bare. It was time for a makeover!
(Click here to SAVE this tutorial on Pinterest).
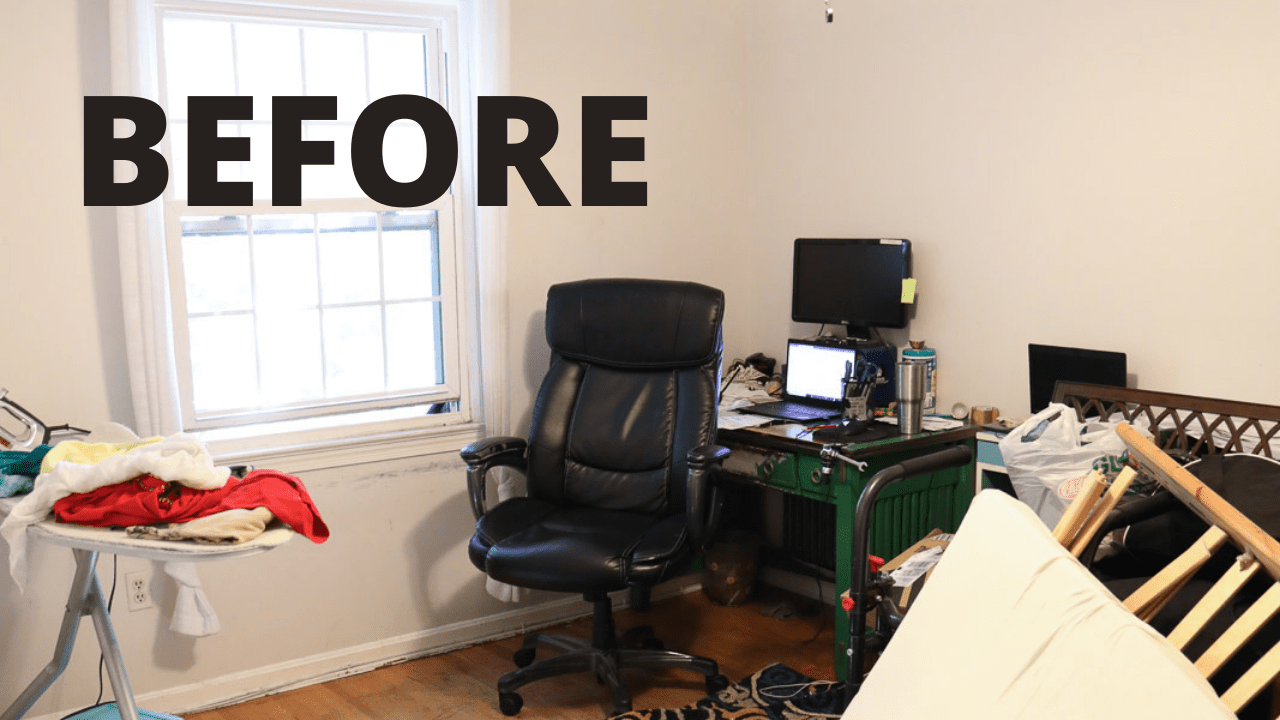
BEFORE – Stair Runner Makeover
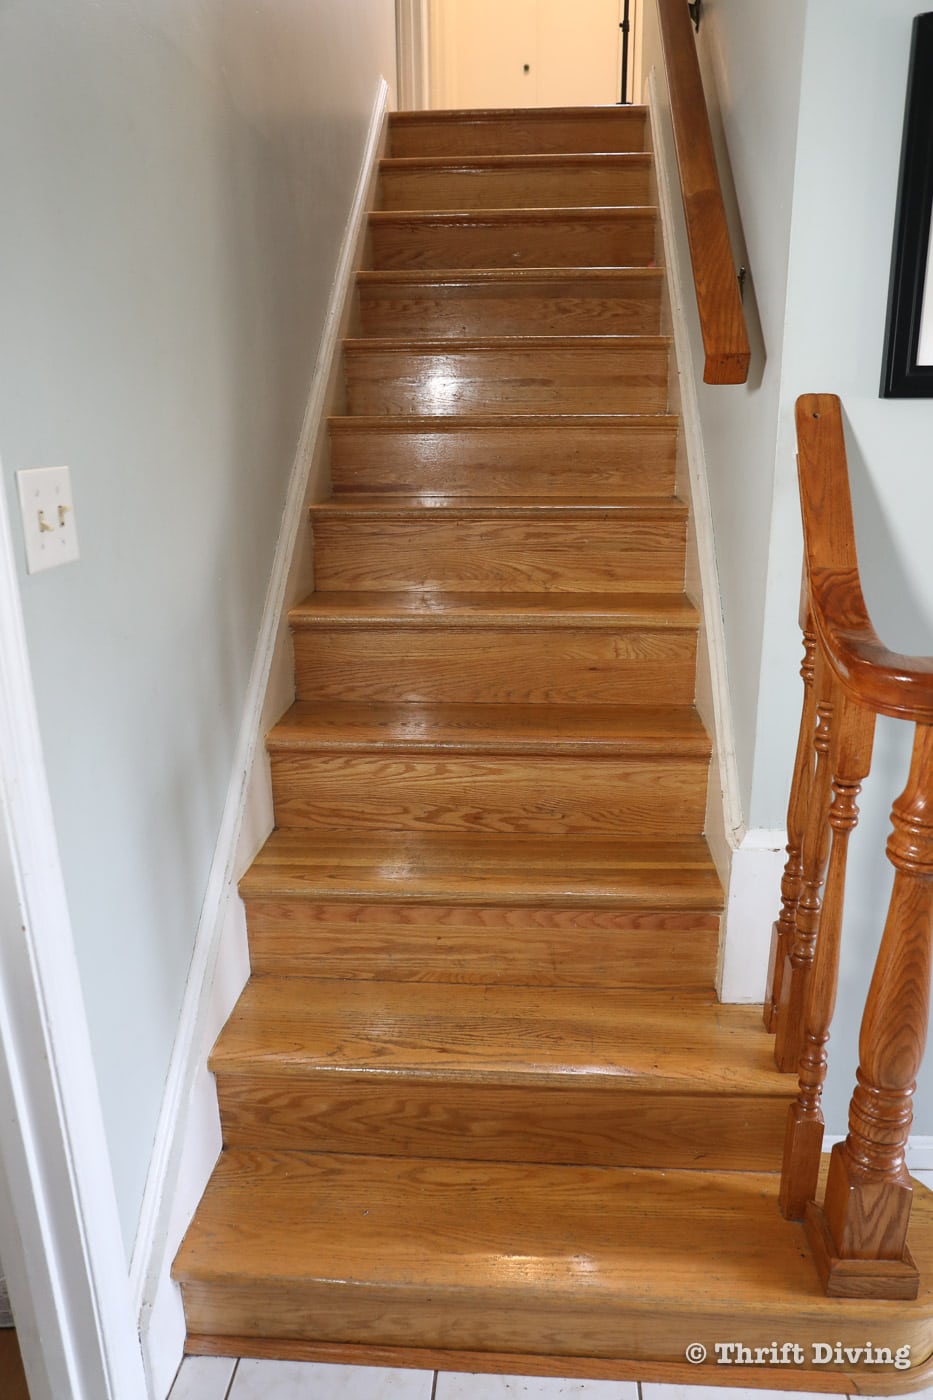
So not only were they dangerous and cold, unwelcoming, but they were loud. You never know how loud a set of stairs are until you’re squeaking down them at 2 a.m. for a sip of water, trying not to wake the kids! (Or, should I say, sneaking it at night after everyone has gone to bed!). LOL
Also, I like my home to feel cozy and warm. As much as wood is awesome (after all, it is more hygienic , easier to clean, and no toxins like wall-to-wall-carpeting which can off-gas), there’s nothing like the feel of soft rugs under your feet on a set of hard stairs.
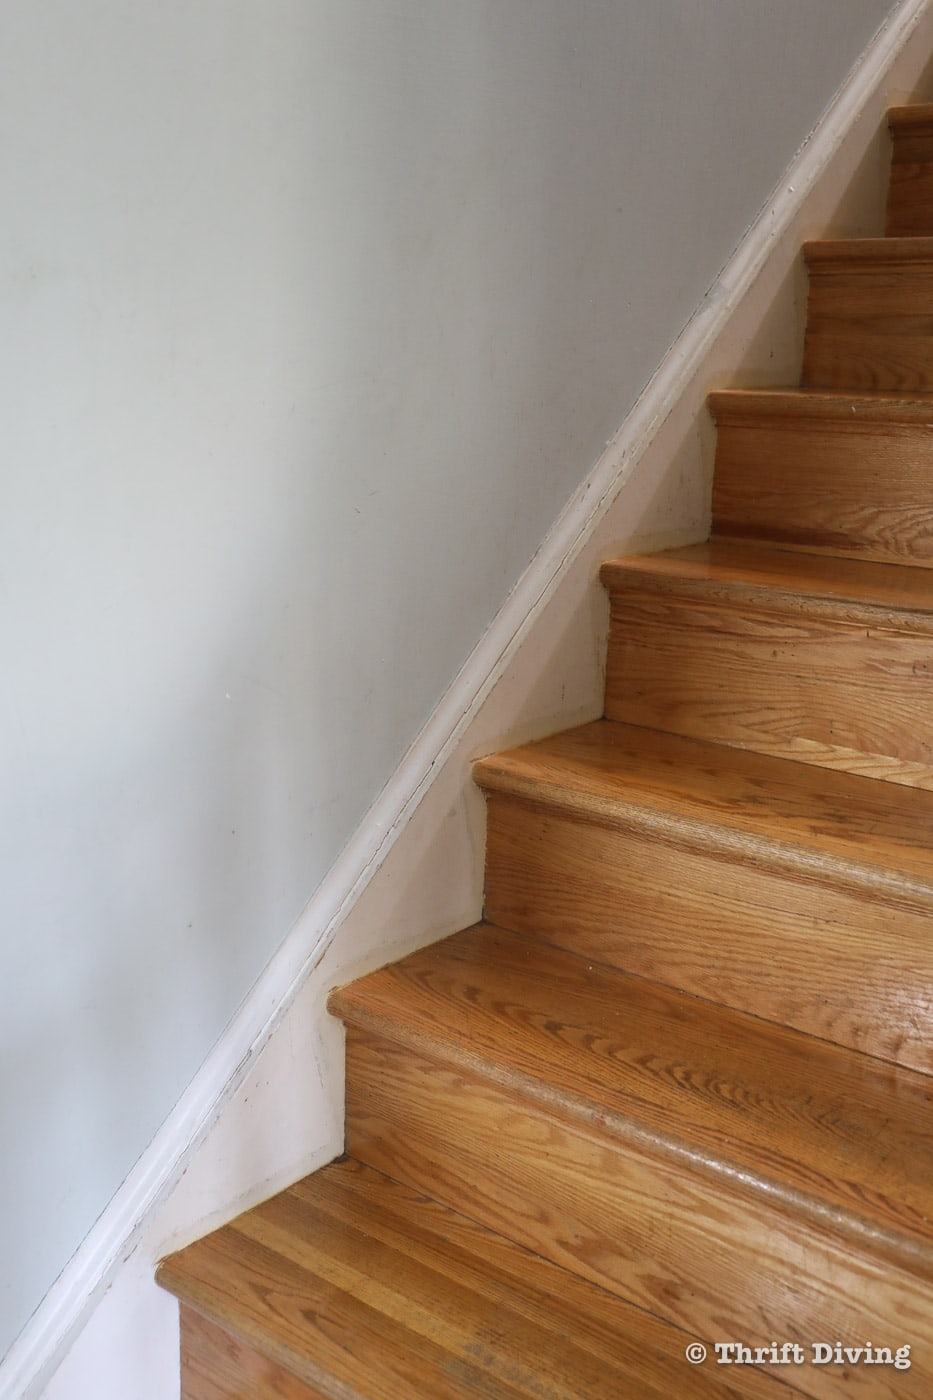
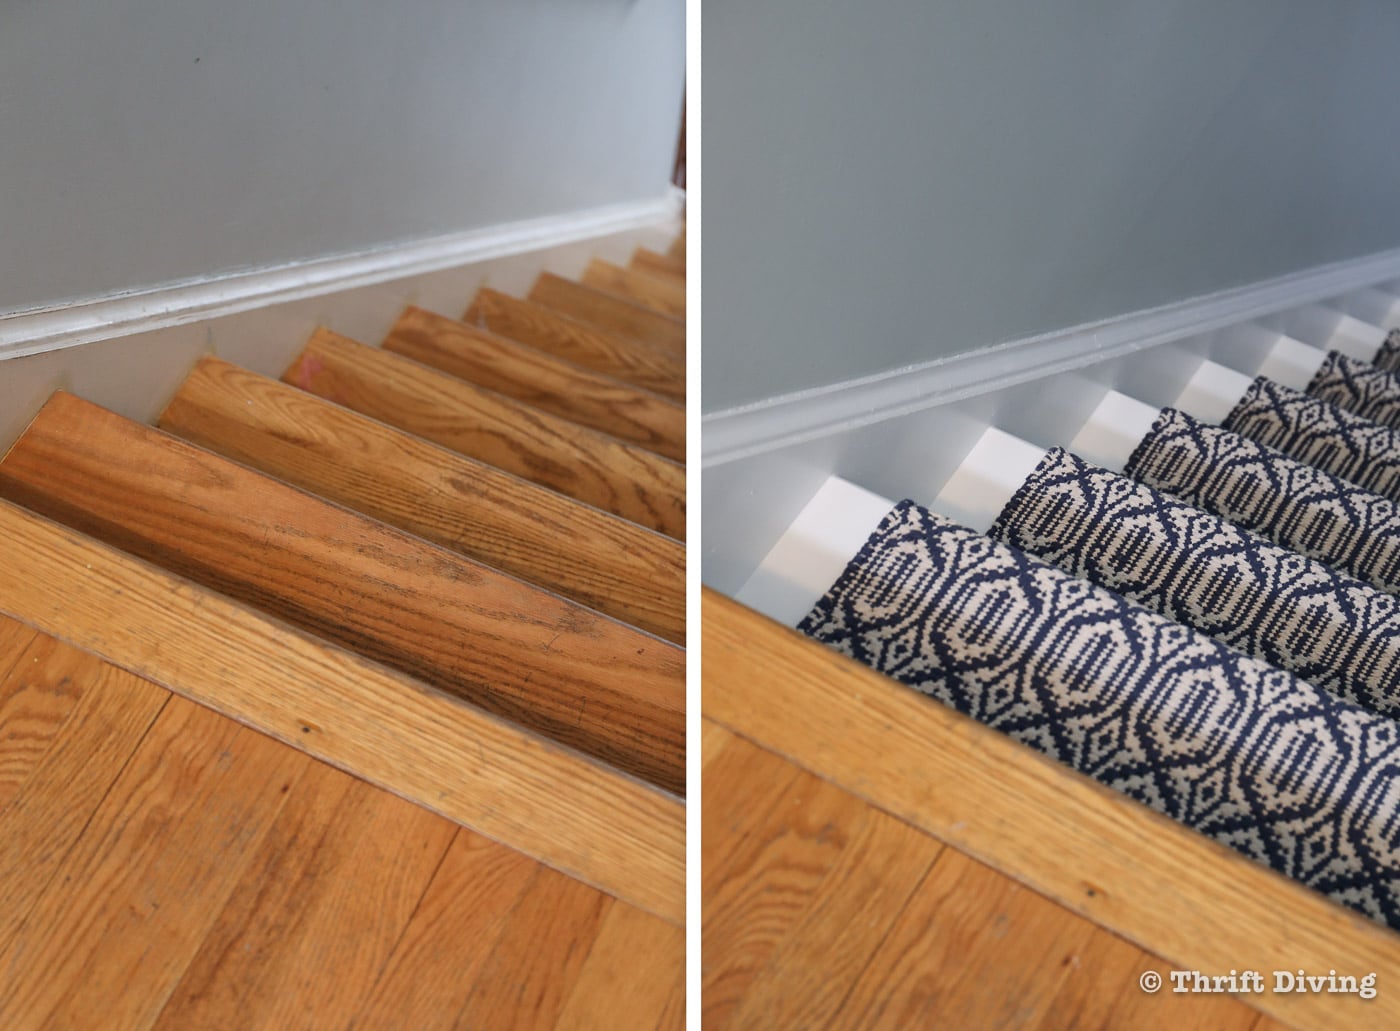
The previous homeowners had carpet on the stairs but it must have been removed at some point before we bought the place. You can see the discolored outline along the side of the stairs (on the stringer). I’m embarrassed to admit that I never even tried to paint it. I just left it ugly like this for years.
I don’t know if stair runners are popular or in style (I doubt they’re outdated), but one thing I do know: they make stairs safer and they look pretty doggone cute! Better than a set of boring ‘ole wooden stairs! Ammiright???
AFTER – Stair Runner Makeover!
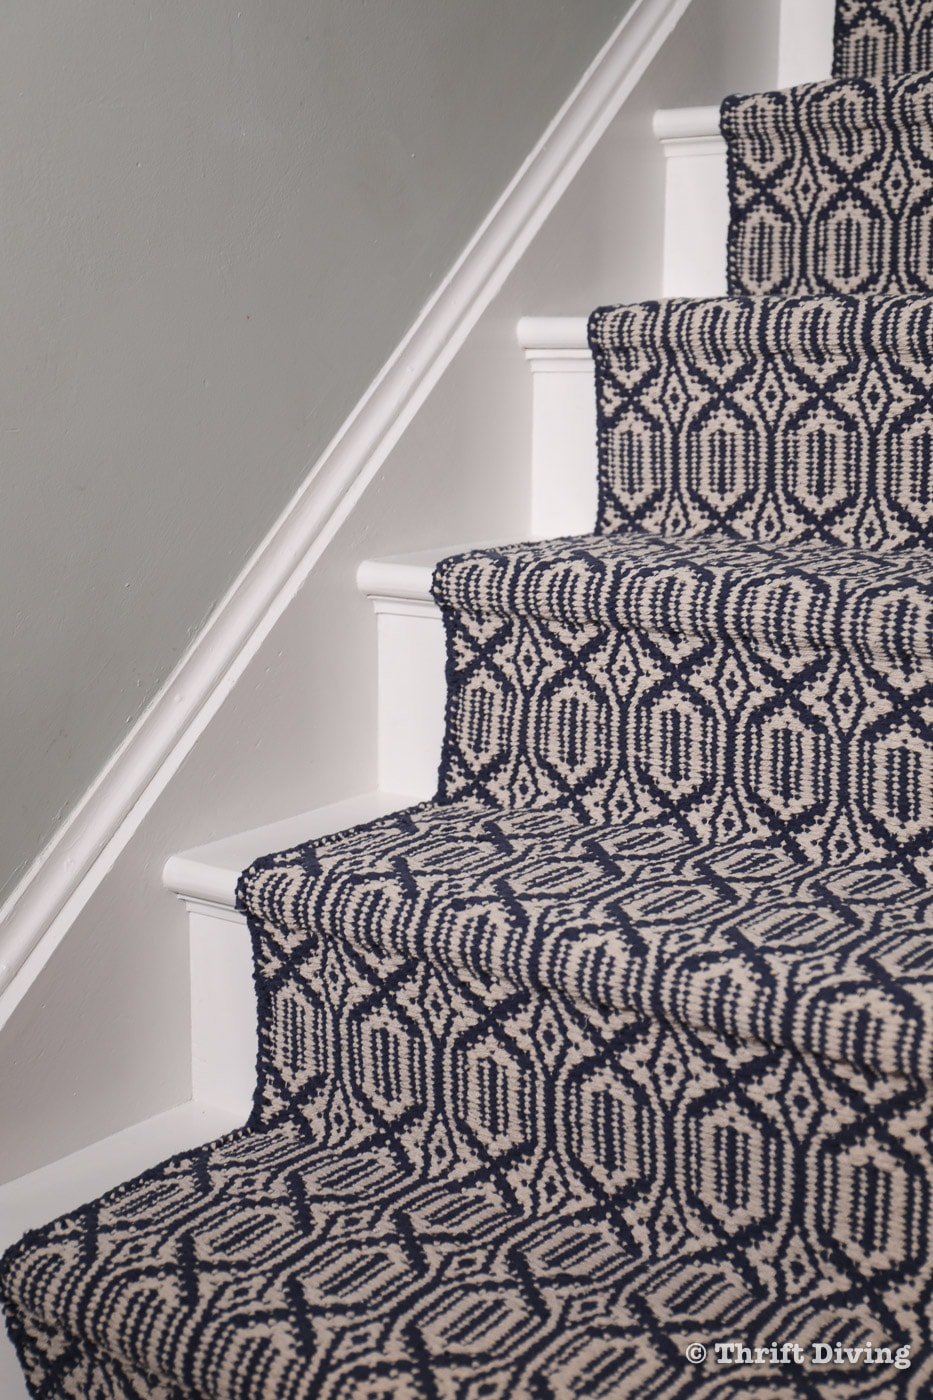
With fresh white paint and modern stair runners, I finally feel like my house is bring brought up to 2020 instead of being stuck in 1973! I love how cozy it feels and it makes me feel better knowing that a foot isn’t going to easily slip off the treads like they have before!
Watch This Tutorial
Some people are visual learners. 🙂 I’ve got ya covered! Click here to watch this tutorial on how to install a stair runner, from my YouTube channel.
Click here to subscribe to my YouTube channel!
Materials – How to Install a Stair Runner
So you might be wondering how easy or difficult it is to lay a stair runner. It’s definitely a beginner project that anyone can do. But you will need some tools and materials to be able to get this project done right. Here’s what you’ll need:
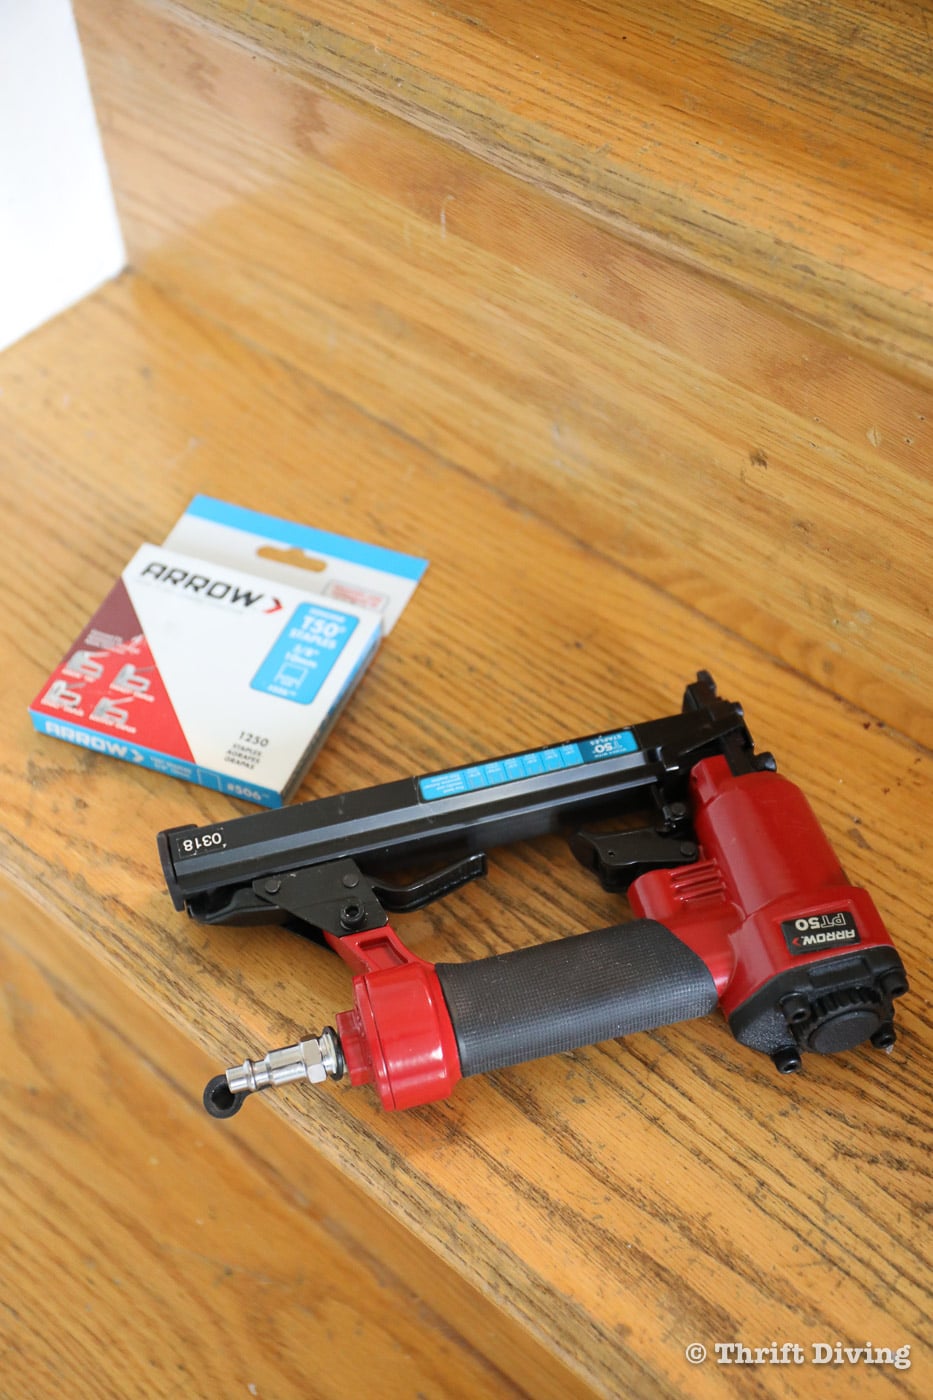
- Arrow Fastener PT50 pneumatic stapler
- Arrow Fastener T50 heavy duty stapler
- 3/8″ and 1/2″ T50 staples
- Stair runners (I bought 3 of these Safavieh Montauk Collection Cotton Runners )
- 20V 1/4″ Sheet Sander (optional)
- 150-grit sand paper
- Air compressor (remember to buy an air hose and a compressor accessory set when you buy an air compressor).
- Rug pads (2′ x 12′) (or buy a similar rug pad on Amazon).
- Water-based primer
- Semi-gloss latex paint
- All-purpose Primer
- Rags
- Paint brush or roller
- Painter’s tape
- Scissors
- Tape measure
- Double-sided tape (optional)
- Simple Green cleaner
- Caulk (trim and molding caulk)
(FYI: If you can’t afford to get a condenser or pneumatic stapler, try checking out this post on How to Paint Your Stairs and use small furniture tacks for securing the rugs.).
Arrow Fastener is one of my sponsors here at Thrift Diving because they make quality fasteners and tools. We’ll be teaming up for a few projects this year. This project was the perfect opportunity to team up because I needed the PT50 pneumatic stapler for adhering the stair runner to the stairs, and Arrow had what I needed to get the job done!
How to Install a Stair Runner: Step-by-Step
In this post you’ll learn how to install a stair runner. Here is some important things you have to know before getting started:
Time: About 3-4 hours.
Cost: $150 – $300
Level: Beginner
Where to Find the Best Stair Runners
Let me just make a quick comment about the best stair runners: they’re hard to find! One challenging thing about this project was trying to find pretty and modern stair runners. If you search “stair runners” on Amazon you’ll find a bunch of really ugly individual peel and stick things that go on the treads. Those are not cute!
Another well-known place is Dash & Albert. But you’ll pay out the wazoo for those rugs (try about $184 for an 8-foot runner!).
The brand I bought, Safavieh Montauk Collection runners, are really cute and way more affordable for 7′ and 8′ runners. I even found the same brand and style at another online department store and it was half as much on Amazon! Just an FYI!
STEP 1: How to Calculate Stair Runner Length
The hardest part of installing a stair runner is measuring to figure out how many stair runner lengths you need to buy in order to cover the entire set of stairs. But before you can figure that out, you have to measure your stairs and then add it all up.
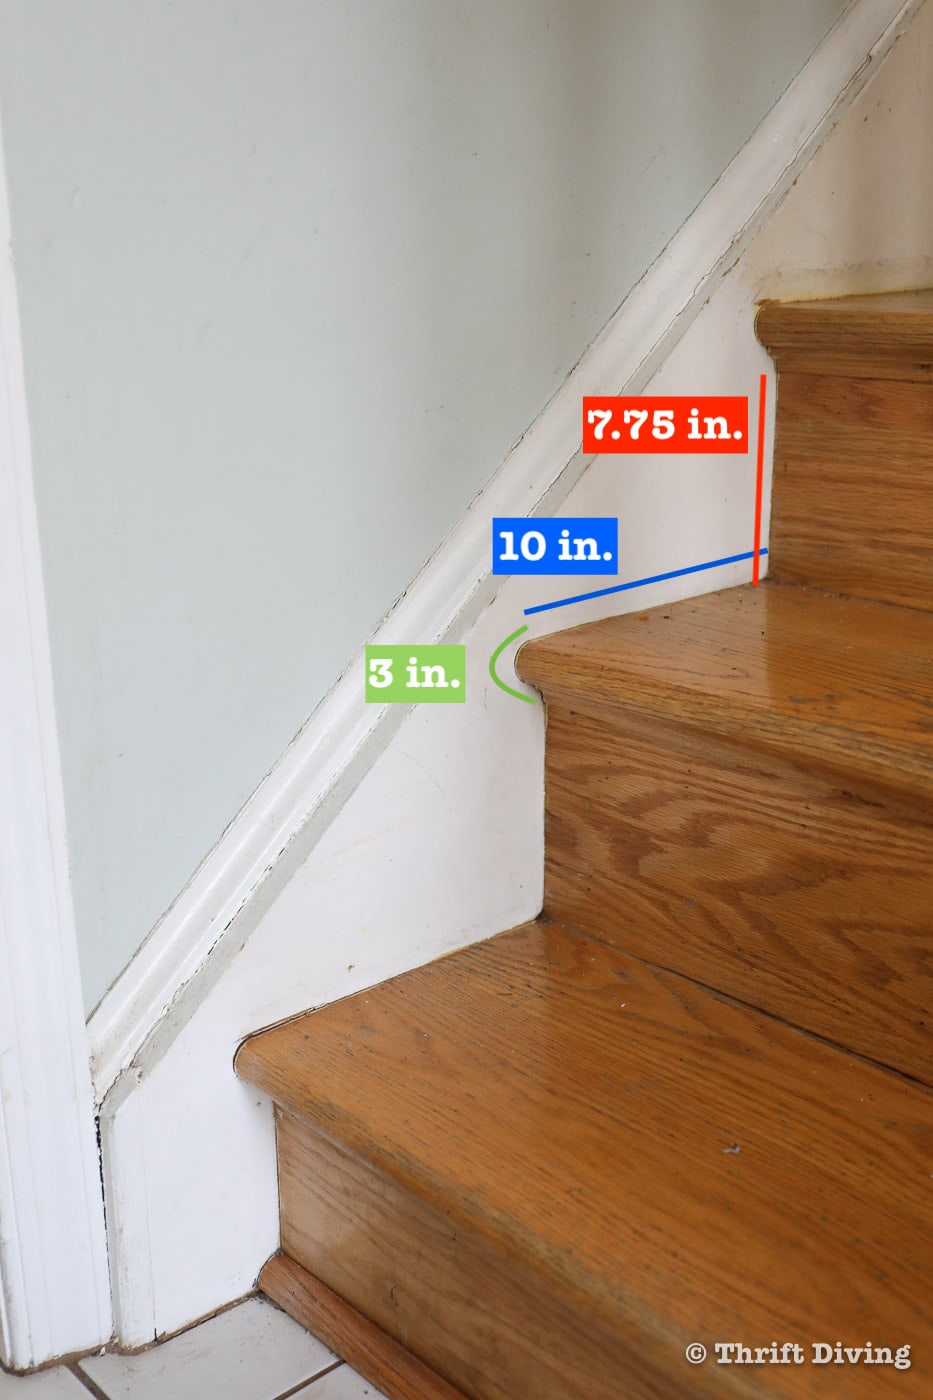
Here are the measurements you need to take:
Rise: This is the vertical part of the stairs. This part of the stair is usually no higher than 7.75 inches in height. For the sake of calculations, let’s just round up to 8″.
Tread: This is the part of the step that your foot lands on. This part is generally about 10 inches, but yours might be a big deeper.
Tread nose: Most steps have a rounded nose part attached to the tread. It’s usually about 2 inches – 3 inches when a tape measure is wrapped around it.
So for an average set of stairs, you can safely assume that each riser, tread, and nose combination is approximately 21″ of stair runner needed.
Start at the top and measure, adding up the total amount of risers, treads, and tread noses there will be covered. In my case, this set of stairs:
- Had 11 treads (not including the top stair, which was the landing).
- Each rise/tread/nose section needed about 21″ of stair runner to cover each stair.
- Therefore 21 inches x 11 treads = about 19.25 feet.
- So….since the stair runners I ordered were 8 feet long, I needed to order 3 stair runners to cover the entire 19.25 feet of stairs. Only 2 rugs would have given me 16″. At least with 3 rugs, I have 24 feet to work with, which means I’ll have a bit left over, which is ok.
Pretty simple, right?? Most stair runners are not going to be as long as you need them in one full piece (unless they’re special order or you get those old-fashioned kind from the home improvement store). Modern stair runners usually go up to 18 feet. The ones I ordered only went up to 8 feet. We’ll talk later about how you connect them to make one long stair runner. Keep reading. 😉
If you’re putting a stair runner on a set of stairs that has a landing and then turns direction and has another set of stairs, you’ll follow these same instructions. You’ll just need to account for that landing space and you’ll staple down enough stair runner to cover that section, as well.
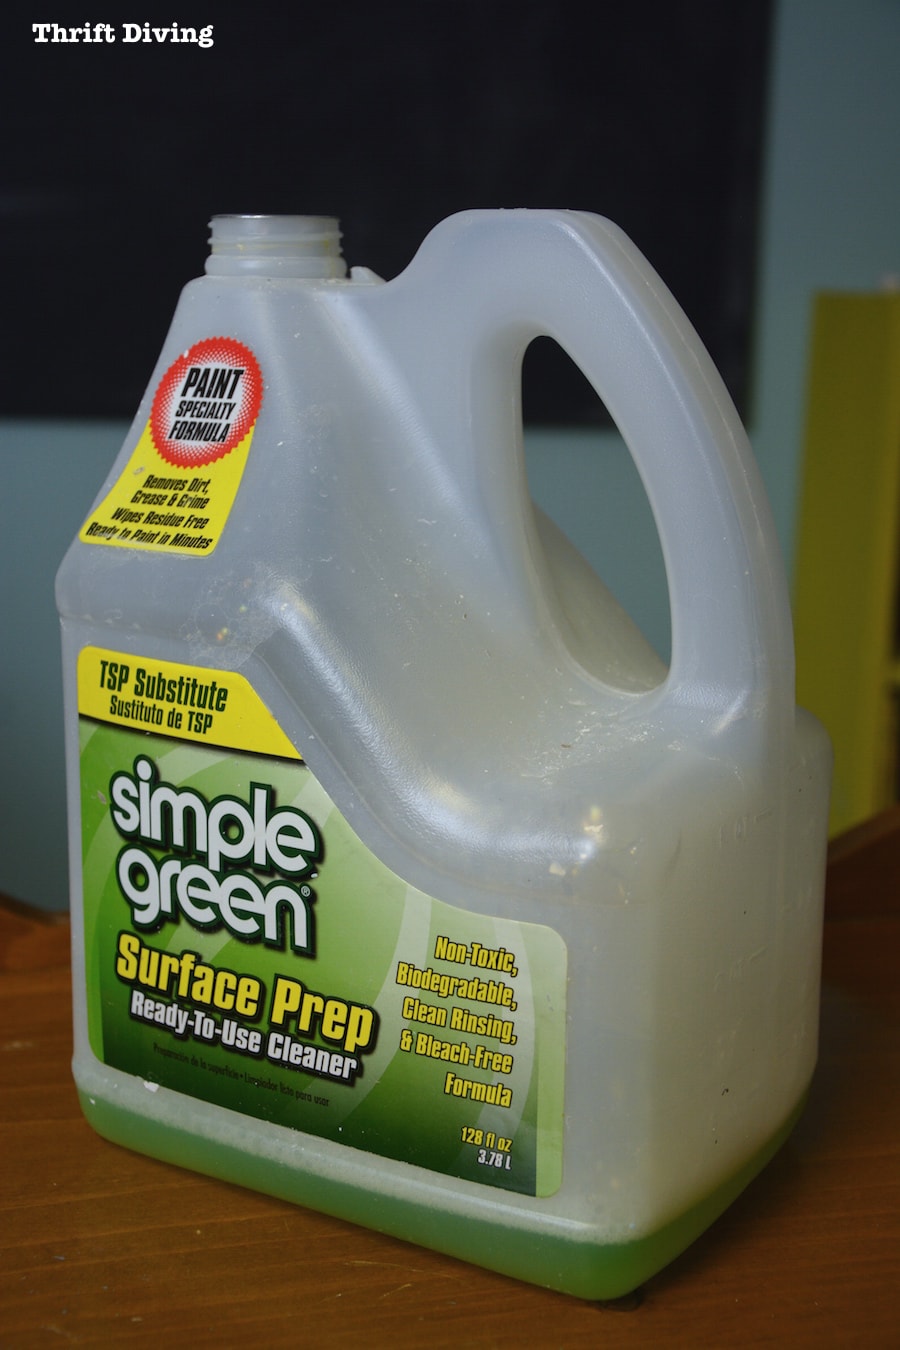
STEP 2: Clean the Stairs and Walls
Before getting starting with installing stair runner, make sure everything is clean. I used Simple Green which is a degreaser, which is perfect for cleaning down the stairwell walls and stairs prior to painting. Use a spray bottle with diluted Simple Green, clean the walls and stairs, and then wipe them down with clean, fresh water.
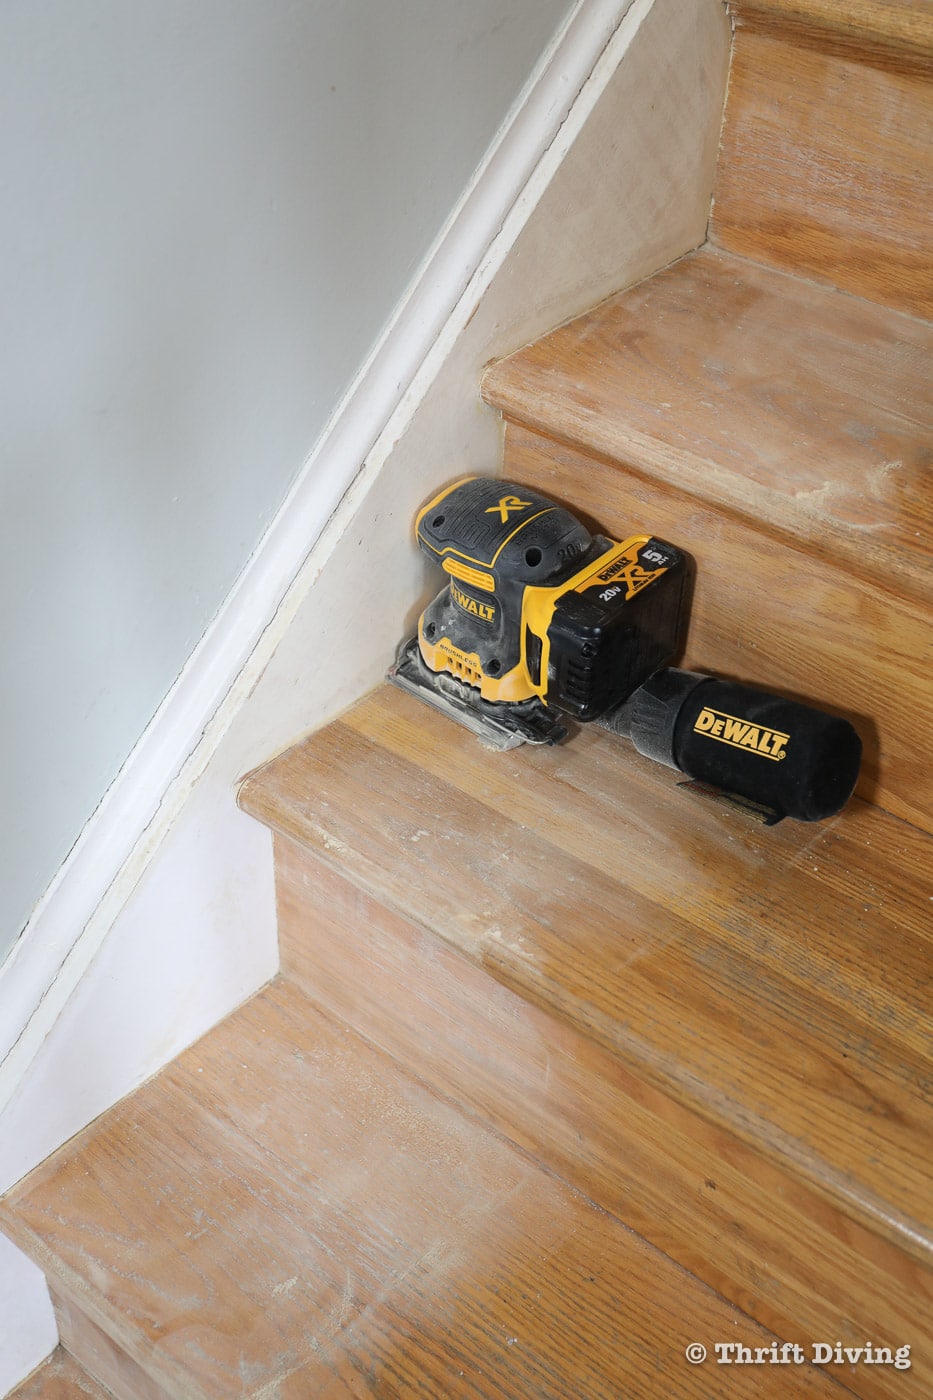
STEP 2: Sand the Stairs with 150-grit Sandpaper
Next, it’s time to sand the stairs! Since you just cleaned the stairs, you will have to wipe the dust off prior to painting, but you can just use clean water at this point, since the stairs are technically “clean.”
I used 150-grit sandpaper with a sheet sander, but you can also sand by hand or with an orbital sander. A sheet sander works best because it’s square and fits nicely into square corners, unlike a round orbital sander.
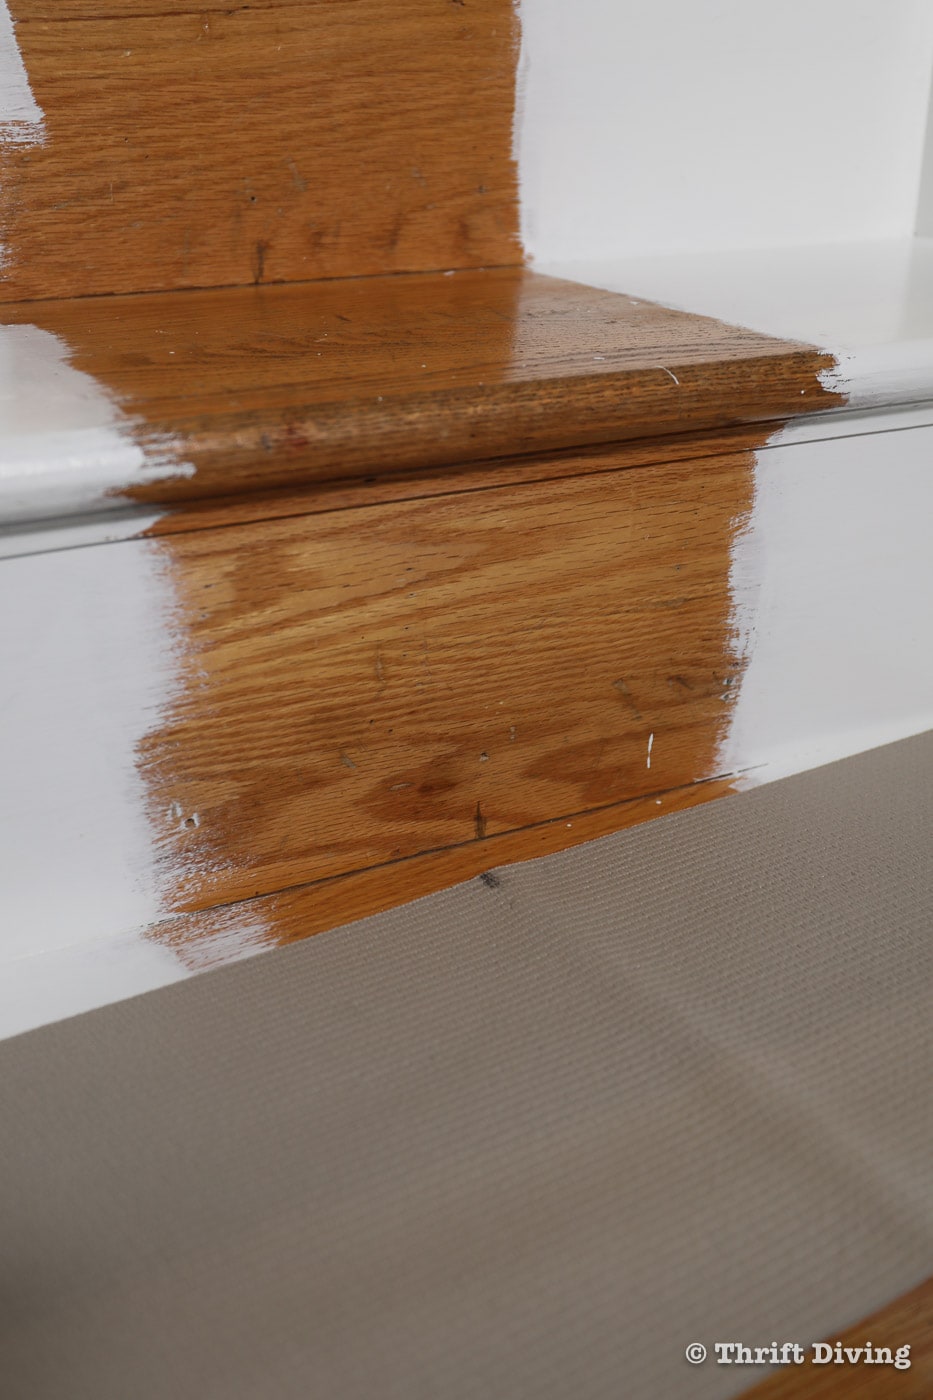
You’ll notice here that I am only sanding the sides of the stairs, not the entire stair. That is correct! Since I planned to install a stair runner, the center would not be seen. I left it untouched and just focused on sanding the sides.
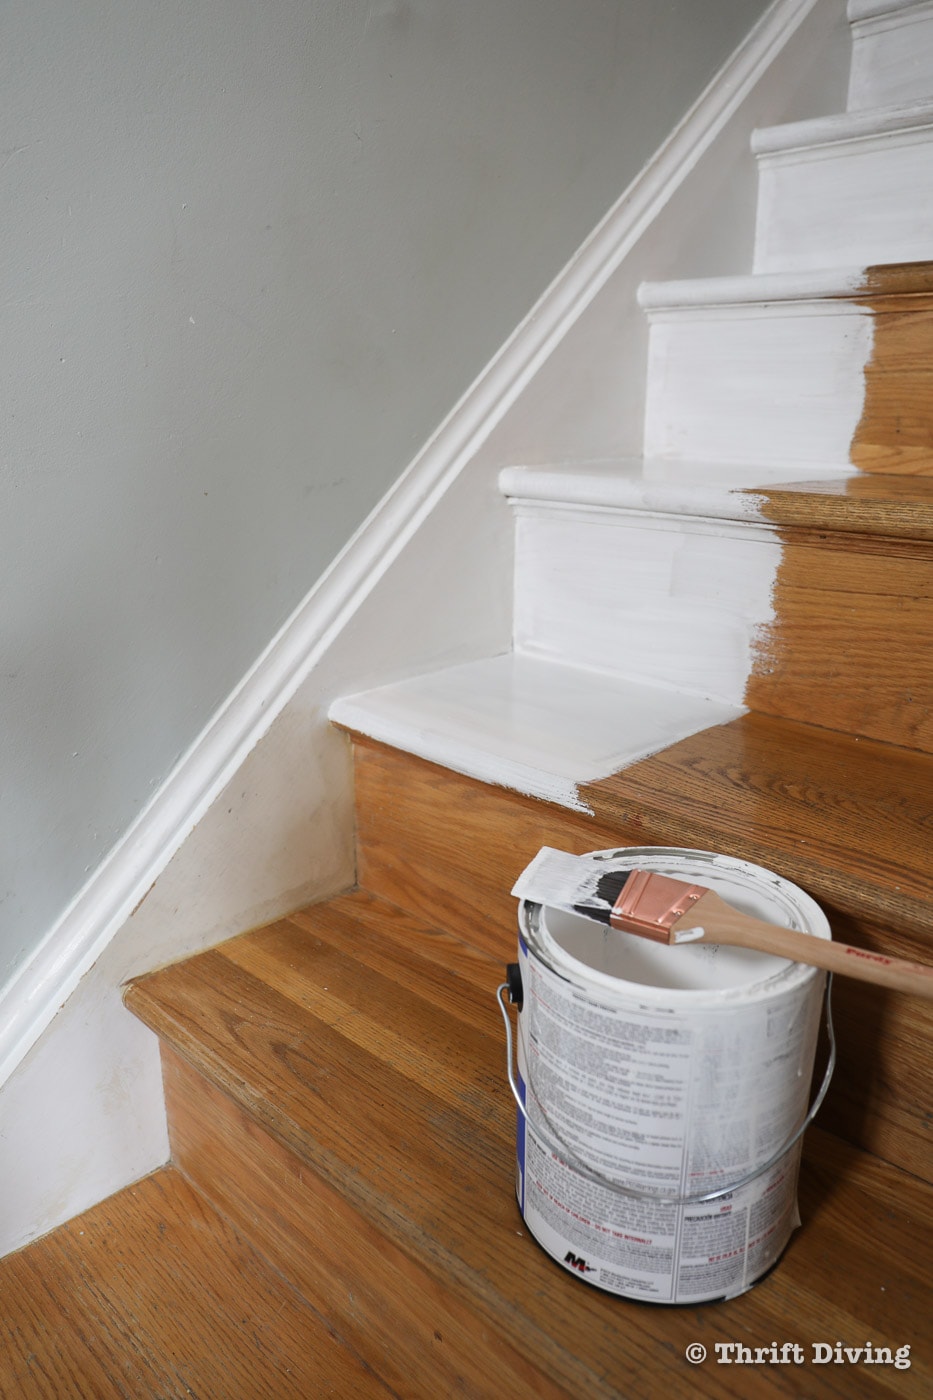
STEP 3: Add 1-2 Coats of Primer
After I cleaned up the dust, you’ll notice that I started priming just the sides, as well. Again, I needed a way to go up and down the stairs, as well as wanted to save time and money by not refinishing the center of the stair. You may choose to do the entire stair, but for me, it made sense to keep the center clear to make it easier for maneuvering.
I used an all-purpose primer and added 2 coats for good coverage.
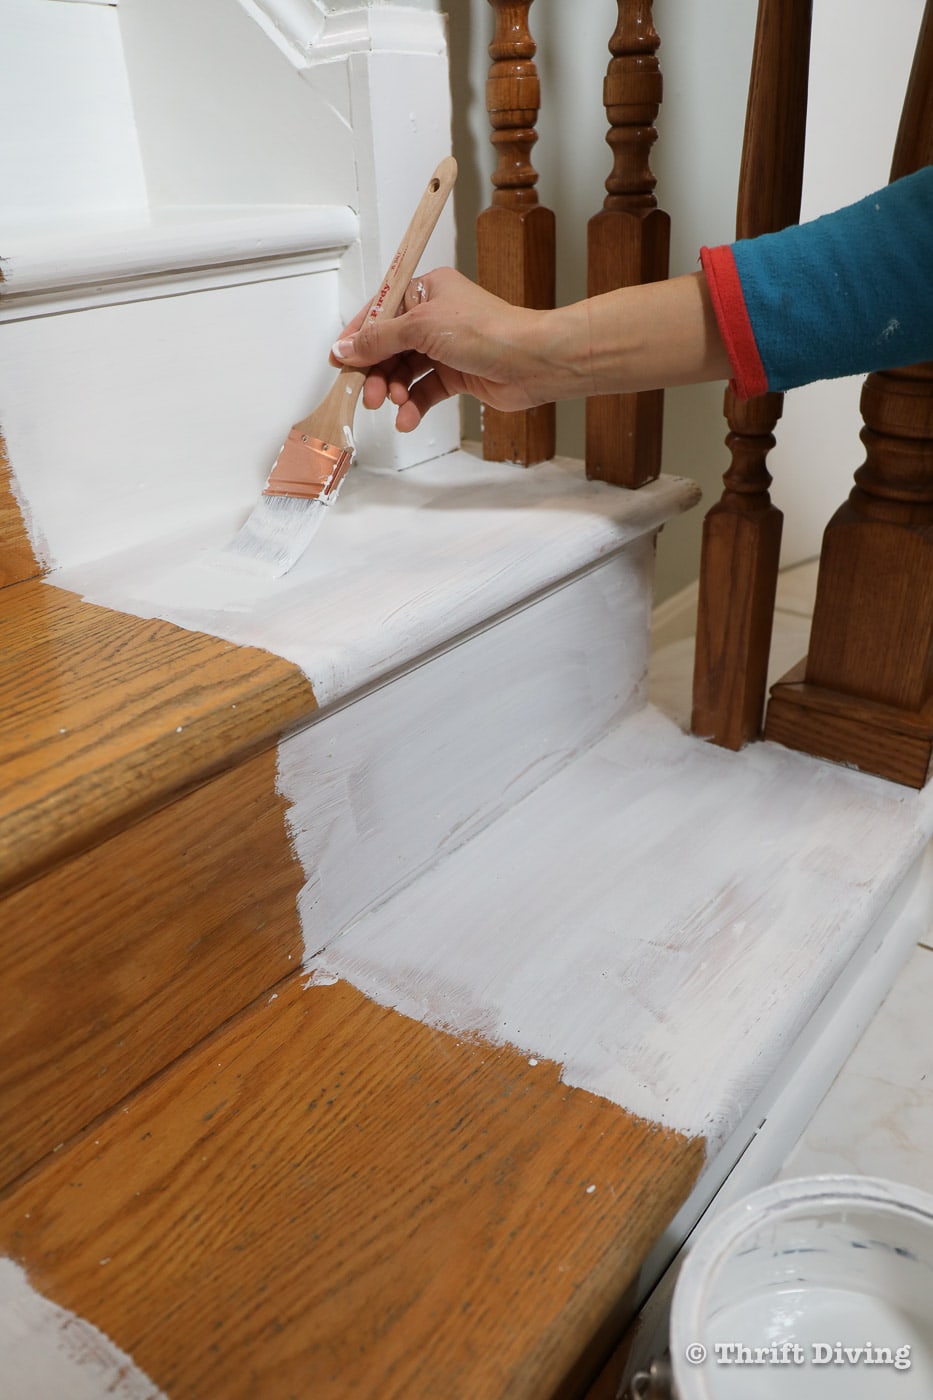
STEP 4: Add 2 – 3 coats of White Semi-gloss Latex Paint
Once the primer was dried, I went over the primer with an interior bright white semi-gloss latex paint. Two coats should be fine but if your steps are really dark, you might find that you need to add multiple coats. Two coats worked well for my set of stairs.
TIP: If you find that the old stain/finish is “bleeding through” your paint, you will need to use KILZ oil-based spray primer first to seal it and then paint over it. Otherwise, the old stain will keep bleeding through your paint.
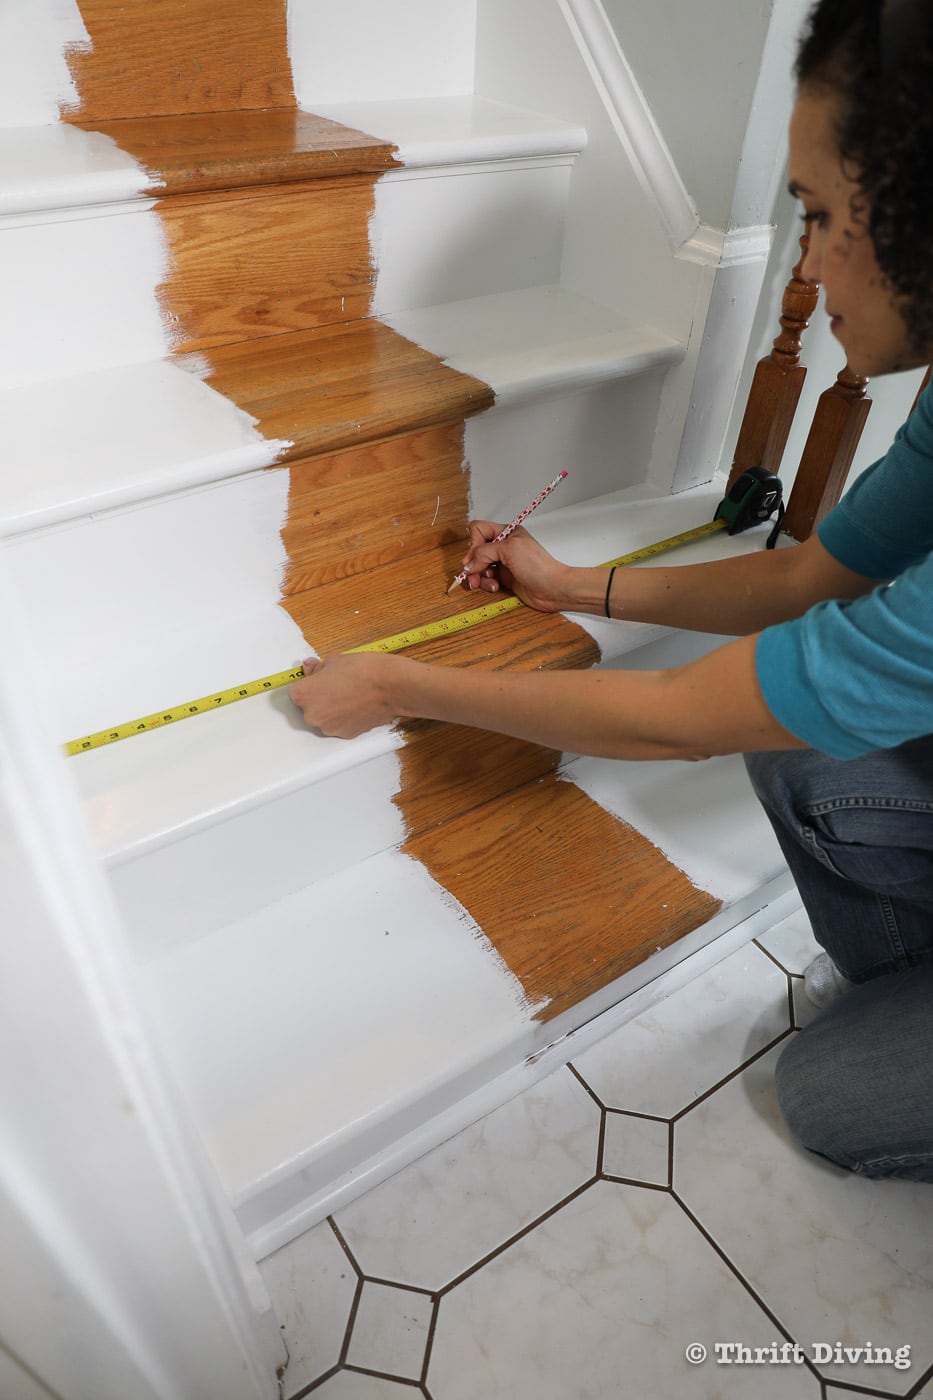
STEP 5: Find the Center Point
Once the paint was dry, it was time to find the center point of the steps. My steps were 34″ wide, so the center point was 17″. This is where I would line up the rug pads and the stair runner so that they’re even along all the steps, and centered!
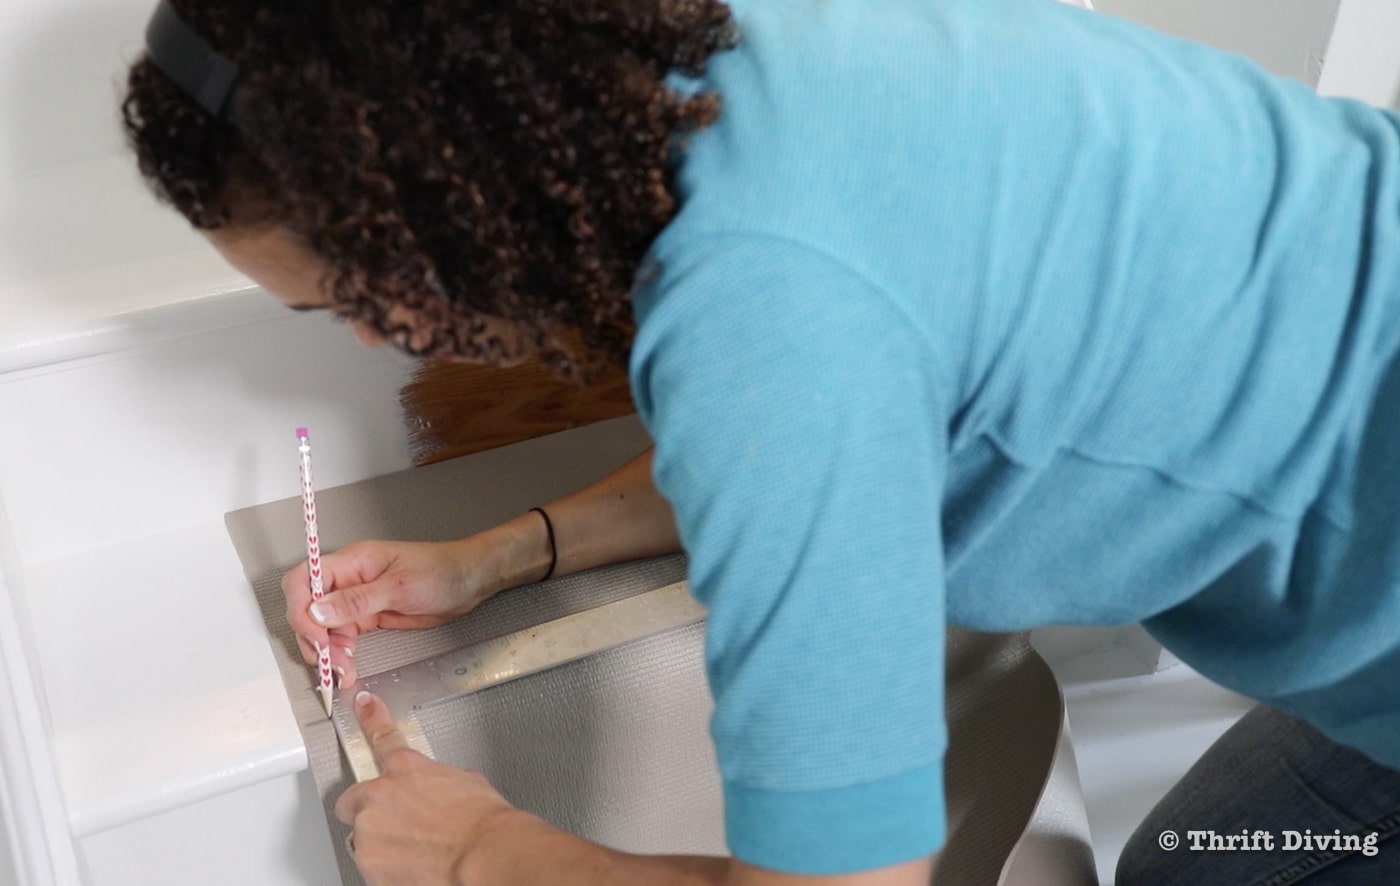
STEP 6: Cut and Attach Rug Pads
The rug pads I am using are pretty thin, but suuupppper comfy and squishy! I had bought 2 packs, which measured 2 feet x 12 feet, so I had enough to double up on the rug pads.
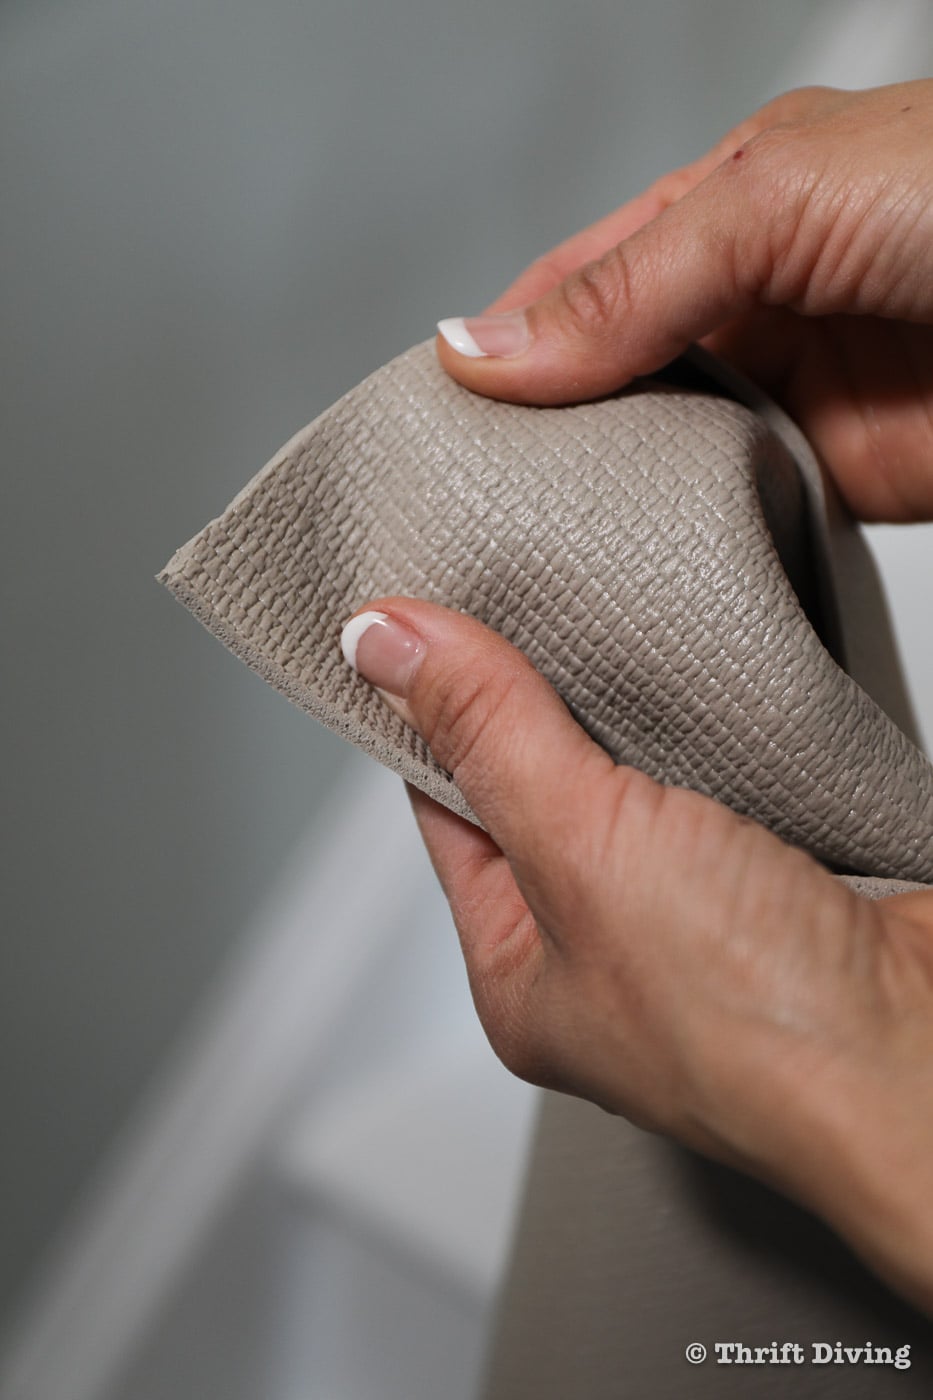
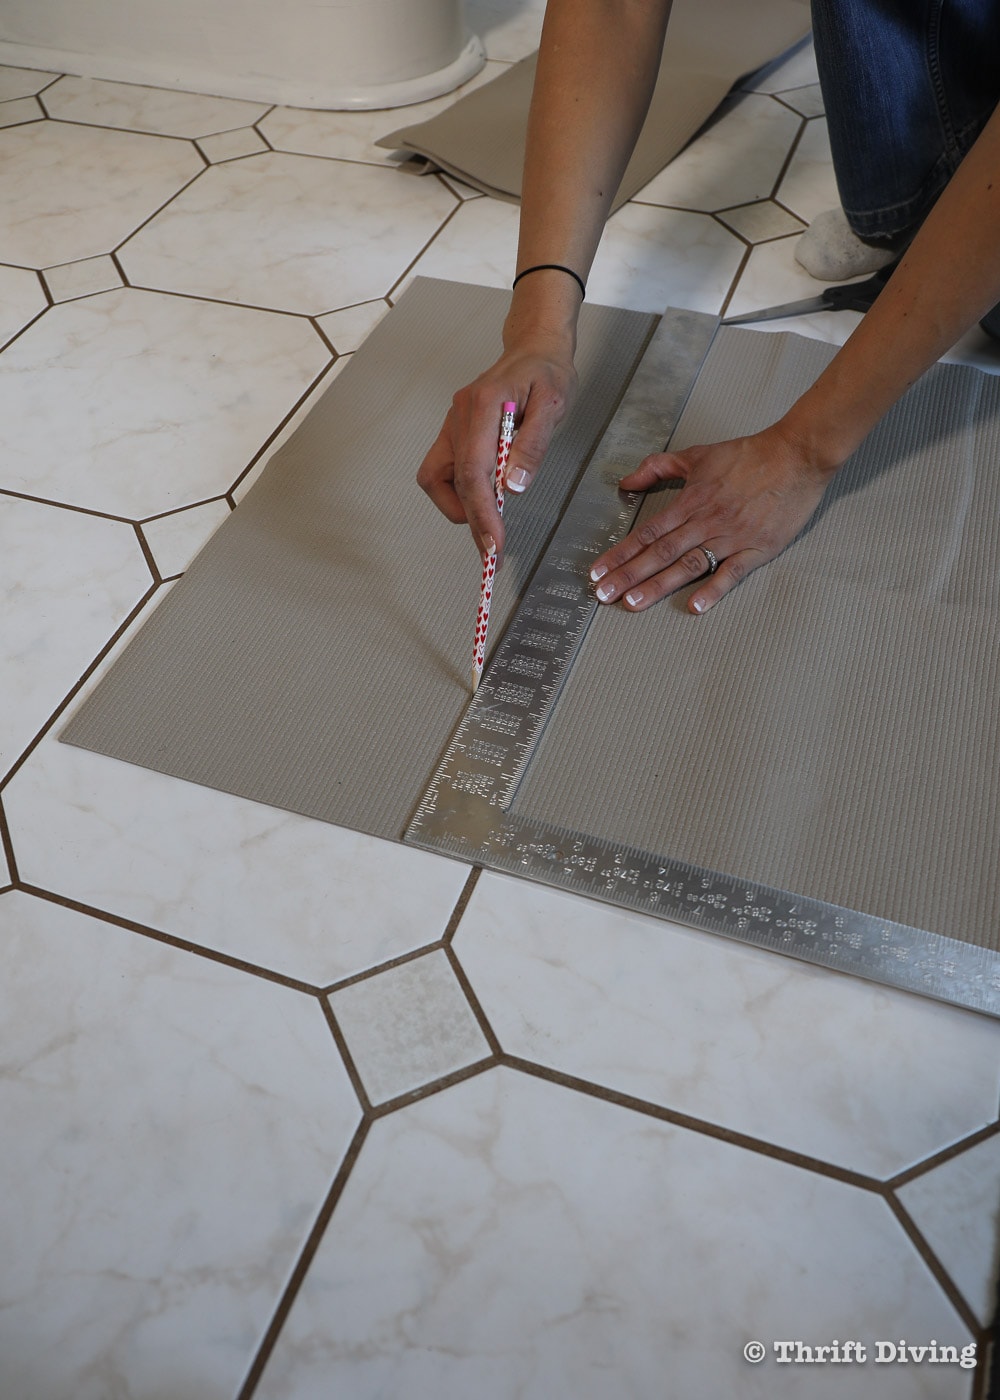
The website where I ordered them had a great tip on knowing how wide to cut the rug pad. It instructed to measure the tread of the stair (the part where your foot lands) and subtract 1/2″ from the measurement. My treads were 10 inches deep, so the rug pads needed to be 9.5 inches wide. Since this rug pad was already 2 feet wide, I just marked the 9.5 inches and drew a straight line.
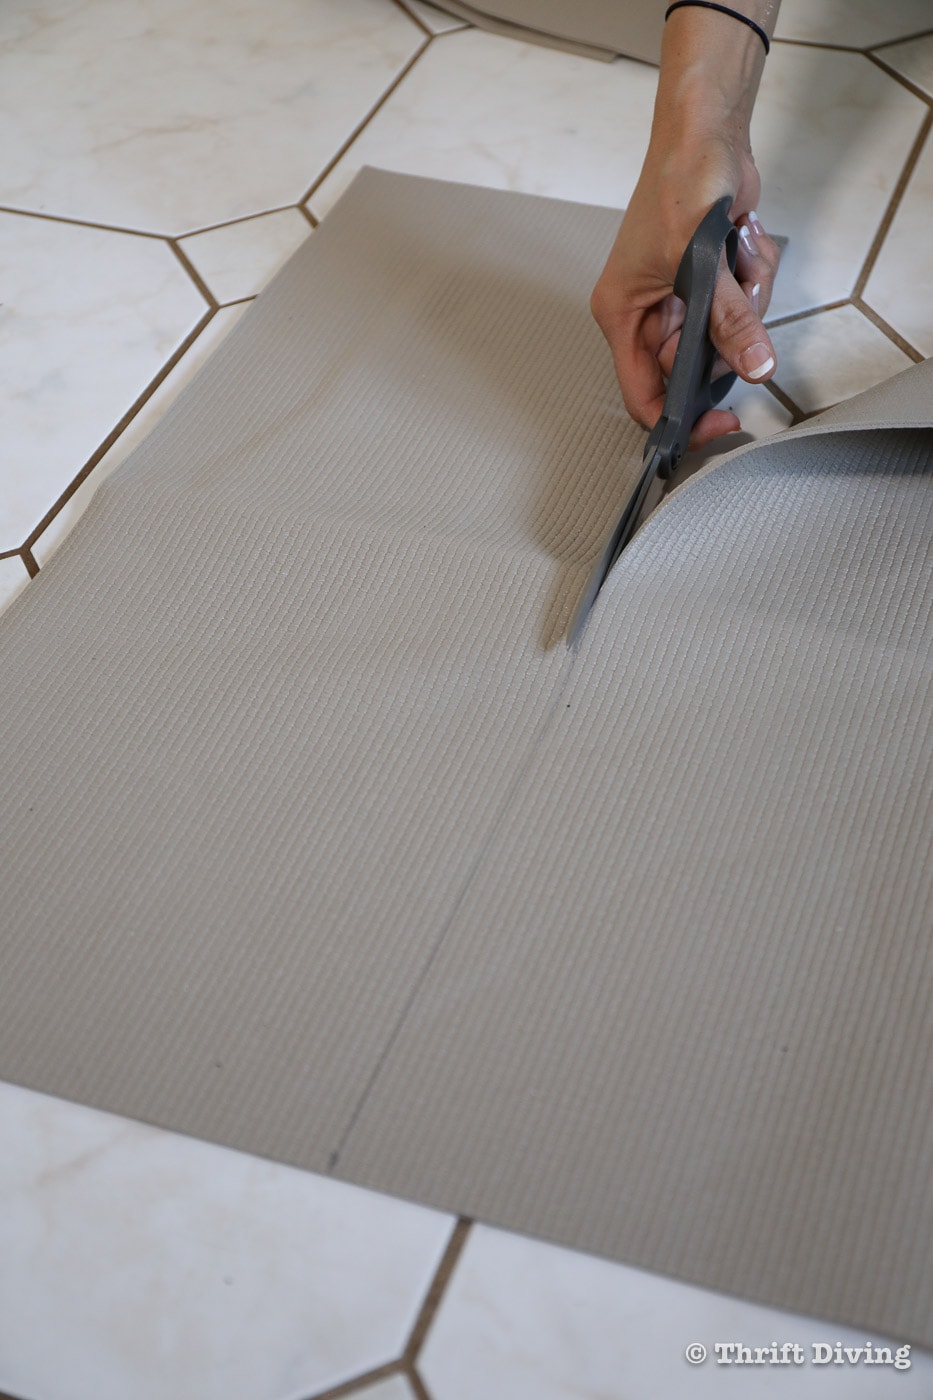
Trimming the pieces down was very easy with scissors. What I loved about this rug pad is that it had such a great non-skid backing! Once these were on my steps, they weren’t going anywhere!
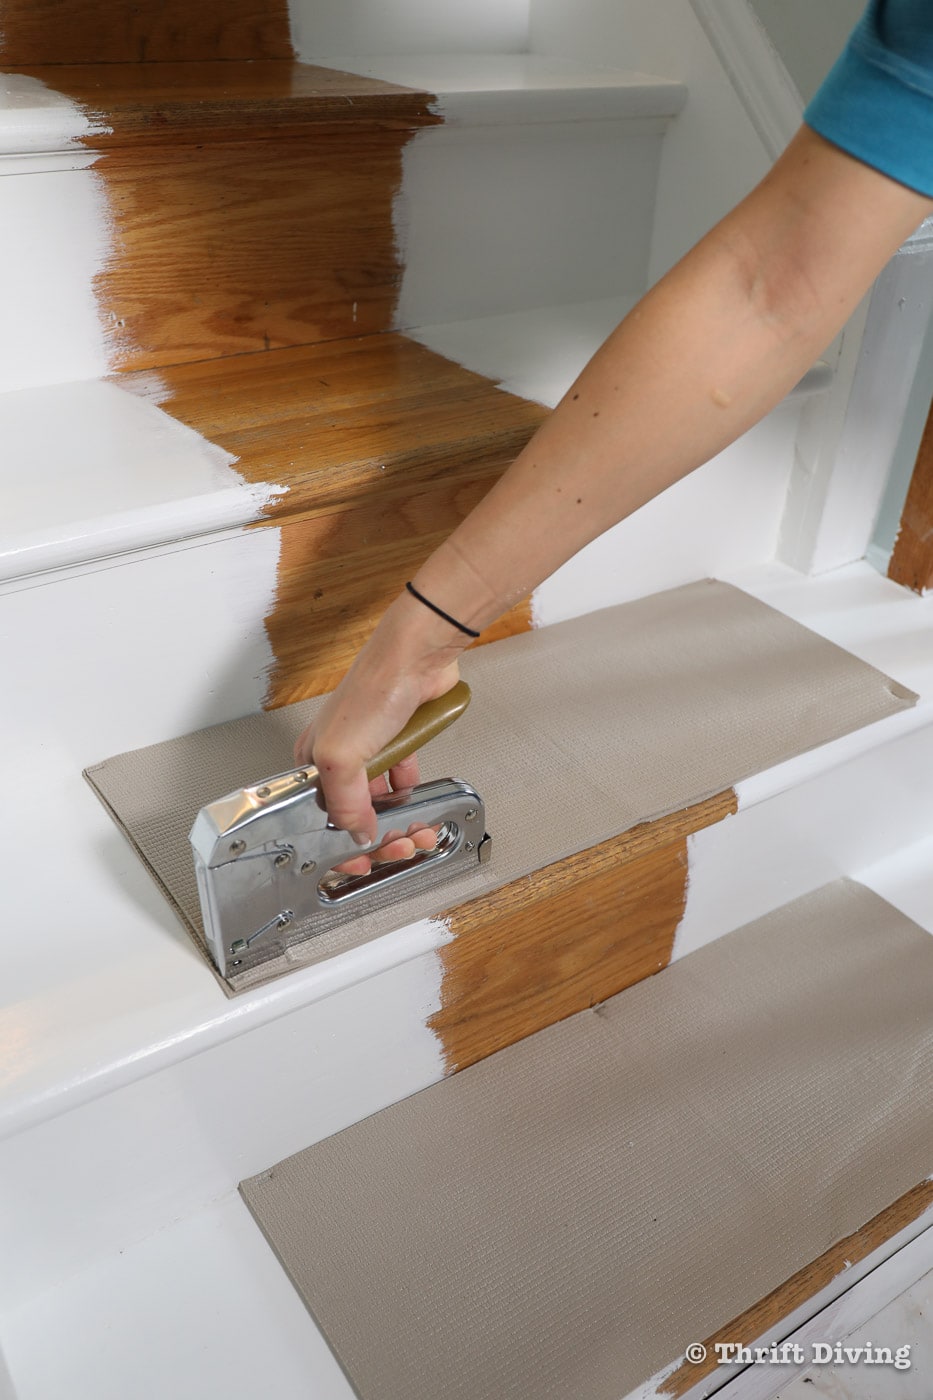
Folding the rug pad in half, I found its center and then lined up the center of the rug paid to the center of the stair.
Using my Arrow T50 heavy duty stapler, I secured the rug pads to the steps. You can also use double-sided tape, but since I had a stapler on hand (and because I was doubling up on the rug pad), I wanted something more secure. I used 3/8″ staples.
STEP 7: Install the Stair Runner
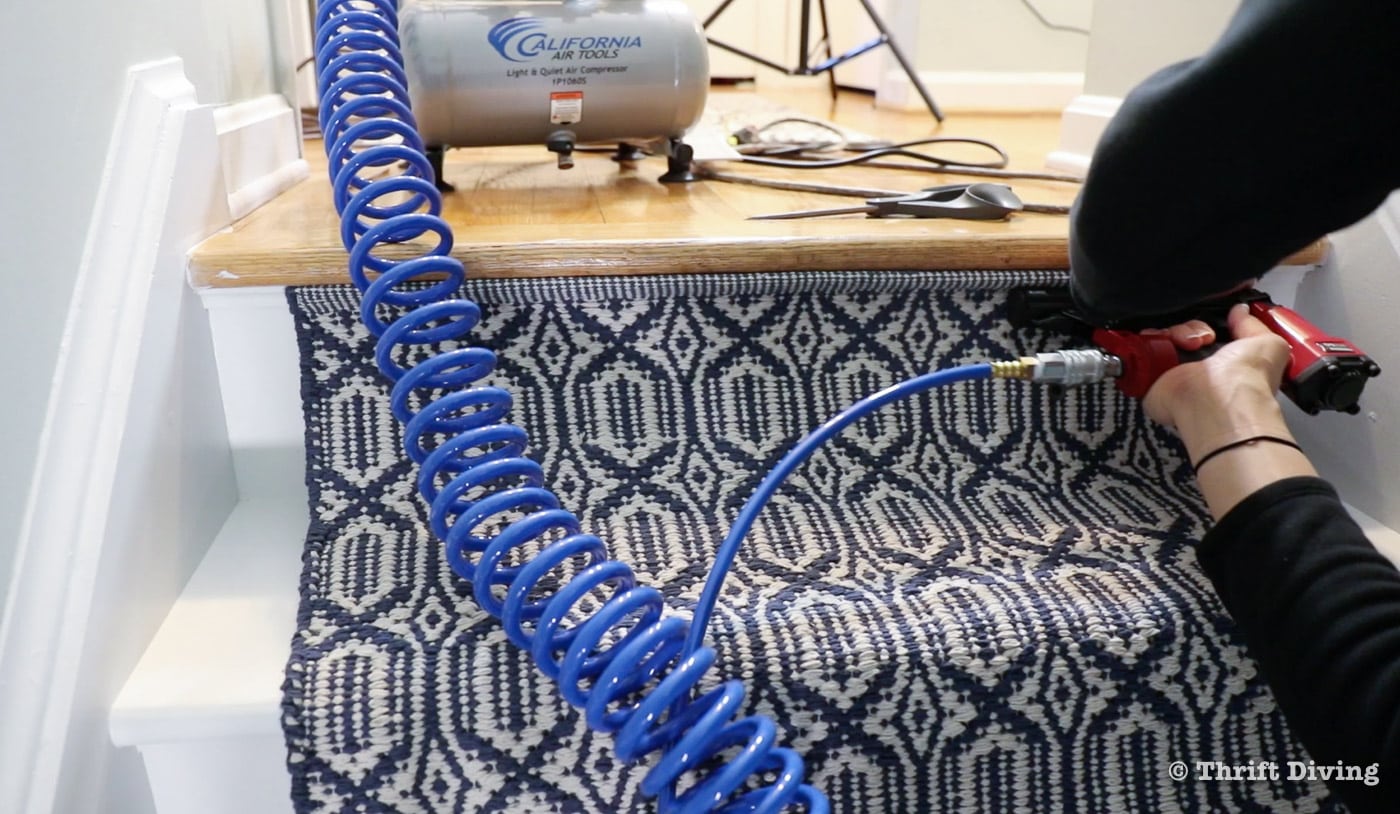
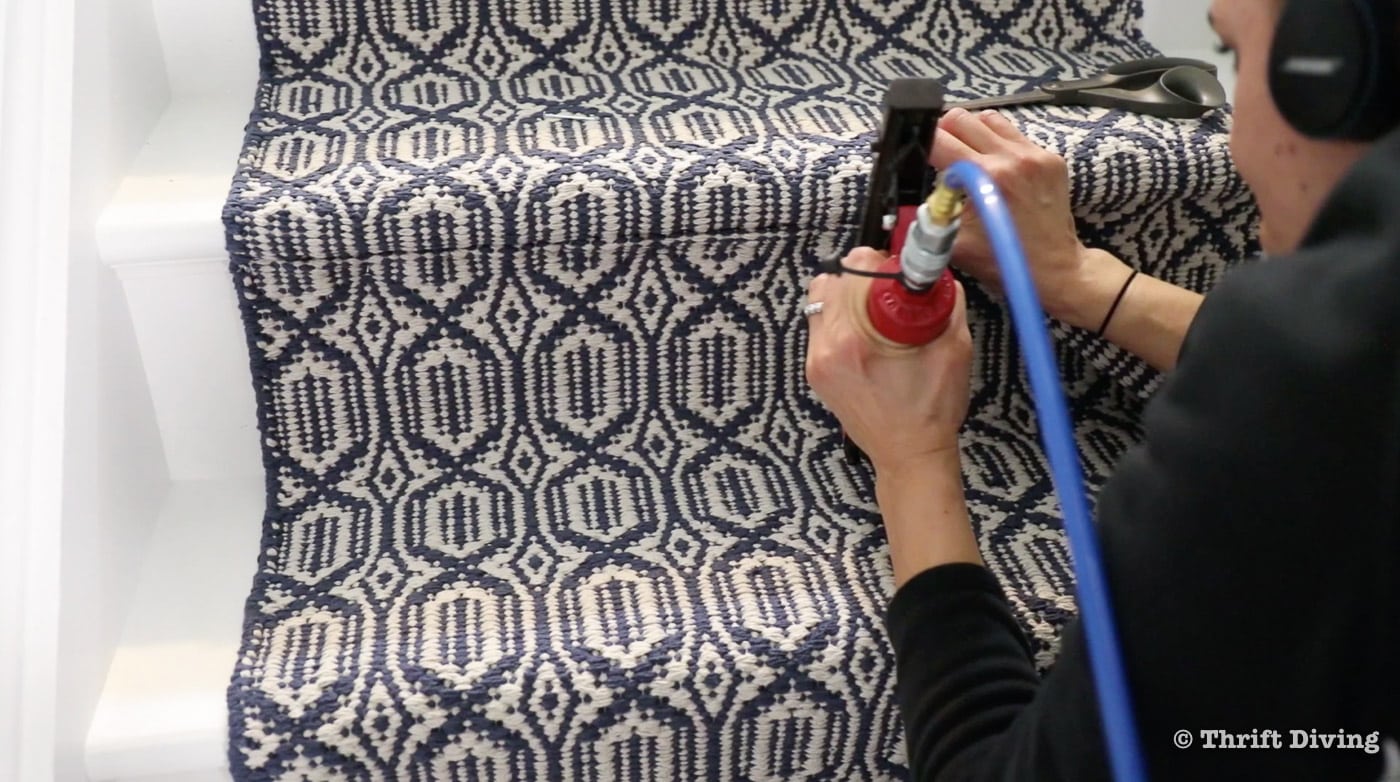
Starting at the very top riser, staple the rug to the top edge of top of the riser (the vertical part). Fold the stair runner in half and find its center. Line up that center with the center mark you made from the rug pad.
The important part here is to make sure it’s even and isn’t pulled too taut in either direction. Secure it on each side with the pneumatic stapler. You’ll want to use the 1/2″ staples here because you’ll likely have some bulkiness.
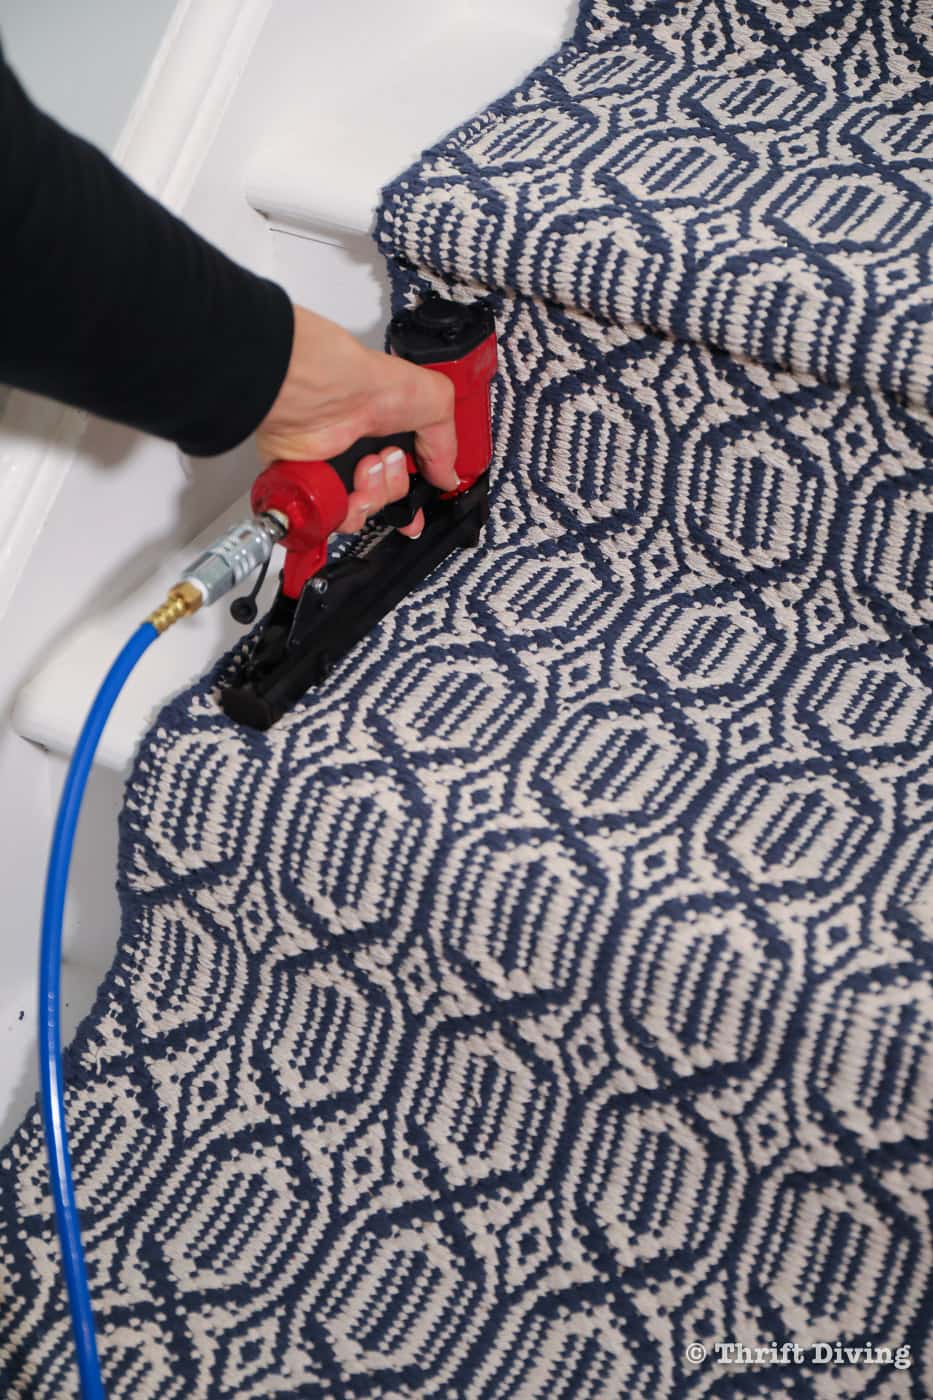
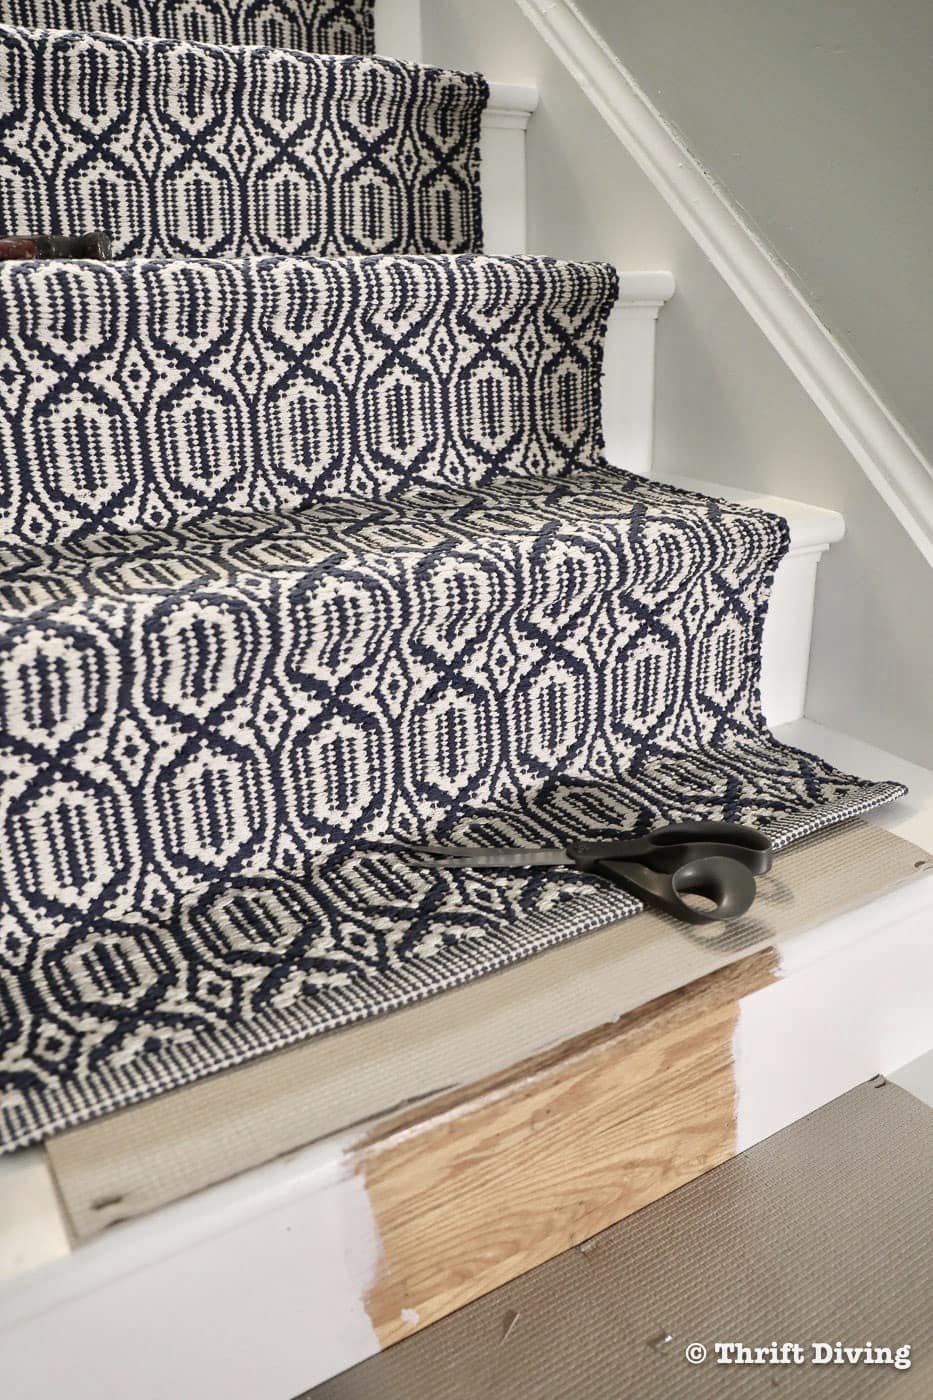
Work your way down the stairs, pulling tight, but don’t over pull or else it will make the rug wonky and uneven. Staple underneath the nose of the tread to secure it, where the staples will be virtually invisible. Use your hands to smooth the carpet stair runner smooth over the tread nose (the round part of the stairs).
You’ll also want to secure the carpet stair runner along the riser, as close as you can get to the riser.
Since the stair runner likely won’t be long enough to cover your entire set of stairs, this is where the multiple rugs will be needed. Some cuts will need to be made along the rug, and along the new rug that will be matched up. The key is to try to match up the pattern as best as you can so that it doesn’t look like an obvious break in the runner.
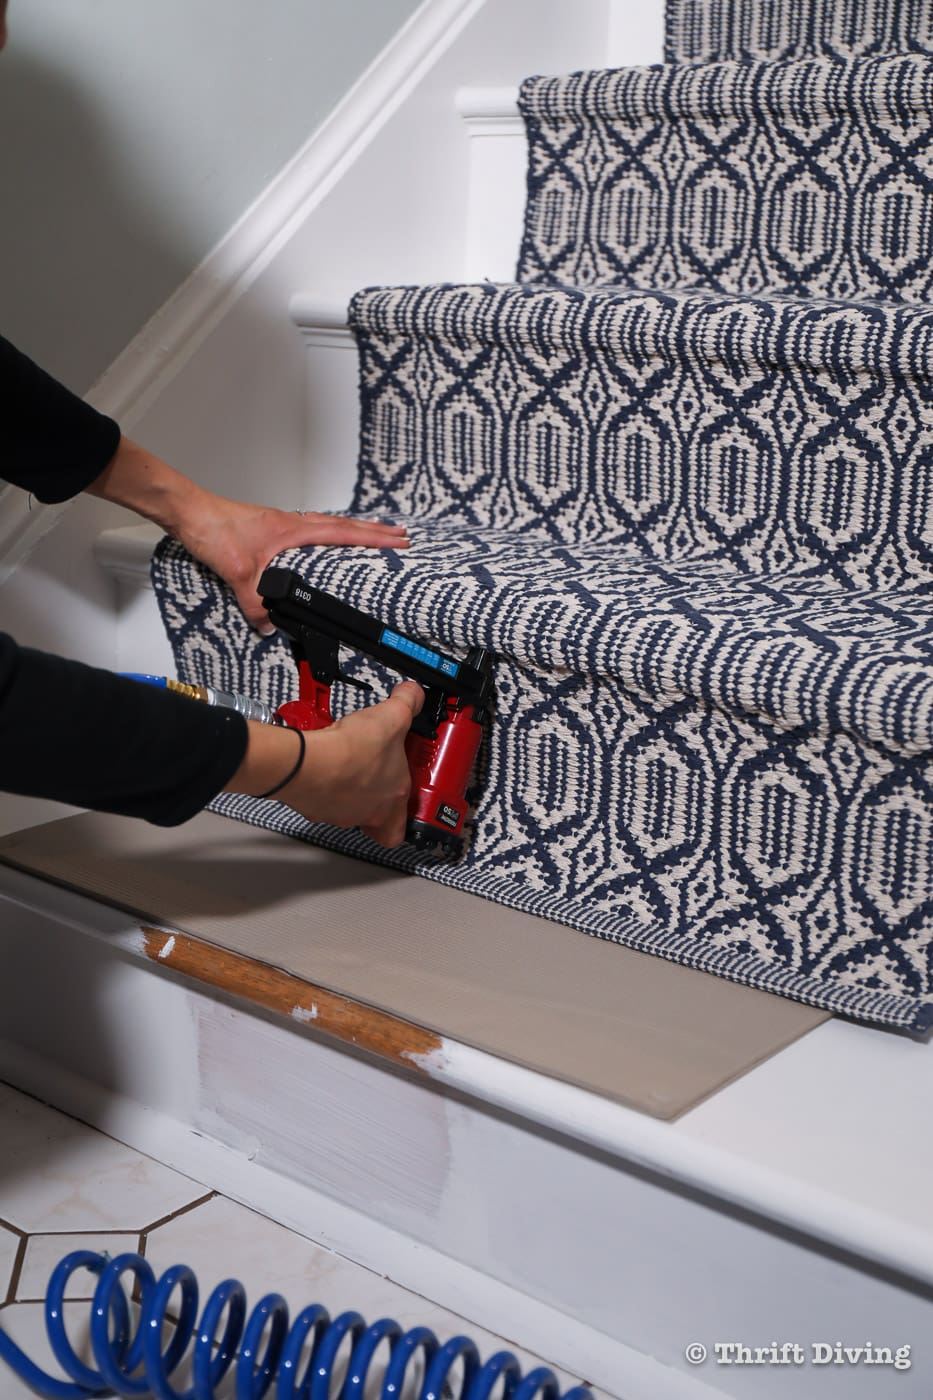
Figure out where you’d like to make the cut, while leaving enough not to unravel (especially with a woven rug like this!).
Trim away the excess. And since it will be bulky fitting the rugs together to match up, use 1/2″ staples. I had to use nails since I didn’t have any 1/2″ staples.
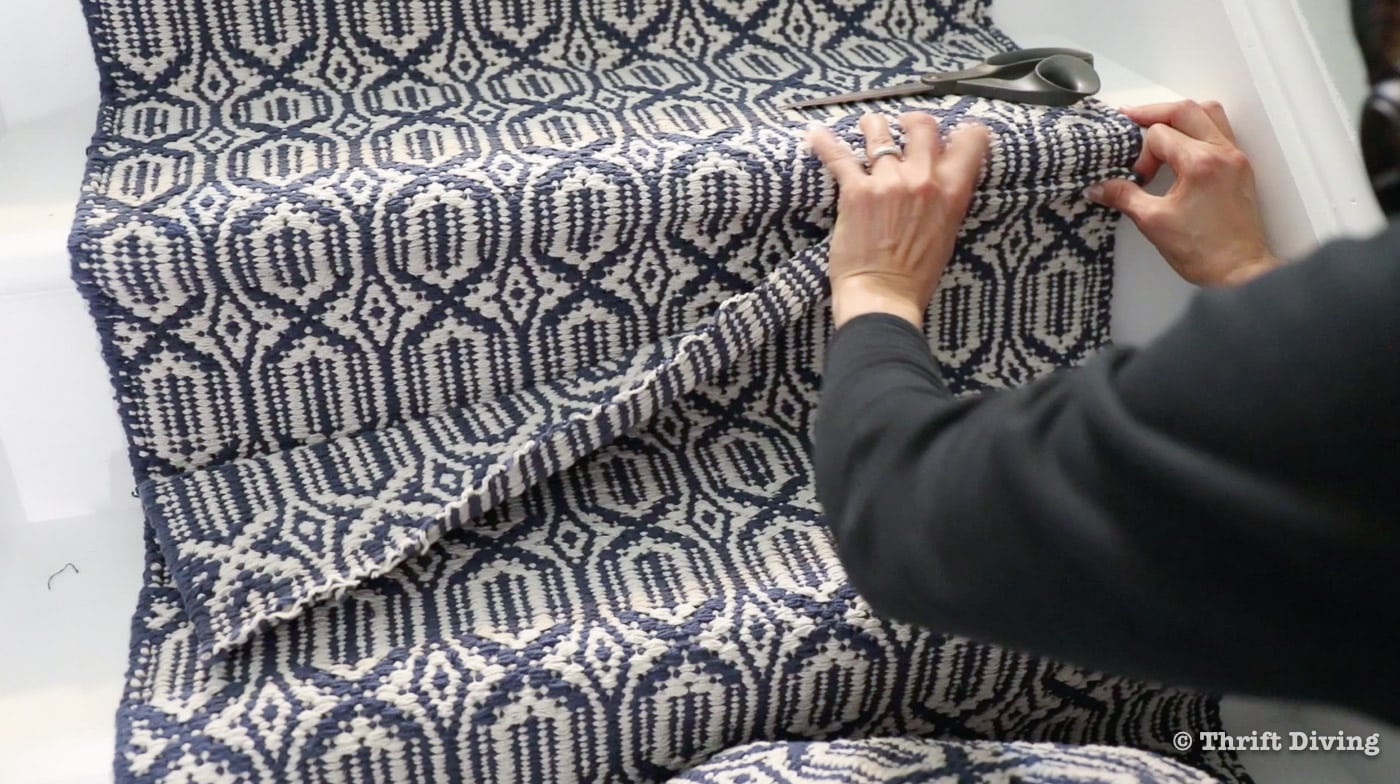
The pattern should be matched up so that the seam is less noticeable.
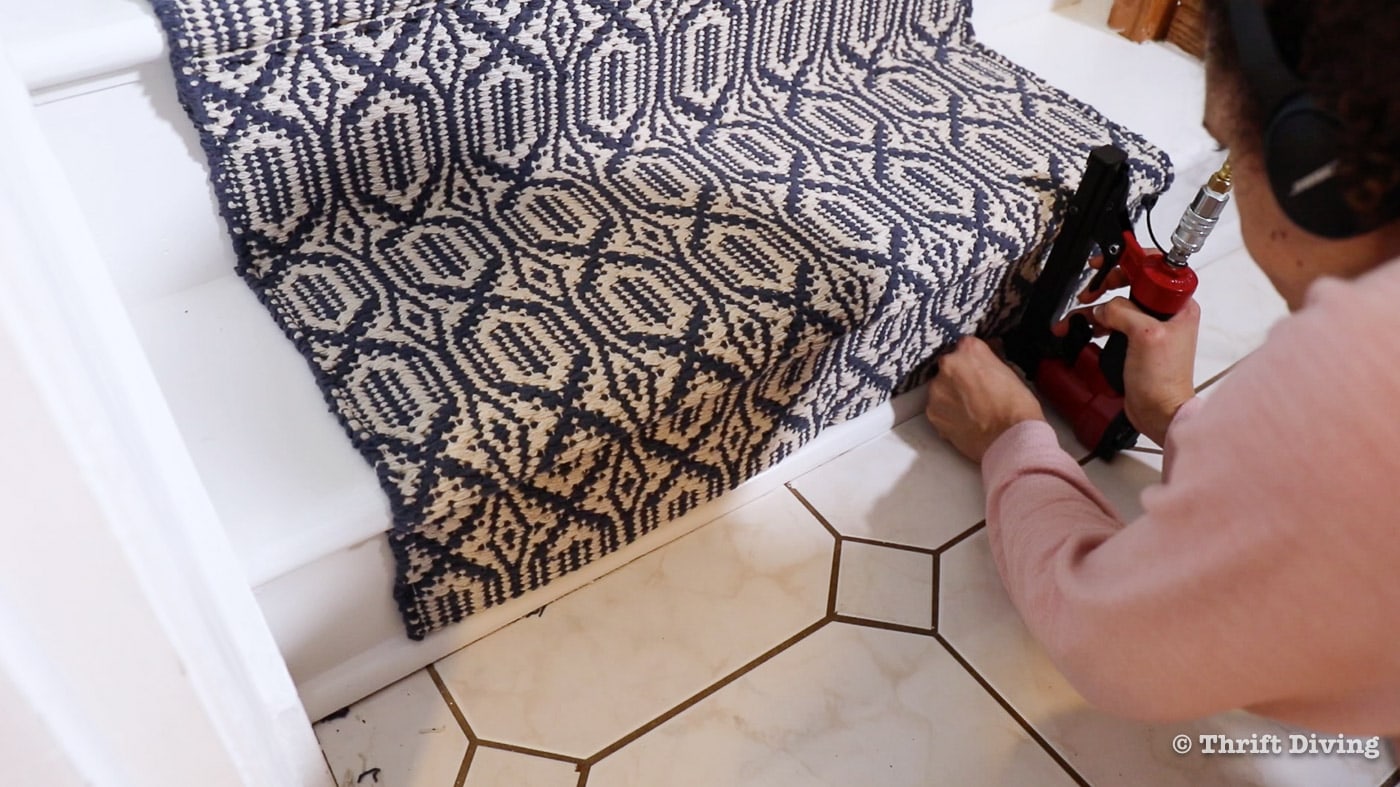
Once you get to the end of the stairs, you’ll trim the excess, fold it under about 2″ and secure with 1/2″ staples. It’s that simple!
STEP 8: Enjoy!
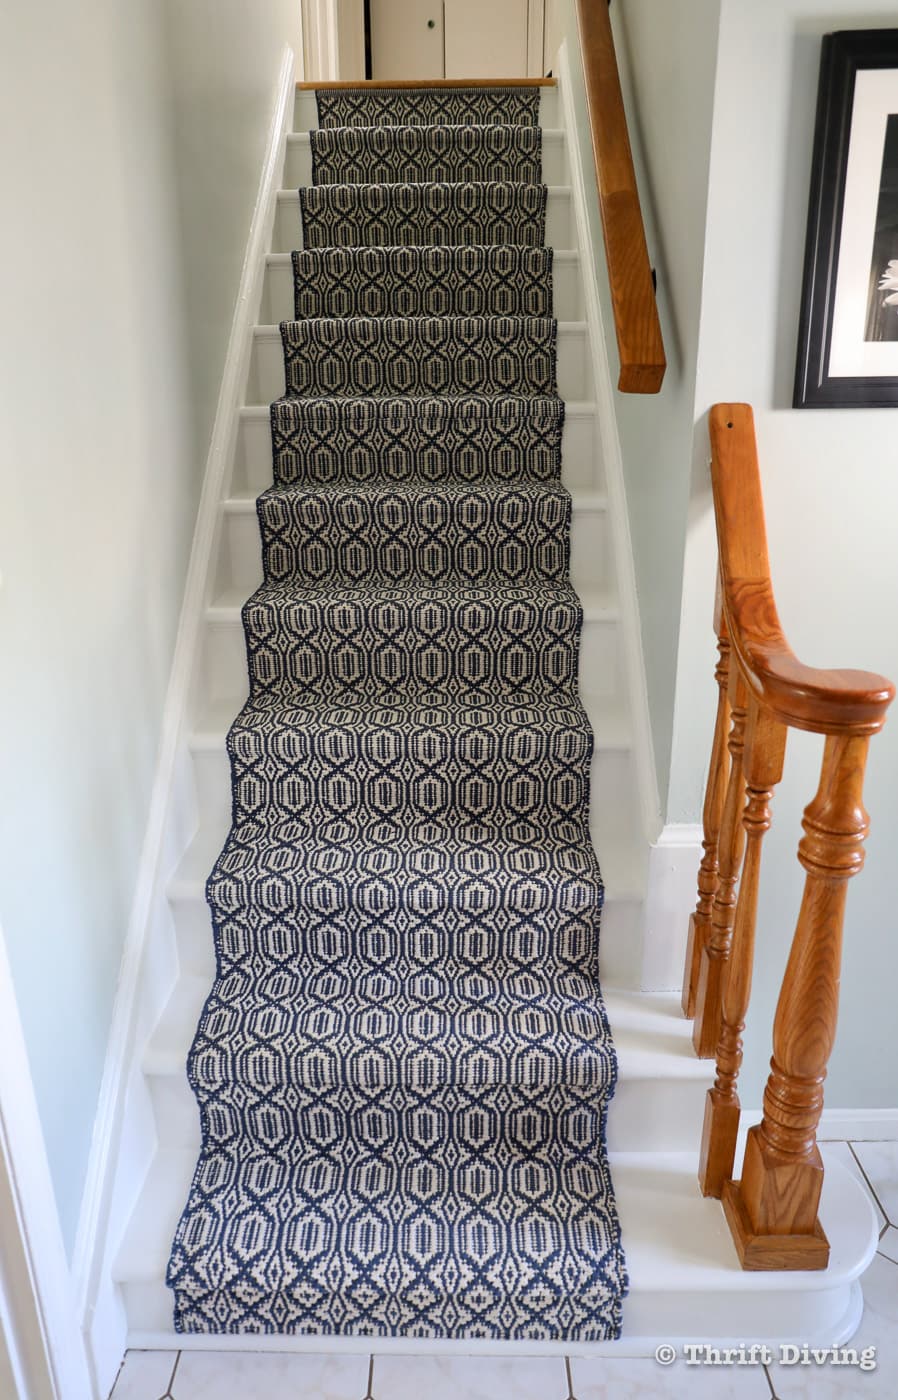
Let’s take a look at how awesome it turned out!

It’s like night and day, these stairs! A few people, of course, comment on how I could have painted over such lovely oak, but you know…this lovely oak was a safety hazard. And it was also very 1970’s.
And the last thing I would want is to sand them down and refinishing them. Yikes. That would be a task and a half, wouldn’t it?! Besides, who doesn’t love a good crisp and modern stair runner?! The house is finally starting to feel less outdated.
I decided not to paint the balusters. I actually like the two-tone look. Plus, they were in such good condition, I have decided that it would pain me to paint them. The worn-out stairs–not so much! 🙂
Everyone in the house has commented on how much quieter and softer it feels on the stairs. And at least now I feel confident that we’re less likely to tumble our butts down the stairs! And at the very least, if we take a tumble, it feels better with padding, right? 😉
![]()
Click here to SAVE this project on Pinterest if you LOVE it!

So are you ready to install a stair runner on your staircase? Leave a comment below and let me know if you’ve ever tackled stair runner installation and which rugs were you decided that a stair runner was right for you!

Download the 5 freebies!

Thrift Diving inspires women to decorate, improve, and maintain their home themselves...using paint, power tools, and thrift stores! Use these 5 printables, checklists, and ebooks to get started!

Beautiful job it does make such a huge difference. Thanks for sharing.
Wow! You absolutely did the right thing.
I love wood, but not the 70’s orange Oak. It makes me cringe.
This looks fresh, clean and gorgeous!
This was seriously an awesome project. You gave me the inspiration and the guidance to do this. Our staircase has transformed from the worst area in my house to the best. Thanks so much!