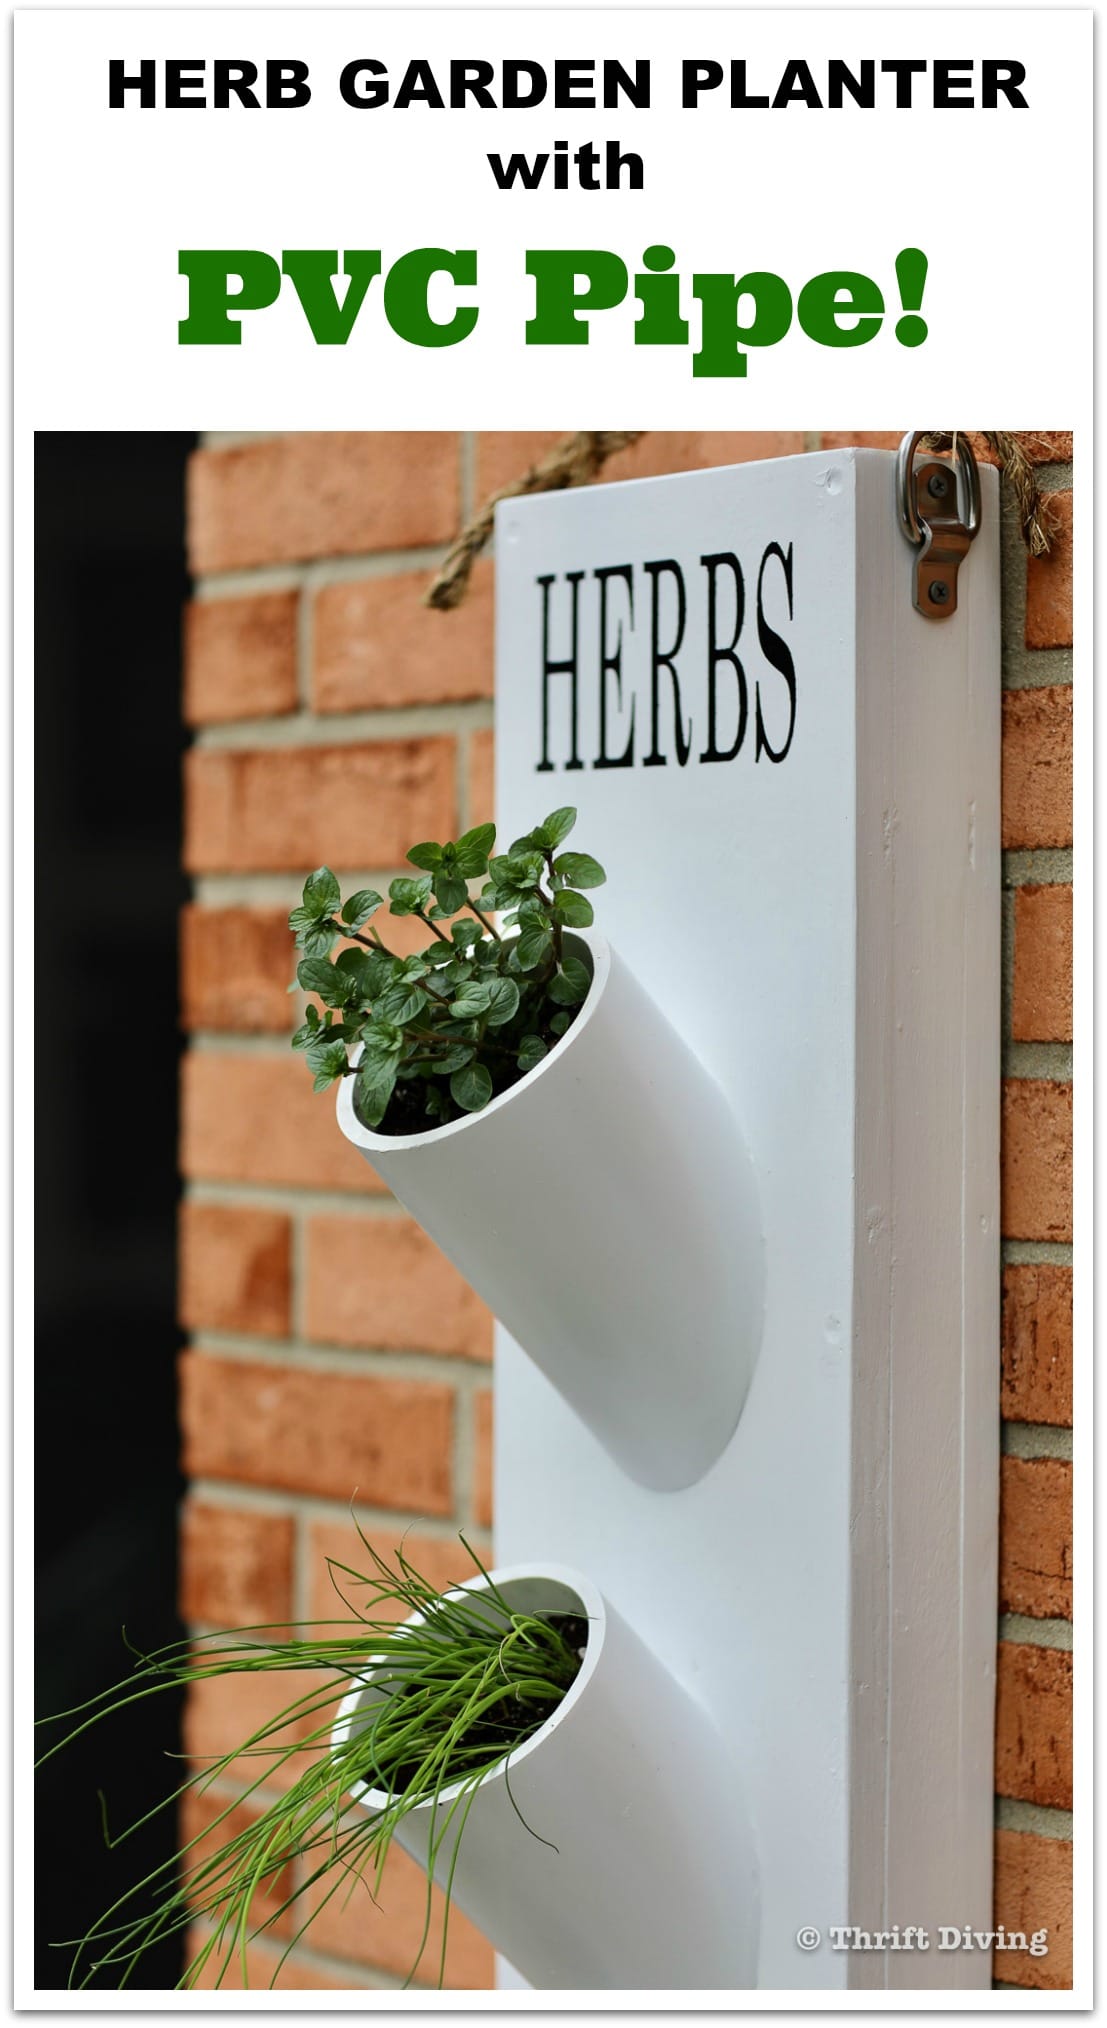
How to Make an Herb Garden Planter Using PVC Piping
If you enjoy this tutorial on how to make an herb garden using PVC pipe, be sure to check out my tutorial on how to build DIY garden beds.
Watch This Herb Garden in Action
This project is featured on my YouTube channel .
It’s only been in the past few years that I’ve started to develop an interest in gardening. I’d always considered myself to be cursed with a black thumb; everything I touched would shrivel up and die. I thought it was because I didn’t know what I was doing (well, it was a little bit of that…), but I realized that when my plants died, it’s purely from lack of attention.
This spring, though, we got nothing but time on our hands. With all this “social distancing” we’re practicing, the only outside time you can do (other than walks) is to hang out on your patio or yard, right? So why not try that old thumb at growing some herbs?
Let’s not forget that going to the grocery store at this point can be a life or death matter (!!!), so growing what you can from home might just allow people to make less trips to the store for fruits and veggies.
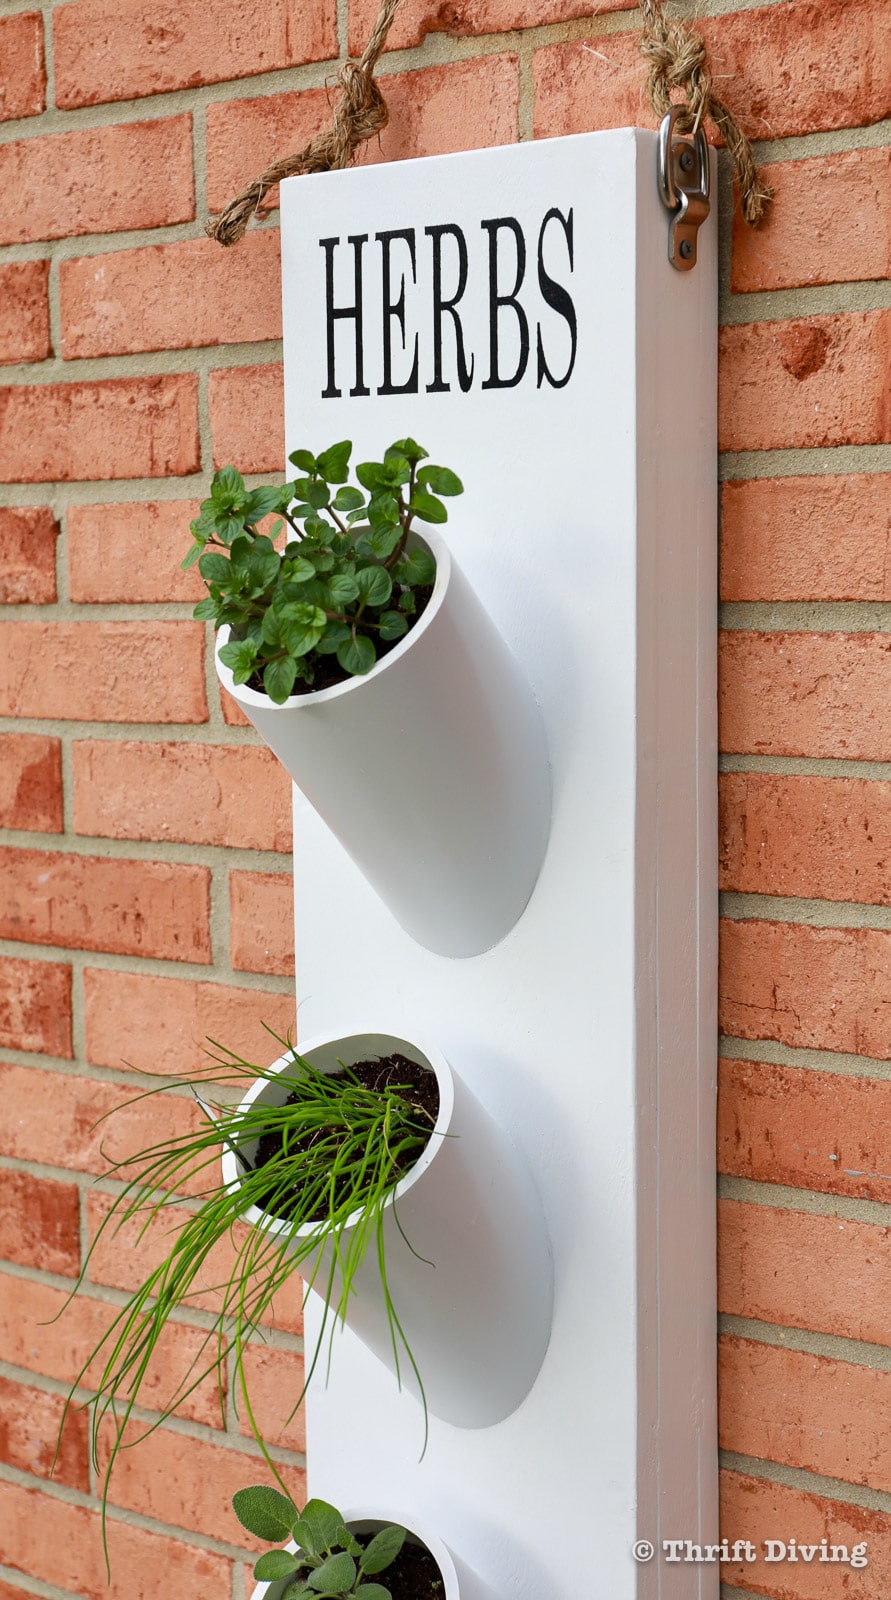
I wanted to get a little crafty with this project and use PVC pipe to make a vertical herb garden that can thrive outdoors when it’s warm….
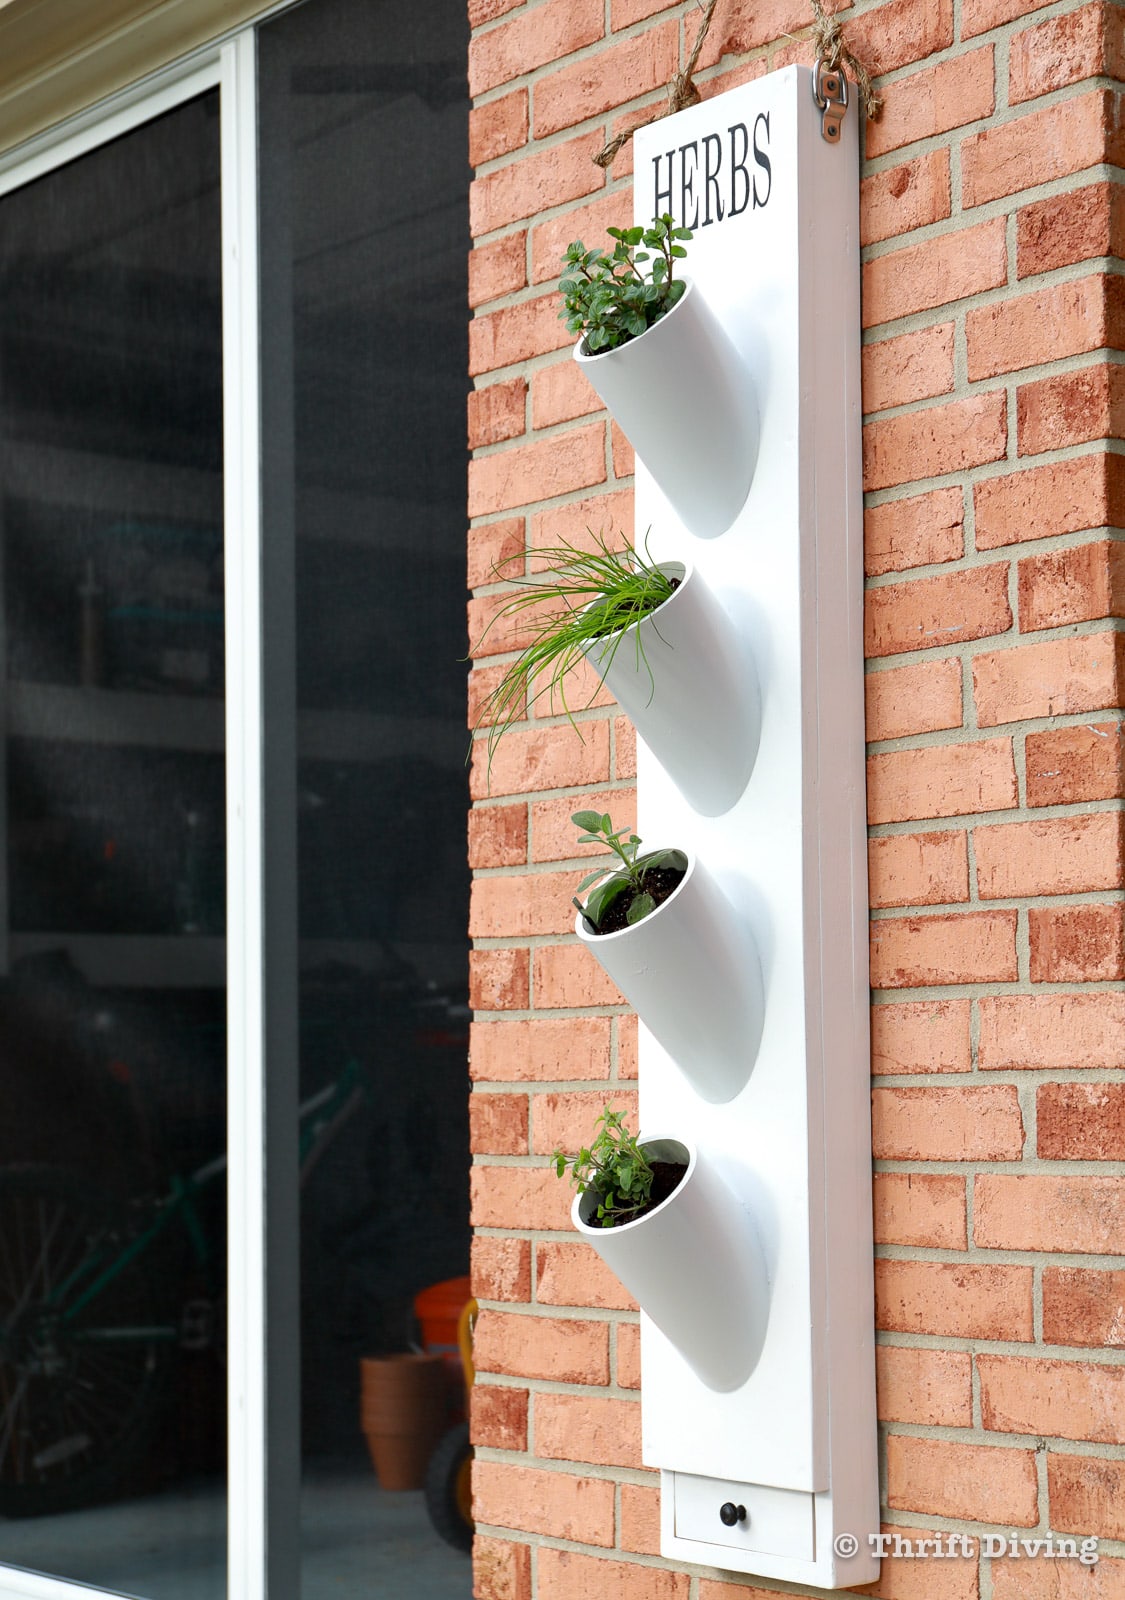
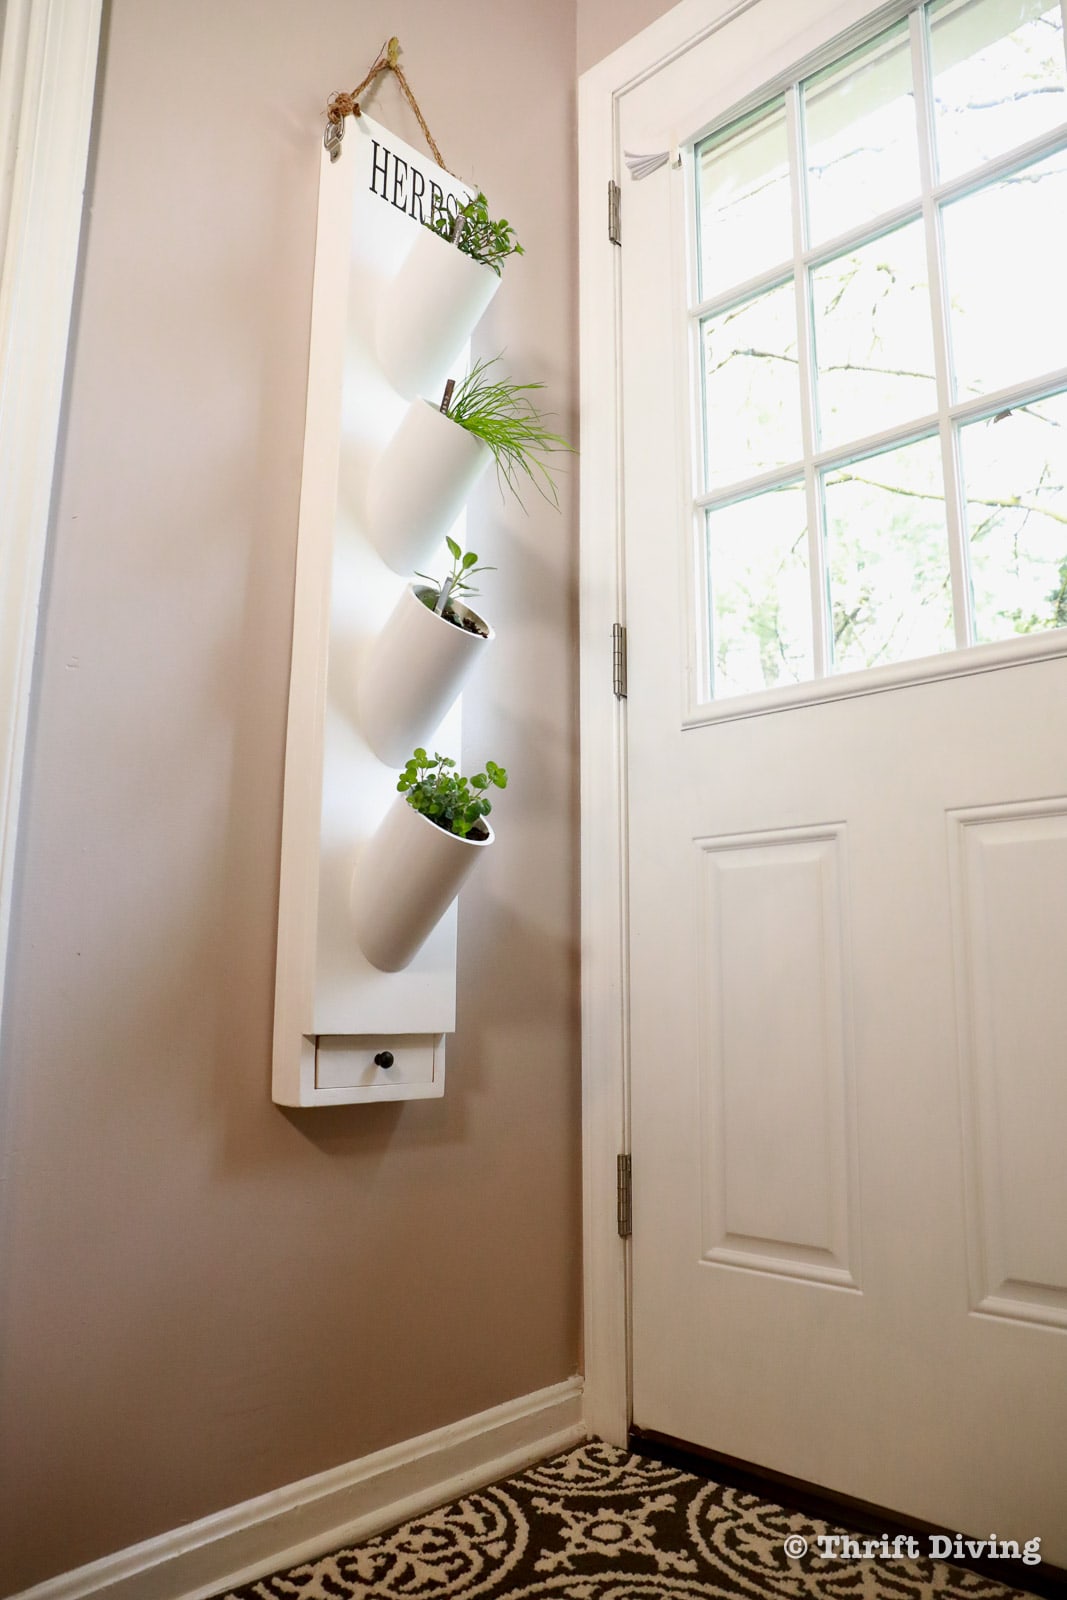
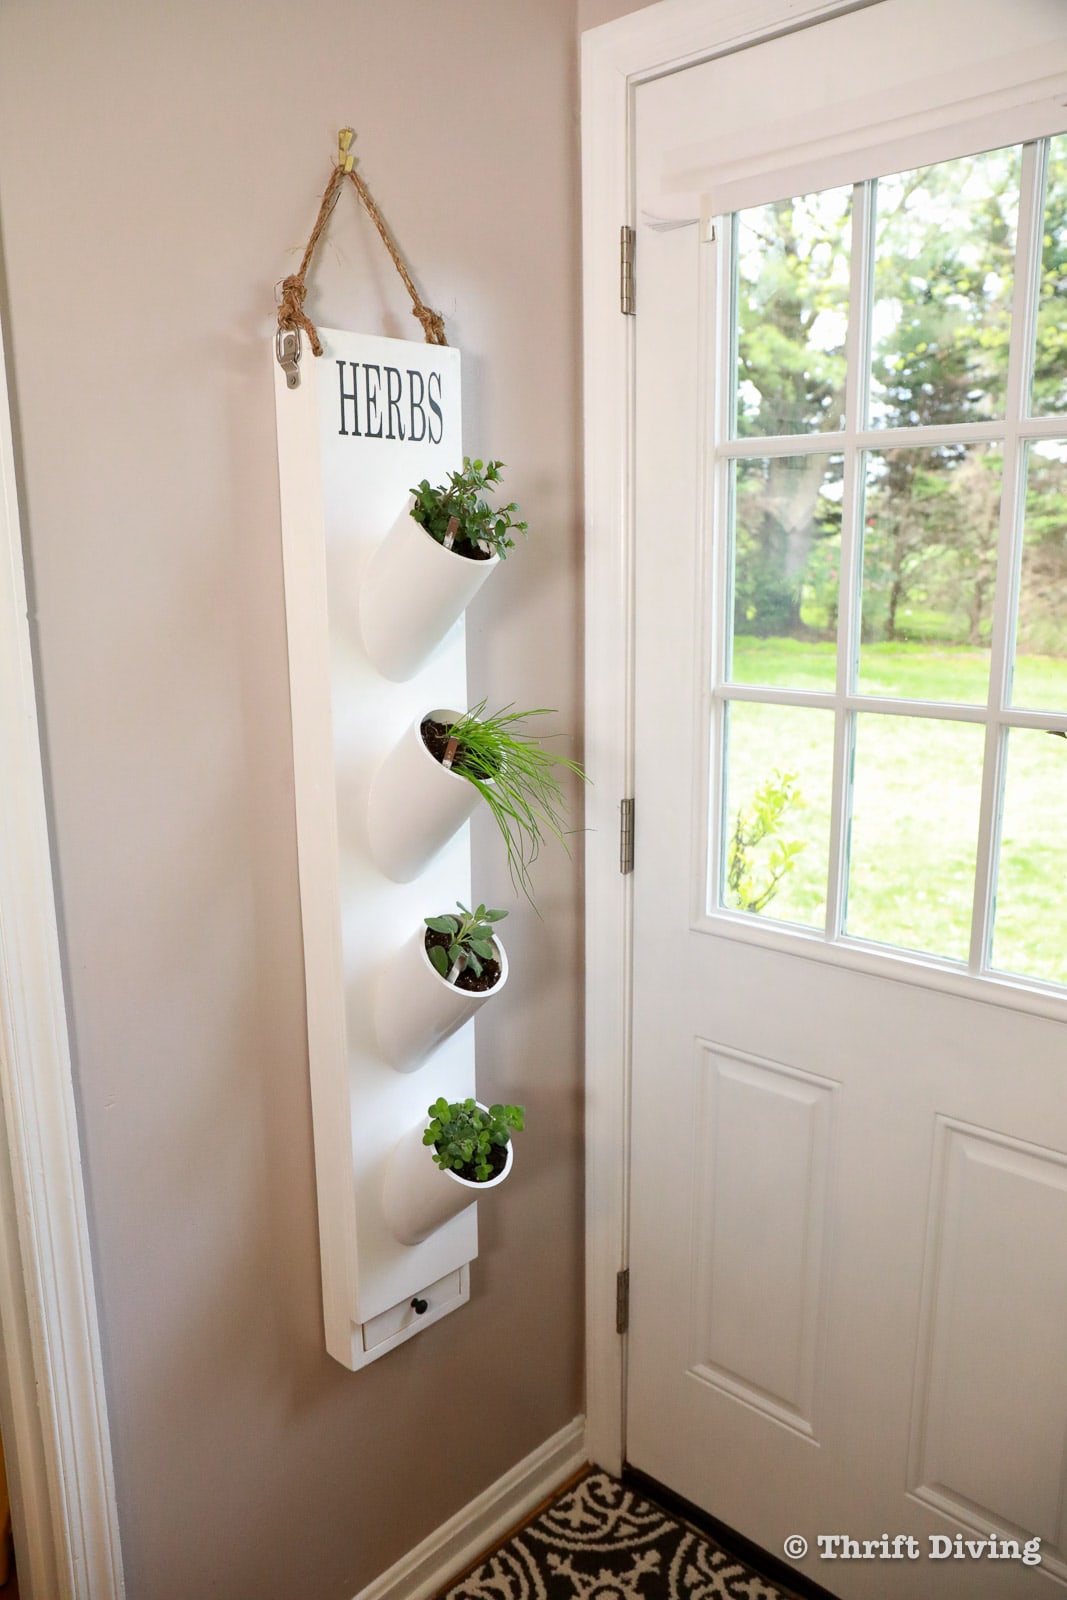
…but when the temps get cooler, you can bring this baby indoors and hang it up right in your kitchen! And because it’s pretty narrow at 8″ wide, you only need a small sliver of wall space. Isn’t this amazing?! I love this planter!
Let’s walk through the tutorial on how to make this DIY vertical herb garden with PVC pipe and plywood!
Since most of us are on lock down due to the coronavirus, going to the hardware store to pick up materials isn’t really an option. But I do know that Home Depot has express delivery. Last I checked, PVC piping was available in my area here in Maryland.
I’ll leave links below for all the tools and materials, but just know that getting some of the materials might be difficult. If that’s the case, just substitute the materials if you can, or save this project on Pinterest and make it later when we’re not stuck inside. Since this herb garden can be hung indoors, it’s relevant all year round. 🙂
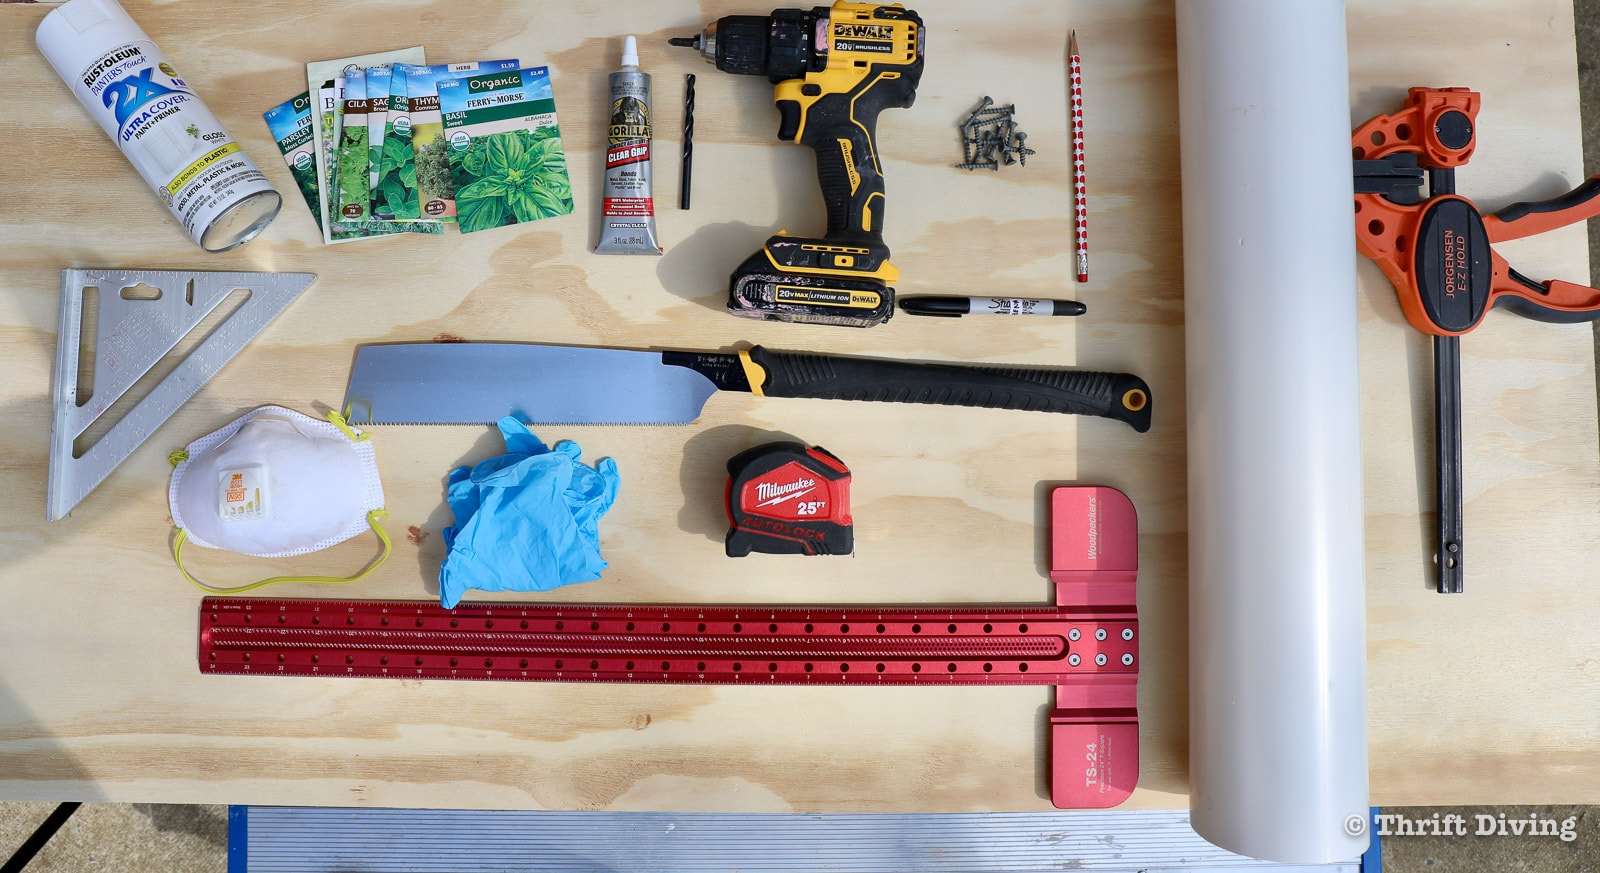
Tools
Here are the tools you’ll need for this project:
- Hand saw
- Miter saw
- Orbital sander
- Miter box (optional)
- Power drill with drill bit and drivers
- Countersink bit
For this project, the most important tools and materials you’ll need will be a 2 ft by 4 ft piece of sanded plywood, 3-4 ft. of PVC piping 4” in width, seeds or plants, a hand saw or miter saw, a circular saw, paint, drill with bits and drivers, and some basic materials and supplies.
Materials
- 4″ PVC pipe (you’ll need about 3′ or 4′ of PVC piping).
- 3/4″ exterior sanded plywood (2 ft x 4 ft)
- Herb seeds
- Ready-to-plant herbs
- Soil
- Pebble for drainage
- Sand paper (150-grit)
- Waterproof glue (such as Gorilla Glue Clear Grip)
- Waterproof varnish (such as Minwax Helsman)
- Exterior paint
- Wood filler
- Mesh screen
- Side brackets
- Rope
- Heavy duty stapler
- Exterior screws (1-1/4″)
- Clamps
- Spray paint
- Alphabet stencils
- Stones/pebbles for drainage
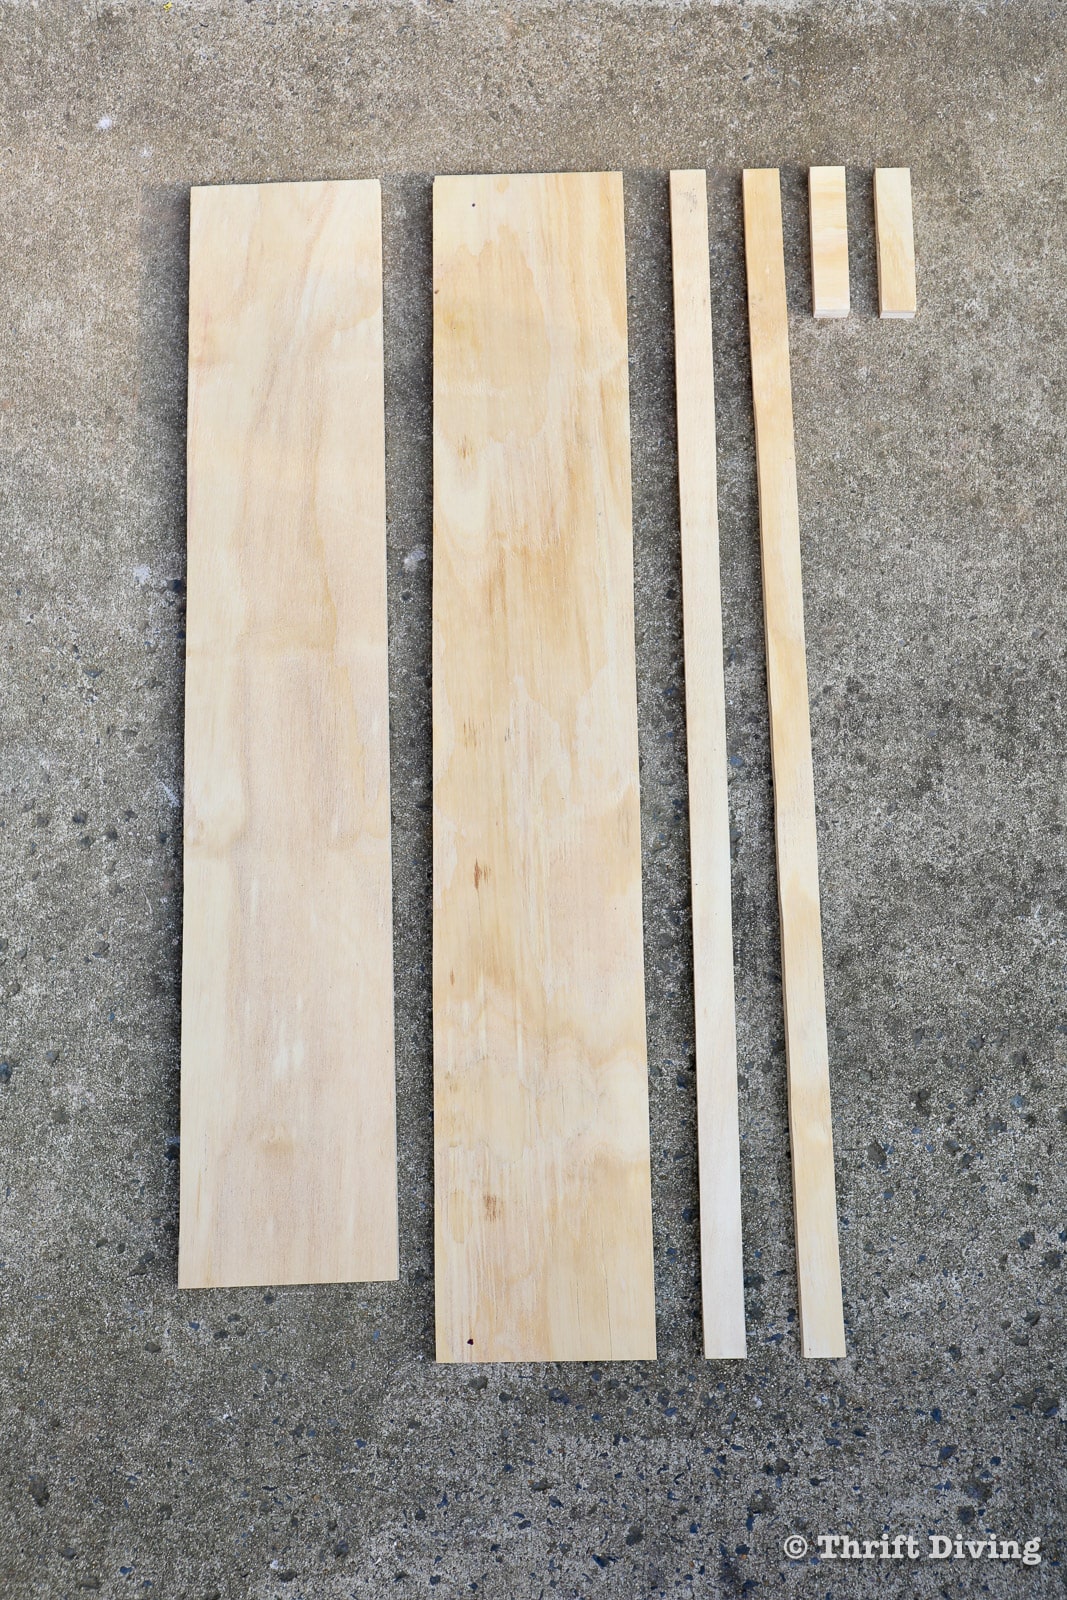
STEP 1: Cut Out 6 Pieces of Wood
We’ll start by marking and cutting two 8” pieces of plywood for the front and back of the hanging vertical herb garden. This is a great opportunity to bring in the kids to help do the measuring, but it’s best for an adult to do the heavy duty cutting. For the back piece, cut it the full length of the plywood. For the front piece, make it 3” shorter, at 45” long.
For the side pieces of the herb garden, initially we measured and cut two 3” pieces, but realized that was too wide, so I trimmed the side pieces down to about 1 and 1/2”. Those were also 48” long.
I also cut 2 end pieces, for a total of 6 pieces for the body of the vertical herb garden.
- Front panel = 8 in. x 45 in.
- Back panel = 8 in. x 48 in.
- Left side panel = 1.5 in. x 48 in.
- Right side panel = 1.5 in. x 48 in.
- Top edge = 1.5 in. x 6.5 in.
- Bottom edge = 1.5 in. x 6.5 in.
STEP 2: Sand the Plywood
After cutting the plywood, sand it down with 150-grit sandpaper or 220-grit sandpaper to avoid splinters.
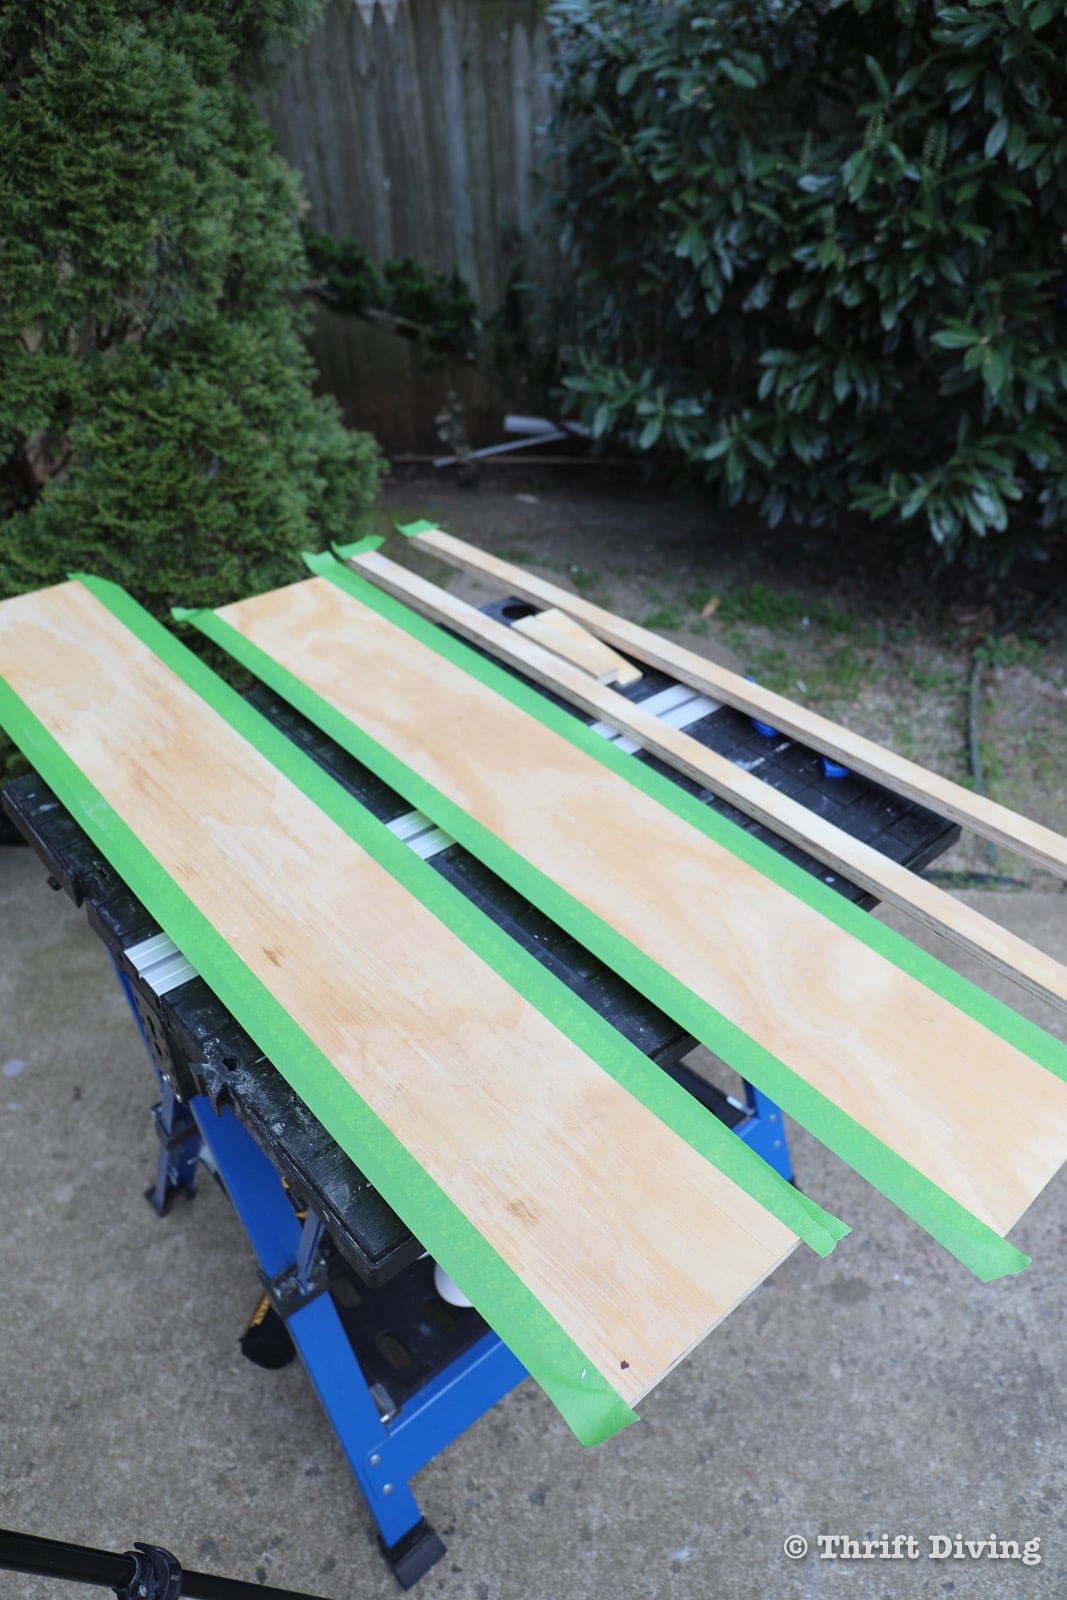
STEP 3: Tape Off the Joints
Once you smooth the boards, test fit them to make sure they all fit together nicely. Next, mark the location of where all the wood comes together. These are the areas we want to tape off. The inside of the herb garden will be varnished to resist moisture, but we don’t want to varnish the parts that will be glued together, in case the varnish affects the glue.
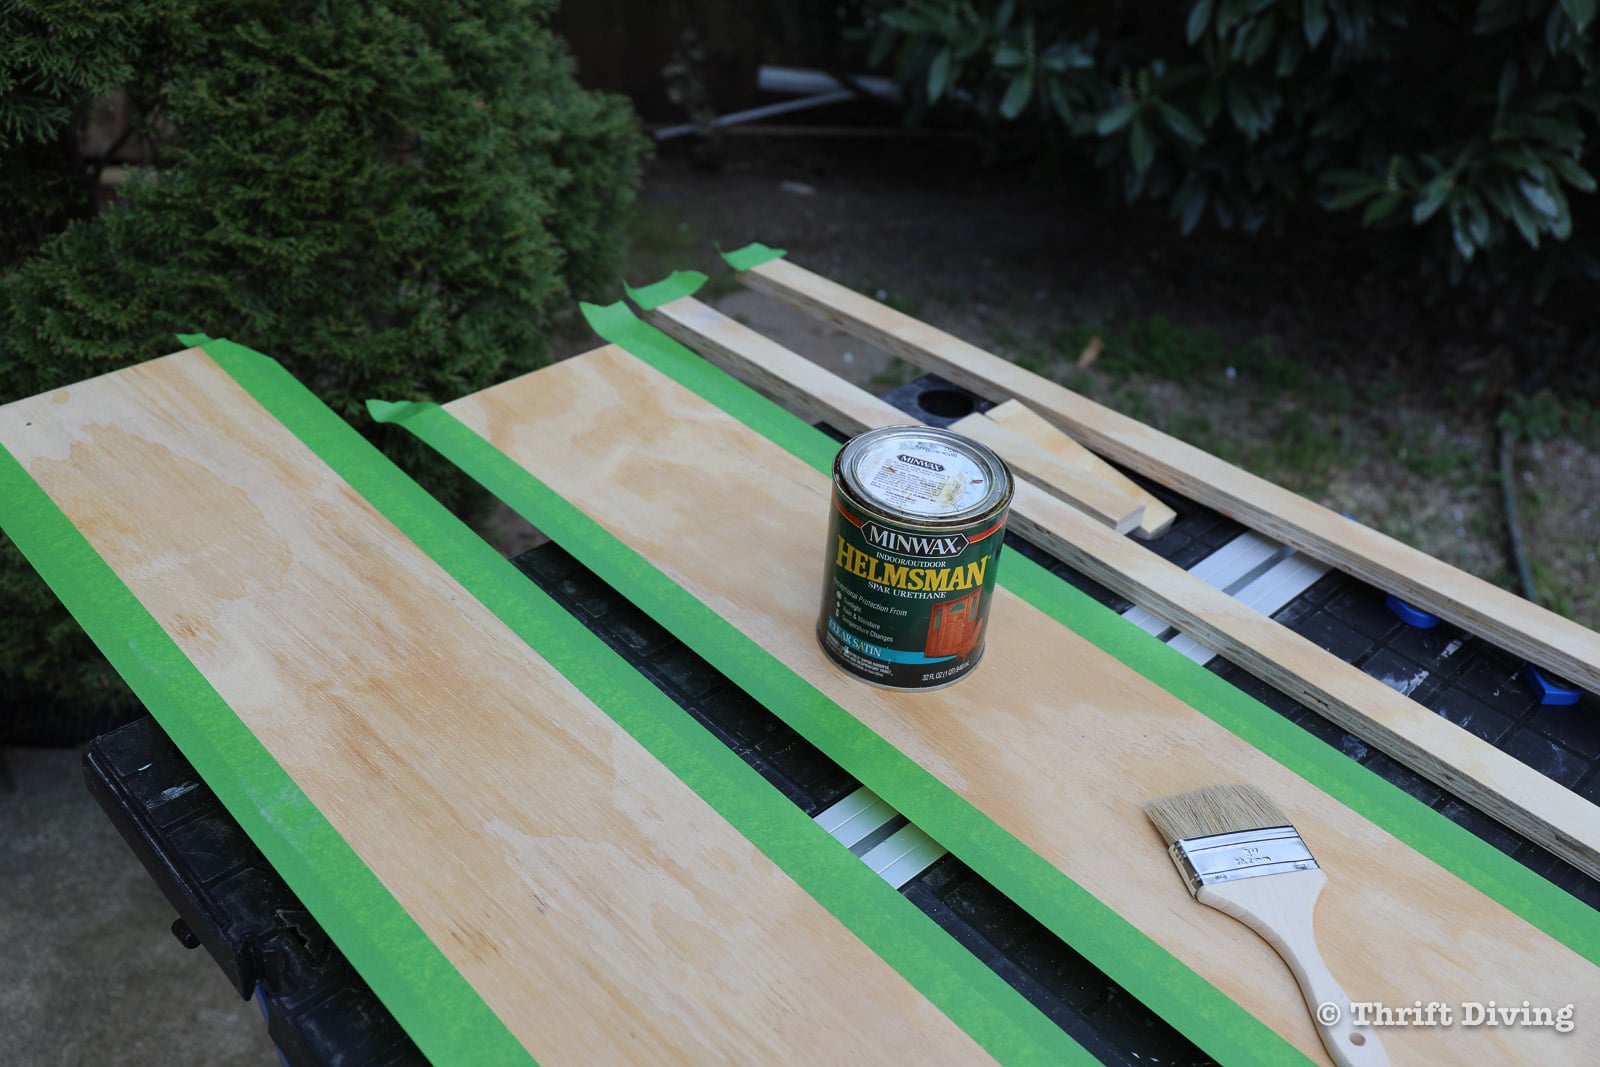
STEP 4: Apply Varnish to the Inside Pieces
Apply 1 coat of weather-resistant varnish to all the inside areas of the herb garden using a natural bristled brush. Only apply this varnish to the inside, NOT the outside. Don’t forget to apply the varnish to the bottom end grain of the front panel. One coat is good enough.
STEP 5: Glue the Body Together
Now it’s time to glue! This is another great opportunity to get kids involved, letting them place the glued pieces into place. Glue up the back, sides, and ends and clamp to hold. Remember to remove any excess glue that squeezes out with a wet towel.
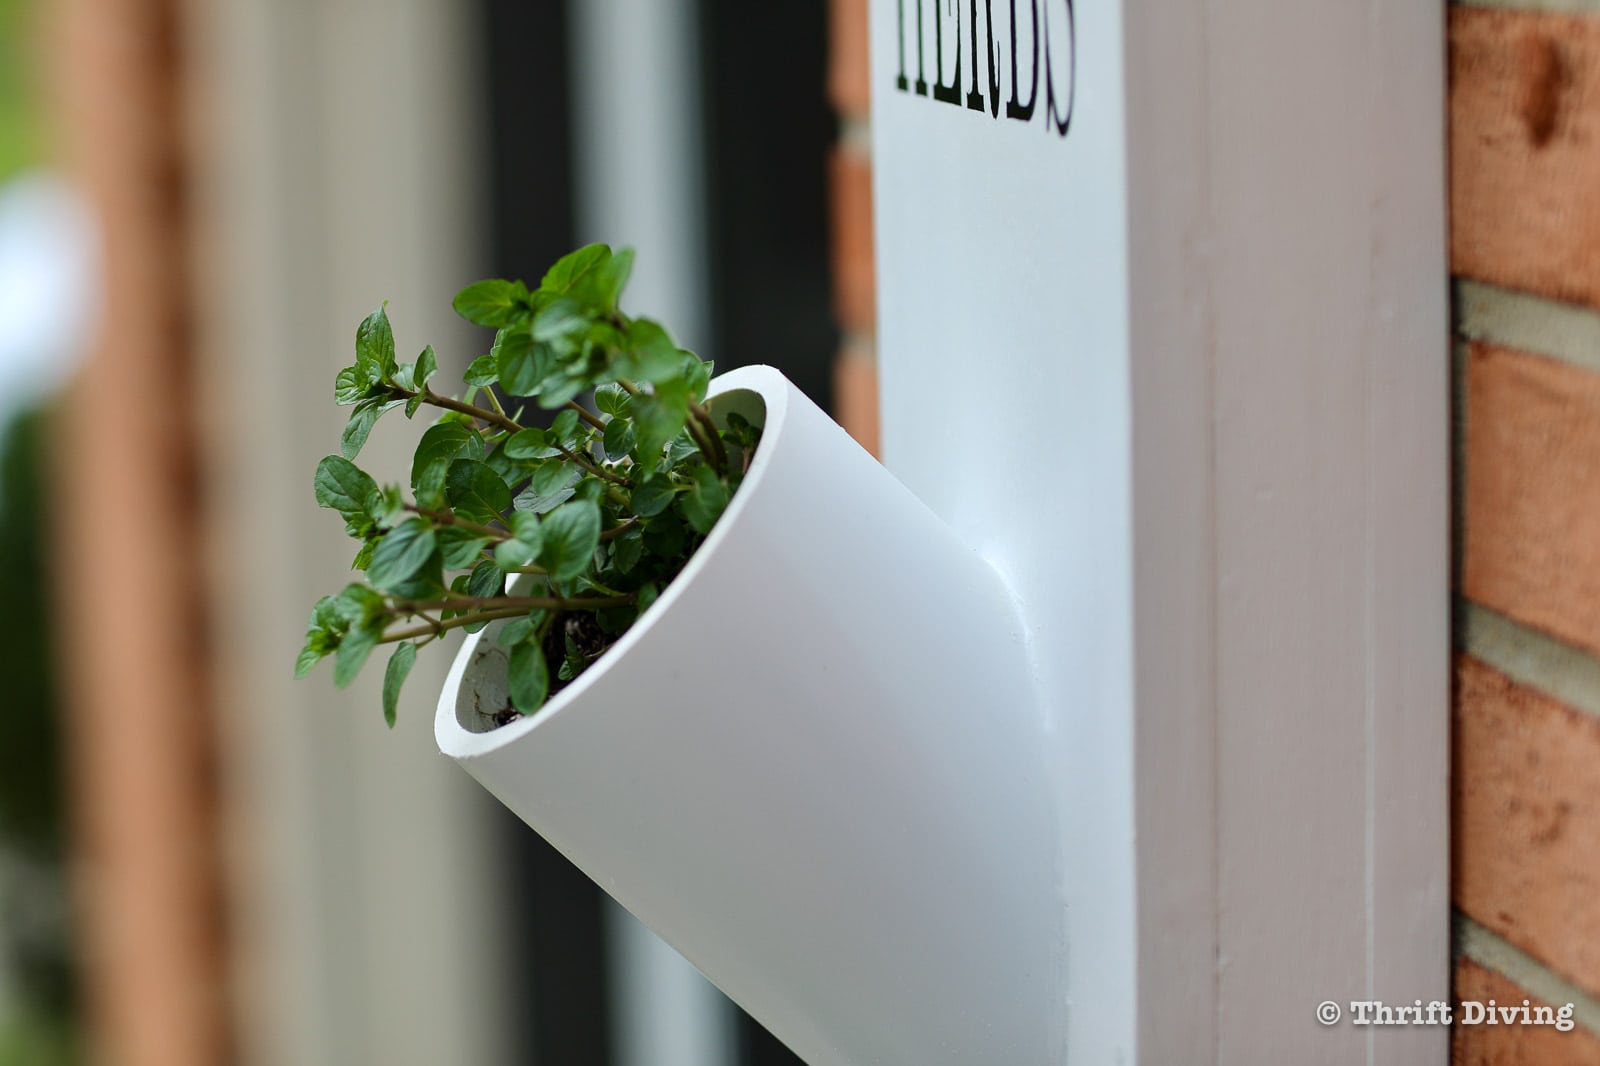
STEP 6: Cut 4 Pieces of PVC Pipe at 45 Degrees
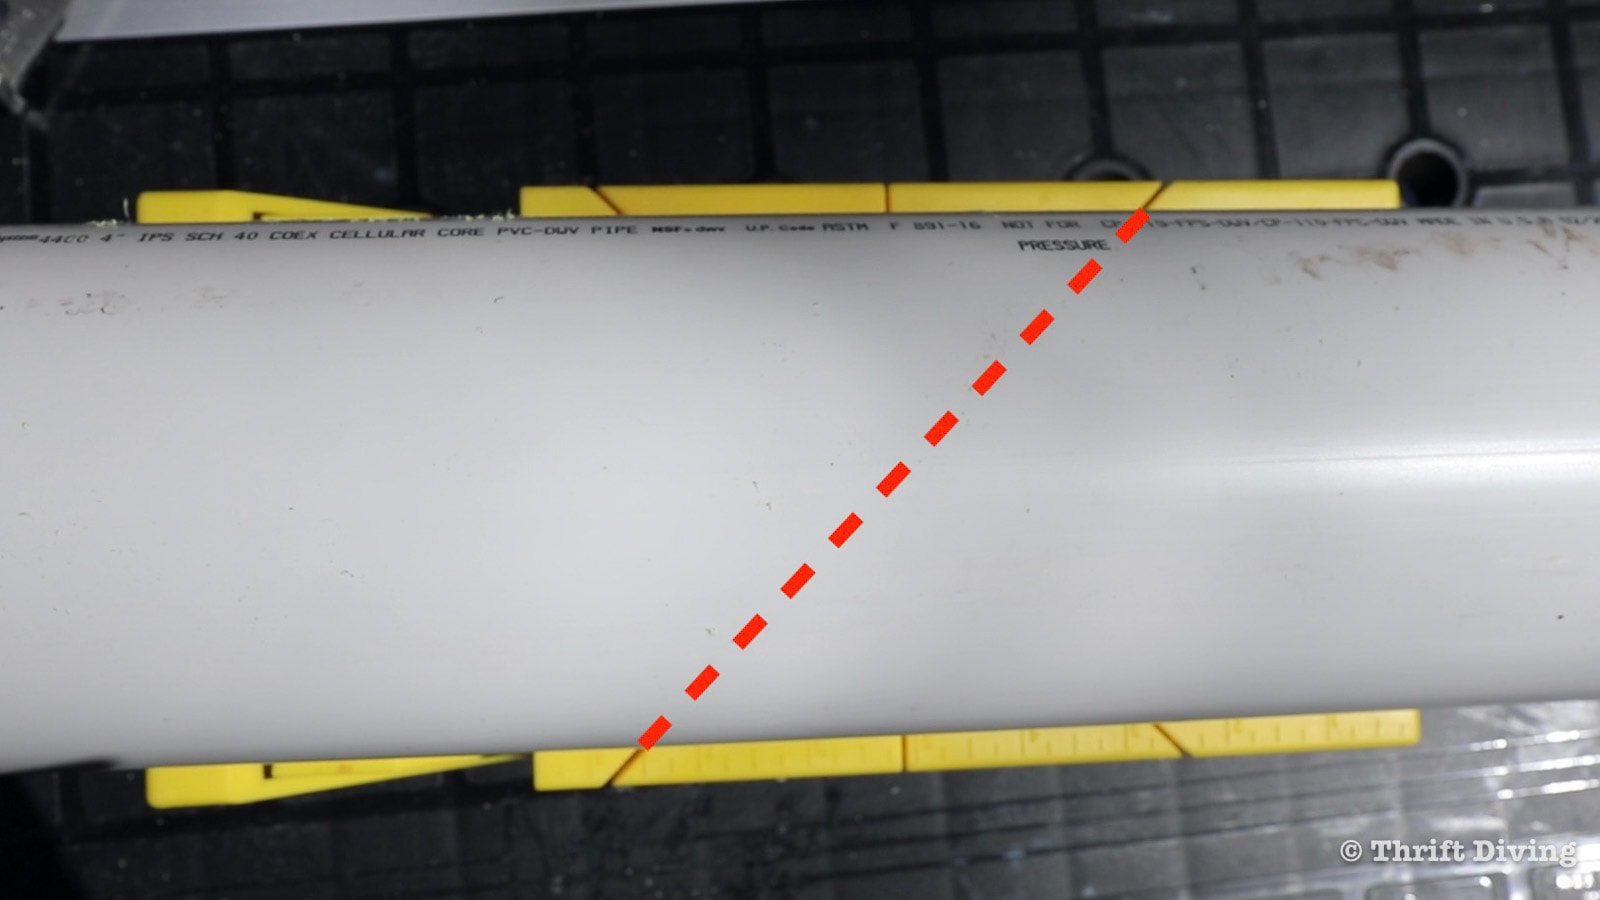
While the base of the herb garden is drying, it’s time to move on to cutting the PVC piping! I found that using a miter box was helpful in determining where the 45-degree cut needed to go for making the planters. You can also use a rafter square.
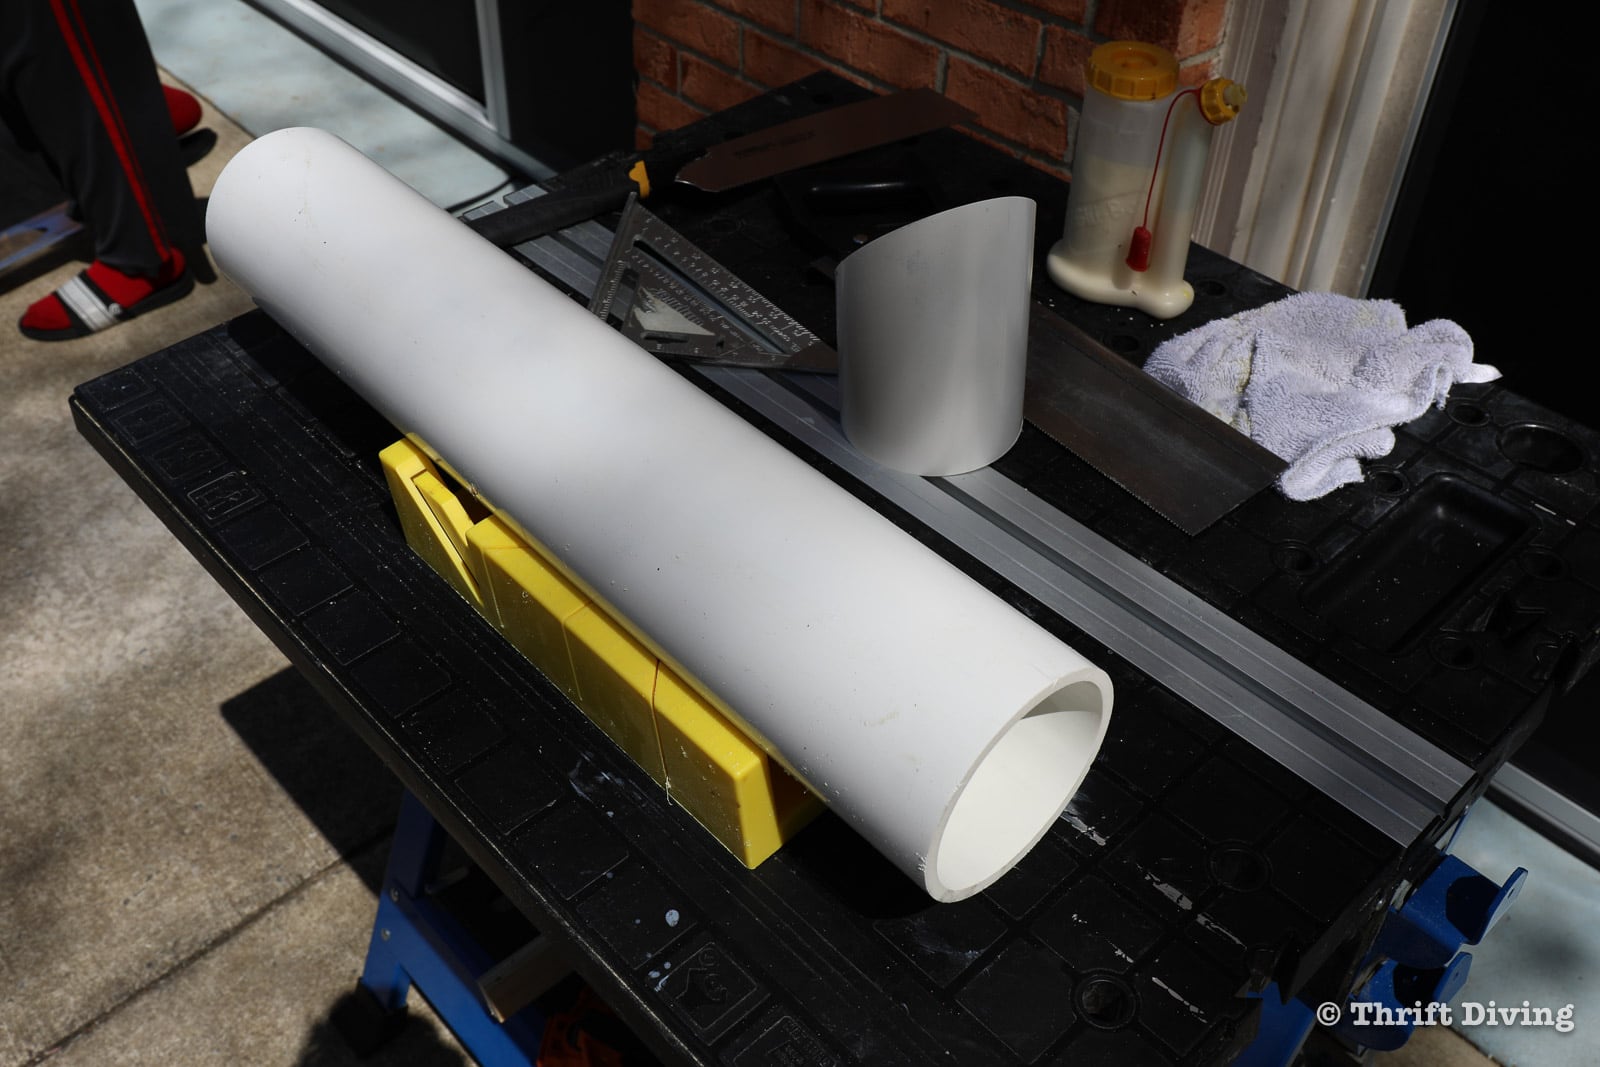
Mark a 45-degree angle and then cut the PVC. You have several ways to do this: with a hand saw, a miter saw, a jigsaw, and other choices. We chose to use a combination of hand saws and a miter saw. If you use a hand saw, you’ll get your workout!
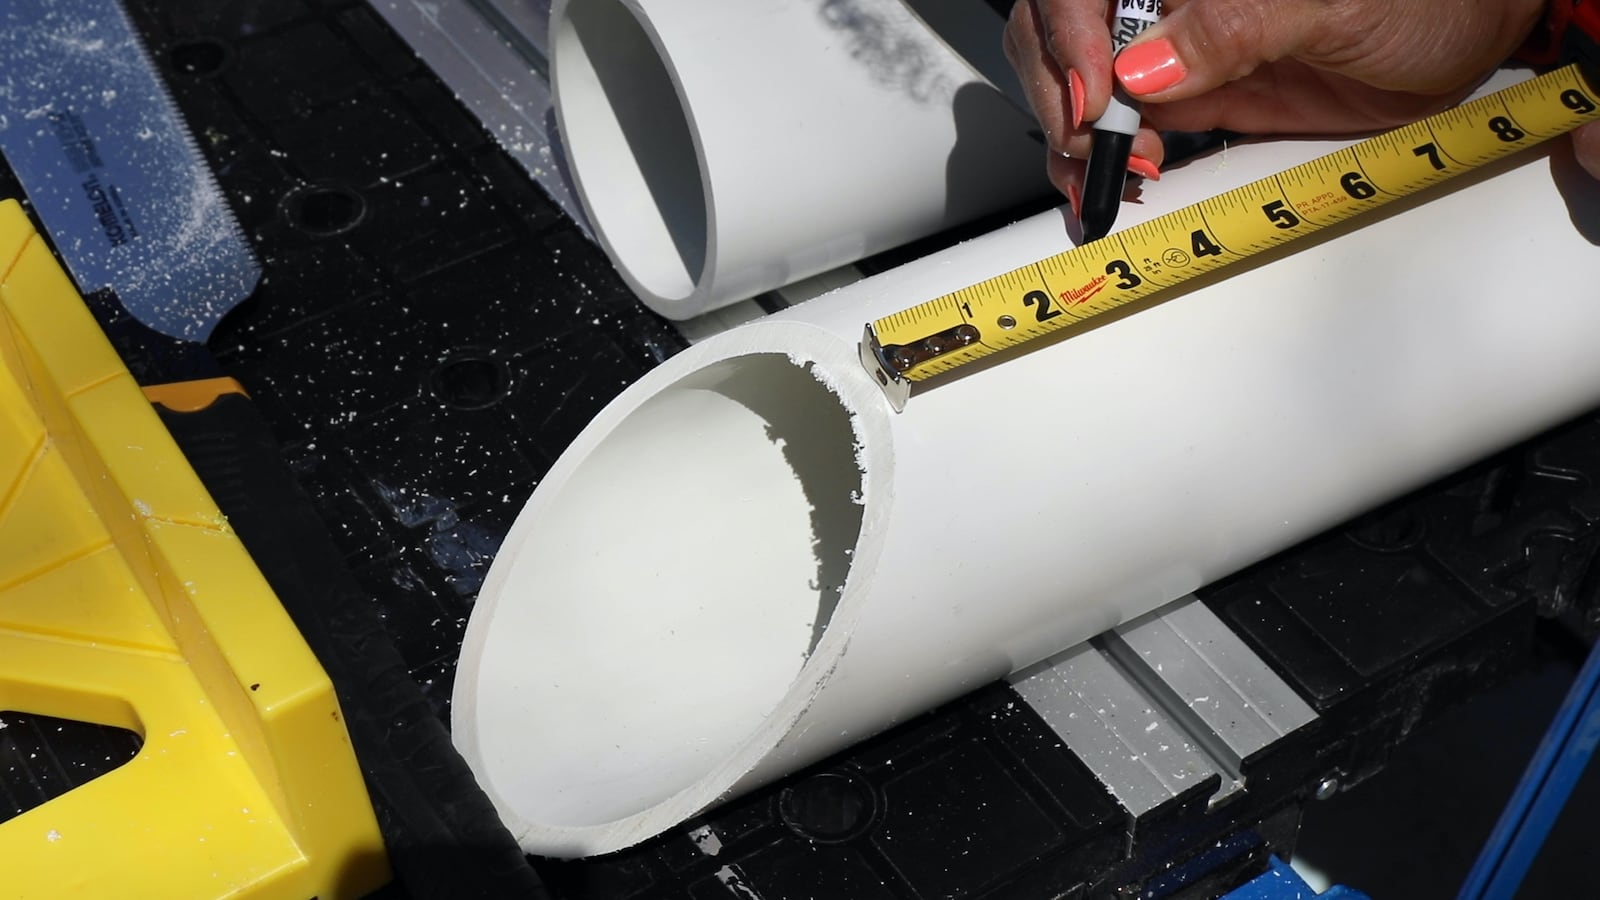
Measure from the curved edge of the planter 2-3/4” and make a straight 90-degree cut. You’ll need 4 of these. You’ll want to make sure they’re all the same size, otherwise it will look wonky.
And keep in mind that when cutting these PVC pipes with a miter saw, it may not cut through the PVC pipe all the way, so you’ll need to rotate it to finish the cut. The handsaw leaves the PVC pipe edges really raw, while the miter saw gives a cleaner cut. However, with a orbital sander you can easily clean it up. A belt sander is the quickest clean up the edges.


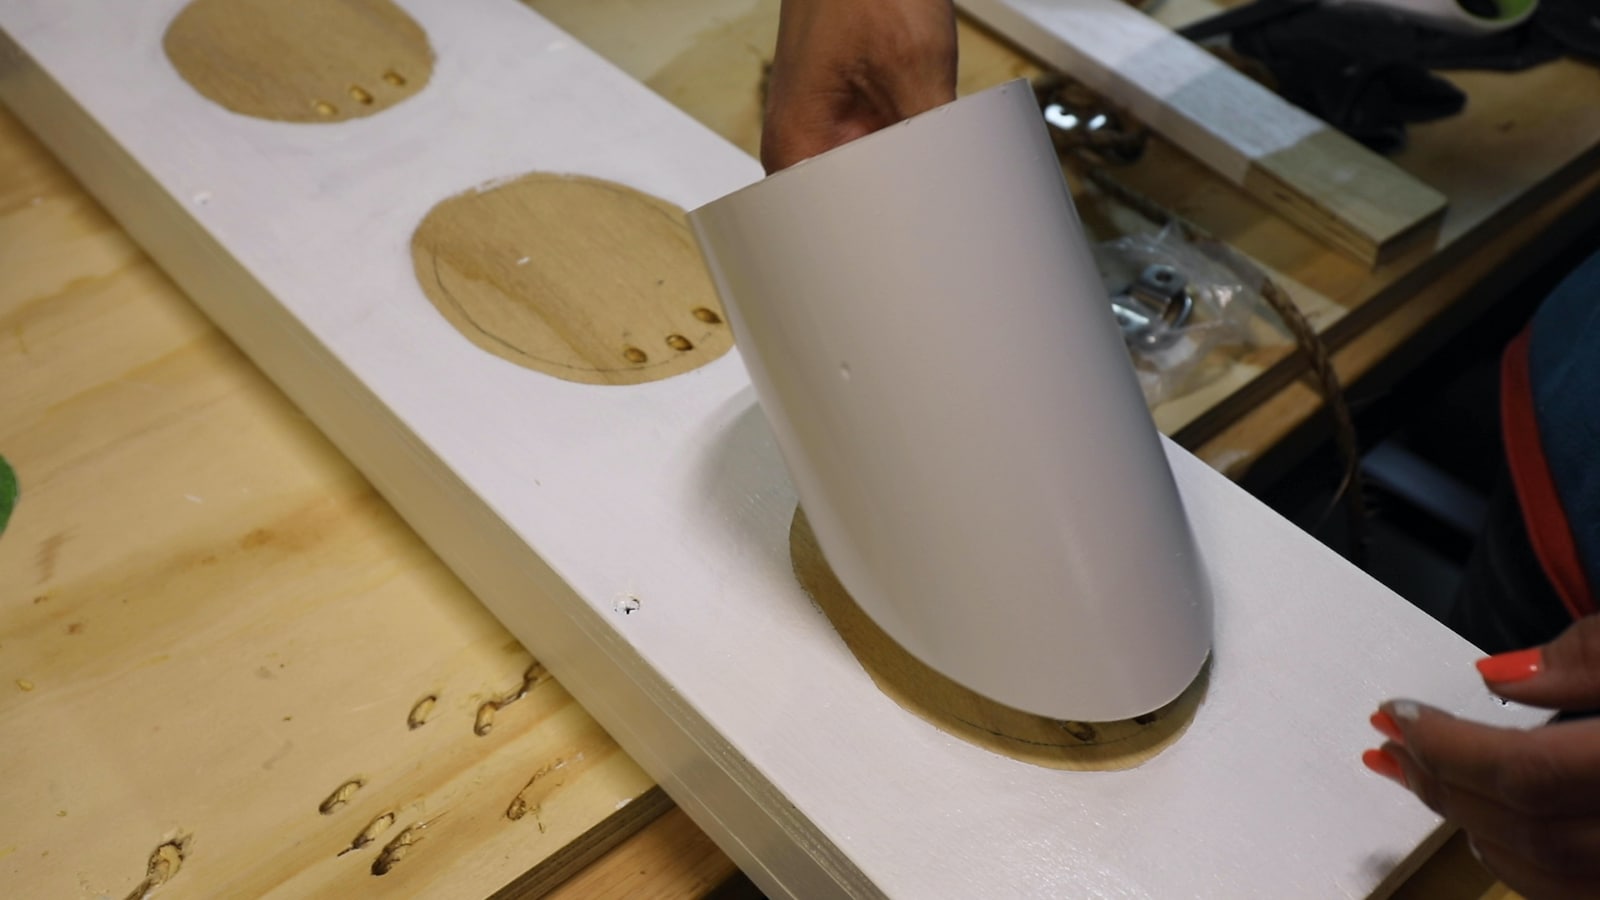
STEP 7: Position and Trace the PVC Pipe Planters
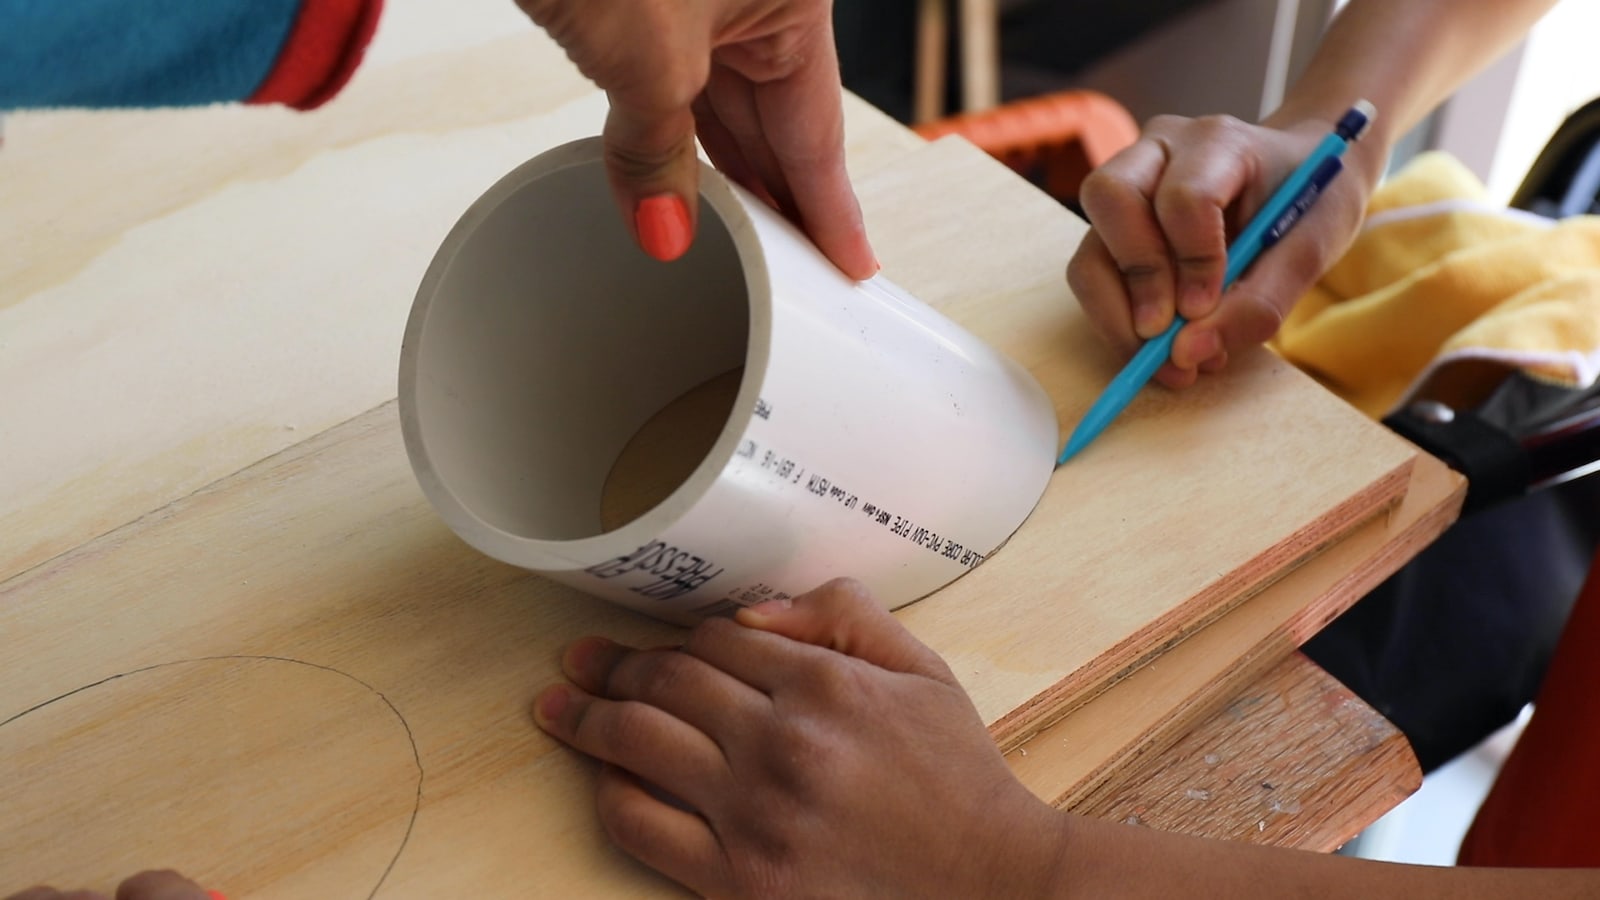
Now it’s time to prep the front panel of the herb garden! The first thing is to determine where they’re going to be placed and making sure they’re straight and evenly spaced .

Once you’ve got them into place, trace around them and mark on the bottom edge which planter goes where. Trace the inside, too, because the inside tracing will help to determine where the drainage holes will be placed. Mark the location of the drainage holes right over top of the inside tracing. You can use any small size drill bit. Just don’t go too small or too large.
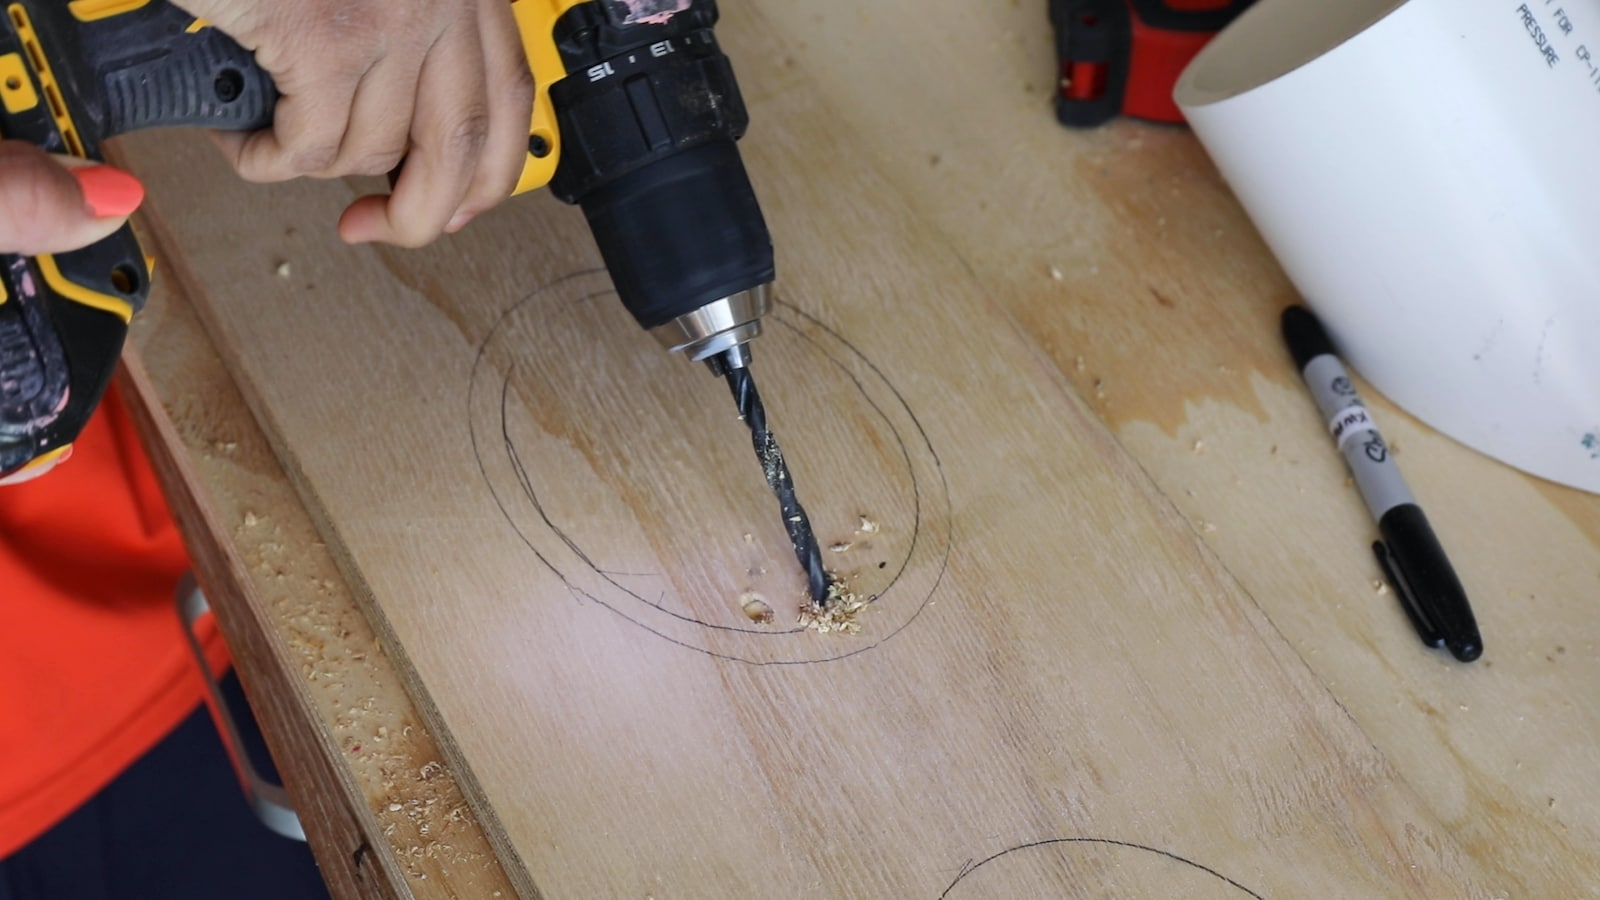
STEP 8: Drill the Drainage Holes
To drill the drainage holes, they need to be slanted so the water will easily drain. Start drilling straight up, and then slowly lean the drill in the direction of the top fo the herb garden until they go all the way through.
STEP 9: Add Mesh Screening Over Drainage Holes
This next step is optional, but I thought it may be helpful to place screening on the inside (backside) of the front panel, over the drainage holes, to prevent large chunks of soil from falling through the holes. Use a heavy duty staple to staple it into place.

STEP 10: Glue and Screw Planter Body
Once the front panel has been prepped with drainage holes and screen, you can add wood glue to the body and attached the top panel. Clamp it until it dries a bit.

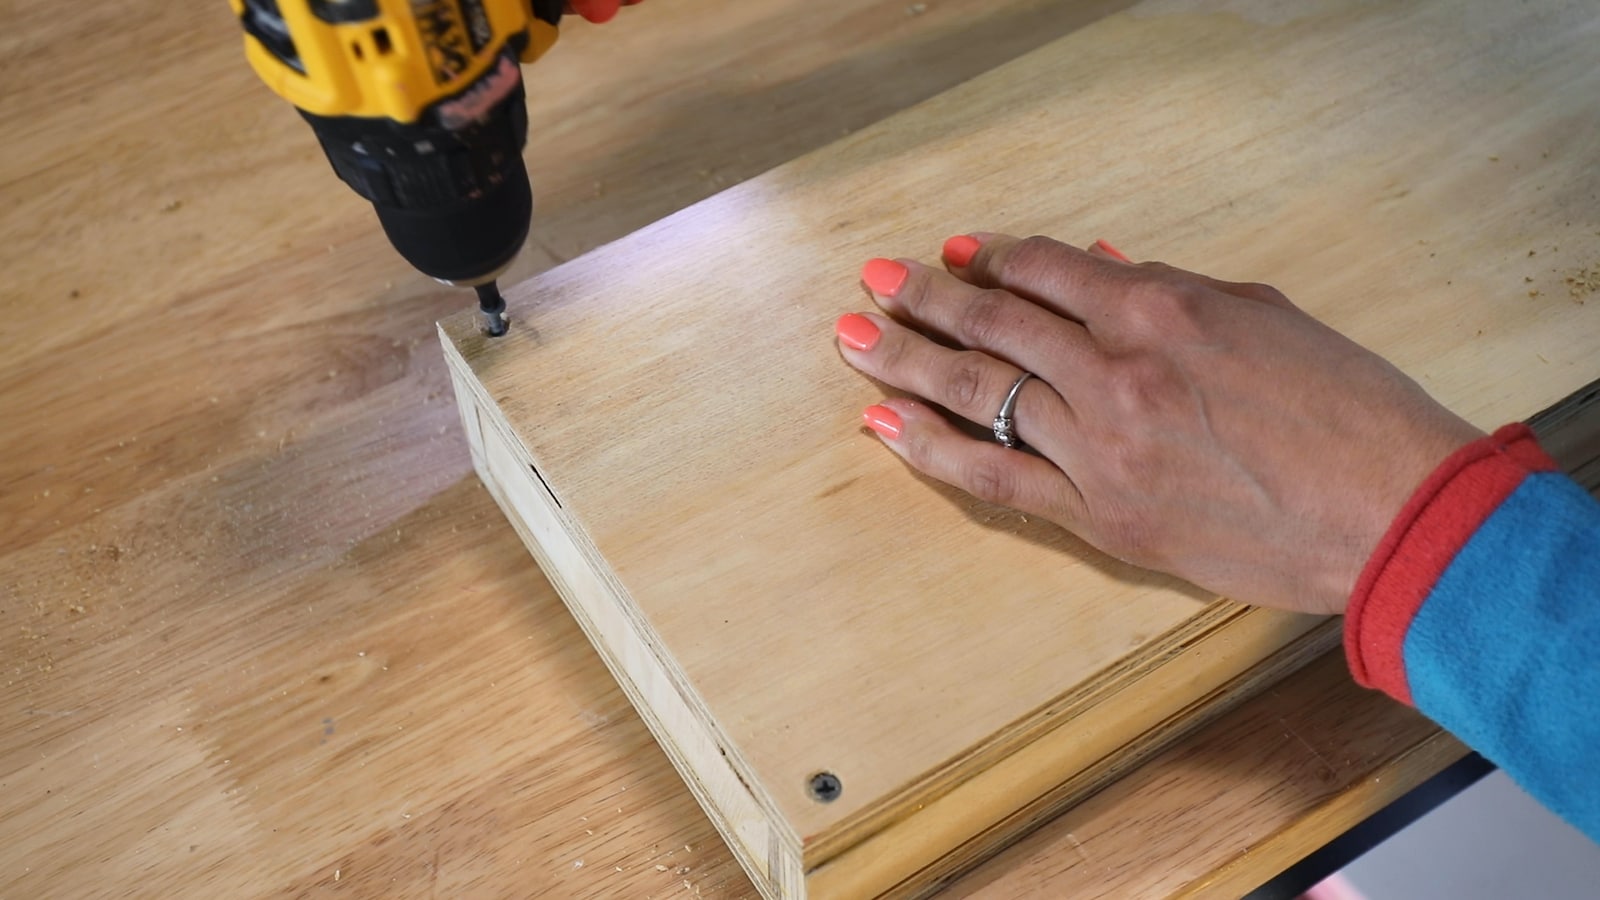
You definitely need pilot holes so you don’t split or crack your wood! Drill pilot holes first.
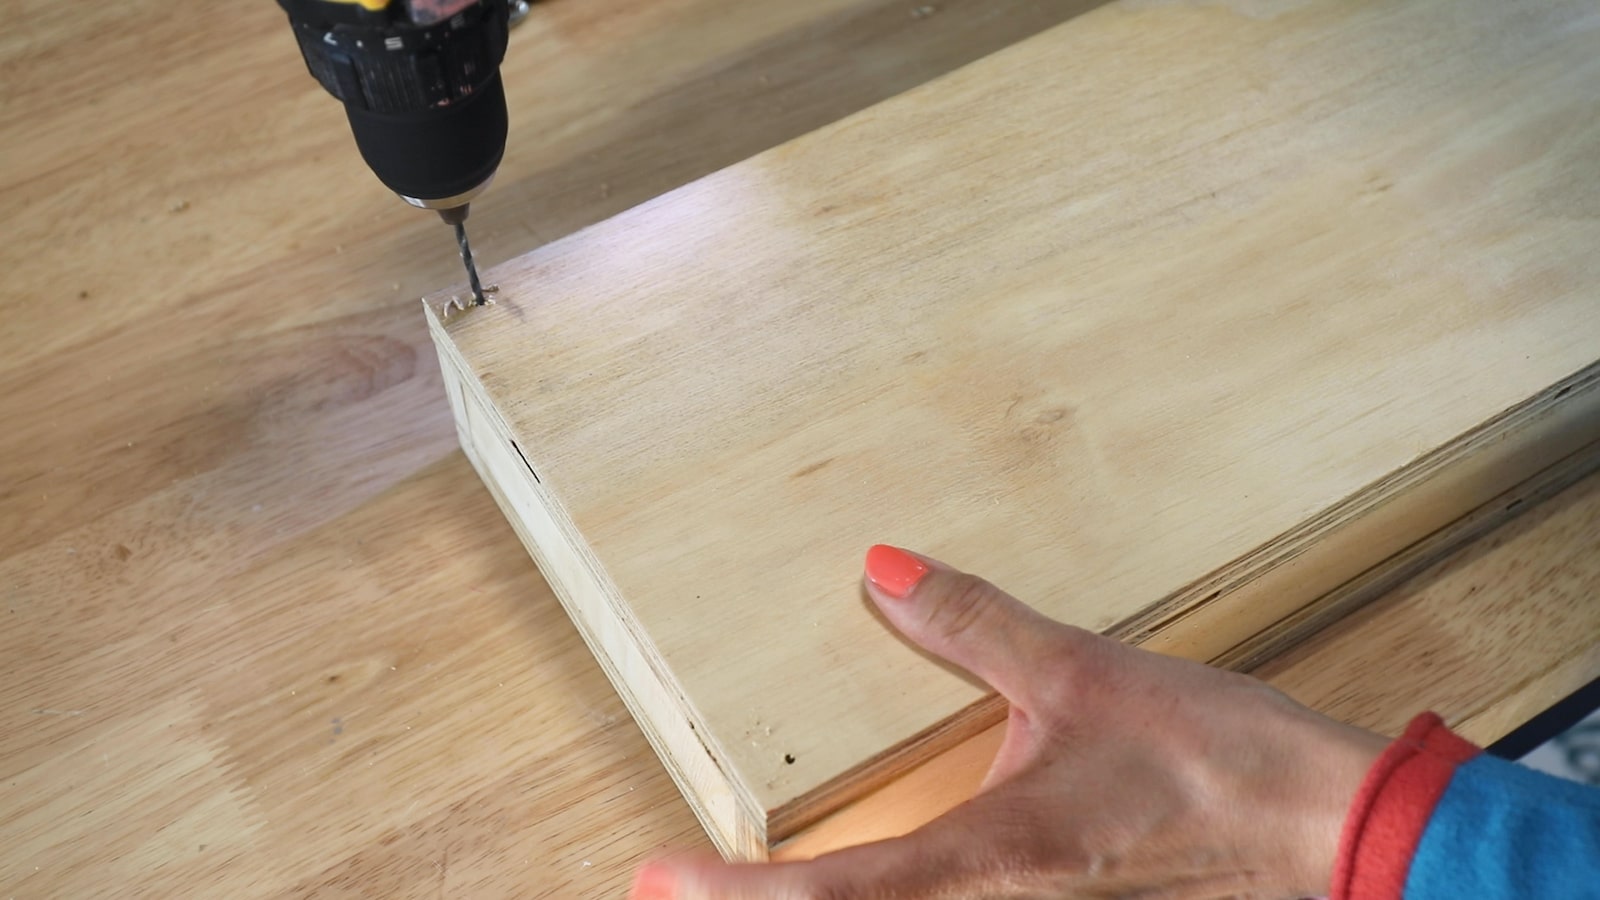
Next, use a countersink bit that will allow the screw to sit below the surface of the wood, but you don’t have to use that. Next, drive 1-1/4” exterior screws into the pilot holes. These won’t rust over time.
Drill pilot holes and drive screws into the front and back panels with pilot holes about 12” apart and in the corners. If you’ve got wood filler, the countersink bit helps you to easily hide the screws.
STEP 11: Fill Screw Holes with Wood Filler
If you don’t have wood filler, paintable caulk is an excellent way to hide screws, as well as sealing up any gaps where the planters meet the wood. Just know that it will shrink on you a bit so you’ll see indentations where you filled the holes. Make make sure to paint over the caulk once it dries.
STEP 12: Paint the Wood and Planters
Next, place tape over the opening of the planters to prevent spray paint from getting inside where the soil and plants will be. Use scissors to trim off the excess tape. Because of the black writing on the PVC pipe, you’ll need several coats of spray paint with primer if you’re going with white or a light color like me. Let the planters dry to the touch before adding new coats, and let them thoroughly dry overnight.
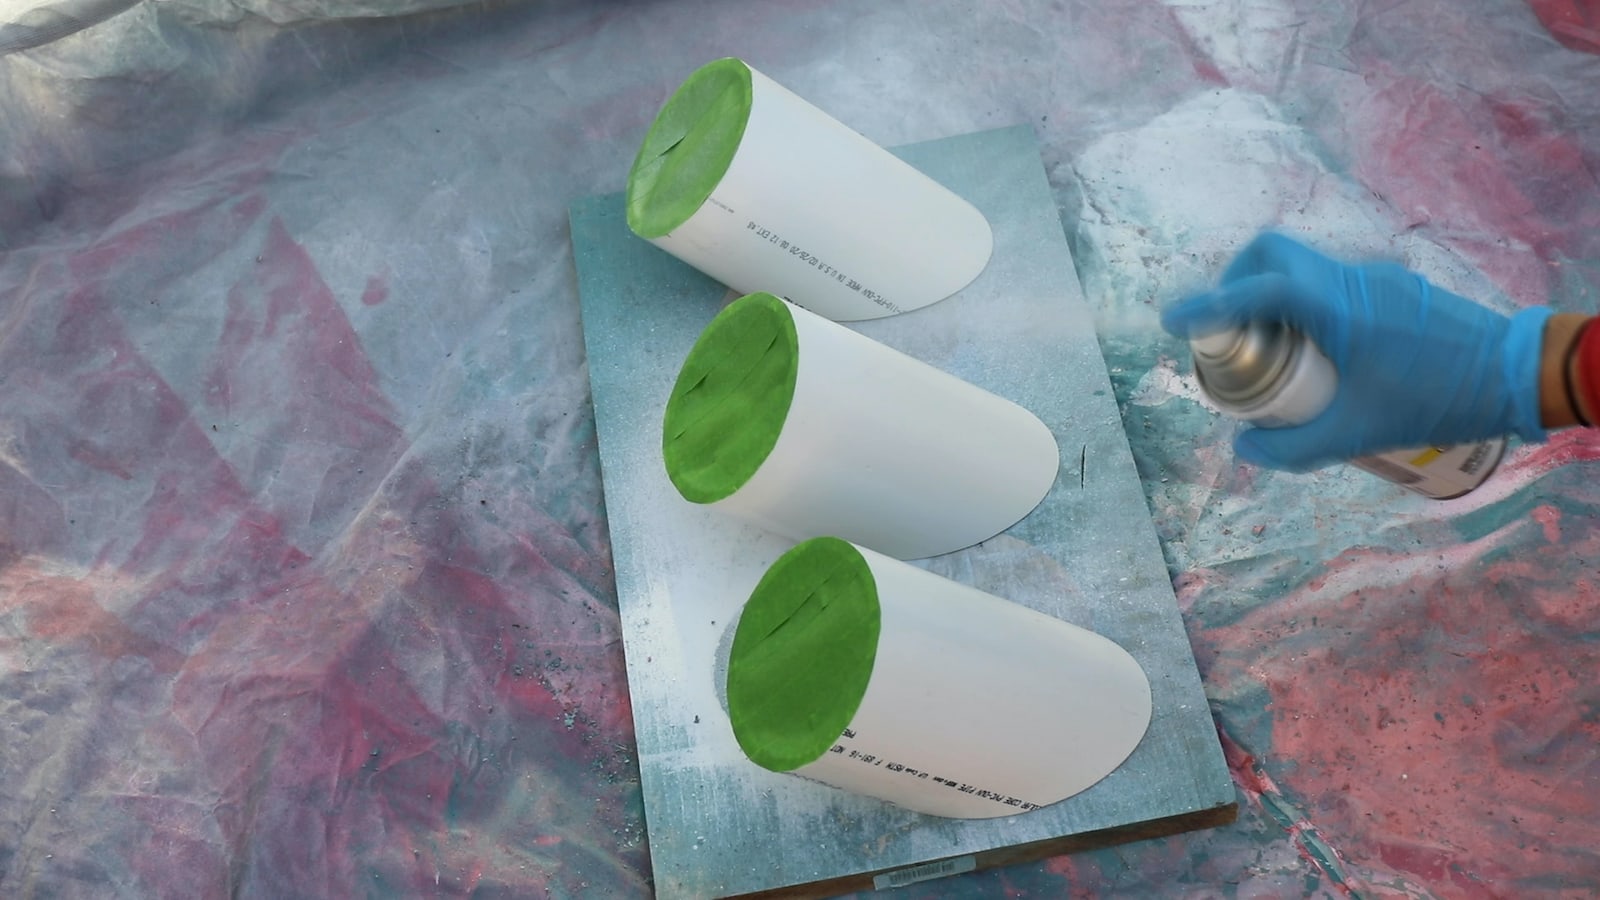
Use an exterior paint since your herb garden WILL be spending time outdoors. If you’ve got wood filler, now is a good time to use it to hide the screws. I didn’t have any so later you’ll see that I tried to use caulk. One to two coats of paint should be enough.
When you get to the front of the herb garden, leave the areas where the planters will be unpainted. The reason why is because we don’t want paint leeching into the soil. But you also want the glue to have a good adhesion to the wood.

Here’s a little tip: be sure to match up the planter to the position that you previous placed them. Then, turn over the planter and use an adhesive around the slanted rim of the planter, then position it into place. Wipe up any excess glue.
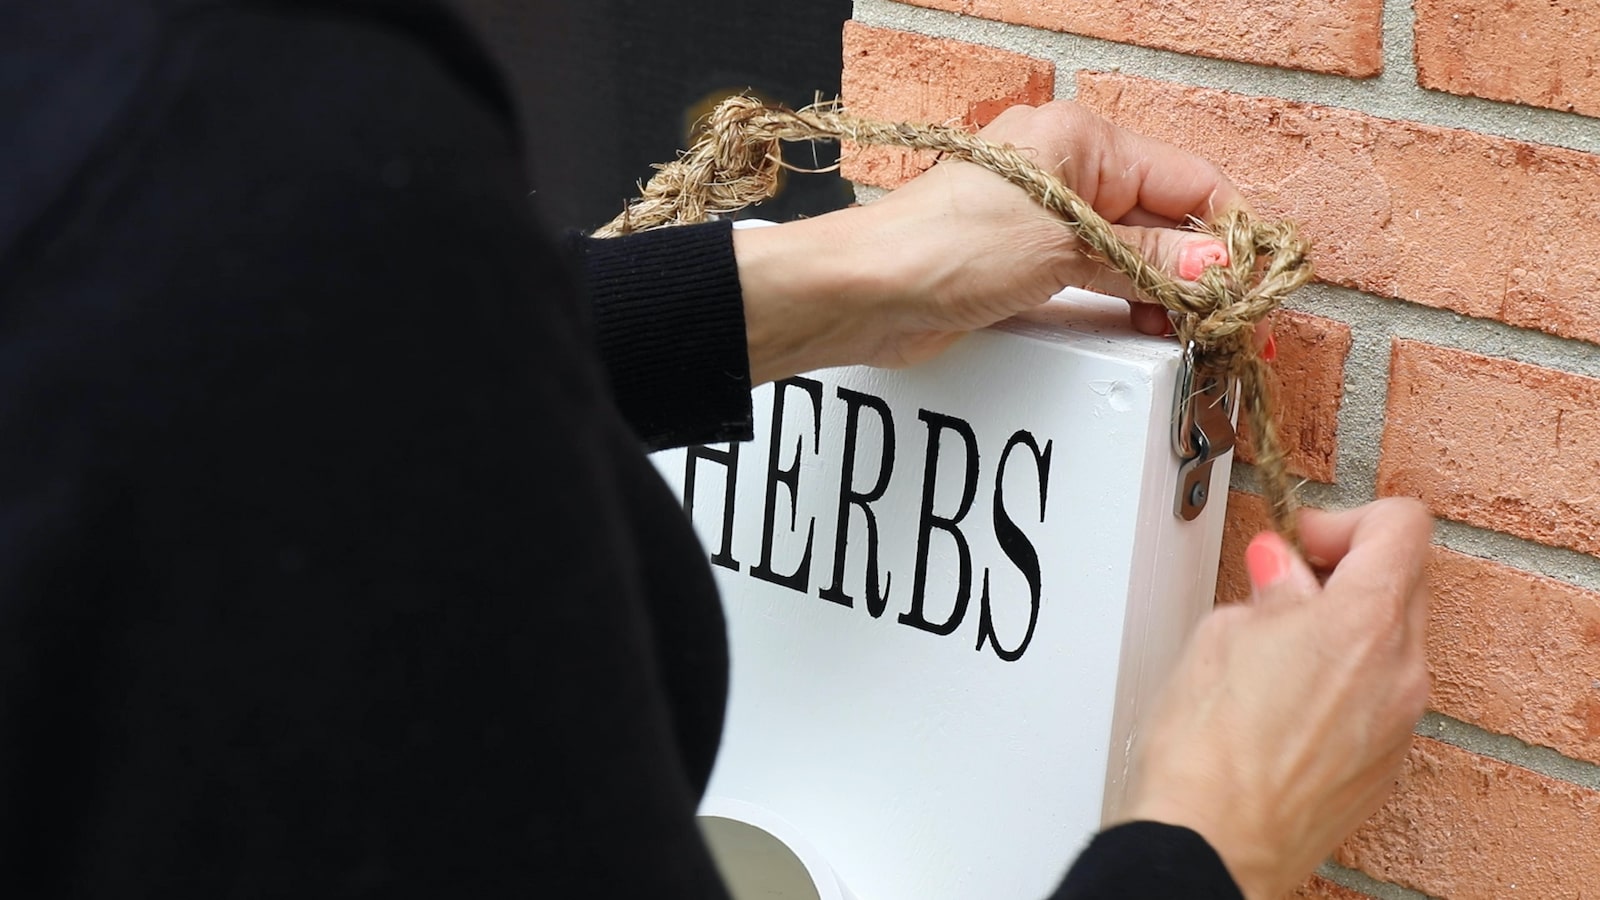
This is optional, but I used my vinyl cutting machine to make a stencil that says “HERBS” but you can use alphabet stencils from the craft store, including writing by hand. Add 2 coats of paint then remove the stencil while it’s still wet. If you’ve got any bleeding, use a small paint brush to clean up the lettering.
STEP 13: Glue PVC Pipe Planters to the Front Panel
Now that the front panel has drainage holes and the locations for the planters have been traced, we can glue and secure the front panel to the body of the herb garden. Again, remember to wipe up any excess glue with a wet towel, and use clamps to secure it while it dries.
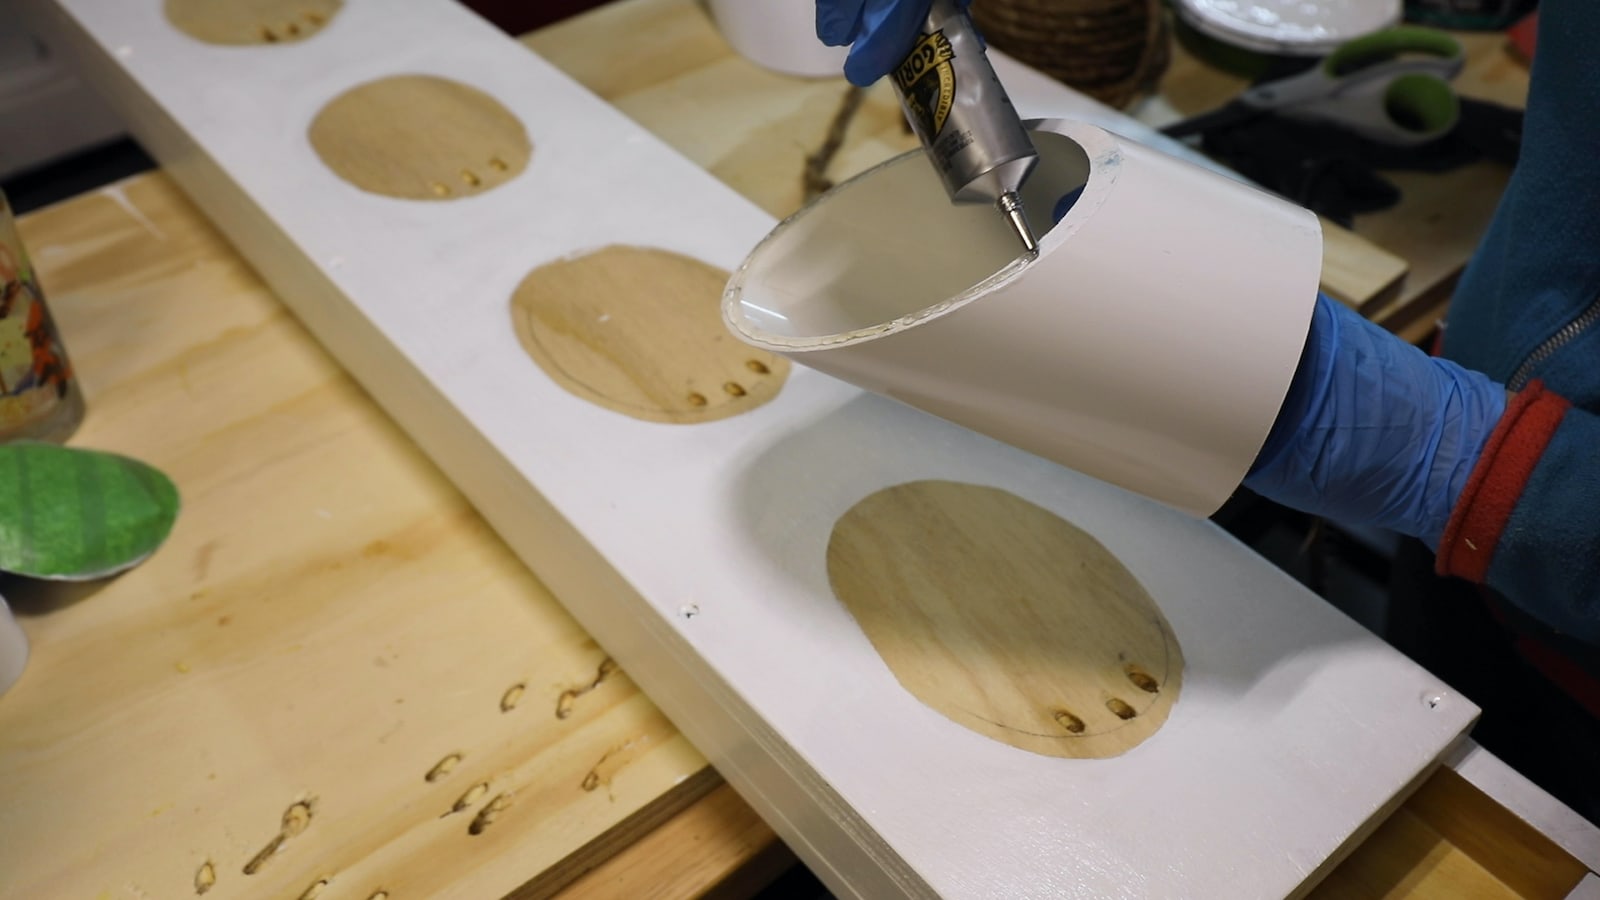
The main goal is to make sure that the PVC planters are even and have good adhesion. Let them dry for 24 hours before filing with stones, soil, and herbs.
STEP 14: Add Side Brackets and Rope
You’ll need a way to hang your herb garden. I love the look of rope. You’ll need 2 D-rings with pilot holes and exterior screws, and some rope. I found instructions online for how to tie a bowline knot on each side. It wasn’t too difficult. Once it was secured, I trimmed off the excess rope.
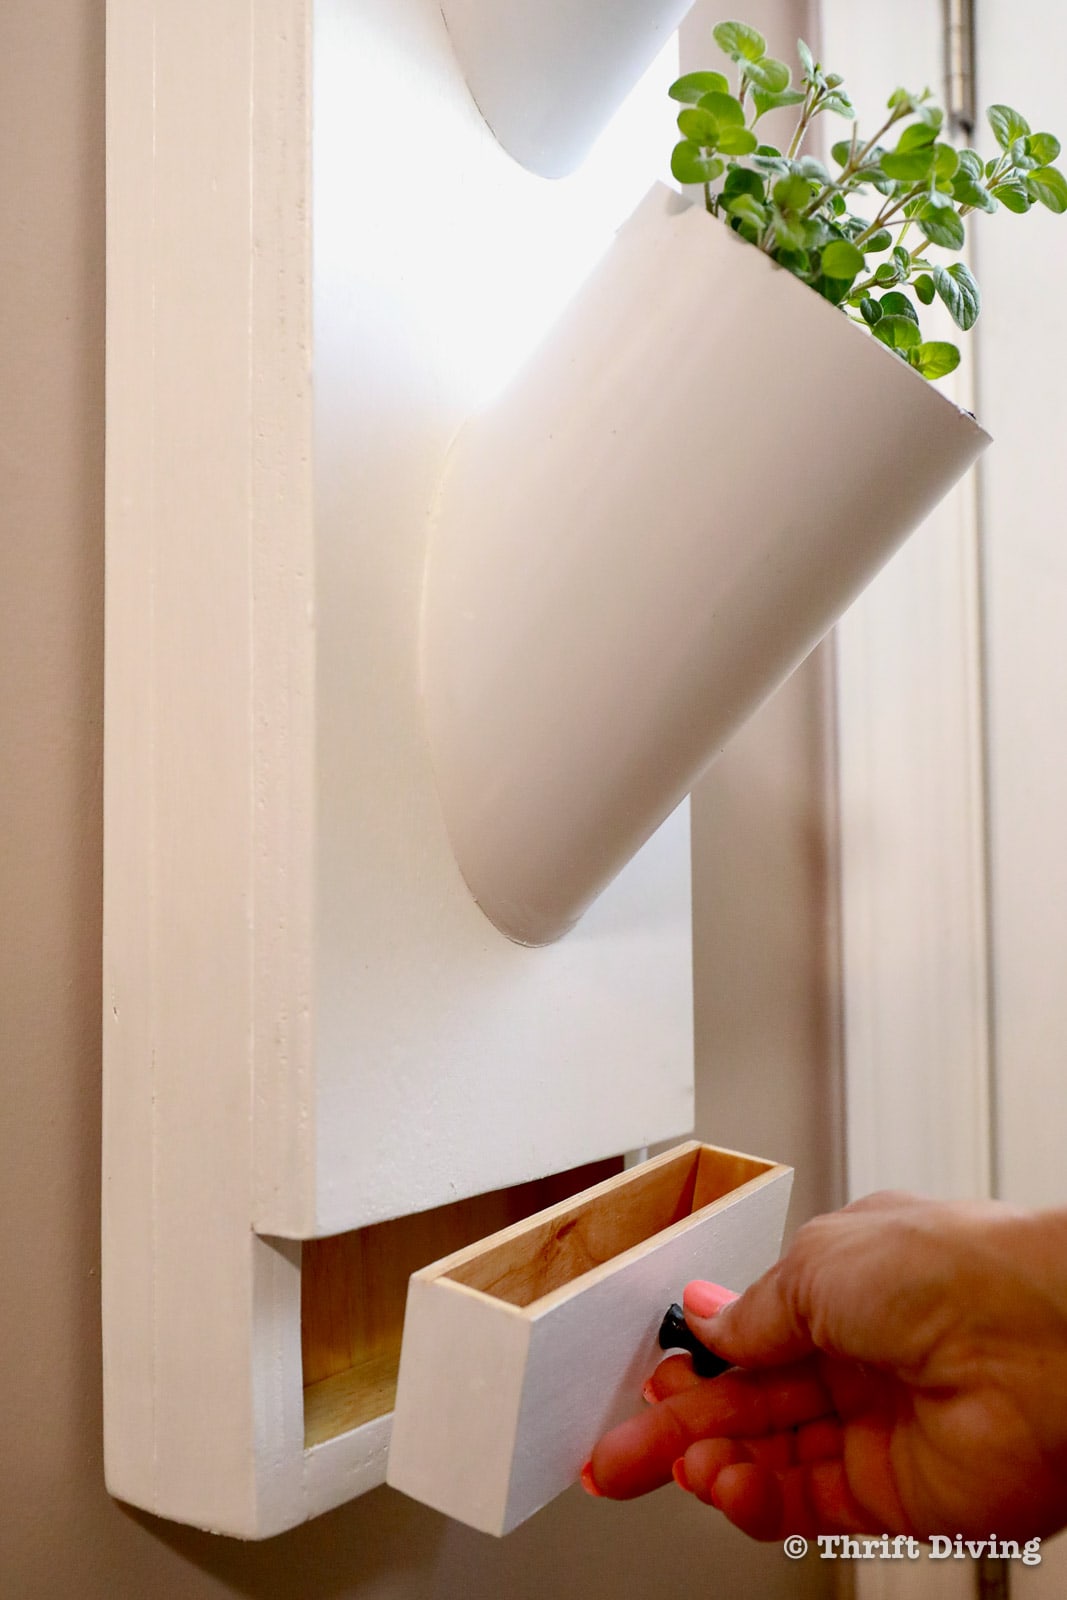
STEP 15: Make a Drip Tray (Optional)
The reason the front panel is shorter than the back panel is that so that any water that drips down through the drainage holes will have a place to land. I use 1/4″ plywood and glued together a little box to sit down in this part. I had a small knob that was perfect to drew into the wood! I varnished the inside of it, as well, to it would be waterproof.
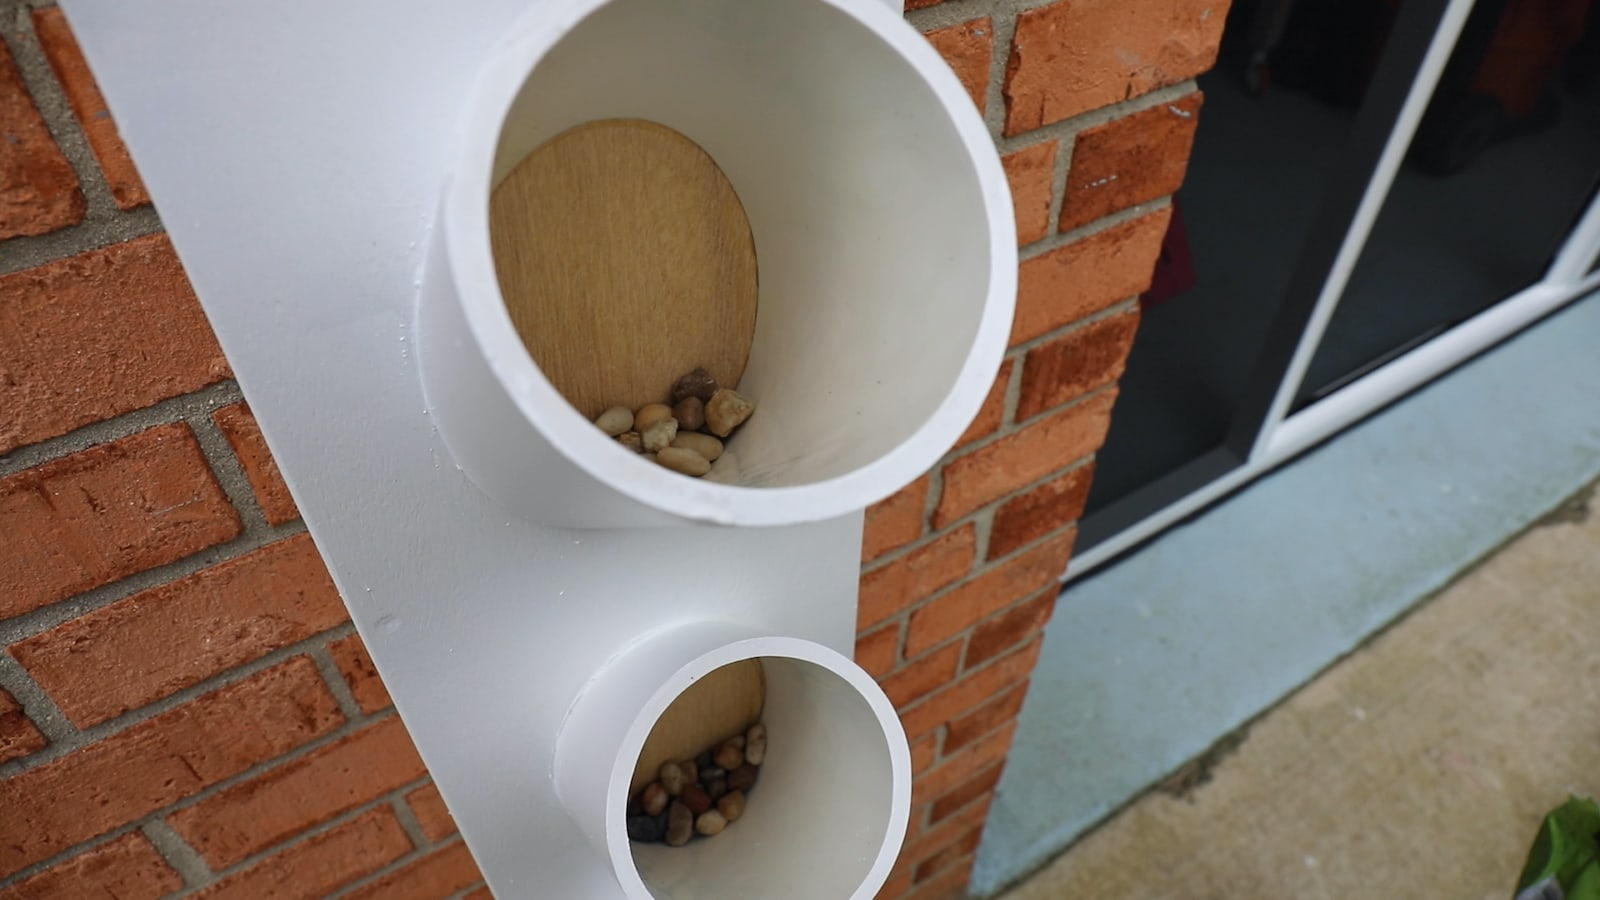
STEP 16: Assemble Your Herb Garden!
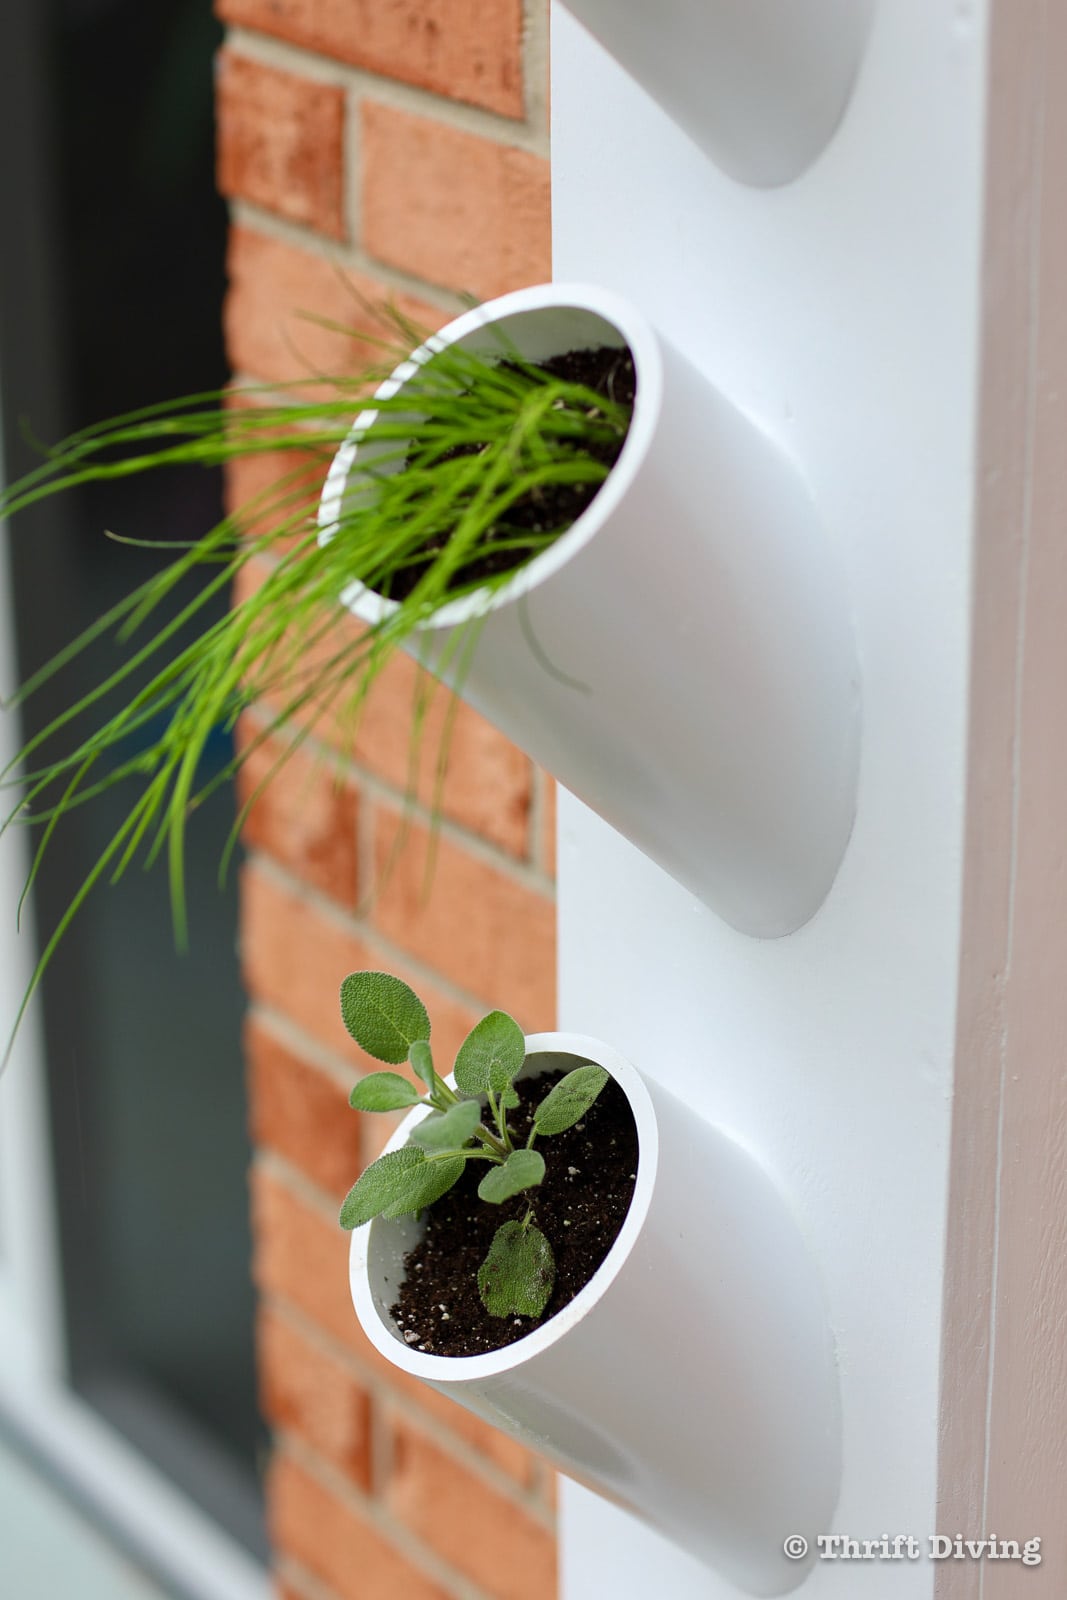
You’ll need some stones to put in the bottom of the planters for drainage. We found some river rocks in our yard. Place a handful into each planter and then fill with 1-2 scoops of soil.
For our herb garden, we were mostly using pre-grown plants from The Home Depot, but I also picked up some seeds for the kids to toss in. Doesn’t it look awesome?! Just be careful when watering it. You don’t want to over-saturate it. I water it from the top edge and let the water soak through the soil. If you water it towards the bottom edge of the PVC planter, and you over water it, the water will drip down the front panel.

When it gets cold, just bring it inside! I’m using a picture frame hook that holds, I think, up to 50 pounds. I think this herb garden might be around 20 lbs. I also like that it’s only 8″ wide so it doesn’t take up a ton of space! I don’t have a lot of wall space, so this area behind the kitchen door is perfect, especially since it gets sunlight.
So what do you think of my herb garden using PVC pipe?!
What started out as PVC piping an a sheet of plywood is now this beautiful vertical herb garden that you can hang outside when it’s warm, but when temperatures cool, you can bring it in and hang it in your kitchen for year-round gardening! It doesn’t get much more versatile than that!
Do you love this project? Click here to SAVE it on Pinterest!
![]()

Download the 5 freebies!

Thrift Diving inspires women to decorate, improve, and maintain their home themselves...using paint, power tools, and thrift stores! Use these 5 printables, checklists, and ebooks to get started!


Hi Serena:
Your plans are well thought out and explained with great detail. Kudos to you. Quick question…is there any downside to adding a 22.5 degree elbow at the “show” end of the PVC? By adding them, it seems like they would do a better/cleaner job with watering and water retention. Thoughts?
Bill
Great idea, Bill! I think an elbow would work well for that very reason. The only consideration is, would you want to use a glue to hold it, which could leech into into the soil? That’s the only thing.
I cannot wait to make one of these! This is such a great project!
Hi Serena!
I love this planter! It’s the perfect project for me and my (bored and unhappy) 13yr old daughter. One question though…I am definitely new to growing herbs-or anything-and always have water everywhere. When you say “water at the top edge” do you mean only water the top plant and then let it drain down to the herbs below it? Or do you water the front edge of each herb individually? How often are you watering it?
Thanks again for this great tutorial.
Thanks, Cindy! I can understand the challenge with kids at home and nothing to do!! What I mean about watering at the top edge is that if you over saturate the plant and water on the bottom part of their circle, and if you water too quickly, the water tends to spill out and create a mess. I found that watering slowly and from the top edge of the circle, closer to the back, it doesn’t make the same mess. And yes, water individually. 🙂 I water it every few days or so, or when the soil appears dry. Hope that helps!
Good instructions. Everything was step by step and easy to follow.
Thank you, Ann! 🙂
What a fabulous idea! This planter would look great outside our front door – thanks for the inspiration!
Your herb garden planter is awesome!!!!! Very PROfessional looking!
Thank you so much, Barbara!! Glad you love it! It was a lot of fun figuring out how to make it. 🙂