How to Make a Canopy Shade with Mosquito Net for Your Patio!
This canopy shade with mosquito net tutorial is sponsored by Arrow Fastener.
I’ve always had a love/hate relationship with my patio. It’s been unfair how the last 12 years we have lived in our home, the patio has either been too something: too hot, too dirty, too many day-biting mosquitoes…
Because it’s always been “too” something, we have never really been able to use it the way we would like.
I’ve always wanted to create a canopy that would block the sun when needed, yet be removable to allow the sun to shine into the living room windows when I would like to take it down. And I’ve always wanted a place to sit outdoors and enjoy nature without the mosquitoes biting the heck out of us.
I think this DIY canopy shade with mosquito net just may solve our problems!
Let’s jump into this tutorial on how to make this canopy shade with mosquito netting for the patio!
Click here to SAVE this project on Pinterest!
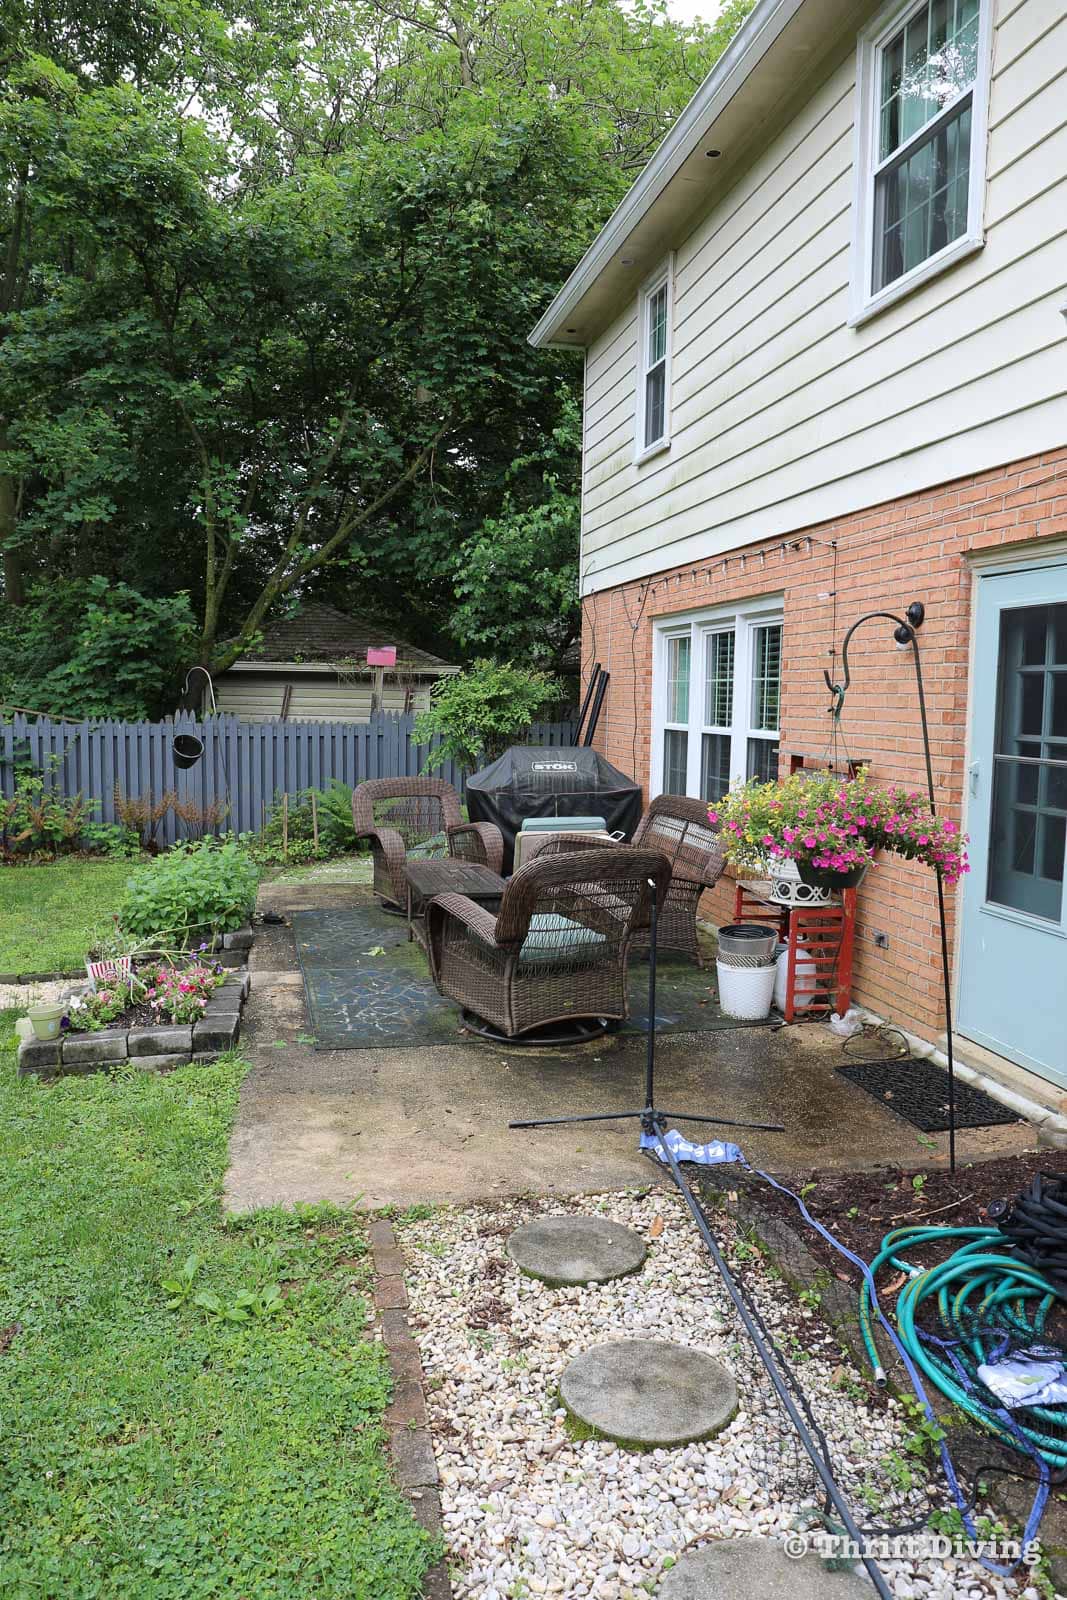
BEFORE

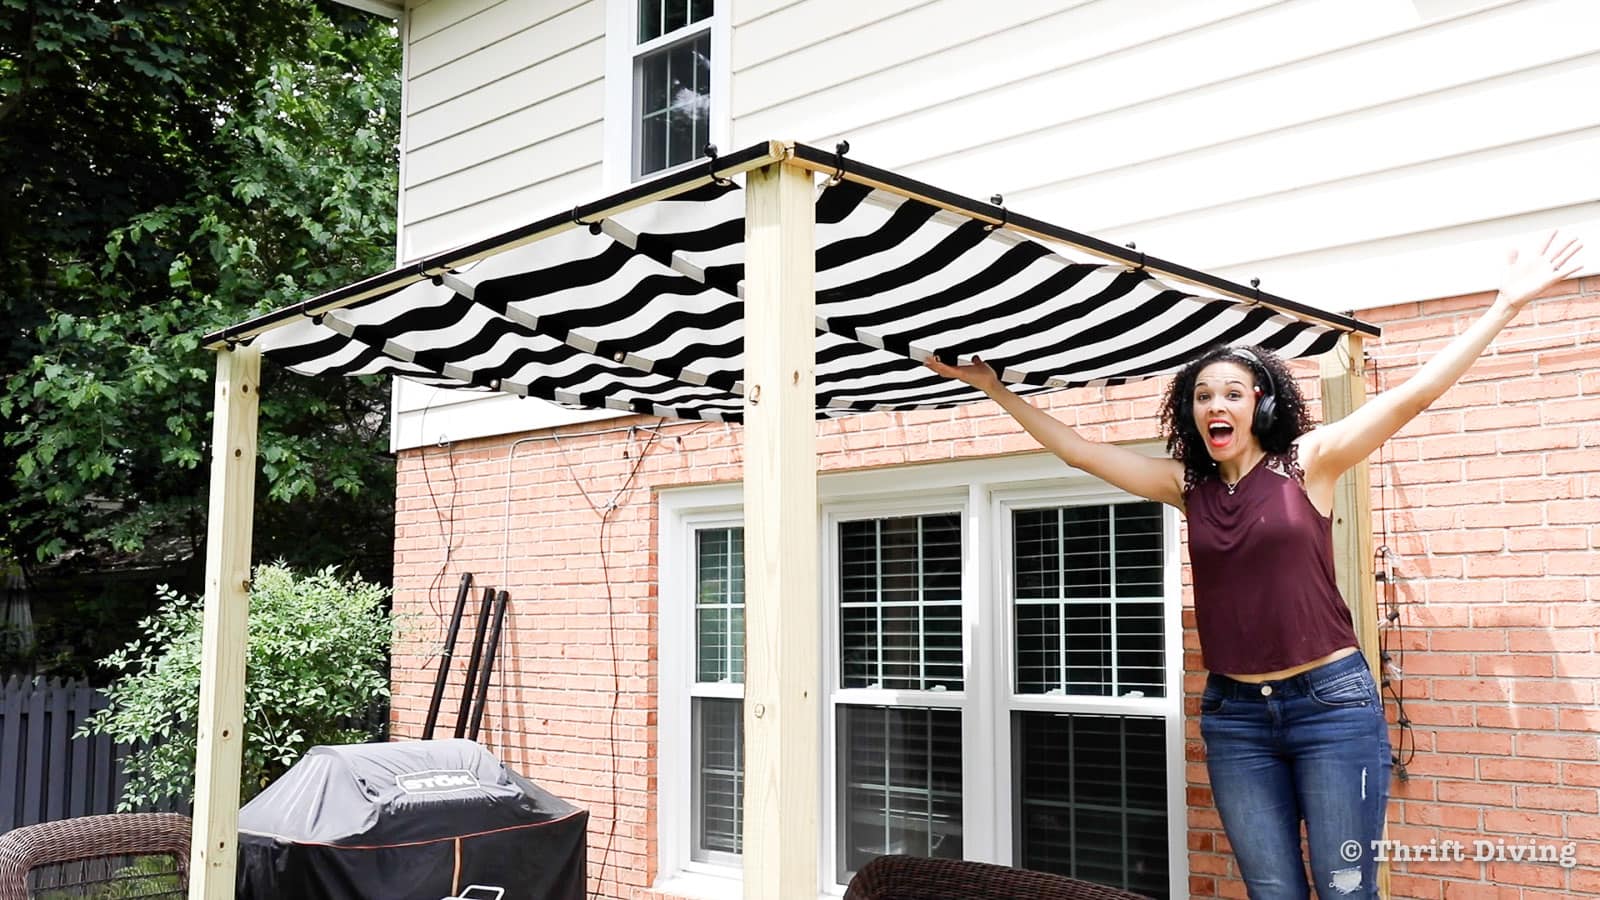
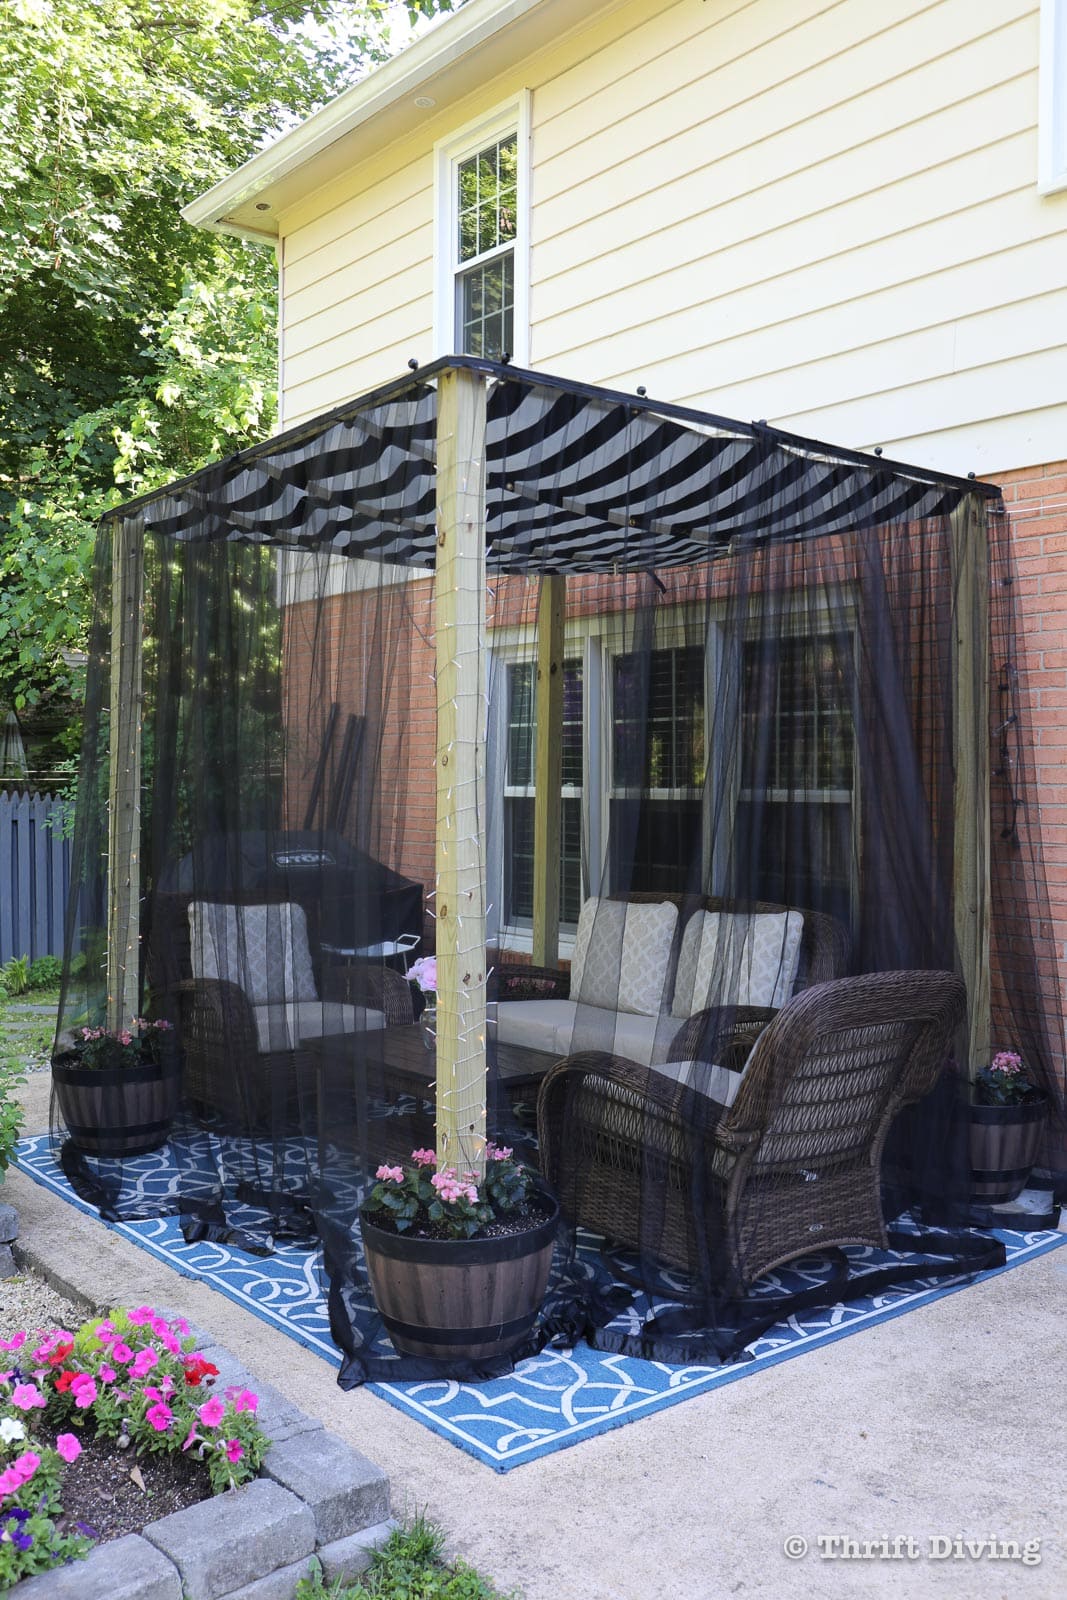
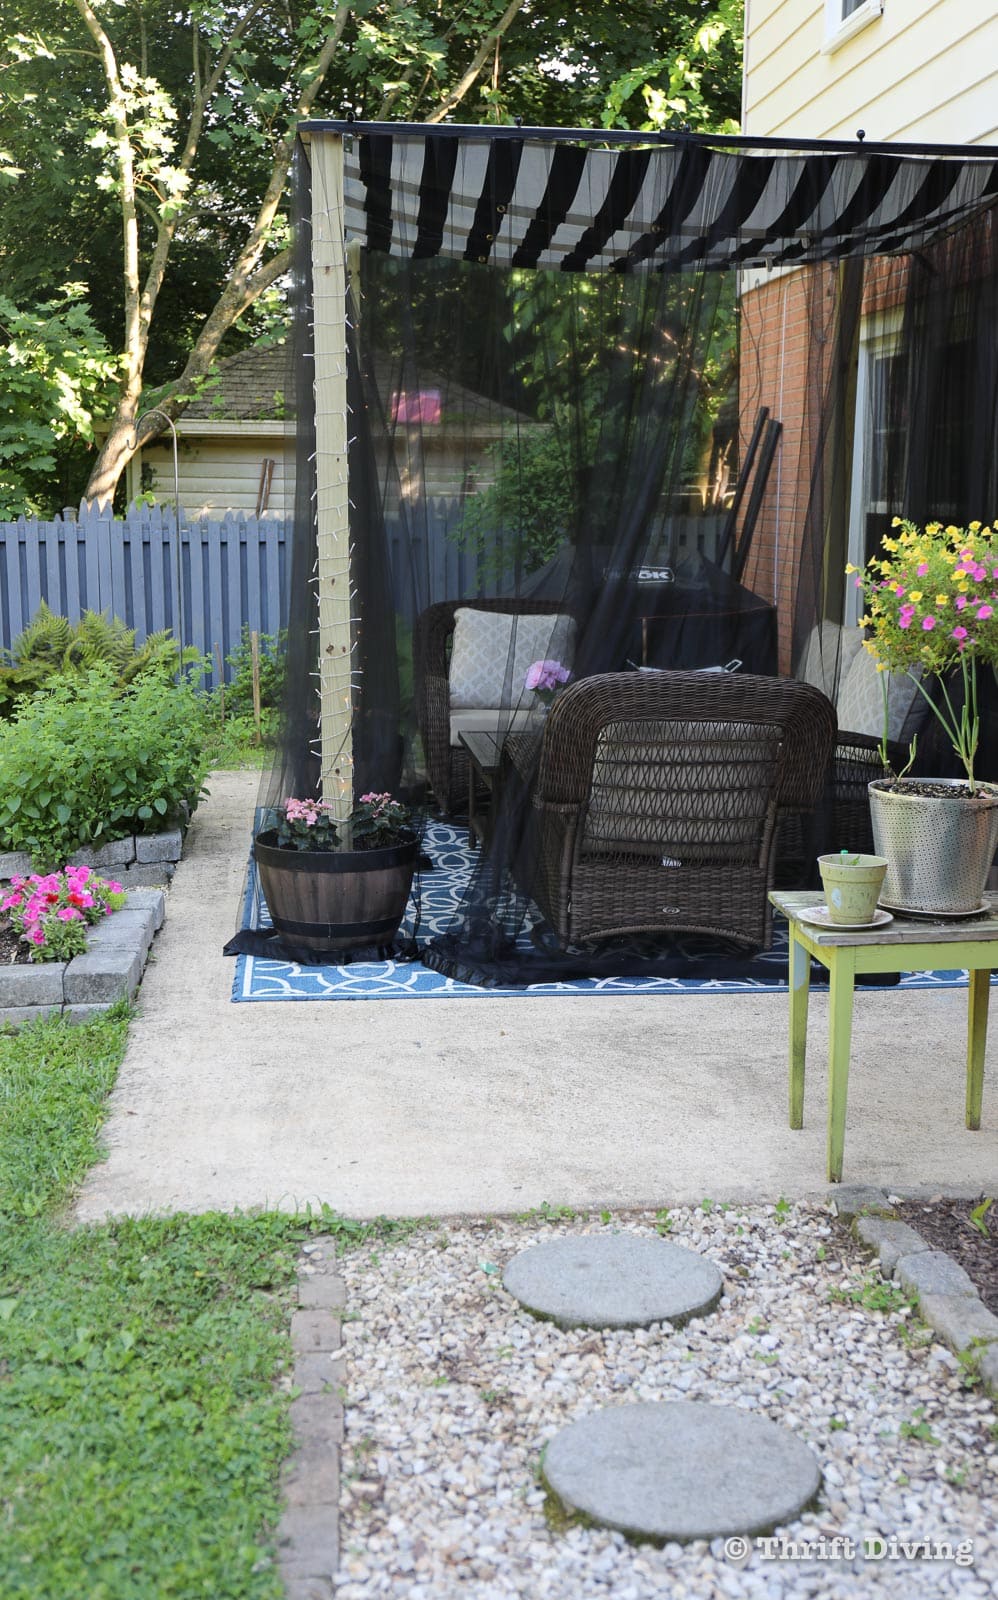
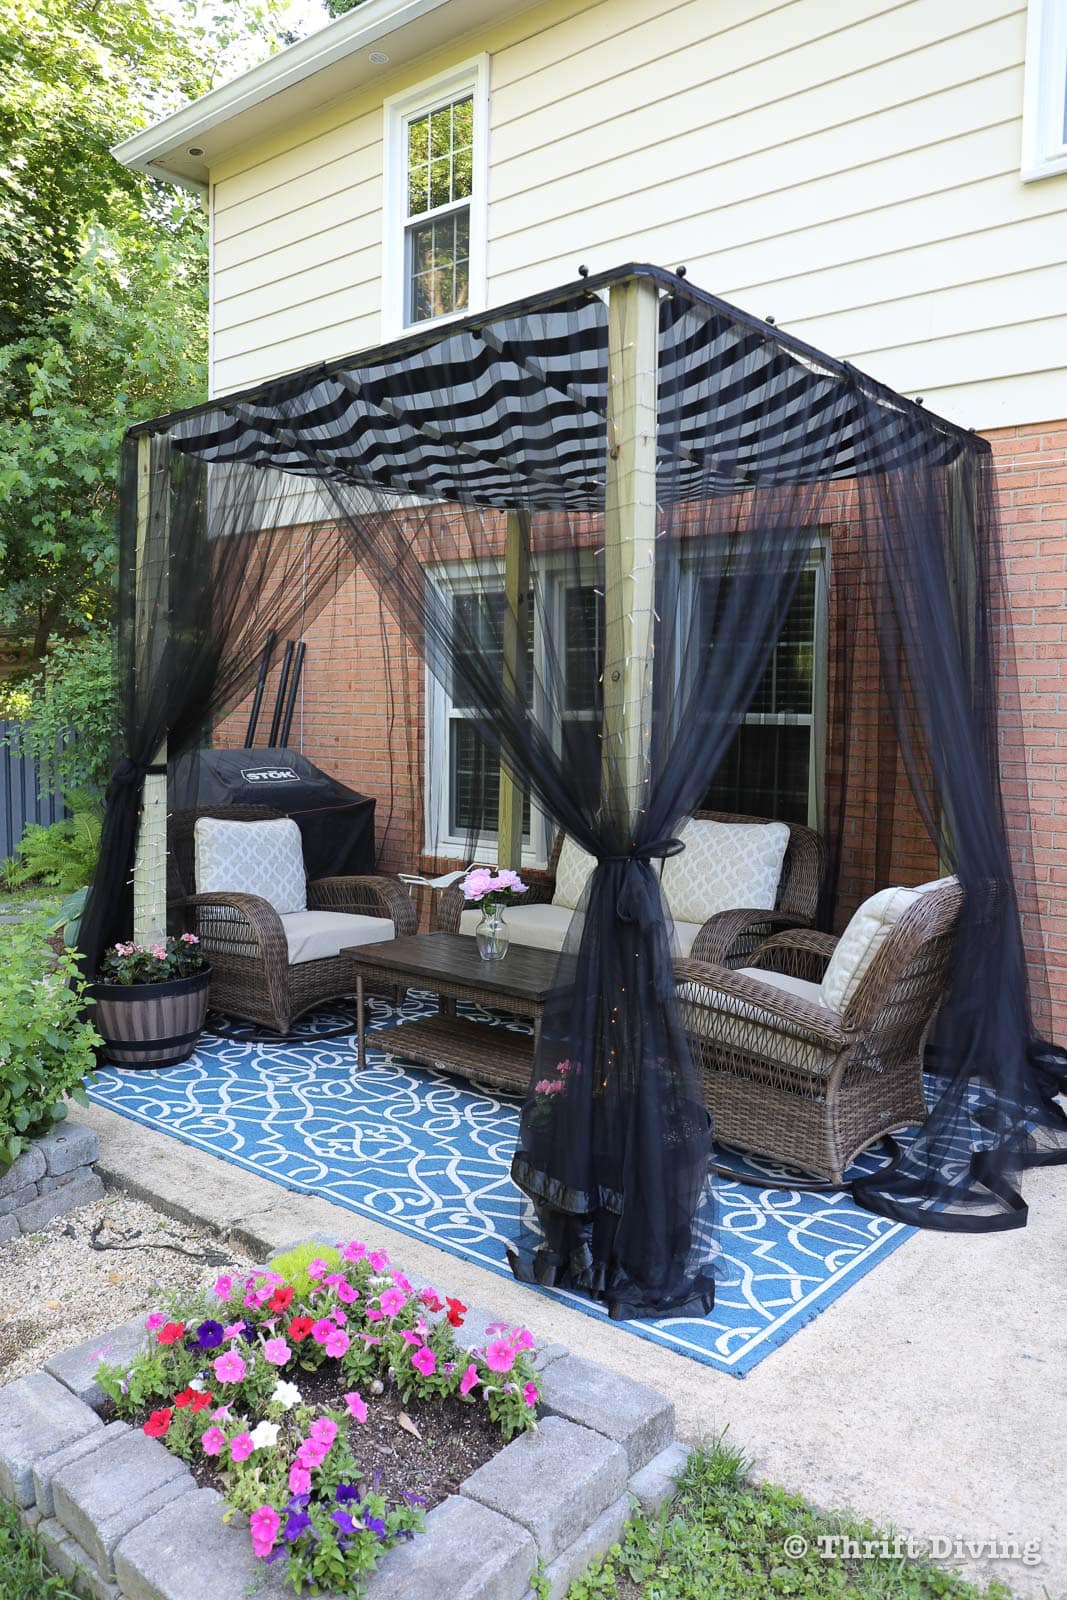
AFTER!

Materials & Tools
- Arrow Fastener Multi Grommet Tool Kit
- Arrow Fastener Grommets
- Sunbrella black and white 46″ fabric (I used 6 yards)
- Sewing machine
- Thread for outdoor fabric
- Hot Knife (for cutting only synthetic fabric to prevent unraveling)
- 4x4x8 pressure treated wooden posts (4 total)
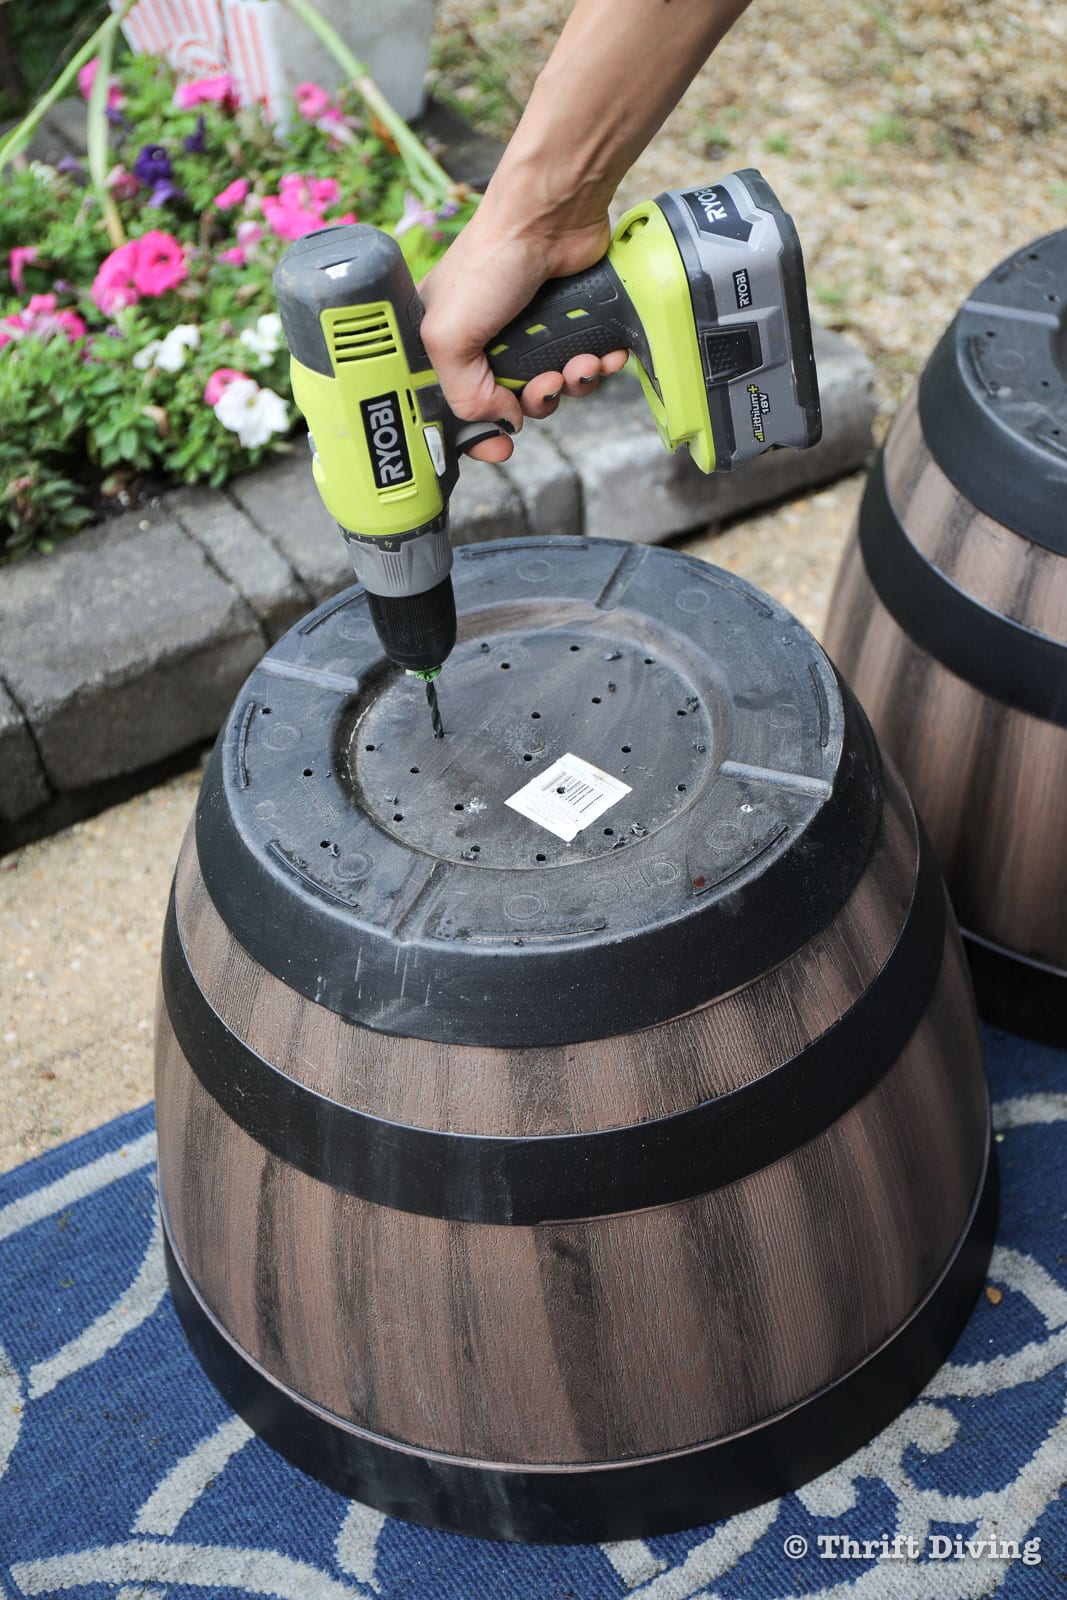
- 4 plastic resin wine barrels
- Fast setting concrete (4 to 5 bags of 50lb concrete)
- Post level
- 2x2x8′ pressure treated wood (4 total for top of canopy)
- Outdoor screws
- Scrap 2×4 boards for bracing
- Pea gravel or rocks for drainage
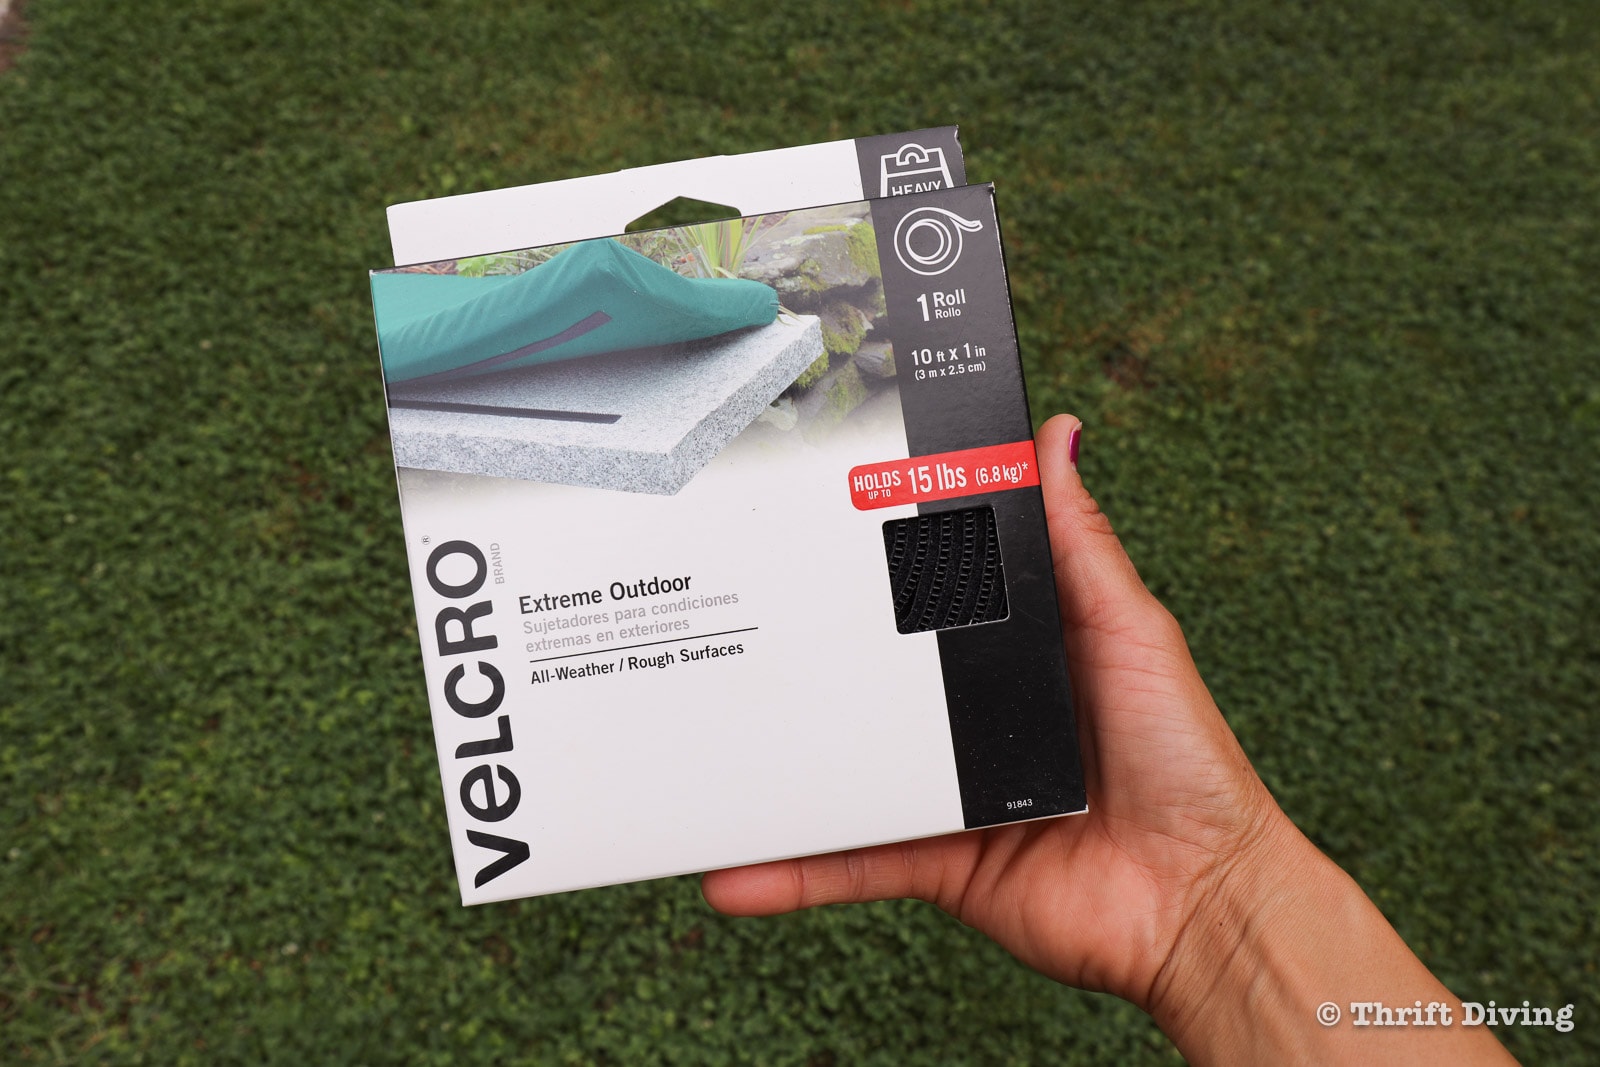
- Velcro hook & loop tape (rated for outdoor use)
- Mosquito netting
- Bungee ball hooks
- Outdoor battery-powered lights
- Arrow Fastener T75 Wire and Cable Staple Gun
- Arrow Fastener T75 staples
- Bias tape (1″ and 2″ sizes)
- Curtain weights
- Power drill with drill bits
- Circular saw, jig saw, or other tool for cutting wood
- Tape measure
- Gloves
- Sandpaper
- Safety glasses
- Hearing protection
- Soil
- Flowers

Watch This Canopy Shade Tutorial in Action!
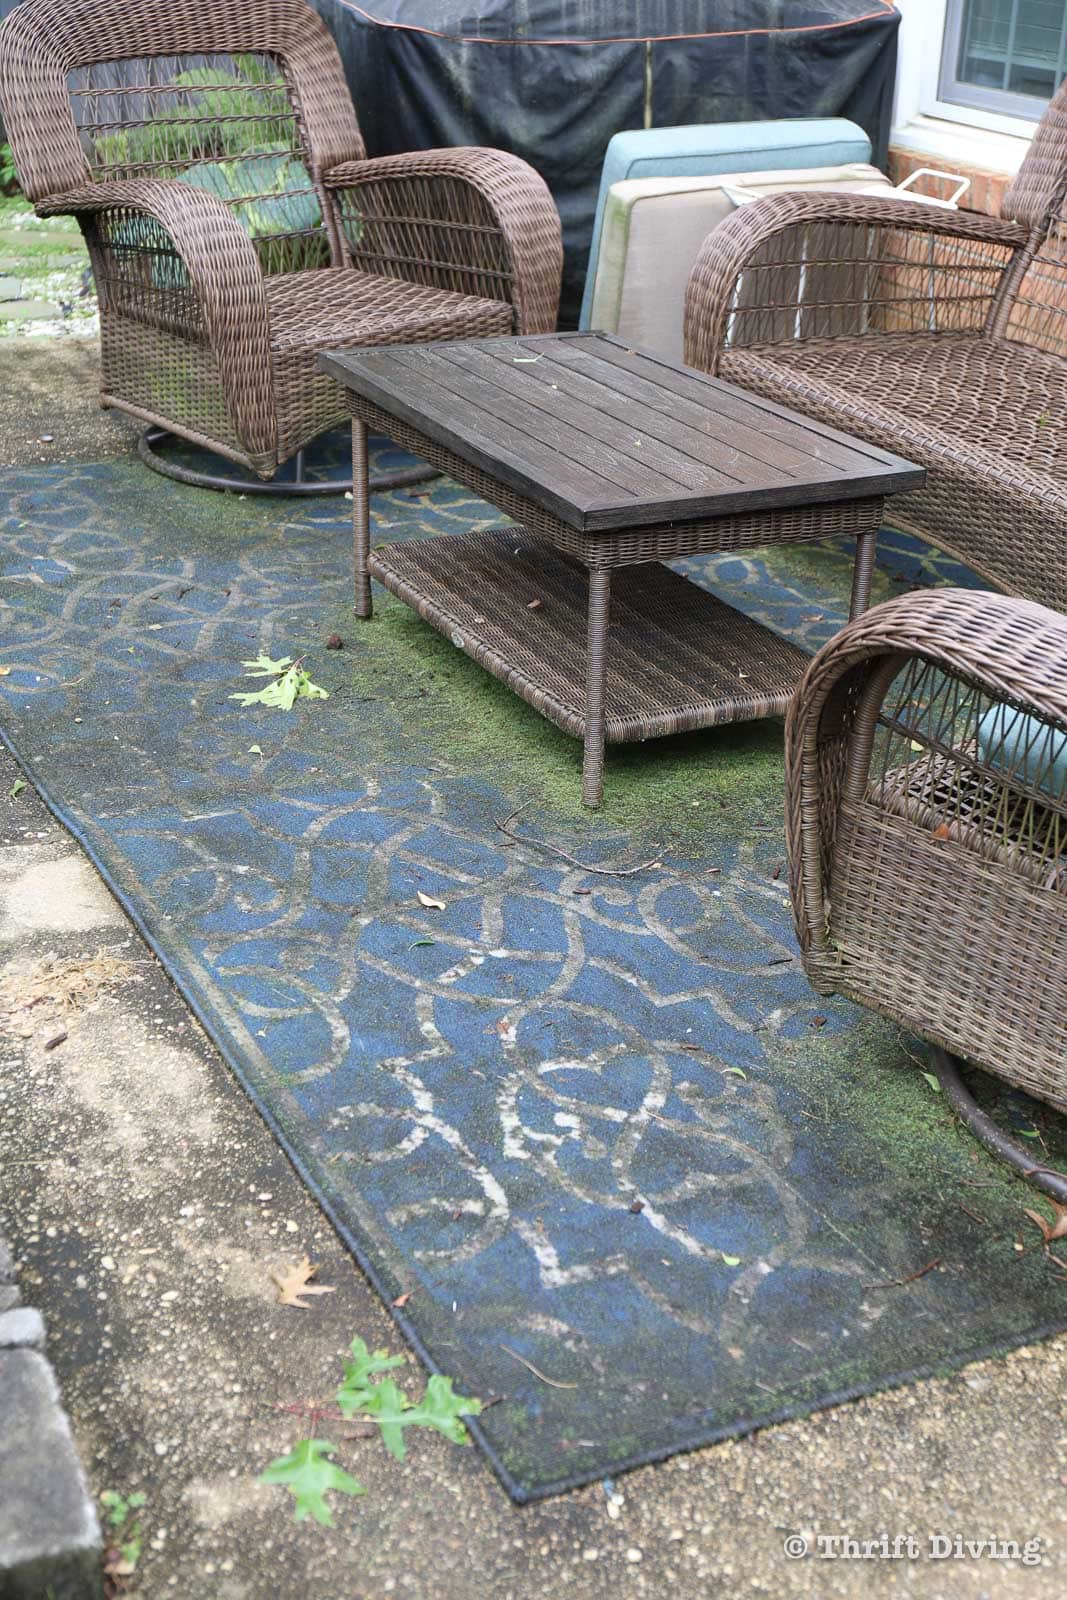
STEP 1: Clean Up Your Patio or Deck
Patios and decks can get pretty disgusting. For some reason, our patio grows mold and mildew throughout the year, no matter the time of year, so it has to be cleaned each spring and summer for it to be usable. You can tell from the pictures below that it was waaaay overdue for a good cleaning!
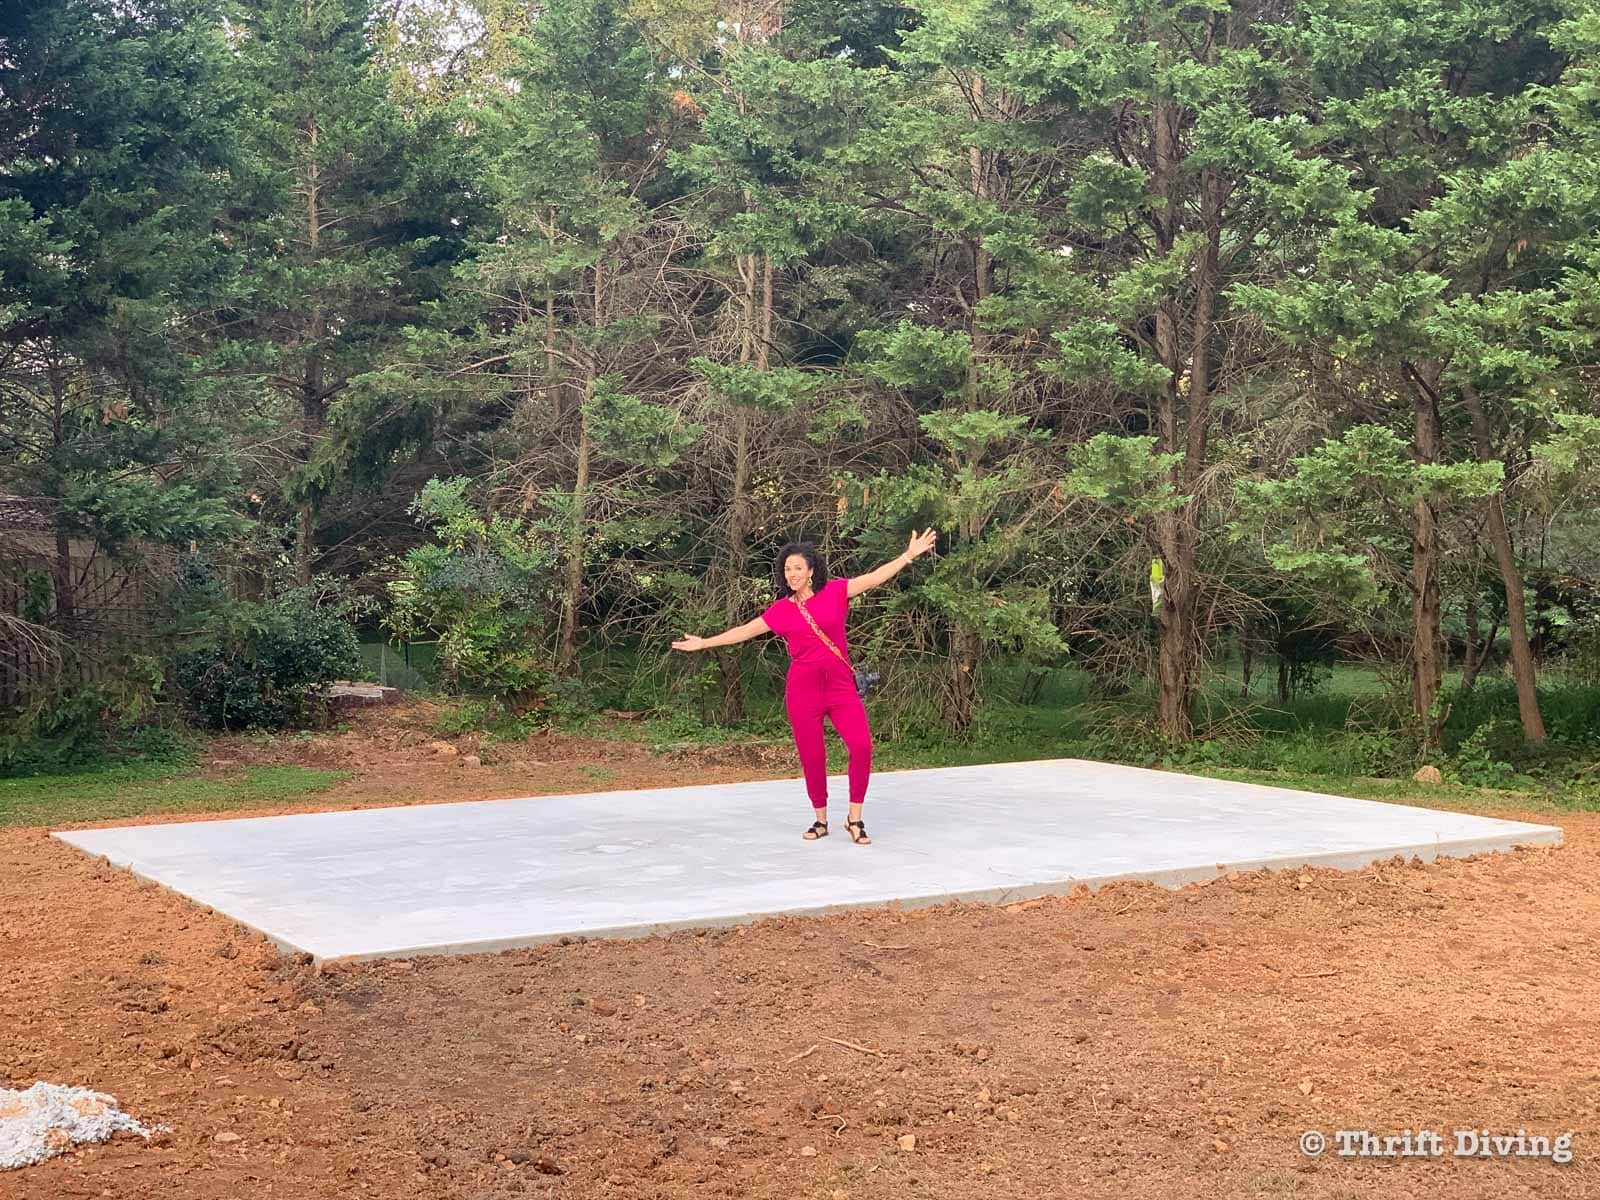
Our patio was the perfect location for this DIY canopy shade because it’s the most level location on our property.
Wherever you build your canopy shade with mosquito net, make sure that your location is level, too. Hills won’t work if you’re planning to use planters with concrete and posts, as I did for this project.
OMG…..our patio was disgusting!
STEP 2: Prepare the 4×4 Posts and Planters
Lightly sand any rough edges on your pressure treated posts. The mosquito net can get snagged if it catches on a rough edge. Wear a dust mask!
TIP: If you’re painting or staining your pressure treated posts, it’s best to test them first to see if they’re “dry” enough to be painted or stained yet. Meaning, if you put water on them, does it soak in or does the water stand on the wood? If the water soaks in, the pressure treated wood is dry enough to be painted or stained. If the water sits on the wood, it’s not dry enough and you must wait. Mine wasn’t totally soaking in during the water test, so I’ll be staining them at a later date.
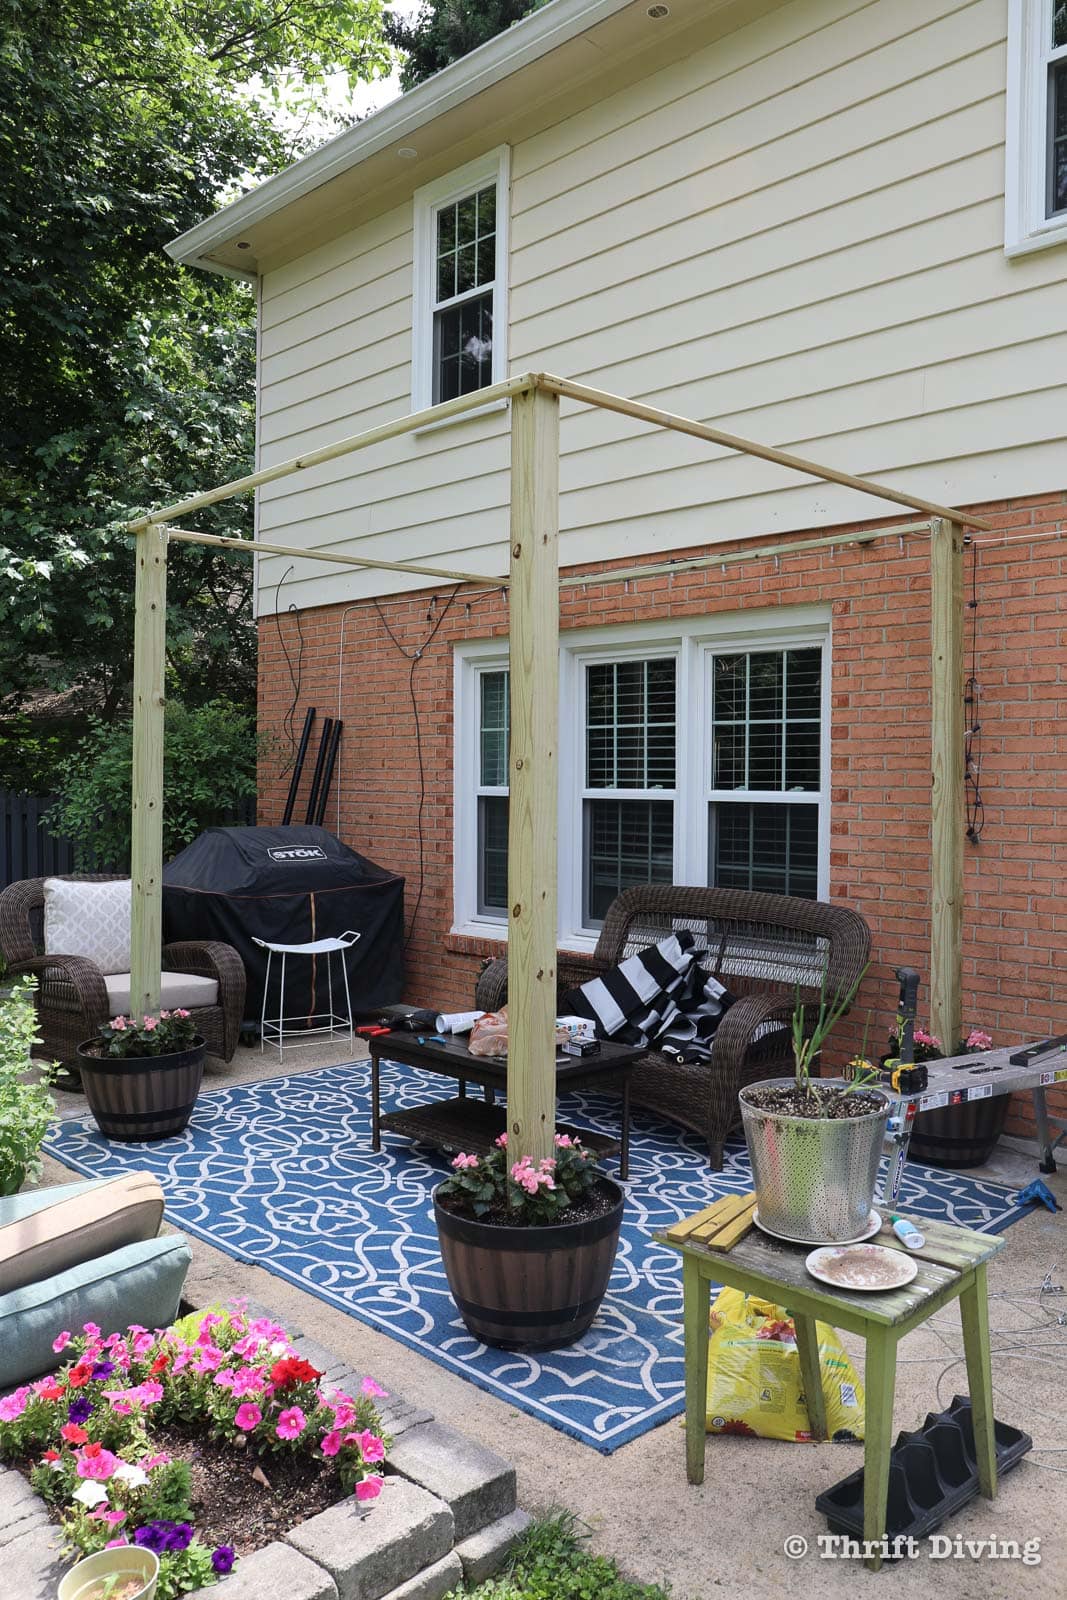
For this canopy shade on my patio, I’m using resin wine barrel planters that will be halfway filled with concrete. I decided to create the canopy with the planters instead of attaching it to the house because I may want to easily move the canopy to a different part of the yard.
I can tilt the concrete planters at an angle and carefully roll them to another location. I wanted this DIY canopy on my patio to be non-permanent (which is good for renters and rental properties, too, since it’s not attached to the house).
I decided to add some drainage holes at the bottom of the planters so that any water can easily drain out.
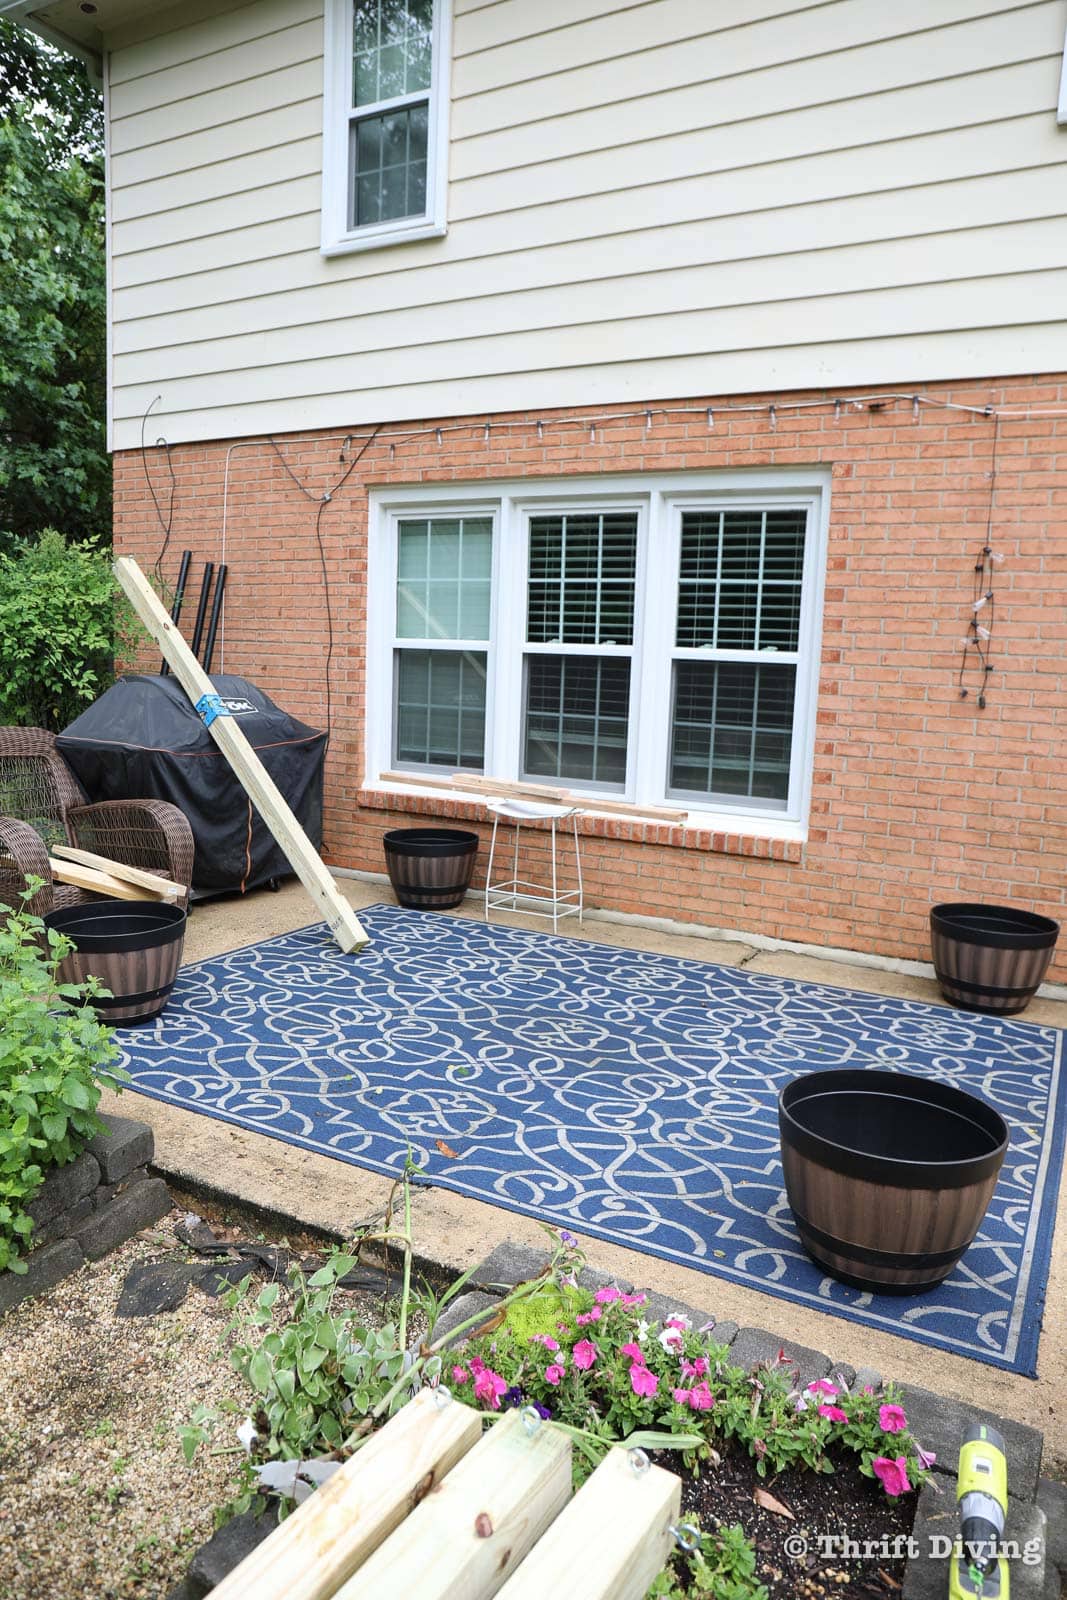
I set the planters in their general location on the patio. I’ll admit that I struggled with this part because I didn’t have stakes and string or anything other than a tape measure to guesstimate their location in relation to the house and to each other.
It’s easiest to use 8-ft 4×4 posts in the planters and 8-ft 2×2 pressure treated wood at the top that will connect all the posts. Not only are they easier to load into your car or van, but if everything is 8-ft, it makes it easier to build everything without really needing tools for cutting or trimming. You’ll just end up with an 8′ x 8′ square, which is perfect for a canopy shade for your patio or deck.
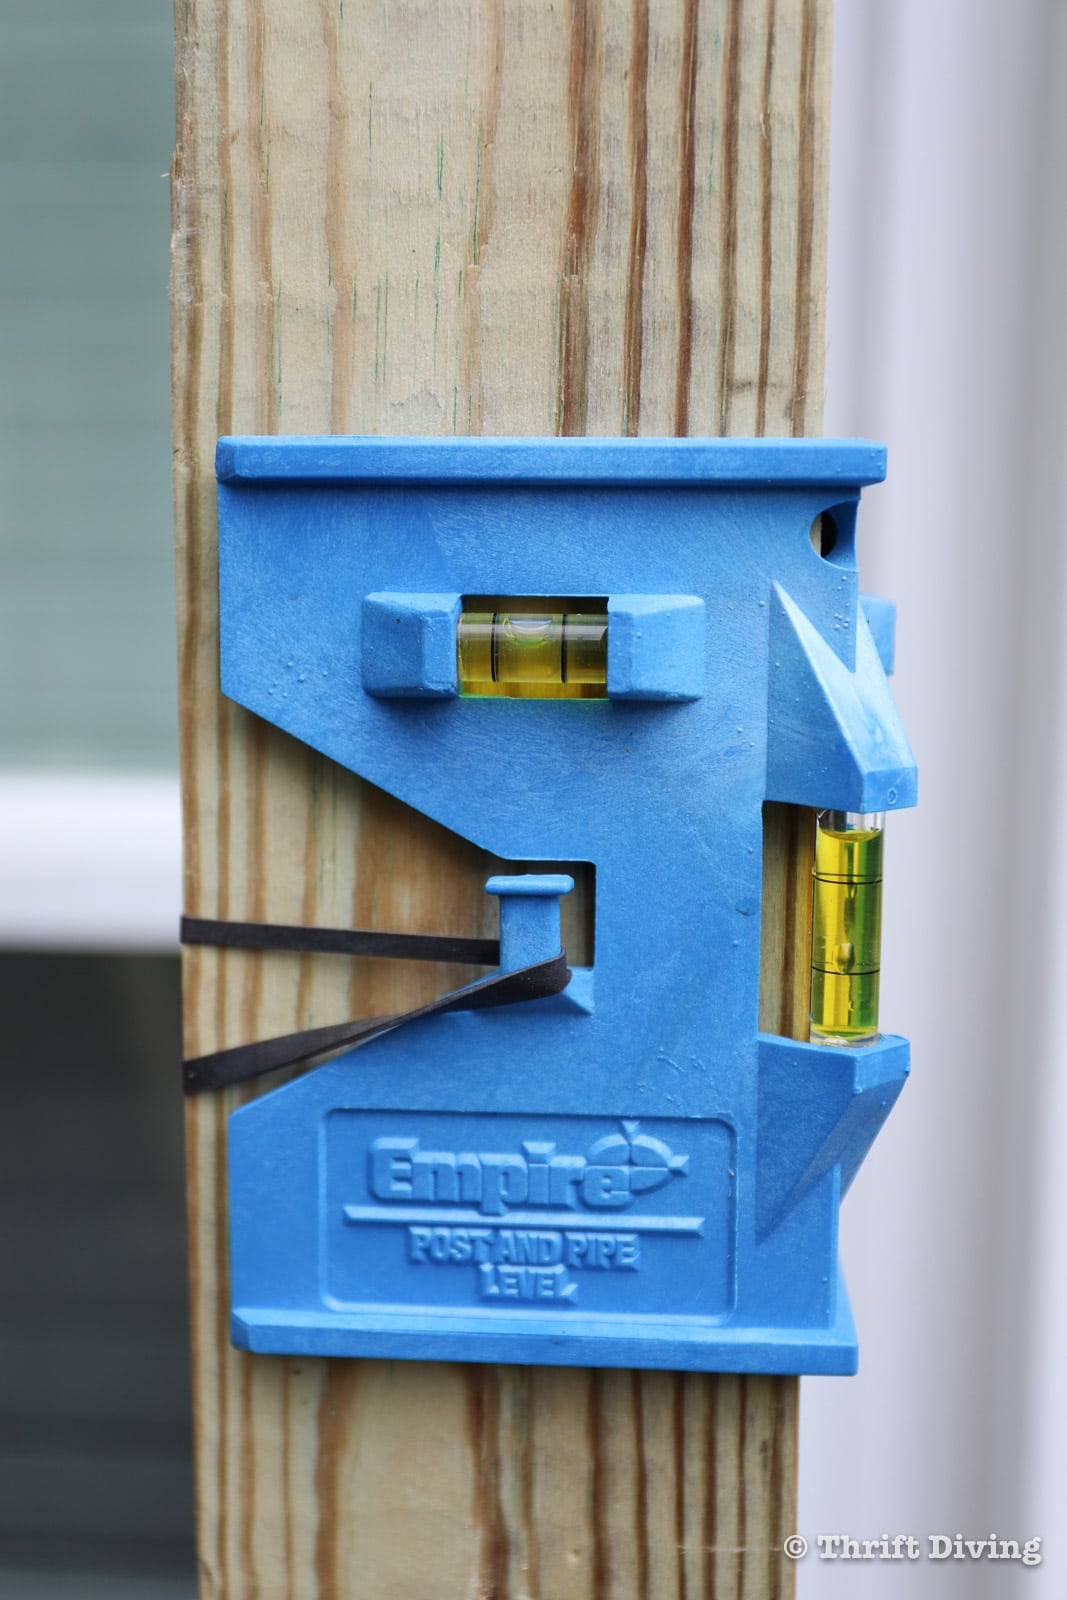
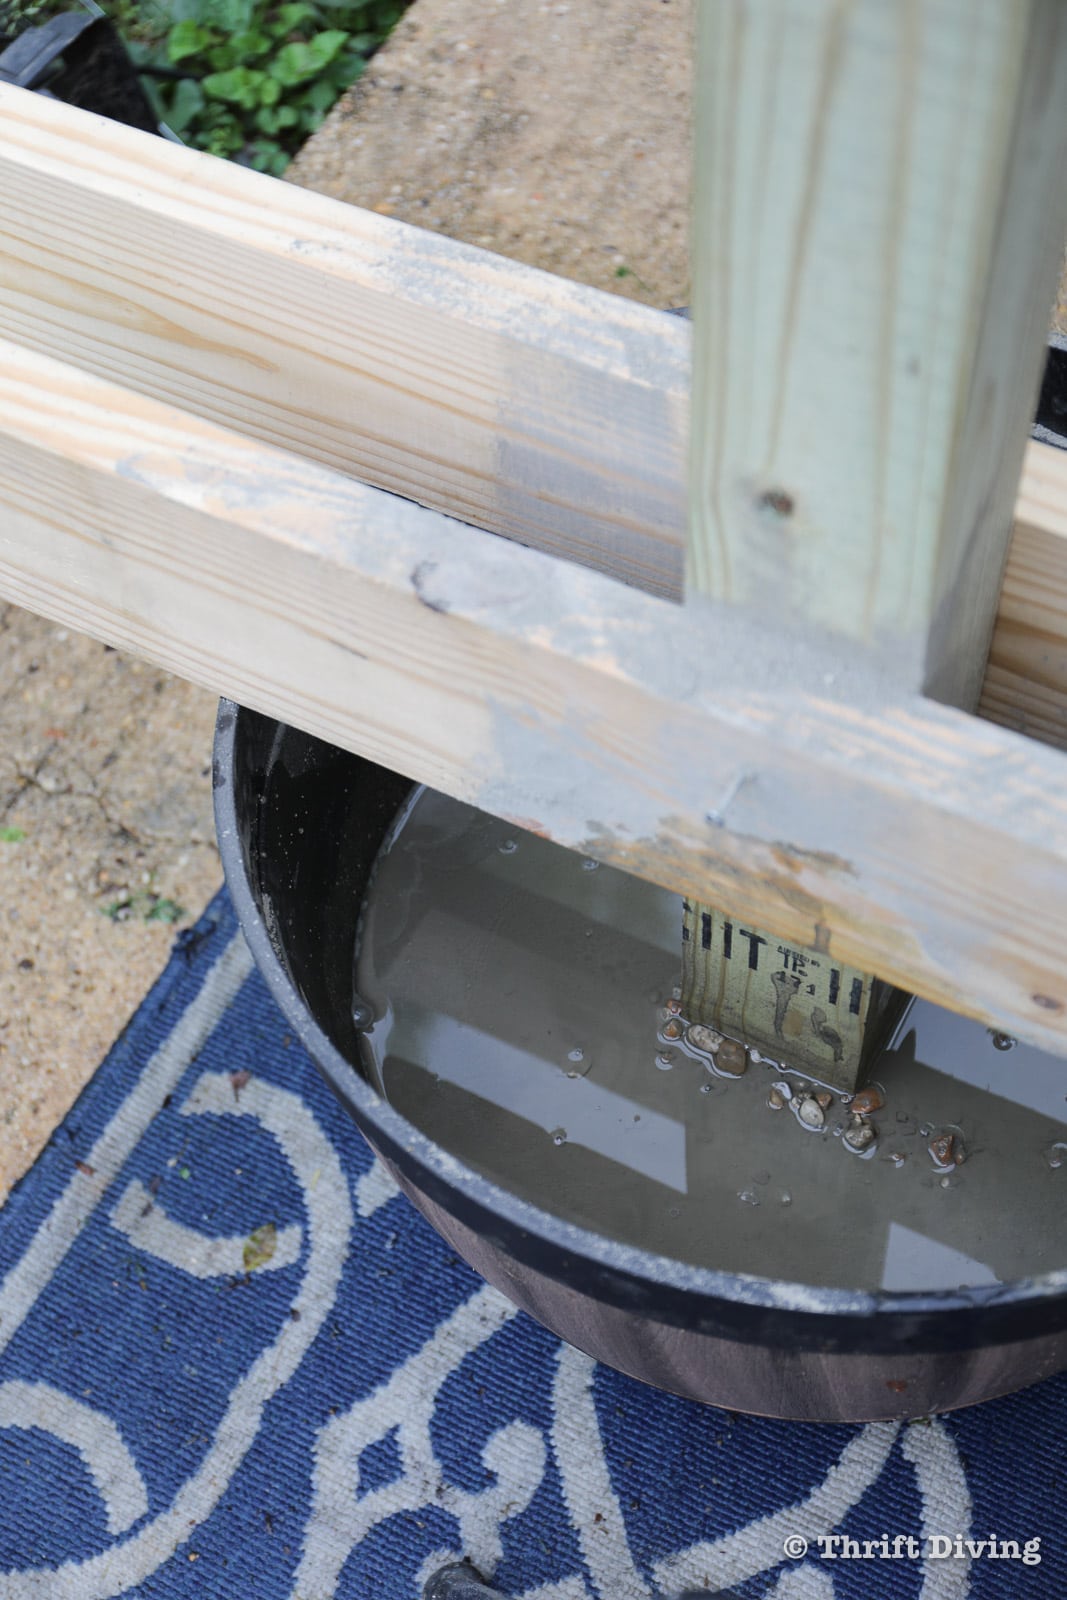
You’ll need some scrap wood (2x4s work great) with screws in order to temporarily hold the 4×4 posts in place. Use some pea gravel or other small stones in the bottom for drainage. Use a post level to make sure the post is plumb and level before pouring in the fast setting concrete.
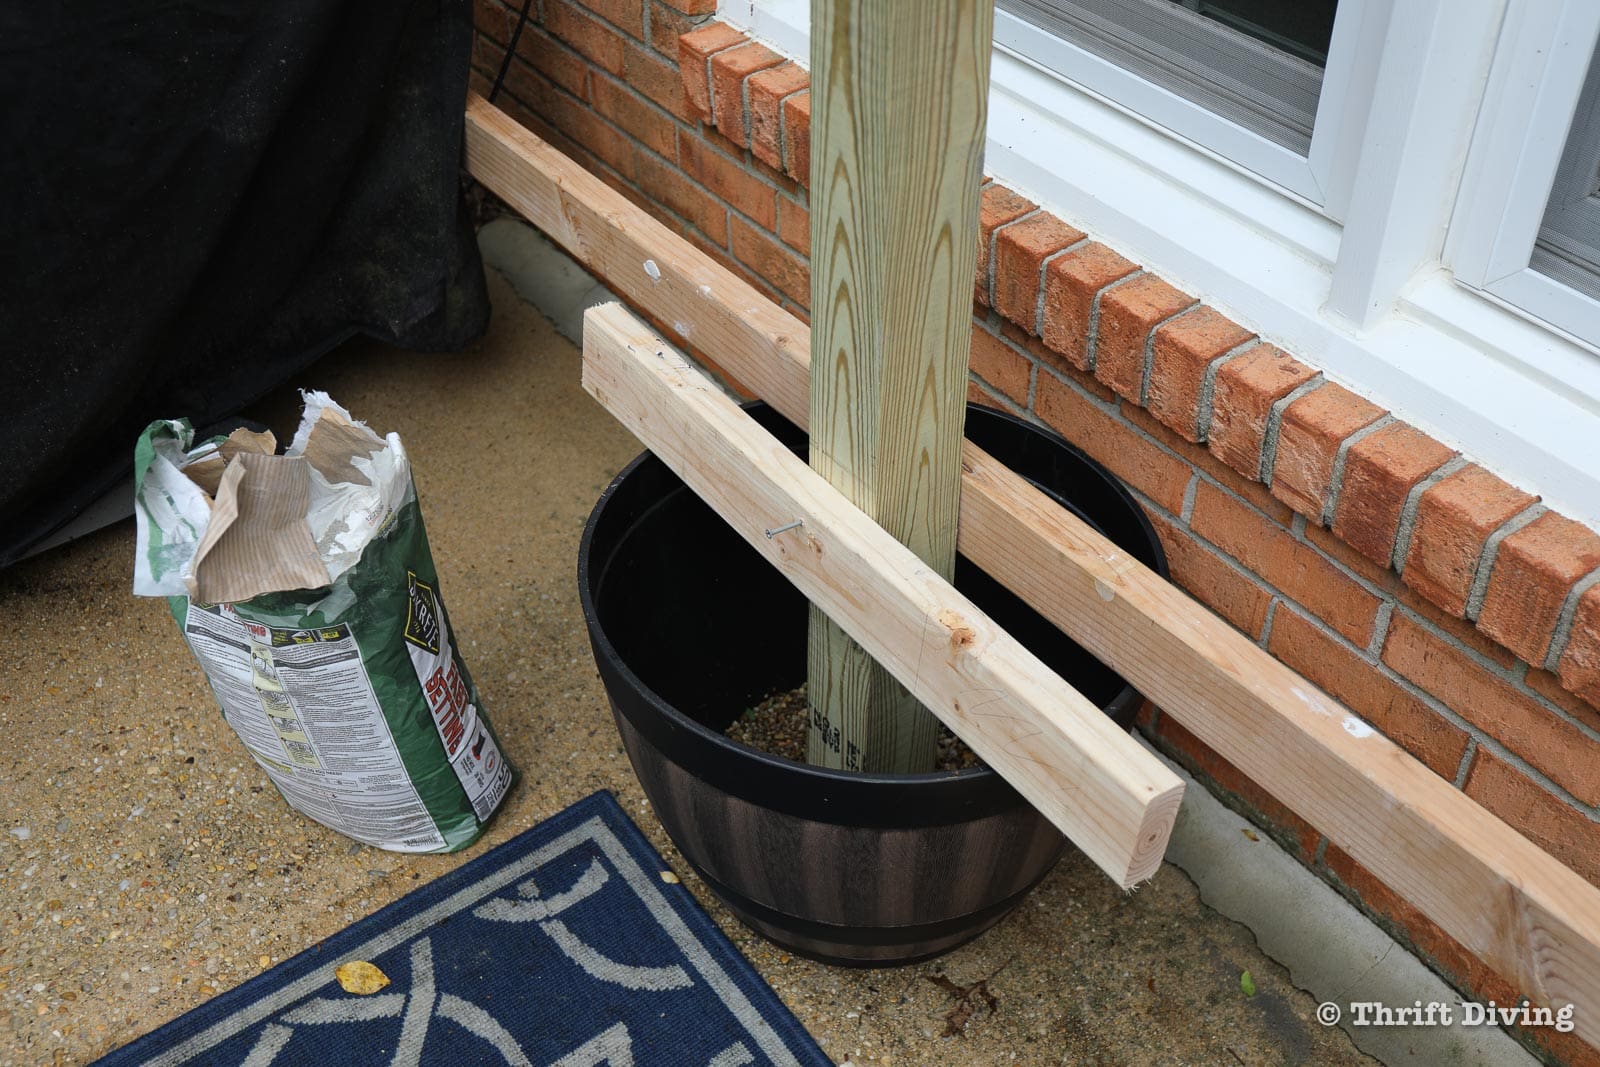
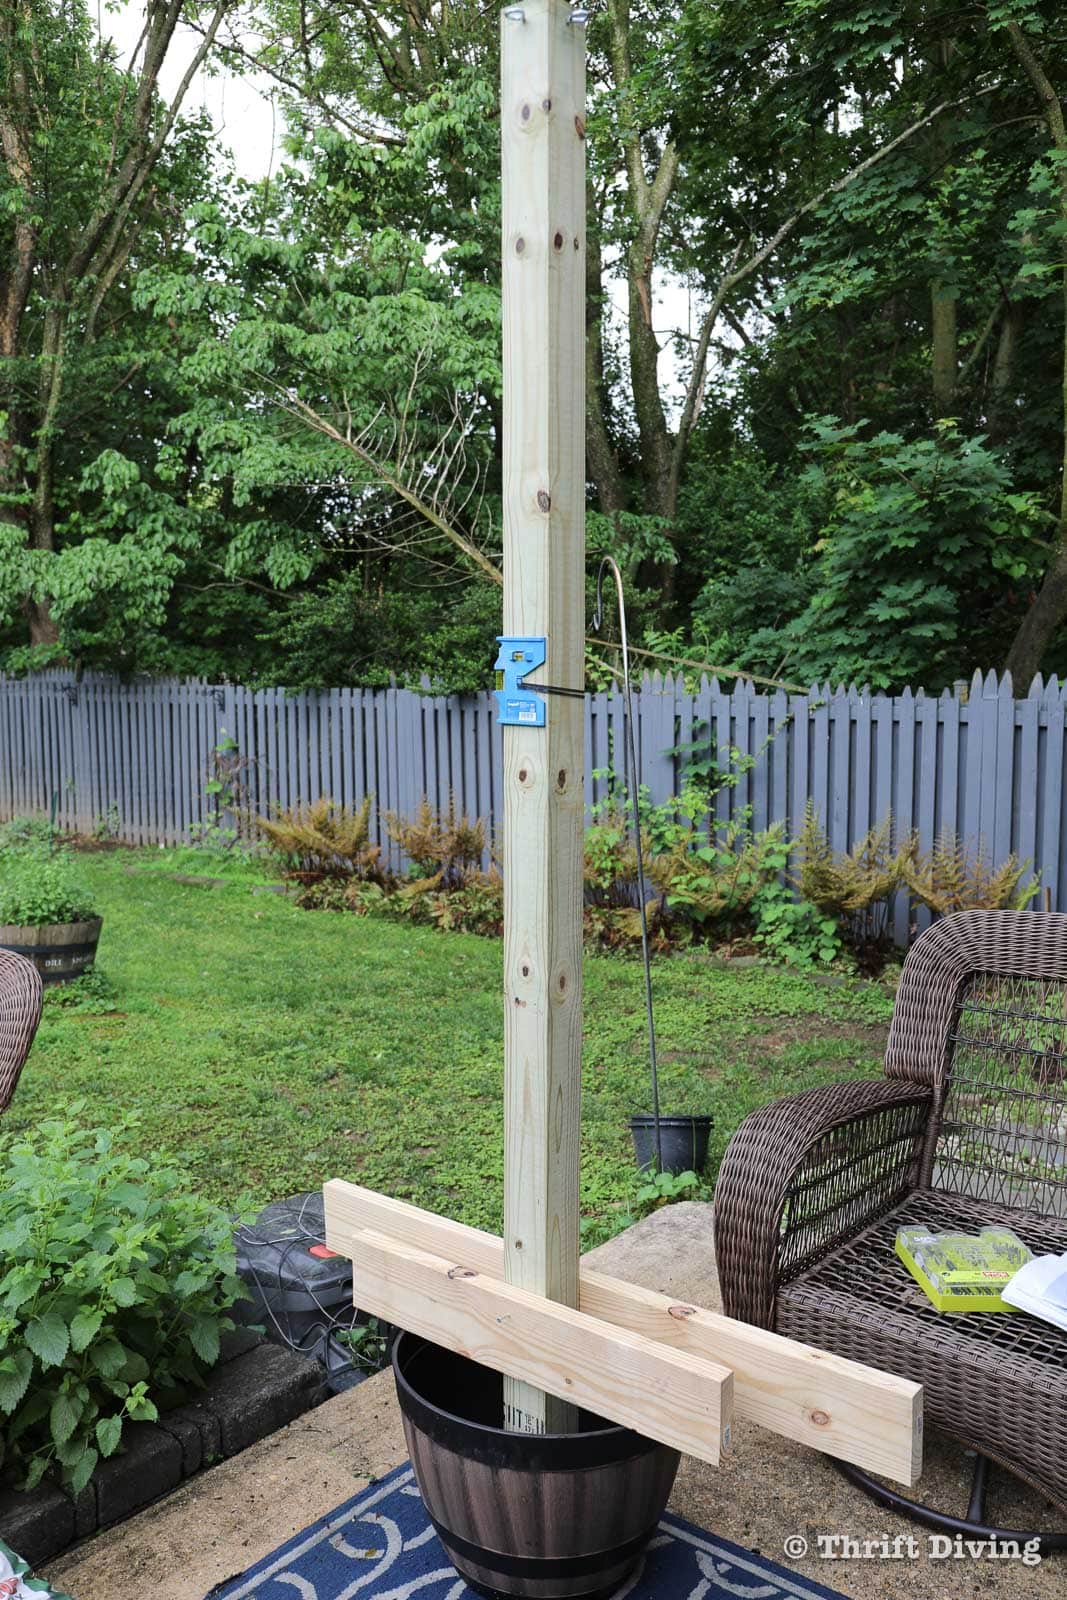
For these 20-inch planters, I used one and a half bags of 50-pound fast setting concrete. It’s soooo easy to use! Simply pour the dry concrete into the planter and then pour in water. No mixing required! For some of my planters, I think I may have used too much water. Oops! The bag said for each bag of concrete, use 2 – 1/2 quarts of water. It seems like it can’t possibly work unless you mix it together, but trust me: it works! It will look “soupy” like this, but after 30 minutes, it starts to harden up.
NOTE: Because there are drainage holes, you will notice that some of the concrete mix leaks out the bottom. Be prepared to wipe that up before it dries, if needed. I didn’t think it was a big deal. I just wanted a way for excess water to drain out. Once the concrete dries, it shouldn’t be a problem.
Also, I only wanted about half of the planter filled with concrete, because the other half will be for soil and flowers!
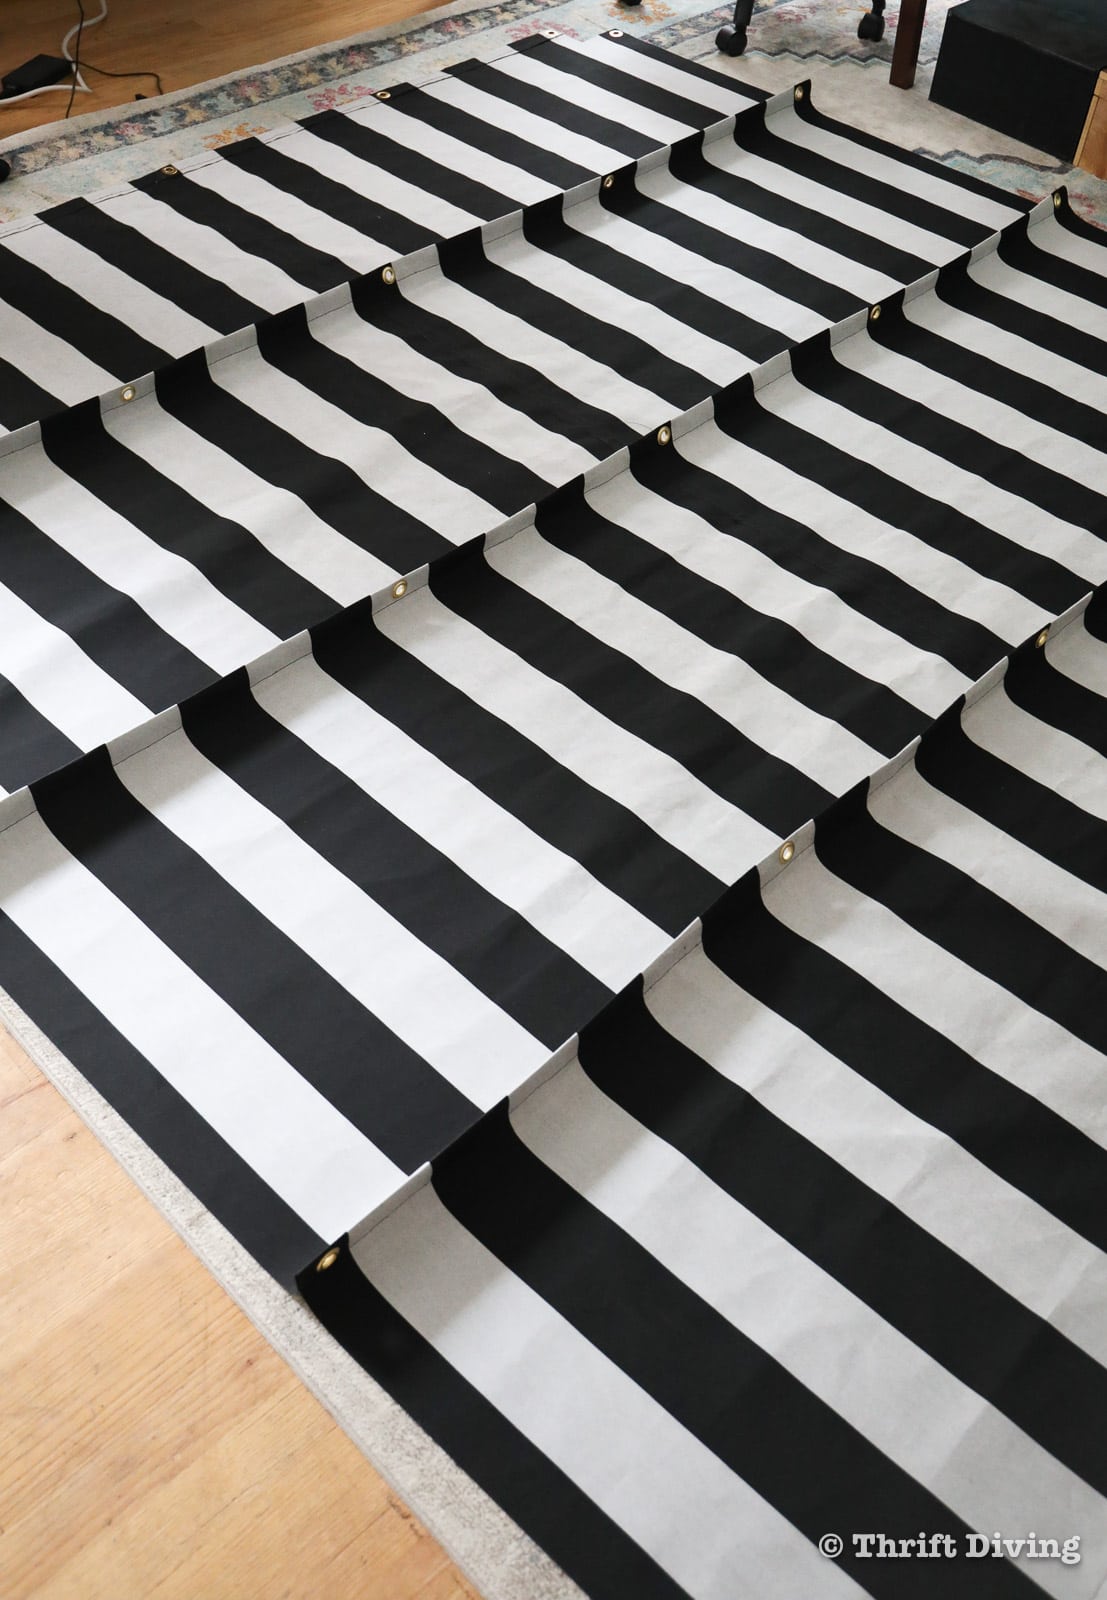
STEP 3: Make the Canopy Shade with Outdoor Fabric
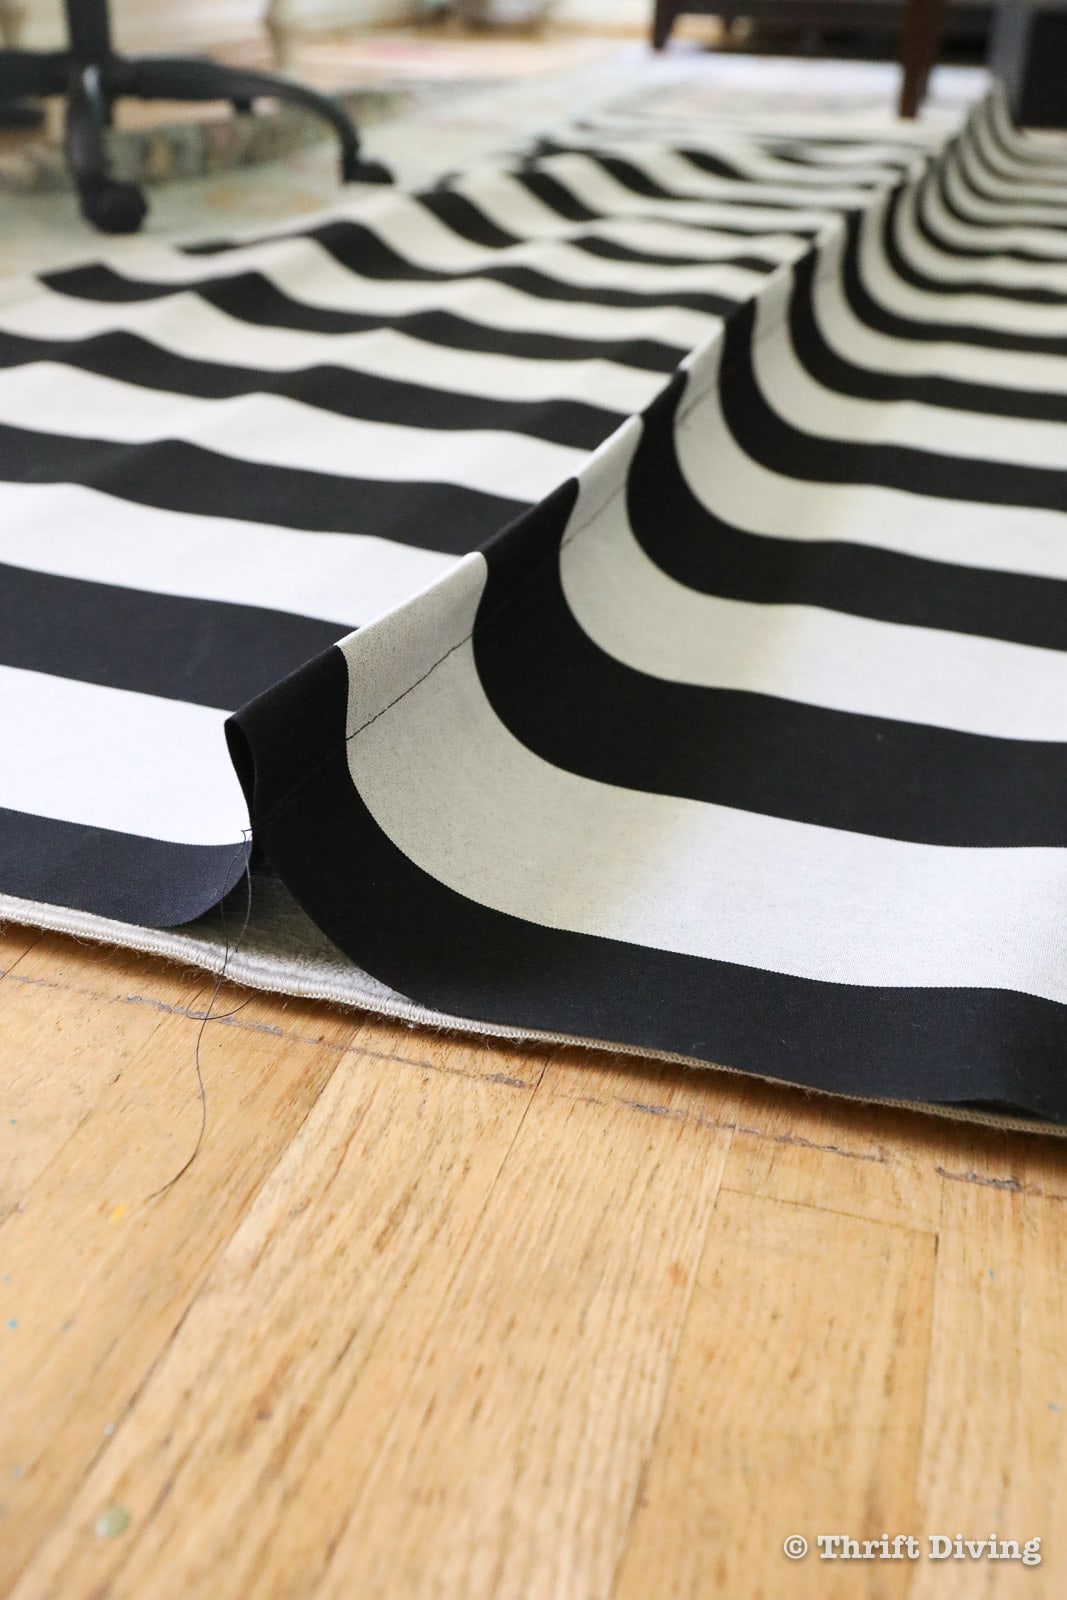
As I mentioned, I’m making an 8’x8′ DIY shade canopy, but I’ll need to leave extra fabric at the top, bottom, and sides for the seams.
Join together your pieces of fabric to create a larger shade canopy if necessary, matching up any patterns.
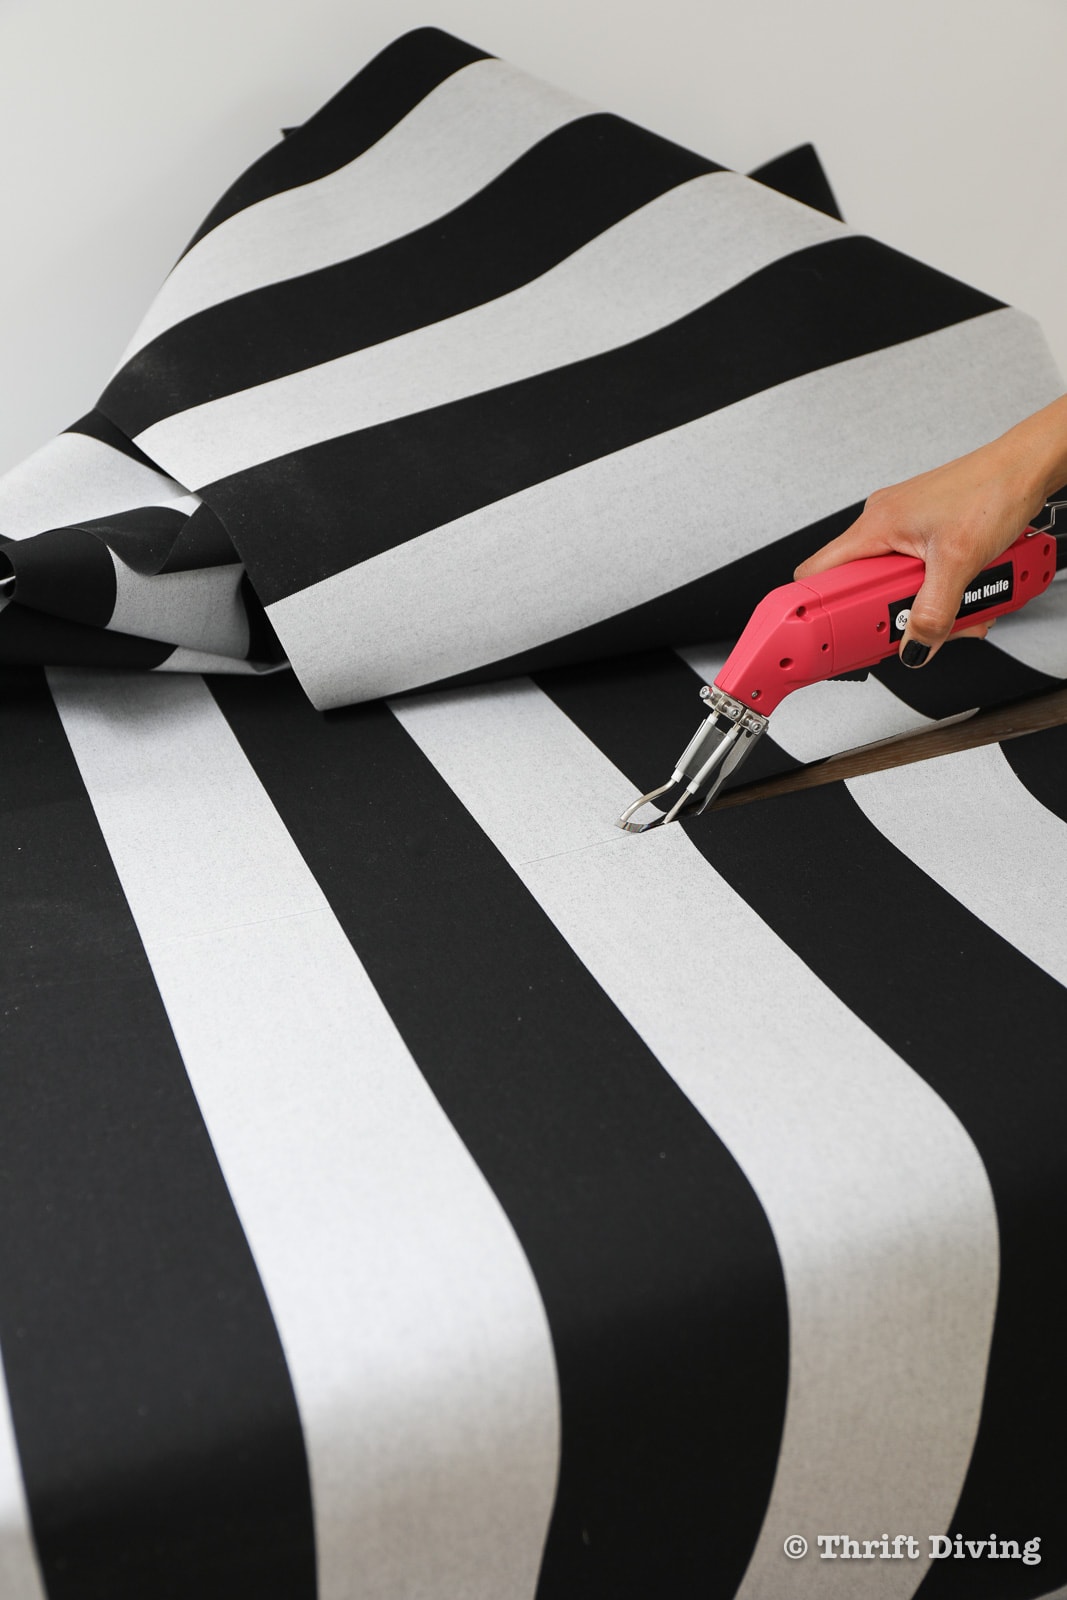
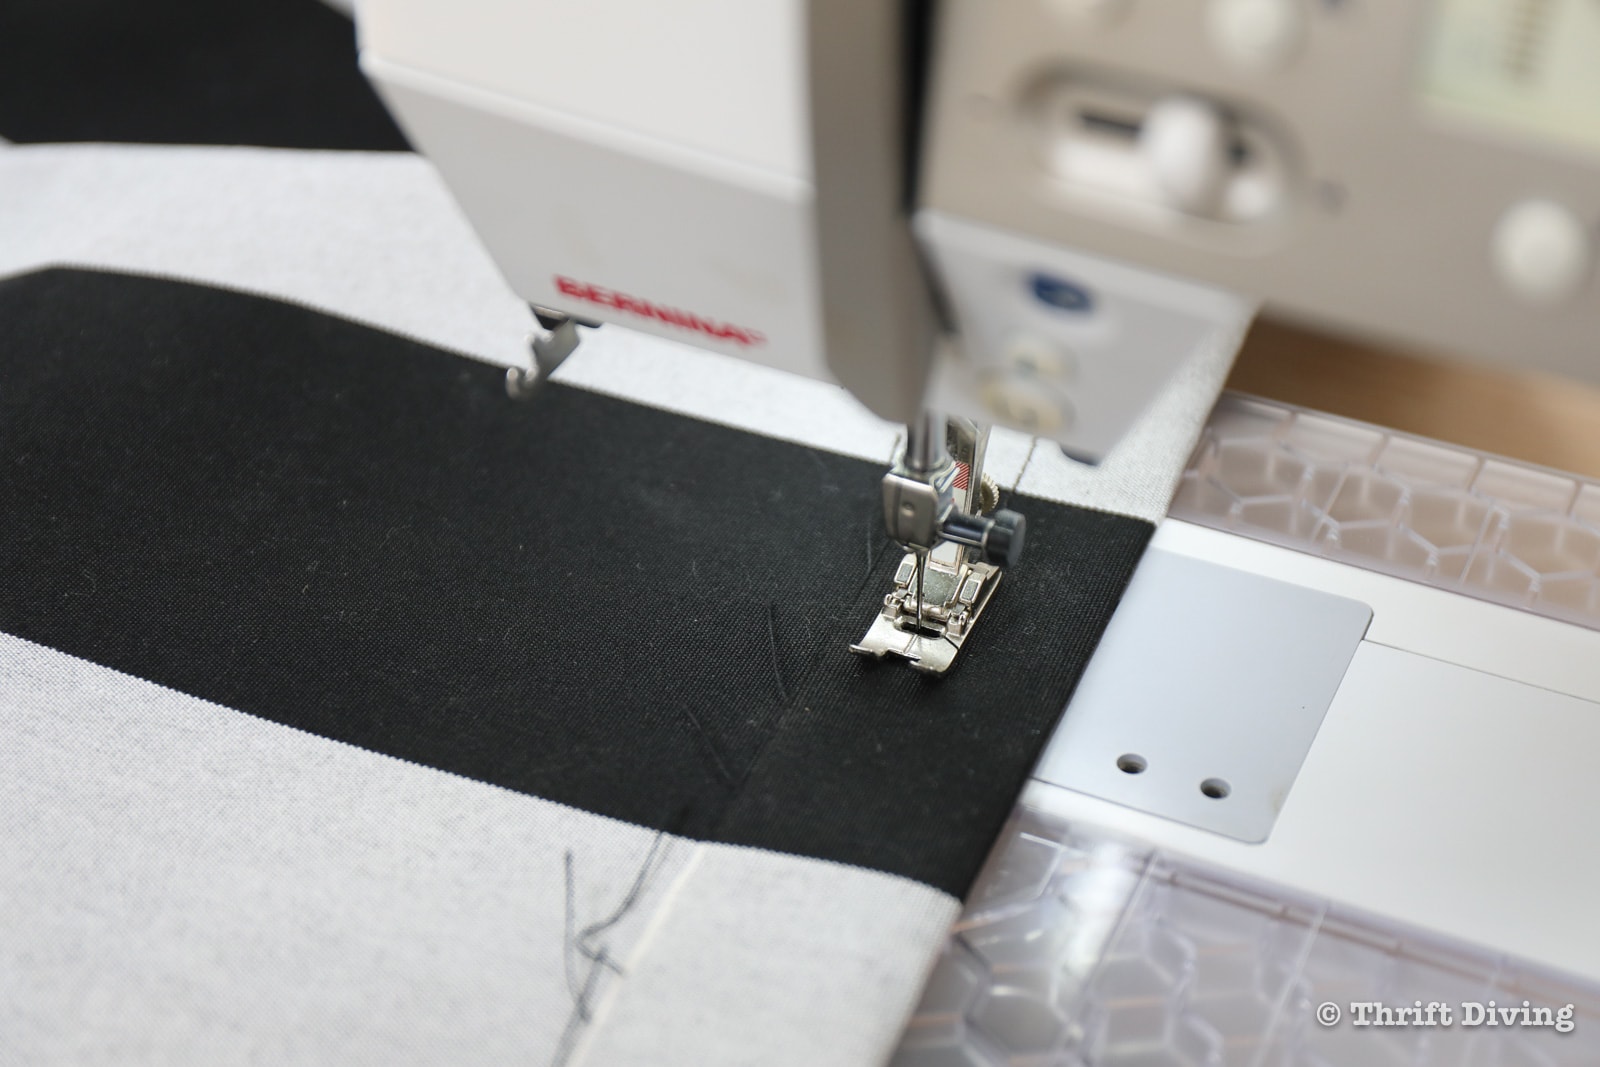
I’m using this awesome black and white striped outdoor awning fabric that is 46″ wide, so I cut the 6 yards I bought in half and then used double-sided tape to secure the two panels in place, overlapping them, and sewing 2 rows of stitching to secure them.
(TIP: If you’re cutting synthetic outdoor fabric, use a hot knife which will melt and cut the fabric at the same time, preventing the fabric from unraveling. DON’T use a hot knife on cotton or other natural fabrics. It is a fire hazard!)
The side seams in the shade canopy are 1″ wide, which were folded in and sewn. Because the ends were fraying, I later trimmed the seams using the hot knife, which eliminated the fraying.
Originally when I designed this canopy shade with mosquito net (it reminded me of a pergola), I imagined that it would have pleats on the upper side with grommets that would allow the canopy shade to be retractable and slide on the wire rope.
But, ummmm…..the project went sideways real quick when I realized that working with wire ropes for this project wasn’t going to work because it was challenging to attach them securely to the 4×4 posts, and because the weight of the fabric pulled the wire rope down into an unflattering position.

Therefore, you can skip this next step of adding these pleats and instead just have a flat canopy with no pleats.
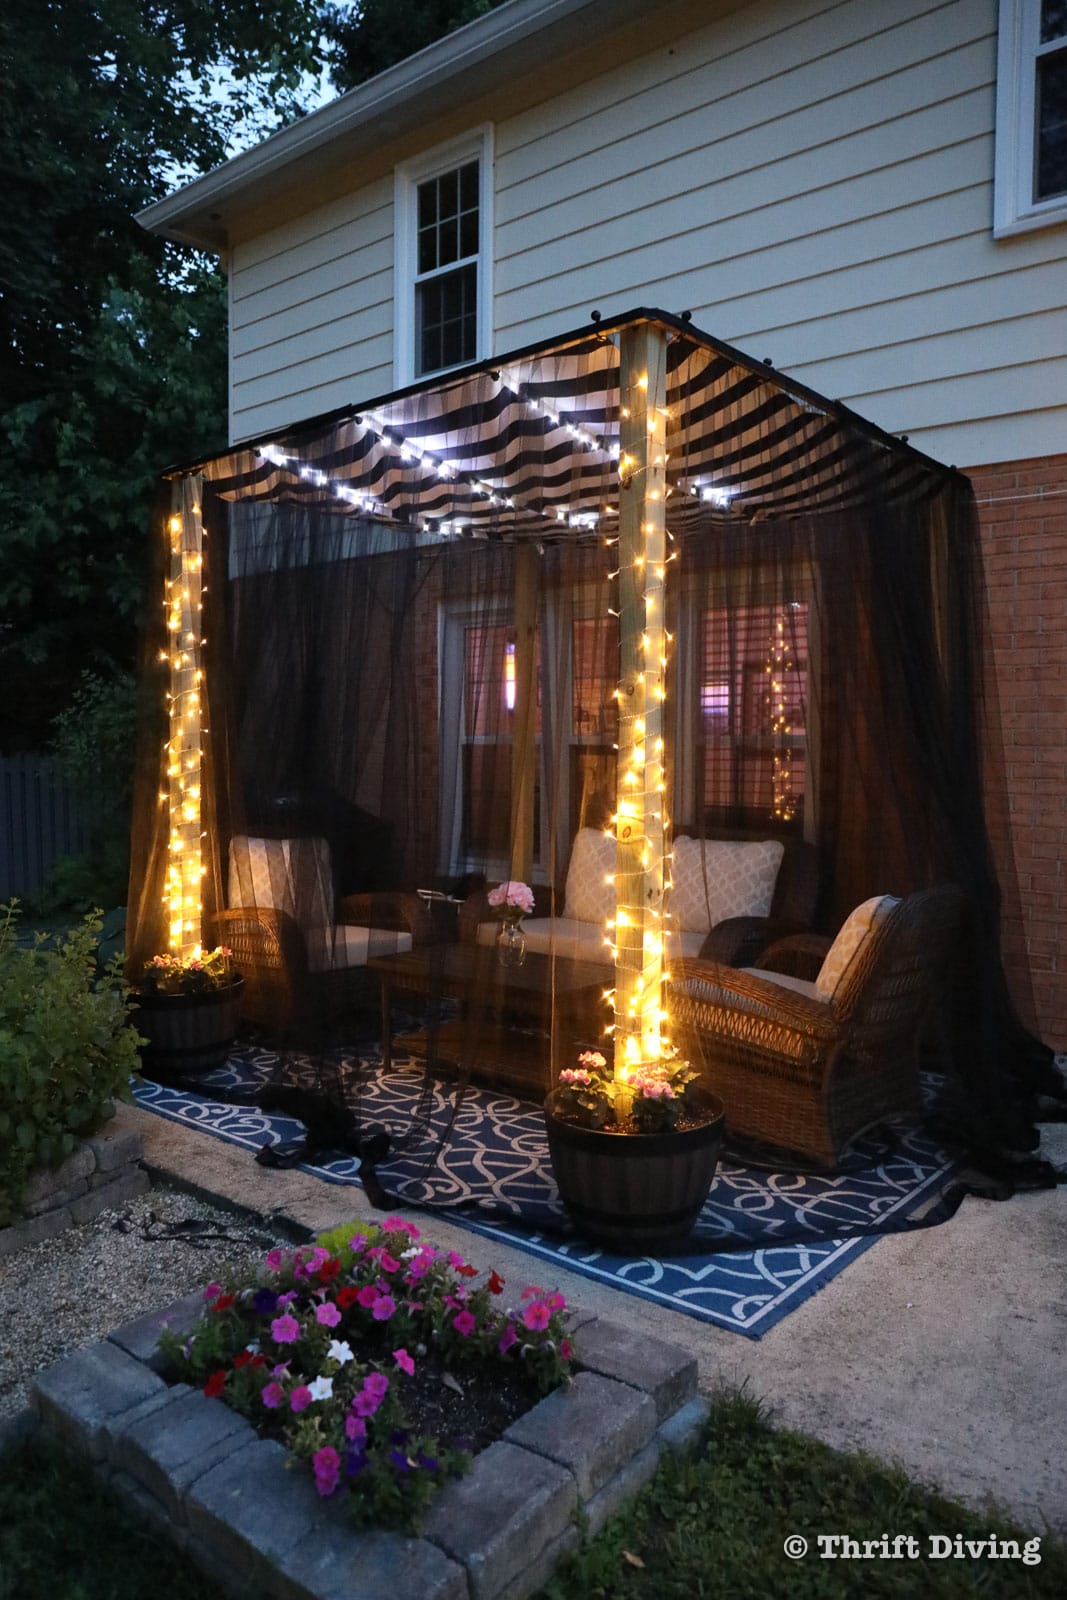
However, I’m going to include this step because later, once I fixed the project, the grommets along the pleats actually came in handy for allowing me to string fairy lights through them in the “ceiling” of the canopy. 🙂
If you’re interested in adding pleats with grommets (which will be the ceiling of the canopy), simply pull the fabric together so that the pleats are evenly divided, and sew a 1″ pleat. In my case, I added pleats every 24″ inches and ended up with 3 pleats.

How to Add Grommets to Fabric
Adding grommets to fabric is so much fun! You can literally add grommets to nearly any type of fabric, including tarps, even through layers of thick outdoor fabric like I used!
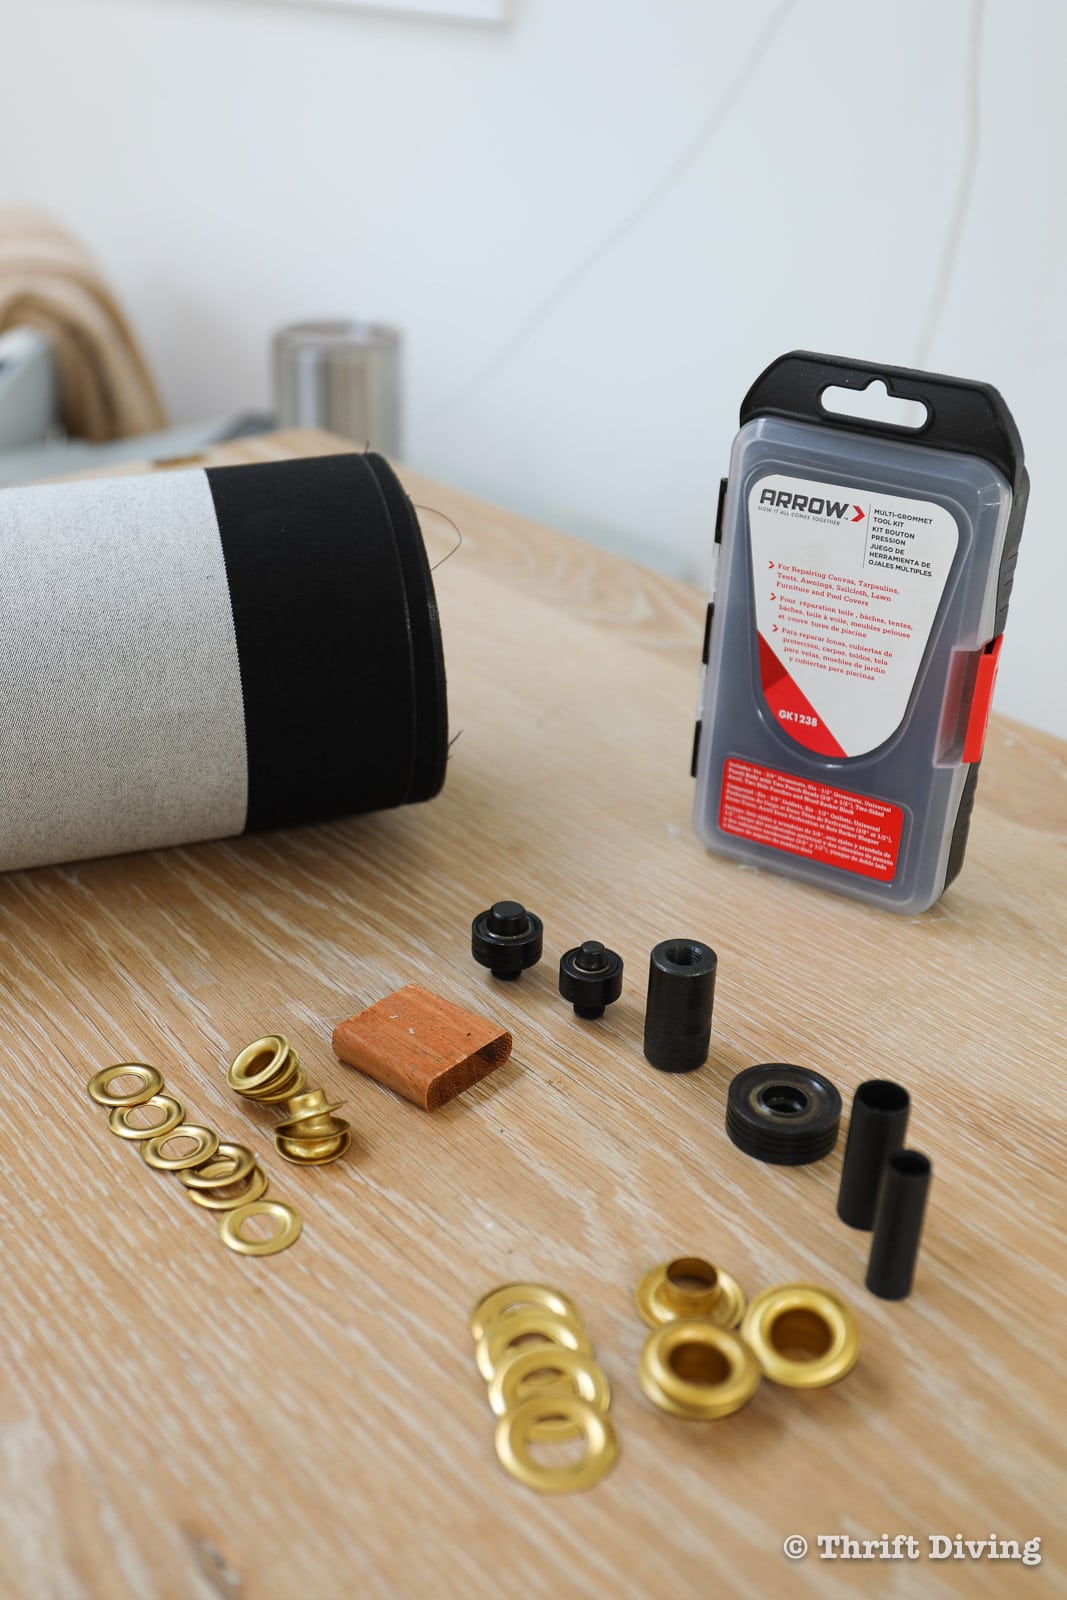
I’m using the Arrow Fastener Multi-Grommet Tool Kit which I’ve used before when I made my pretty no-sew shower curtain. The kit comes with six sets each of the most popular size grommets – 3/8″ and 1/2″ – and it’s rust-resistant 100% brass, so you can use them outdoors for this DIY canopy shade with mosquito net project.
The kit also includes a universal punch body with two punch heads (3/8″ & 1/2″), two-sided anvil, two hole punches, and a wood backer block in a free storage case to keep everything organized together.
You may need to buy some extra grommets, like I did, since the kit may not have enough for this project.
I realized after putting together this collage that I did one thing wrong:
I placed some of the grommets on the “wrong” side of the fabric. Not a biggie. So when you’re doing your grommets, make sure that the RIGHT side of the fabric is facing DOWN, and the WRONG side of the fabric is facing UP. 🙂 For the pictures below, I realized after-the-fact that my fabric should have been right-side-down.
(Hey, I’m not afraid to admit to my mistakes….LOL).
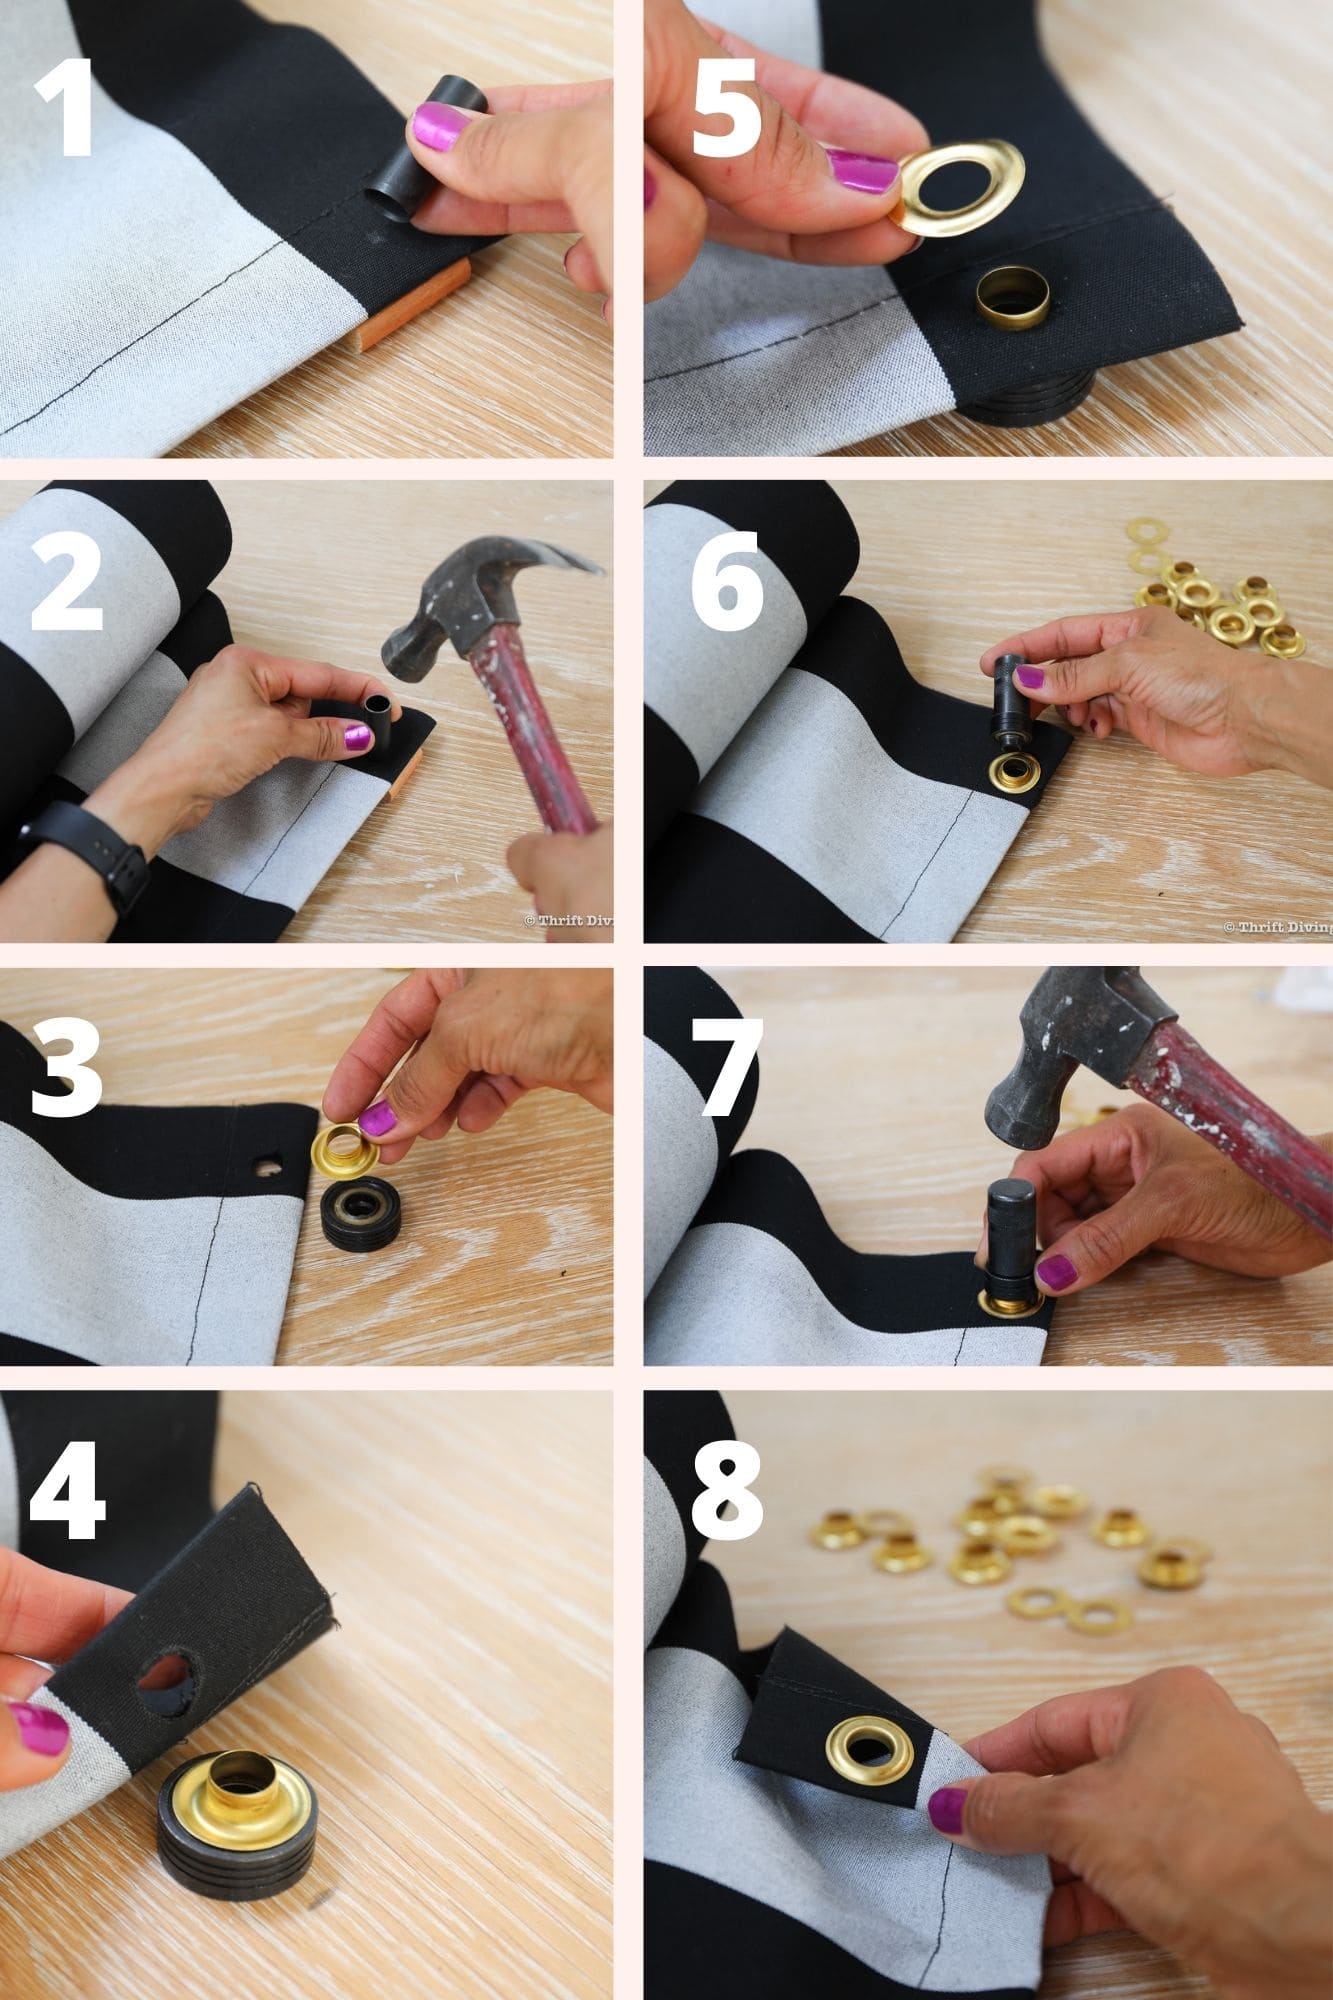
I also installed grommets around the perimeter of the canopy shade (about every 24″), as well as cut out each of the four corners and installed grommets on the corners to fit around the 4×4 posts.

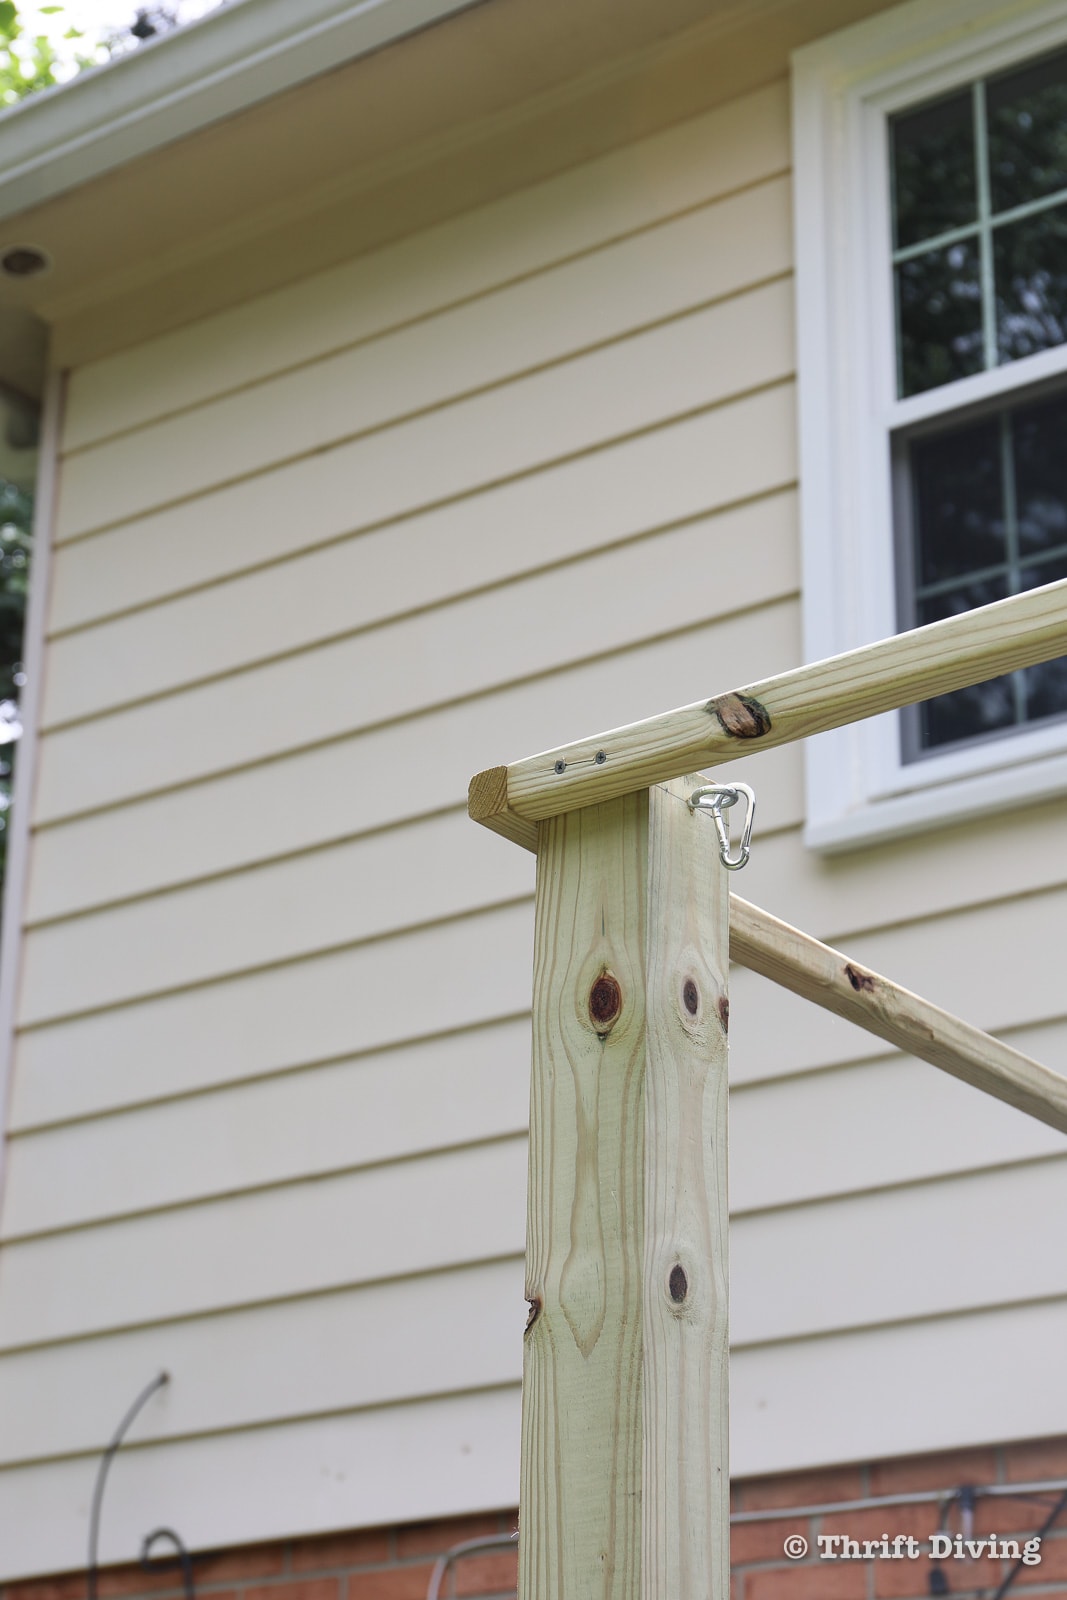
STEP 4: Install the 2×2 Boards to the 4×4 Posts
The concrete should be dry after a day or so (it will keep curing, however, but it will feel dry to the touch on its surface). Next up is to install the 2×2 pressure treated posts to the 4×4 posts.
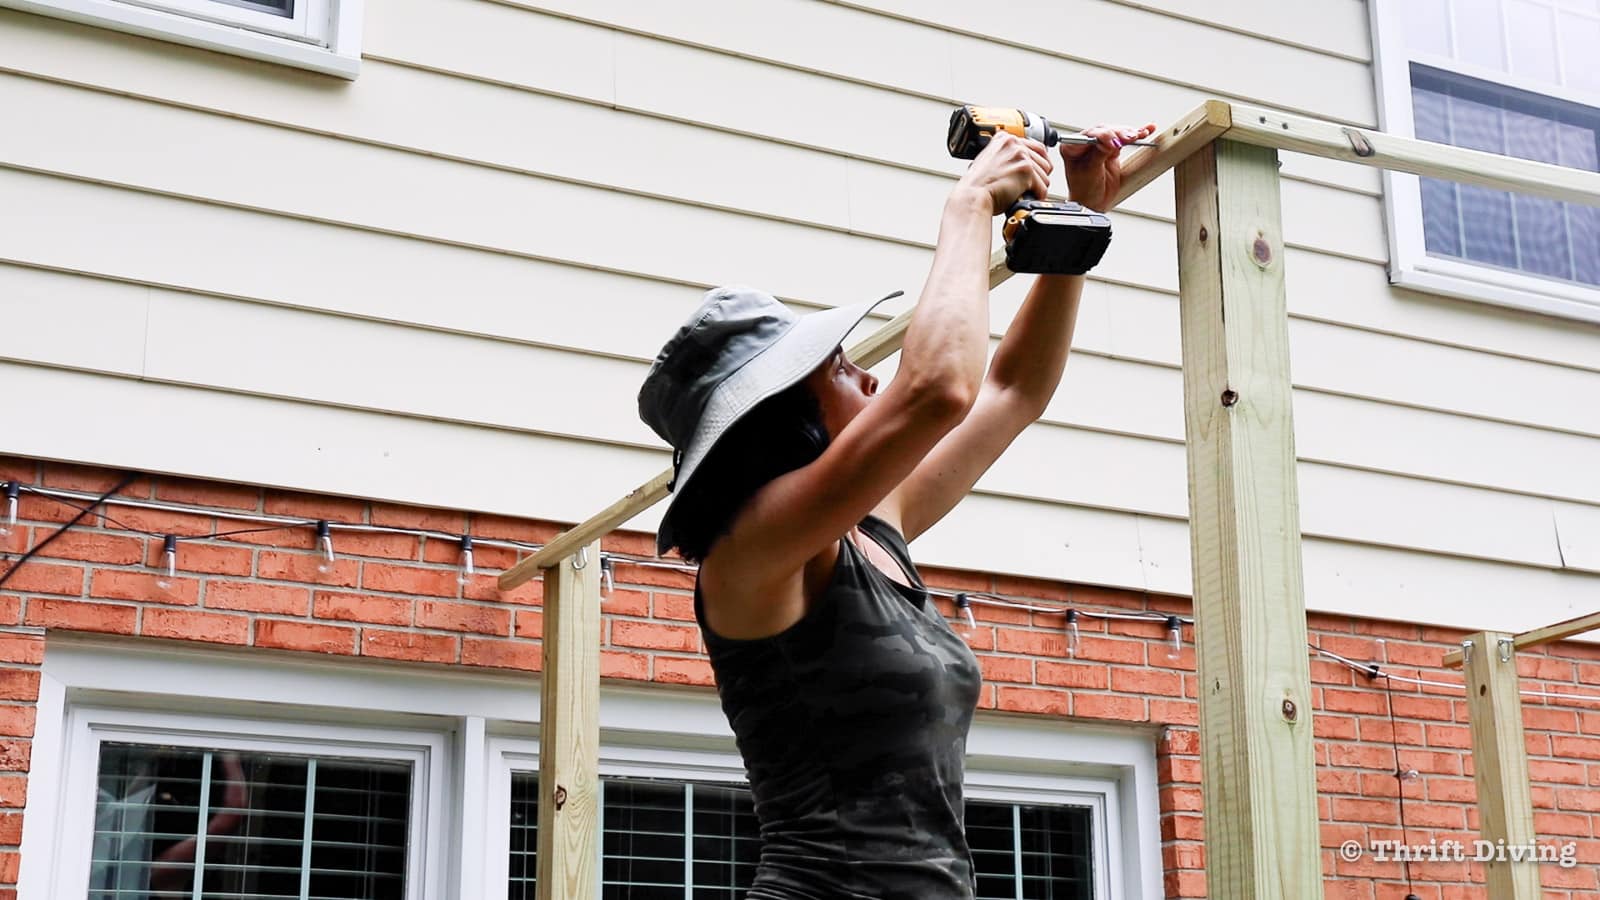
The ends should be flush and you will want to use exterior screws (so they don’t rust). If needed, drill pilot holes first so that your screws don’t crack the 2×2 pieces of wood.
Use a level to make sure they’re level.
(Don’t mind the hardware hanging off of the posts. These were left over hardware pieces when I had attempted to make this canopy shade with wire rope and it didn’t turn out).
Depending on the size of your shade canopy frame, you might have to cut off an end so that the boards are as flush as possible. Use a circular saw or reciprocating saw, if needed.
I also added soil and begonias to the planters! I added a few more drainage holes around the planter where the soil meets the concrete.
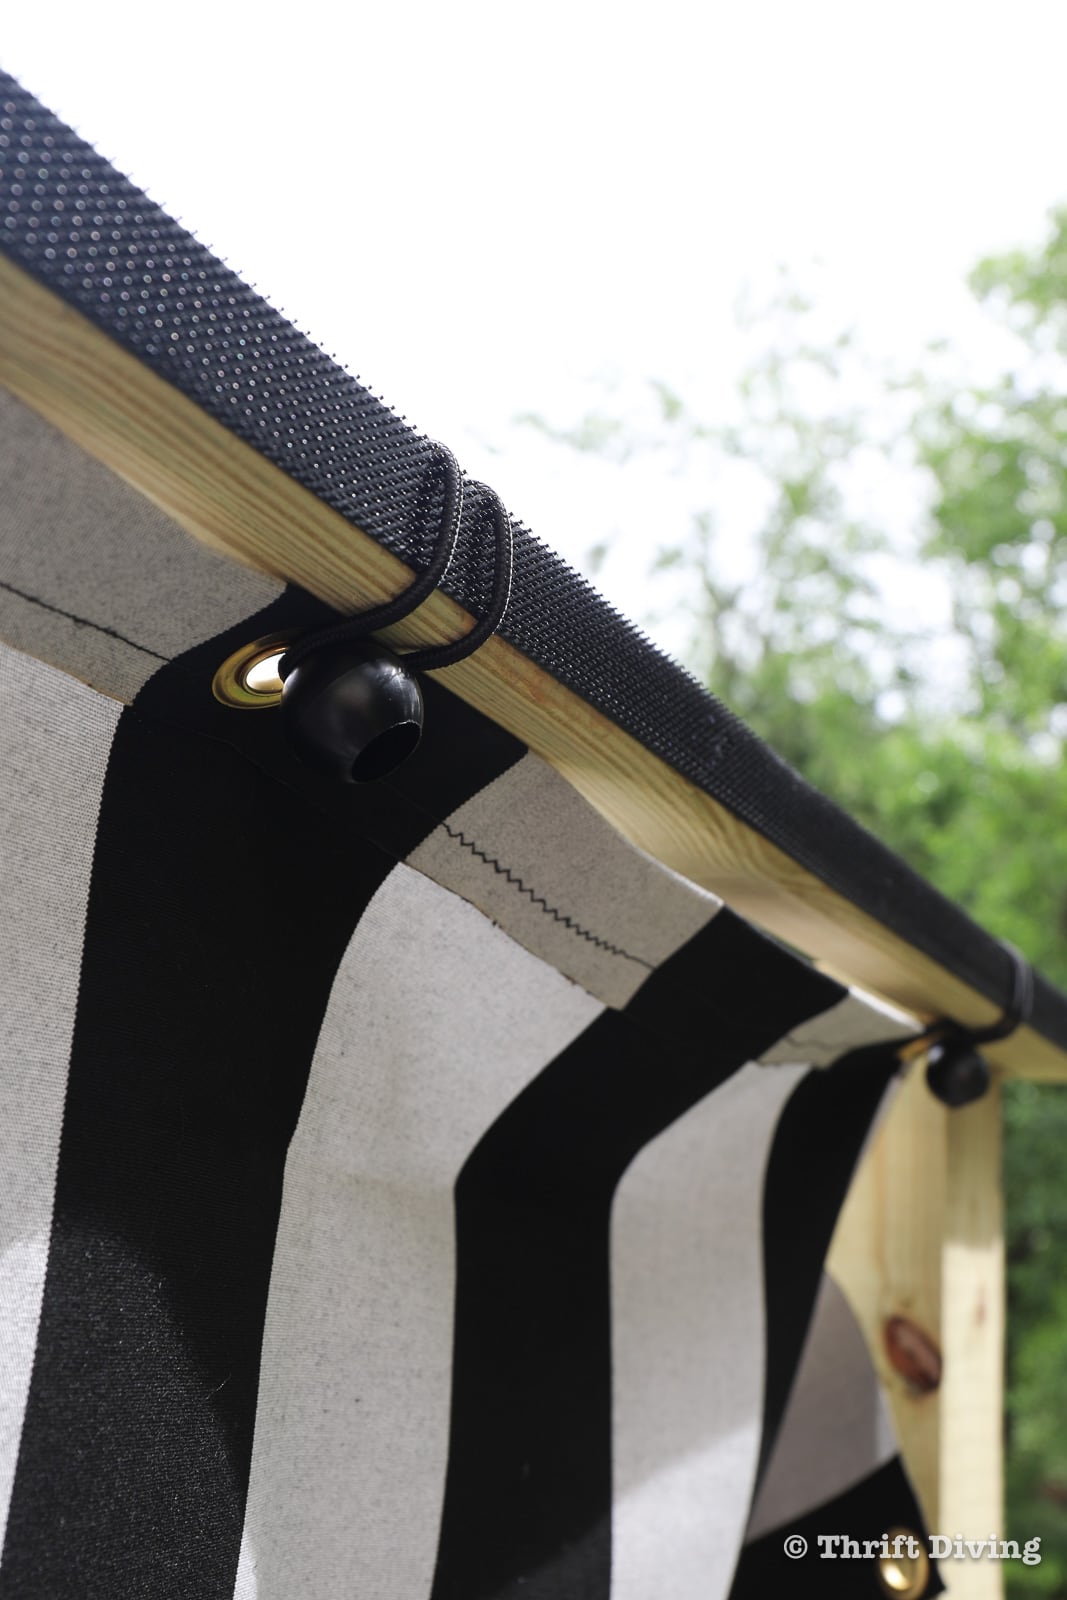
STEP 5: Attach Hook and Loop Tape to the Top of the Canopy
The feature I am sooo excited about is the mosquito net I wanted to add to this canopy shade! I used Velcro because it could easily be attached to the top of the post and could be removable in seconds if needed.
Be sure to use the Extreme Outdoor so that it can weather the weather. 🙂
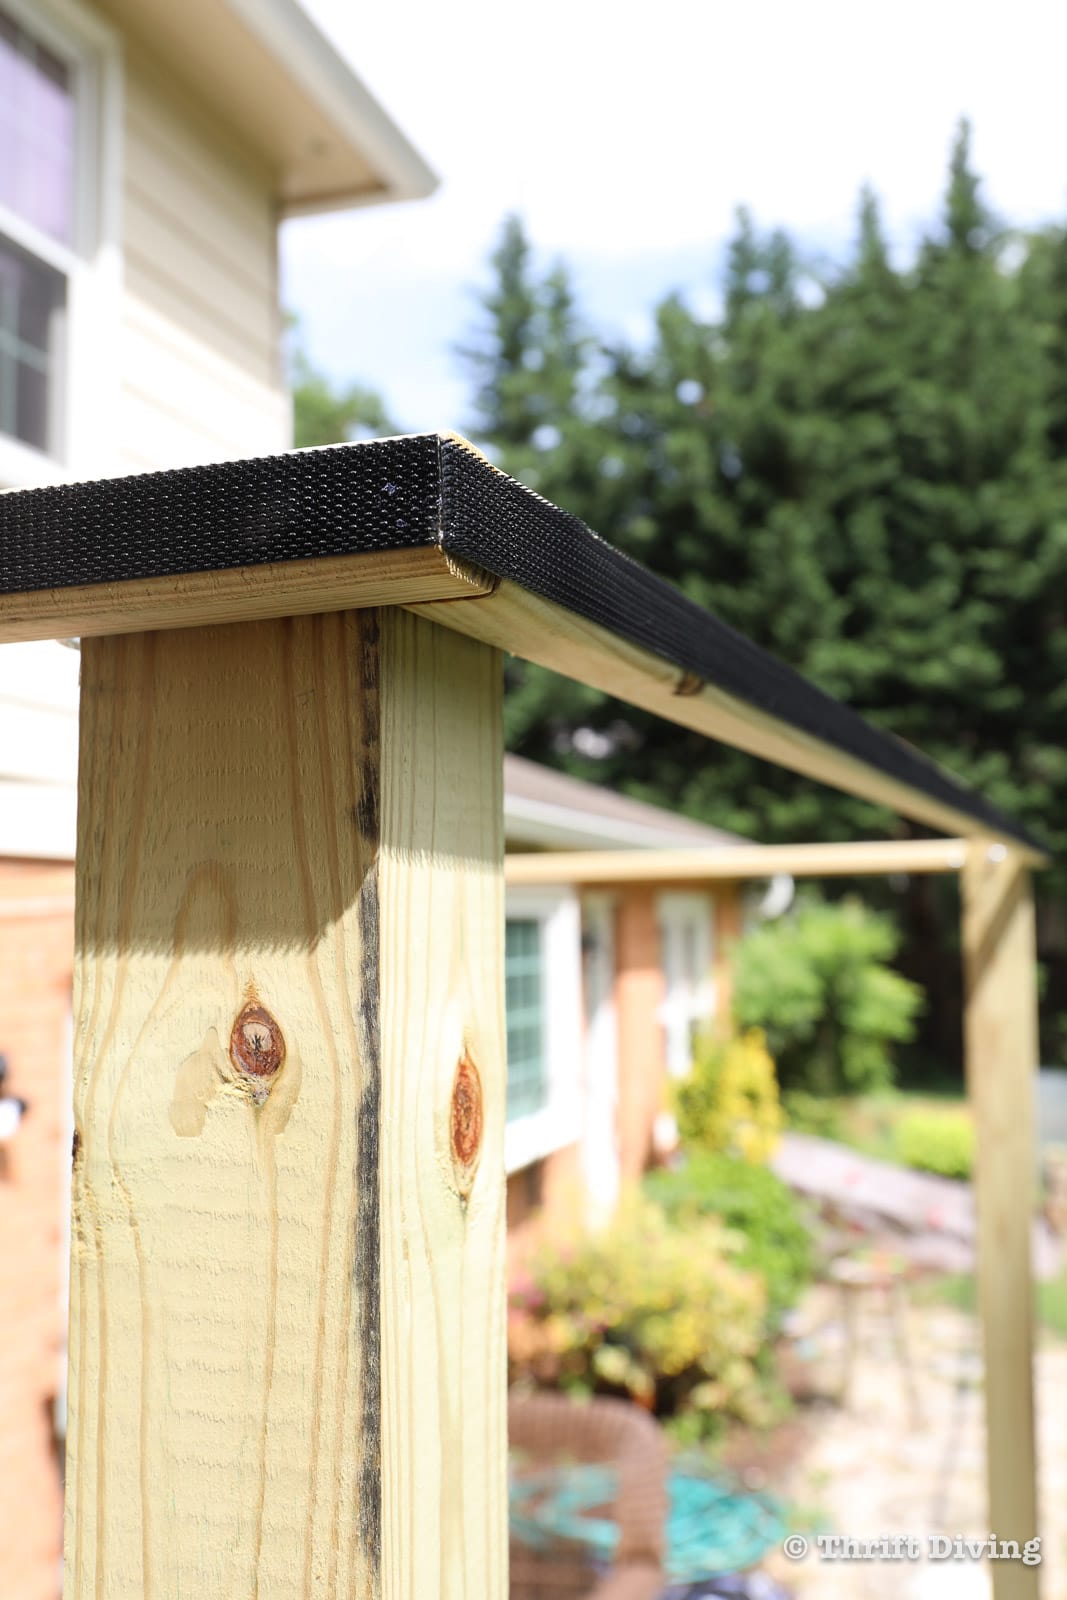
I attached the rough “hook” side of the tape to the top of the canopy, around the entire perimeter.
STEP 6: How to Sew a Mosquito Net for a Shade Canopy for the Patio
Mosquito netting is a super fine fabric and can be difficult to work with because it’s so thin and slippery. But I knew that this DIY canopy shade wouldn’t be as magical without it!
I used three huge pieces of mosquito net fabric that I ordered online, but there was some prep work that needed to be done in order to sew the mosquito net to fit the canopy for my patio.
The selvages of the mosquito netting were reinforced. I placed one of the reinforced edges onto bias tape. bias tape and the soft “loop” of the Velcro, peeling off the sticky tape of the Velcro and
STEP A: Place 1″ bias tape down on the table, wrong side up.
STEP B: Place the edge of the mosquito netting onto the bias tape, and carefully peel off the backing of the Velcro, sandwiching the mosquito net between the bias tape and Velcro. Use the reinforced selvage edge of the mosquito netting. Every few inches, fold the mosquito netting which will create a pretty, fuller mosquito net. Use sewing pins to hold it all together.

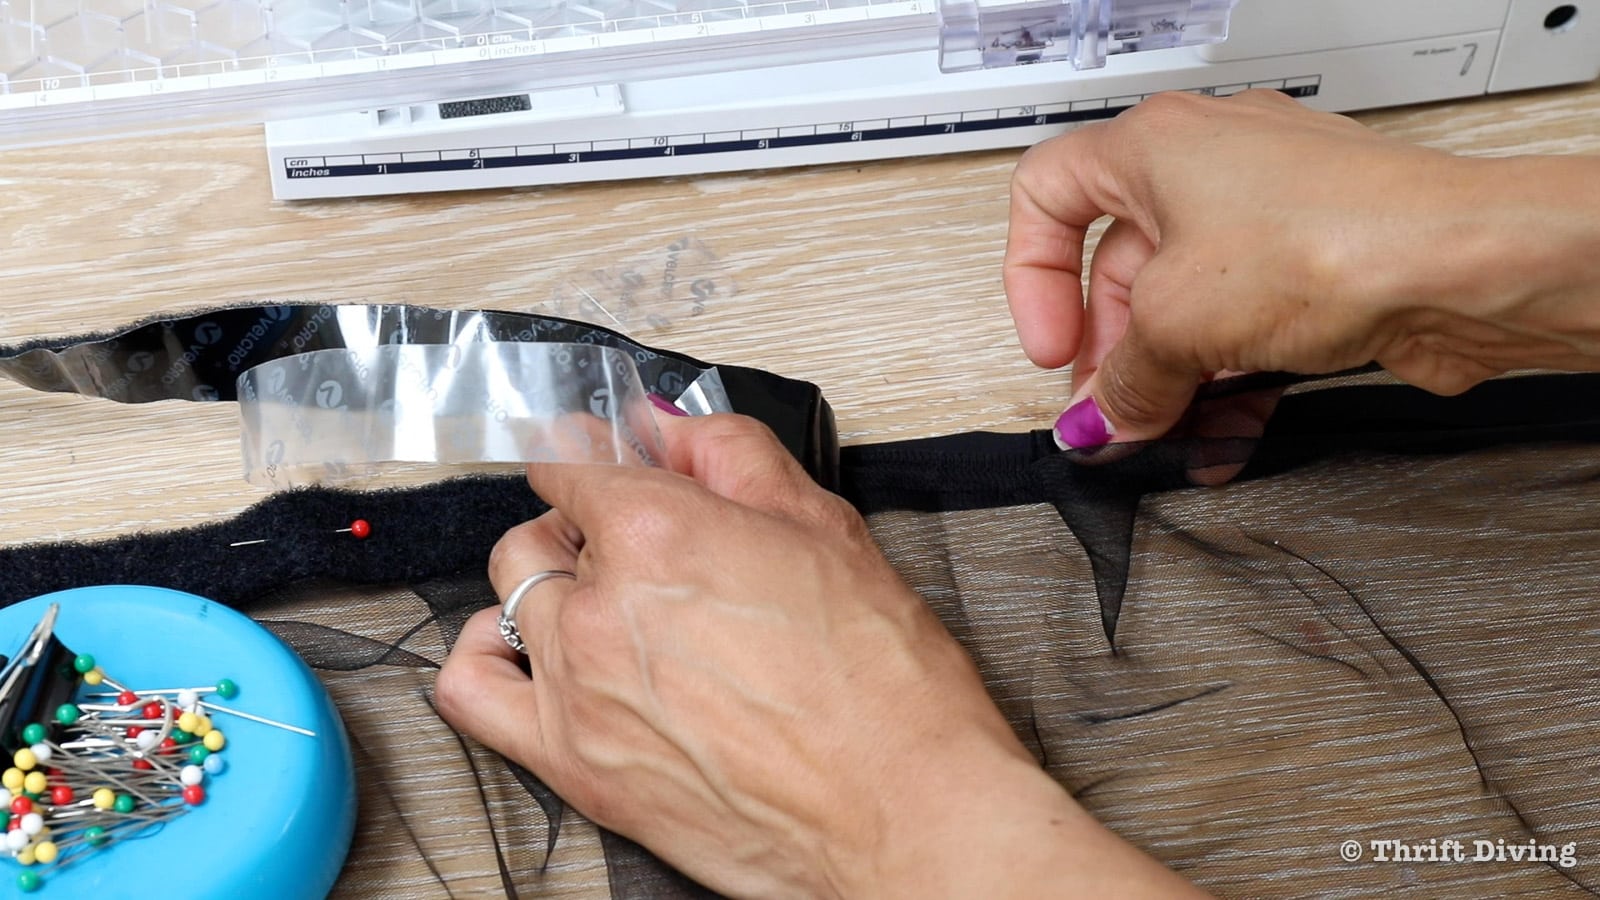

STEP C: Next, sew two rows of stitching to sandwich all three layers together, catching all 3 layers.

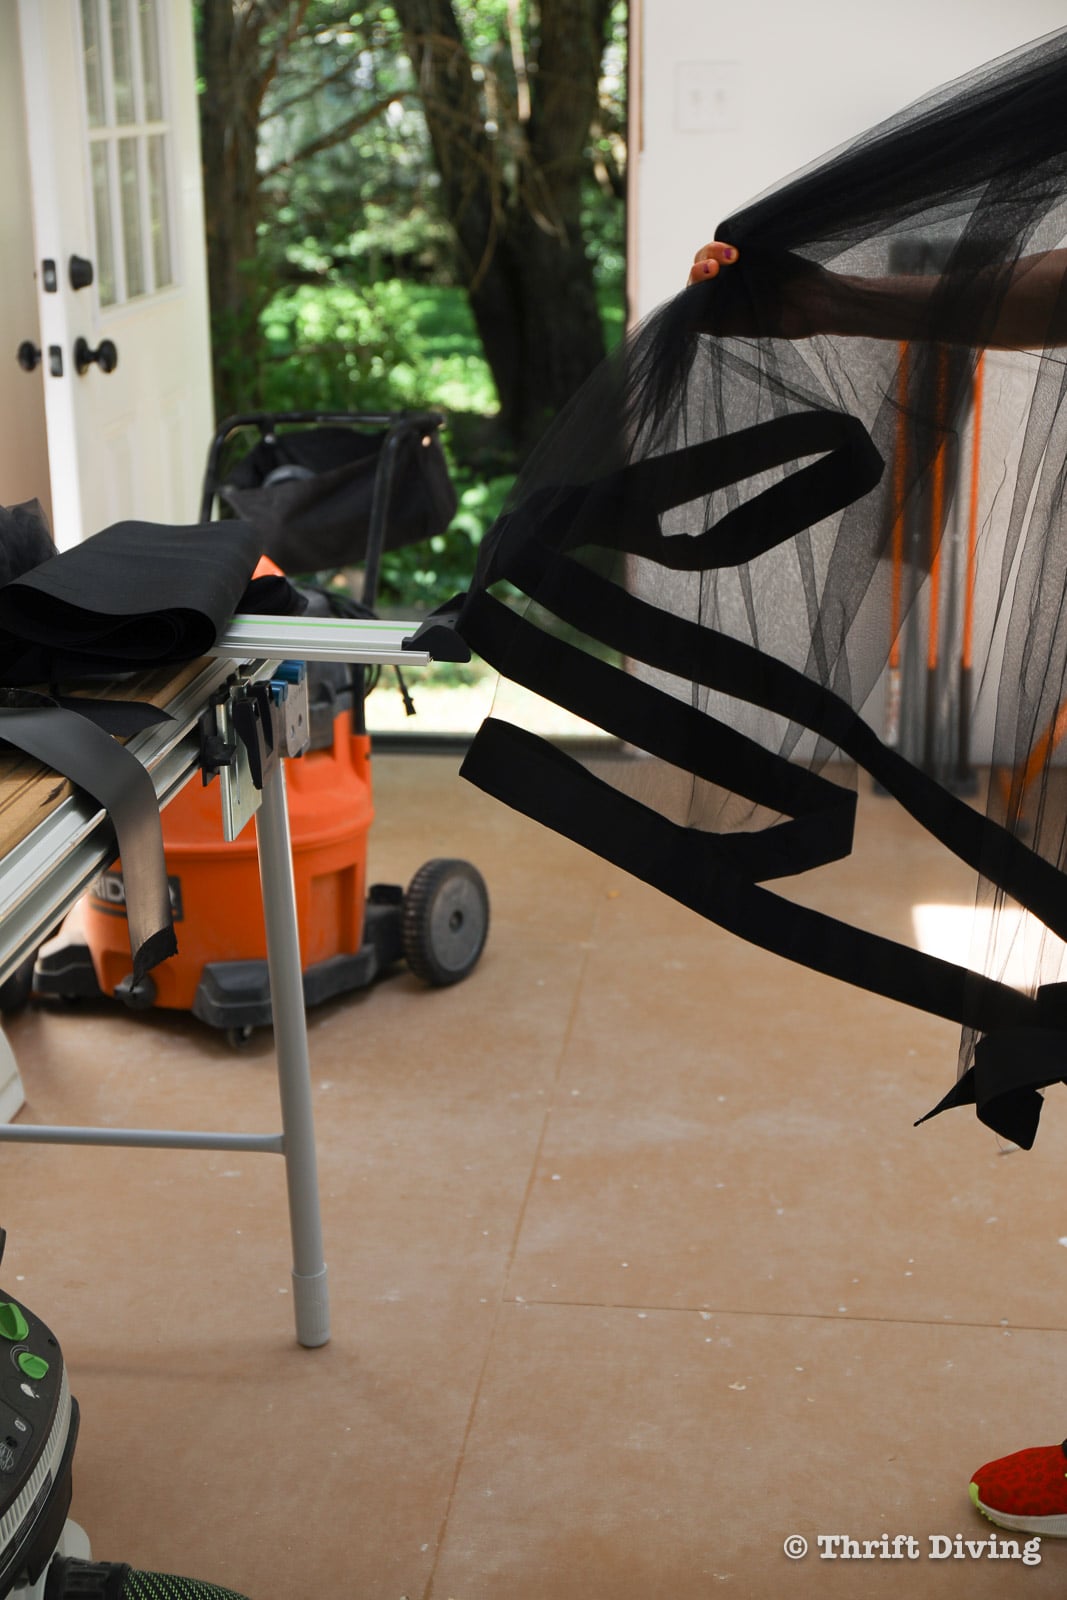
STEP D: Lastly, sew 2″ bias tape (or another thick, outdoor fabric) to the bottom of the mosquito net to finish off the bottom and add some weight to the mosquito net. Use curtain weights sewn into the bias tape at the bottom for even more added weight to the mosquito net so that the wind doesn’t blow it everywhere when it’s attached to the canopy shade.

The bottom of the mosquito net will be thick and reinforced with the fabric and weights!
STEP 7: Attach Canopy Shade to the Wooden Canopy on the Patio
Now that the canopy shade was sewn….the mosquito net was sewing….it was time to attach everything onto the canopy on the patio.
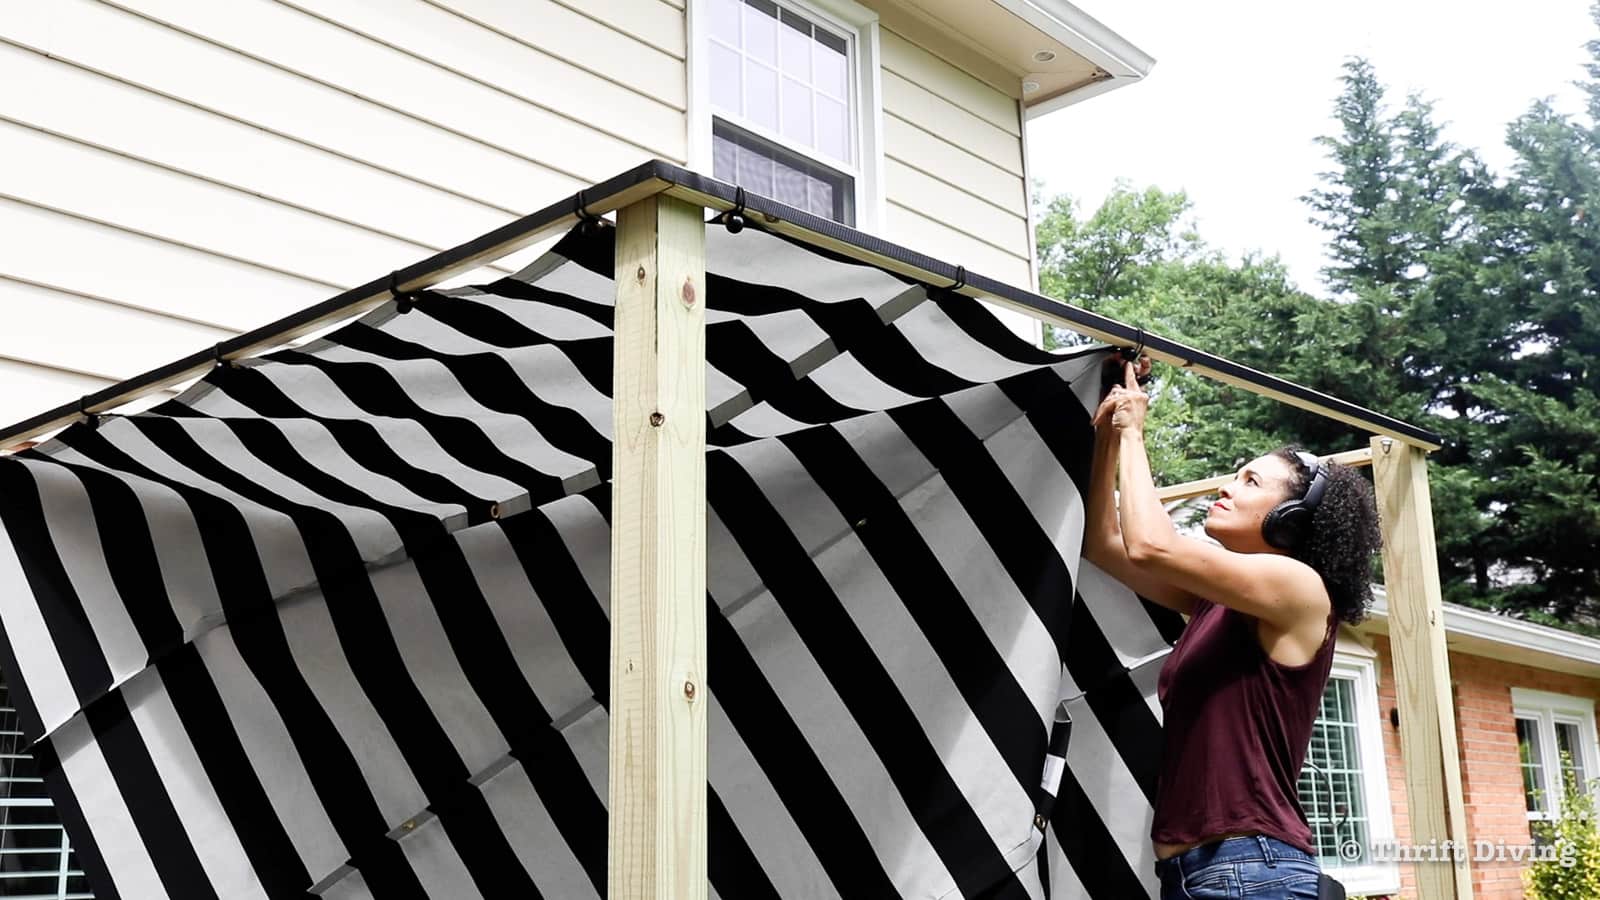
First, I used these bungee cord attachments to secure the canopy shade to wood at the top of the canopy. The bungee went through the grommet and around the wood. The hook part of the Velcro wasn’t in the way. I just wrapped it around the entire wood and Velcro.
You have to understand how big of a deal it was that I got the sewn canopy shade to fit properly!
The first attempt using wire ropes was a complete bust. It never feels good when you plan so much for a project to turn out, you purchase tools and materials, only to find that you just wasted a bunch of money and need to go and re-buy more materials in an attempt to fix it.
In fact, I talked about this on my podcast Episode #69 “When DIY Projects DON’T Turn Out!”.
It absolutely sucks when that happens. But to be able to turn it around into something you’re proud of….? Now that is something to celebrate!!!!
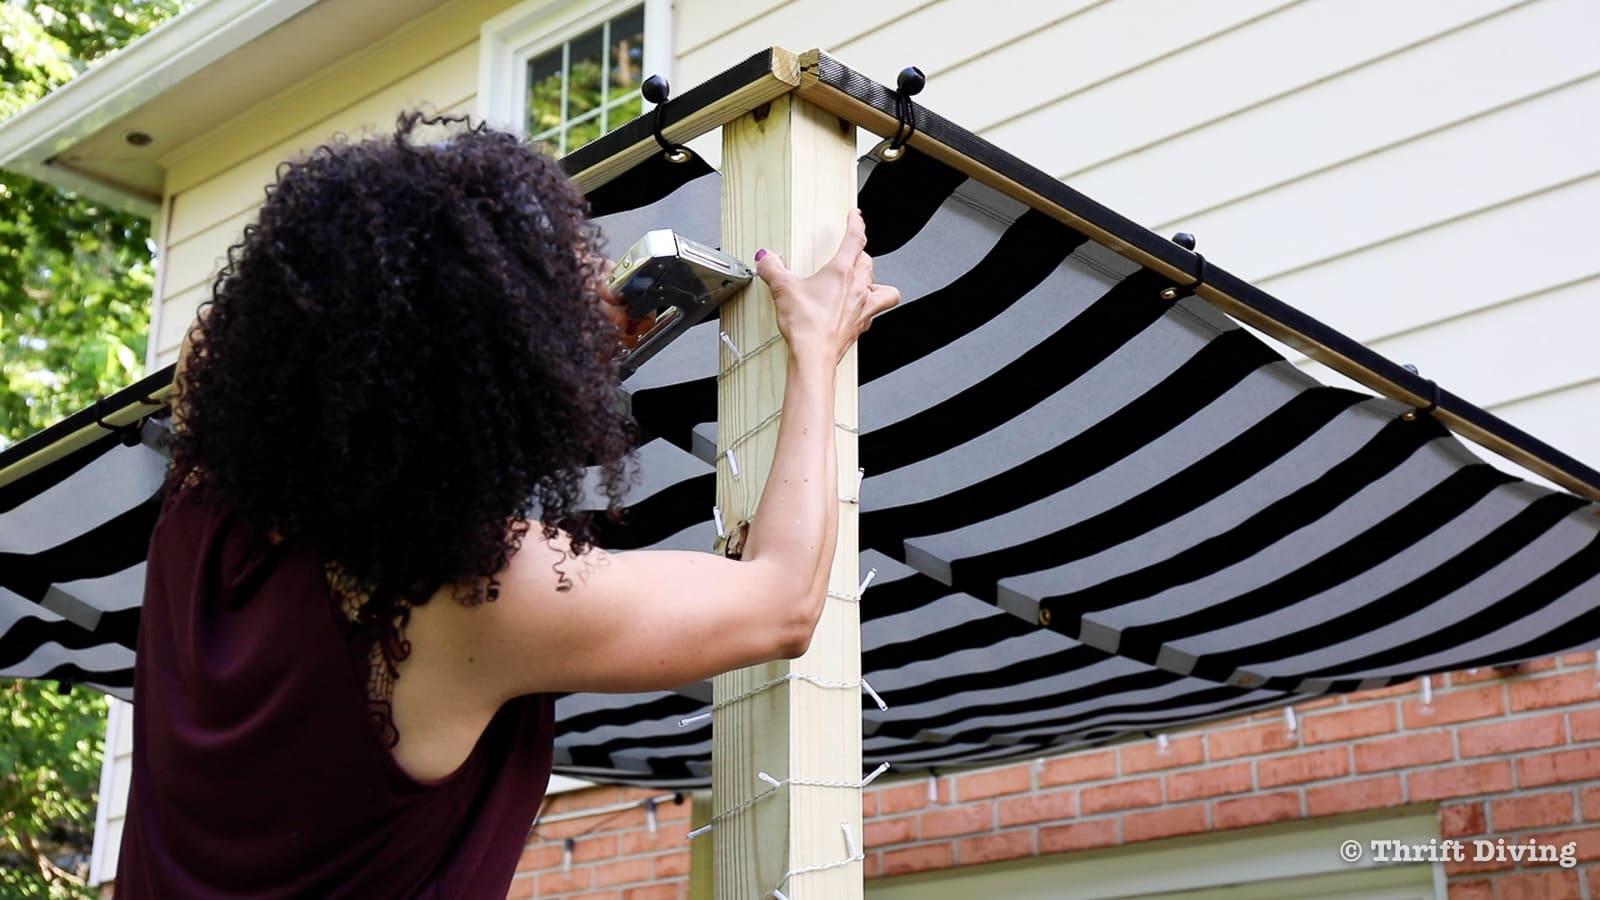
I also added battery-powered lights to the 4×4 posts and used my Arrow Fastener T75 Wire and Cable Staple Gun to secure the lights to the post. What I love about the T75 is that the staples are round to protect the delicate low-voltage wiring.
STEP 8: Attach the Mosquito Net to the Canopy Shade
With the sewn canopy in place, next up was to attach the mosquito net that I sewn. I actually ended up sewing 3 and 1/2 panels of mosquito netting to enclose the entire canopy shade on my patio.
With the soft “loop” part of the Velcro attached to the top of the mosquito net, I attached it to the “hook” part.
I strategically placed the ends of the mosquito net at the “openings” where people will enter and exit the patio.
I learned a few tips when sewing a mosquito net for a patio shade canopy, too:
- Overlap the mosquito nets by 12″ to create an opening, which allows you to come and go, but creates enough overlap that mosquitos and flies won’t have easy access because of the excess fabric.
- Mosquito nets with the added fullness and rouching will help trap any flying bugs within its folds if they do happen to get in. Didn’t realize this would happen, but it’s a great discovery after the fact! 🙂
- Don’t worry about small gaps between the mosquito net and canopy at the top. I don’t think mosquitos or flies are smart enough to look for gaps at the top. And as I mentioned in the previous point, any insects that fly in tend to get trapped in the holds of the mosquito net at the top and can’t figure out how to get out. 😉

BEFORE
AFTER!
BEFORE
AFTER!
BEFORE

AFTER!

How Much Did This DIY Canopy Shade with Mosquito Net Cost?
I hate to think about how much money I wasted due to buying the wire ropes and hardware that I ended up not even using. I tossed most of the packaging so most of the hardware cannot be returned. Oh well….I’ll have to use it for something else, right? 🙂
Costs
Not all DIY projects are cheaper than being something store-bought. This definitely wasn’t one of those projects! LOL. When I total up everything, the total cost was about $611. The biggest expense was the fabric for the canopy shade. Initially I had bought the fabric for awnings for my “she shed.” But since this project came up, I decided to use it for this canopy shade with mosquito next project instead. Cheaper outdoor fabric can be used. Or you can just buy an existing canopy shade. But what fun would that be, right?? 😉
Here were the final costs:
- Arrow Fastener Multi Grommet Tool Kit – $12
- Arrow Fastener Grommets – $8
- Sunbrella black and white 46″ fabric (I used 6 yards) – $180
- Sewing machine – Already had
- Thread for outdoor fabric – $16
- Hot Knife (for cutting only synthetic fabric to prevent unraveling) – $80 (although I will be using this for future projects so I won’t include this in the final cost)
- 4x4x8 pressure treated wooden posts (4 total) – $44
- 4 plastic resin wine barrels – $68
- Fast setting concrete (4 to 5 bags of 50lb concrete) – $36
- Post level – $6
- 2x2x8′ pressure treated wood (4 total for top of canopy) – $21
- Outdoor screws – Already had
- Scrap 2×4 boards for bracing – Already had
- Pea gravel or rocks for drainage – Already had
- Velcro hook & loop tape (rated for outdoor use) – Already had
- Mosquito netting – $72
- Bungee ball hooks – $10
- Outdoor battery-powered lights – Already had
- Arrow Fastener T75 Wire and Cable Staple Gun – Already had
- Arrow Fastener T75 staples – Already had
- Bias tape (1″ and 2″ sizes) – $20
- Curtain weights – $18
- Power drill with drill bits – Already had
- Circular saw, jig saw, or other tool for cutting wood – Already had
- Tape measure – Already had
- Gloves – Already had
- Sandpaper – Already had
- Safety glasses – Already had
- Hearing protection – Already had
- Soil – $20
- Flowers (20 begonias at $4 each) – $80
If you’ve got a patio or deck that is either too sunny and/or full of mosquitos, then this DIY canopy shade with mosquito net can help to create outdoor living space you didn’t have before! You don’t have to make everything from scratch, especially if you’re low on budget or supplies. But hopefully you’ll be inspired by something in this tutorial that will help you to create the outdoor oasis you crave, too.
Be sure to check out Arrow Fastener for tools to create this project and more!
Love this project? Click here to SAVE it on Pinterest!
![]()

Download the 5 freebies!

Thrift Diving inspires women to decorate, improve, and maintain their home themselves...using paint, power tools, and thrift stores! Use these 5 printables, checklists, and ebooks to get started!

Hi! I love this! I am going to do this for shade beside our pool. Thank you for sharing!!! How do you keep water from pooling, debri/leaves off the top, clean it and keep it from getting mildowy from rain water?? Thanks so much! That’s my only concern for ours! Trying to avoid drainage holes as the whole point is to keep out the mosquitoes- they are horrendous here!!! 💞💞
this is great, thanks for sharing……!
You are BRILLIANT, each time I saw the diamond adds I thought “wow, brilliant Earth, is Genius, to back you, over& over I though, brilliant, & saw the words printed over the most brilliant earth, jewelery” I want a canopy & a Brilliant Earth, ring, or ear rings, or necklace, or really I want bracelets, because I have long thin arms, & pretty hands, to drawl attention to. I lost my foe sapphire & zirconia bracelet, & I miss it. Everyone commented on how lovely it was.( my long arms, I bet) it wasn’t even real. I live that you had to struggle, the story is better because of it. It can even be made with more ingenuity, cheaper. Wrap cinder blocks in heavy plastic, fill with cement. Heat an insulated handled knife in hot out door charcoal, off & on to heat seal edges of freedom fabric. Use pennies, in the foe bias 2″ tape, sew a box around them to hold in place, or hot glue to finished hem& use black nail polish to paint Linclon to match. The only mandatory tools are Arrows gramits, & they are a big part of the expensive look. You could sew button holes to put the hoop & ball thing through, but I would go arrow all the way. I am going to follow you always, great minds think alike! You are Brilliant Earth all the way. I’ll think of you each time my Brilliant Earth bracelet twinkels in the sun light. Mary R
I’ve never left a comment before. I ❤ your diy, ❤ Brilliant Earth for being smart enough to realize how often we would see & say Brilliant! At your instructions & final after photos, & I ❤ Arrows’ groments & staple gun & rounded staples, once saw a diy, where a man shorted out everything behind dry wall from one staple too strongly pinching his electrical. lmao. So yea I’m hooked. That is one sexy out door diy, mosquito netting never looked so good, I must be one of the first viewers, only 700 views. I expect you’ll have 100 of thousand soon then millions, just because the netting the black & white stripes, the before & after are breath taking. Looking forward to my Brilliant Earth bracelet looking like your fairy lights Mary R.
Hi Mary! YAY! So glad that you commented! There is a first time for everything and I’m glad you finally commented. 🙂 Yes, you were one of the first to view the project! It’s doing well on YouTube, thankfully. It was such a fun project, once I realized that it would turn out. How stressful! And with electrical, yeah, that man should be careful. I hate to think of having to go into the wall to repair electrical wires due to a bad decision! LOL
Thank you so much, Lorinda!!
Last year I had a flea infestation. I have two cats and it was he**. I tried diatomaceous earth, flea spray, flea pills on the cats, everything. However it wasn’t until I found this video: https://youtu.be/Gsr_NDBRc9U. If it wasn’t for learning about “flea larvee and pupee” (LOL), I never would have been able to control them. It took about 2 months, but if I had seen this video sooner, it would have been quicker. It took a) killing the fleas on the animal, b) bombing the environment, c) vacuuming daily, d) preventing more fleas from developing. I had to figure out where the cats were spending most of their time (two different cats, two different places), kill them, and then prevent them. The “living salt shaker” idea was a game changer. It was a couple of hundred dollars for the medicines and flea collars but it was worth it.
Hi Cathy!! Wow, what a nightmare for you! That’s what I have learned about insect outbreaks is that it’s not just a matter of removing the source. Nope–instead, you have to spend at least 2 months attacking all the eggs that are site unseen so that you can stop the entire infestation! I once had a carpet beetle infestation in my mini van that i believe I brought in from leaving cut flowers in my van. I tore that van inside and out and sprayed the insecticide and also the growth inhibitor and it did the job. OMG, I was traumatized from that! Vacuuming becomes your best friend, along with the insecticides. I hope you never have to deal with that again!!!!
This turned out so pretty! I truly admire your DIY skills as well as keeping it real about your mistakes along the way. Thanks for all the detail you provide. Enjoy your canopy this summer, it really does look magical with the lights and netting!
Thank you so much, Vicki!! I can’t wait to use it this summer!!!