BEFORE & AFTER: My Pretty Little Laundry Room Makeover!
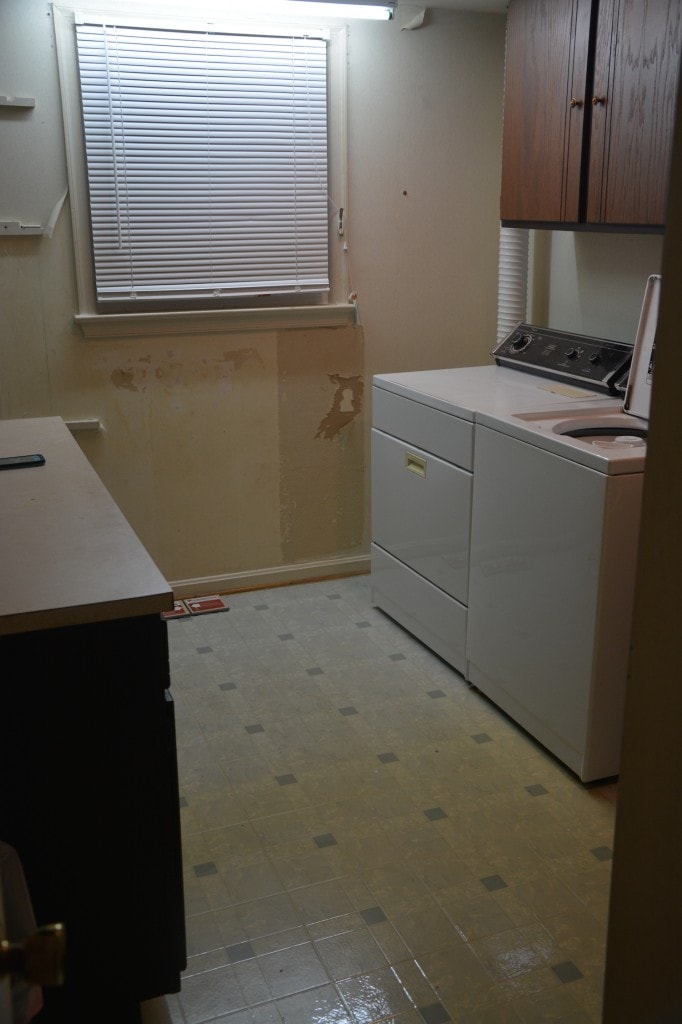
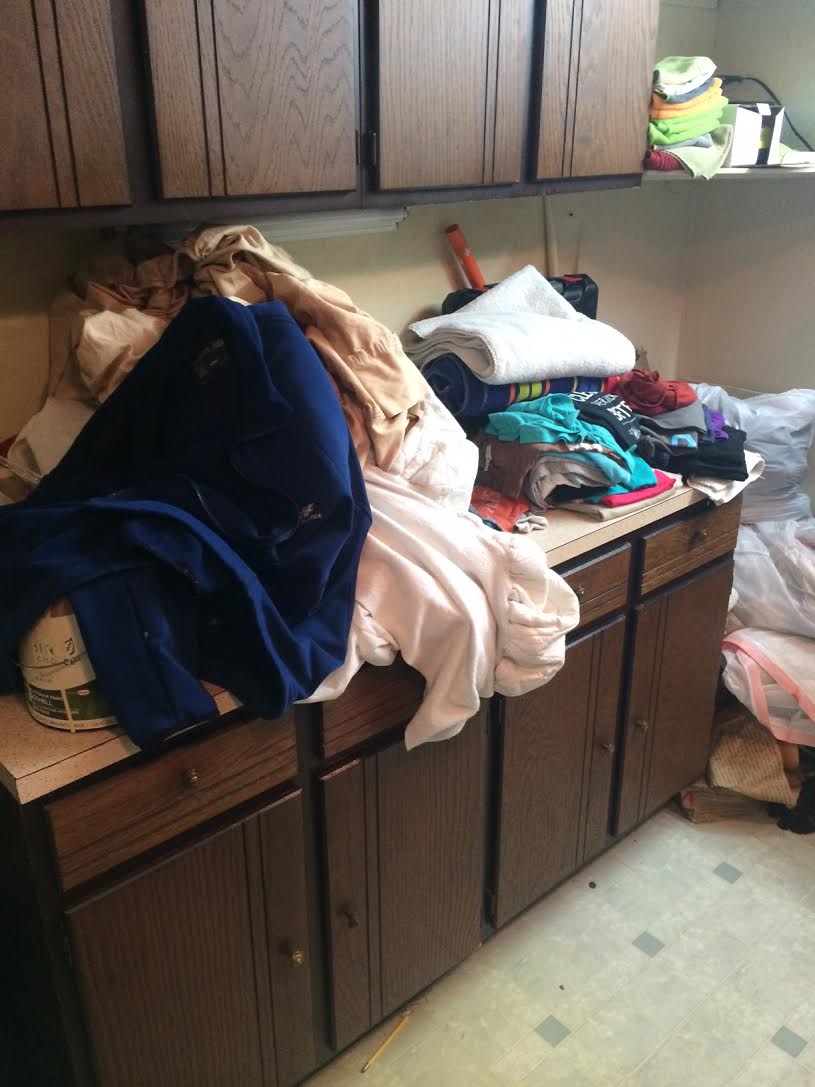
This, my friends, THIS…………is what my laundry room used to look like before my pretty little laundry room makeover.
BEFORE

Let me just warn you right now.
I’m going to walk you through how I turned my really horrid laundry room into one of the prettiest laundry rooms I could ever hope for. And I did it all myself. I took on this room as part of my 30-Day June Room Challenge series, along with 43 other readers, and we vowed to transform just one space in our house in 30 days. (Want to join the next round of Room Challenges? Click below to sign up and I’ll email you when you’re ready for the next challenge! 🙂
![]()
This was the most exhausting project I have ever done.
I did more in these last 30 days than I did in the 3.5 years since we’ve lived here!
And now, I’m excited to share my story and “BEFORE” and “AFTER” pics with you!!!
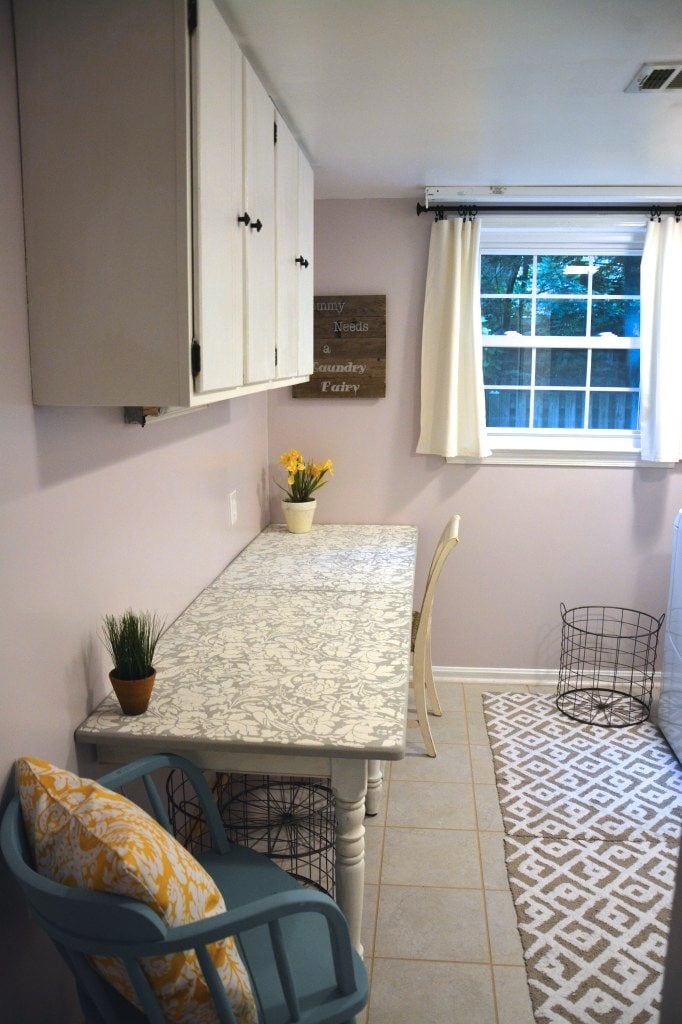
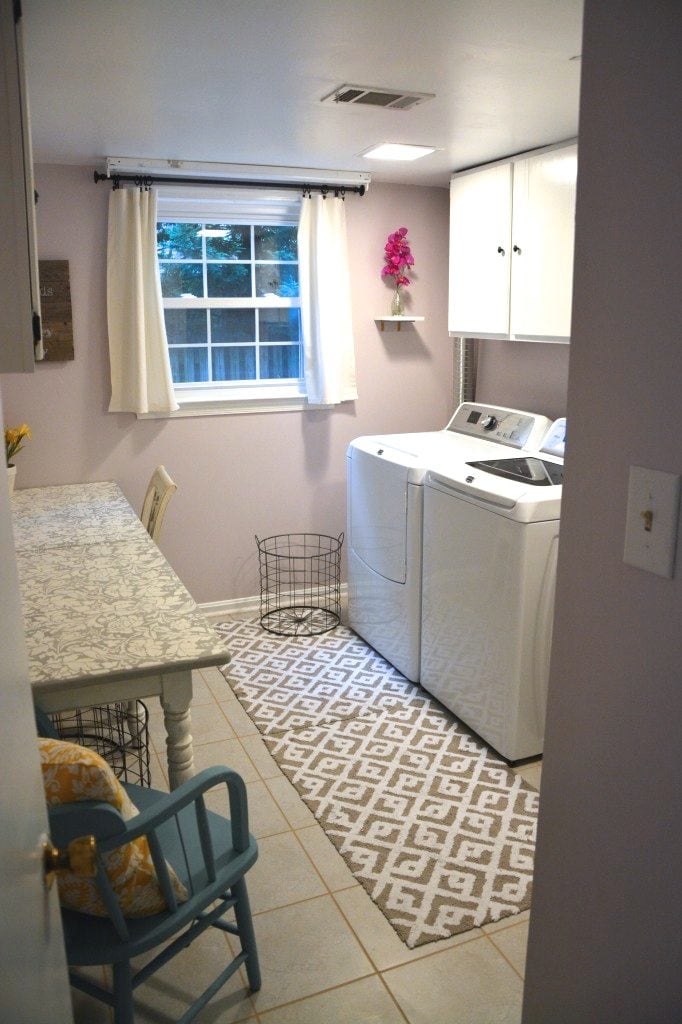
AFTER
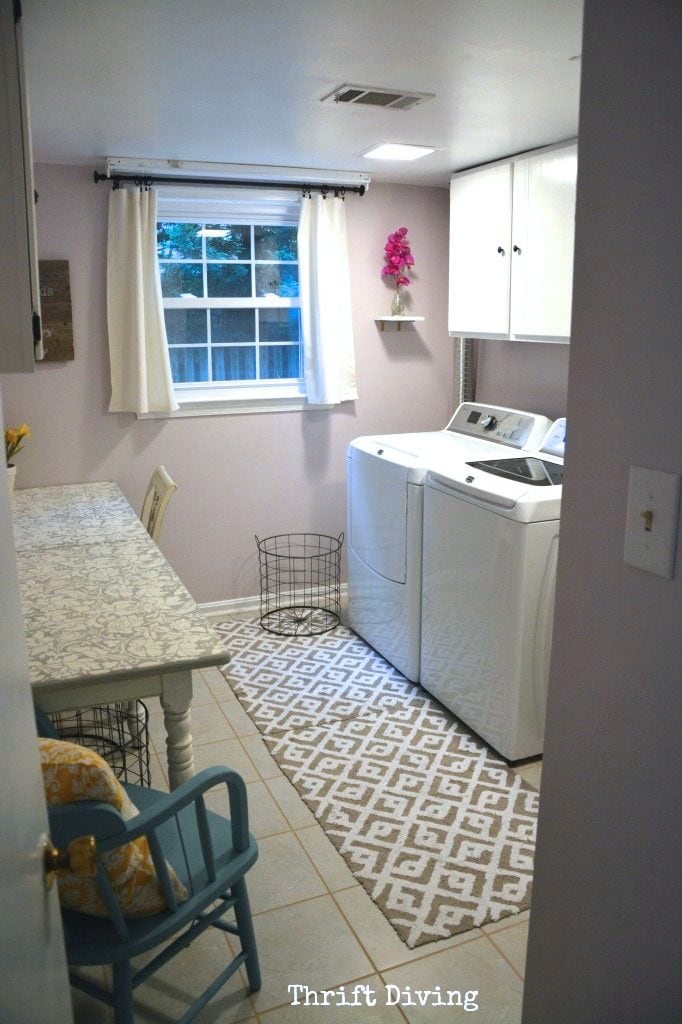
I still can’t believe I did this.
I really took on this daunting room….stayed up to 2 a.m. most nights (since I work full-time, when else would I have time to do it??!), and put my sweat into turning it into my beautiful oasis.
This 30-day room challenge was an idea that popped into my head one day while driving to work and I knew it was just the solution to my problem of “decorating procrastinating.” I knew this challenge would change my life. Holding myself to a deadline was key. Because, without deadlines, we just spin our wheels, don’t we? I didn’t want to do that anymore.
DECORATING PROCRASTINATING
The phenomenon of piling up crap in a room that you don’t know what to do with, so you just shut the door and vow to “someday” make it over, but never do. ~Thrift Diving
BEFORE
First thing I did was move everything out. That’s really the only way to start a room makeover–just get it out, and quickly.
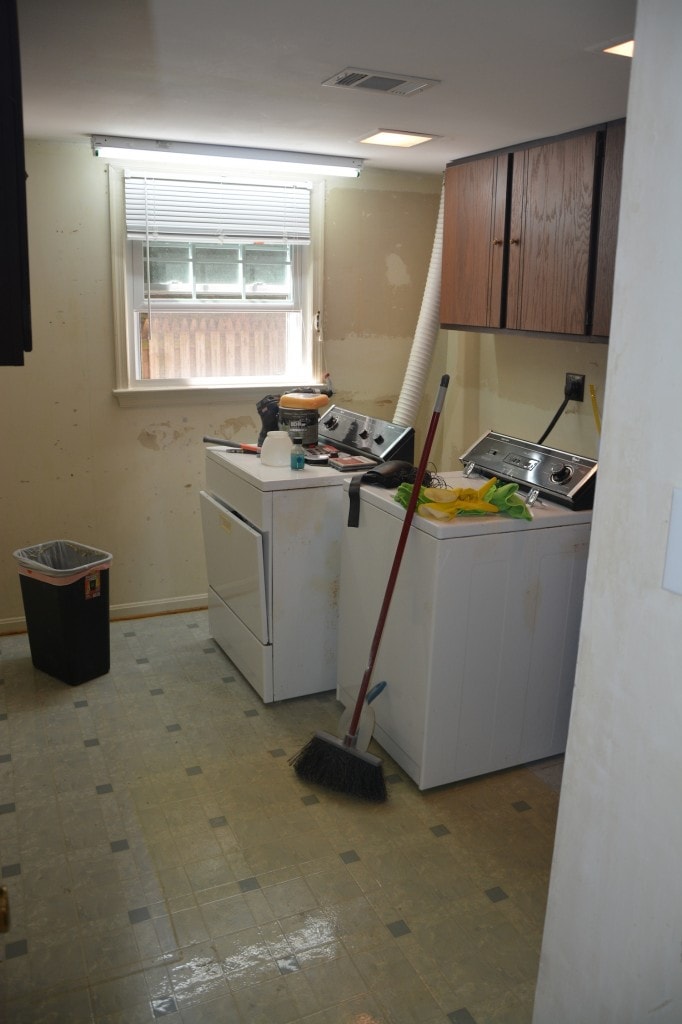
Once I got started on the renovation, I had to scrape the glue off, and I also moved the base cabinet into the garage to use in my workshop area. Look what joy I found behind the cabinet: DIRT!!! I should be so embarrassed to show you this….But anyway….we’re friends! Right?? You won’t judge me too much ;).
It’s hard to believe this is the same room!!!
AFTER
My Most Proud Accomplishment!!
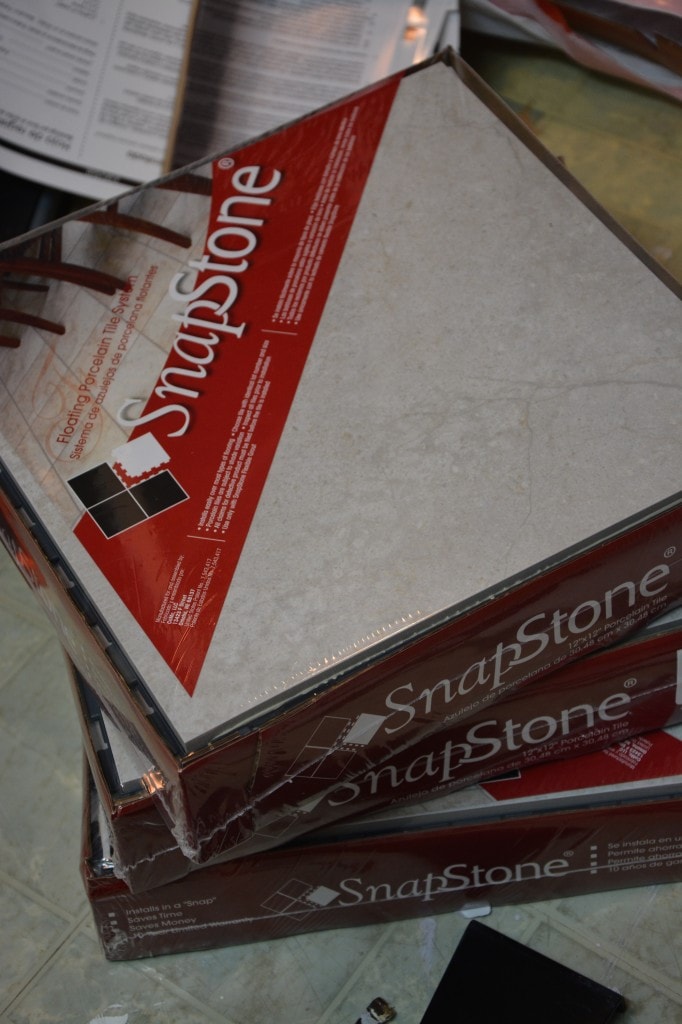
First, I have to give a huge THANK YOU to one of my sponsors, SnapStone, a floating floor system that uses real porcelain tile. I used the Arcadia tile.
I had contacted them about this challenge and they offered to supply the flooring. Without them, I really don’t think this laundry room makeover would have been as wonderful as it is! So, thank you, Snap Stone!
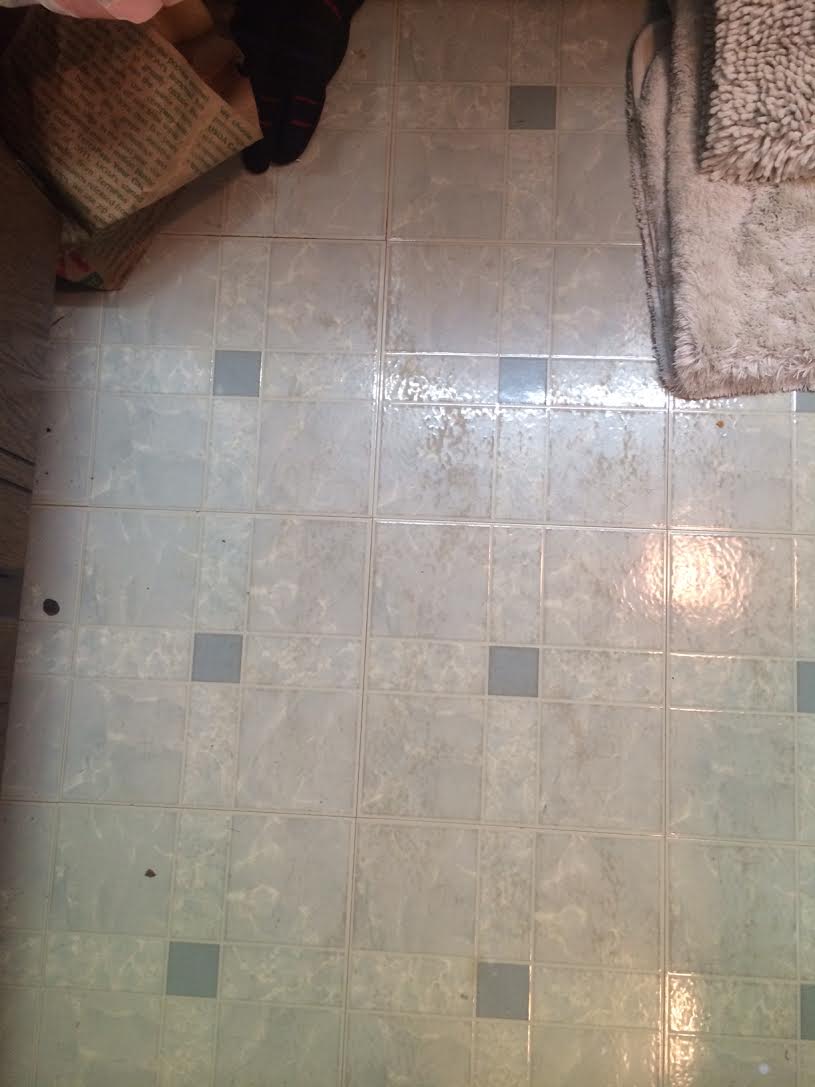
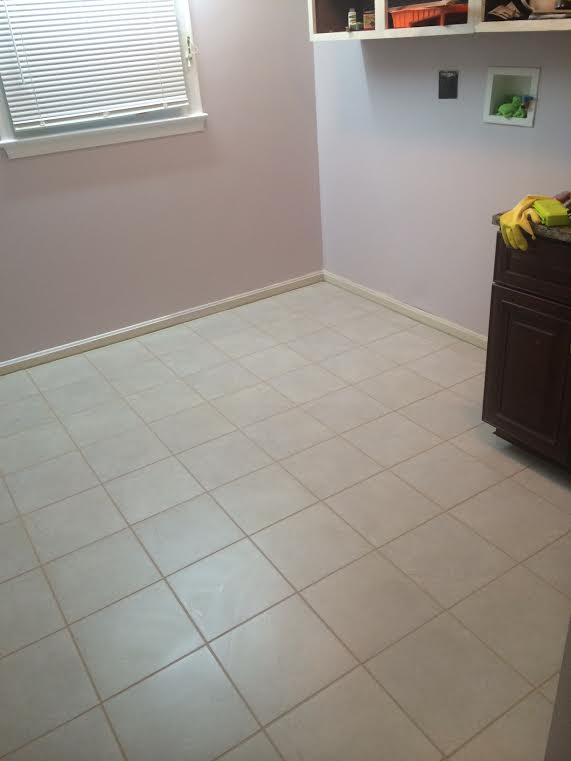
Remember how my floor looked?
I knew this would transform my floor….I just hoped I could do it!!
I have to admit, I was nervous.
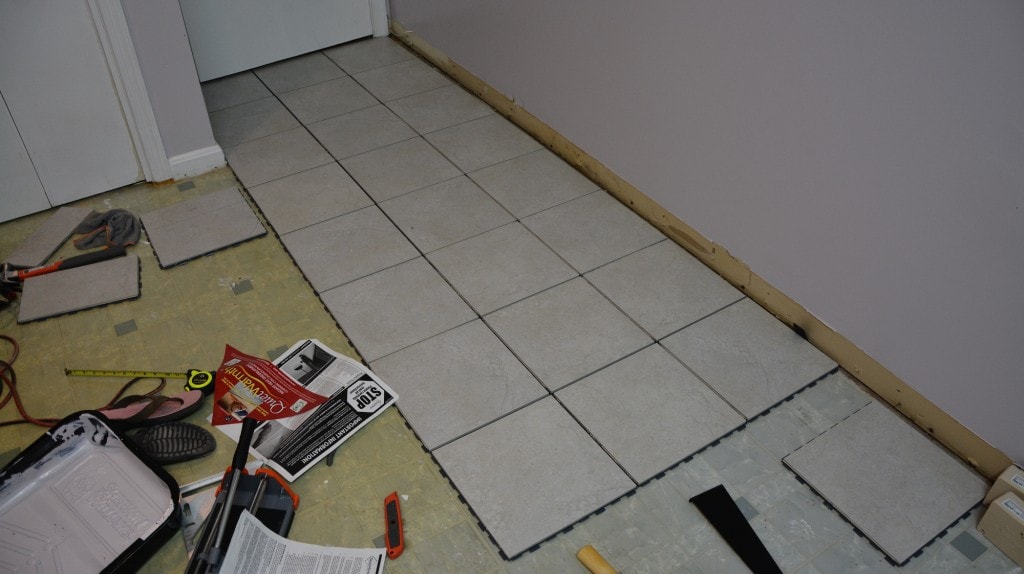
I have never laid any kind of flooring, but the reason I reached out to them is because of its ease of installation. It’s a unique product on the market that allows DIY’ers (albeit inexperienced floor tile layers like myself) to take control of our own project instead of paying someone else to do it.
With this floor, I just snapped and clicked it together, like a puzzle. And I could install it directly over my old flooring! (Stay tune because I’ll be posting the full video on how I did it on my YouTube channel!)
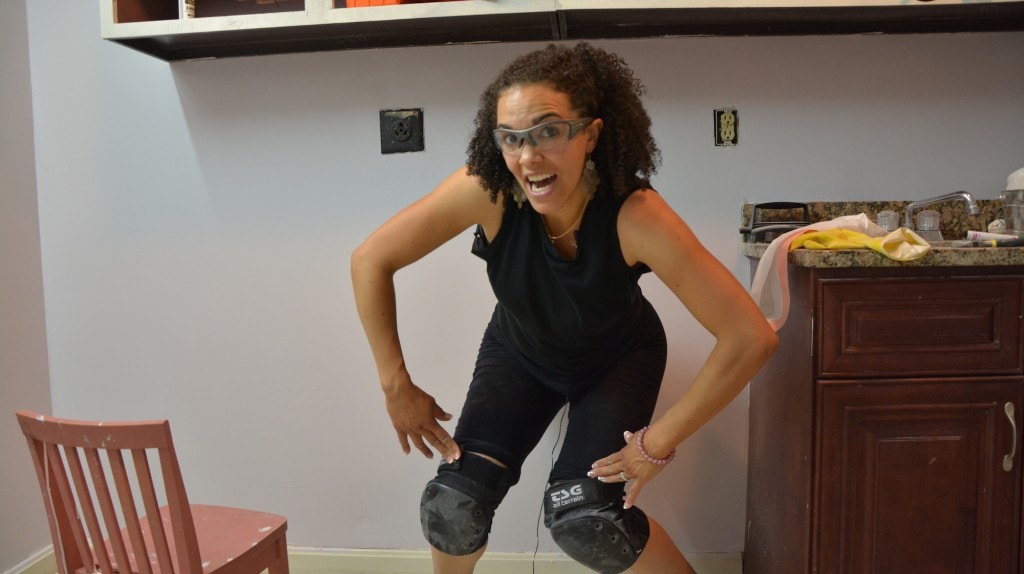
My vinyl looked like aged cheese!
Jobs like this required knee pads. TRUST ME.
I also had to learn to use new tools, like this Ryobi Angle Grinder, to cut the porcelain tiles. Talk about scary! But I felt like a total DIY badass after each cut.
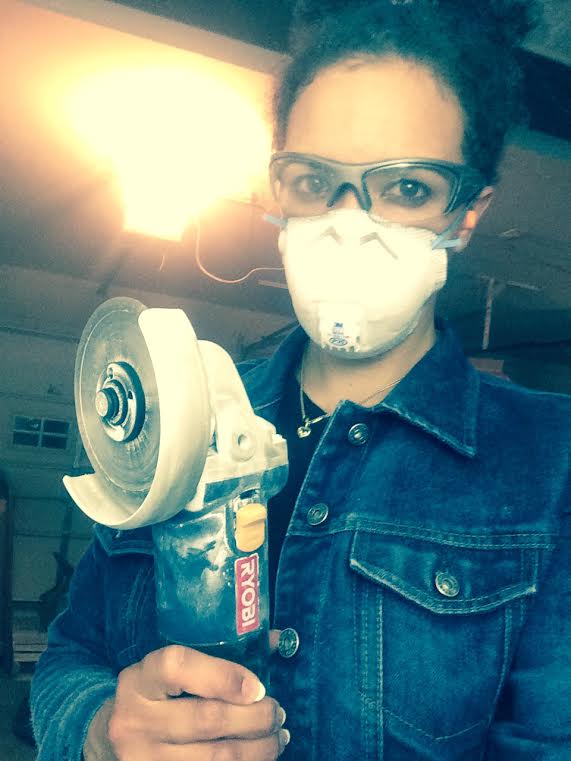
But the knee paint and nightmares of slicing off a finger by accident were worth it!! Look what I did!!
FLOOR DONE!
Now it’s just gorgeousness under my feet!

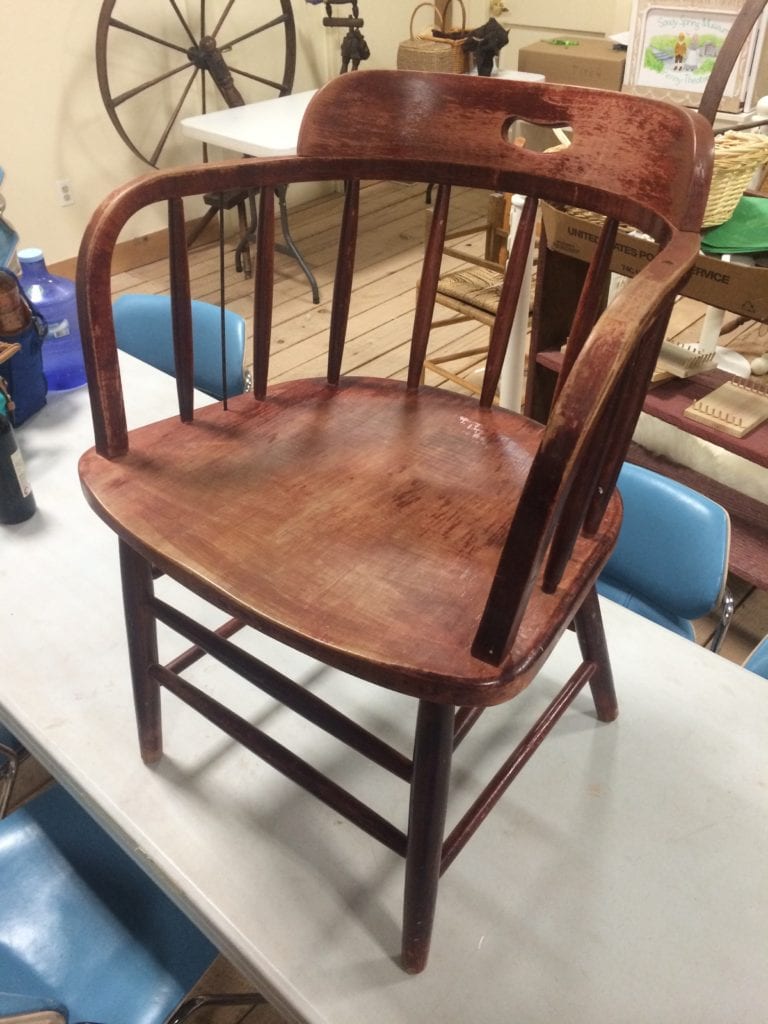
That chair there came from a yard sale for $5.00!
BEFORE
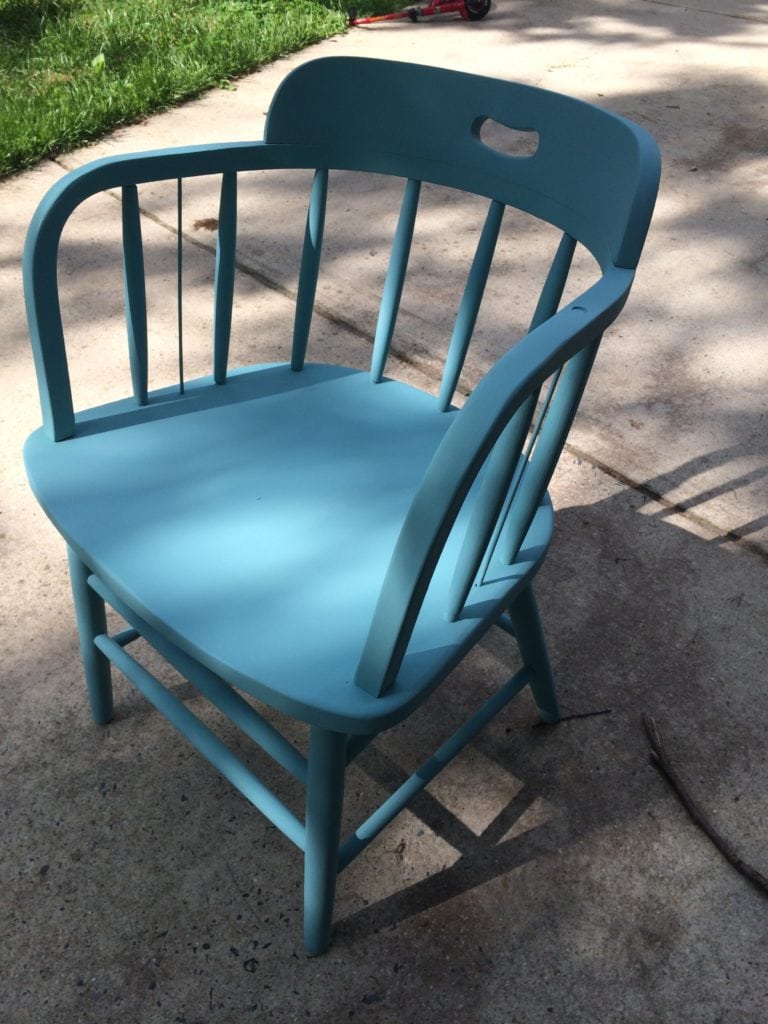
AFTER – Annie Sloan Provence
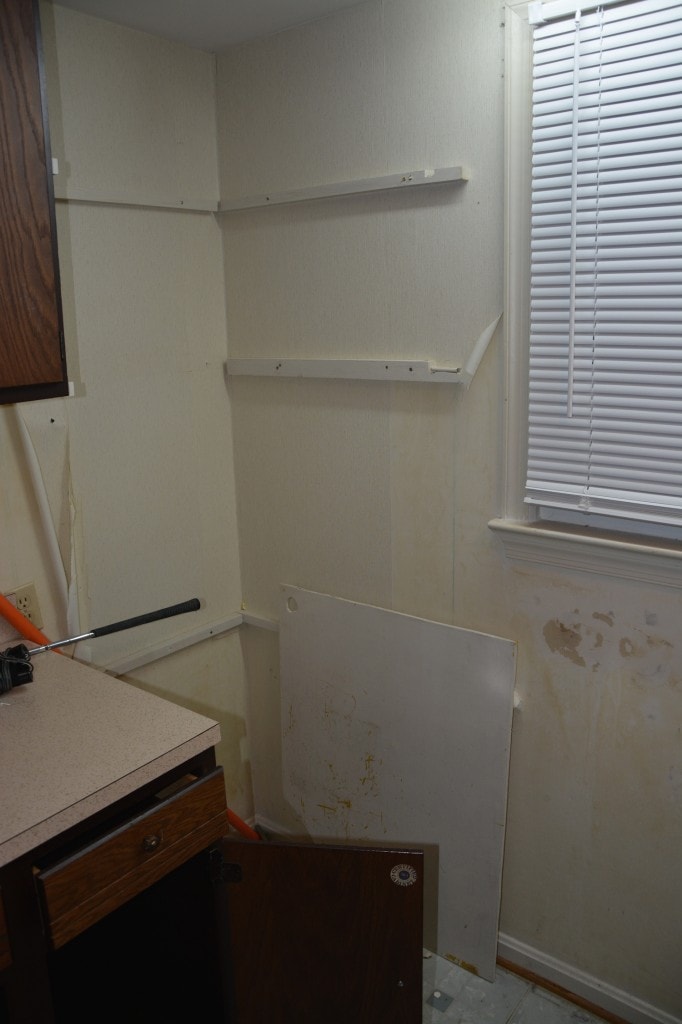
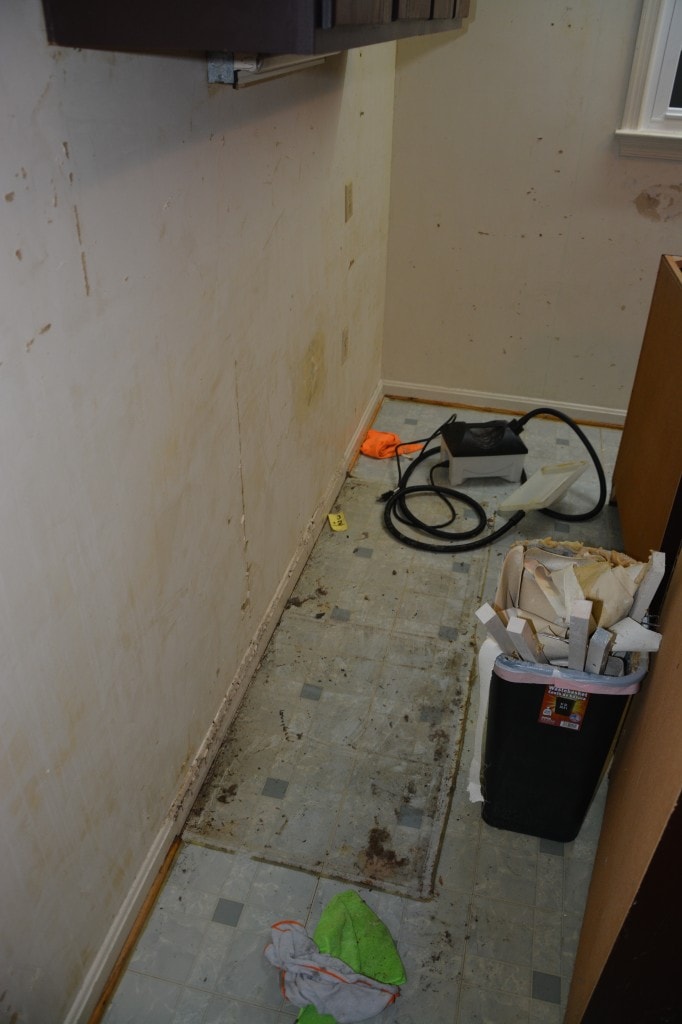
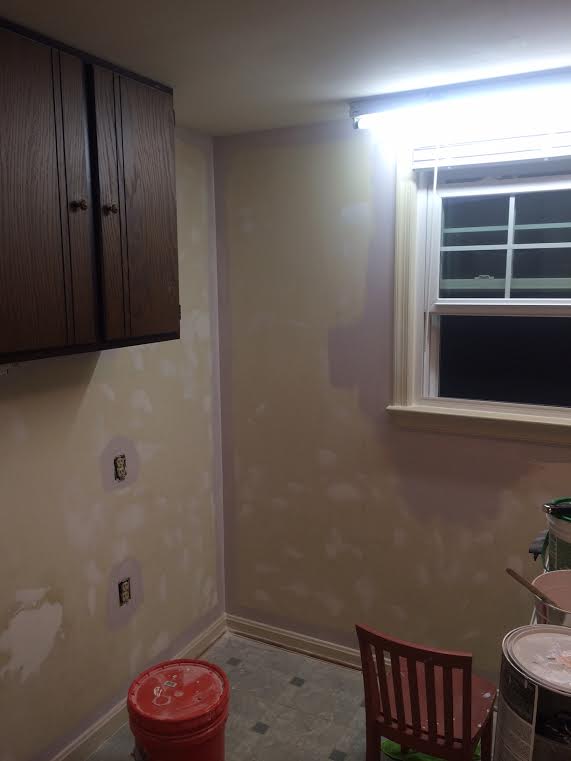
Oh, the Horror of the Walls!
Do you remember these walls? Of course you do.
The wallpaper had completely removed the top layer of drywall, so yours truly had to re-plaster and sand those babies down.
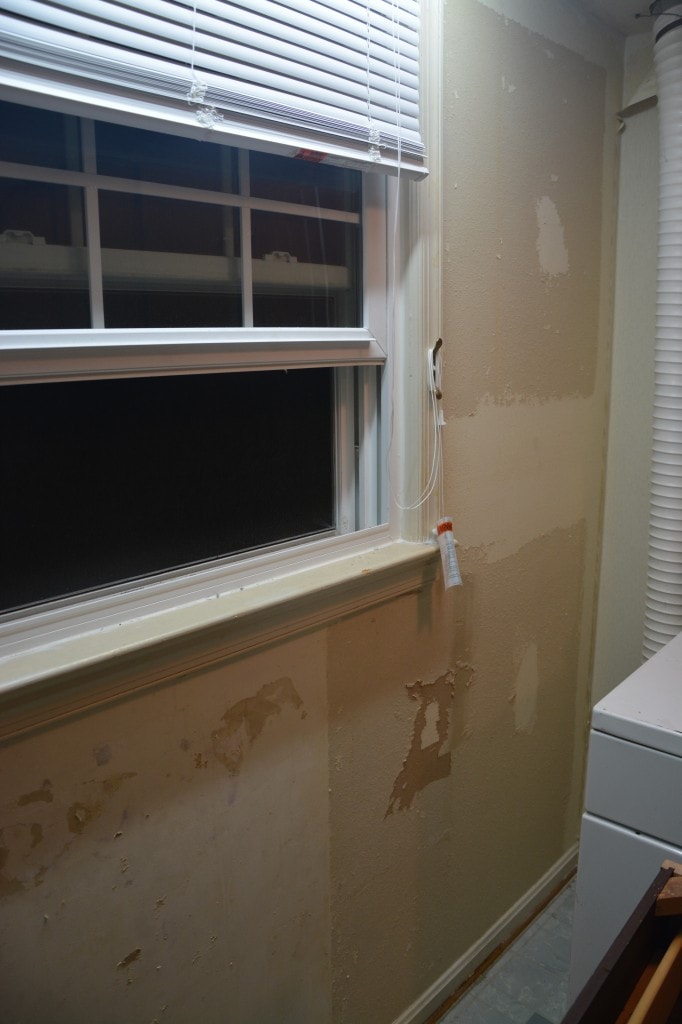
Sanding Haze
This pic is not blurry. This is a sanding haze. Because the walls have to be replastered and sanded, this was the result. Thank God for dust masks!!
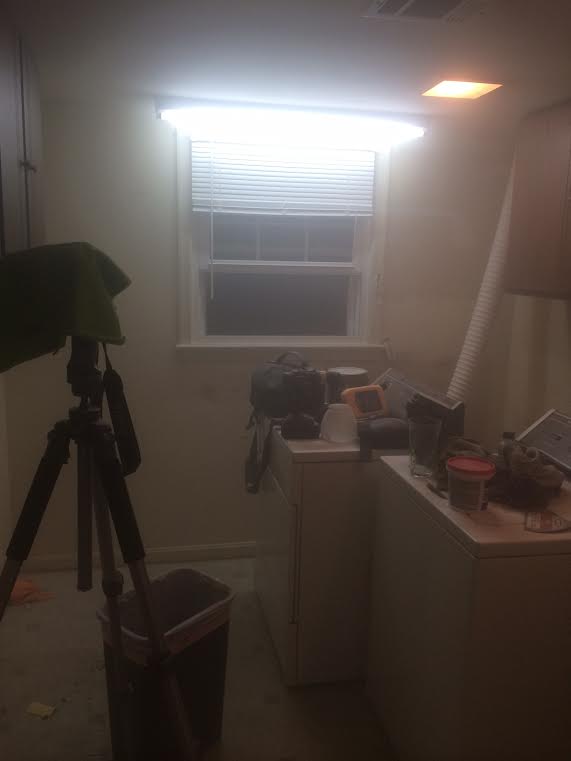
For several evenings, this is how I looked, well into the midnight hours…..

After they were all patched and sanded, I started painted. I can’t even tell you what color this is. It’s a custom mix from a mistake color I bought. But it’s PERFECT for this room!
This washer and dryer was ancient. It took 140 minutes to dry each small load of clothes! HA! Hubby was nice enough to grant me the funds to order a new washer and dryer. Bless him!
OLD WASHER AND DRYER
BRAND-SPANKING NEW MAYTAGS!
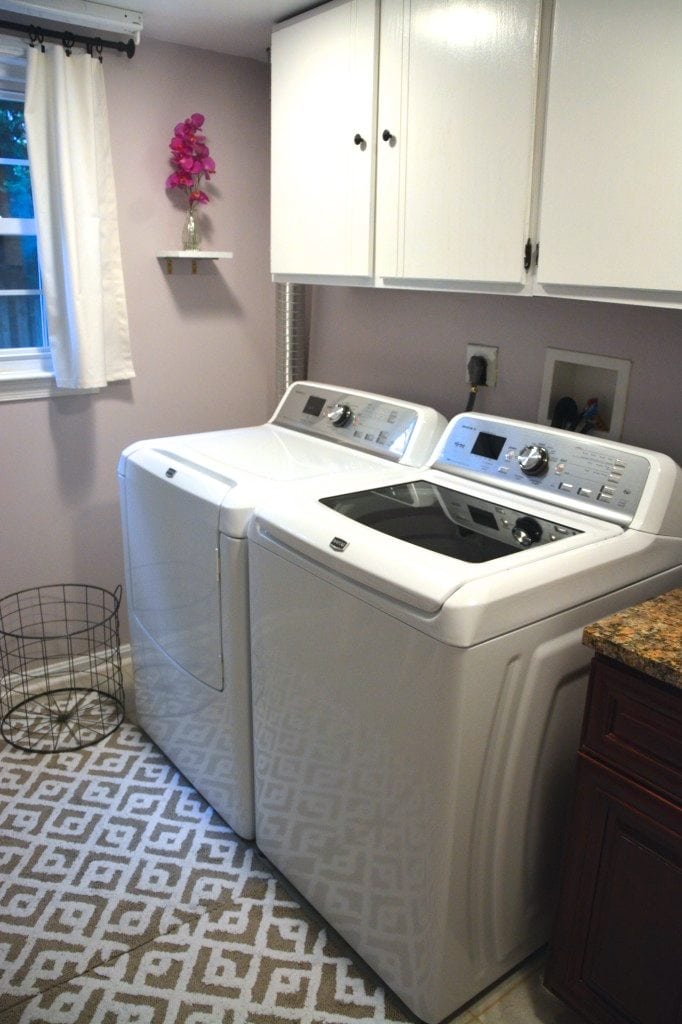
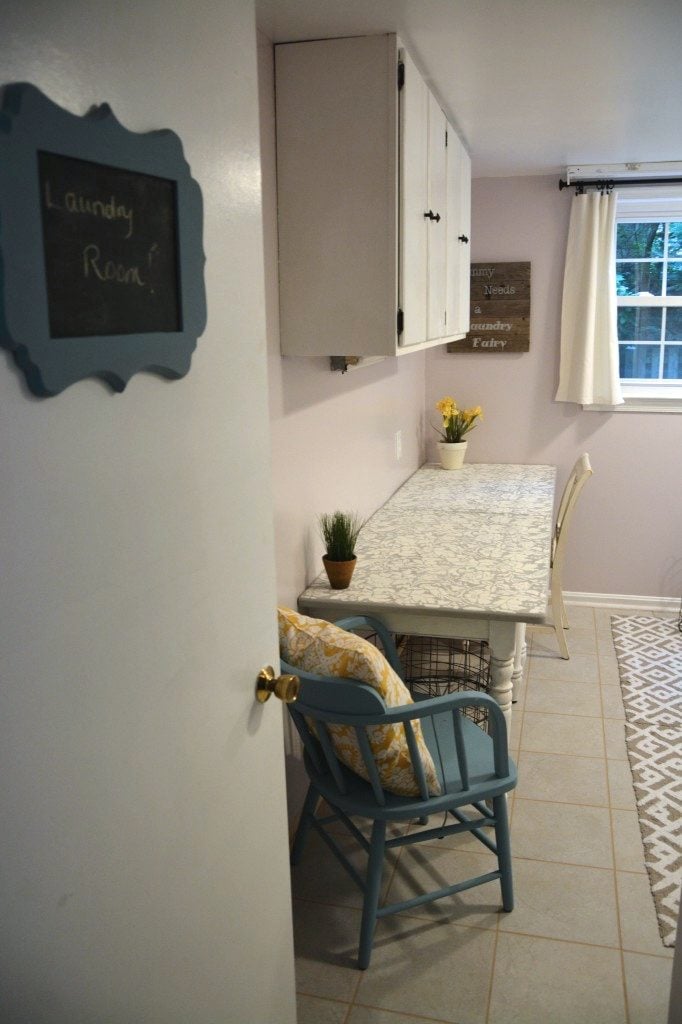
Now, it’s a serene, beautiful shade of lavendar that feels good enough to use in every part of my house!
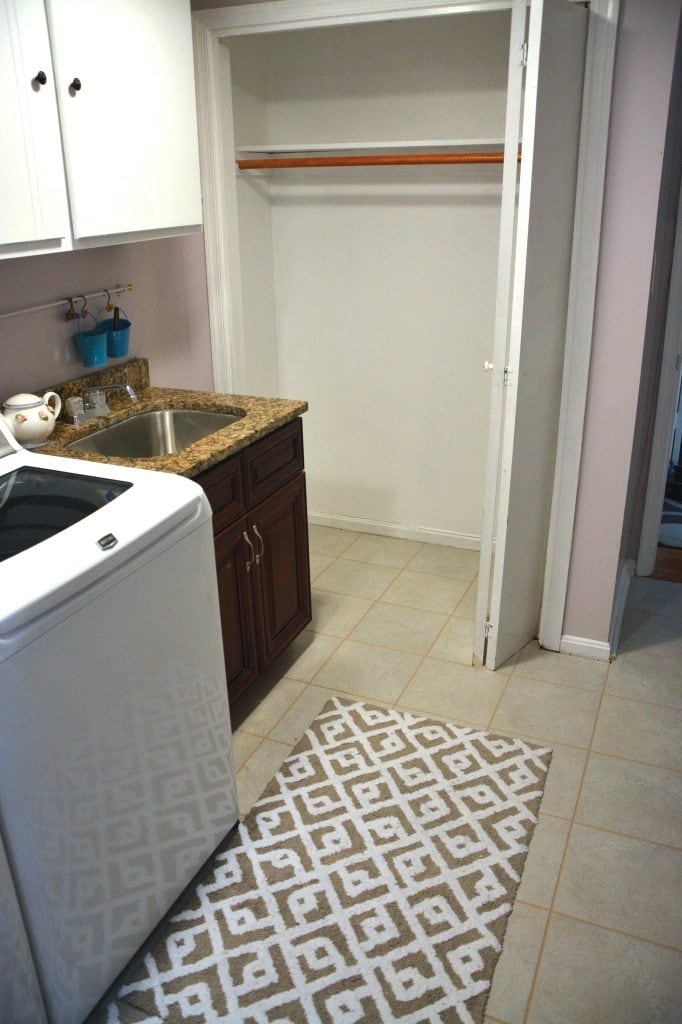
I still have to lay quarter round along the baseboards, and put the doors back on the tracks (can’t figure out the silly doors)….
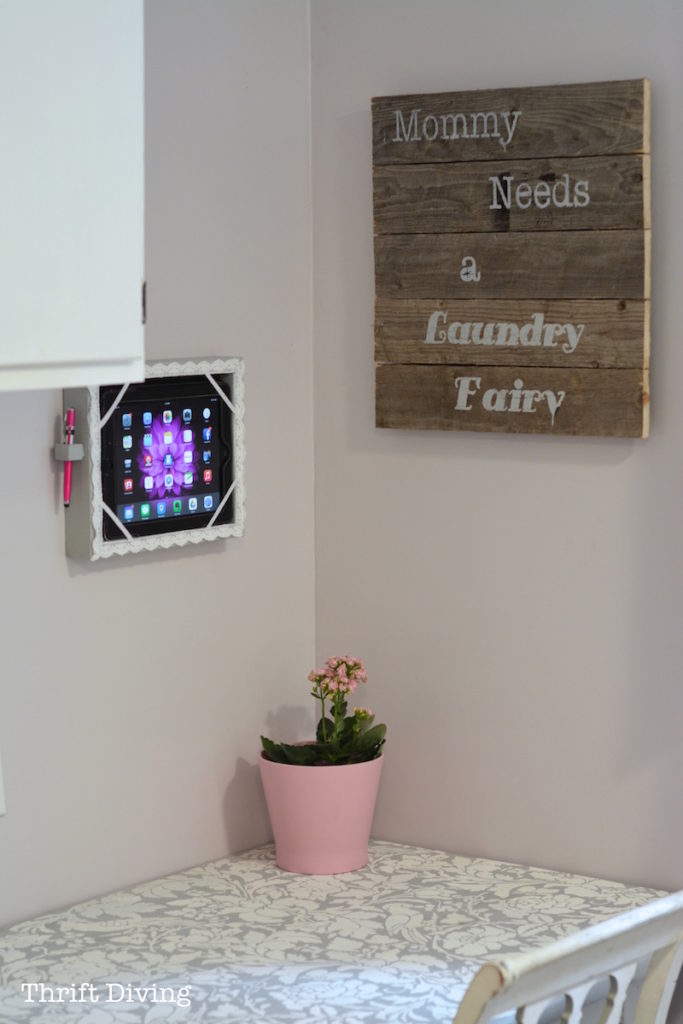
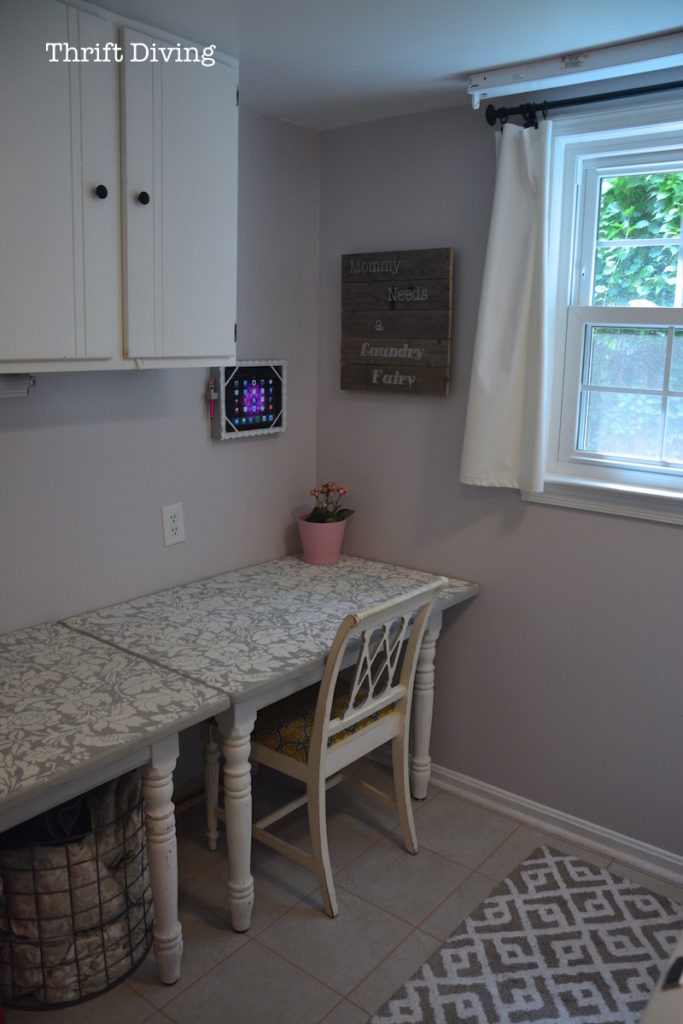
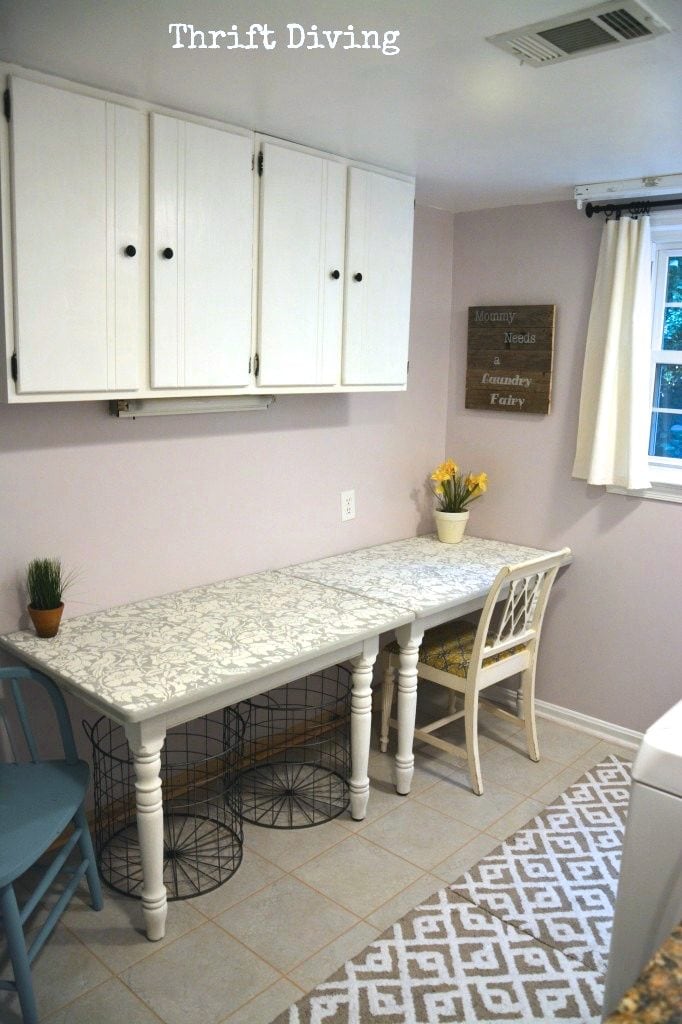
Later, I updated the laundry room to include this DIY tablet holder, which I love to use while folding laundry now!
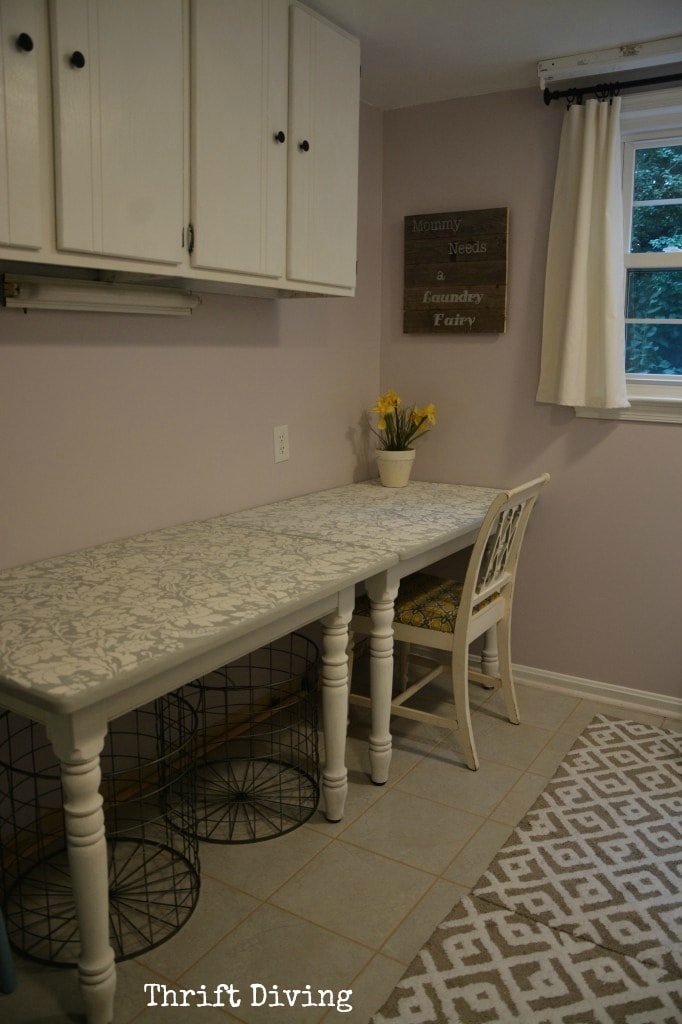
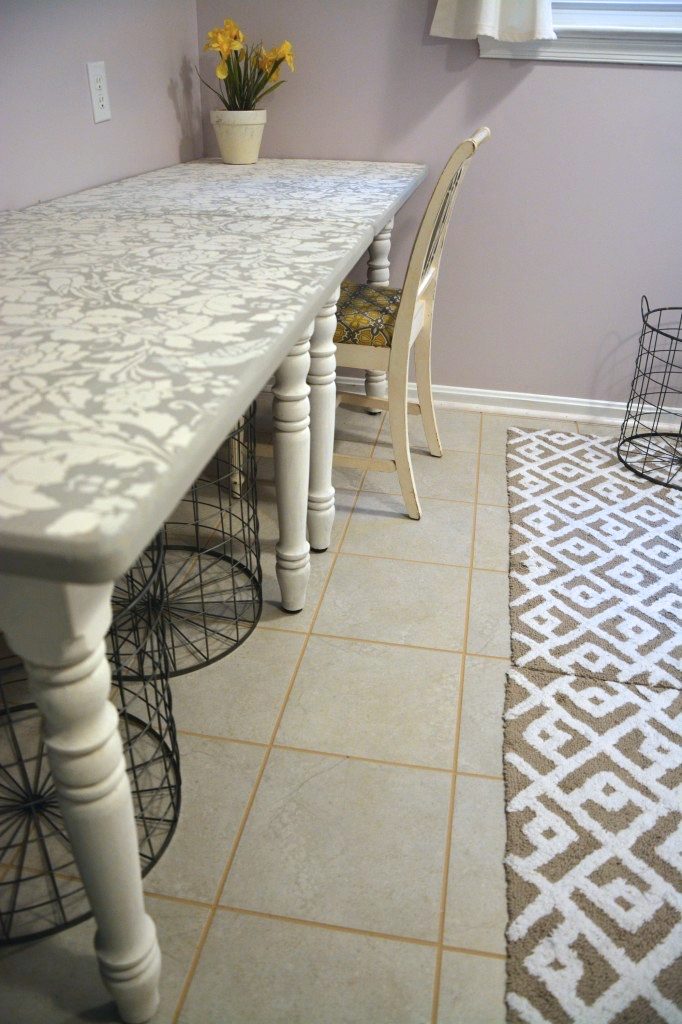
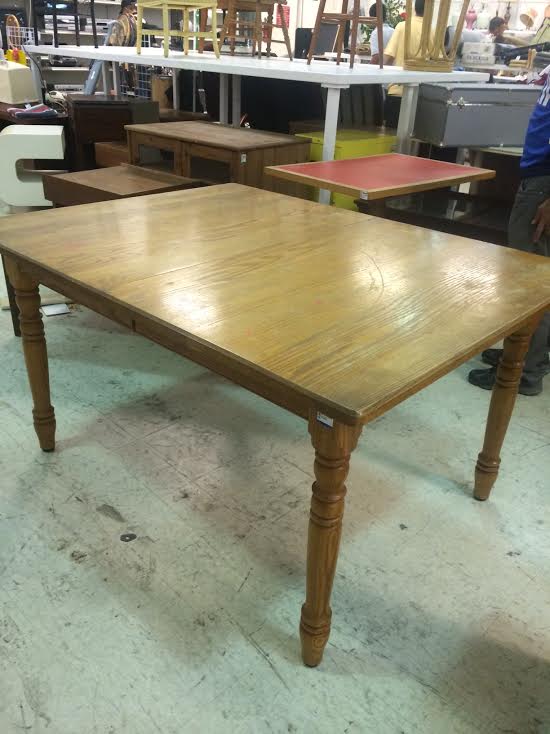
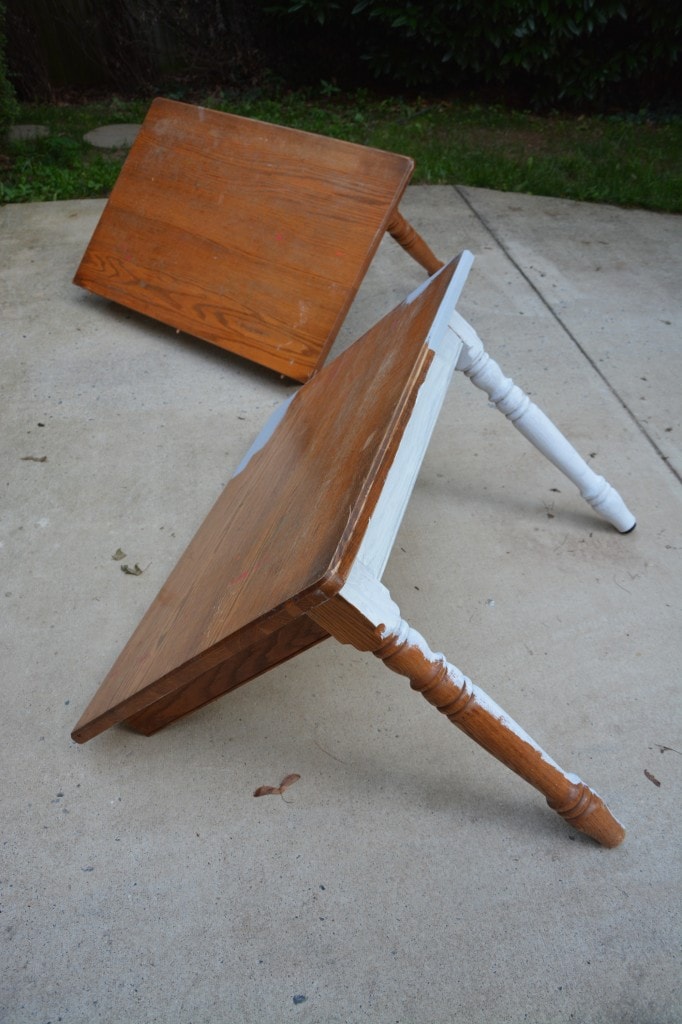
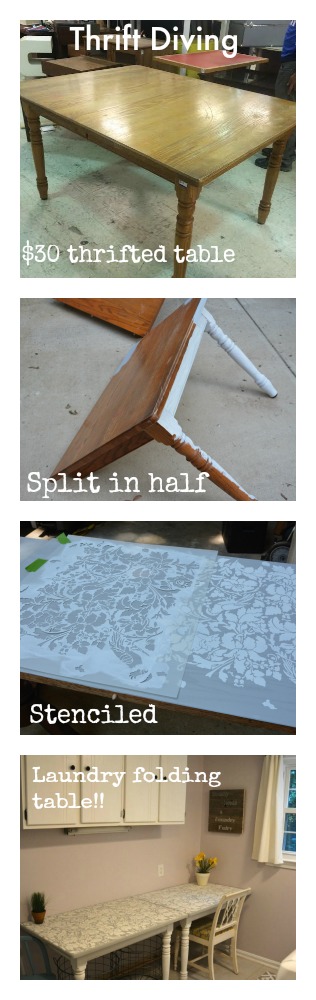
And do you remember this table I found at the thrift store for $30? I told you in a previous post that I was going to cut it in half to create a long folding table with storage underneath for dirty clothes.
It was exactly what I was looking for. . .
BEFORE
Getting coats of Annie Sloan Paris Grey on top and white on the legs….
AFTER
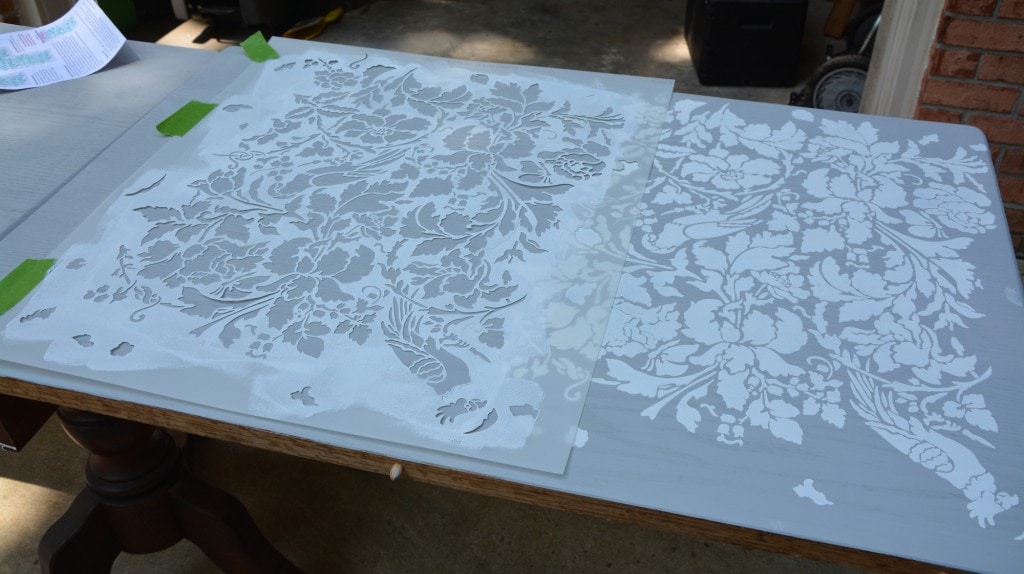
Thanks to Royal Design Studio for providing me with this floral damask stencil, which I used for the pattern on top of the table!! I love it!!! (Stay tuned for the full tutorial and video on my YouTube channel!)
I plan to put casters and liners in those wire laundry baskets under the table and store dirty clothes under there!
CLICK HERE
TO
PIN THIS TABLE! 🙂
And since this post is already waaaayyy long, let me leave you with one more project: the wall art (full tutorial and video coming soon on my YouTube channel!)
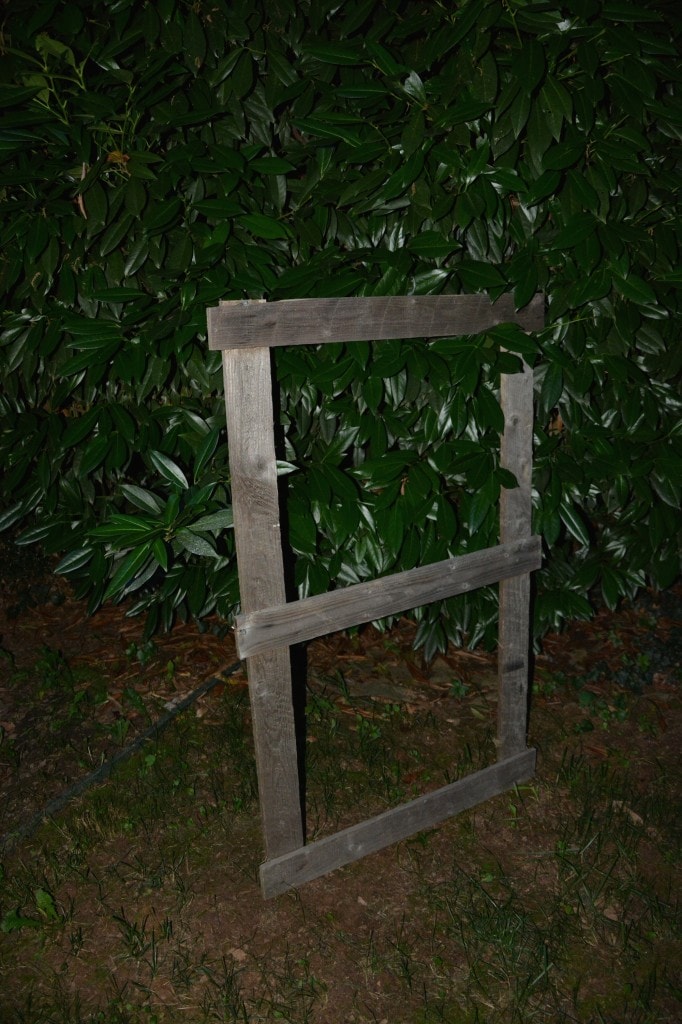
BEFORE
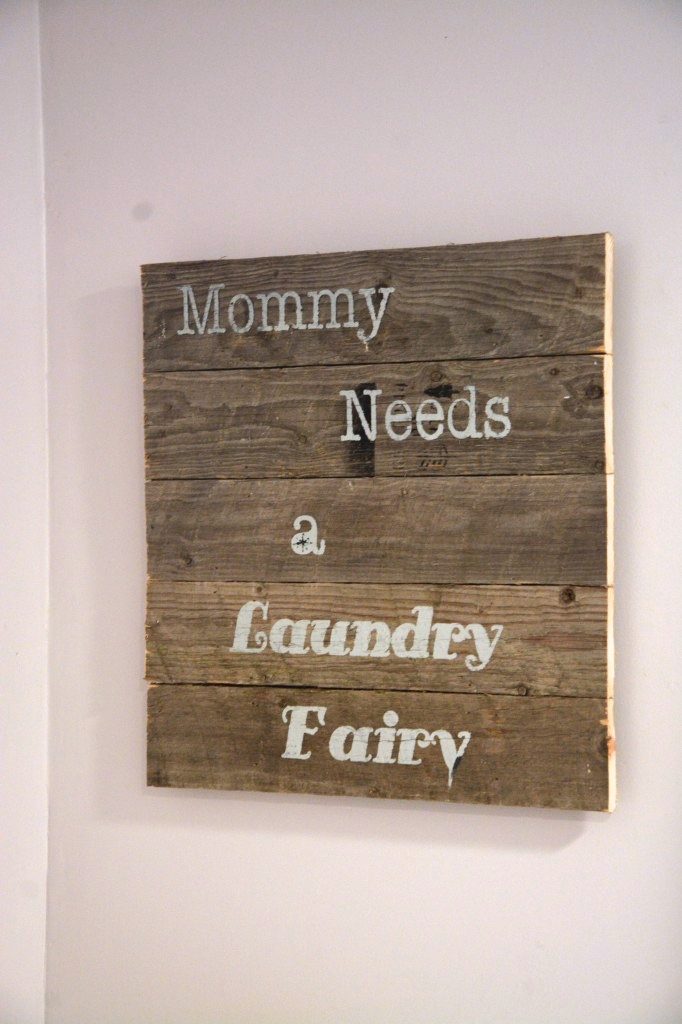
Found almost 2 years ago on the side of the road. I knew I would do something with this one day…..
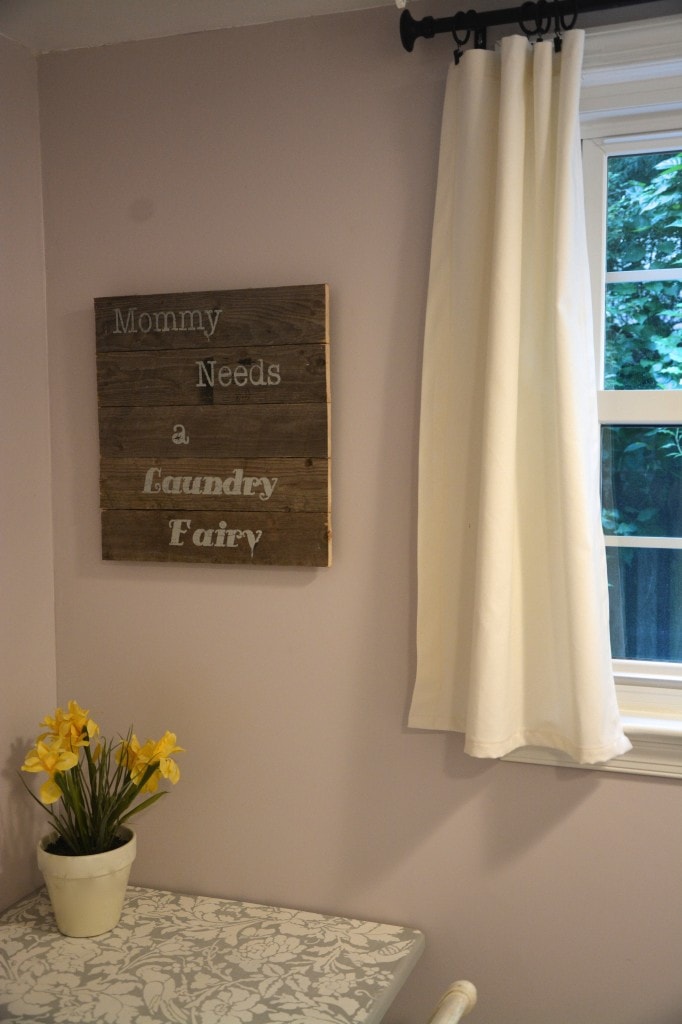
AFTER
And so I did…..”Mommy Needs a Laundry Fairy”………
🙂 Weathered DIY wall art!
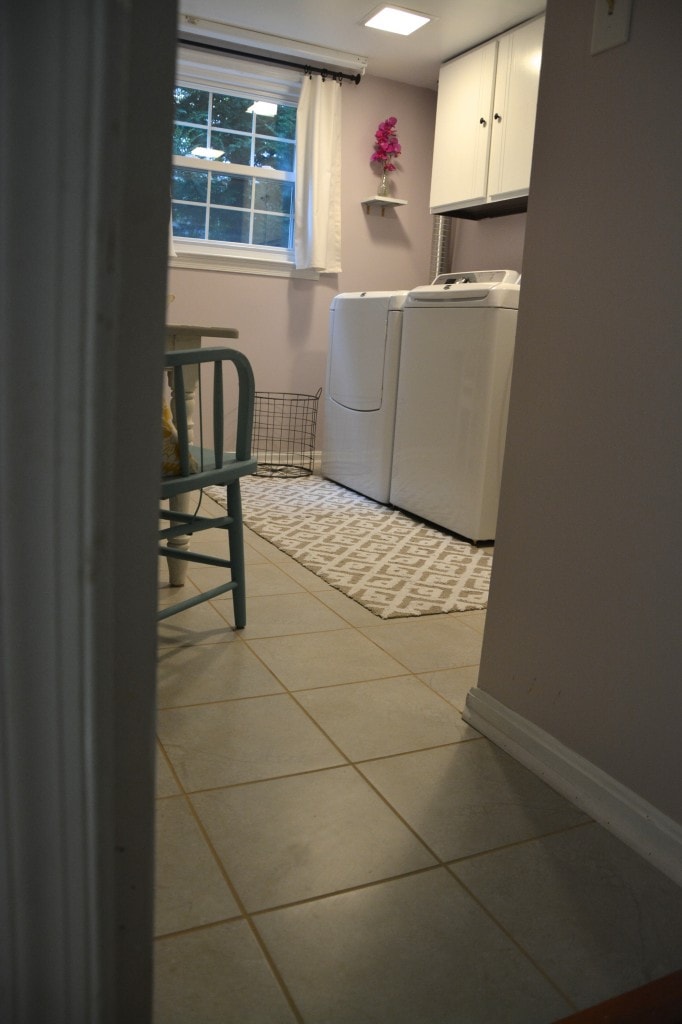
One last quick look at the “BEFORE:
AFTER
Project Details – (More to Come!)
– Paint – Behr – Custom Mix
– Washer and Dryer – Magtag Bravos XL <– Home Depot is having a special to save up to 30% off major appliances! CLICK HERE to check it out.
– Flooring – Sponsored by SnapStone
– Folding Table – thrifted
– Rugs – Home Goods
– Laundry Baskets – Home Goods
– Wall Art – No cost
SPECIAL THANKS: I want to thanks the sponsors that provided materials for me to complete this challenge, as well as the prizes that three lucky participants will be getting when announced on Monday, July 7th!
*SnapStone
*Ryobi Tools
*HomeRight
*Royal Design Studio
I haven’t even calculated how much it cost. I know I should have. But honestly, it was expensive. The washer and dryer were must-haves, and to install the flooring, I had to plop down about $150 in supplies that I needed to actually do the work. I’ll add all that up later. What’s most important is that I LOVE LOVE LOVE this room, and I’m fantasizing about sitting at my folding table watching Orange is the New Black while folding hubby’s drawers. 🙂
So what do you think?!?!?! Do you love it as much as I do!?! And who’s ready for the next round of room challenges??
Sign up below and I will email you when the next round of 30-Day Room Challenges are starting!
![]()

Download the 5 freebies!

Thrift Diving inspires women to decorate, improve, and maintain their home themselves...using paint, power tools, and thrift stores! Use these 5 printables, checklists, and ebooks to get started!

Beautiful laundryroom makeover! Loved how you were able to create two lovely tables from one. Your color choice of liac is so refreshing I chose this color for my bedroom two years and it is so relaxing to me.☺ I’m so inspired by your talent and creativity. Since covid has invaded our lives I’m looking forward to doing some new projects indoors🤗
Aww, thank you so much, Pat! I don’t even remember the color I used on the laundry room, and I need to figure it out, because my youngest son is using this space for his Zoom schooling. And he’s marked up the wall by rubbing the chair against it. SIGH…. Now I’m like, what custom color did I use..?? LOL. Oooh, I love the idea of a lilac bedroom! I’ve had the same color for 10 years. I may have to try that for my bedroom! I am ready for a change, too. We are spending so much time indoors, it’s time to change it up since that’s the only thing we can control right now. LOL. Thanks for commenting!!
You did an amazing work. Such an inspirational transformation!I like the idea of the tablet holder. How many days did you spend on this makeover?