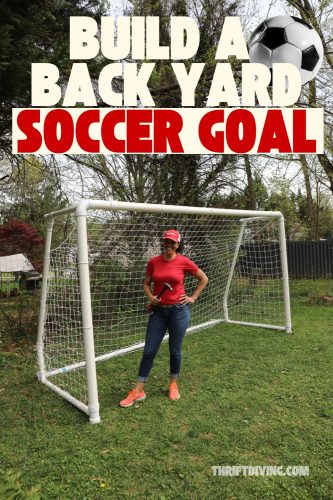
Build a Backyard Soccer Goal: Step by Step Tutorial!
This backyard soccer goal project was sponsored by Arrow Tool Group.
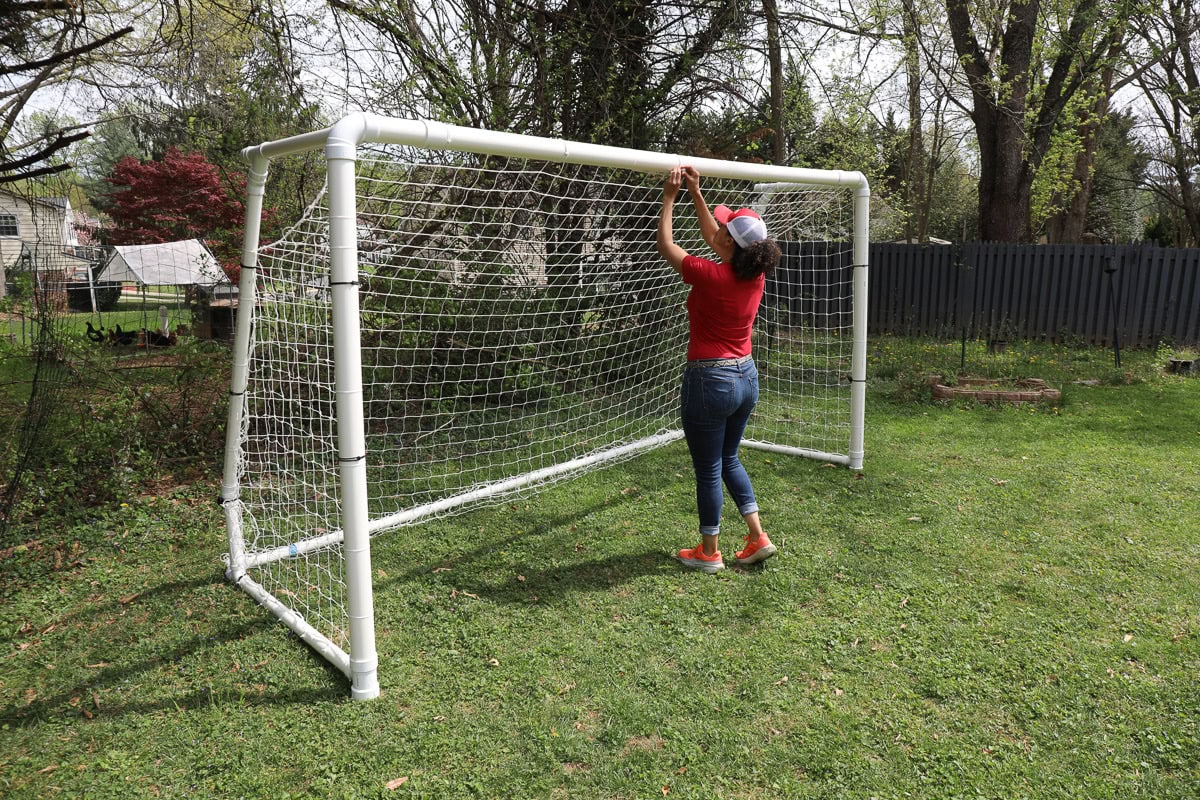
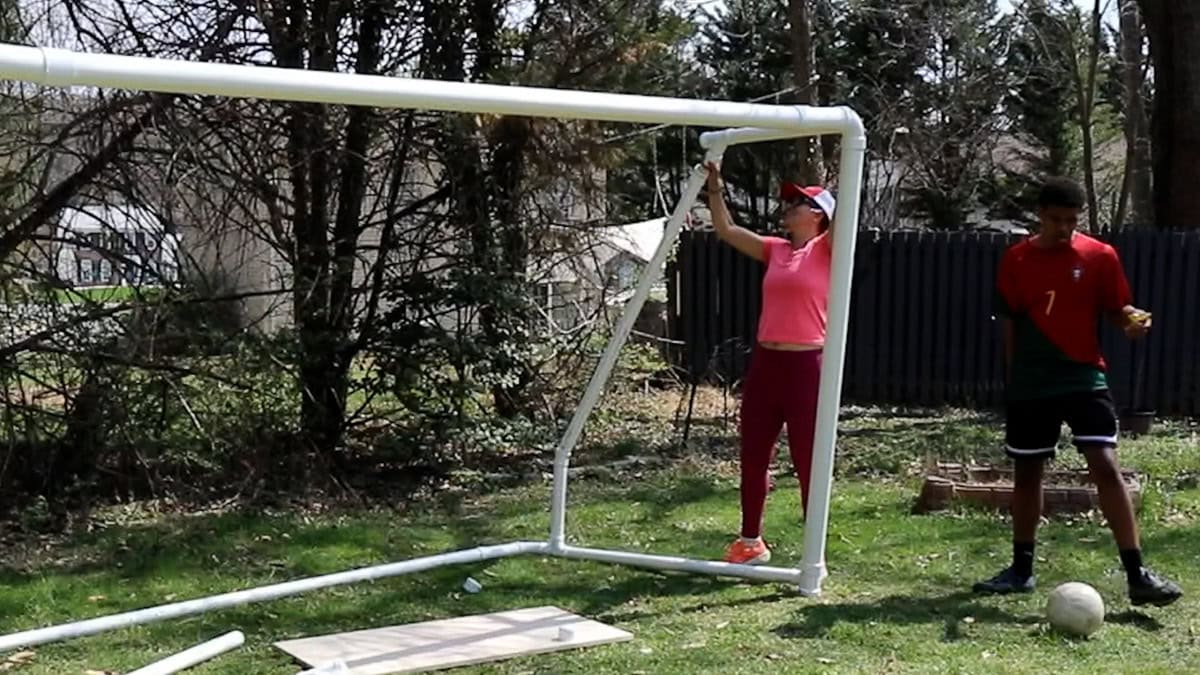
The size of my backyard on this .24 acre lot was one of the things that drew me to my home in 2010 when we bought it. It turned out to be ample space for backyard projects, such as my 16’x26′ “she shed,”….a large gazebo with a floating deck…and now the latest addition, this oversized 12’x 6′ backyard soccer goal made from PVC! I’m thankful we’ve had enough space to add so many fun things to extend our outdoor living and recreational space!
My 14-year-old soccer player once called me a “middle-aged soccer mom.” He thought he was being funny (some would say he was being mean-spirited), but little did he know, it was a compliment!).
I’m an over-zealous soccer mom, in fact! Which is why when Arrow Tool Group asked my son and me to get ready for the big game starting Summer 2026, I didn’t hesitate. Yes, let’s build a backyard soccer goal. We have the space. And we’re going to make a couple of soccer training rebounders, too. Turning my backyard space into a training yard for my avid soccer fan and player is something that a middle-aged soccer mom says, “Let’s goooo!”
Save this project to Pinterest!

I have never built a backyard soccer goal, so I did a little bit of research and found that PVC is the easy “go-to” for the project. I found a couple of YouTube videos to help lead the way, along with gathering my stash of Arrow tools, and I started planning and cutting.
My son, Kojo, chipped in, but honestly?? He did more playing than helping. But spending that time in the backyard with him brought us even closer, and I’m sure it’s a project we’ll look back on with fond memories.
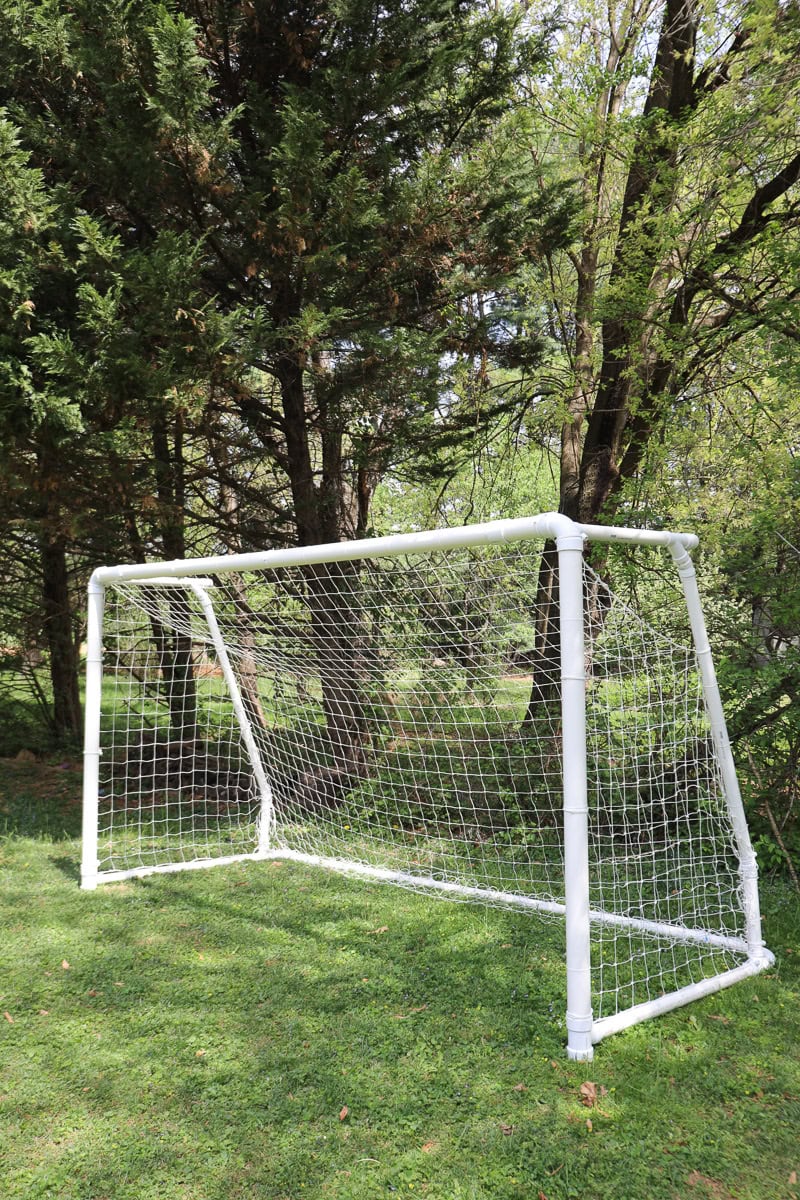
Okay, so let’s jump into how I created our 12′ x 6′ backyard soccer goal, with rebounders!
WATCH: Build a Backyard Soccer Goal!
You can also find the DIY soccer rebounder tutorial on YouTube HERE.
Tools
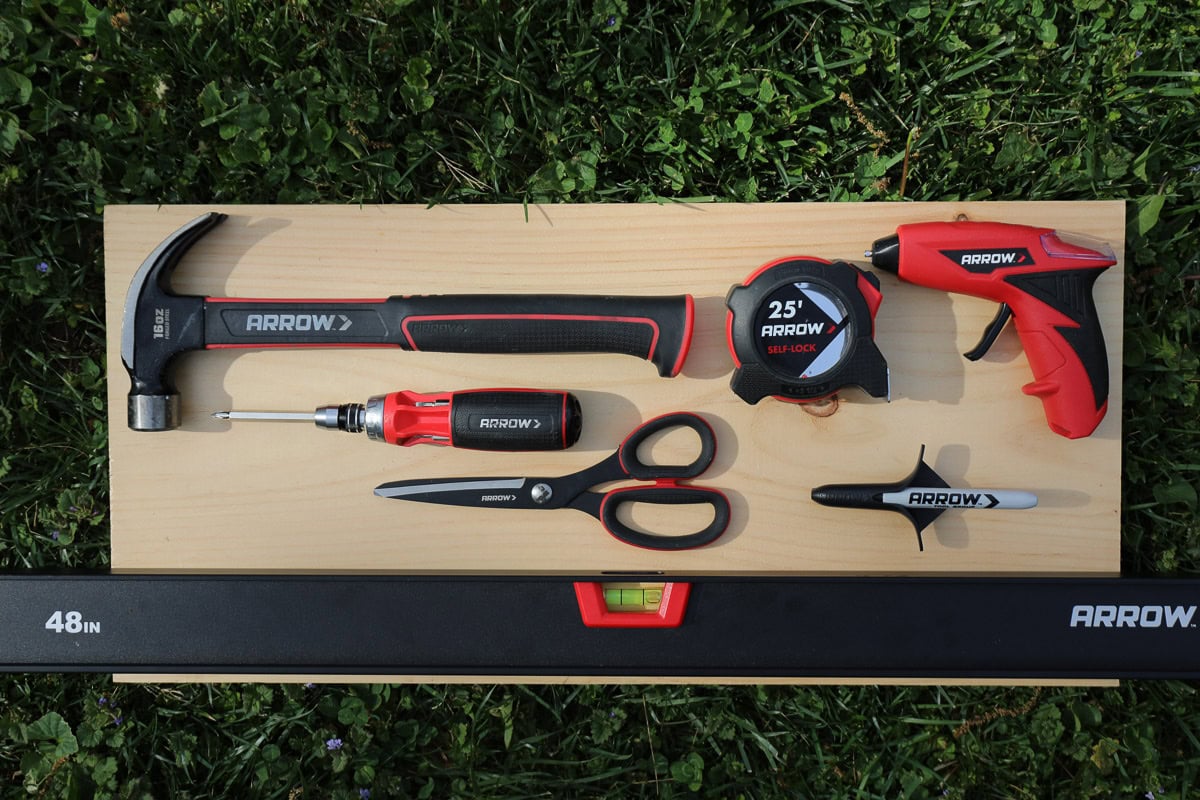
To create this backyard soccer goal, I’m using the following Arrow Tool Group tools, including WORK PRO power tools:
- Tape measure
- 8″ scissors
- Arrow marker holster
- Screwdriver
- Level
- Hammer
- Glue gun (optional for decorating rebounder)
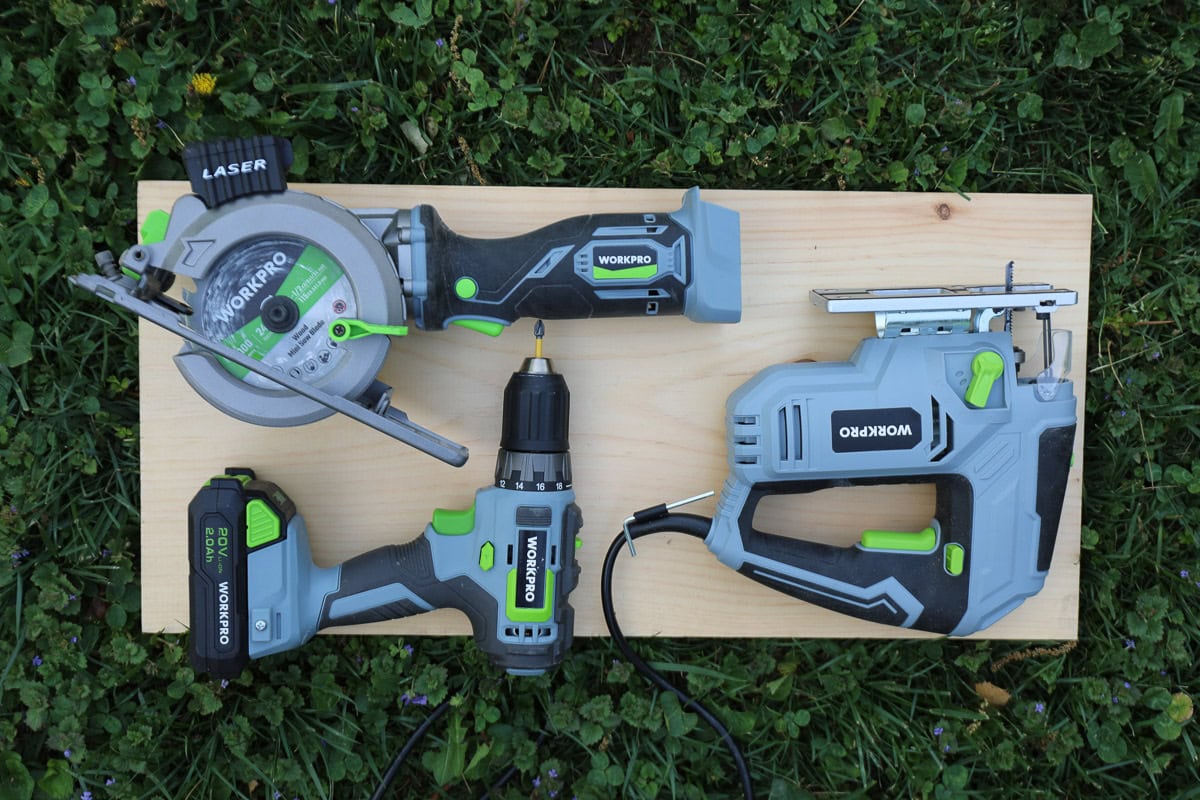
Power Tools
You’ll also need some WORKPRO tools for cutting the PVC and wood for rebounders, along with a power drill if you don’t have a screwdriver:
- Handheld saw
- Jigsaw with scroll blade (optional, if you’re building the soccer rebounders, too)
- Power drill with driving and drilling bits ((optional, if you’re building the soccer rebounders, too)
Materials
You’ll need a few materials, too.
- 3″ PVC pipes (3 total)
- 2″ PVC pipes (4 total)
- PVC Connectors (see parts list below)
- Oversized 12′ x 6′ soccer net
- Soccer backstop net (optional)
- PVC cement
- Zip ties (14″)
- White bungees (6″)
- Sandpaper
- Miter box (optional for holding PVC while cutting)
- T-Rex white waterproof tape
PVC Pieces You’ll Need
Let’s separate these out by the sizes and connectors you’ll need:
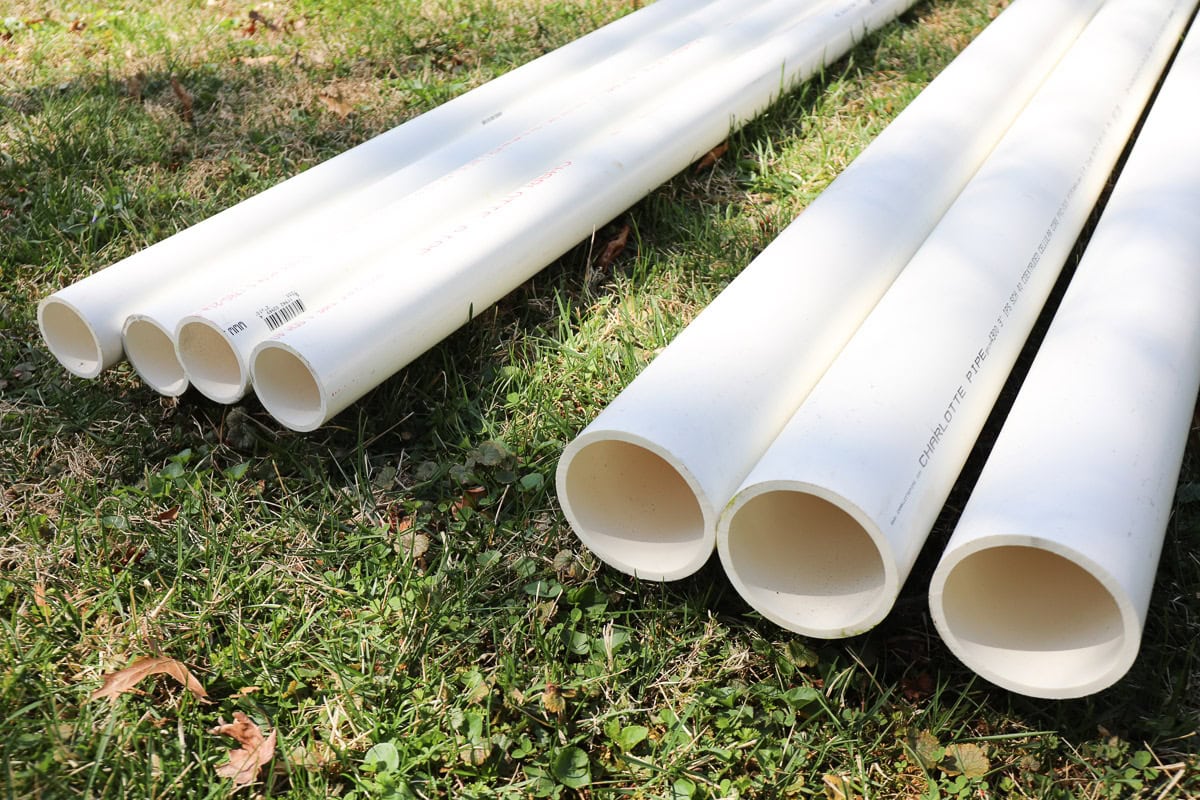
3″ PVC Pipes & Cuts Needed
- Purchase three 10-foot PVC pipes with 3″ diameter, and cut the following pieces:
- One 10-ft piece (no cut needed)
- Two 6-ft pieces
- Two 10″ pieces
2″ PVC Pipes
- Purchase four 10-foot PVC pipes with 2″ diameter, and cut the following pieces:
- One 10-ft piece (no cut needed)
- Two 58″ pieces
- Two 48″ pieces
- Two 24″ pieces
- Two 15″ pieces
- Two 12″ pieces
- Four 2″ pieces
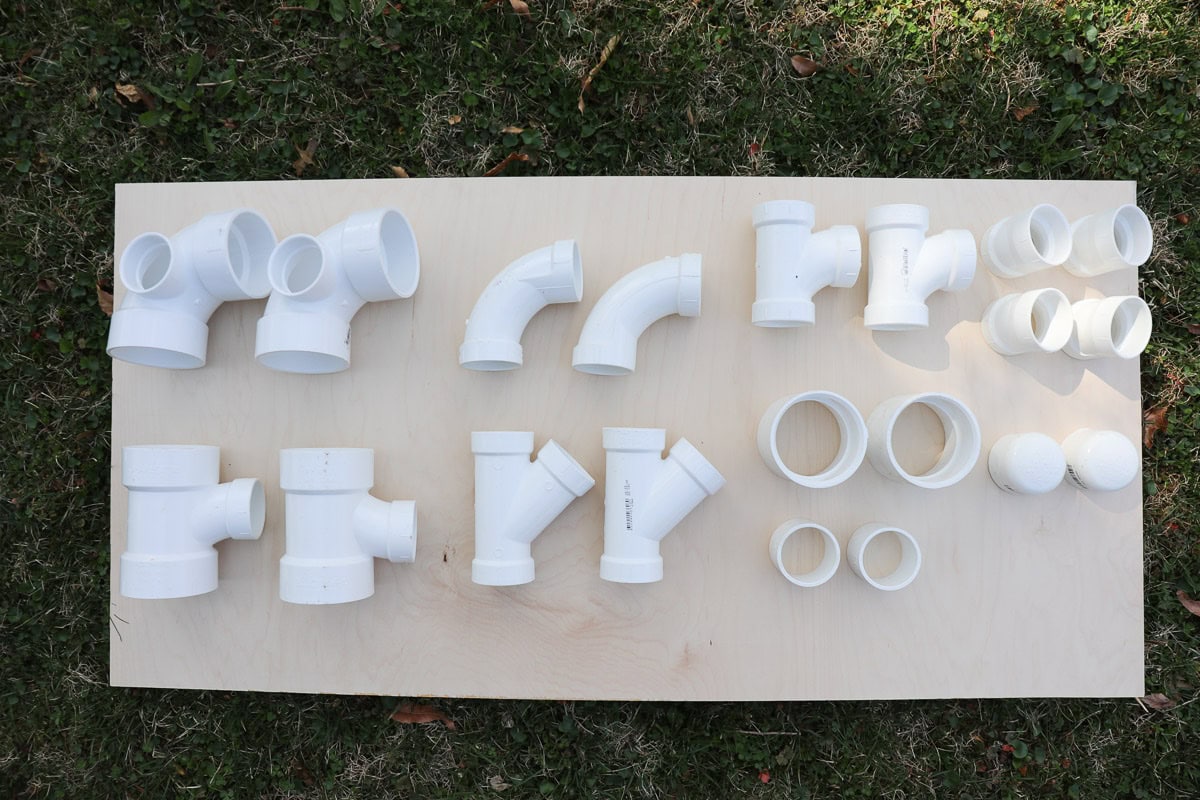
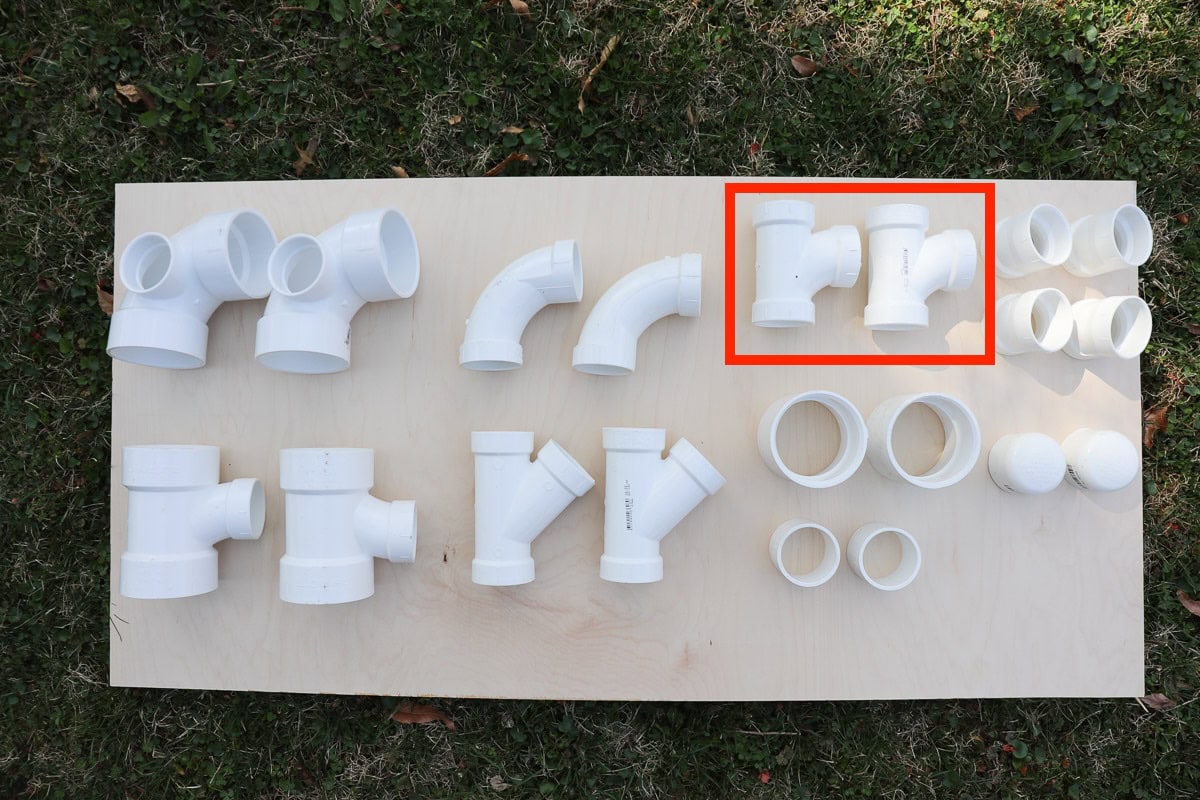
PVC Connectors
- Two 3″ x 3″ x 2″ 90-degree elbow connectors
- Two 3″ x 3″ x 2″ tee connectors
- Two 2″x2″ 90-degree elbow connectors
- Two 2″ wye connectors
- Two 2″ tee connectors
- Four 2″ 22.5-degree elbows
- Two 3″ couplings
- Two 2″ couplings
- Two 2″ end caps
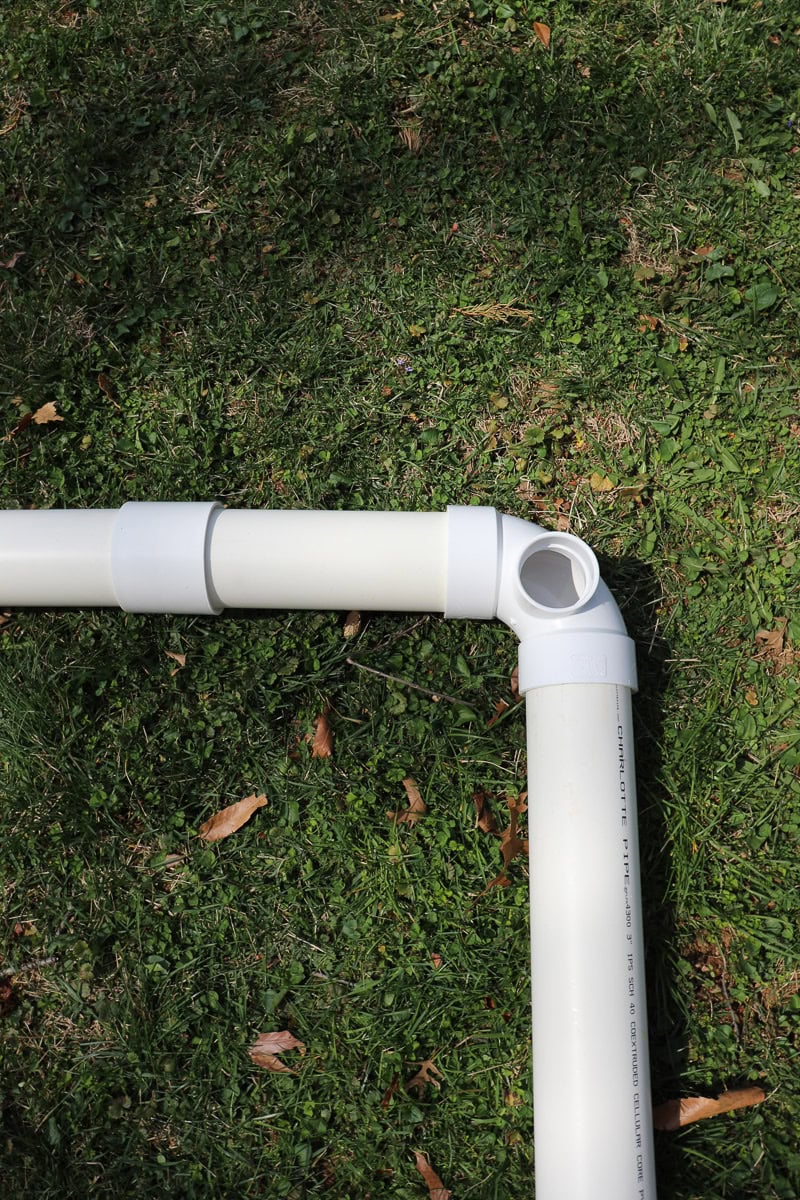
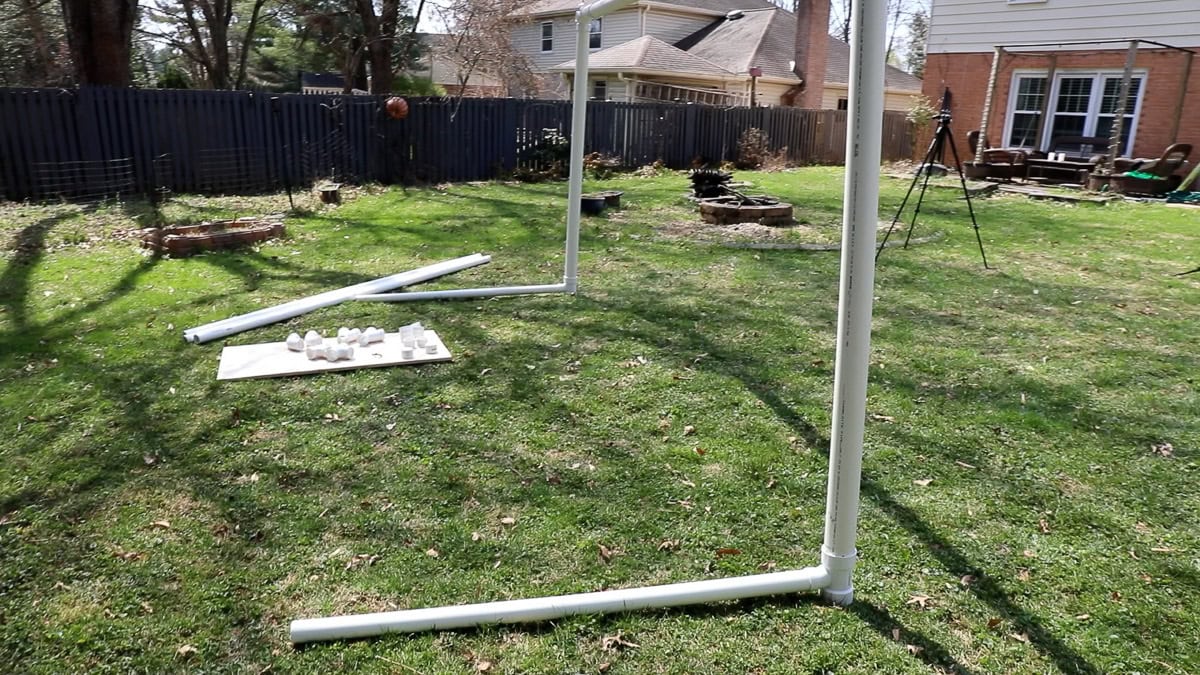
STEP 1: Build the Front Frame of the Backyard Soccer Goal
Cut two pieces of 3″ PVC pipe at a length of 10″ each. The front of the soccer goal needs to be extra sturdy, so 3″ PVC will be used on these parts. Connect one long 10-foot piece of 3″ PVC, with a coupling, to the 10″ PVC, and a right angle corner connector. This will form the top of the soccer goal front face.
Along the sides, dry-fit the 6-foot pieces of 3″ PVC, so that the top corners and soccer goal will look like this when connected:
STEP 2: Attach the Bottom Sides
Only the front face frame of the backyard soccer goal will be 3″ PVC. The sides and back will be 2″ PVC.
Cut two 48″ inch (4-foot) pieces of 2″ PVC for sides that will be close to the ground.
Attach the highlighted connectors to the ends of those 48-inch pieces of PVC.
STEP 3: Assemble the Back Support
Once the sides near the ground have been dry-fit together, let’s assemble the back support of the backyard soccer goal that will rest on the ground.
Cut two pieces of 2″ PVC at 12″ each. Place a 10-foot piece of 2″ PVC on the ground. Using a 2″ coupling, join the shorter pieces to either side of the 10-foot piece.
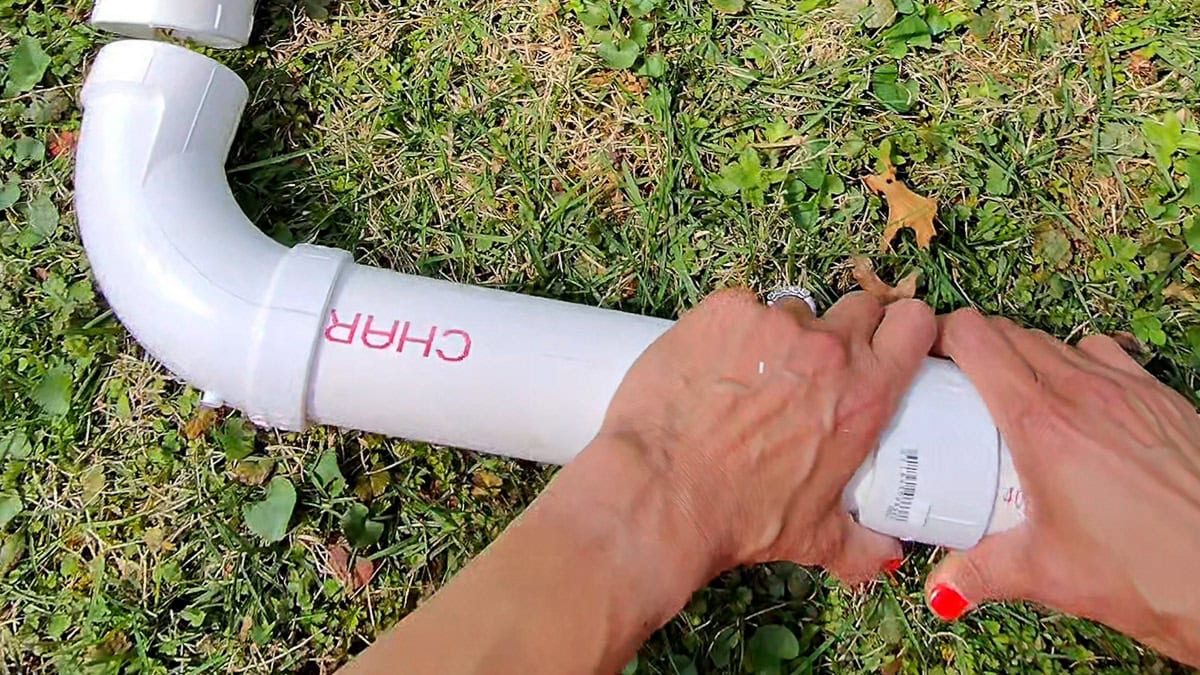
Next, attach a 90-degree elbow joint to the end. You’ll need a 2″ piece of PVC to join the elbow and the other connector from the previous step.
If the piece is a little shorter than 2″, that’s okay. As long as there is a small piece that joins these connectors.

In those connectors near the ground, cut two 15″ pieces of 2″ PVC.
STEP 4: Assemble the Top Sides of the Backyard Soccer Goal
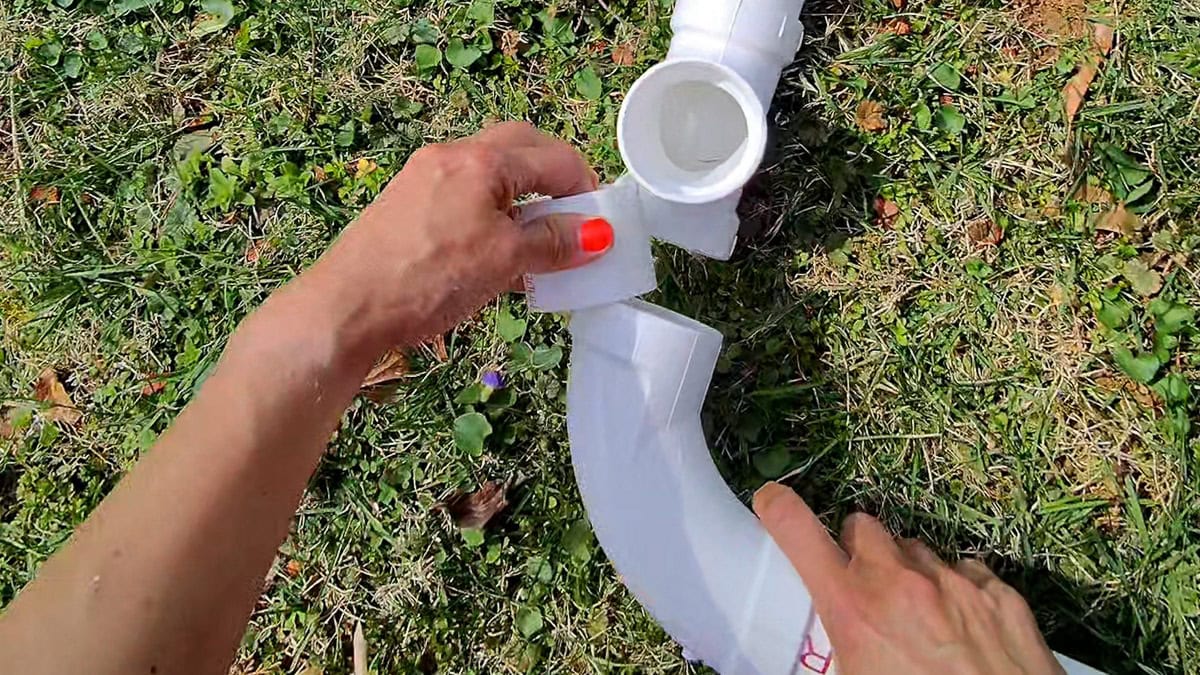
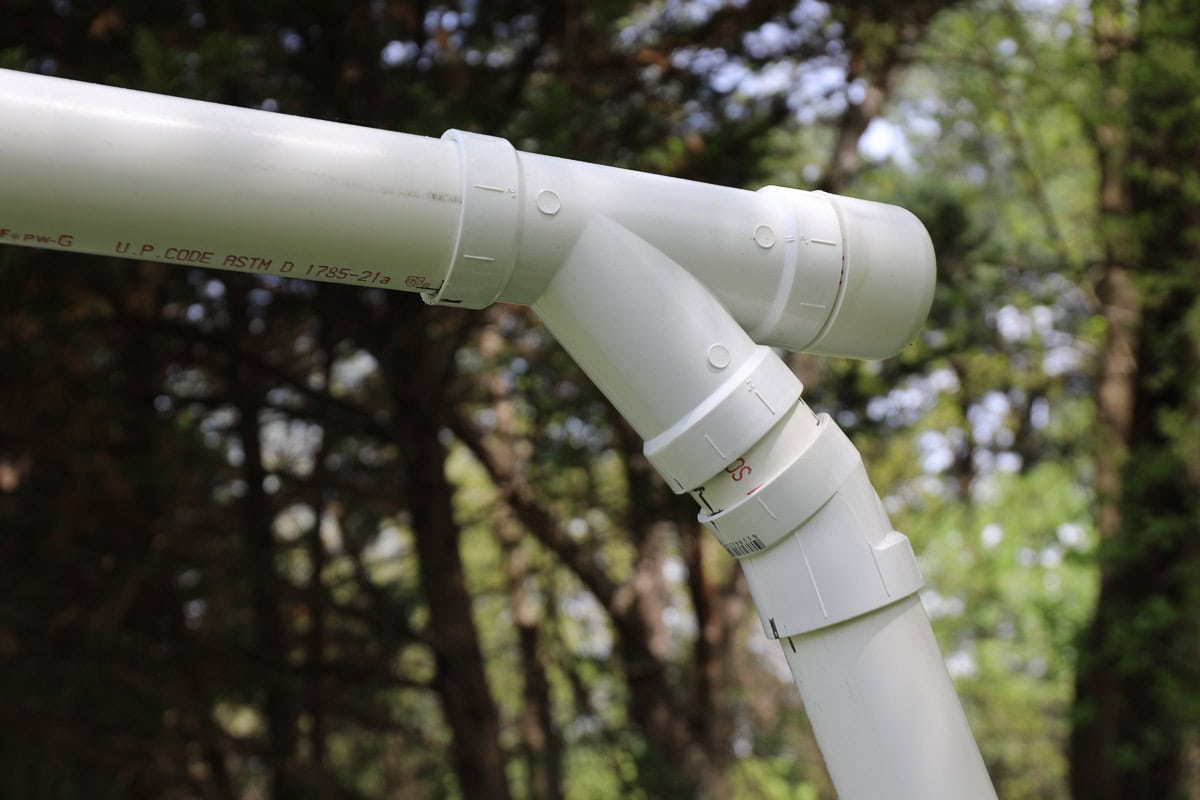
Extending from the top corners of the soccer goal will be 24″ pieces of 2″ PVC pipe on each side. At the end of the 24″ piece will be a 2″ wye connector.
At the end of the 2″ wye connector, you’ll need a 2″ piece of PVC to connect a 22.5-degree elbow joint connector, as shown in my hand. These 22.5-degree connectors are standard and can be found with all the PVC parts in the plumbing department at your local hardware store. (The other end of the 2″ wye connectors will be capped off with a 2″ small piece of PVC and a 2″ PVC cap.
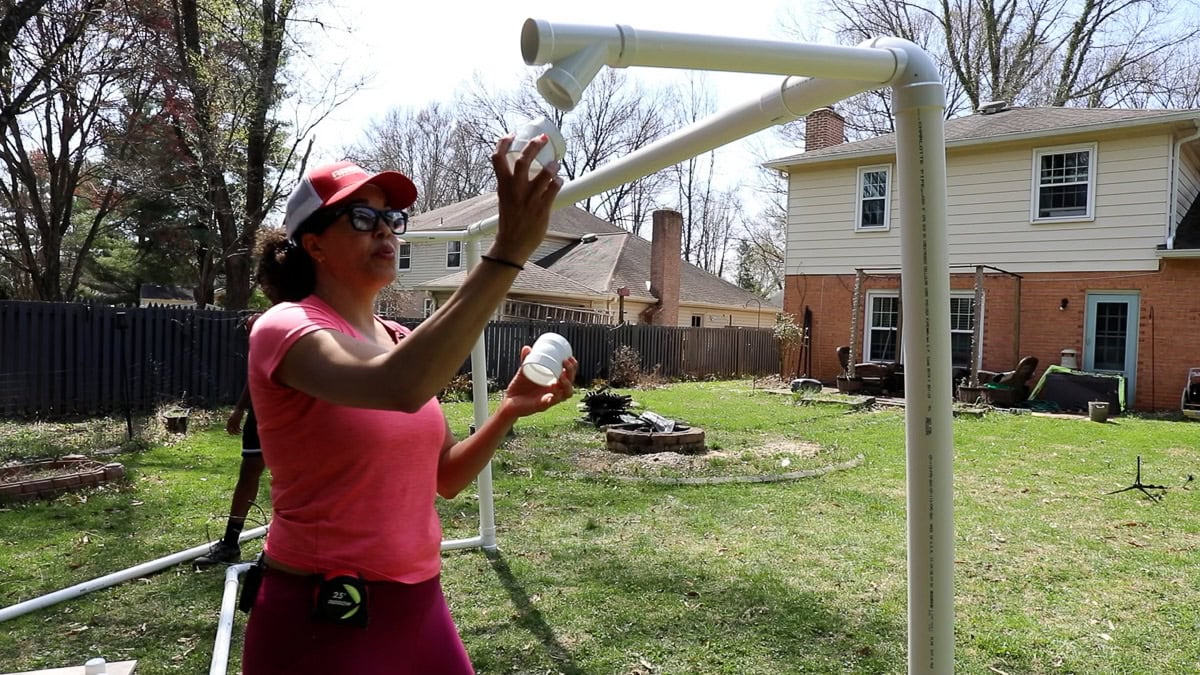
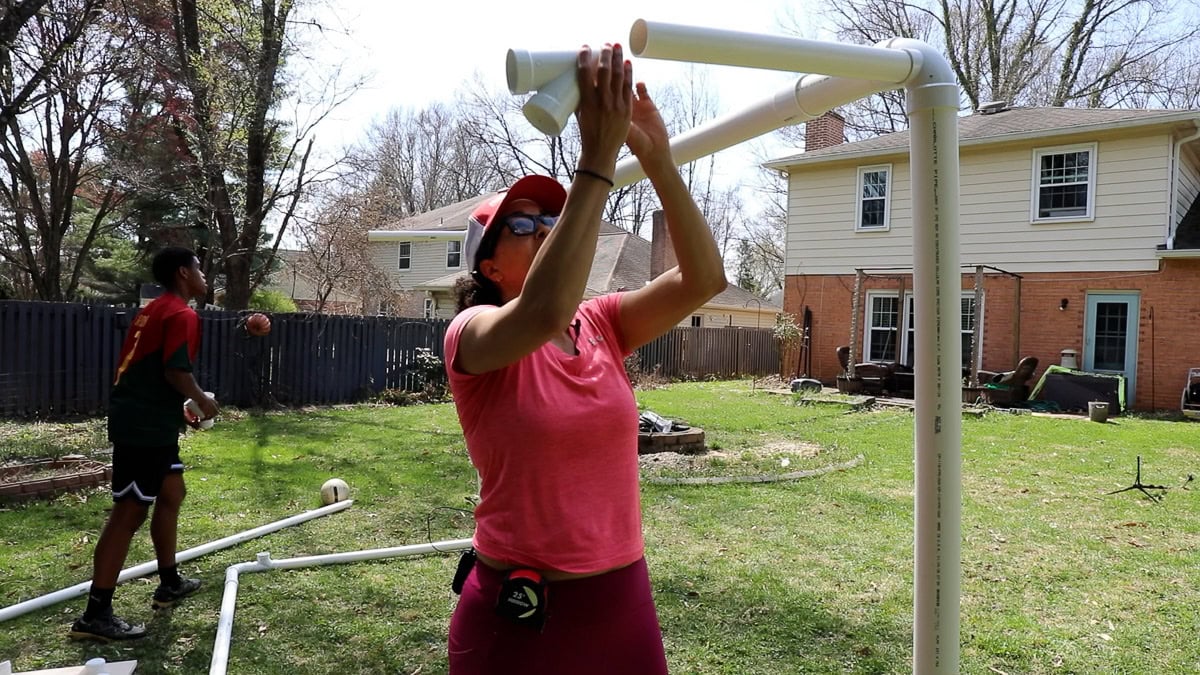
Place another 22.5-degree elbow on top of the 15″ piece of PVC sticking up. Next, cut two 58″ pieces of 2″ PVC. This longer piece will connect between the two 22.5-degree elbows.
Add a 2″ end cap to the end of the wye connector at the top.
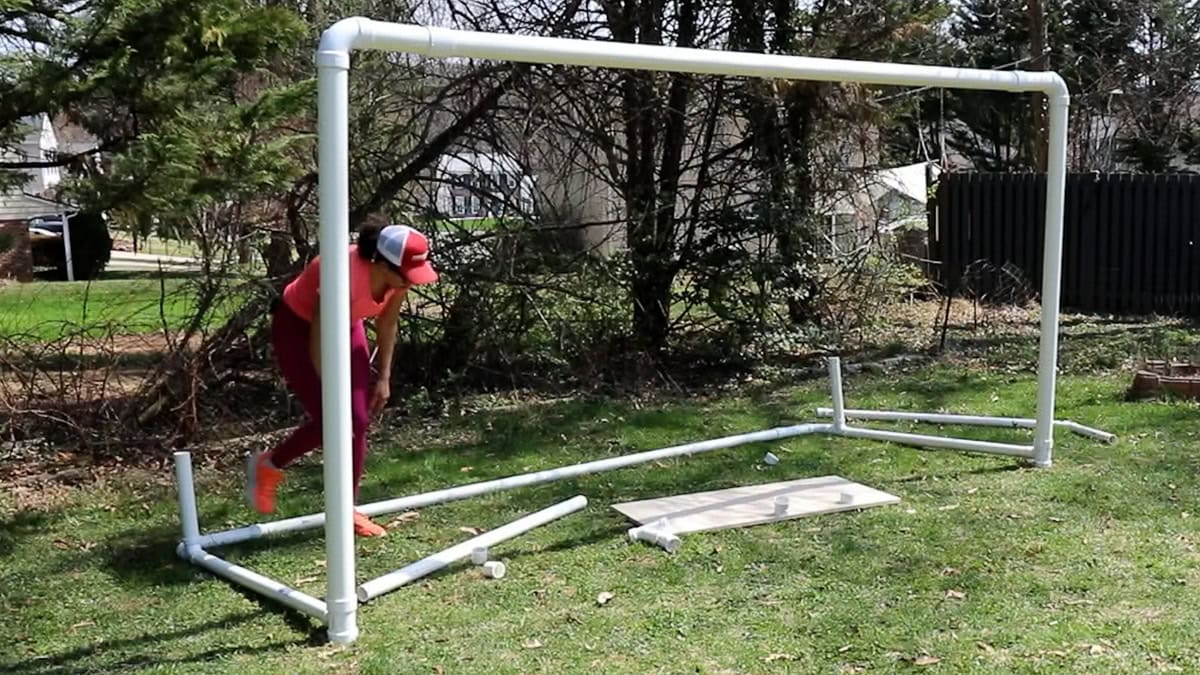
Your backyard soccer goal “dry fitting” should stand on its own!
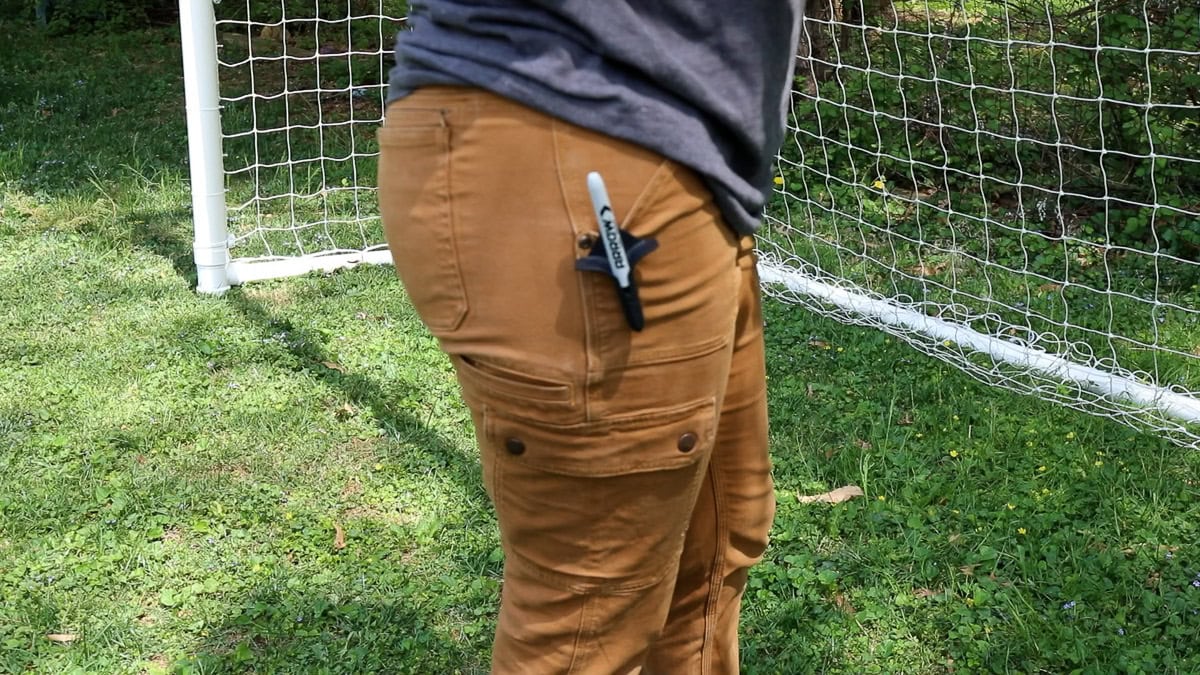
STEP 5: Mark All of Your Joints with a Sharpie
This part is pretty important. Go to each joint and make sure they’re straight and even. Then, use a Sharpie to mark each joint. Marking the parts with matching lines ensures you assemble them straight and even when it’s time to glue everything together with PVC cement.
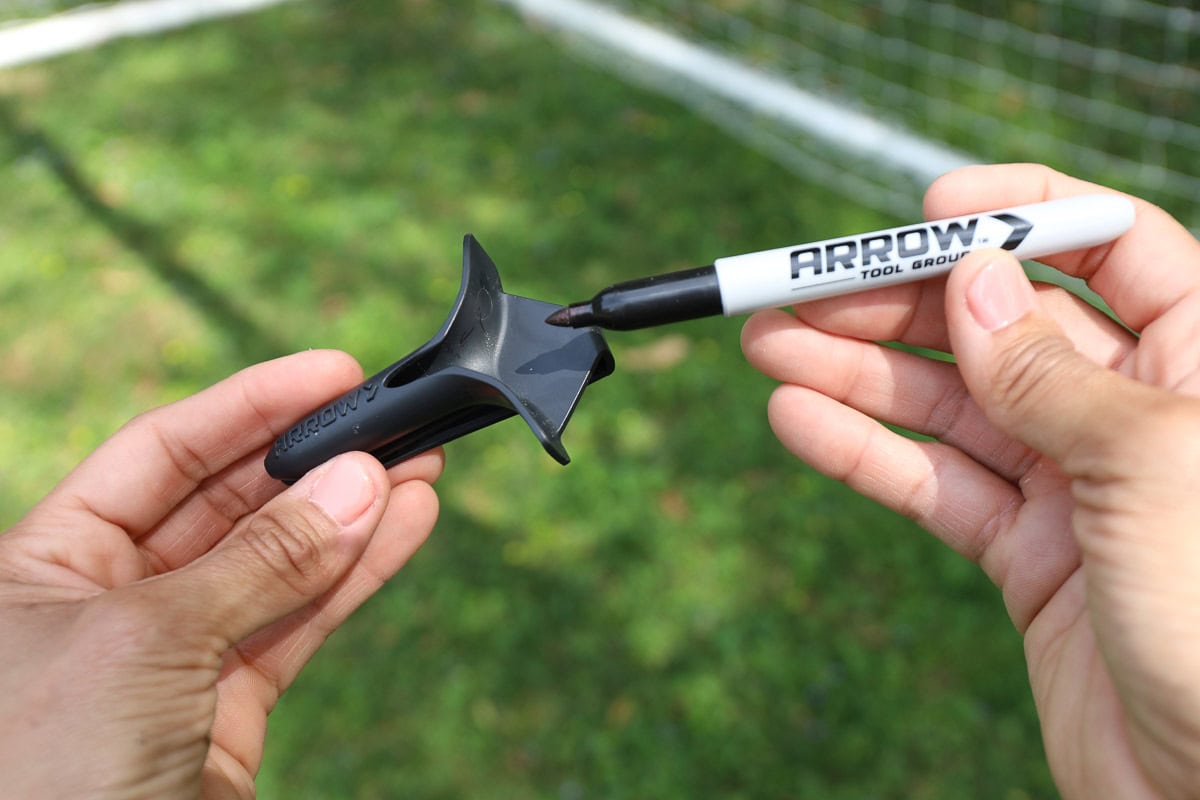
This is where the Arrow marker holster is so important, because you’ll need quick, easy access to the marker! With this on your hip (or hat brim), you’ll be able to move quickly without looking for your marker. 🙂
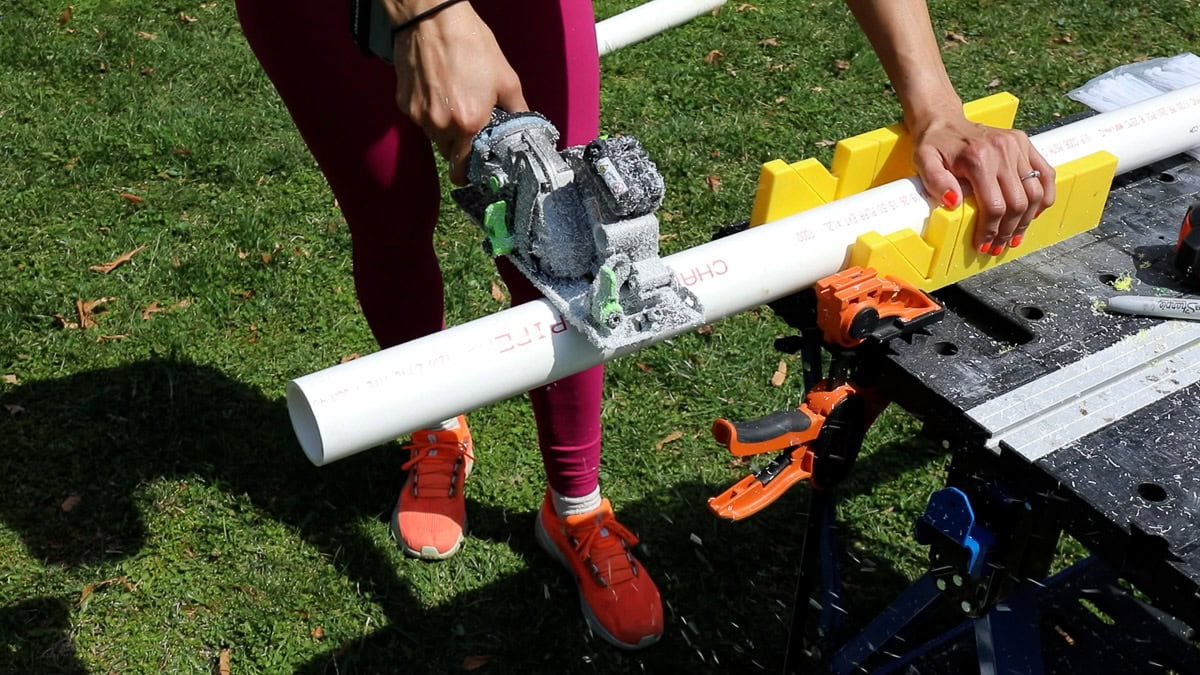
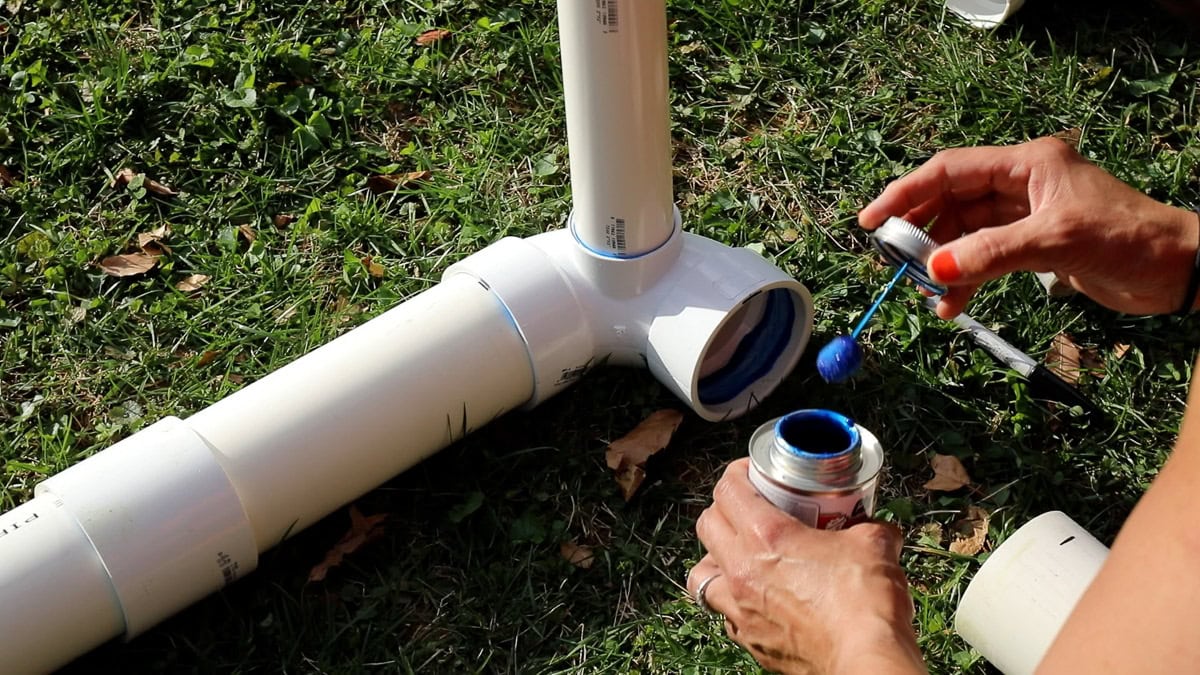
STEP 6: Use PVC Cement to Secure the Joints
Use sandpaper to roughen up the ends of the PVC and within the connectors, then add a layer of PVC cement before gluing each piece together. Be careful here, because PVC cement sets within seconds! If you make a mistake, you could end up ruining a joint and need to purchase more PVC or connections.
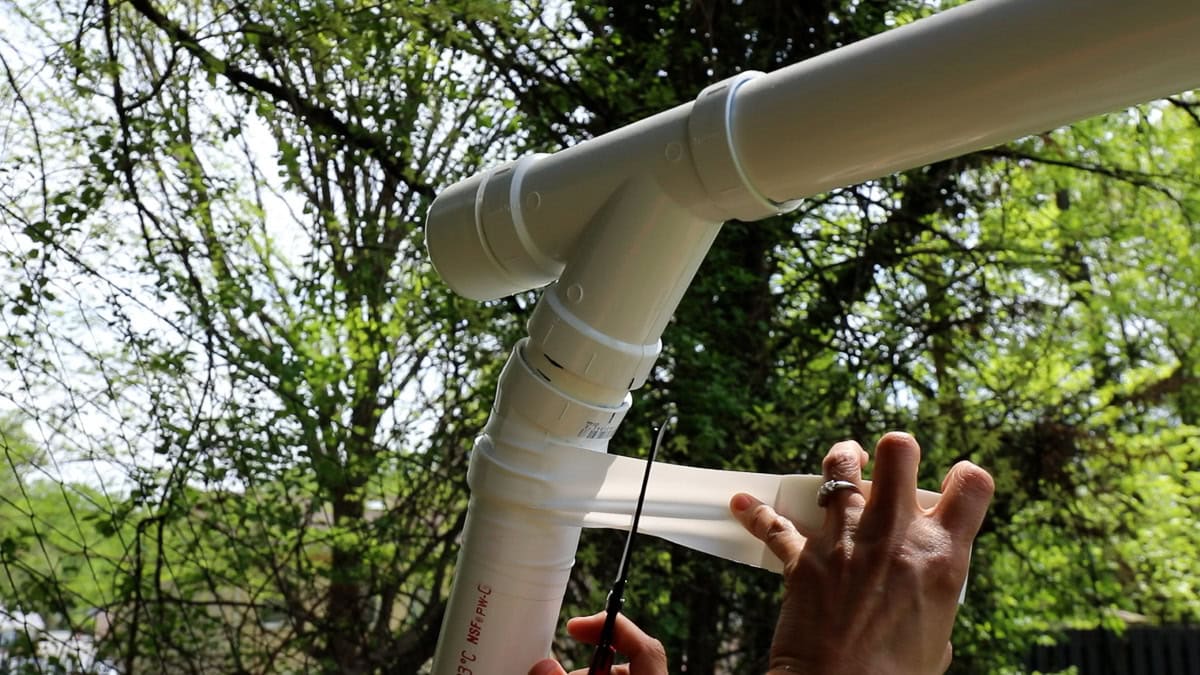
STEP 7: Tape the Joints with Waterproof Tape
I learned that while PVC is a great option for backyard soccer goals, the joints can crack or get weak depending on how much of a beating it takes. My son is 6’0″ and 180 pounds; he’s got powerful kicks! We want to protect the joints, so I wrapped some of the joints that could crack with a particularly hard kick with waterproof T-Rex white tape. For smaller kids, this step likely isn’t necessary.
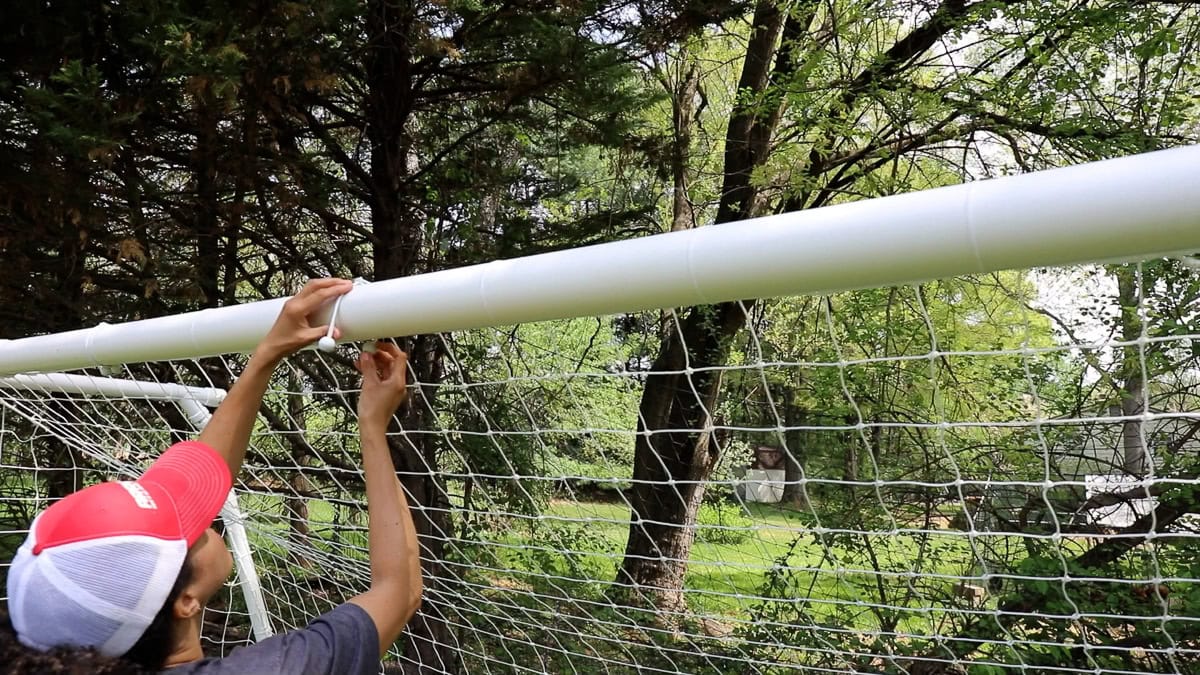
STEP 8: Attach the Net
Since this goal is an oversized 12′ x 6′ backyard soccer goal, I ordered an oversized soccer net from Epic Sports. This oversized net was just a bit taller than 6-feet, at 6.5′ instead, with a general depth. It wasn’t a perfect fit, but with zip ties and bungee cords, it fit nicely and was high quality!
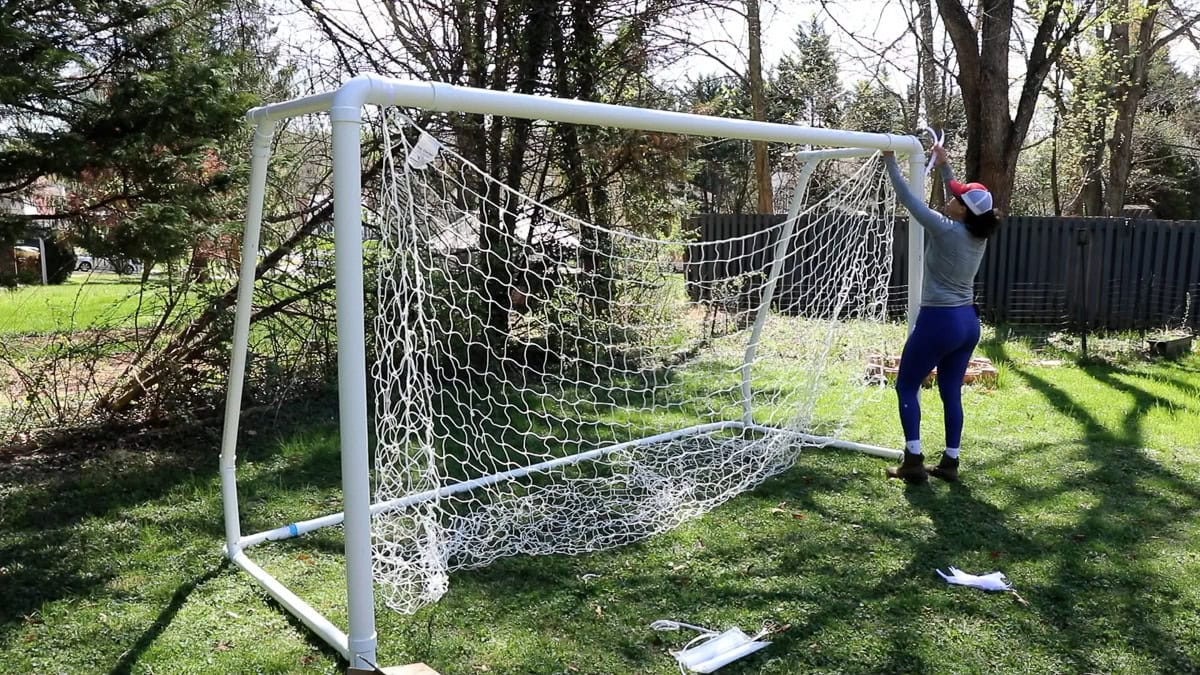
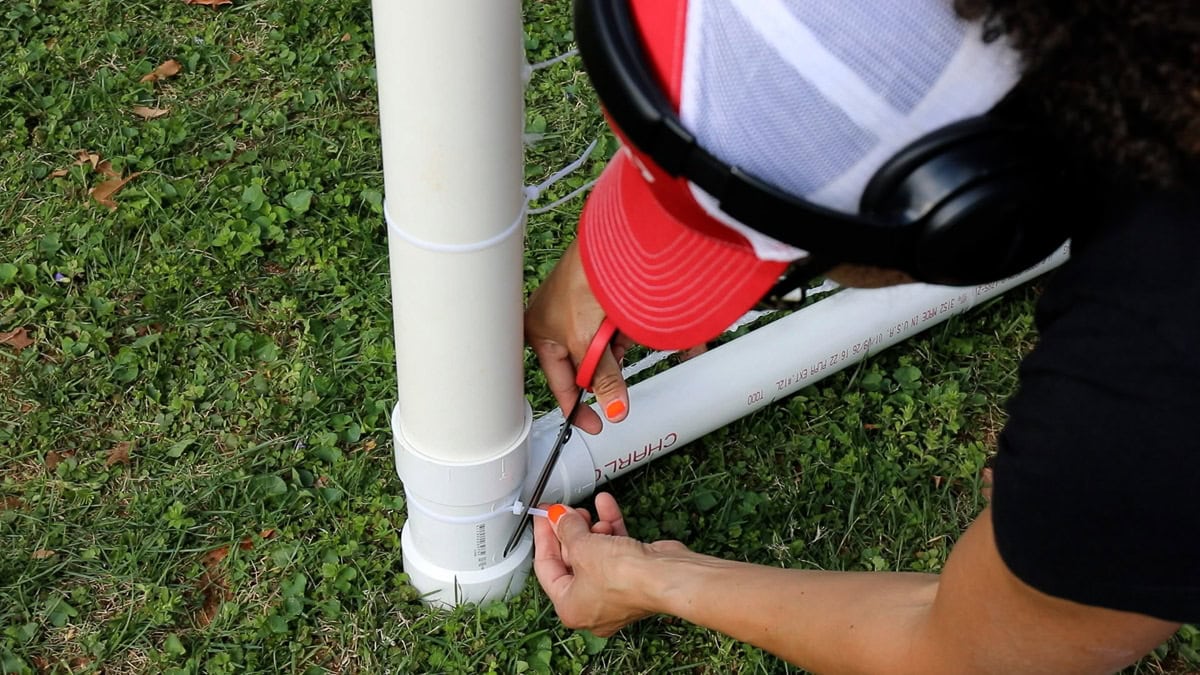
Here are a couple of tips when securing the soccer net to the PVC pipes:
- Use both zip ties and bungee cords. Zip ties alone won’t hold for powerful soccer kicks.
- Bungee cords should be used in areas where there could be extra stress on the net (e.g. corners or where the ball may strike).
- Use 14″ zip ties for the 3″ PVC pipes, and 12″ zip ties for 2″ PVC.
- Bungee cords can be daisy chained together to wrap around the larger 3″ PVC.
- Use your Arrow scissors to trim each zip tie.
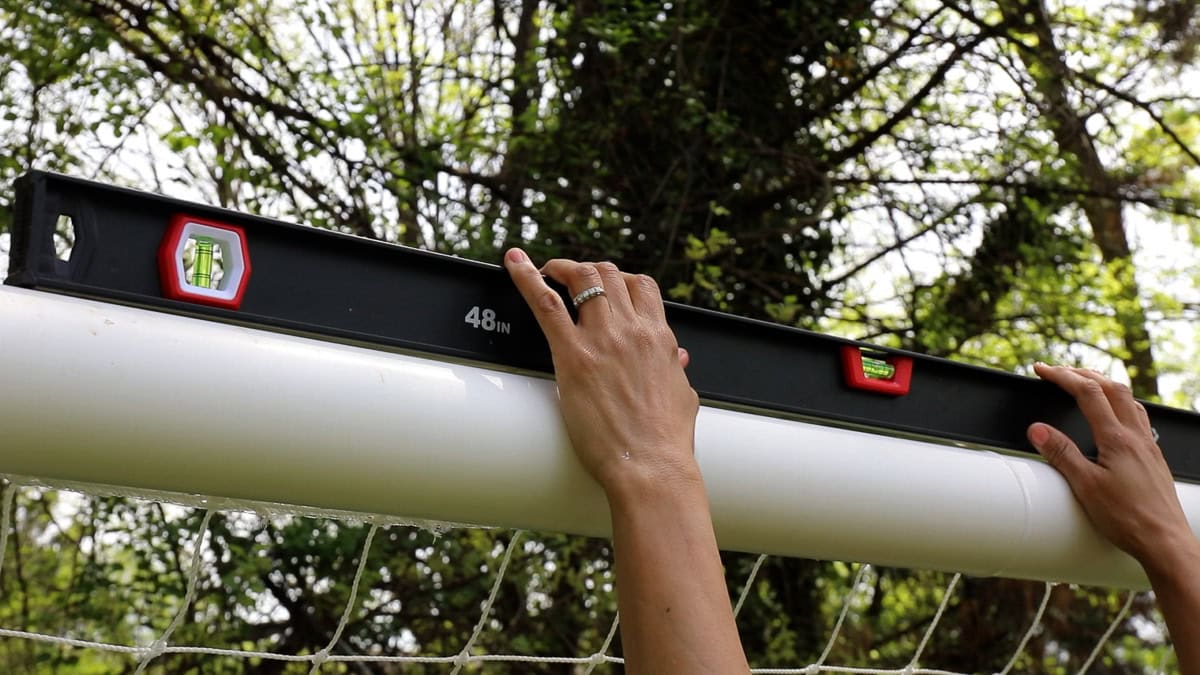
STEP 9: Check for Level
Use an arrow level to make sure that your backyard soccer goal is level and plumb. If it’s not level, you can use landscaping sand under a side to ensure it’s level.
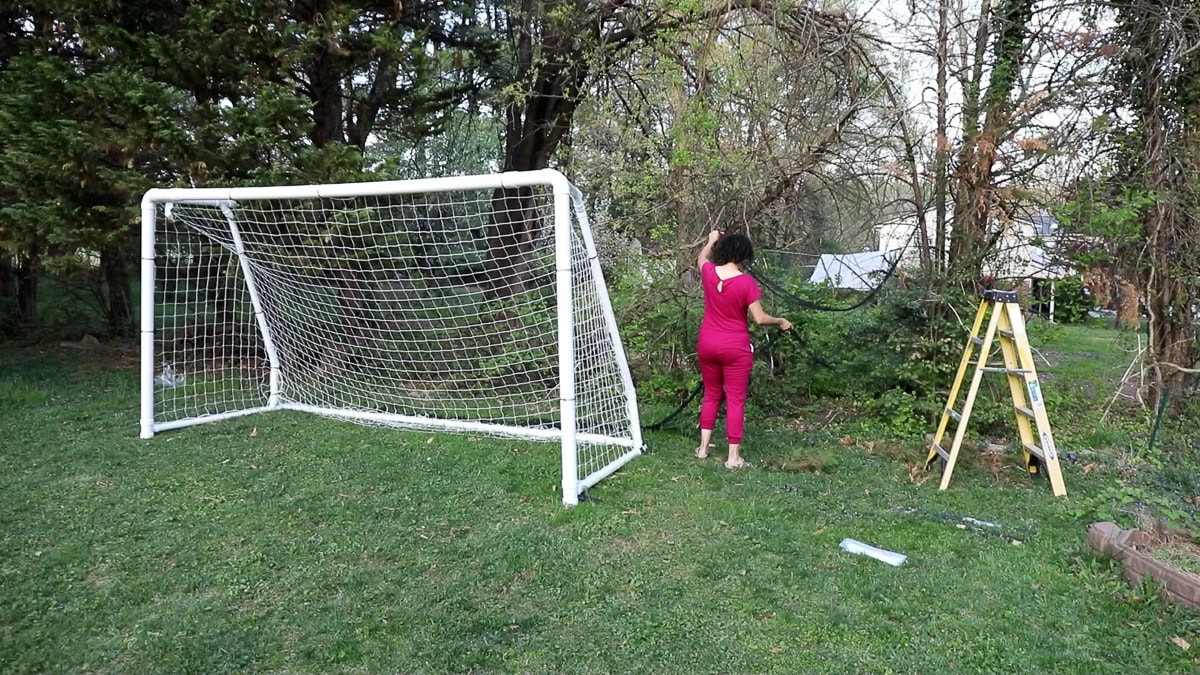
STEP 10: BONUS: Hang a Soccer Backstop Net BEHIND Your Backyard Soccer Goal!
While we wish our kids were as accurate as Lionel Messi, more often than not, they’ll overshoot the ball. Save them a trip to the neighbor’s yard or into sticker bushes by installing a backstop net behind your backyard soccer goal. I ordered a 10′ x 30′ and used zip ties to hang it from nearby overhead trees. You can also install ground stakes or buy a frame to mount it to.
Building a Backyard Soccer Goal With Kids
This project wasn’t a ton cheaper than buying a ready-made goal (it was about $250 for PVC parts), but it’s much more sturdy than what can be purchased at your local athletics store. And besides, the joy of building this soccer goal with your child makes it all the more special. The quality time, and the opportunity to get their hands on tools, teaching them a thing or two about how to use the tools, makes this project a winner.
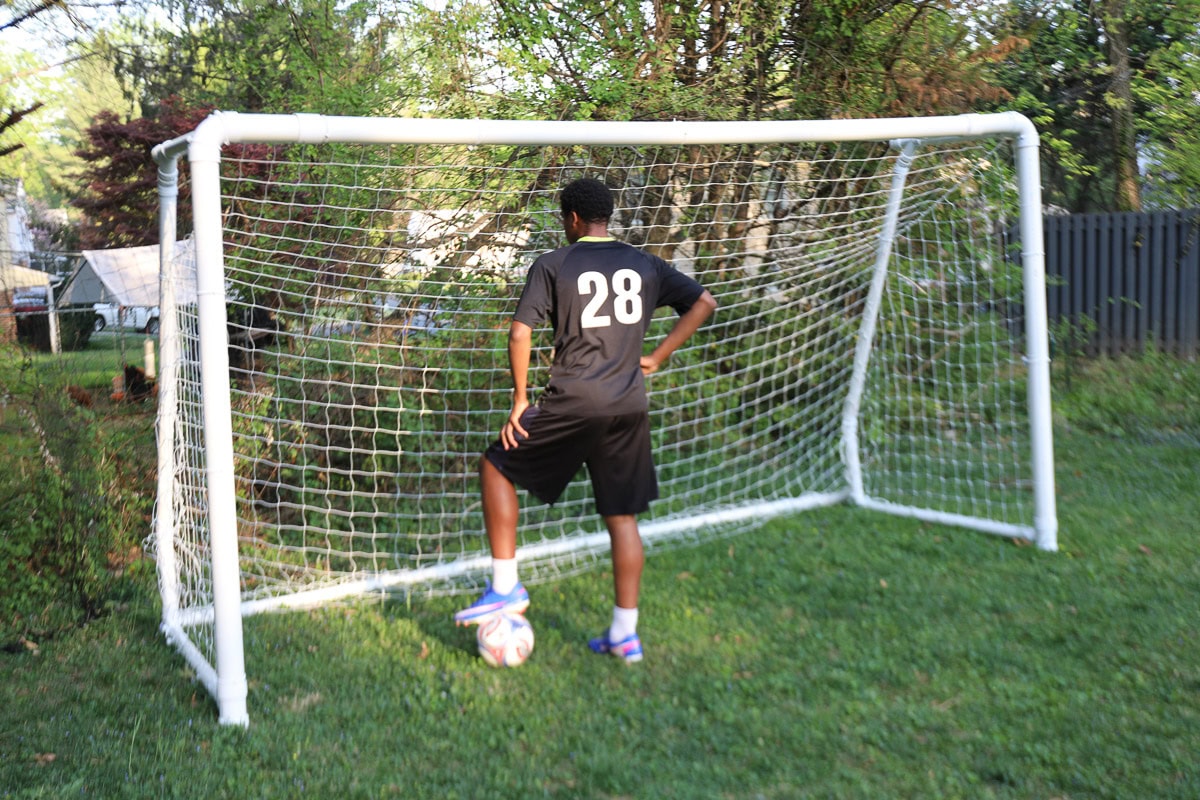
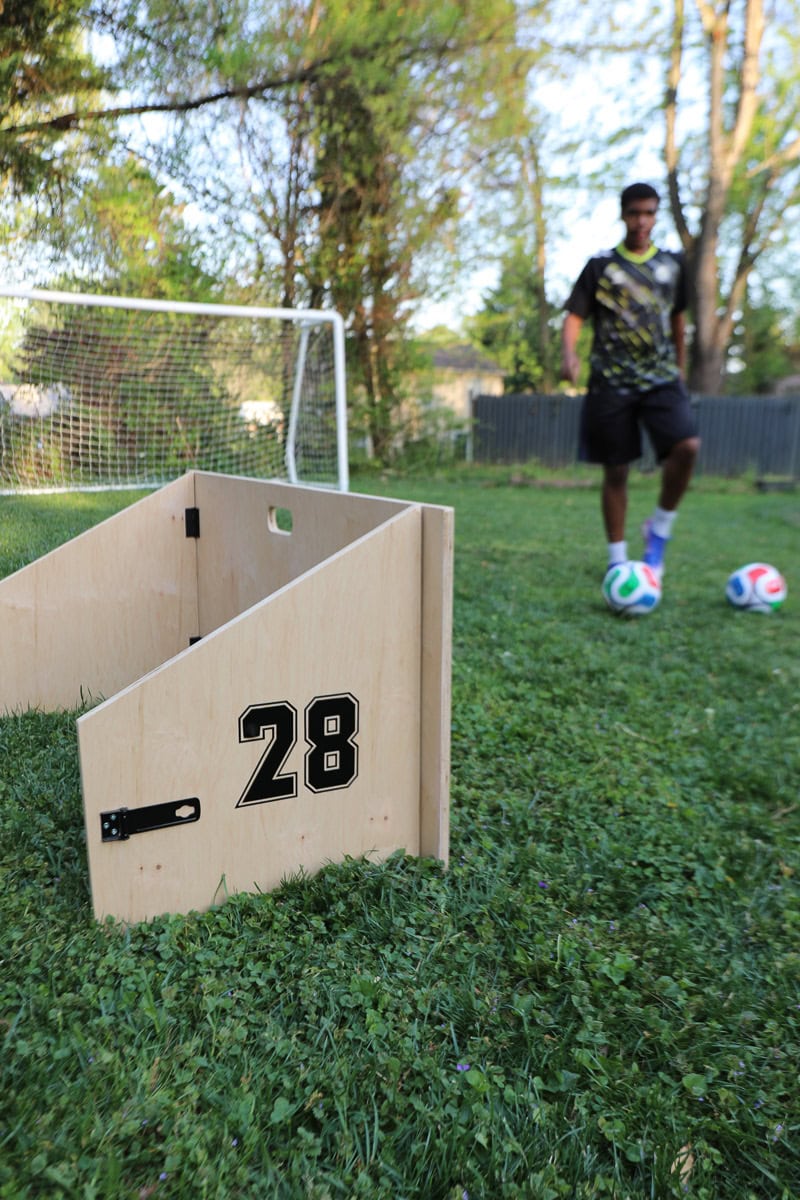
We are so excited for the BIG GAME coming soon! We’re turning our backyard into a soccer training field, practicing our strikes, dribbling, and passing. And you know a backyard soccer goal isn’t complete without a couple of soccer rebounders.
Head over to the next project to see how I made a couple of rebounders for my son, as well.
Enter to Win a $500 Gift Card (and Arrow Tool Kit)!
Be sure to enter the Arrow “Go for the Goal” Giveaway, from April 22, 2206 to May 6, 2026, for a chance to win a set of Arrow tools and a $500 gift card so that you can buy these materials to make your own backyard soccer goal and rebounders!
![]()
Love this project? Click here to SAVE it on Pinterest!
![]()

Download the 5 freebies!

Thrift Diving inspires women to decorate, improve, and maintain their home themselves...using paint, power tools, and thrift stores! Use these 5 printables, checklists, and ebooks to get started!
Thank you so much for this post!!! My son and I built a goal today (we made ours 8 feet because he’s a goalie and wants to have the “real thing” to practice on at home) and your post and video made it SO EASY for me to do with him. Really appreciated how it was organized with how to cut things and how everything was linked. It made the whole project so much easier. Thank you so much for making this project feasible for me to do with my son!
Awww, this is great to read, Sarah! So glad it was helpful for you! My only advice would be to tape the joints as tightly as you can with exterior tape, because if your son is really powerful and kicking balls AT the goal, it can crack the PVC joints. Awesome your son is a goalie. I have so much respect for how they throw their bodies the way they do!!!! 🙂