I Was TOO SCARED to Start This DIY Project!
For some reason, people think that because you’ve got years of experience in picking up power tools and attempting hard DIY projects, that you’ve got it all figured out.
…that there’s no fear…
…that you know what you’re doing all the time…
…that you’re going to crush it, and make it look easy while you’re at it.
But you know what??
That’s baloney, my friend.
Because the truth is this: mistakes happen ALL.THE.TIME during DIY projects. Sometimes the fear of those mistakes are enough to stop you in your tracks. Sometimes that fear manifests as an intense urge to clean your house right at the same time you decide you’re going to try to tackle said project. HA! (Tell me I’m not the only one that happens to!).
I suffer from “DIY fear,” too. The result is that my projects tend to take much longer than expected, because at each “scary” point in the project, I stop to do research, questioning whether the direction I’m taking is the right step, or if I am doing something that’s going to result in a costly (or embarrassing!) mistake that I didn’t foresee.
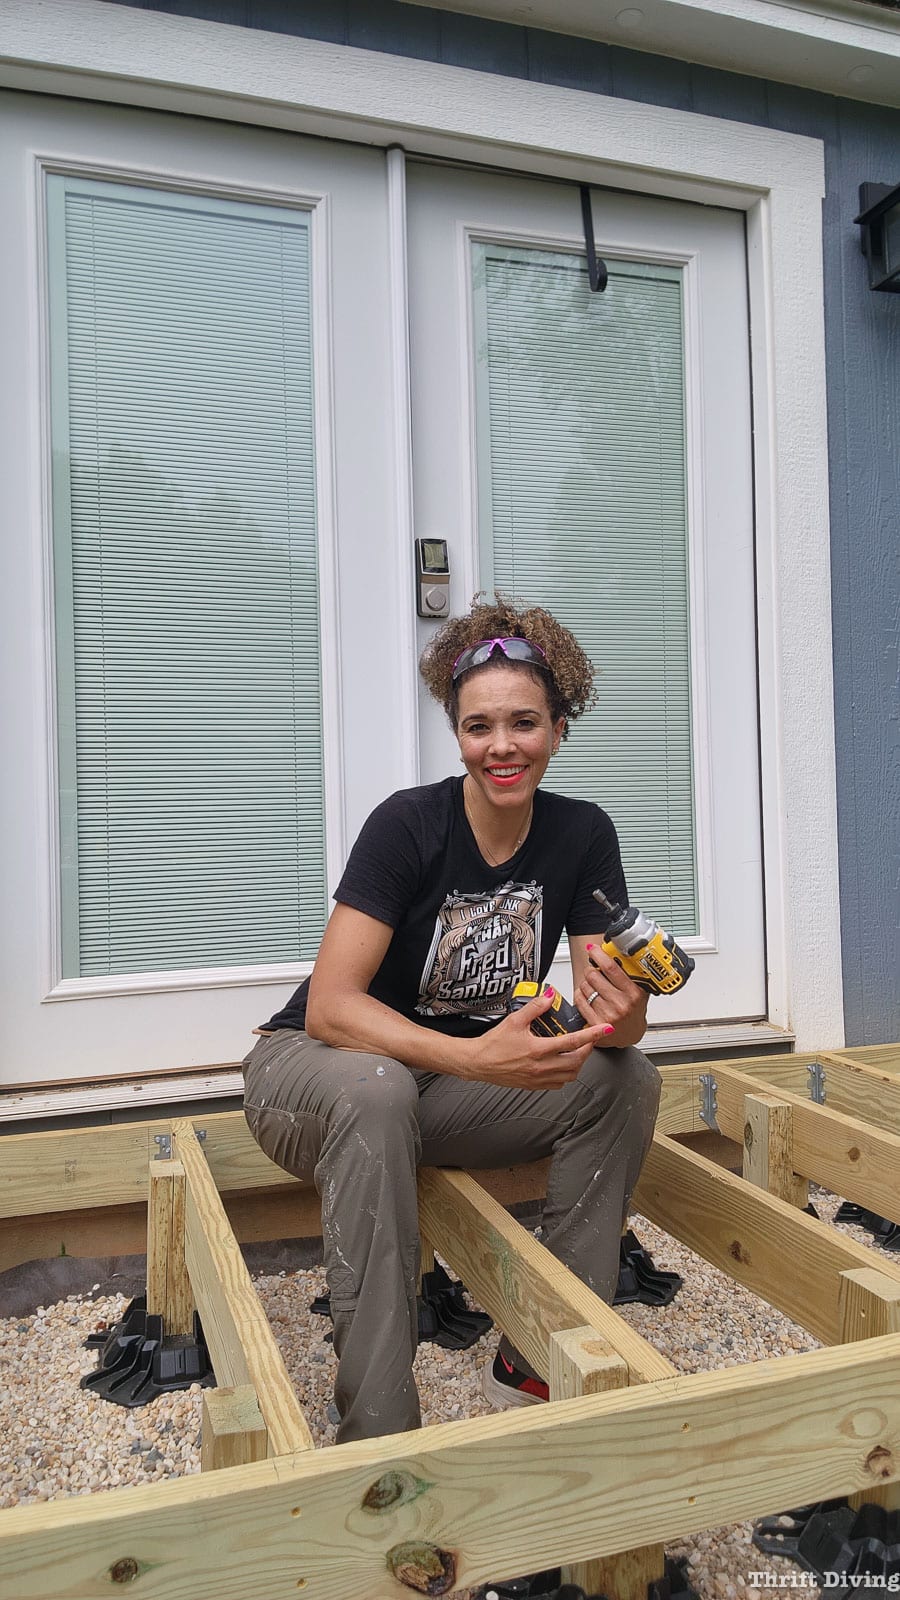
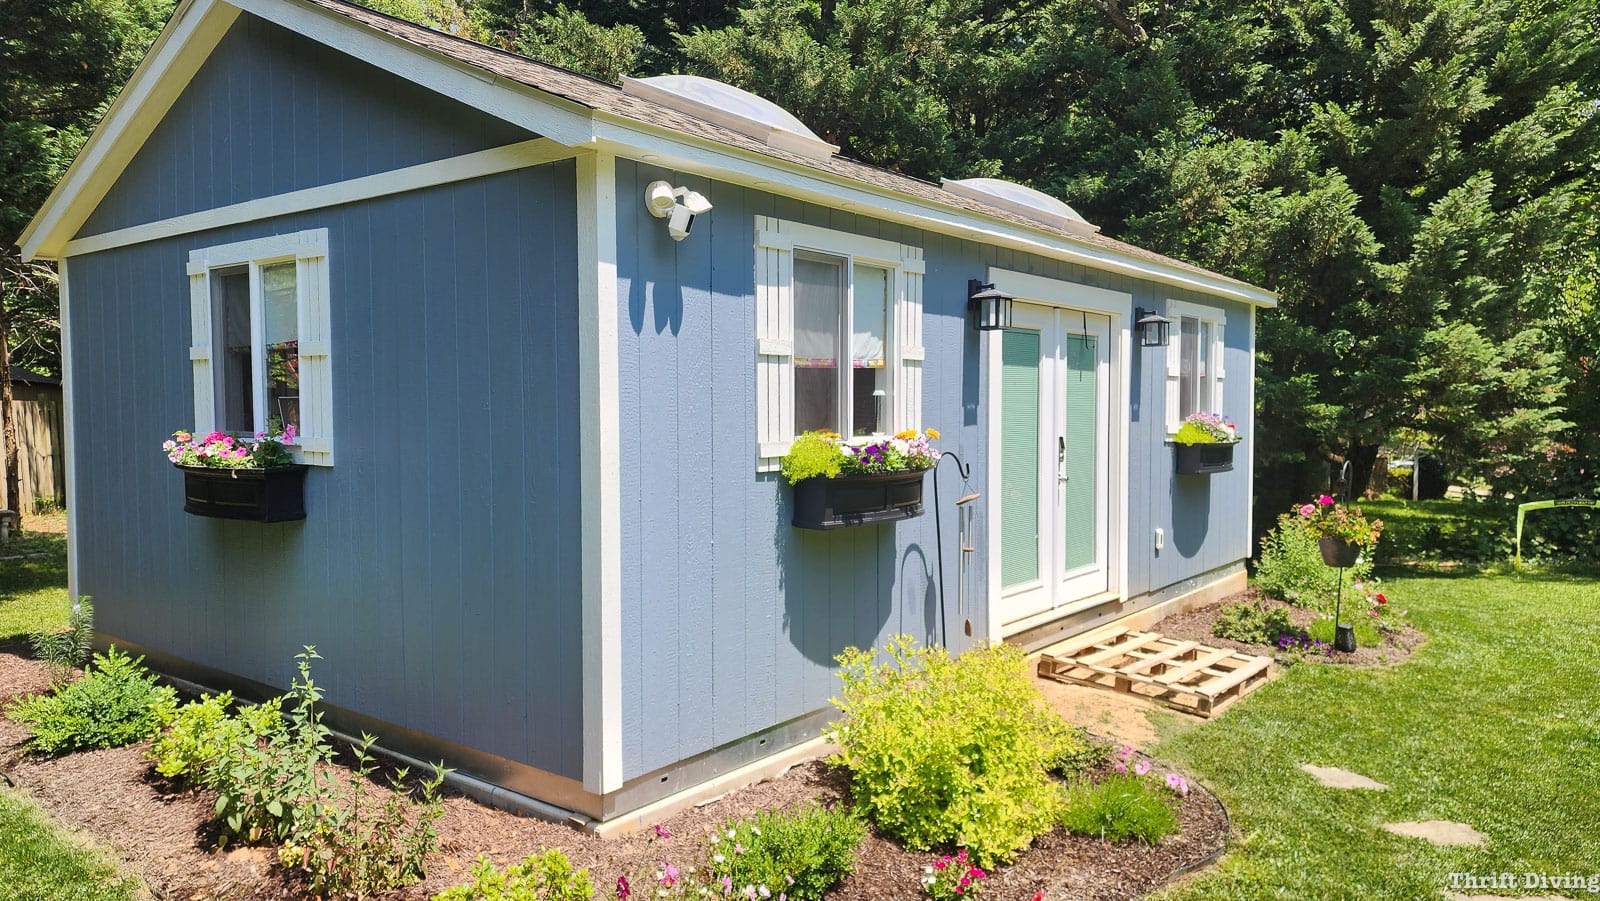
In fact, for the past 3 weeks (my goodness….has it really been that long??!), I’ve been building this tiny floating deck off the front of my “she shed.”
The reason it’s been taking so long is because….gulp….I’ve been afraid to move forward at each step.
Heck, I was afraid to even start!
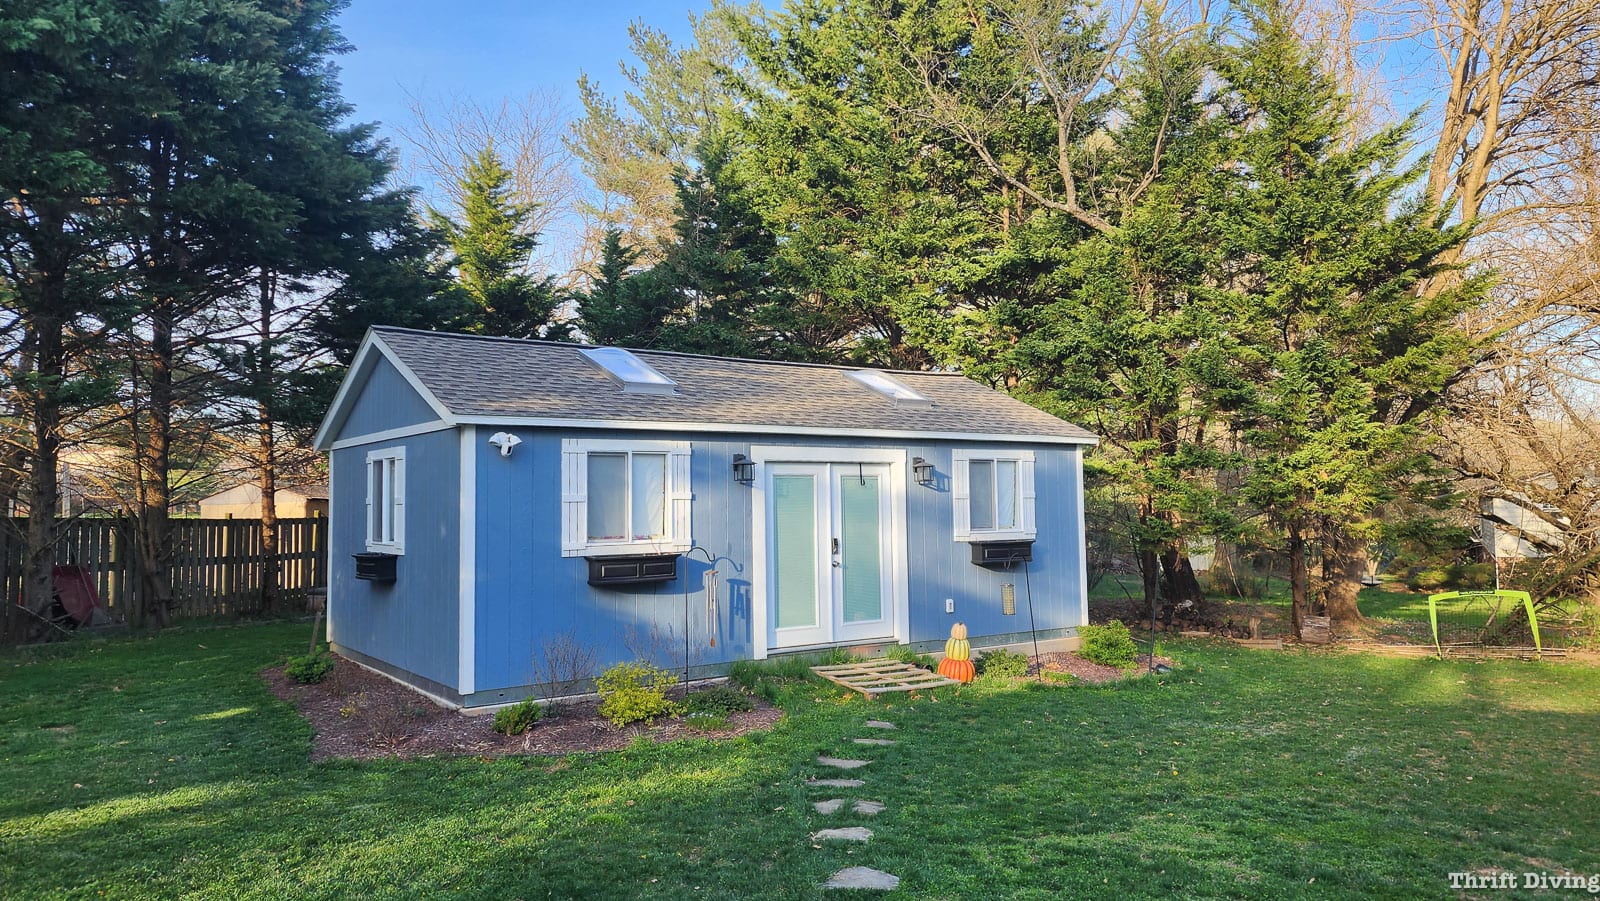
You see, I’ve had my 16’x26′ “she shed” for well over a year and a half now. You can watch the entire progress on my YouTube channel playlist here).
I knew that building a deck needed to be a priority project because stepping up into that shed is a 12″ knee-breaker. I’m 45 years old, but you’d assume I was 75 the way the grunts and groans would escape my pursed lips each morning when I would trek outside to my backyard oasis.
That step-up was no joke.
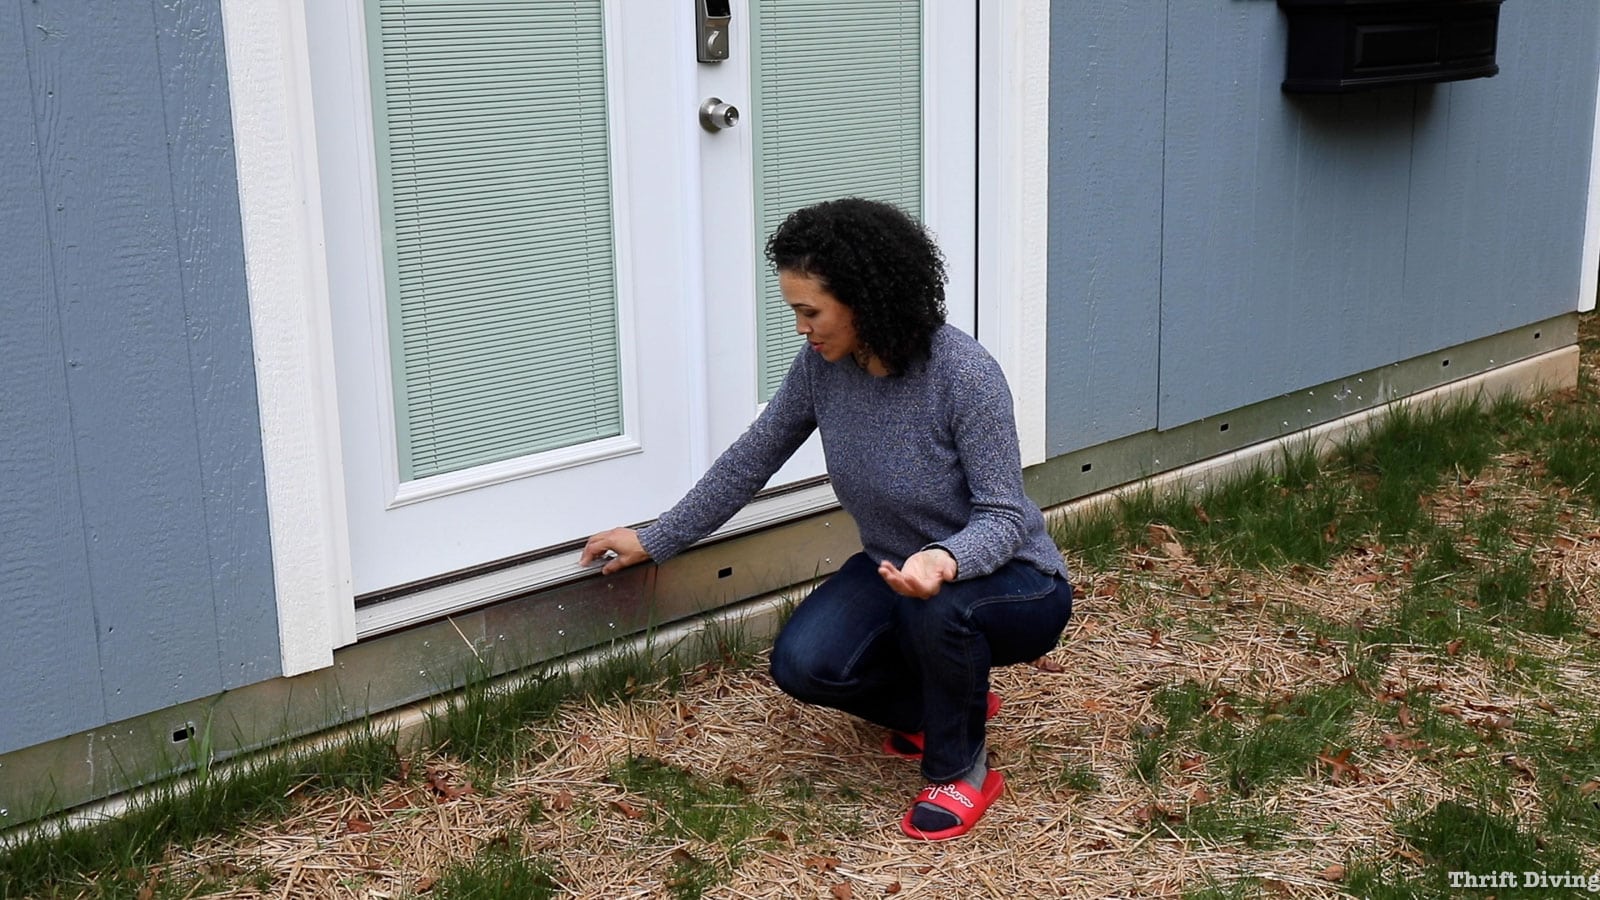
I got the “clever” idea to toss an old pallet in front as a stand-in porch, which was actually the dumbest ideaI I could have thought up, considering that I didn’t fill in the spaces of the pallet. So I went from a 12″ knee-breaker situation to a 6″ ankle-breaker option. HA!
(And yes, I actually got my foot caught in the pallet a couple times and went sprawling, only to end up unhurt and laughing at how ridiculously slow-motioned my fall was. But I digress….)
Just as the weather started to improve, and the grass started growing again, there was a ridiculous amount of grass touching up through the pallet. Which I later learned was a prime target for little red clover mites to gain entry into my shed. That’s a whoooolllee other topic I’ll touch on later. But I knew that the exterior of my shed needed a lot of TLC.
What better time to care for the garden, get rid of pests, and–oh, yeah–finally get around to building the deck that was giving me nightmares.
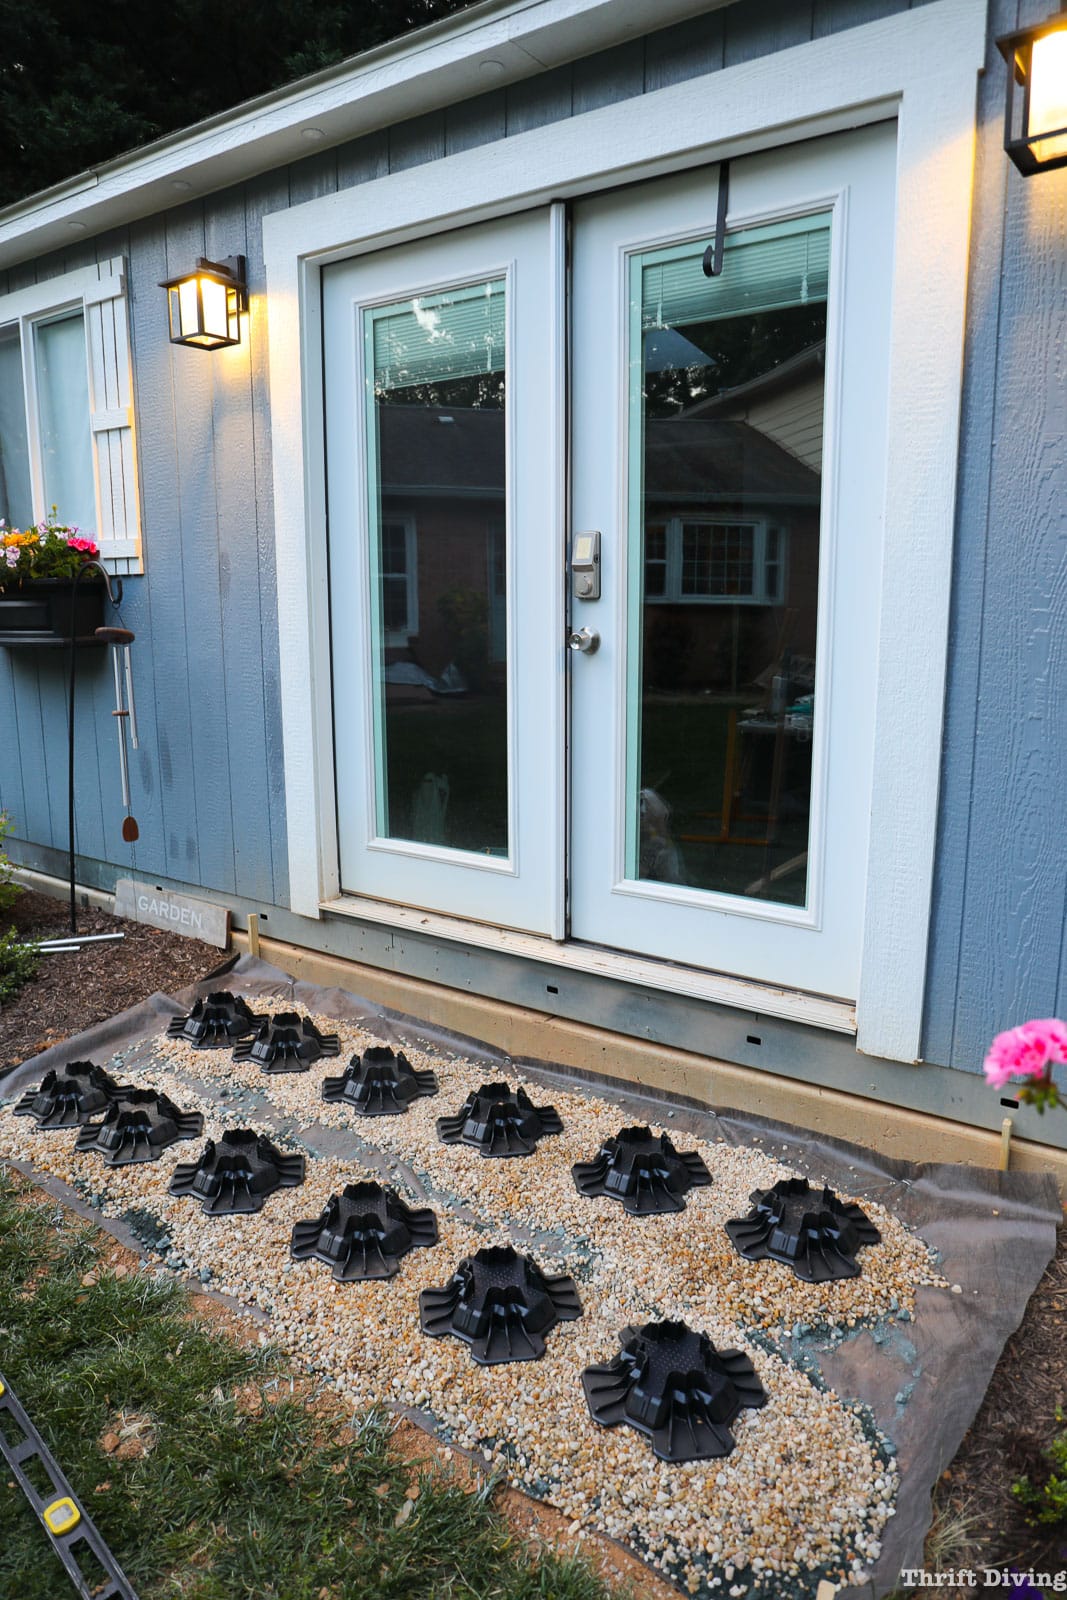
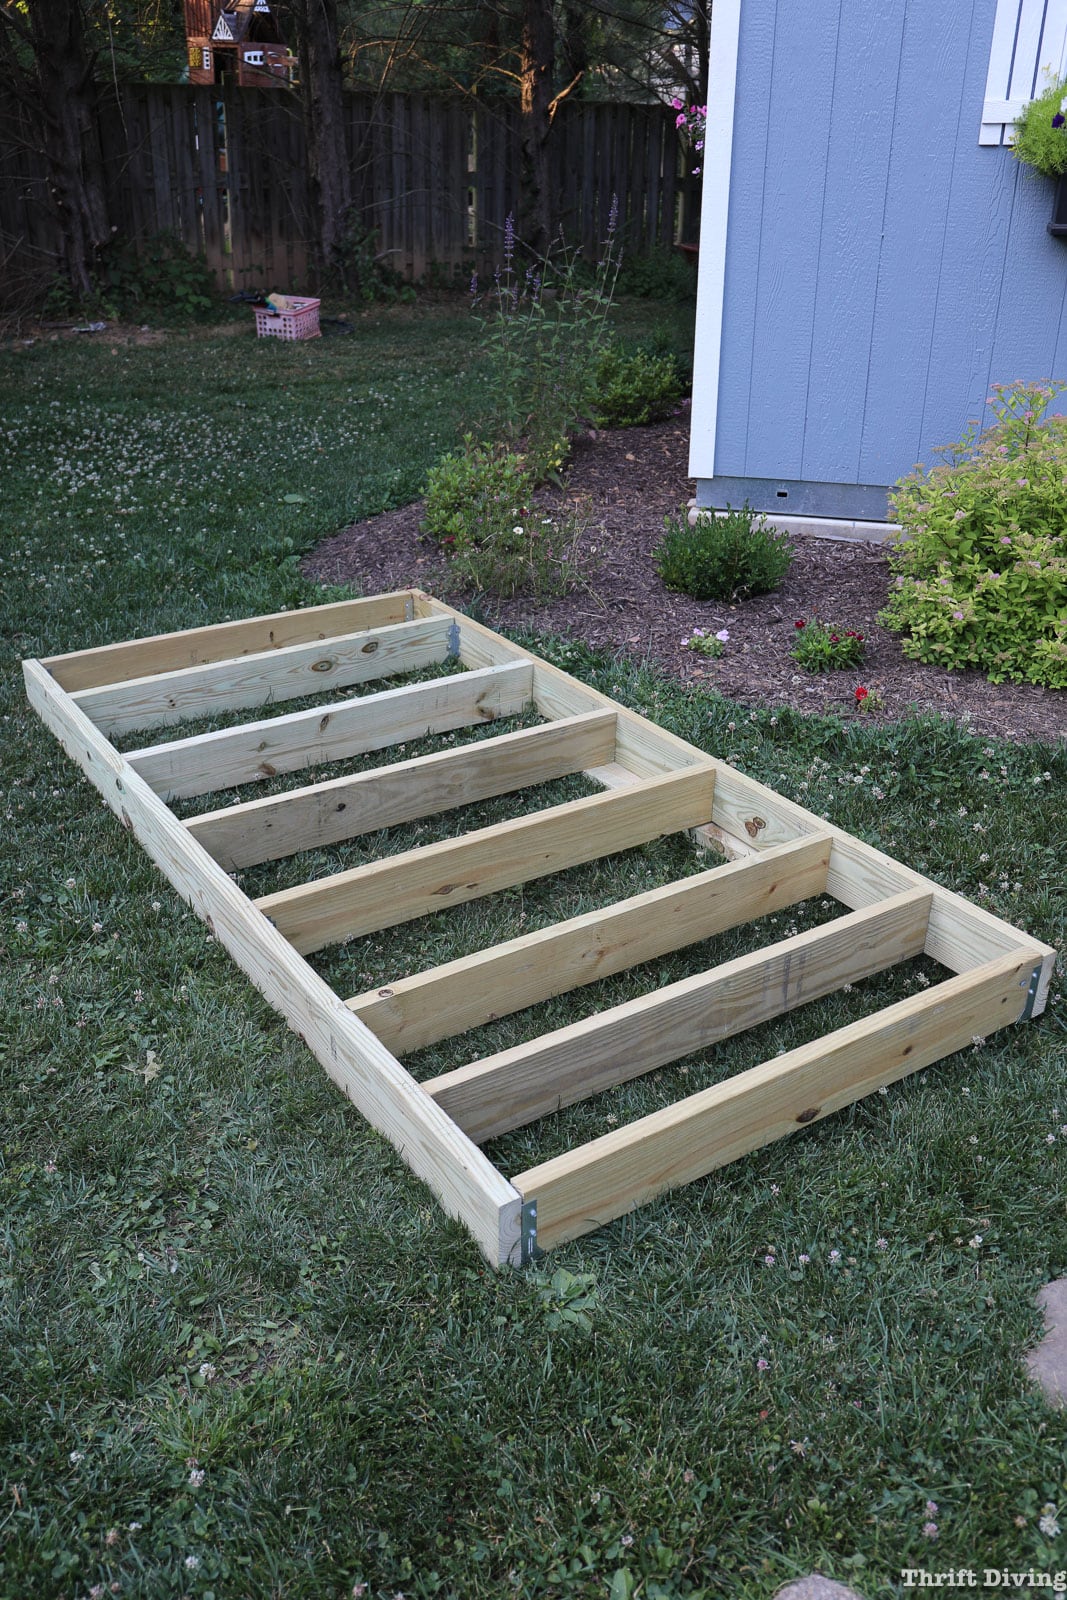
Removing grass from a simple 4’x8′ space was back-breaking work that I have grown to despise. But it has to be done!
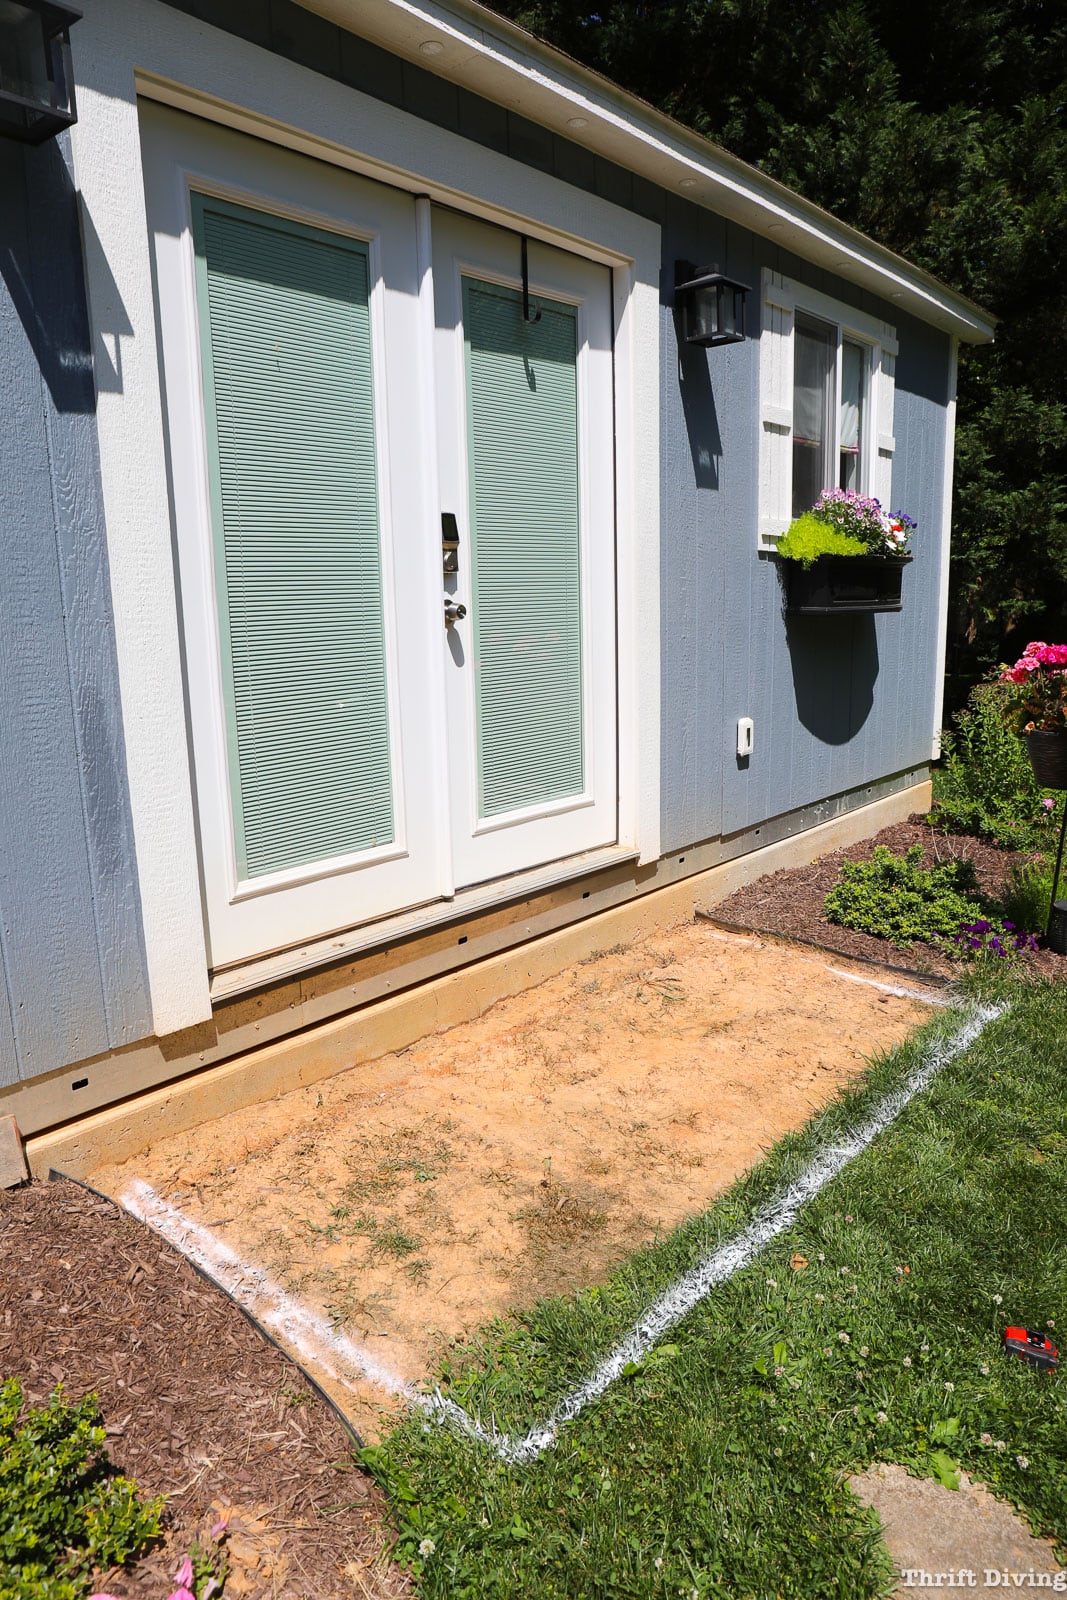
I placed the pallet back into place after the grass was removed……aaaaannnnddddd….I procrastinated some more.
I considering hiring my concrete contractor to install a concrete sloped sidewalk from my house to my shed (a solid 20 paces away, so not too long), but at $5,000, I knew I could build a simple 4’x8′ pressure treated wood deck on the front of my shed for waaaaay less than a fancy sidewalk. After all, I loved my cute little stepping stones. Who needed to replace those??
Now here was a time when Facebook ads actually served me up exactly what I needed that I didn’t know I needed.
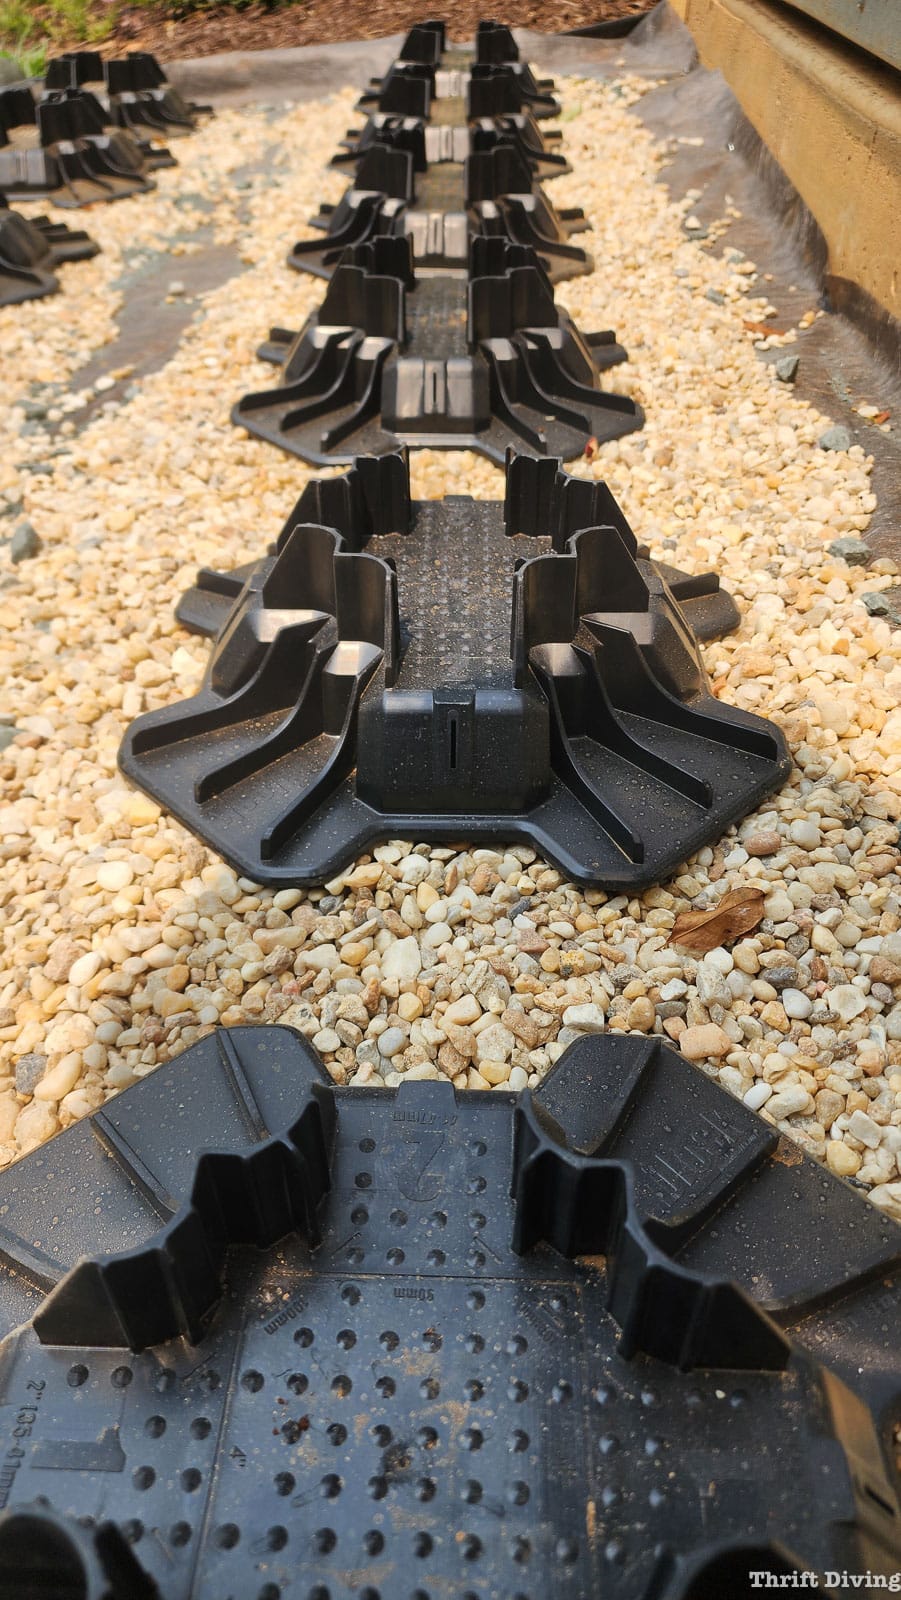
One night I was scrolling through Facebook and I saw an ad for Tuff Blocks, which are tough, recycled plastic foundation supports for decks. They pretty much can eliminate the need for drilling down 30″ below the frost line and are a solid replacement for traditional concrete foundations (or can be used in conjunction with concrete so that some of your foundations are concrete and some are Tuff Blocks).
These were going to be perfect! Thank you, Mark Z., for serving me up the answer to my question: How in the heck do I properly build a deck on my shed?!?!
With these Tuff Blocks, of course.
As I was seeing this project take shape, I started to feel a bit more at ease with the idea that I can properly do this. That it won’t collapse. That I won’t make a catastrophic mistake that causes the deck to crumble to pieces the minute I step on it.
I’m being a bit melodramatic, and a bit facetious, but come on…..you know the fears can be real. Even if the immediate mistakes don’t cause an immediate collapse, I worried about the things I didn’t know that could affect the integrity of the deck months or years down the road.
But no matter what, I had to keep going. I had gotten this far.
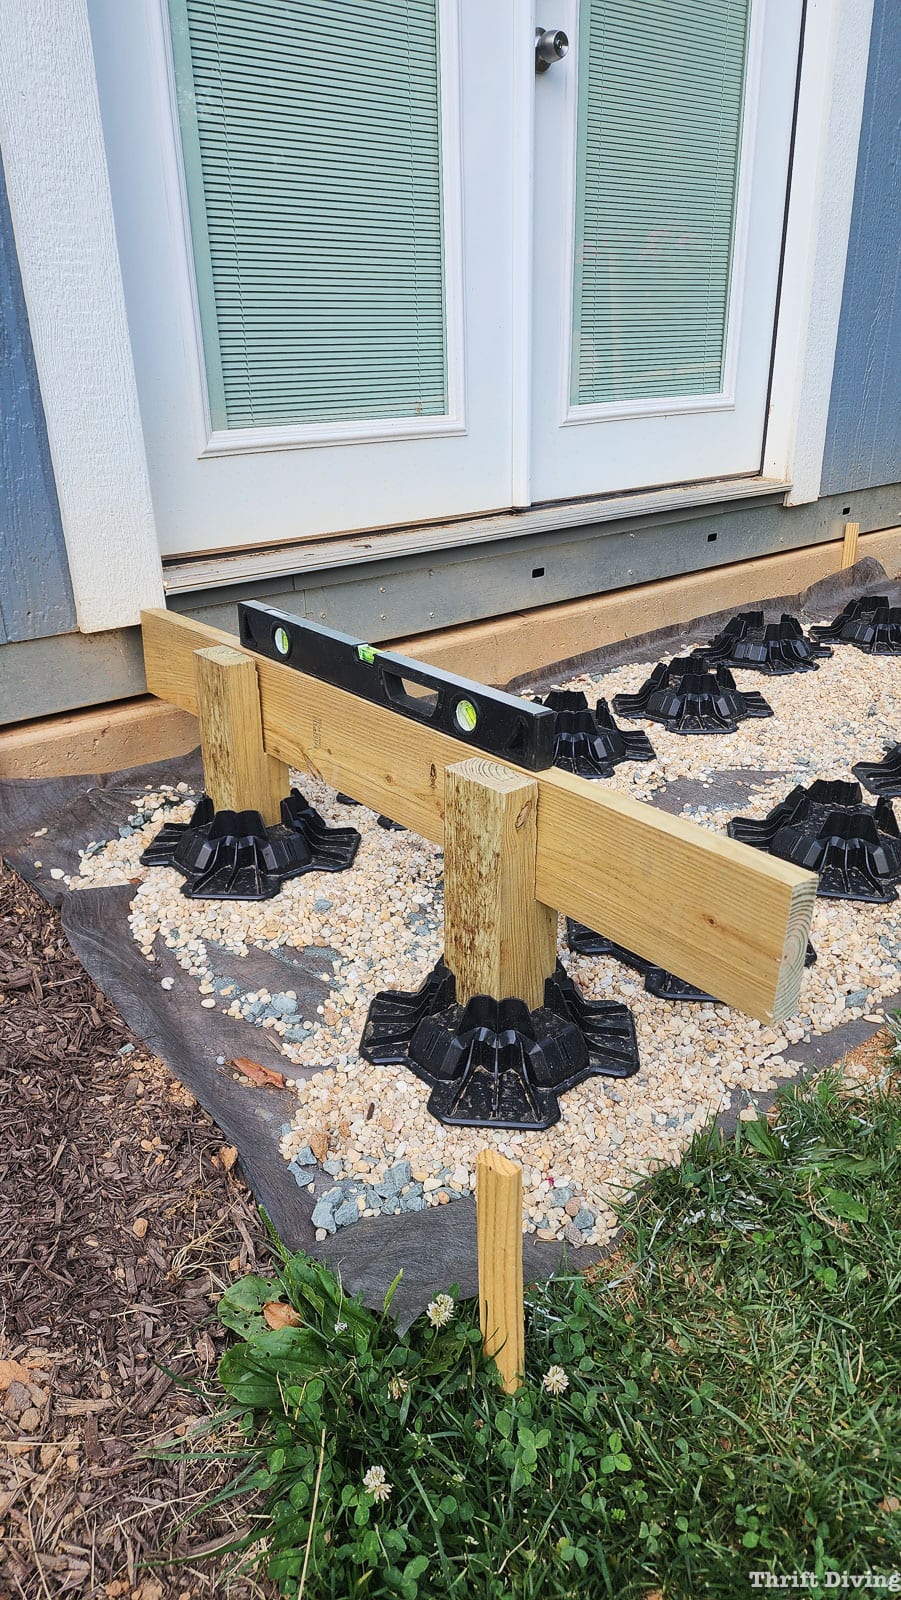
So each day I would work a little more….and a little more….leveling the Tuff Blocks, cutting wood, and trying to figure out the next step to frame this deck.
And I’m embarrassed to admit that everything I learned in Advanced Framing in Carpentry school…..went out the window.
I kid you not.
I tried to follow Tuff Blocks tutorial to a “T,” and as a result, I had “forgotten” about the basic carpentry training I had learned, which taught me how to properly lay out lumber for framing, with 16″ on-center joists.
I was acting like a complete newbie: I mis-measured. I mis-aligned. I had to rework each piece because it just wasn’t lining up the way I thought it would.
I even had to remove everything I had done and start over from (what felt like) scratch.
But the poignant moment was when I realized, “Wait, Serena….why are you making this so hard??” I also realized that the layout I was doing was simply wrong. But that is where I found beauty: in the fact that I knew that what I was doing was wrong.
You see…I think we sometimes have such poor faith in our ability because a project is new and uncharted territory that, instead of relying on what we already know and adding knowledge on to what we already know, we think we have to reinvent the wheel and do a project completely different, based on someone else’s instructions.
Once I was able to let go of “I have to do it this way” and incorporated my own skill into building this deck, it came together surprisingly quickly!
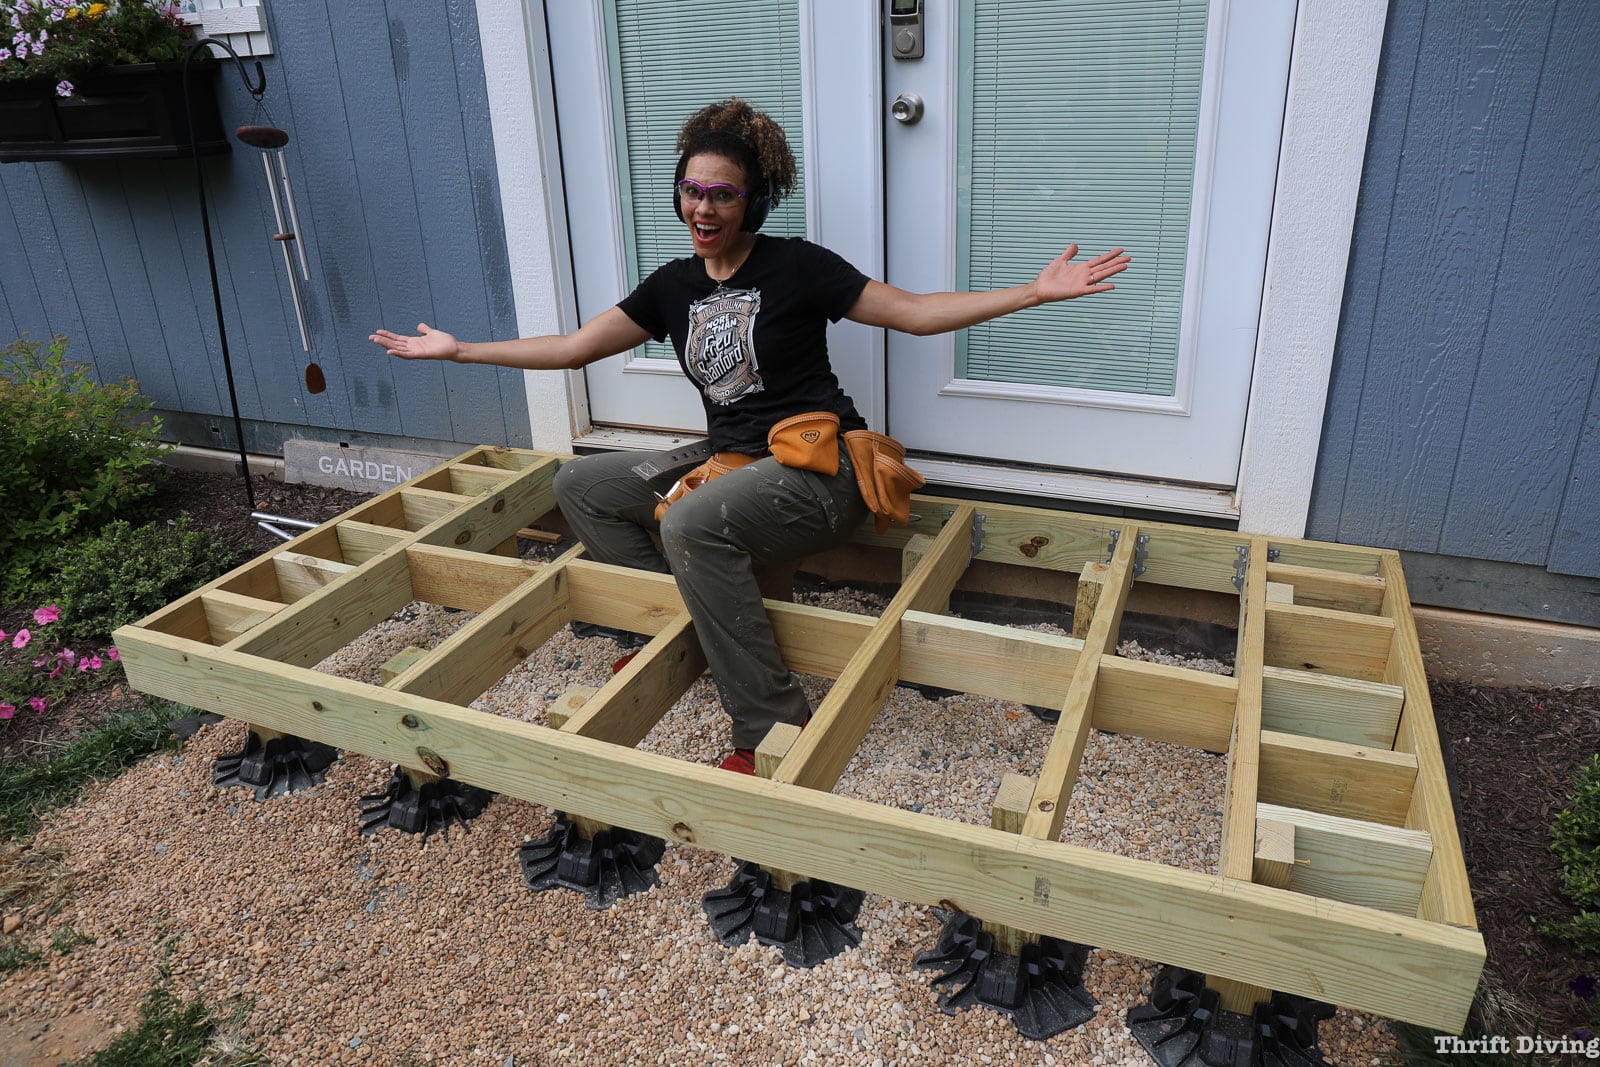
Within a matter of a couple days, I went from having no deck to having a framed, solidly built framed deck!
Did I run into other problems?
You bet I did.
I’ll share more of those challenges in the upcoming tutorial and what I did to fix those mistakes. But I got my confidence back once I realized that I already had much of the skill inside of me for building this deck. I just needed a few adjustments, and a bit more knowledge of how it all comes together.
I needed to stop treating myself like a moron. I’ve got this. And I know how to do this, even if I have never done this before.
And more importantly, even if I don’t know what I’m doing, I have the confidence and the skill to figure it out. Even if it takes longer than expected.
If you’ve got a DIY project you’ve been afraid to tackle, or you’re moving suuuuuper slow on it because each step feels like a potential snag, here’s my advice to you:
- Do your research, but don’t get bogged down in research that you are paralyzed to take action. Just get started. Keep researching as you go through each step.
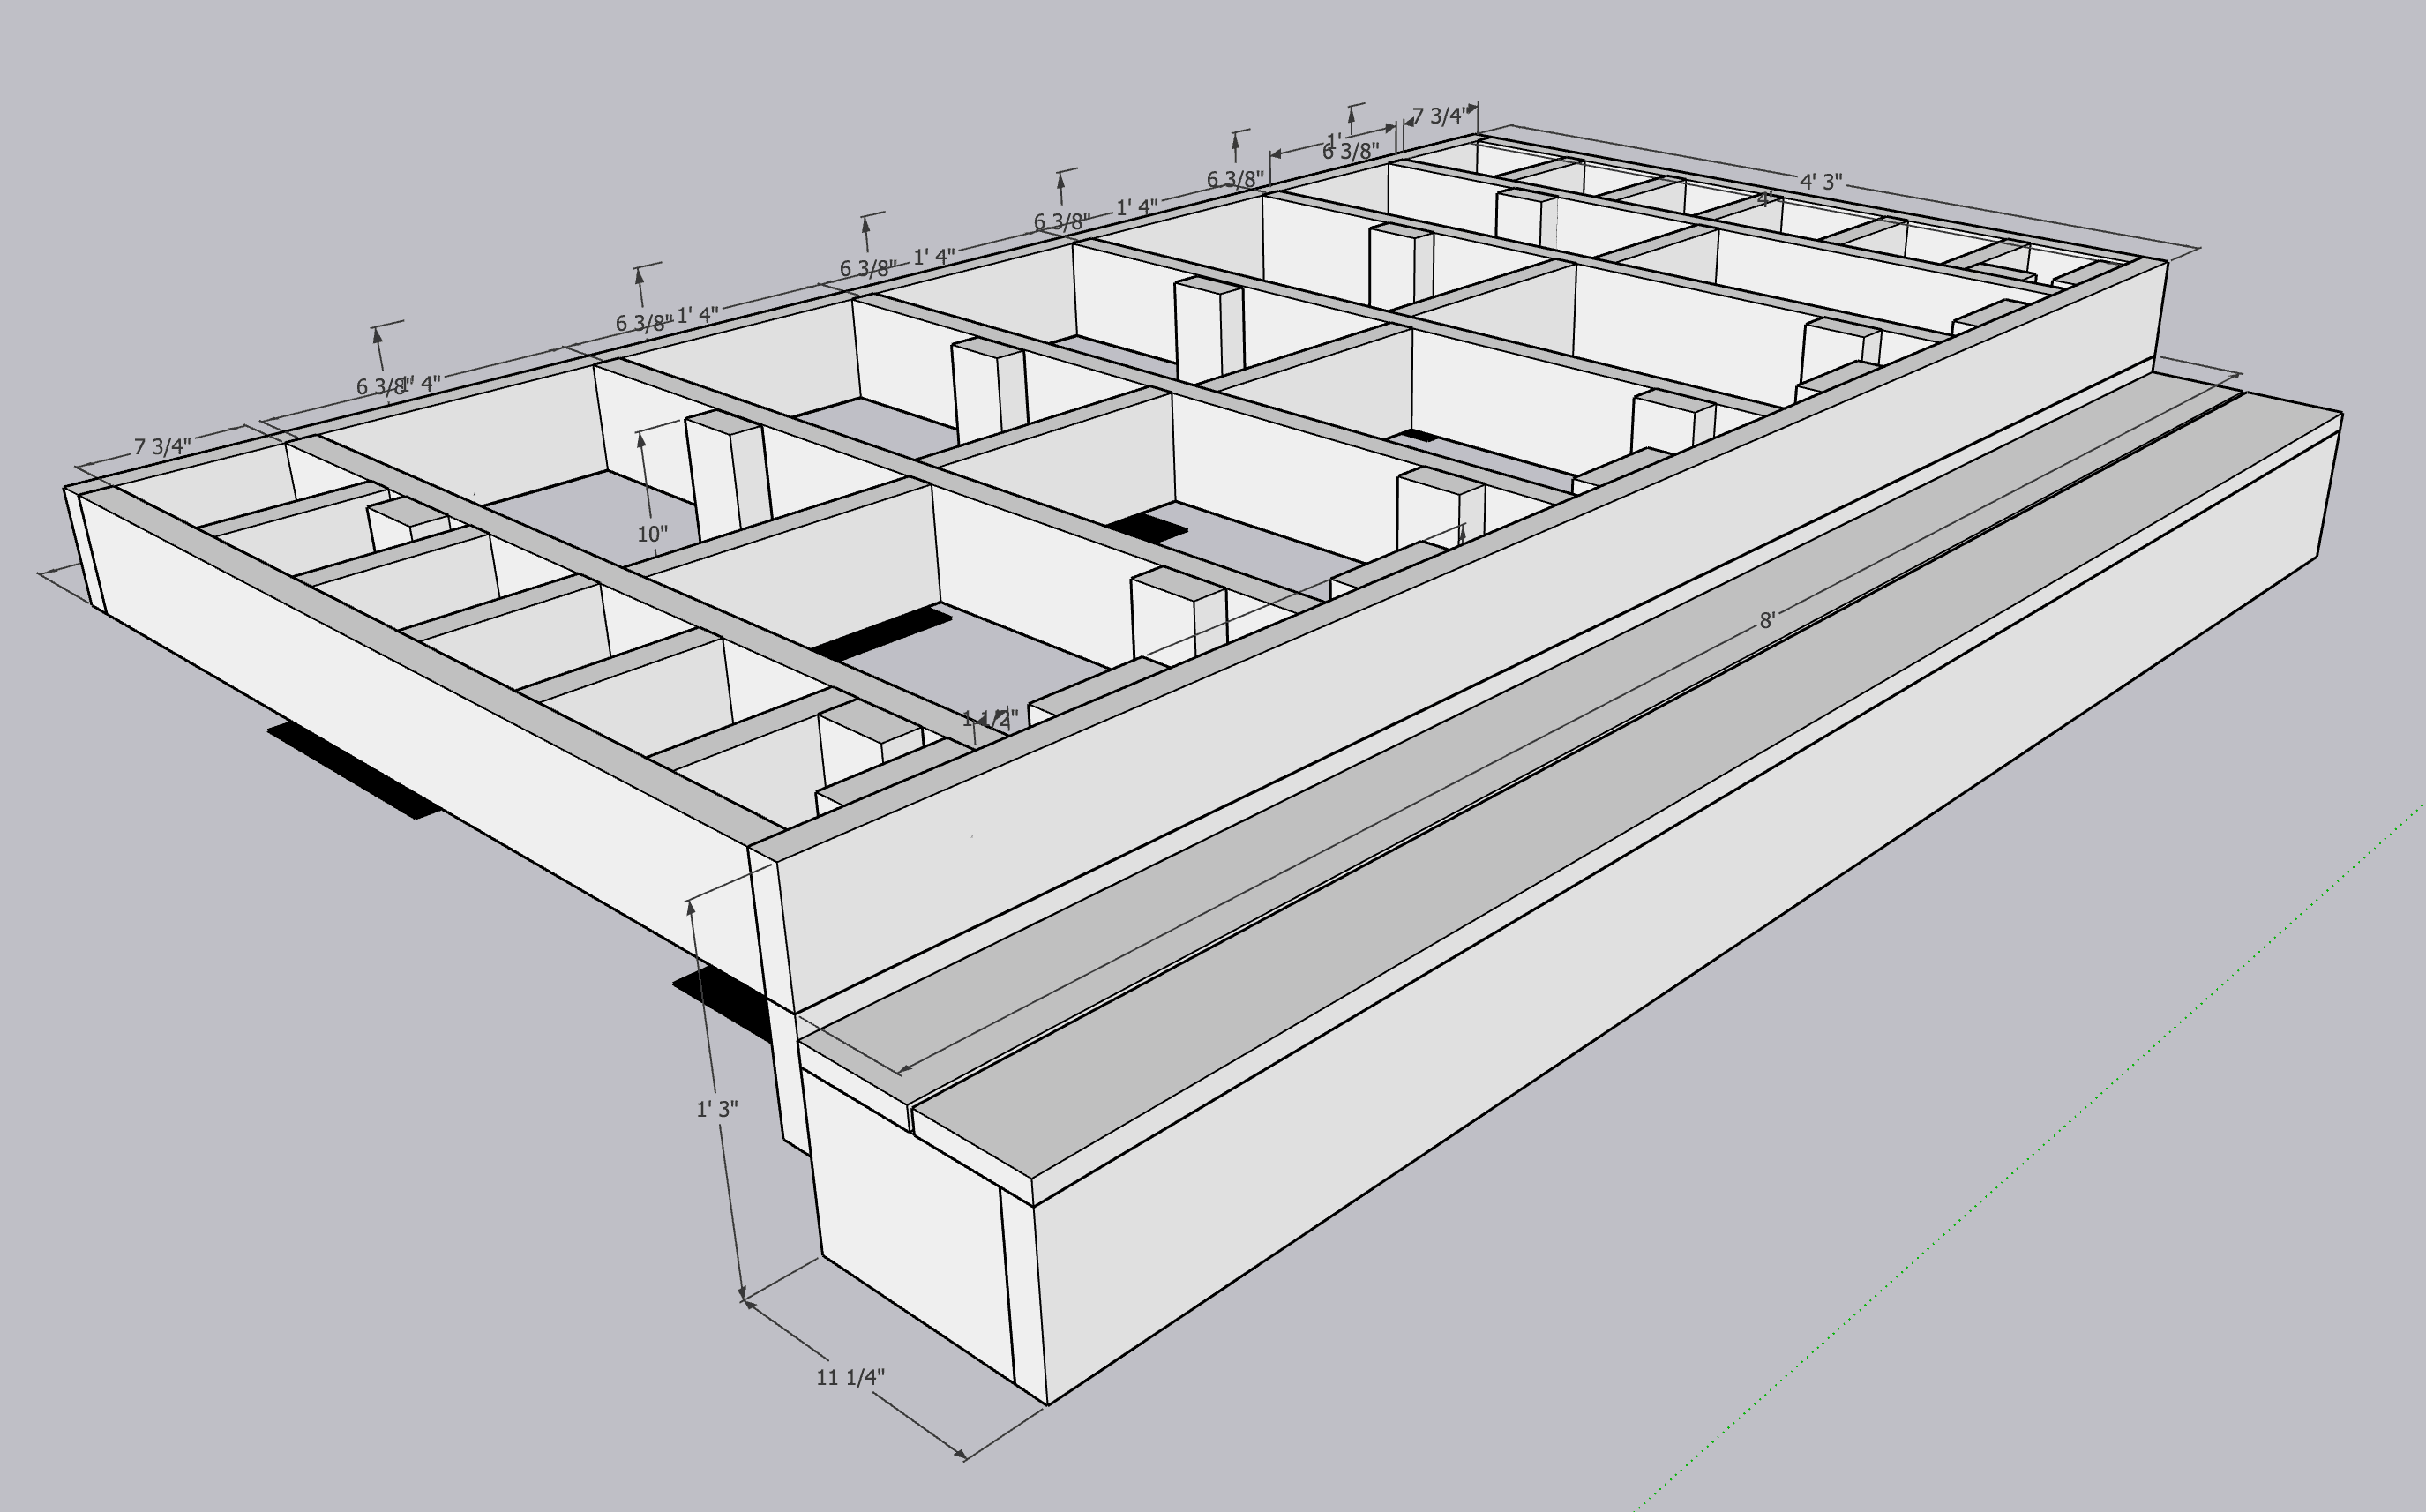
- Plan how you’re going to attack the project. Write it out step-by-step. Sketch it out in a notebook. Visualizing it can help you imagine beforehand what it will turn out to be. This helps to prevent mistakes later on and help you to know how much material you’ll need to buy.
- Work on it a little each day. Even if it’s just 30 minutes. Progress is important. And baby steps count as long as you’re moving in the right direction.
- Celebrate the little wins! Most people won’t even attempt a project! So give yourself credit for at least starting!

I also took my time to use SketchUp to plan out what the deck should look like, with measurements, to help minimize future mistakes, as well as to figure out how much pressure treated wood I would need to buy.
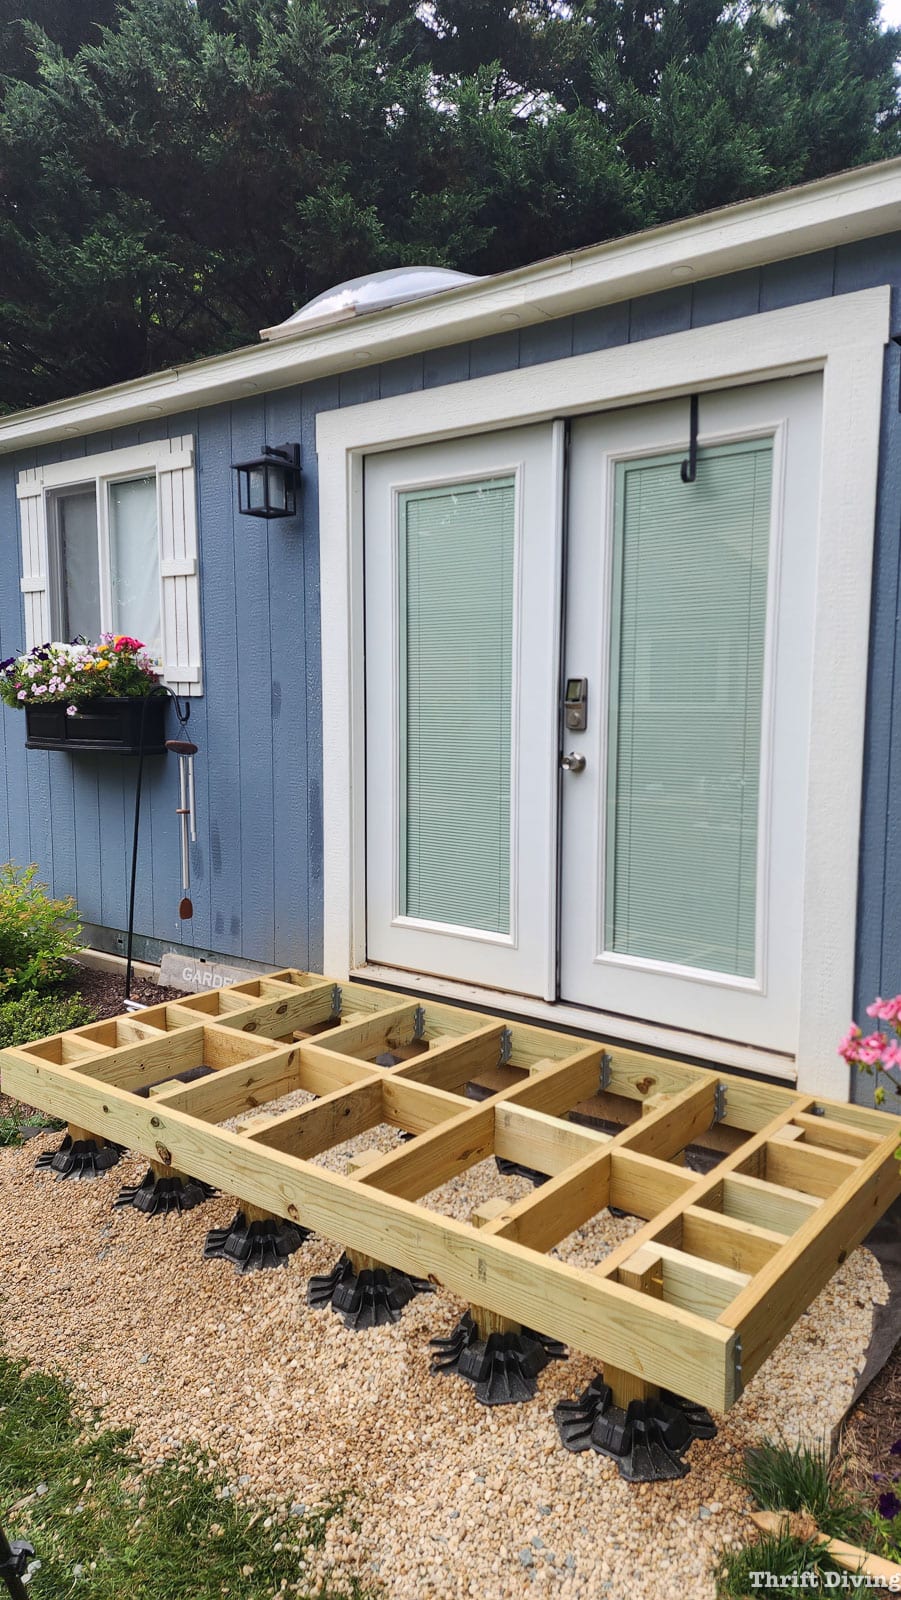
So this is the current state of the “she shed” deck so far. It makes for an interesting “step-up” when I go to work each morning, balancing across each joist like a tightrope walker performing for the first time.
The fear is that I’ll mis-step and twist an ankle. For that reason alone, I’ll be moving quickly on finishing up the deck this week, if all goes well!
I’ll admit that I’m nervous about properly framing out the steps, but with the SketchUp draft I created, I feel like it can’t go too wrong.
I’m even thinking about doing a small canopy over the door, as well!
Oh, and I’ve got to fix those mismatched touch-up painted spots. The paint wasn’t a good match. 😉
Be sure to come back to see how this deck turns out! I’ll have a full tutorial for you very soon!
Have you ever been scared of a project before? How did you overcome the fear and finished the project successfully? Leave a comment below to share!

Download the 5 freebies!

Thrift Diving inspires women to decorate, improve, and maintain their home themselves...using paint, power tools, and thrift stores! Use these 5 printables, checklists, and ebooks to get started!


This totally hit home with me! I’m not building a deck mind you, just decrapizizing my BIG file cabinet. To open it an see all the years of paper, receipts, and old manuals for appliances that have long ago been replaced, was an overwhelming task that I quickly slammed the drawer on waaaaay to many times. But when I started with a cup of coffee and just faced it one file folder at a time, it didn’t seem nearly as daunting. I realized that it didn’t all need to be done a week ago last Tuesday, it just needed to be done! I haven’t finished everything, yet, but the progress is really motivational! Just wanted to share, because the title of your post is what got me started. Thanks for the inspiration and can’t wait to see your finished deck! I’d say “break a leg” but we definitely don’t want that! WINK! WINK!
Hi Karen! Wow, you said something really important: one file folder at a time! It doesn’t have to get done all at once. I think if we kept that in mine more often, we would make a lot more progress in every part of our life! Thank you for sharing your progress, and I hope you’re still making a dent in “decrapizizing” your file cabinet! LOL (Love that word….)
freaking genius!!!!!!!!!!!!!! I’ve been wracking my brain trying to figure out how to build a small platform for a cupula I’ve refinished and want to put in my garden. Crushed stone? Ugh. That’s haaaard. Bricks or pavers, with little wedges to level it? Nope, that was a heavy and frustrating attempt. But Tuff Blocks??? YES! And, I just found a 4 pack on eBay, brand new for $21 – and free shipping!! It’s such a small area I need, just 24×24. I can adjust for the slope with the uprights. Serena, Dear Serena – this is the ZILLIONTH time your suggestions have solved my DIY problems!! Thank you!!
Awww….this is so awesome to hear, Ruth!!! So glad that I was able to provide a solution for you! YAY!!! Please do send me pics to show me how it turns out for you! They are super easy to use! You can also find them at Lowe’s (not Home Depot) for about $10 each! So you got a good deal for $21!
Confidence is earned over a lifetime of trial and error, but I think as women we often doubt ourselves. I struggle with that too, but, like you I’ve learned that progress is more important than perfection. Serena Apia: Keeping it real for as long as I’ve know you.
Now please, no sprained ankle posts. xo
Wise words, Alys! I think it’s okay to feel a lack of confidence at time, but it depends on what you do after that. Do you tackle something head on? Or run from it? I like to run TOWARDS it. Albeit SLOW…..but fast walking still counts, right? 😉 Thank you!
Can I ask how you came up with the framing part? Why the small ones to the left and to the right? I’m just curious. I made one for my husband’s bbq shed I made and I just scattered them. So wondering how you came up with that sketch. 🙂 thanks. trying to post comment but says I duplicated it already
Hey Sonia! Yes, the smaller ones are because the Tuff Blocks are back about a foot from the edge. Since the supports are back about a foot (so that the support block doesn’t show), the Tuff Block people recommend adding bracing to that area on both sides for extra strength. I hadn’t known to do that, but I learned it in their tutorial! I figure that it can’t hurt to “over” reinforce!
You’re an inspiration! Thanks for keeping it real and sharing your struggles along with your successes. We built a new home a little over three years ago and our door is fiberglass which was stained and sealed. I’m not so sure they didn’t just use the same stain and sealer from the inside of the house, and also it faces the sun, but it started fading/flaking last year. The thought of ruining our expensive fiberglass door with the beautiful craftsman stain glass window and matching sidelites scared me, and I was reading all kinds of tutorials, some that seemed too simple and probably wouldn’t hold up, and some that were quite involved. We ended up taking the door off and putting up a cheap temporary door so I could work on it in the garage. The cleaning part went okay, but I was way too heavy handed with the gel stain you have to use on fiberglass and it looked horrible. Frustrated, I started cleaning it off with mineral spirits and lo and behold, when it was partially removed it looked really good, like actual stained wood! I learned oil based stain needs three days to dry before using a water-based top coat. Now, a year later I haven’t done the sidelites yet, due to weather, sickness, and procrastination because I can’t remove them, and we live on a windy gravel road so I’m concerned about keeping it clean and my cat away from it while it dries, as well as making it match the door. I just need to go for it and it probably won’t be near as hard as I think, and they are also much smaller. Thanks for sharing, your she-shed is so cute!
Wow, what a project, Vicki! It definitely sounds like they used the wrong stain and sealer. For something that gets that much direct sunlight, they would have had to use something more appropriate and rated for outdoor use. But you did it!! So exciting, and I bet it looks great! Way to go. All that research you did paid off. I wonder if you could put up some sort of plastic sheeting and seal off that area from dust and pets?
Serena,yes it’s true. I am a cook ,seamstress (sounds so fancy)?I have been asked to make 400 mints for a wedding,at my church.No big deal,hah!What stymied me was using gold glitter as decorations. Had never used it before and just made myself silly worrying over it.,long story short good sense came to the rescue and they are finished, waiting for the hig day. !The mind is a wonderful gift, but yourself can really trip you up. Enjoy your shed. I have never worked with power tools,unless you count a drill yo use in putting up curtain rods in plaster. That was an adventure to say the least. Have a blesses day.
Hi Charleen! Wow…..400 is a huge number to make of ANYTHING! LOL. So glad they turned out for you! Did you do a few tests first to see how they would turn out, and then, once you were able to perfect it, you did the entire batch? That’s the best way! Test, test, test….and execute!
I really appreciate your insight and honesty about all the steps of fear, resistance and hesitation when it comes to doing something new, like this deck project. I think being conscious of how the fear stops us (not only in DIY projects) but other areas of life, gives us the ability to decide how we choose to tackle whatever it is. If we let it sit below conscious awareness, we’ll just keep doing the dishes or laundry or whatever sidetracks us away from our inner discomfort.
I run into this all the time with myself. Lately it has been working on a project that I started years ago making self-hypnosis meditations (I’m a counselor and hypnotherapist), creating a new website for the recordings, writing the sequences, recording and editing it myself, mastering the recordings, and the last part of dealing with marketing. All the different steps seemed overwhelming separately and adding all the steps of all those processes seemed impossible.
I have finally gotten to the place where I can look at the fear directly and say, “What is this resistance about?” And then, “So now what do I want to do about this?” It feels like developing a new type of muscle strength like we do when lifting weights, when it comes to pushing through the fear. The more I walk through each step, the satisfaction of figuring out how to do it outweighs the fear. The next time it’s just a little easier and at the end of the project I let myself feel good about the accomplishment.