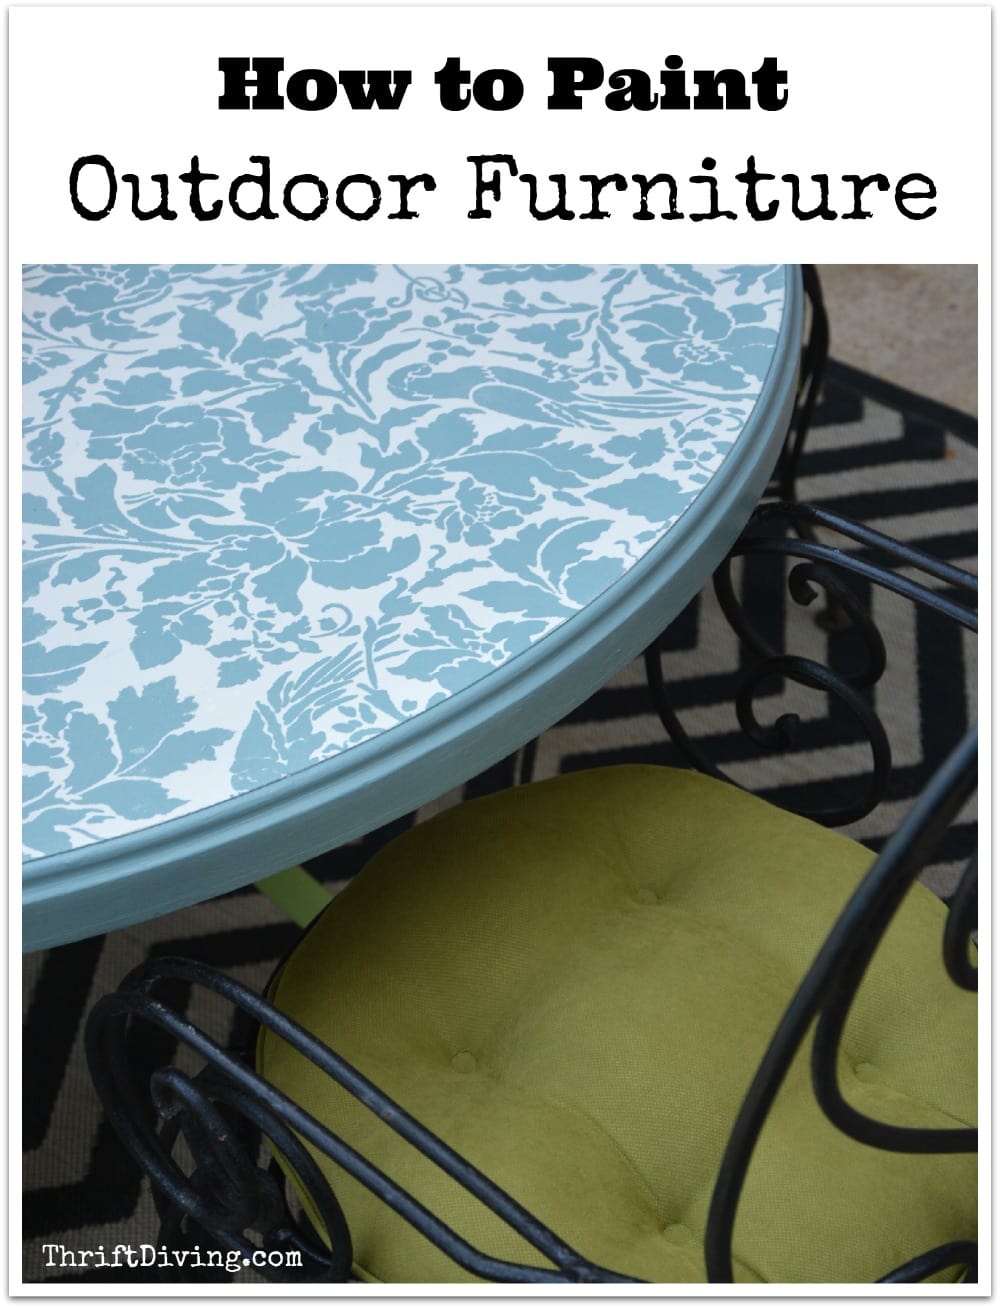
How to Paint Outdoor Furniture
I’m going to modernize that little saying just a tad:
“Insanity is painting the same piece of furniture over and over again and expecting different results.”
LOL….Here’s why.
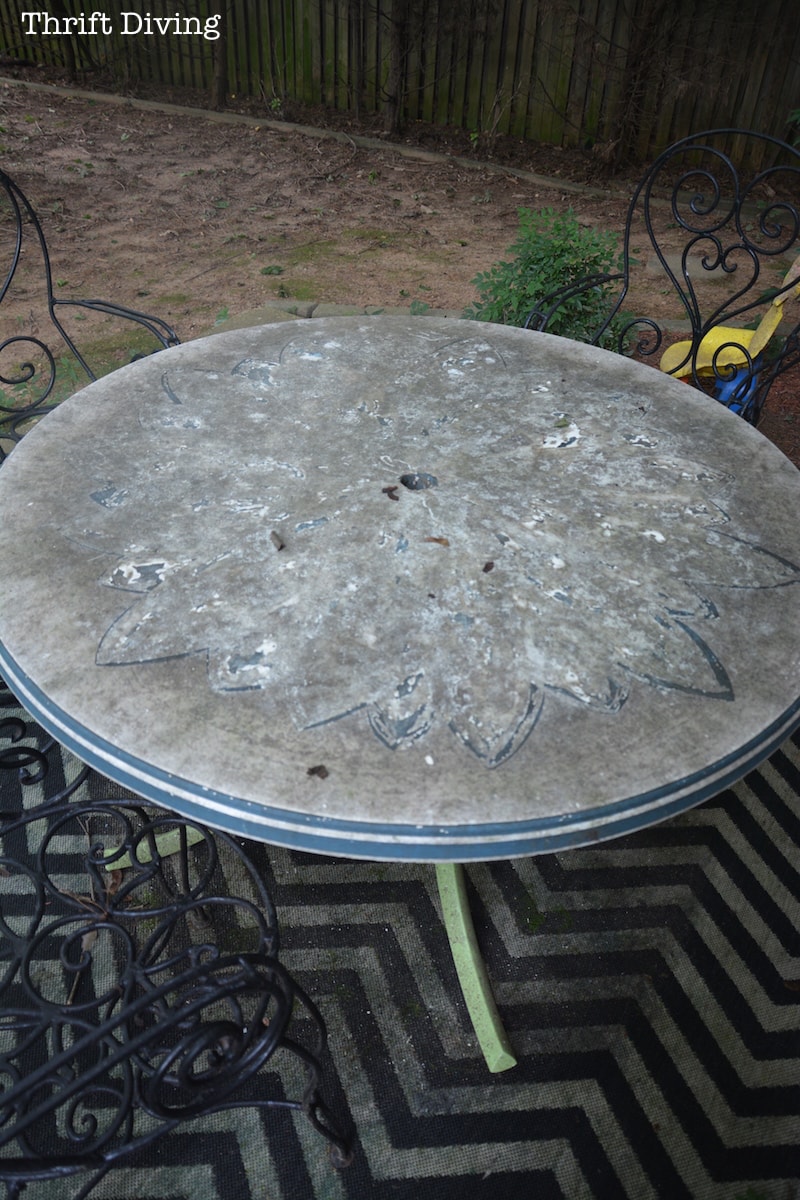
Remember this table I found next to a dumpster a few years ago?

After its awesome makeover where I hand-painted a flower on the top, it got totally ruined from the elements because my patio used to be always be shady, moist, and icky.
It looked so bad that if I had seen this on the side of the road??–dude–no way in the world I would have even dreamed of stopping! LOL
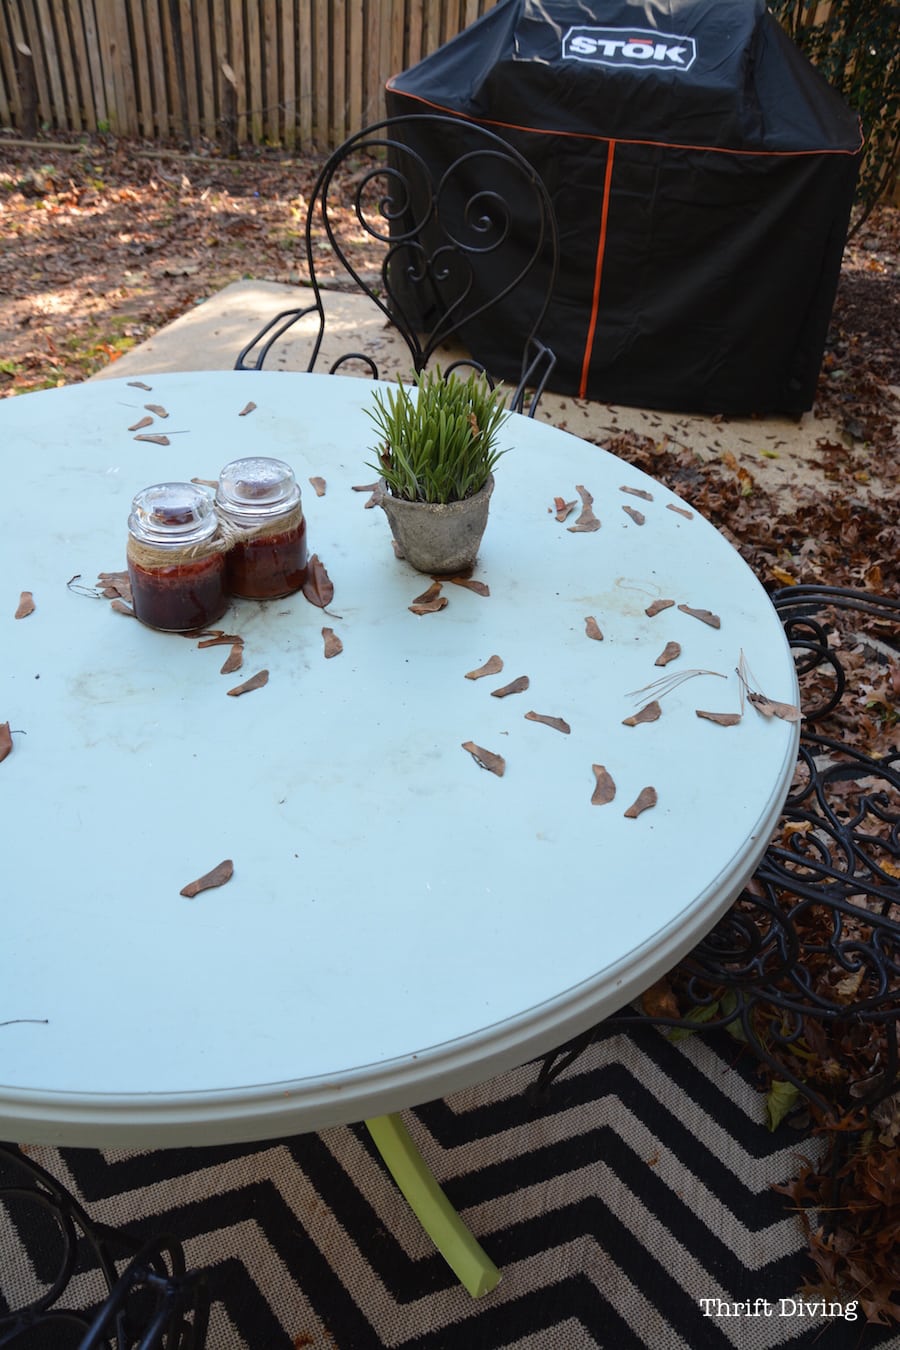
I washed it and sanded it down and started over this summer and turned it into a pretty plain patio table. (Click here to see my pretty patio makeover).
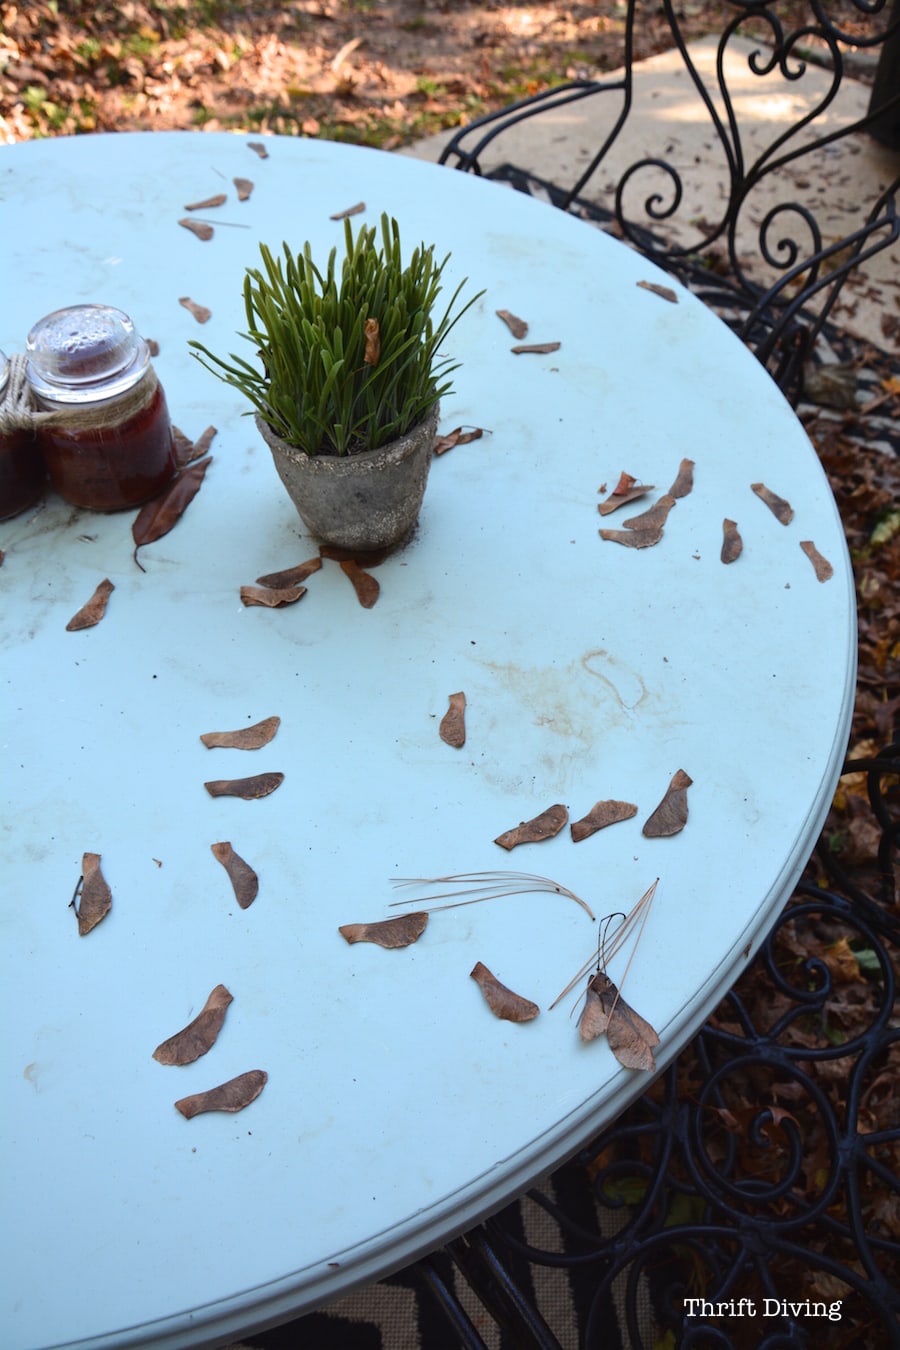
But just recently, after sitting out in the elements, it most recently looked like this. I just couldn’t win!
THEN IT GOT RUINED….Again….
So I decided to paint it this week one.final.time and squash all the insanity. HAHA!
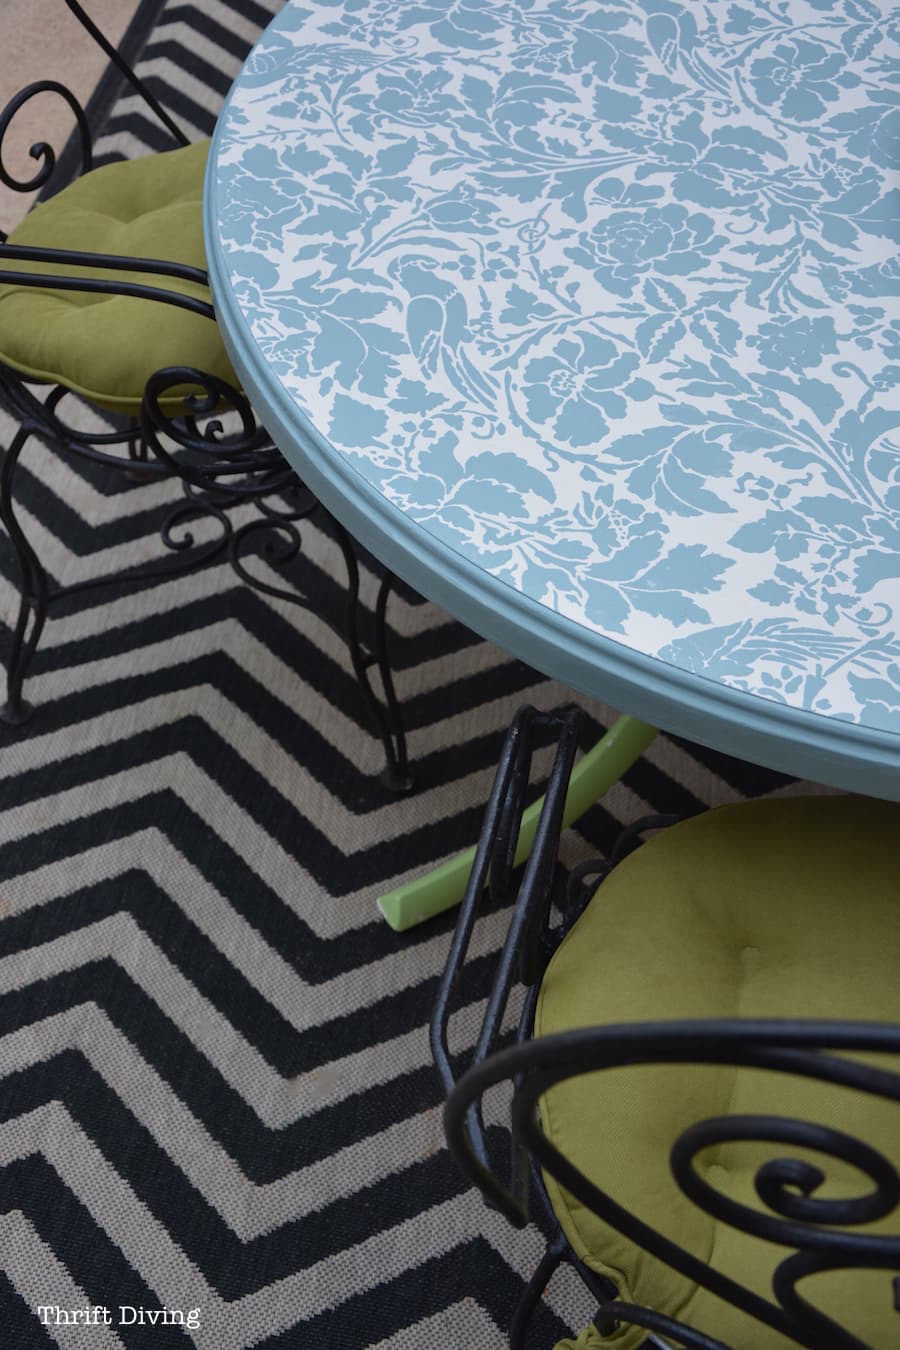
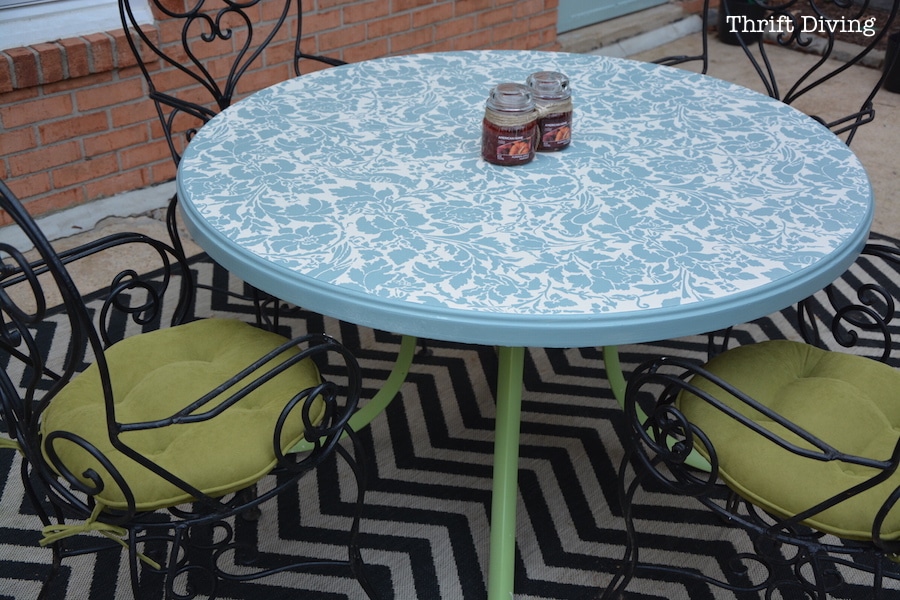
AFTER!

How to Paint Outdoor Furniture
Here’s what you’ll need to paint outdoor furniture that is going to be exposed to the elements.
Materials List
(I participant in the Amazon Services LLC Associates Program and other affiliate advertising programs designed to provide a means for me to earn fees by linking to Amazon.com and affiliated sites).
- Simple Green – The recommended cleaner and degreaser
- Beyond Paint – I used the colors Off White and Nantucket
- Small roller and brush
- Floral Damask Stencil
STEP 1 – Scrub and Scrub Some More
Make sure that your outdoor furniture is super clean. I love using Simple Green and an old scrub sponge to make sure I’ve gotten all the gunk off!
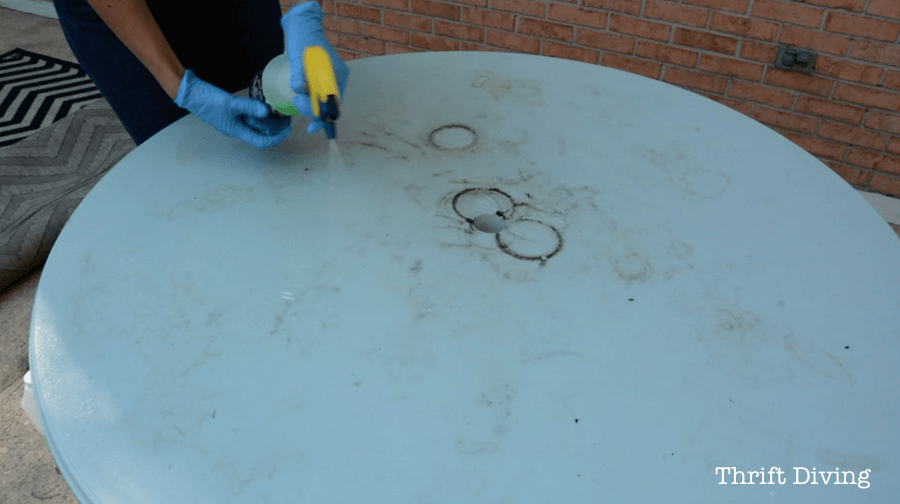
Let it dry for 24 hours if your outdoor furniture is porous. Mine’s not, so a good drying with towels was okay.


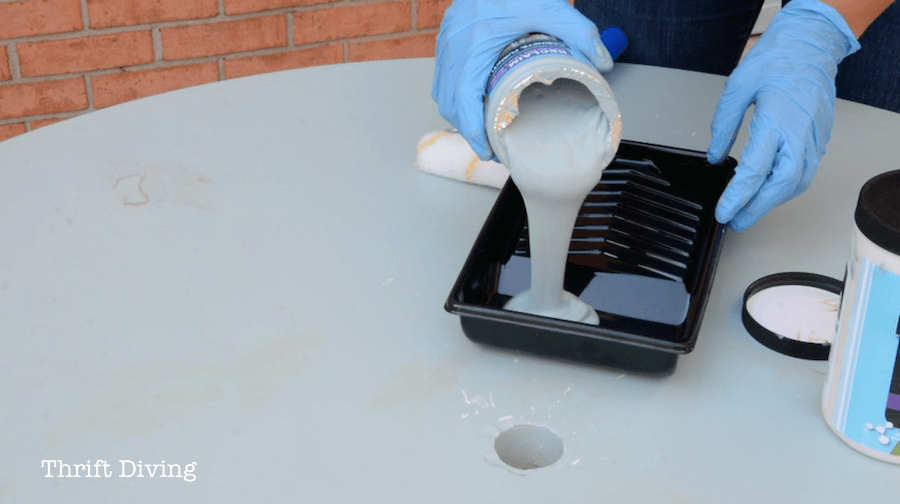
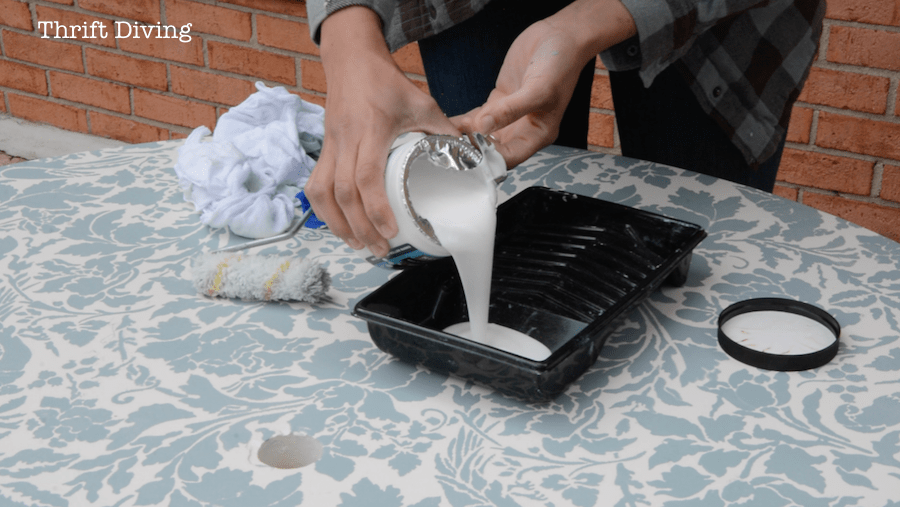
STEP 2 – Mix Your Paint Very Well
I’ve used Beyond Paint’s Off White and Nantucket before (when I painted my old thrifted china cabinet and for my vintage dresser in my bedroom). Both turned out amazing!
And since you can use it on outdoor furniture, too, I wanted to use it again. I like that there’s a sealer to help protect it. Just what I need!
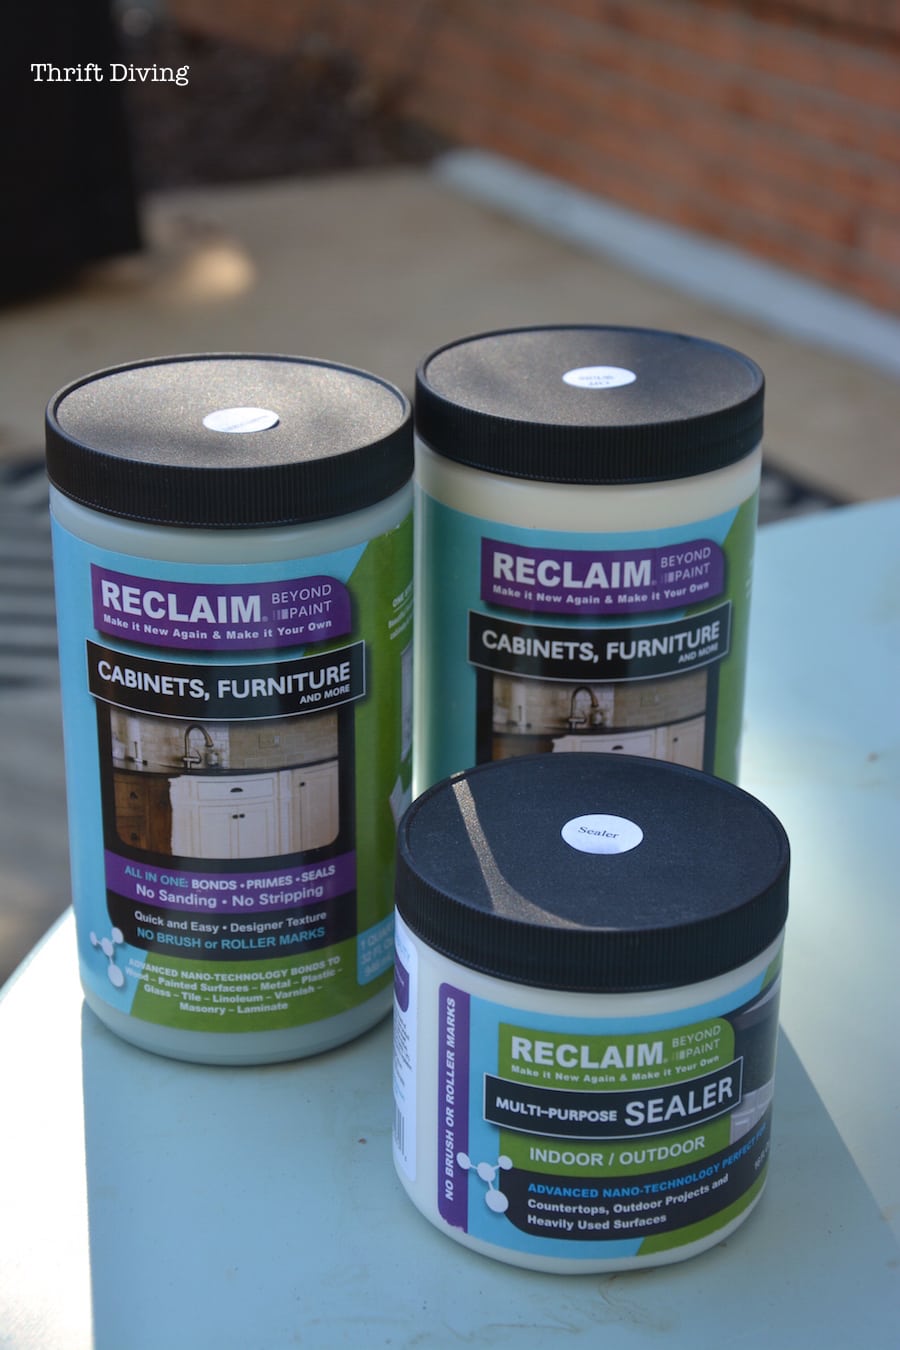
Beyond Paint is a non-toxic low-VOC “hearty” paint (I totally made up the “hearty” word, but it’s true). It goes on really smooth, has lots of pigment and body, and I like that it’s got a bit of sheen to it. It’s got a little sheen to it and lots of pigment, so it’s a full-body paint for projects that you want full coverage.
No sanding, no primer needed.
It’s self-sealing, so when I did my china cabinet and dresser, I was able to skip sealer and wax. WOO HOO! (P.S. I hate waxing furniture. Just sayin’…).
But since this table is going to be outdoors, it was going to need sealer.
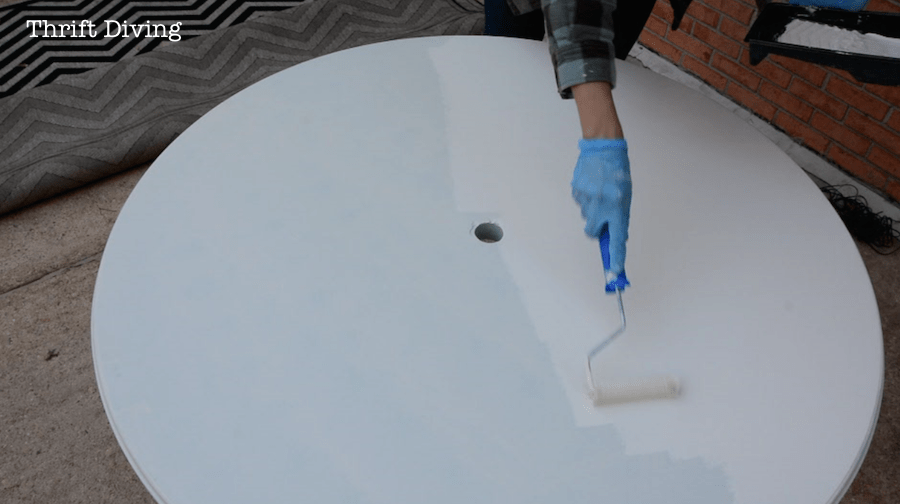
Oh, and before I forget–use a roller with this paint. It’s got some texture to it, and the texture responds well with a roller.
If you’re doing a piece that has lots of nooks and crannies, then you can use a brush, but you’ll just need it for pushing the paint into the crevices. Otherwise, just use rollers!

STEP 3 – Apply Your First Coat
Don’t go all paint crazy here :). Keep the paint on your brush very light and use long, even strokes.
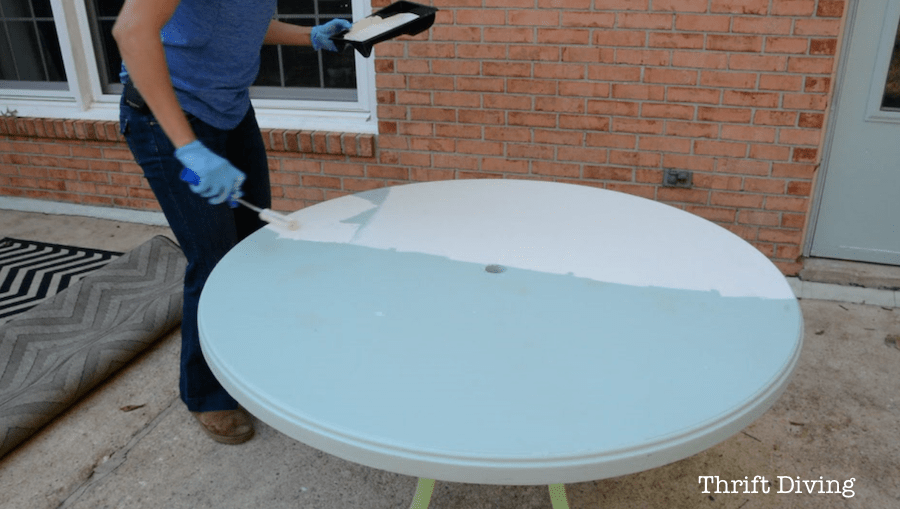
STEP 4 – Always Add a Second Coat
Most paint is going to require two coats. You can see here that with that second coat, it really covered the first coat really good!
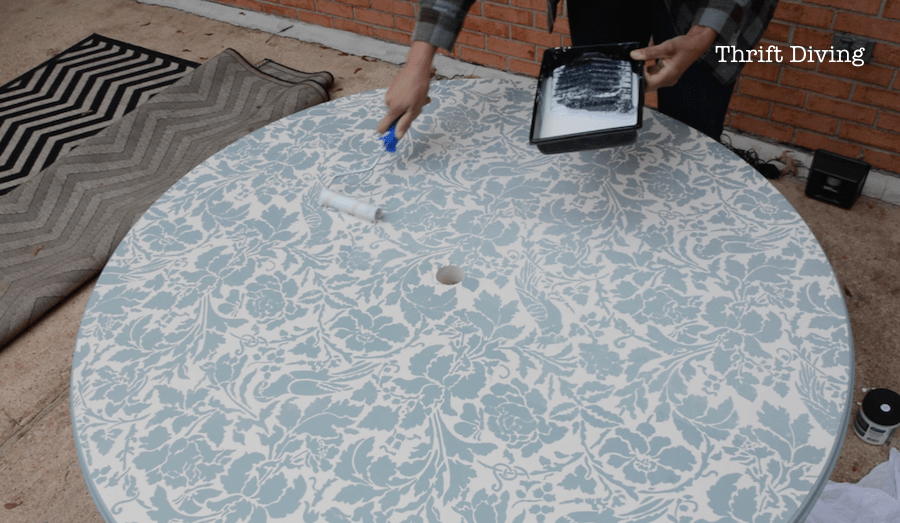
STEP 5 – Stencil on Top Color
I looooovvveee me some stencils on painted furniture. LOVE.
They just add a bit of flair without needing to do much more work!
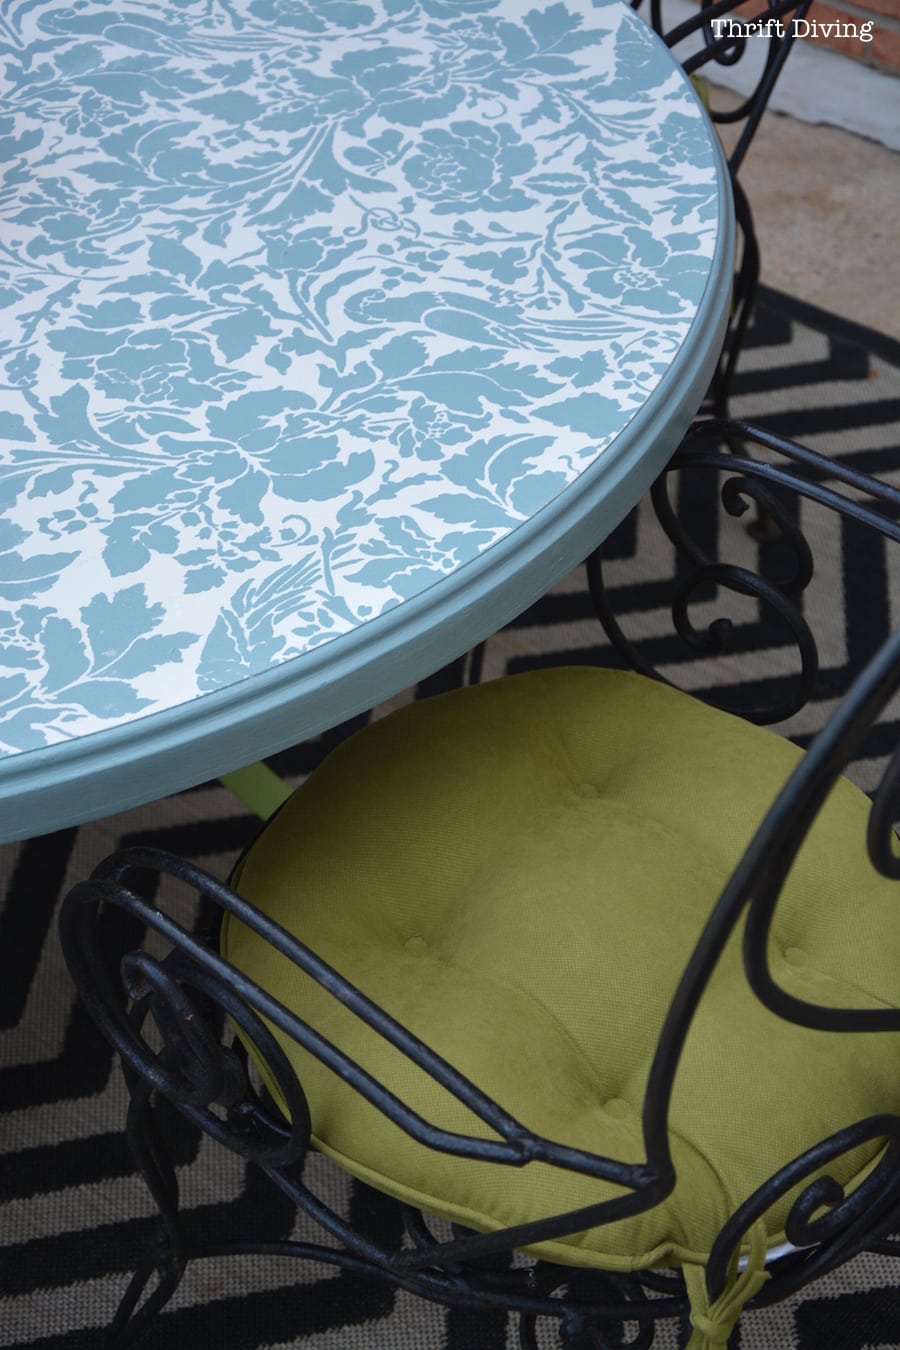
Here, I placed my pretty floral stencil down on the table and used the Beyond Paint Nantucket on top.
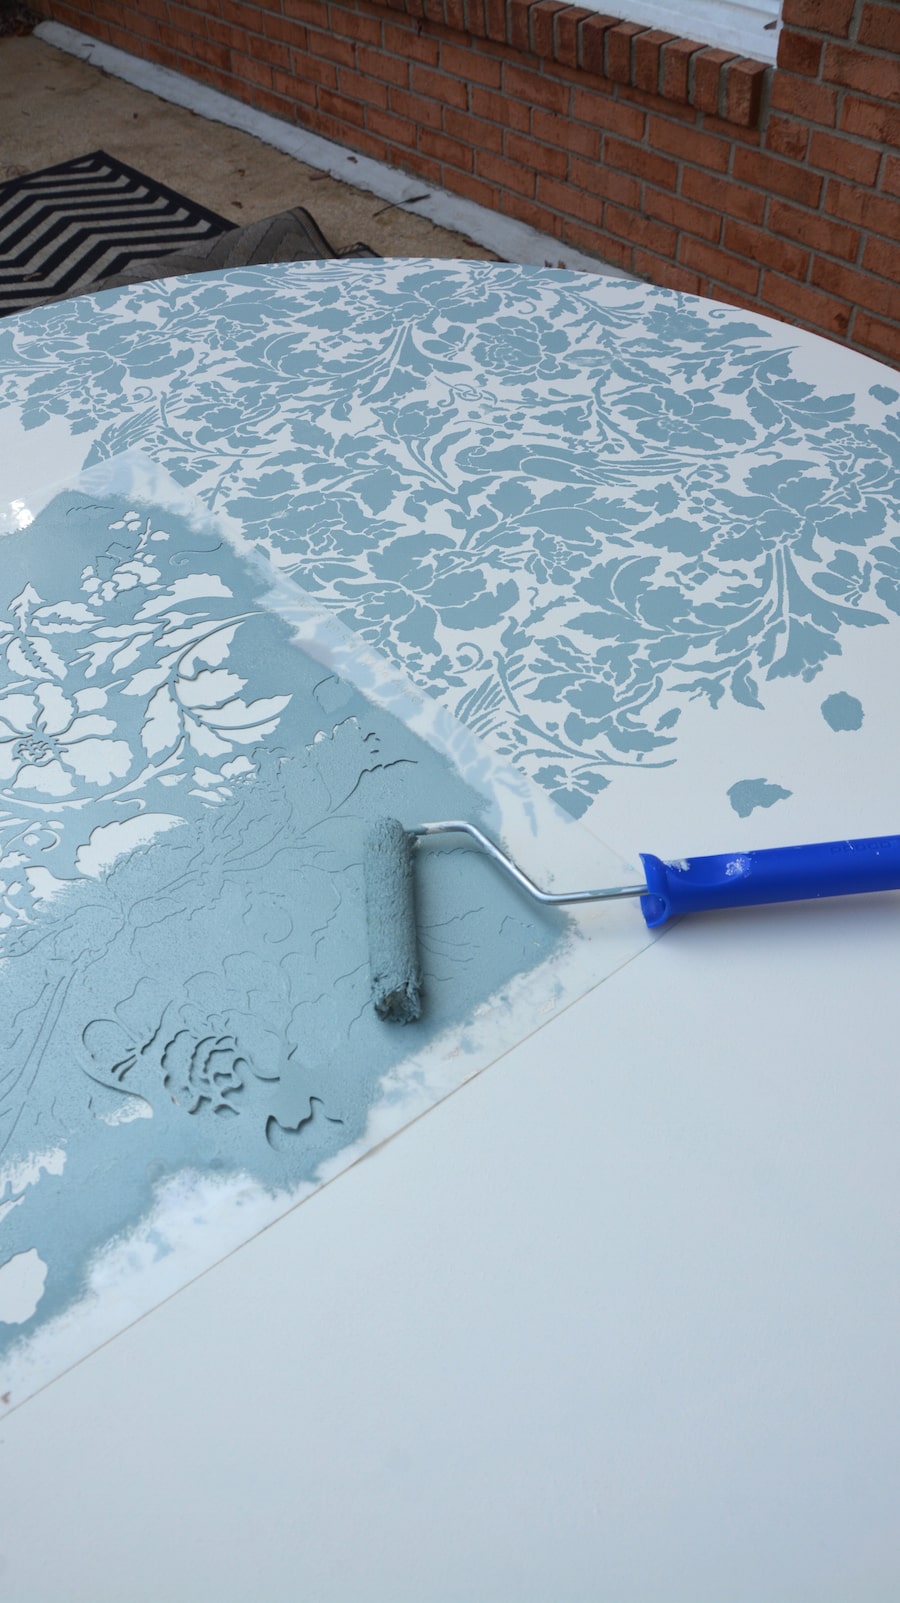
I also painted the sides of the table in the Nantucket!
I decided to keep the legs green, which match the seat cushions that I have for the chairs.
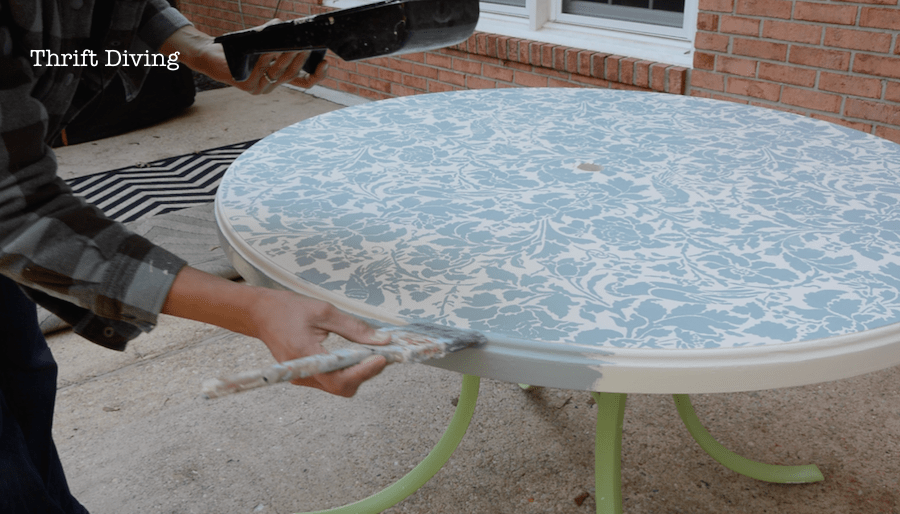
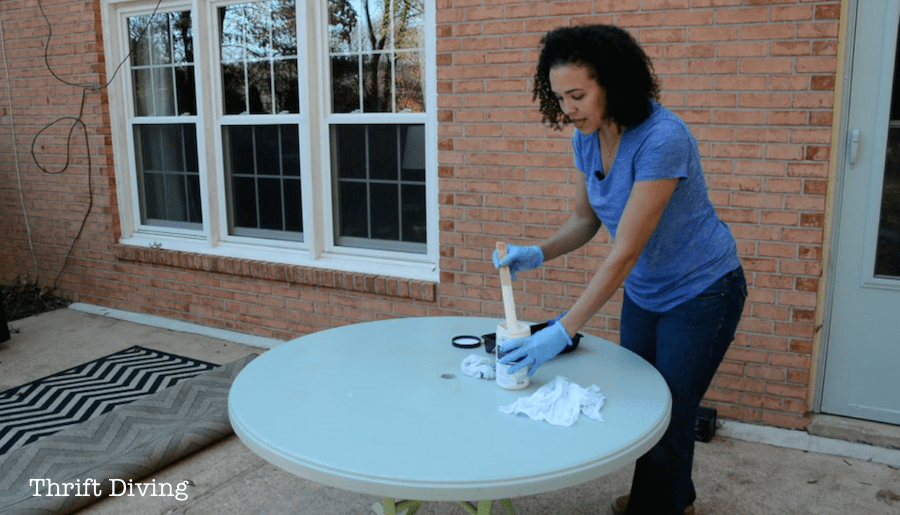
STEP 6 – Seal It In!
The last step is to seal the table. You’re supposed to wait 24 hours before sealing. But for the sake of time, I waited just a few hours. EEK! I hope that doesn’t screw me up down the road!! But….do as I say……not as I do. Okay? 😉
It will go on milky, but dries clear, so don’t be alarmed.
Apply it with a roller, too. I just washed out the same roller I used for the paint and used it with the sealer.
If you think you’re going to get rain, move it indoors to dry. Any water that touches it before it’s had time to fully cure (3 days) could make the sealer cloudy.
(And don’t you know it’s calling for rain tomorrow?! I better make room in my cluttered garage. HA!).
Watch the Video – How to Paint Outdoor Furniture
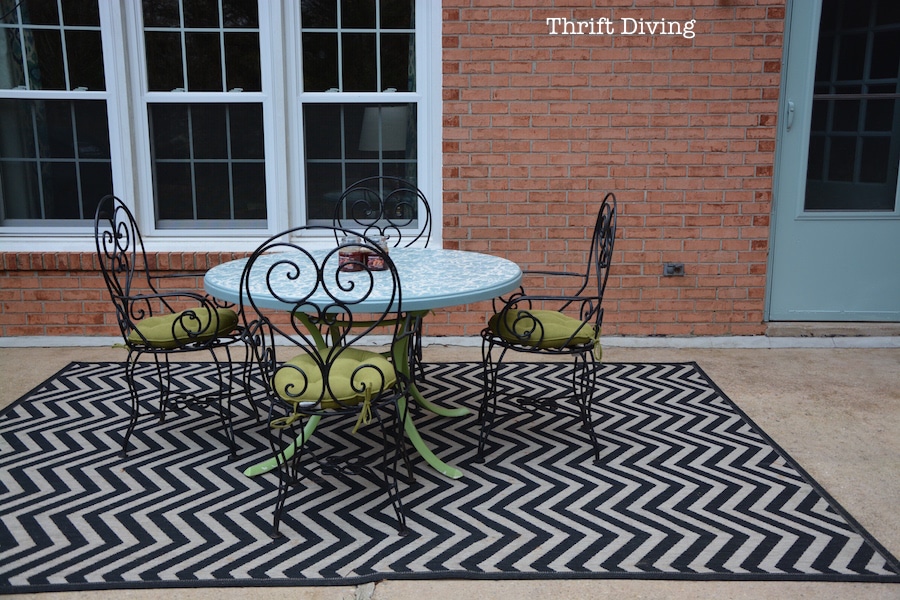
Here’s the table in action!
Let’s see the BEFORE again.
BEFORE
AFTER!
Send them a “LIKE” over on the Beyond Paint Facebook page and let them know Thrift Diving sent you!

This post was brought to you by Beyond Paint. This project and all writing and opinions are my own! Enjoy!
Download the 5 freebies!

Thrift Diving inspires women to decorate, improve, and maintain their home themselves...using paint, power tools, and thrift stores! Use these 5 printables, checklists, and ebooks to get started!
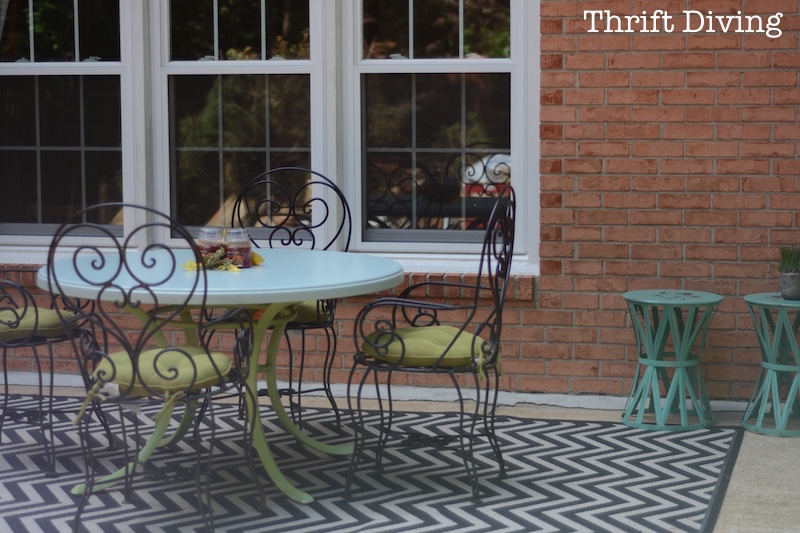
It came out so nice. I love how it all looks on that black and white rug!
Hello, I’m a newbie to the diy world. I’ve been terrified to make a move on anything because I have zero experience. But seeing all of your projects has given me motivation to go for it! 🙂 So I actually picked up a set of dining chairs on the side of the road and stuffed them in my car 😆 I really like the paint you used, my question is, should I seal the chairs? You said only seal if high traffic areas. Is a dining chair considered one?? My mind tells me yes, but my gut is still wondering 🙄 Story of my life..
Anyway, thank you so much for all of your help and for inspiring us with all that you do!! You’re a beautiful soul 🤗
Would love a link to buy this exact stencil design.
How long has this table lasted? looks great! would love to see how it’s been holding up!
Hi, I’m new here and just browsing through your blog. How has this table held up with this kind of paint? Did the sealer help maintain the paint?
Hi there! Beautiful work. You make it look so easy! In fact, sooooooo easy, I might have to try this…
Question: I have a wrought iron bistro set that has been rusting in my backyard for the last … ummmm… several years? Do you think this Reclaim paint will go over that, or will I need to sand it down?
Thanks in advance. You da BOMB!
They came out really nice.
Thanks, Altagracia!! 🙂
Hi, Serena. Beautiful makeover and colors! They (whoever they are) say, “3rd time’s the charm!” My philosophy says, “If it doesn’t work the first time, try again until it does! lol It does look like a tablecloth. Love that! That last picture of the patio with the table and chairs on the rug is CHARMING!
My apartment has a small deck with a closet size storage room off it. I want to try container gardening, using some plastic shelves and pots, but also would like a small bistro table and a couple chairs. This post gives me some IDEAS! I was very concerned because anything out there is exposed to the elements, but now I think it can work! Come Spring I’ll be looking for that table at garage sales, thrift stores, ??? Haven’t decided on any colors yet, but the building is painted a soft creamy yellowish color, so lots of possibilities. I love how you spark ideas!
Hey Serena, I love the “new” table! I have a square glass top table that I want to repaint. Thanks for sharing your experiences. I’m thinking of using Rustoleum. Well it will have to wait until next Spring. We’re supposed to have snow on Friday…. Love ya’
Ooh, snow! I really wish we would get some. It’s been too warm. But we’re supposed to be getting a cooling down here in Maryland, so I’m excited about that! Where do you live that you’re getting snow?
I’m in Wisconsin….
Wisconsin is beautiful! 🙂
Beautiful! It looks like a tablecloth. I hope the third time is the charm! Do yourself a favor and cover that table and those pretty iron chairs for the winter. You will thank yourself in the spring!
Gretchen, you are so right! It does look like a tablecloth now that you mention it! I’m going to head to Home Depot today and get some plastic because it’s supposed to rain. I was thinking I’d shove it in the garage but that’s not going to work. LOL. Too much crap in there for that. I’ll cover them up for sure!!! Glad you like it!