How to Remove Wood Scratches on Furniture and Kitchen Cabinets
The post on how to remove wood scratches on furniture and cabinets is sponsored by The Home Depot.
What if you don’t want to paint wood, but you don’t want to strip and re-stain it, either? What if you only want to remove the wood scratches and restore it to its original glory? Well, there is a way to restore it. That’s what I sought to find out with my latest thrift store furniture makeover. I knew there had to be a better way to restore tables, chairs, and other pieces of wood furniture (and even kitchen cabinets!) instead of painting or stripping.
Watch: How to Remove Scratches on Furniture and Kitchen Cabinets
I used to paint every single piece of wood furniture I bought from the thrift store. That is, until I built my own custom bathroom vanity from scratch. Manipulating the red oak, shaping it into something that started as only a vision in my mind, sparked an appreciation that didn’t previously exist. Suddenly, I wanted to preserve wood, uncover it, re-stain it, bring it back to life. It is a living thing, after all.
Moving forward after I built the vanity, I thought long and hard about whether a piece of wood was destined to be restored or painted. If it had a bunch of nooks and crannies, it often got painted (have you ever tried to strip and re-stain round legs and nooks and crannies?! Believe me–it’s the worse kind of DIY punishment).
But if it’s a flat surface like a desk, table, or vanity, I typically try to salvage the wood top, like the pretty pink French Provincial vanity I thrifted for $10.
Chairs, though, are a whole separate beast. There are so many sides and parts, some of them hard to reach, some of them curved, that it makes stripping time consuming and difficult.
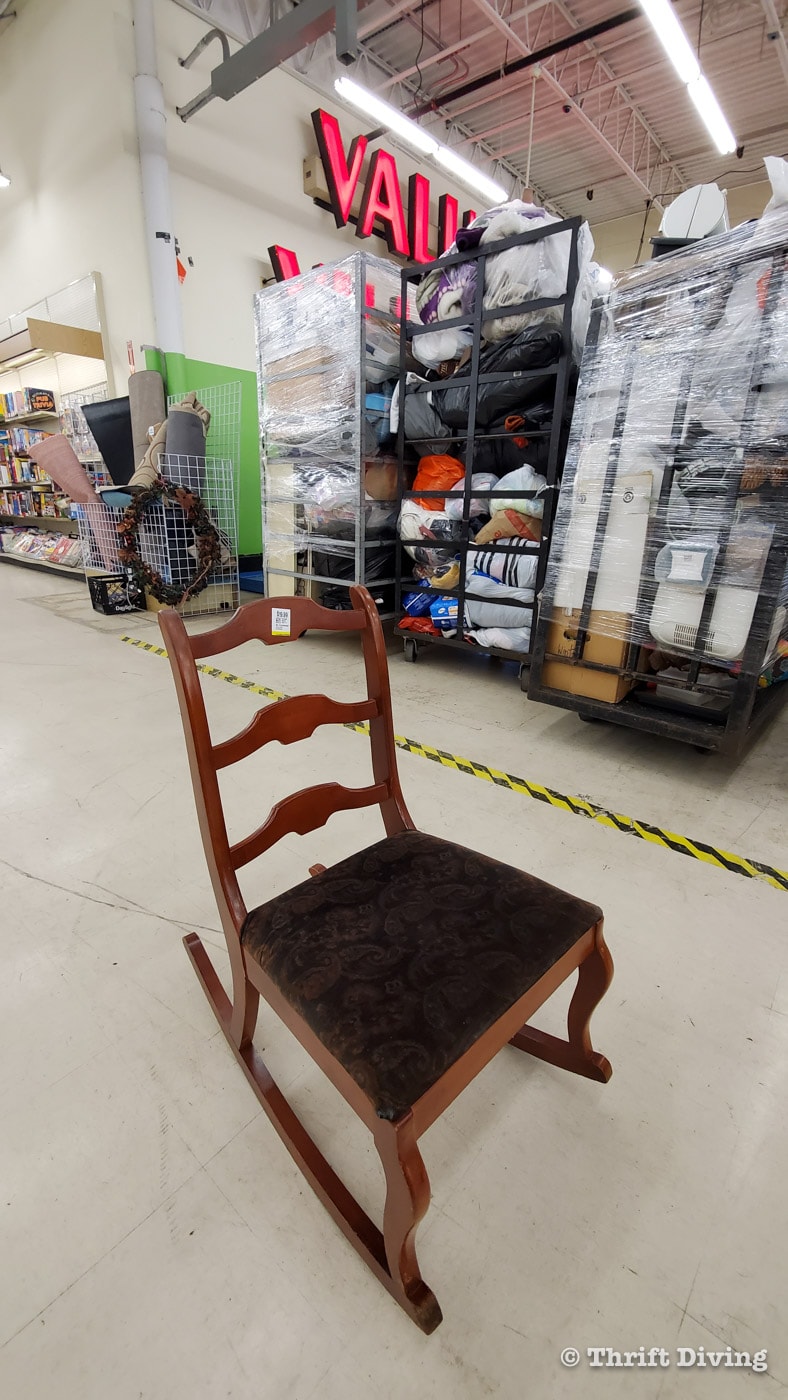
That’s what I sought to find out with this amazingly little $20 thrifted wooden rocking chair that I nearly overlooked one day at the thrift store.
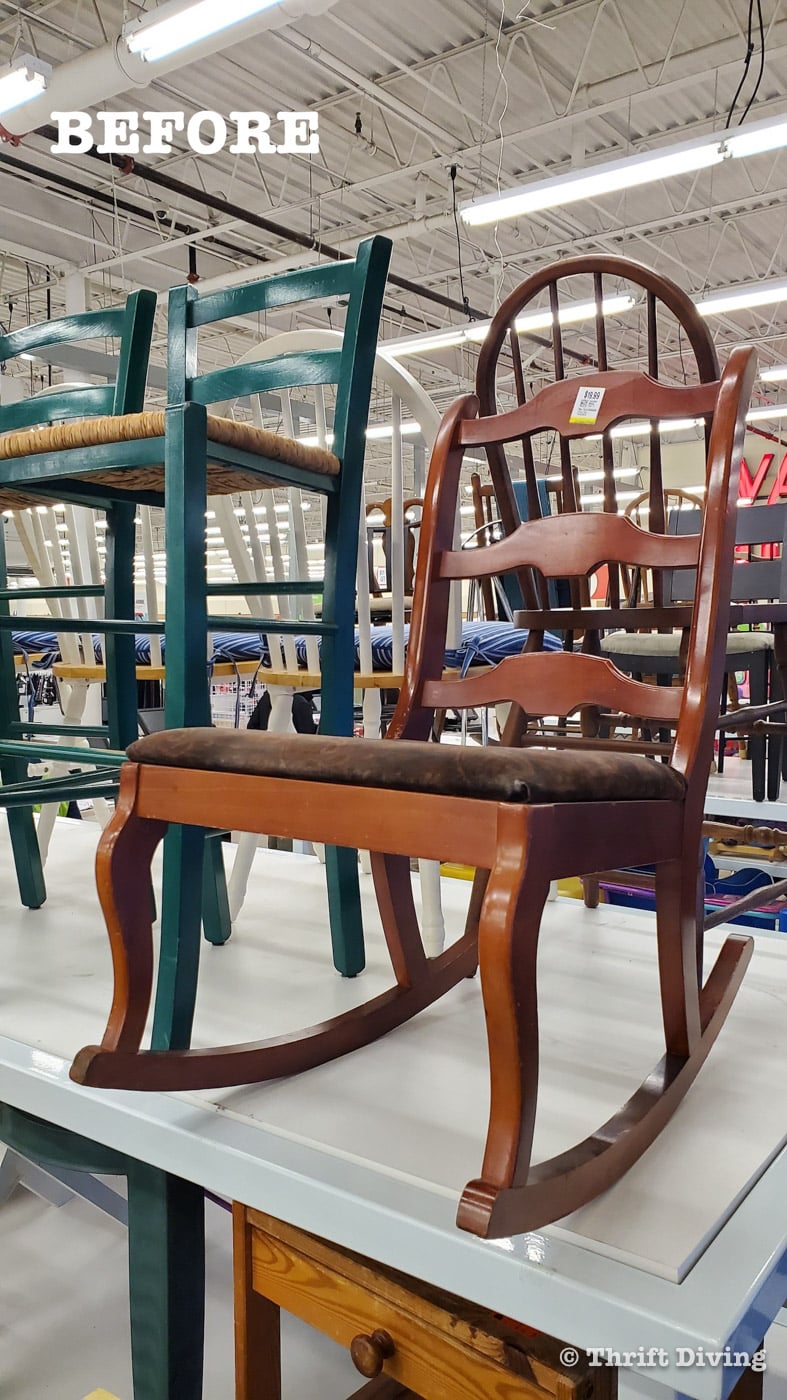
Thrift store furniture can be in near-perfect condition but just have some scratches that you need to hide, or it can be a total strip-job that can take hours (days, perhaps??) to restore. Thankfully, this rocking chair was the former: great condition but a little beat up with scratches in the wood. Not to mention that it had three hideous layers of upholstery on the seat (I later discovered) that needed to be changed. But it was in solid condition, which was a plus. Now, the question was, could I restore this wood chair without stripping? Could I bring it back to life? We were about to find out!
About 6 months ago I had picked up a pack of these wood repair markers because I was curious about whether they worked to remove scratches on wood furniture, cabinets, and wood floors. An opportunity came up recently where the company that makes these wanted to sponsor an Instagram video of me using some of these markers, including testing out their furniture restorer solution. My curiosity was piqued. If they worked as well as I had hoped, it could potentially save you and I a whoooolllle lot of headache when it comes to restoring thrifted furniture!

In this blog post, I’ll walk you through what I did to restore the wooden rocking chair and some tips for using these wood repair markers so you have success with using them, too! Ready? Let’s jump in with the materials you’ll need to fix wood scratches! (And yes, although this post is geared towards wood furniture and cabinets, it will also work to fix scratches on on wood flooring, too).
Materials
(The following materials are affiliate links on HomeDepot.com. Shopping through these links cost nothing for you but will provide a small commission to Thrift Diving. Thank you!)
- Wood repair markers
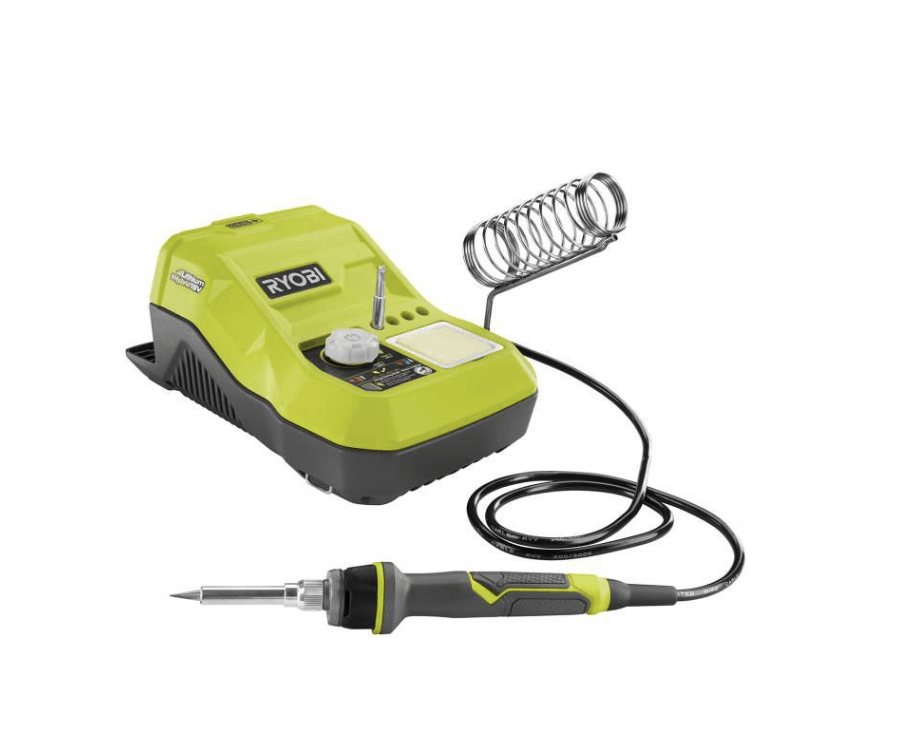
- Dremel Cordless Screwdriver
- Cabinet & Furniture Restorer
- Lint-free cloth
- Lemon oil
- Fabric
- Stapler
- Staples 3/8″
- Microfiber cloth
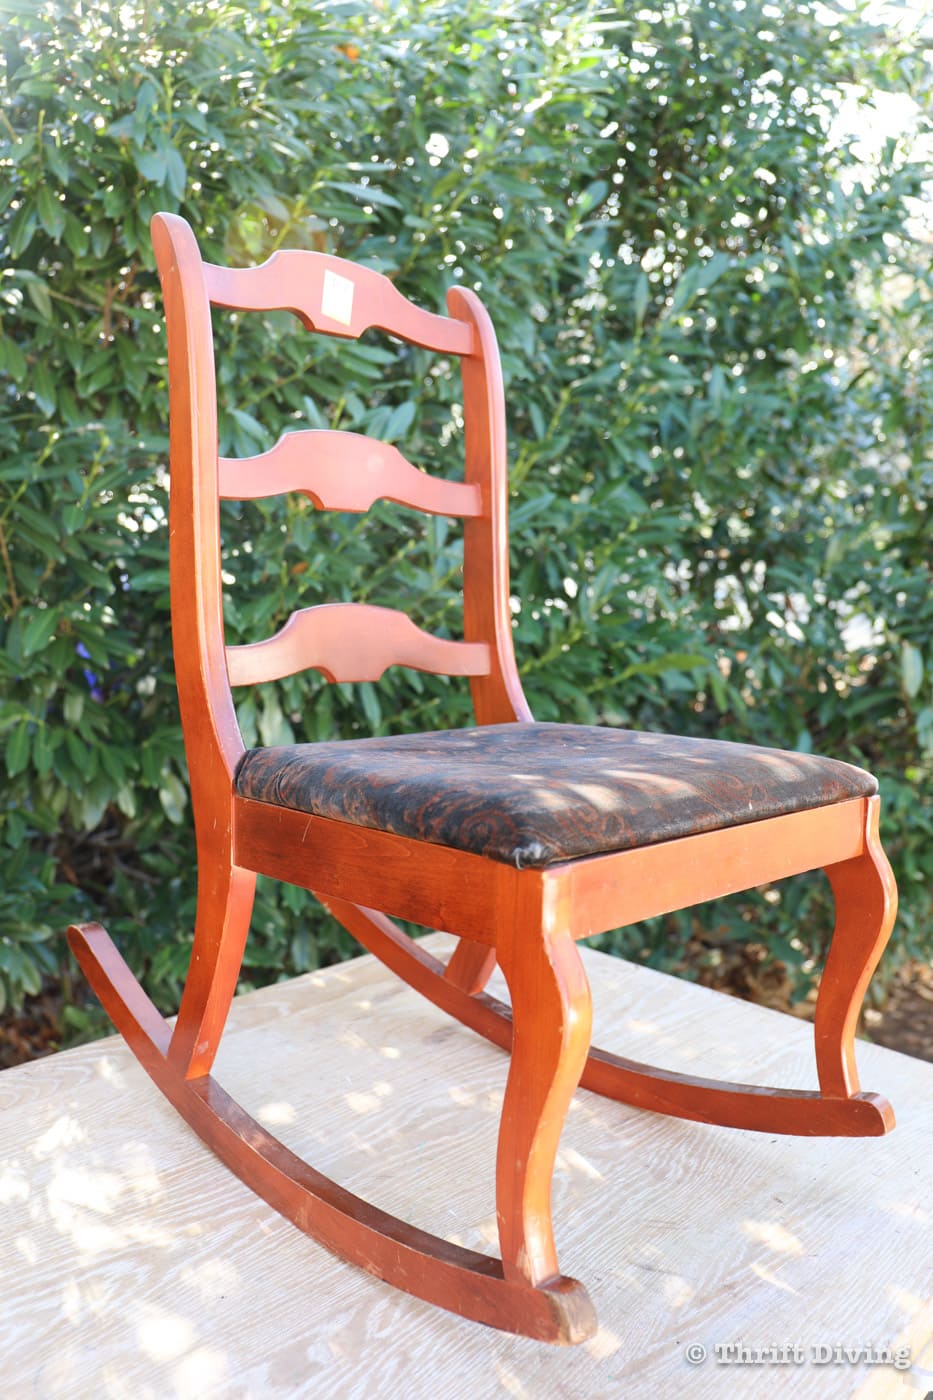
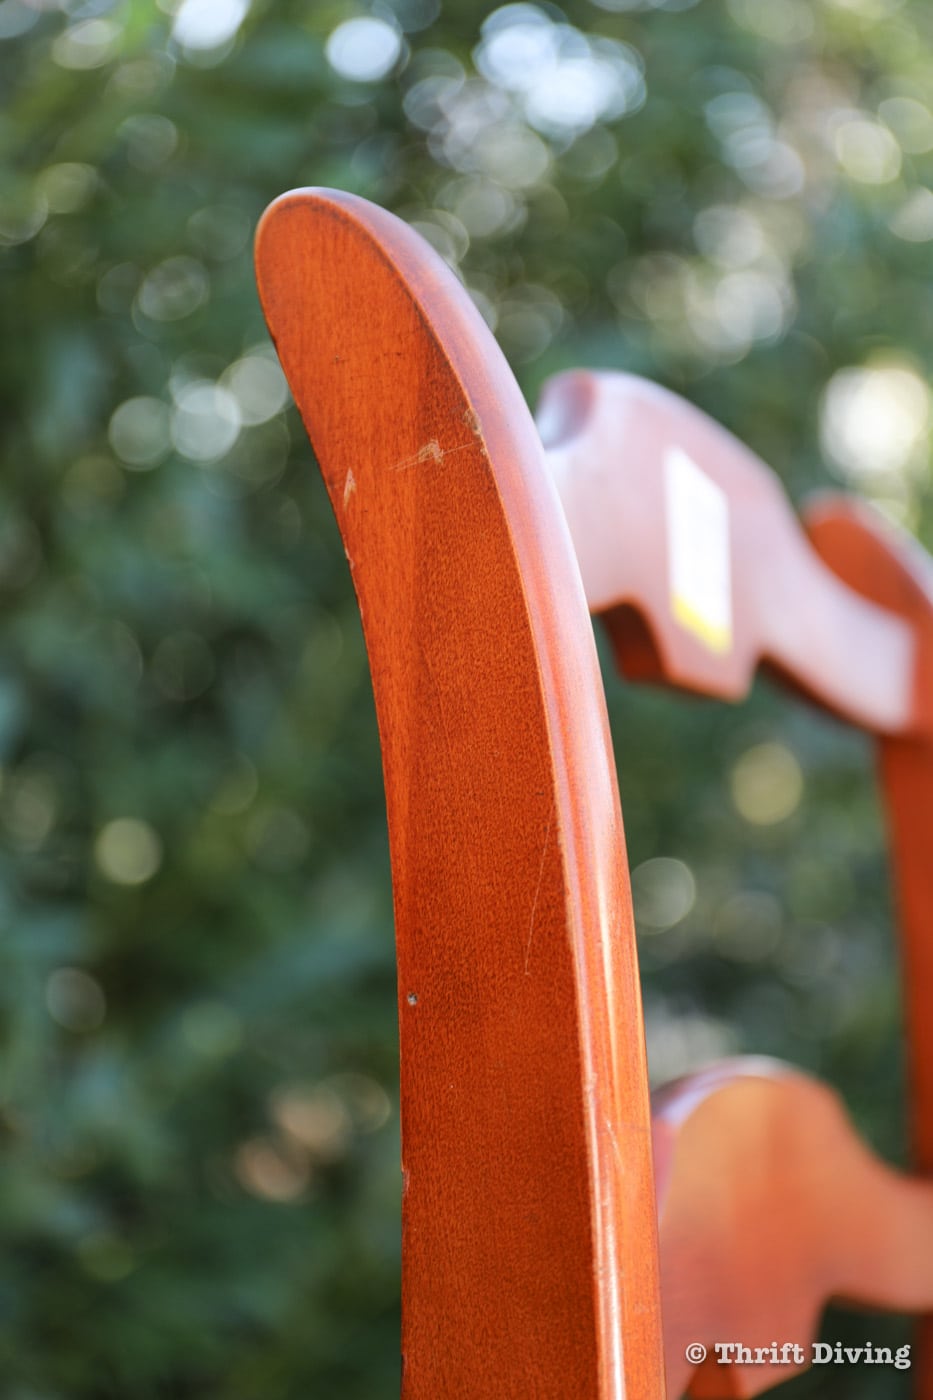
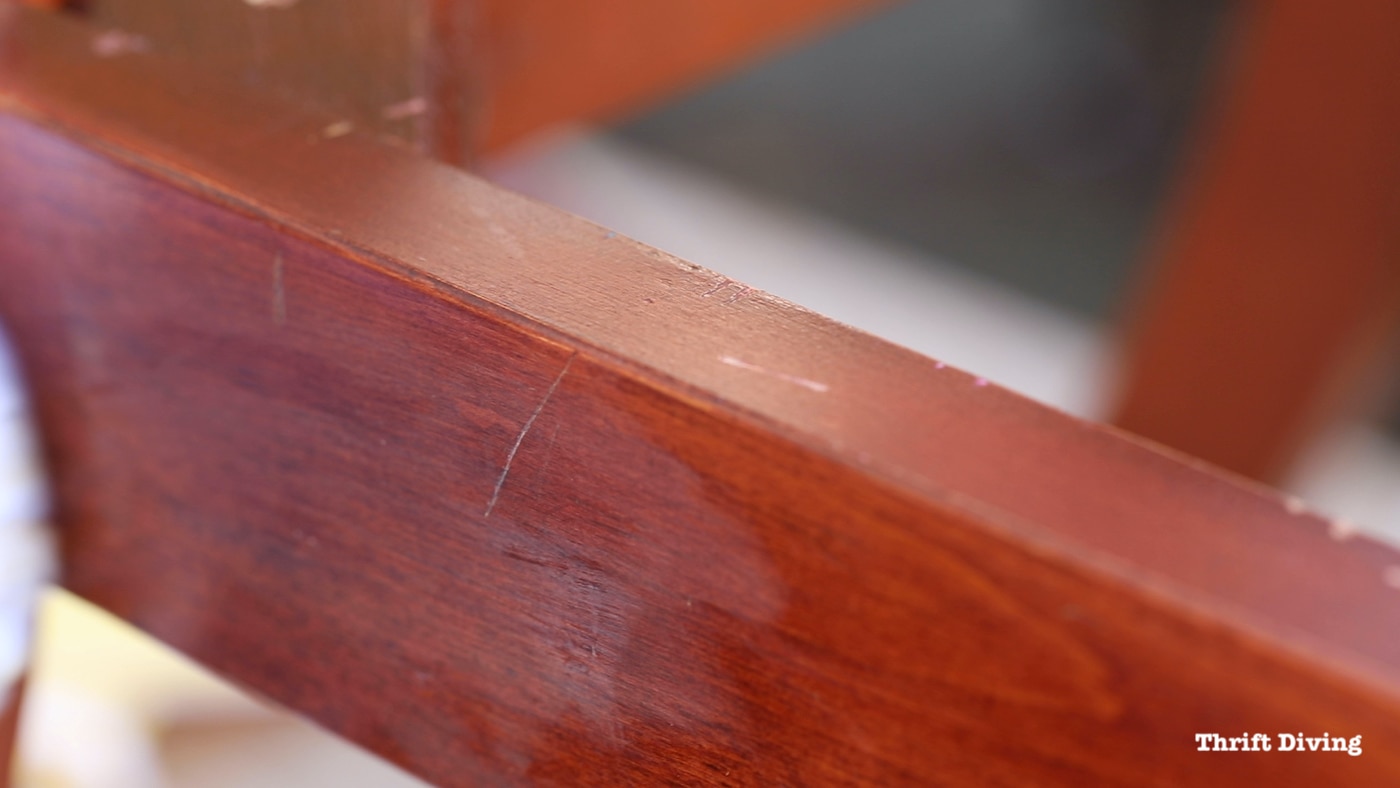
The Wood Scratches
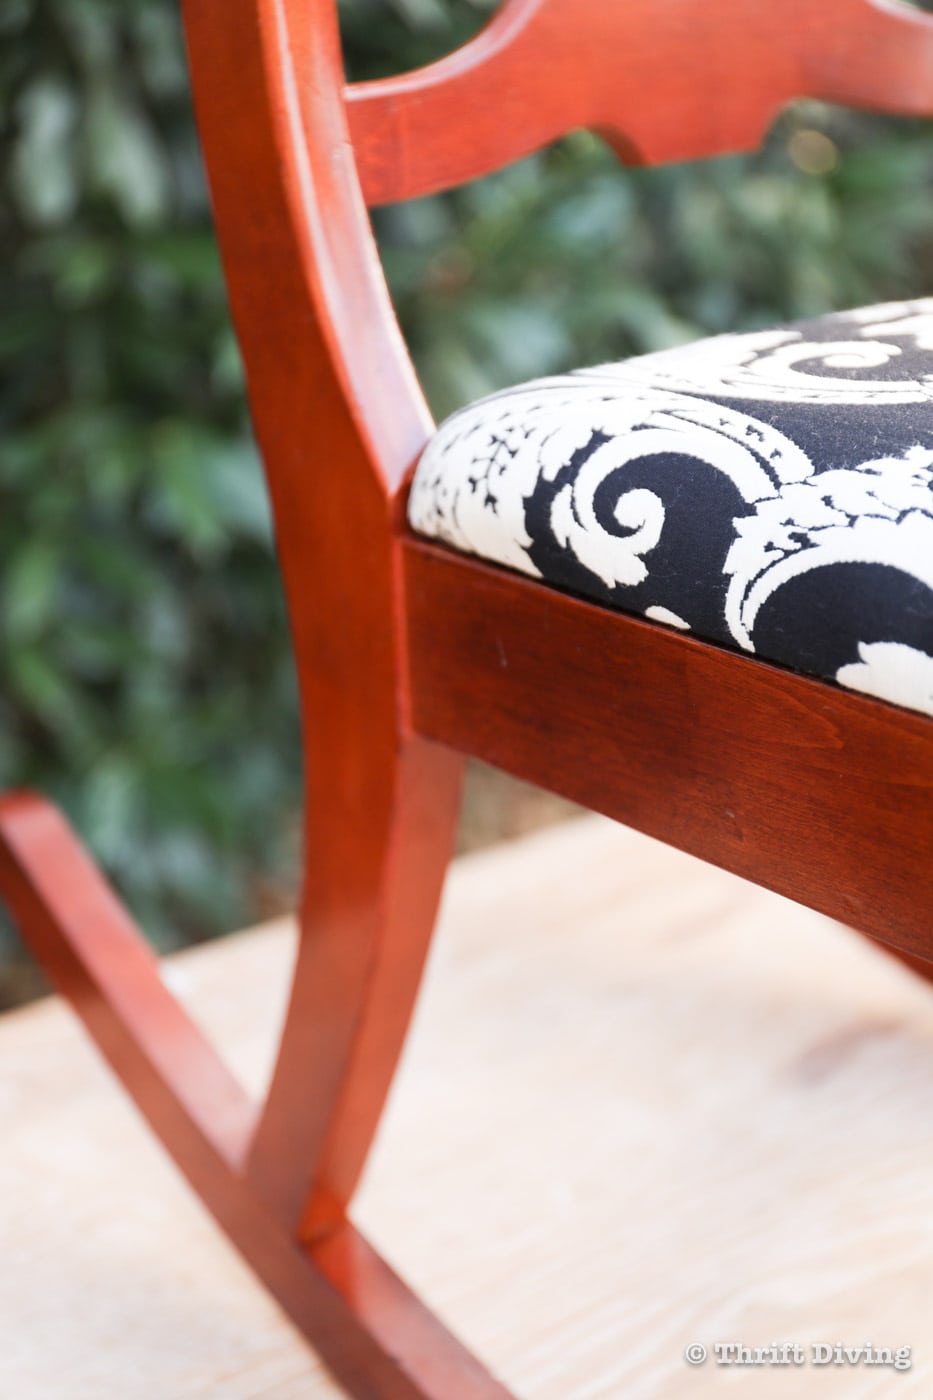
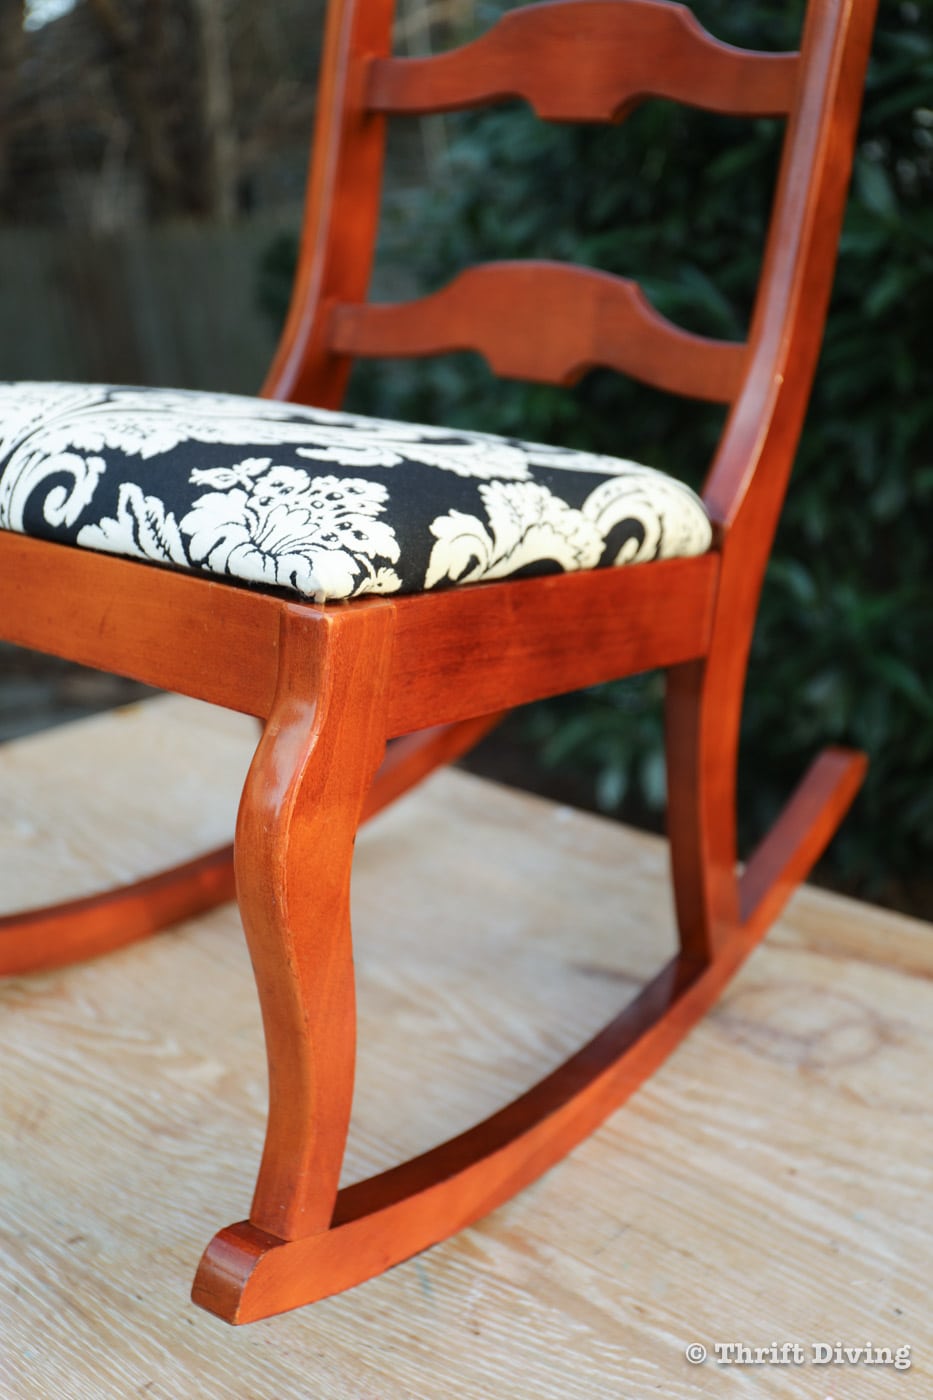
From the close-ups of this rocking chair, you can see that the wood scratches are minimal. I mean, if I were to reupholster this seat cushion and leave the wood alone, it wouldn’t be the worst thing in the world. But it wouldn’t look “fresh.” The wood would still look like it’s seen a decade or two.
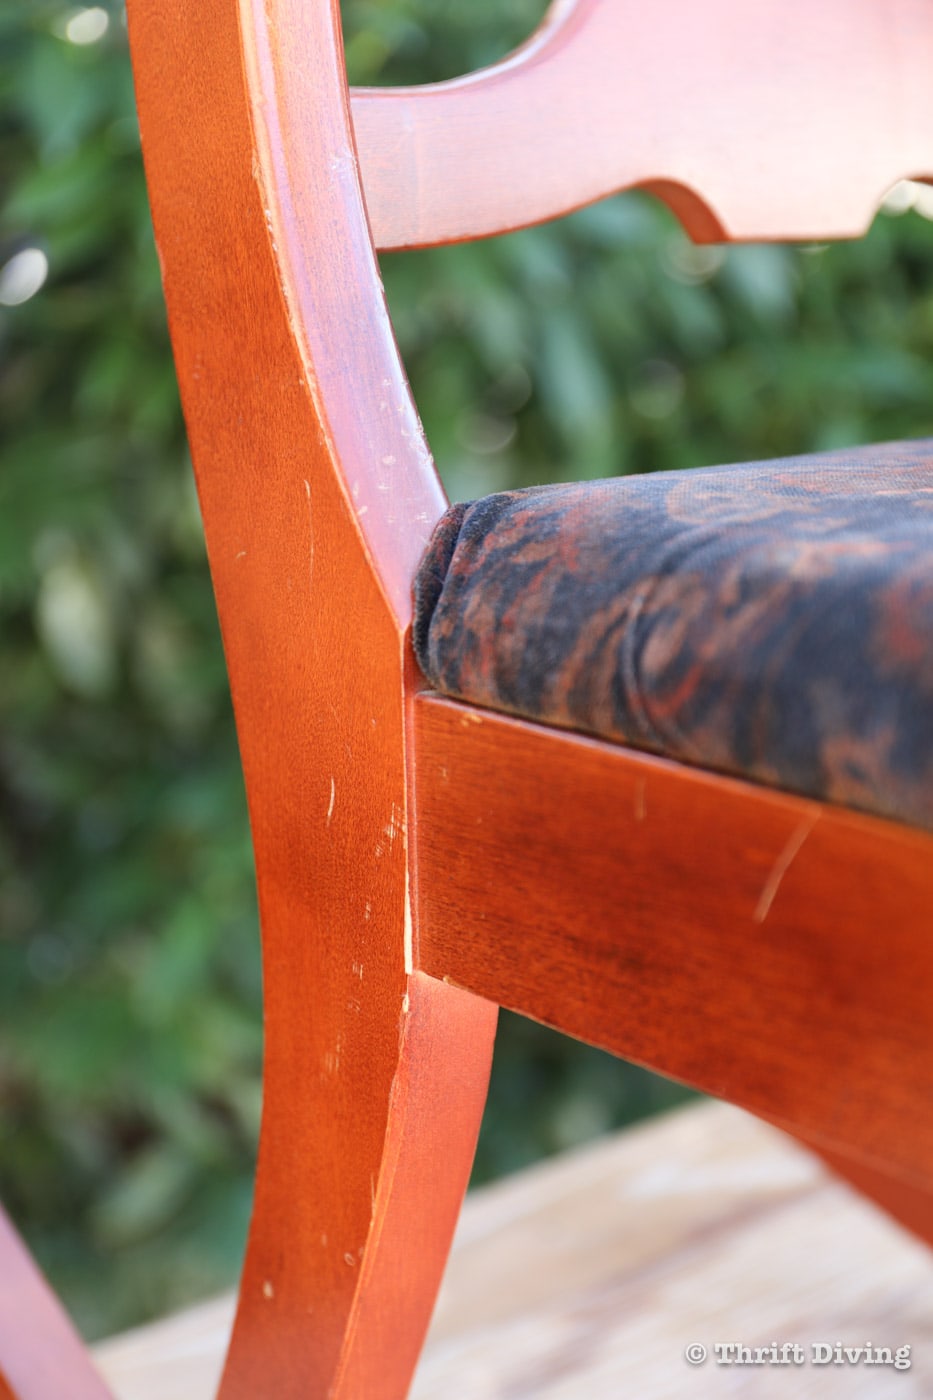
There are, of course, some parts of the chair that had a bit more damage, like an animal had scratched and gouged the edge of the leg. There wasn’t much I could do about that since I was attempting to restore it without any sanding–just wood markers and some shine. But I was hoping that by coloring it in with the wood repair markers, I would be able to disguise it well.
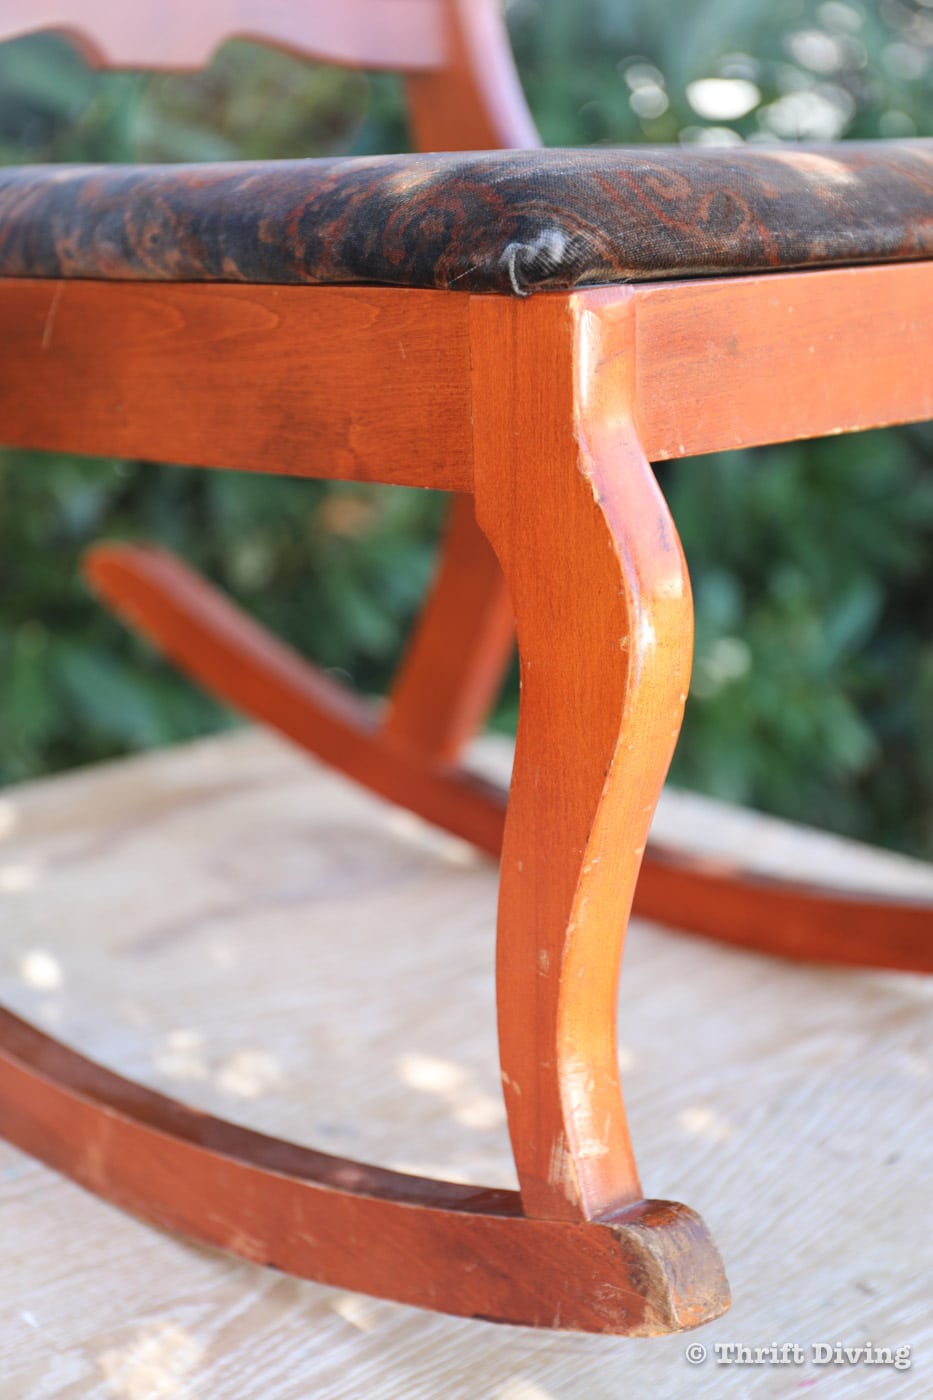
But most of these scratches and dings were pretty simple. I couldn’t wait to see how well I could fix them!
Now that you know what I was working with, let’s jump into the step-by-step tutorial on how to remove wood scratches. Or better yet, how to hide wood scratches, since really, removing scratches is best done with sandpaper (or color wax, which I have no experience using, but am curious to try some day!). But for this post, we’re skipping the sandpaper, filler wax, or anything else. We’re just seeing how well the wood repair makers perform, along with the wipe-on shine! 🙂
STEP 1: Wash the Wood
Before doing any project with furniture, you always want to wipe it down first. Sounds pretty simple, but I won’t lie that sometimes I would just jump right in to begin painting a piece of furniture. Stupid, I know, but this was eons ago when I had first started refinishing furniture. Call it laziness. Call it ignorance. But now, I know better. Including repairing wood scratches. The chair needs a good clean up. My go-to for cleaning furniture projects before painting or refinishing is Simple Green. Mix about 1 oz with 1 cup of water, spray it on, wipe it off, and then wipe with a clean, fresh cloth.
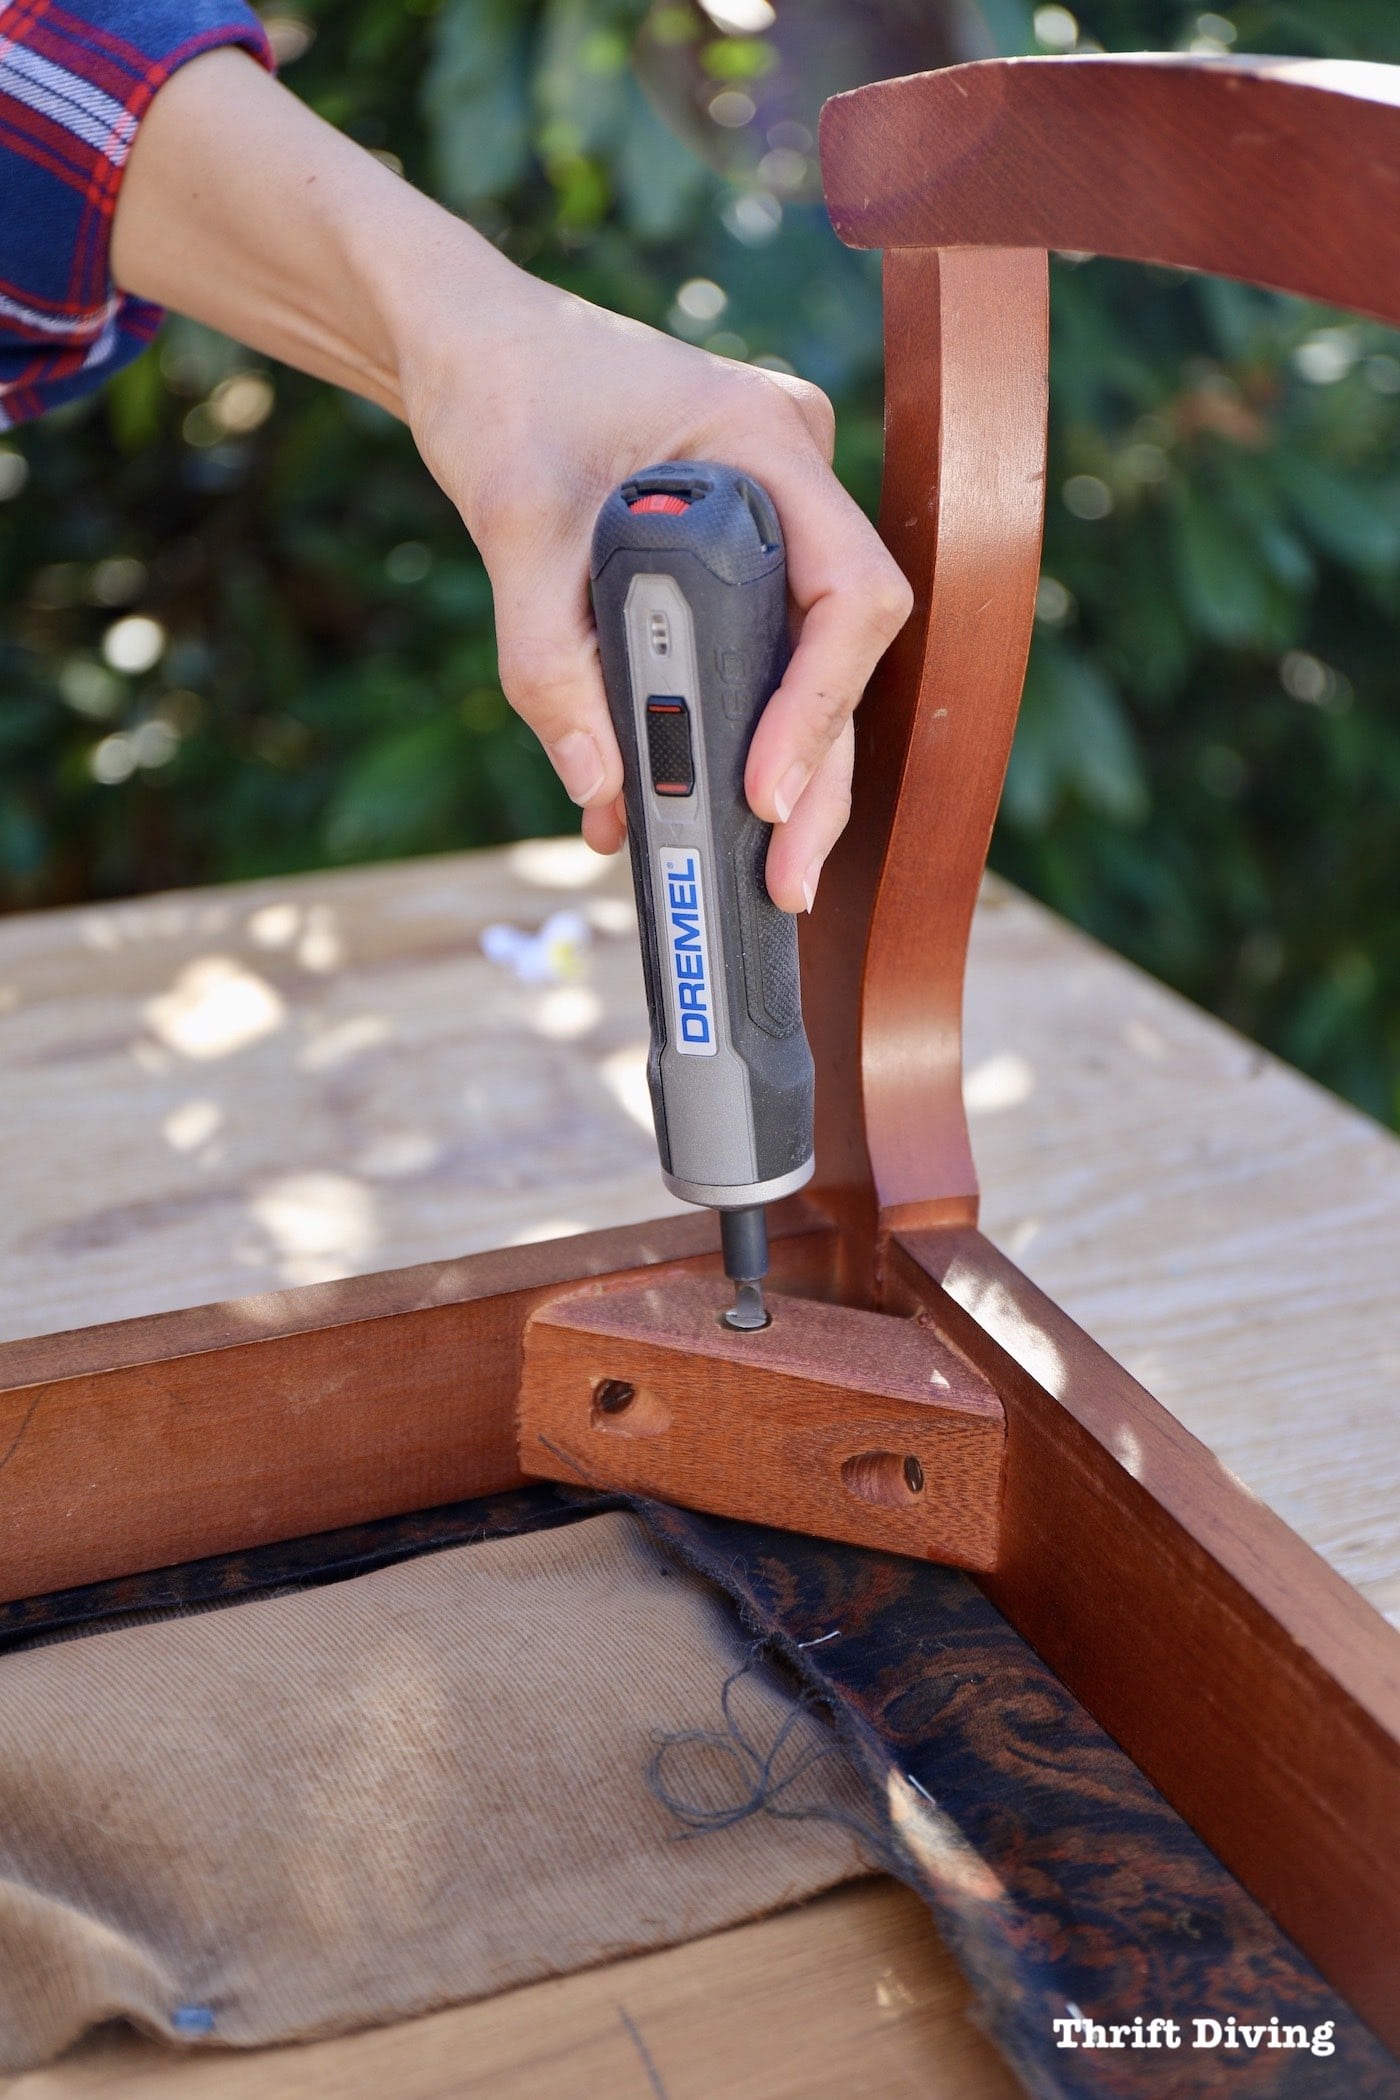
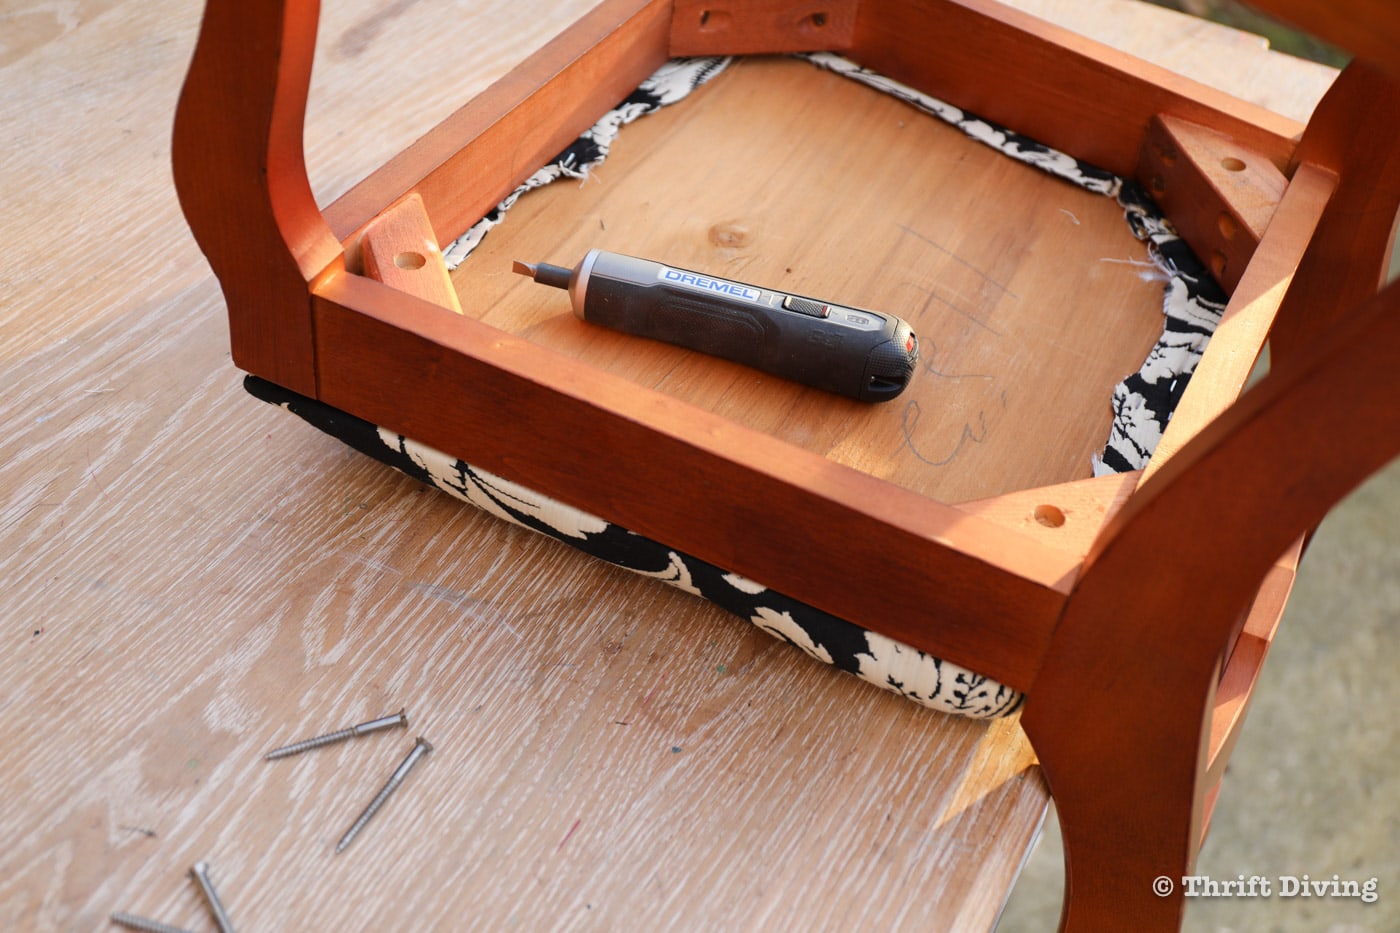
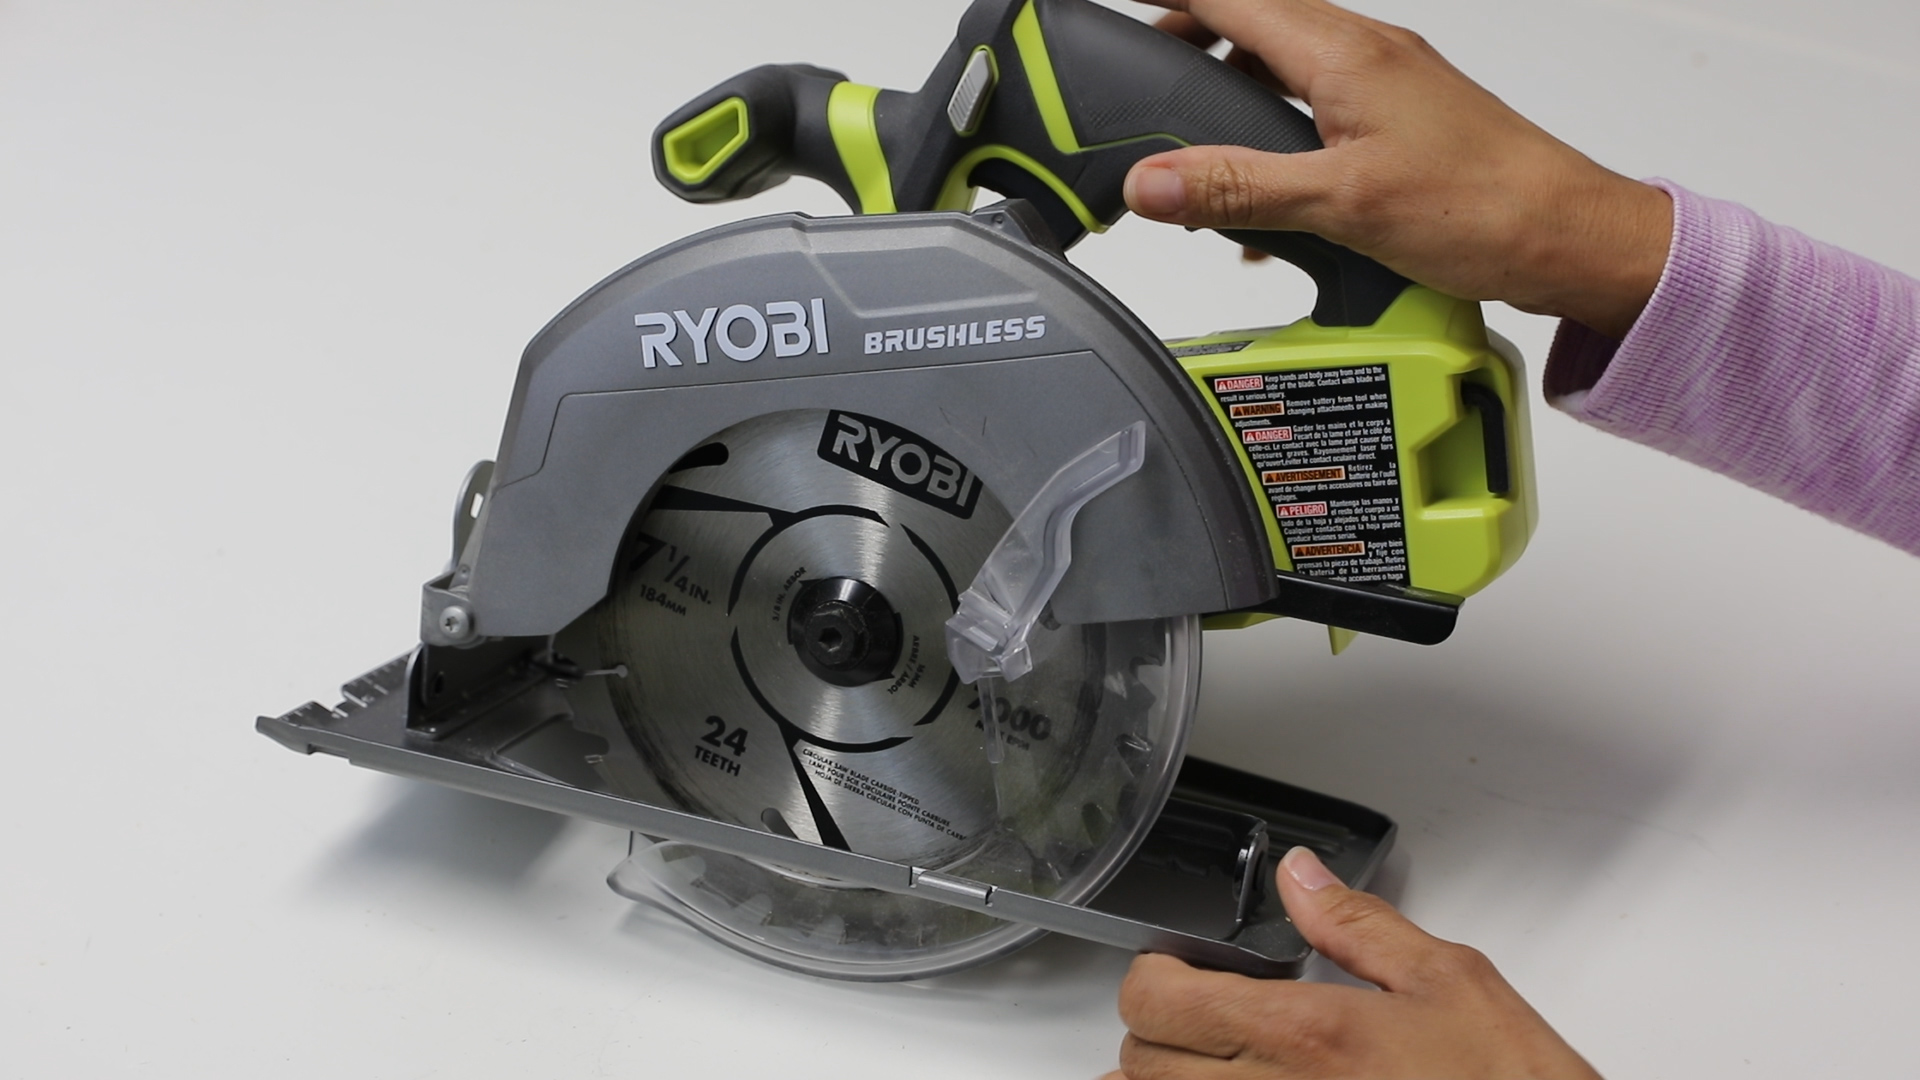
Before washing the wood, though, you’ll want to remove any fixtures on the furniture. In this case, the chair’s seat needed to come off. I used my Dremel GO 4-Volt Max Lithium-Ion Cordless Screwdriver (provided by The Home Depot as part of their Home Depot ProSpective program where I get to test out new tools, which is awesome!). This cordless screwdriver was perfect for removing the screws holding the seat in place.
It’s just the right size for fitting into tight spaces (so if you’re removing or adding knows and handles when doing furniture makeovers, it’s small enough to fit into those tight spaces).
I like that it plugs into a USB to charge. And can drive screws twice as fast as other cordless screwdrivers. Perfect for your DIY toolbox!
(Pssst! If you’re someone that doesn’t want to own or invest in big bulky power tools, this cordless screwdriver is for you!).
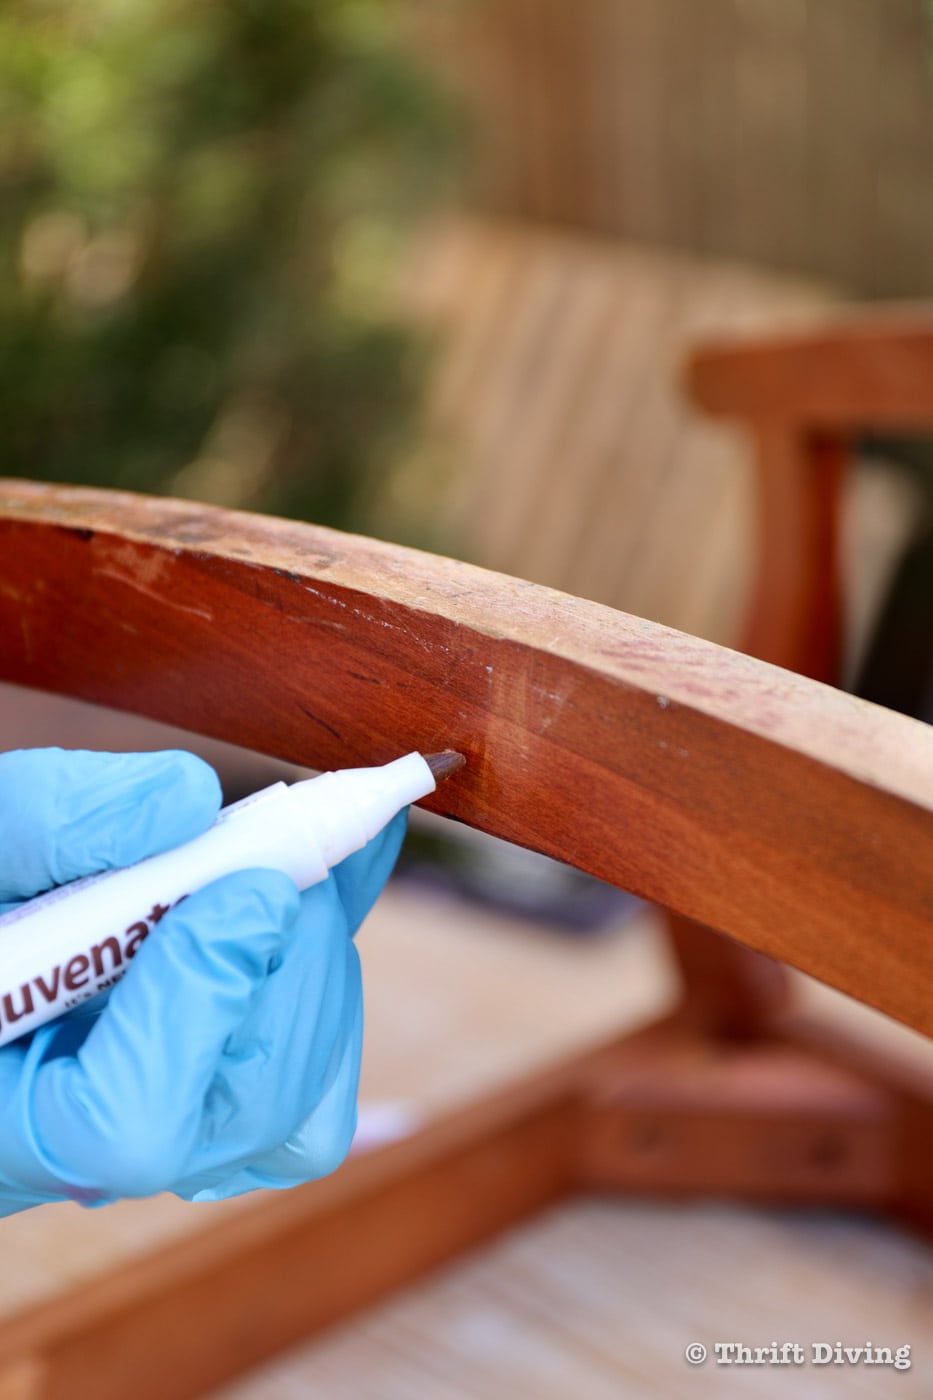
STEP 2: Pick a Test Area
Wood repair markers should always be tested in an area that won’t easily be seen. So if you’re fixing scratches on a wood table, choose an edge that isn’t smack-dab in the middle of the table top. If you choose the wrong color, you don’t want the mistake to show.
For my rocking chair makeover, I started tested at the back of the rocking chair leg, on the edge. If I messed up or picked a wrong color, this spot was less likely to be noticeable.
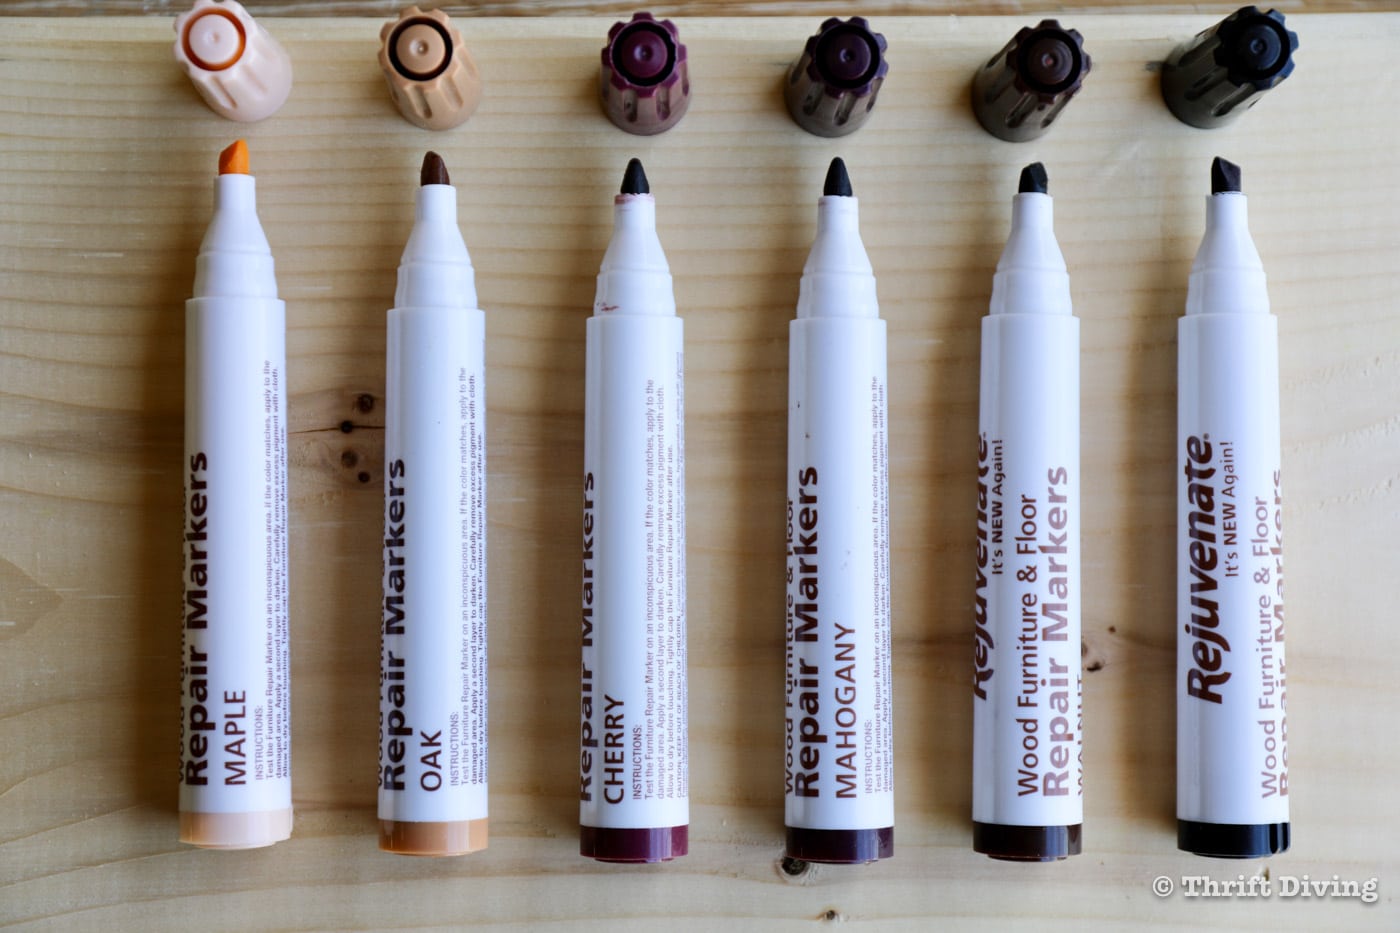
Remember that you’ve got 6 choices of wood repair markers in the kit. Don’t be afraid to test each one of them.
Here are some tips for choosing the right colors:
- Start light and then go darker if needed. You’ll be surprised that just because your chair or table is cherry, the lighter colors may still work. Believe me–it’s easier to go from lighter to darker than from darker to lighter.
- Test multiple markers in different test areas. – I found that my chair needed the Cherry wood repair marker in some areas and the lighter Oak marker in other areas.
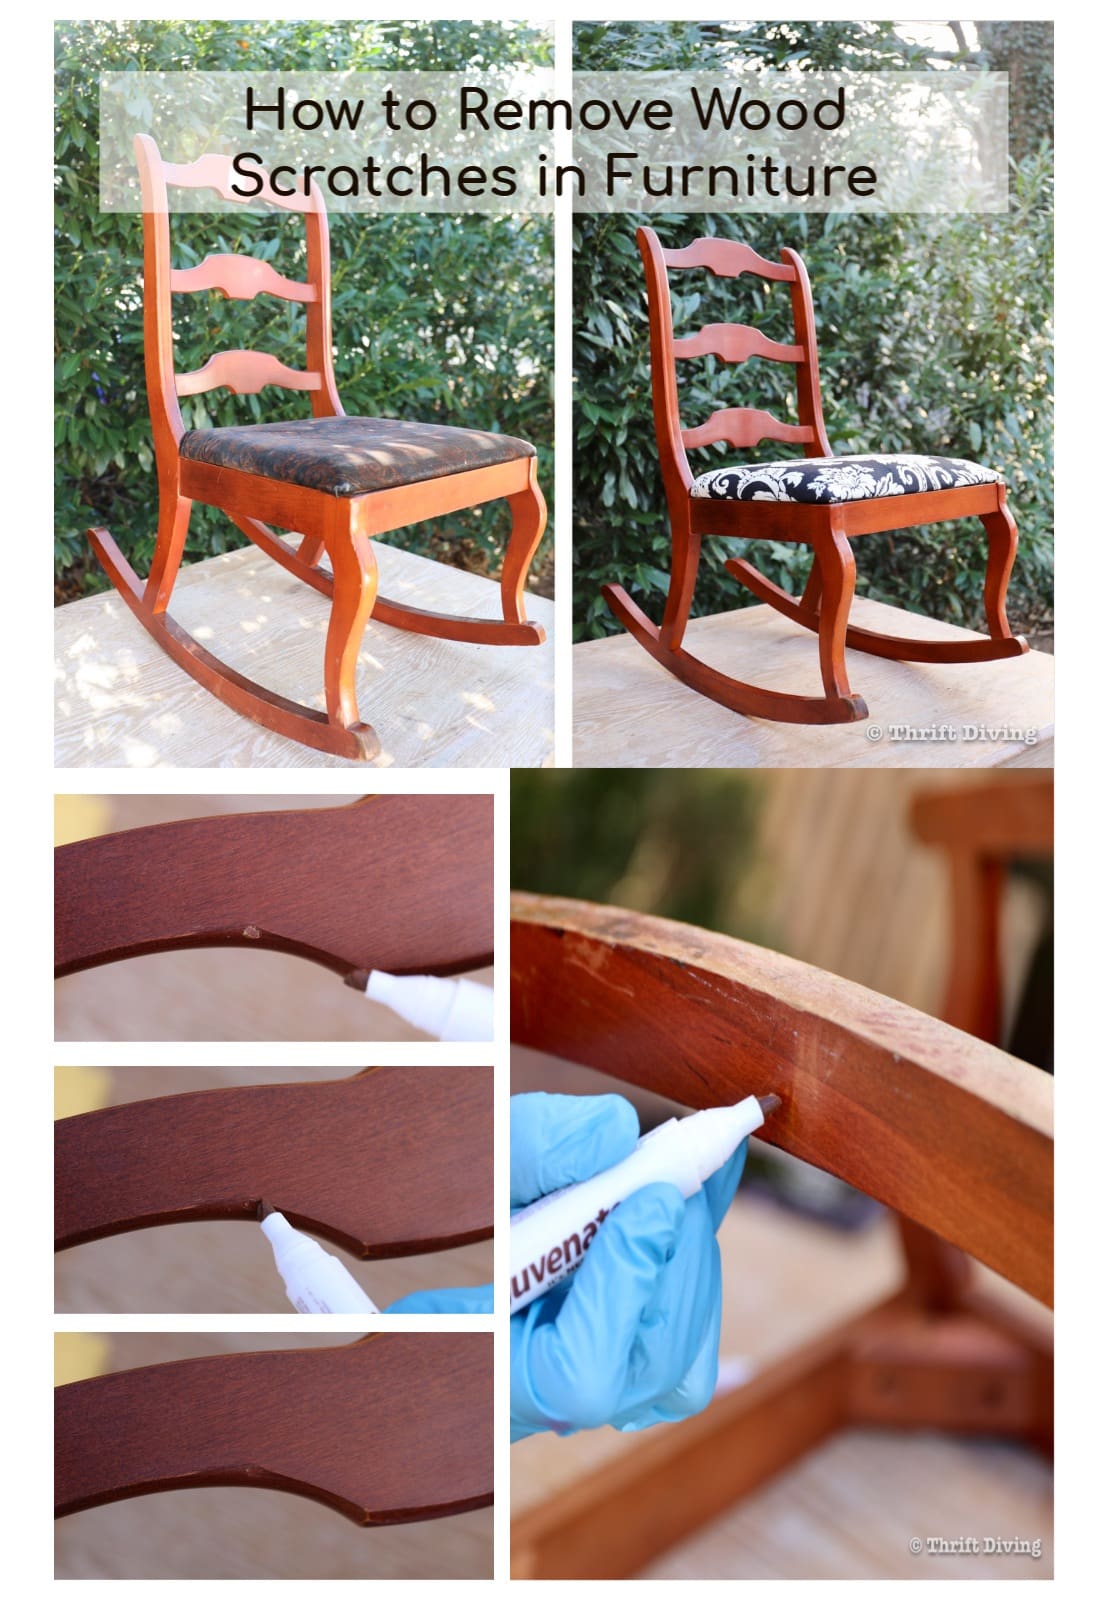
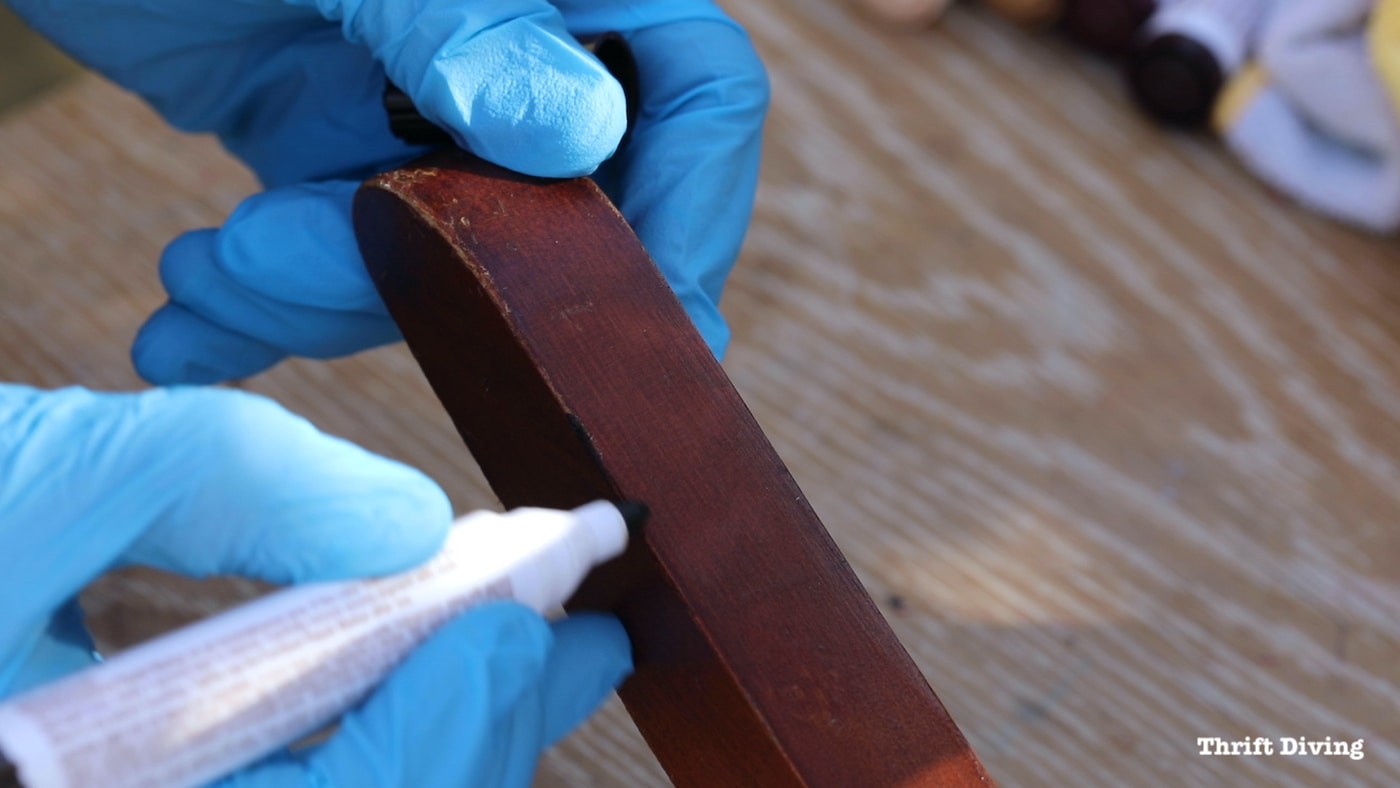
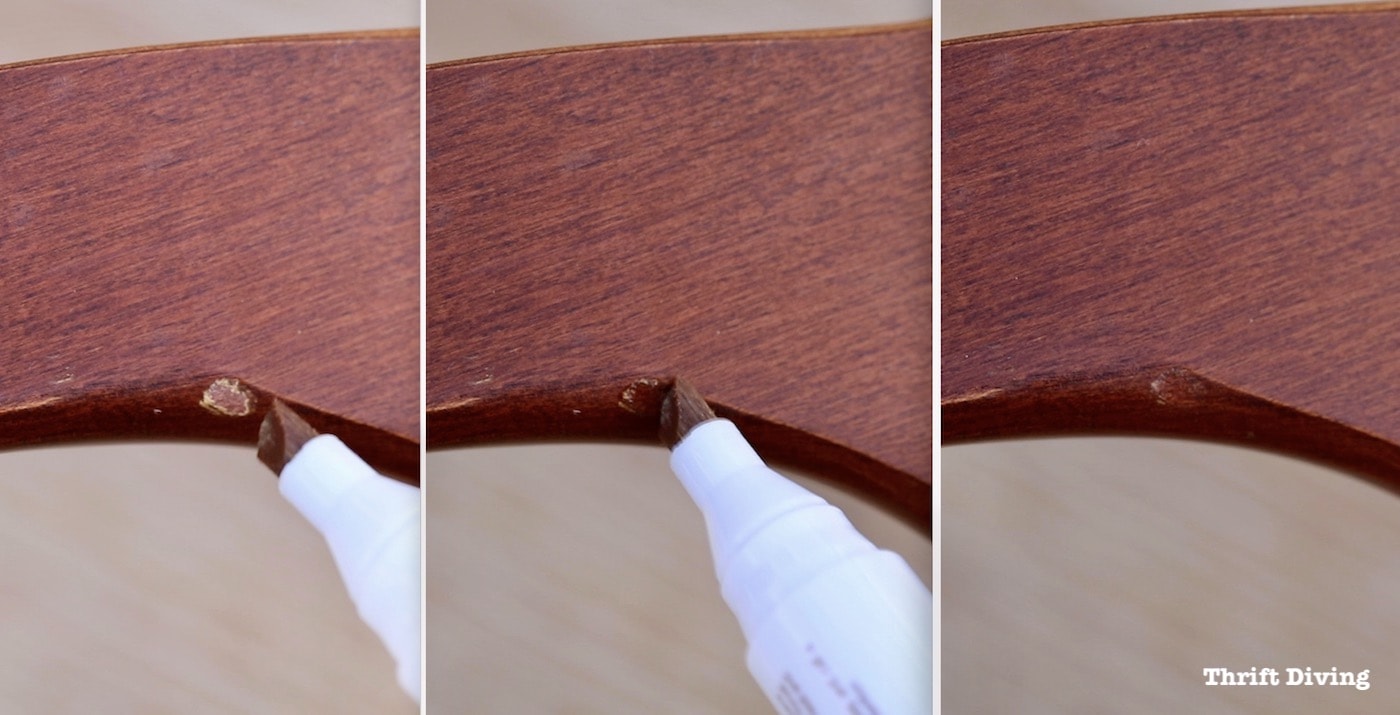
STEP 3: Fill in the Wood Scratches (Here’s How)
Now that you’ve picked the wood repair markers that work best for your color of wood on your chair, table, (or even wood floors), here’s the best way to attack the project.
- Always start with a lighter color (as I mentioned above). If it’s too light, use a darker marker over the scratch.
- Only fill in the scratch with as little marker as necessary. Don’t color the entire area or it could change the color of the wood and make it difficult to blend into the existing wood.
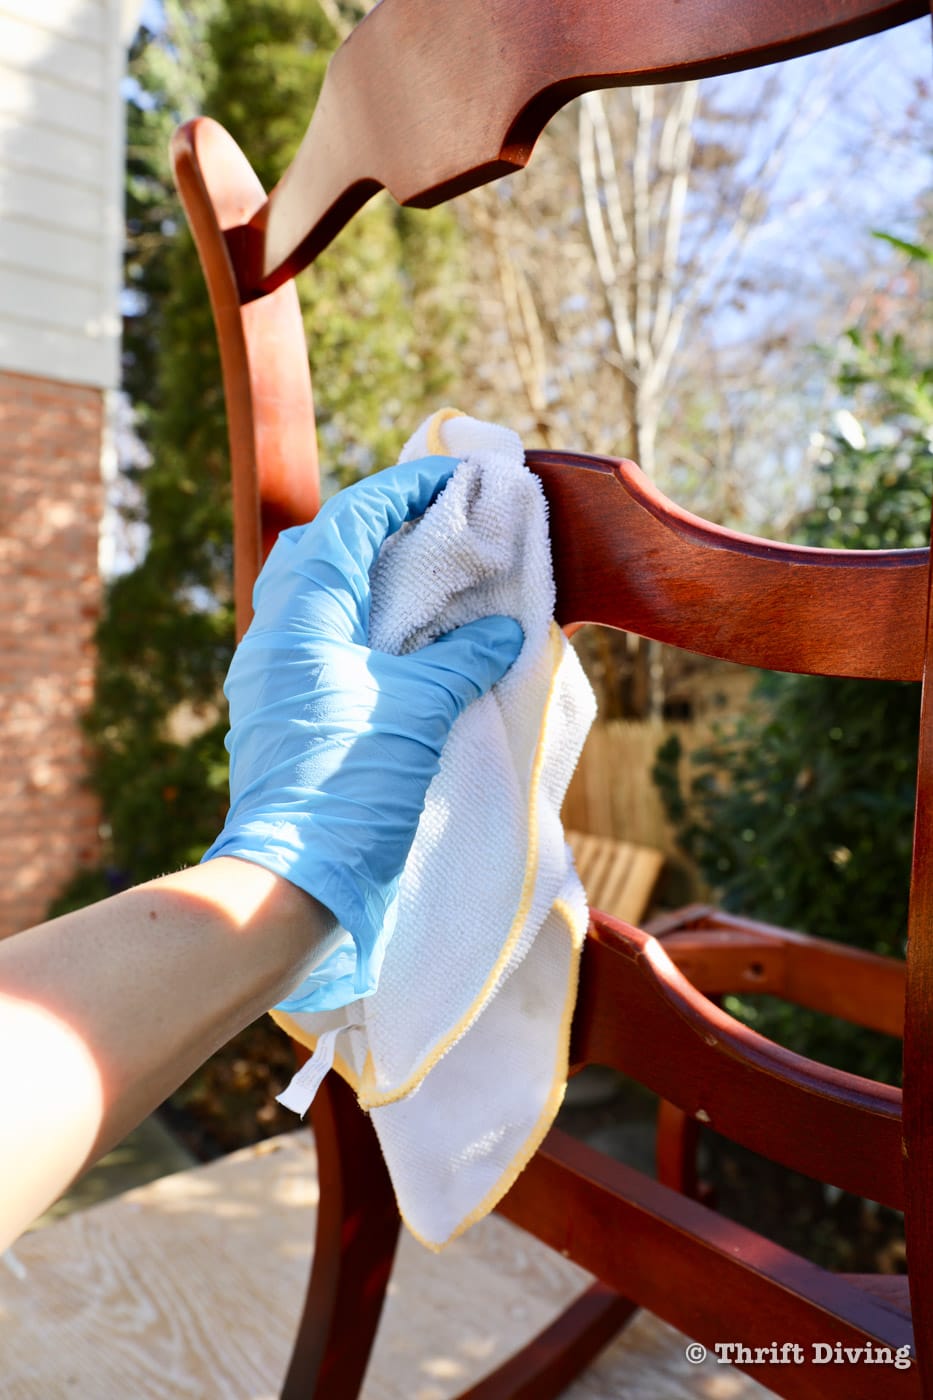
- Use a soft lint-free cloth (old tee-shirt??) to immediately wipe the excess marker. Use a little bit of lemon oil on the cloth when wiping and blending the marker. It helps the marker to blend in better and moisturizes the wood (this tip with the lemon oil was offered by one of my YouTube viewers–thanks!).
- If you make a mistake and add too much marker, use an alcohol wipe (or even better a cotton swab with alcohol on the tip) to wipe only the marker off. Don’t use the alcohol to wipe an entire area or it will dry out the wood. (Ask me how I know this….LOL).
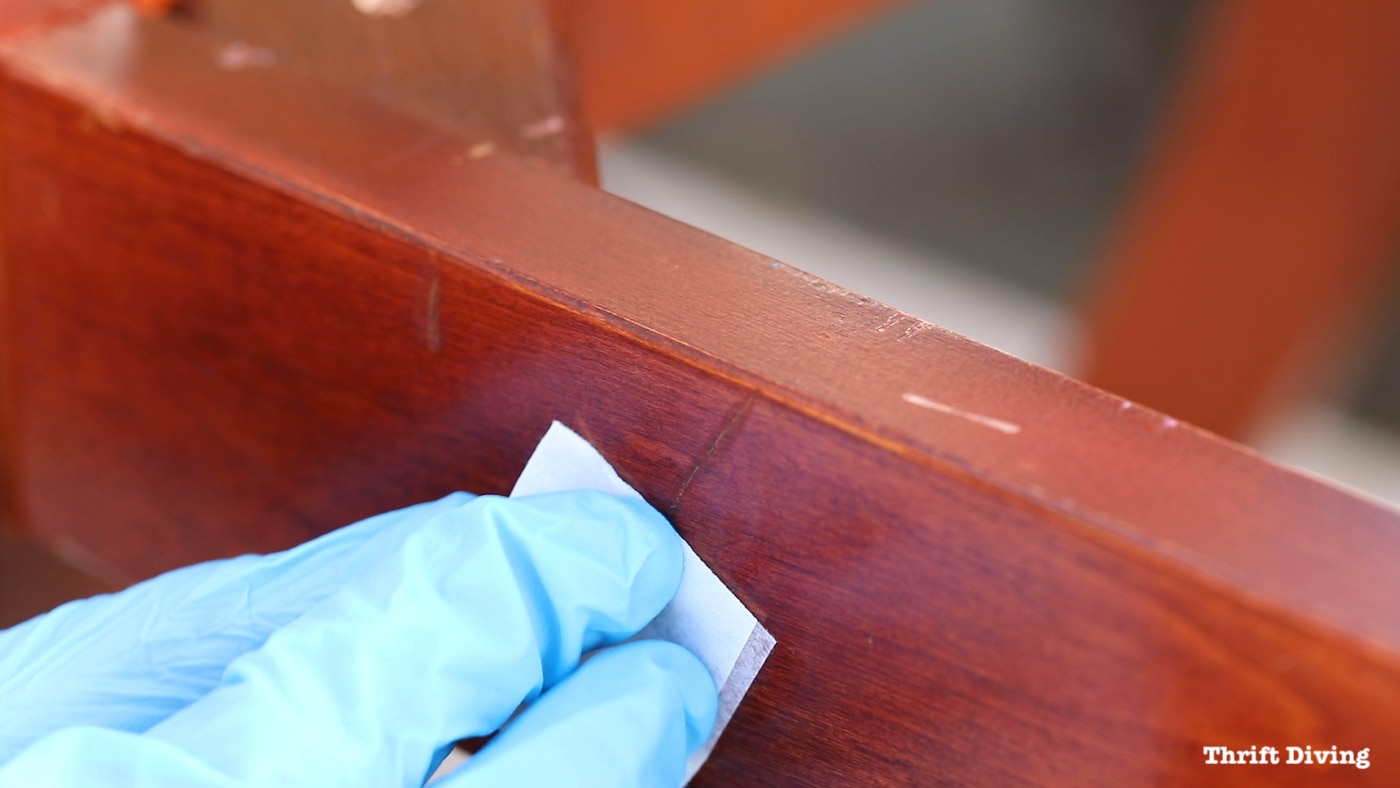
As you can see, too much alcohol wiped over the area will leave the wood dried out, so just be careful when trying to remove any excess wood repair marker. It’s best to simply be super careful and only use the marker in the scratch and not around the scratch.
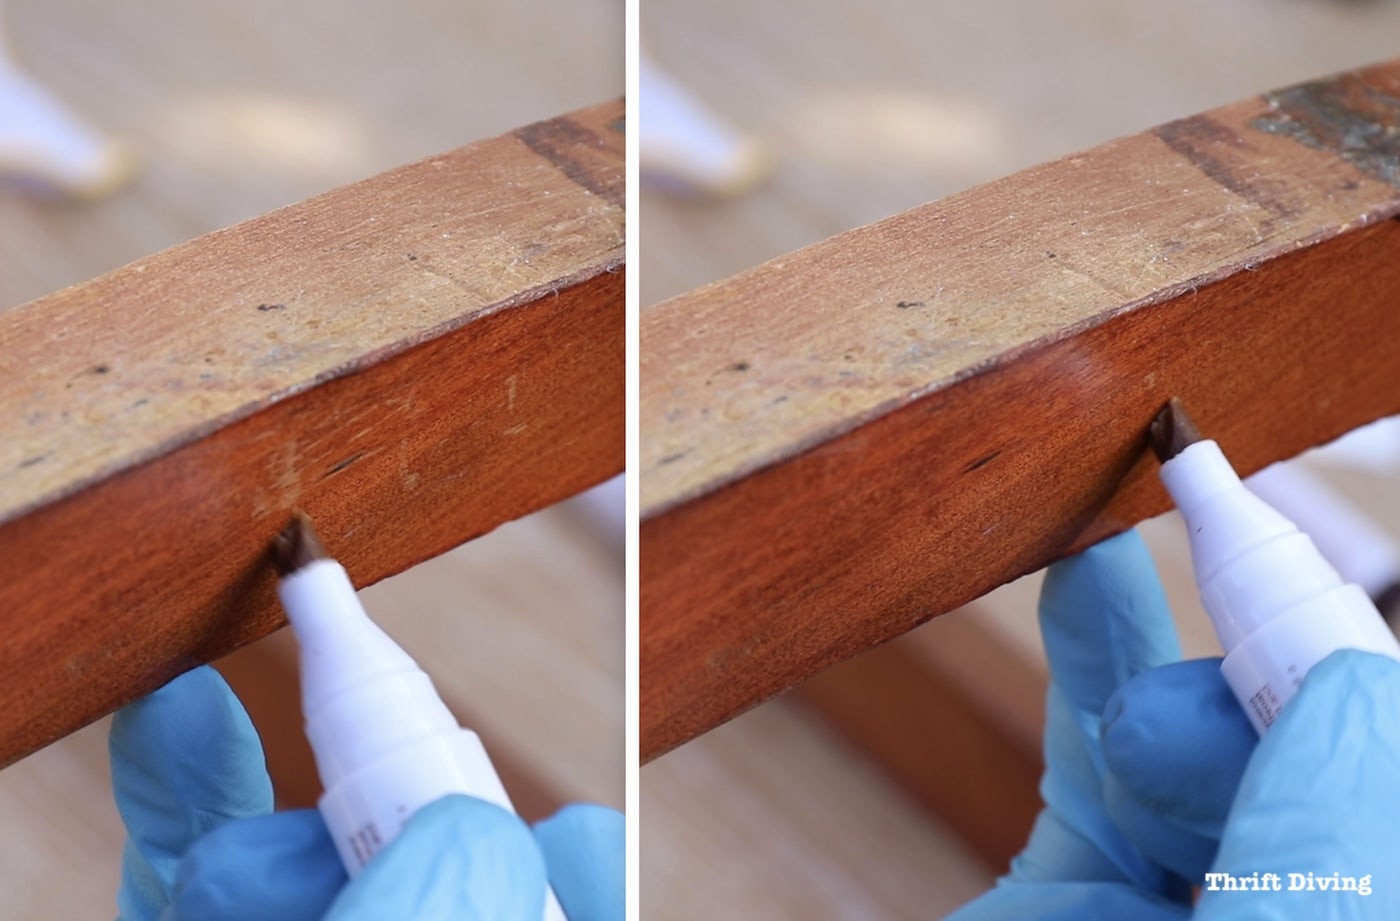
Chips, scratches, and gouges in wood furniture (and even kitchen cabinets) draw a lot of attention to that area. What I like about the wood repair markers is that even though the scratch or chip is still there, it’s much less noticeable! Here’s a screenshot of just how well they work on the rocking chair I restored, using the Oak wood marker.
And with the markers, I was able to take surface scuffs and completely fill those in to where they weren’t even noticeable at all! No photoshop there, just plan disguise with marker. 🙂
Let the marker dry about 20 minutes before moving on to the next step.
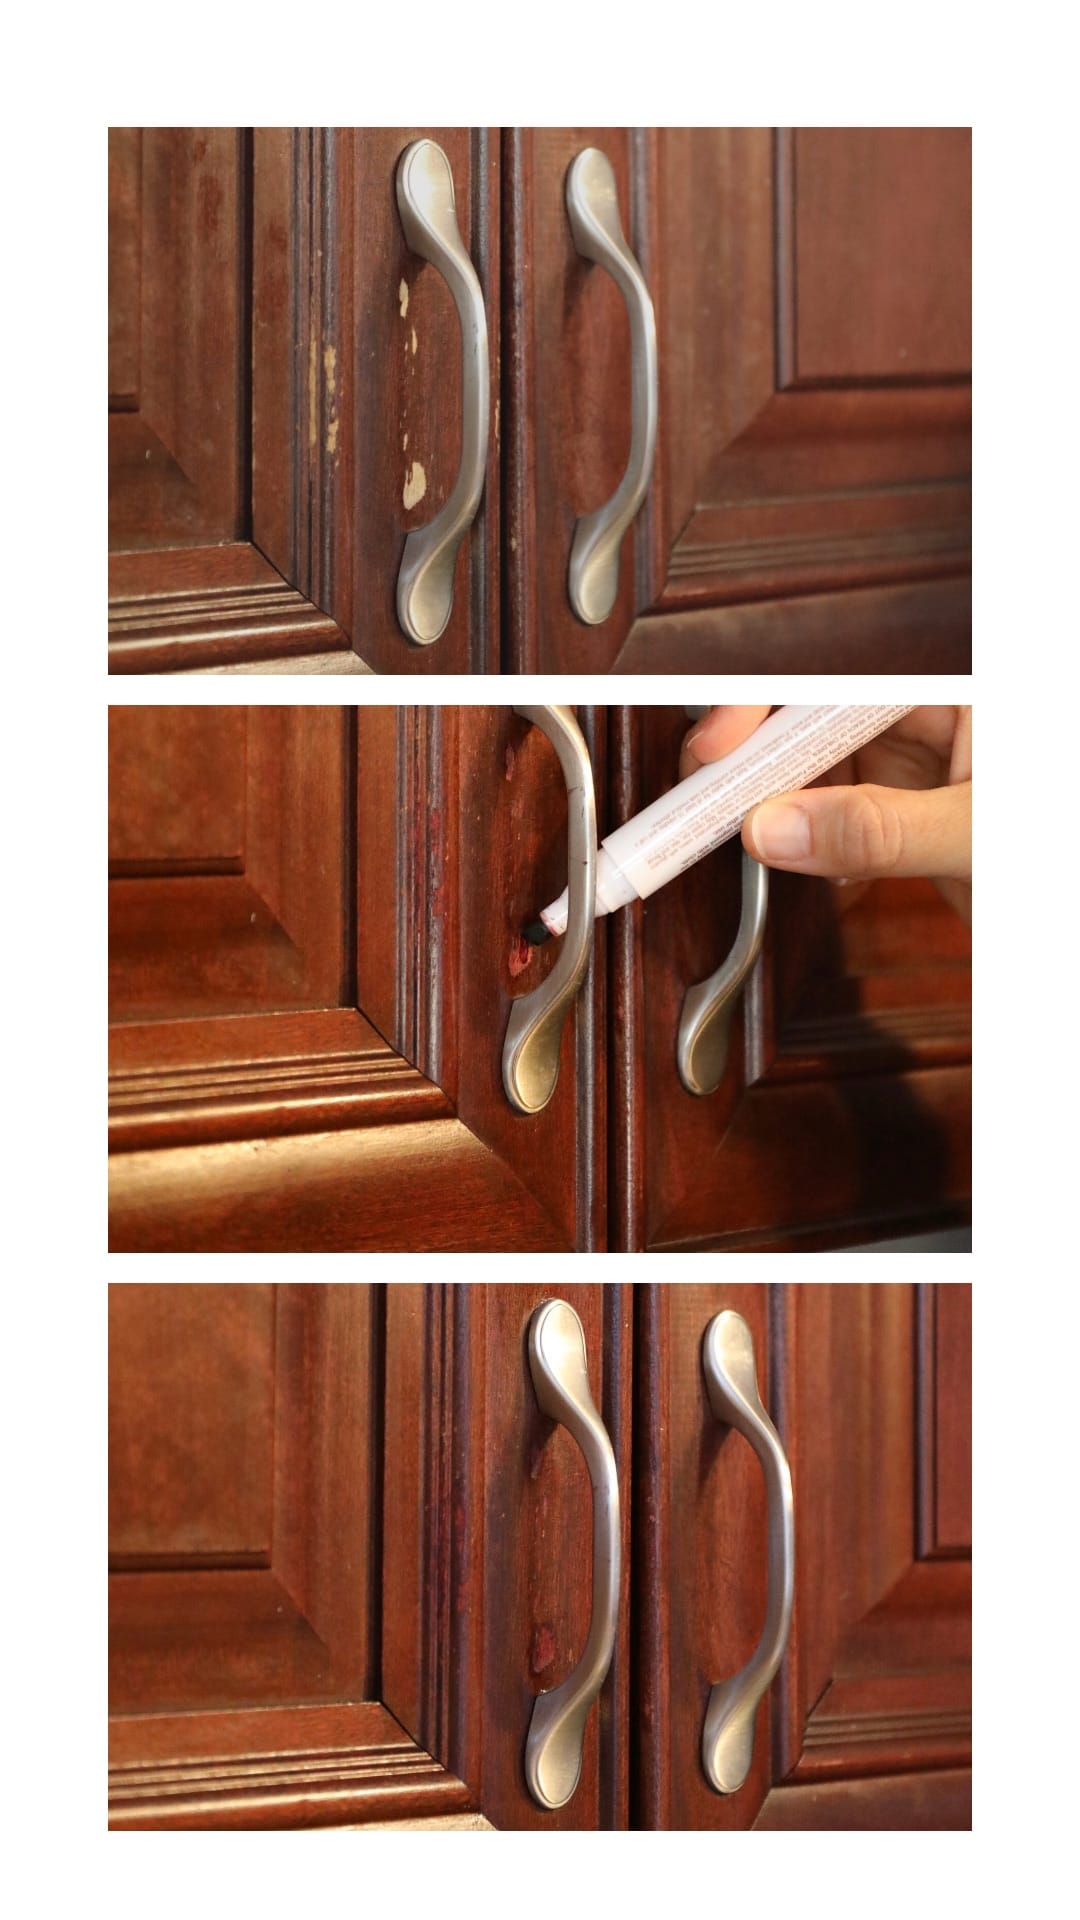
These wood repair markers can also be used on kitchen cabinets and wood floors. While I don’t have a test for the wood floors, I did give them a try on my kitchen cabinets, which you can see one area was pretty scratched up. While it wasn’t perfect, it did blend the scratches in so well that when company comes over, I won’t have to be embarrassed. 🙂
STEP 4: Add Two Coats of Cabinet and Furniture Restorer
After hiding the scratches and letting it dry for about 20 minutes, whether you’re fixing furniture or cabinets, you’ll definitely want to follow up with something to shine the wood furniture. I used this cabinet and furniture restorer, which came with its own microfiber cloth, to smooth on two coats. I didn’t buff it in, I just wiped it on as smoothly as I could in the direction of the grain, letting it dry for about 20 minutes, and then going back over it again. The more coats you add, the shinier it will become.
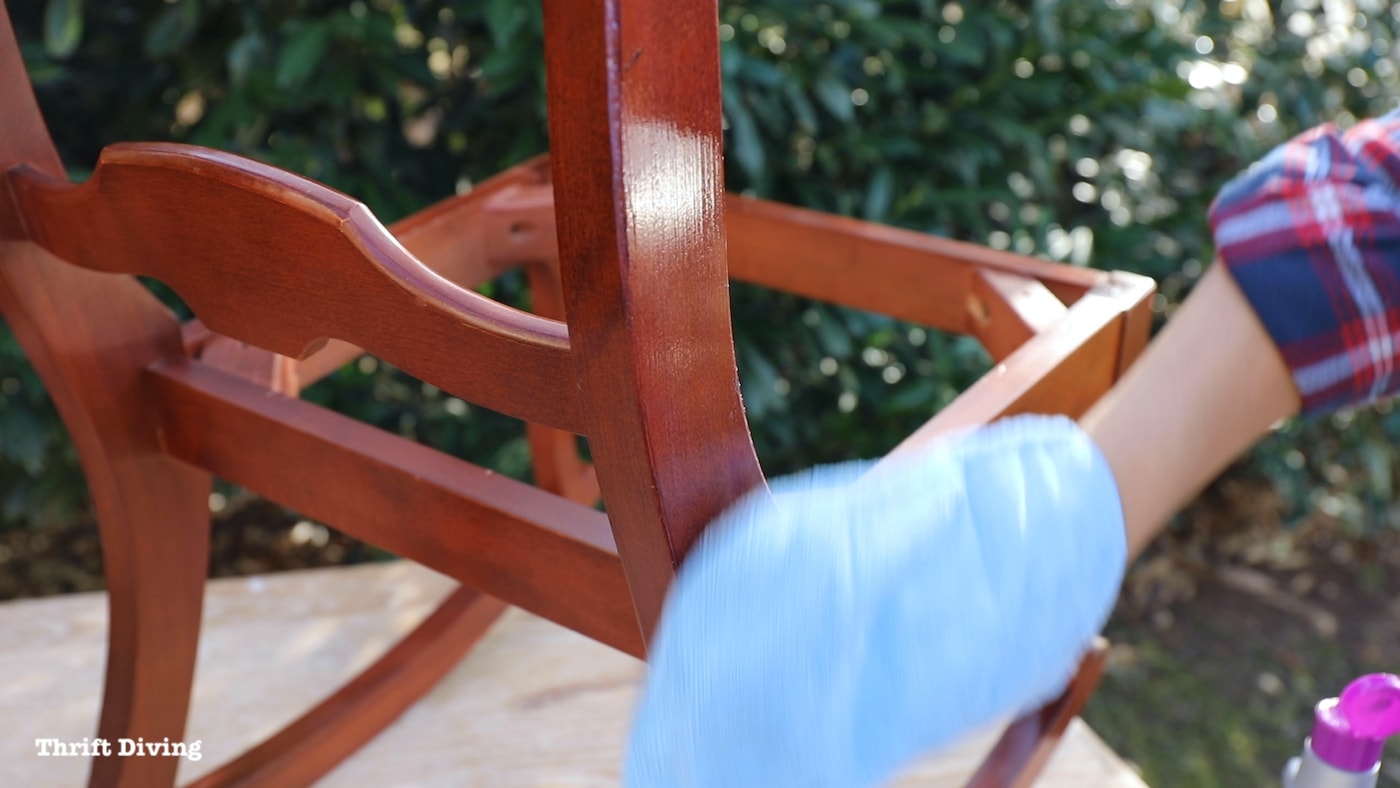
If the product streaks, just add your second coat in the opposite direction against the grain to help even out those streaks.
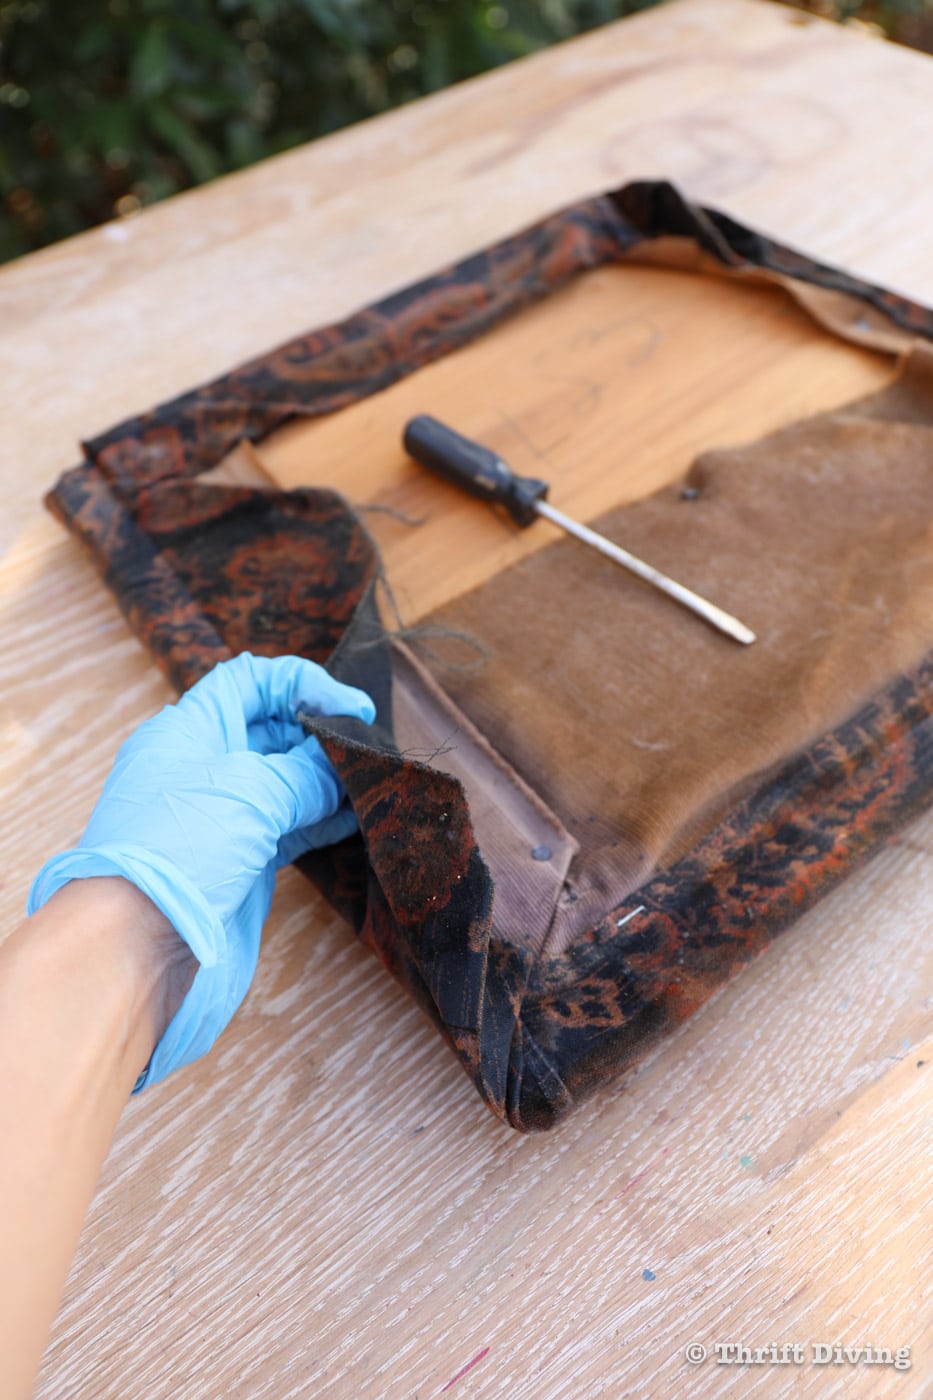
STEP 5: Remove the Old Seat Cover Fabric
You may not need to do this step, depending on the type of furniture you’re restoring. But in my case, this old rocking chair has 3 nasty layers of old fabric on it. Those needed to come off ASAP.
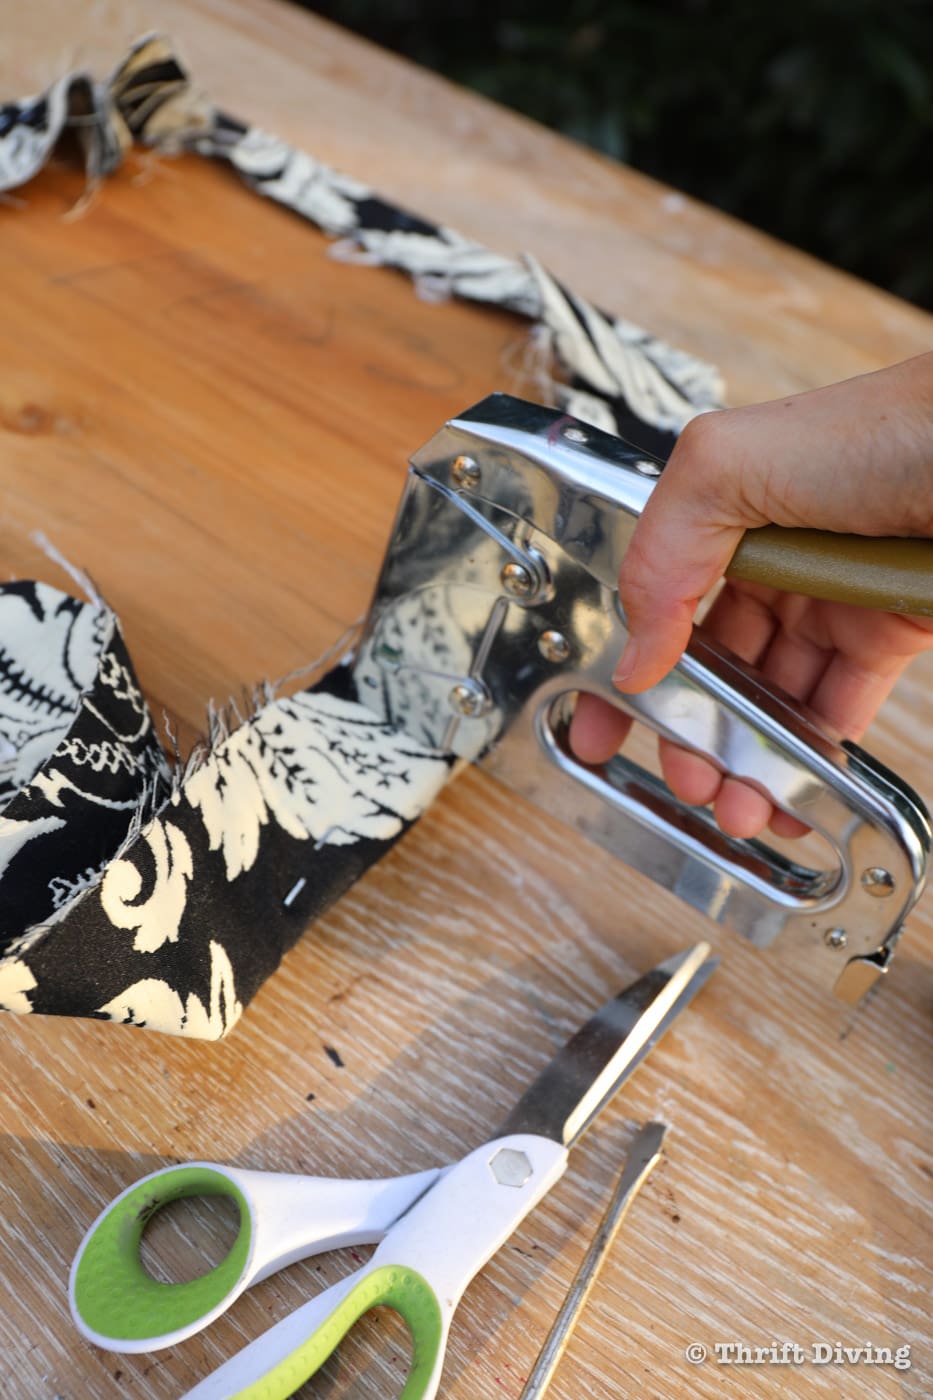
STEP 6: Attach the New Fabric
I’m skipping through some of the steps since this post is already way too long. 🙂 You can see all the steps in this video tutorial on YouTube channel, or you can check out this blog post on how I reupholstered my wingback chair.
But I did replace the cotton fiber batting inside of the chair. I don’t like reusing old cushion stuffing from thrift chairs. ICK!
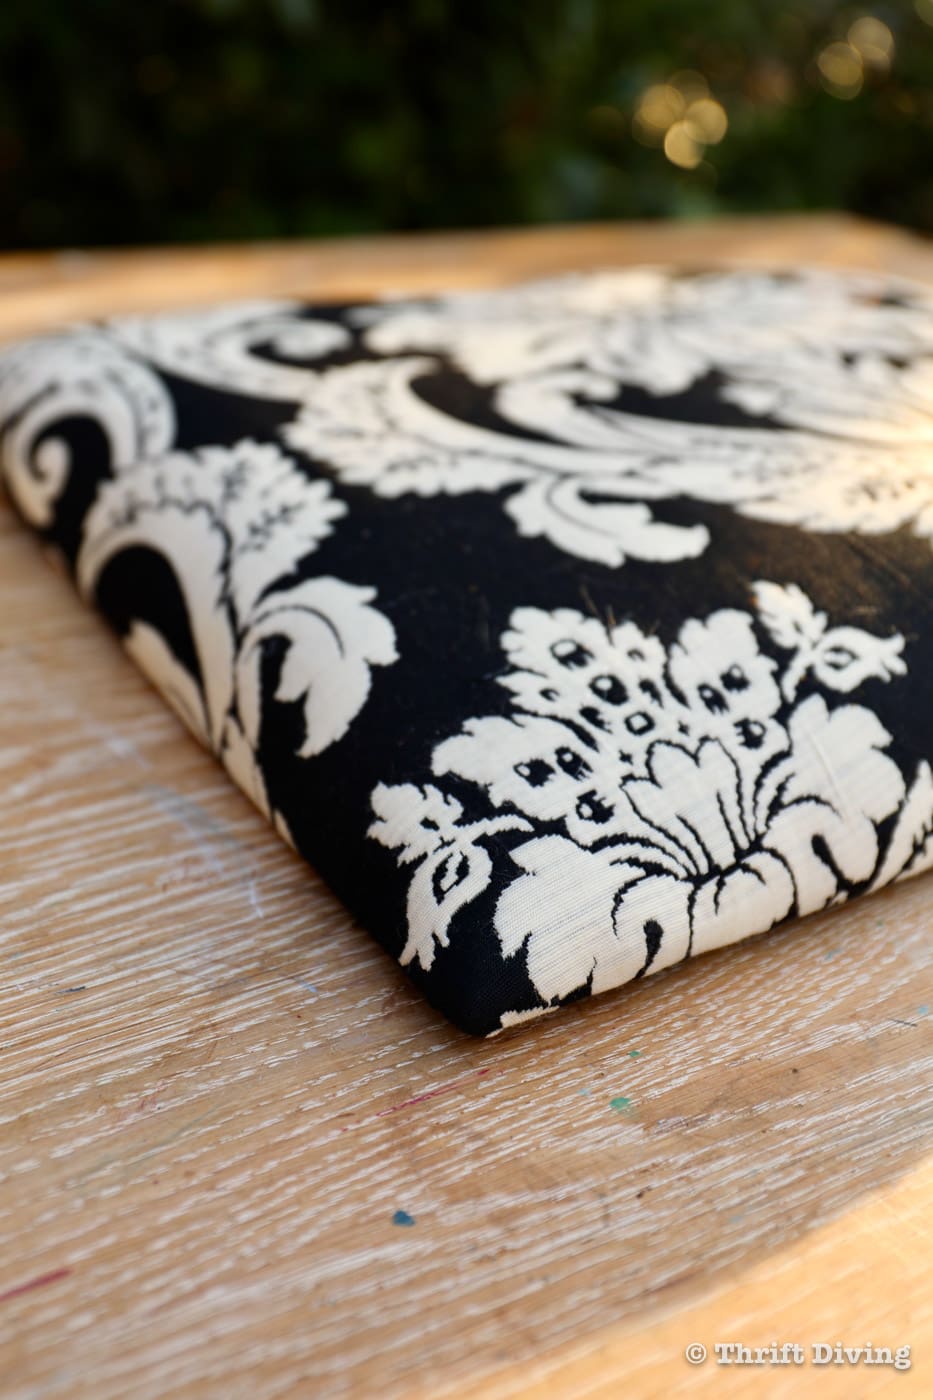
The new fabric is this amazing reversible black and white damask fabric that I’ve had for so many years. I bought it from New York City when I went on a fabric shopping trip there years ago and I have just never used it. It’s it perfect for this chair?!
STEP 7: Reattach the Seat Cushion to the Chair Base
Once it’s all recovered, it’s time to reattached the seat cushion to the chair. If you want to get your hands on one of these cordless screwdrivers, you can buy it on HomeDepot.com HERE.
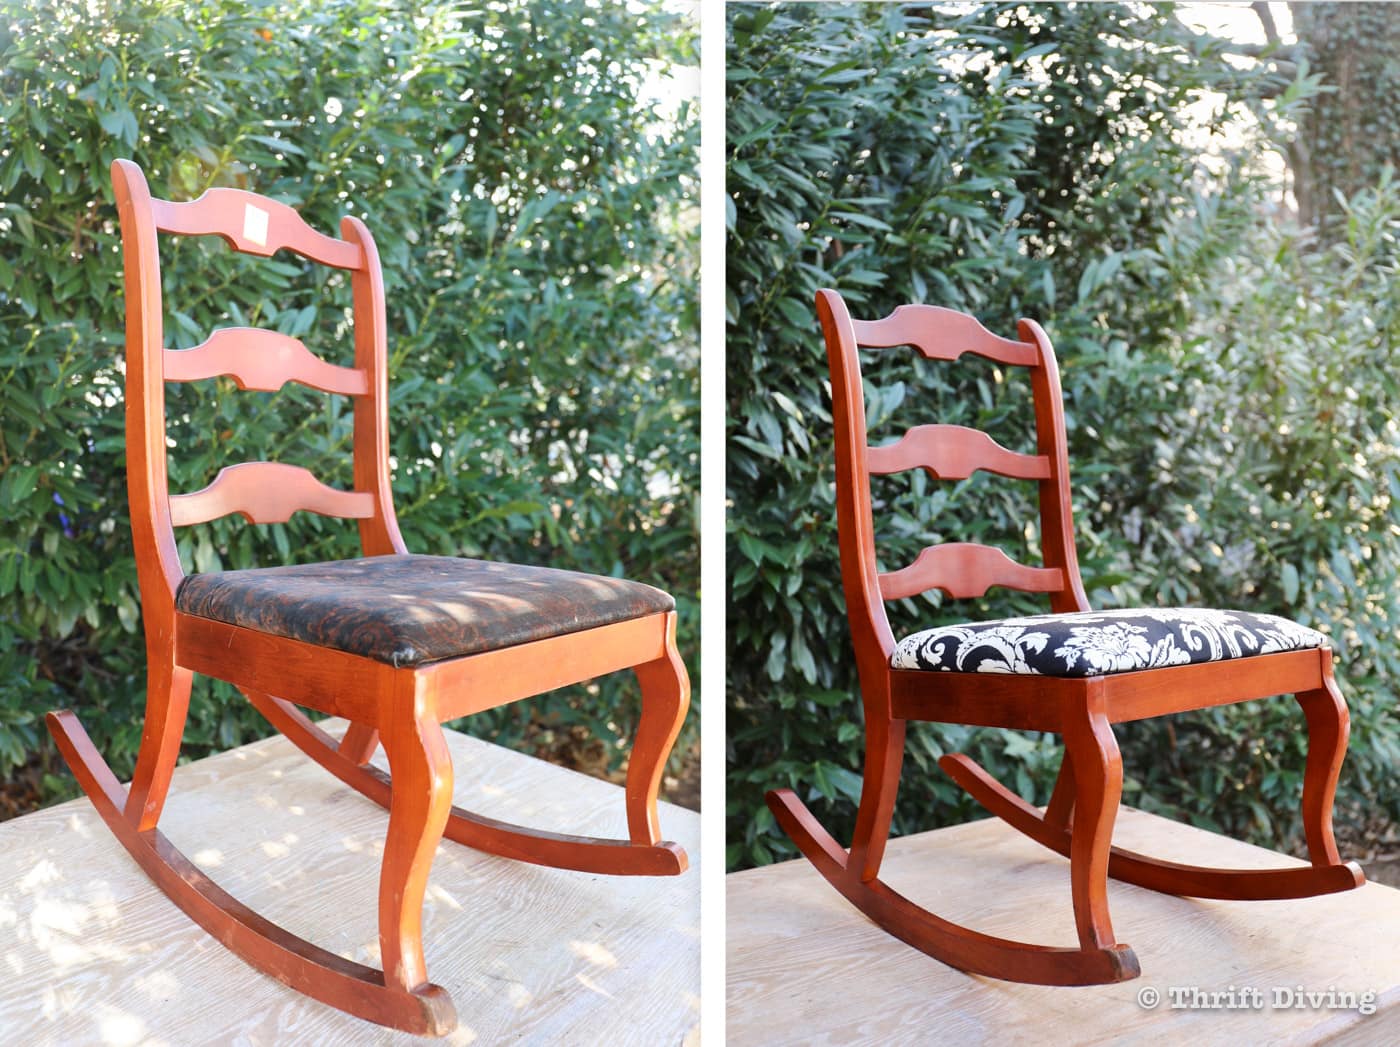
Let’s have another look at what it looked like before I refinished it. From these “BEFORE” picture, it’s hard to see the scratches, but they were there!
BEFORE
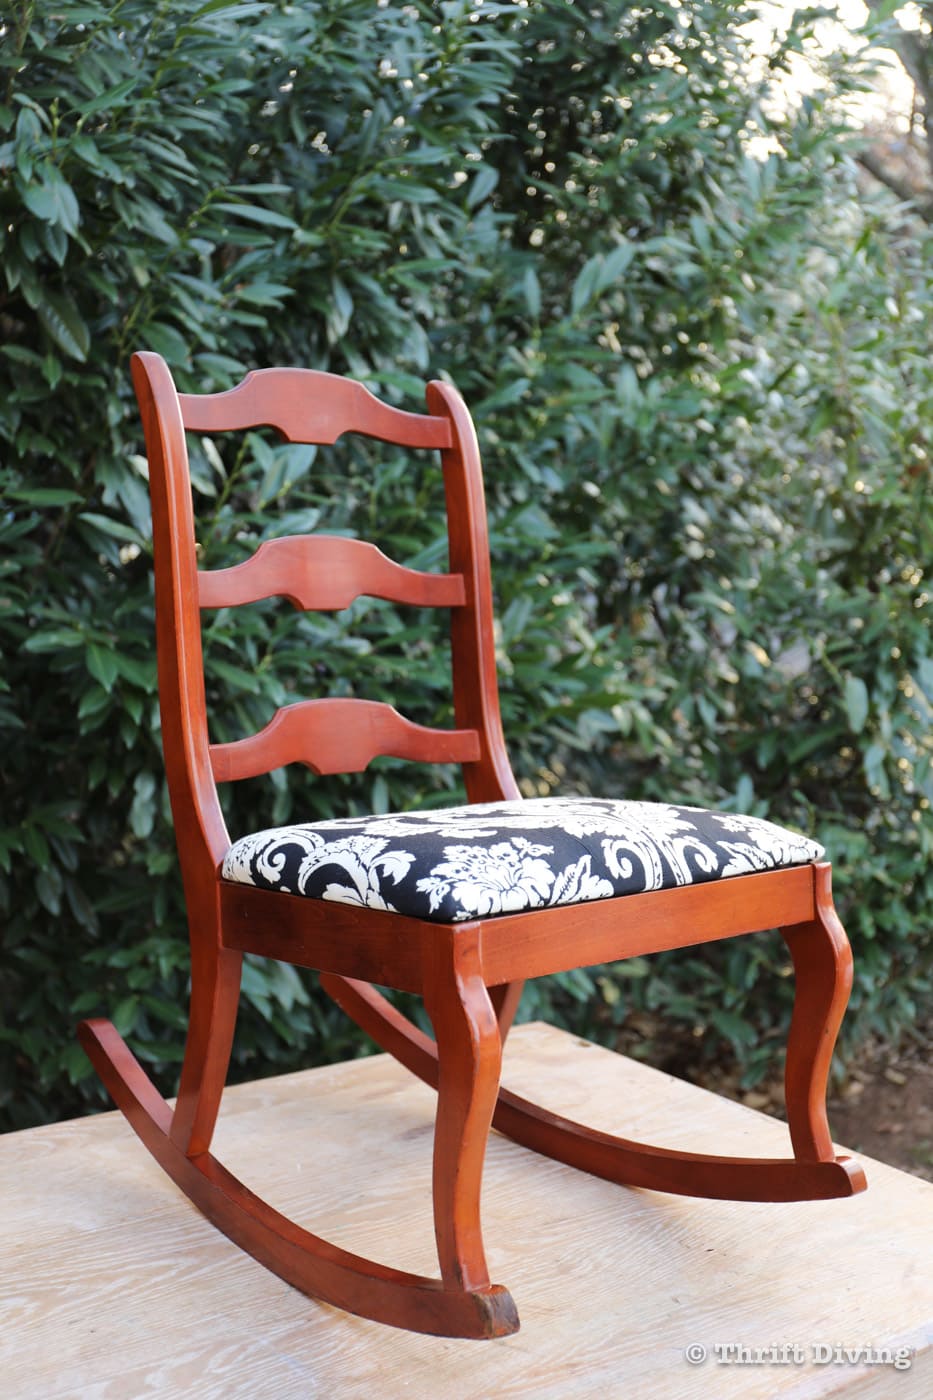
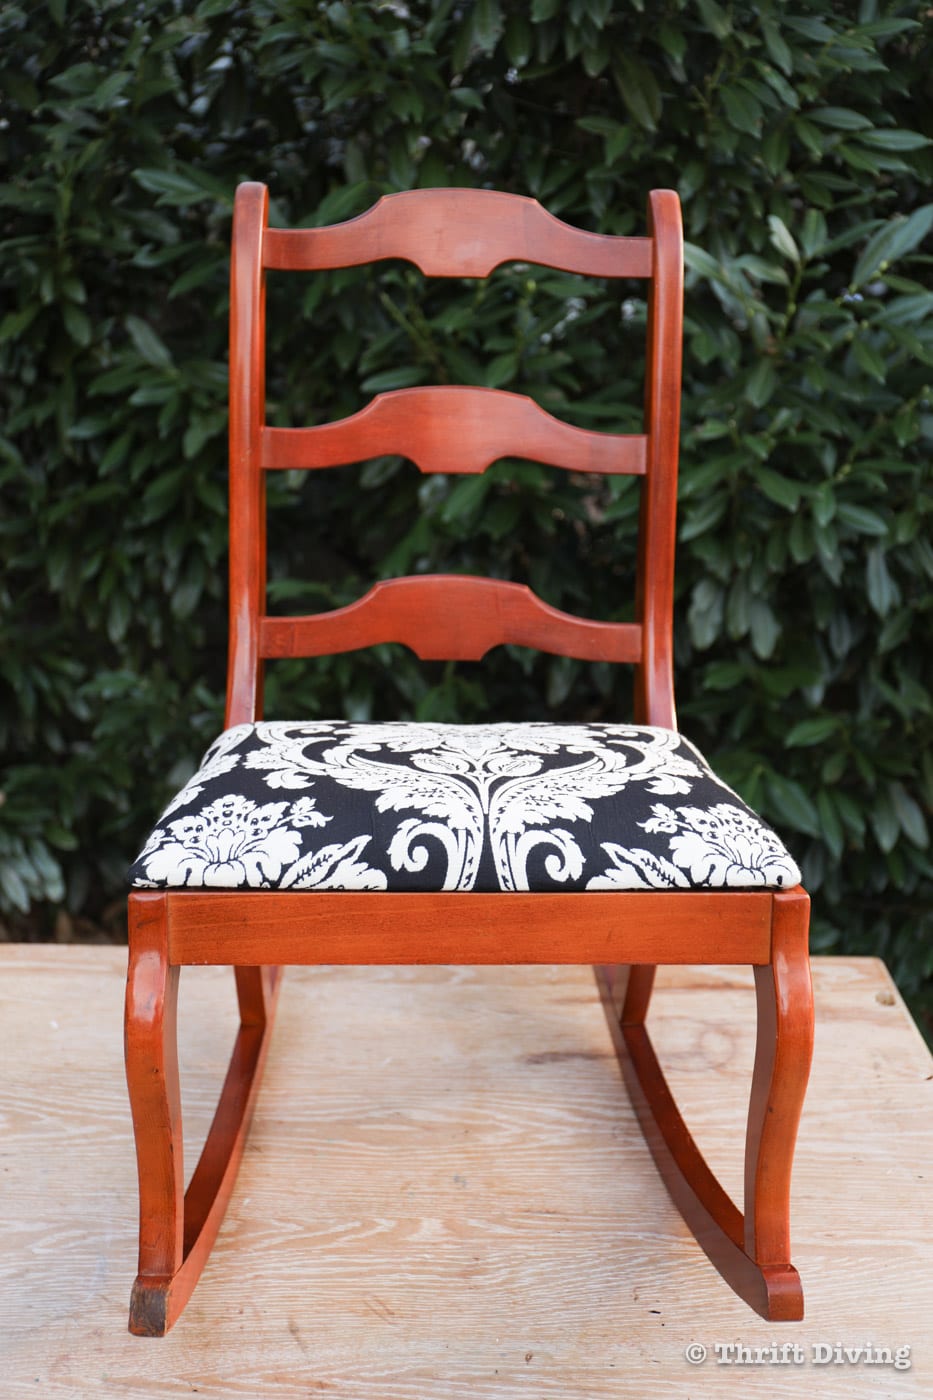
AFTER!
Now it’s fresh, updated, and even more modern with the fun fabric! My butt is a bit too big for it, LOL, but it’s perfect for a child’s room or in a pretty corner for reading.
With Scratches
Scratches Hidden!
This just proves that not every piece of furniture needs to be painted, stripped, or totally re-stained. With wood repair markers, it’s possible to hide the scratches. Is it a perfect, brand new chair? Nope. But with scratches minimized, you can enjoy the beauty of the makeover and breath new life into furniture that might very well end up next to a trash can. Or at a thrift store.
Love this project?? Click here to save it on Pinterest!
Want More Info?
Before you keep reading, go ahead and subscribe to my blog so you’ll be notified of new blog posts via email! Plus, you’ll get 5 freebies just for subscribing.
- Understanding Wood: 7 Things You Must Know Before Your Next DIY Project
- How to Strip Furniture: Everything You Need to Know
- BEFORE & AFTER: Strip Wood – A Natural Furniture Makeover

Download the 5 freebies!

Thrift Diving inspires women to decorate, improve, and maintain their home themselves...using paint, power tools, and thrift stores! Use these 5 printables, checklists, and ebooks to get started!


These markers worked really well. I’m inspired to try one on my scratched bamboo floor. Your chair looks amazing.
Yes! You have to try these markers. They’re amazing!! Good luck with your floor. Be sure to test it an inconspicuous area first. 🙂