How to Make a Gift Box Out of Scrapbook Paper
It’s super easy to learn how to make a gift box out of scrapbook paper. You know what kind of gifts are the best ones? The small ones that fit inside the small little box, too!
I love something that speaks to the heart and isn’t just store-bought gigantic electronic for the sake of fulfilling a “gift quota.” (Umm….I love my electronics, but some things are more precious than that).
To honor the small gifts in life here is a really cool tutorial on how to wrap up your awesome heartfelt gift with something handmade: your own DIY gift box from scrapbook paper:
This has turned into one of my favorite little projects to do because not only is it quick, but it’s personalized, hand-crafted, and inexpensive.
The coolest thing is that all you need are 2 pieces of pretty, thick scrapbook paper (one for the lid, one for the base), and some basic supplies and anyone can make it!
Okay, so quick– go grab your scrapbook paper.
Then go grab some awesome little treats….toys….candy…..really, anything that will fit inside a 4 x 4 box…..
Be creative!
How to Make a Gift Box Out of Scrapbook Paper
Materials
(I participant in the Amazon Services LLC Associates Program, an affiliate advertising program designed to provide a means for me to earn fees by linking to Amazon.com and affiliated sites).
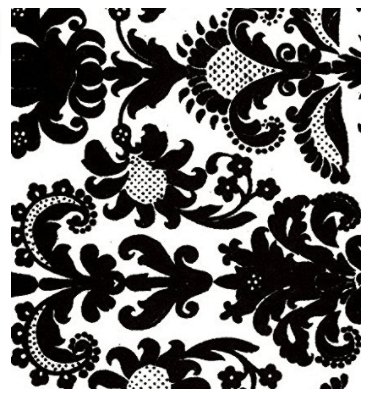
- Velvety scrapbook paper like this pretty black and white one from Amazon
- Paper cutter
- Mod Podge (I like the matte version)
- Scissors
- Ruler
- Pencil
- Tissue paper (TIP: Keep an assortment of tissue paper on hand!)
- Pretty ribbon (here’s my favorite purple satin ribbon!)
STEP 1: Get the right kind of scrapbook paper.
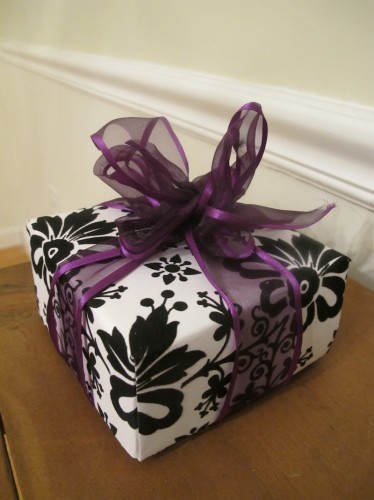
For this project, use thick paper, preferably the kind that has yummy velvety stuff on it. I absolutely LOVE this black velvet filigree on white one from Amazon. It will hold up much more sturdy. But regular scrapbook paper works well, too. You can also glue or tape 2 pieces together for added thickness.
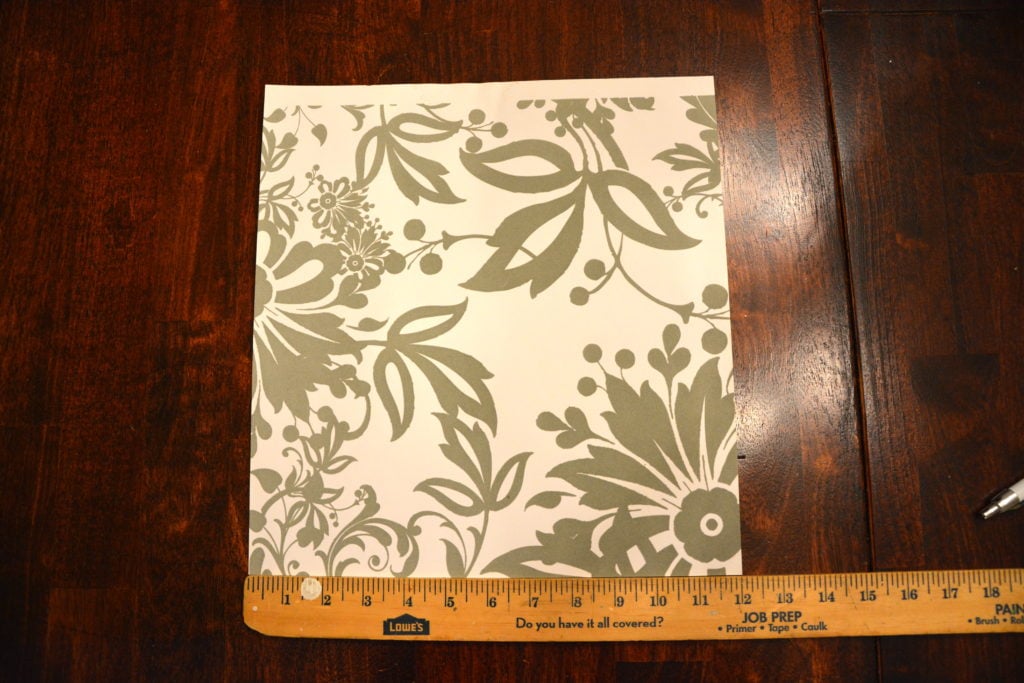
STEP 2: Measure your scrapbook paper (trim if needed).
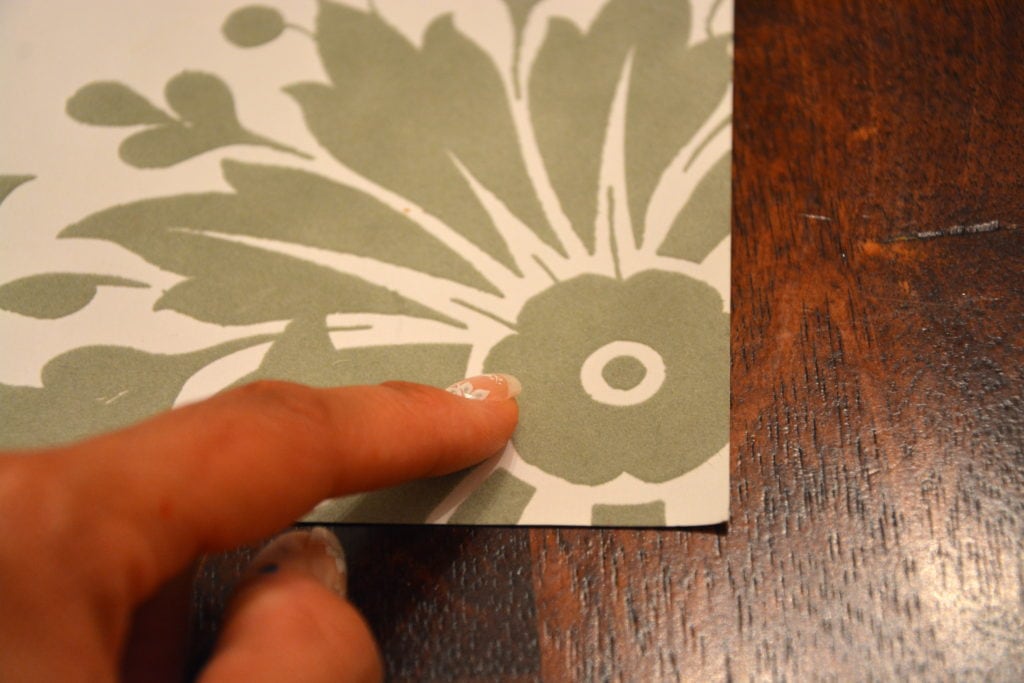
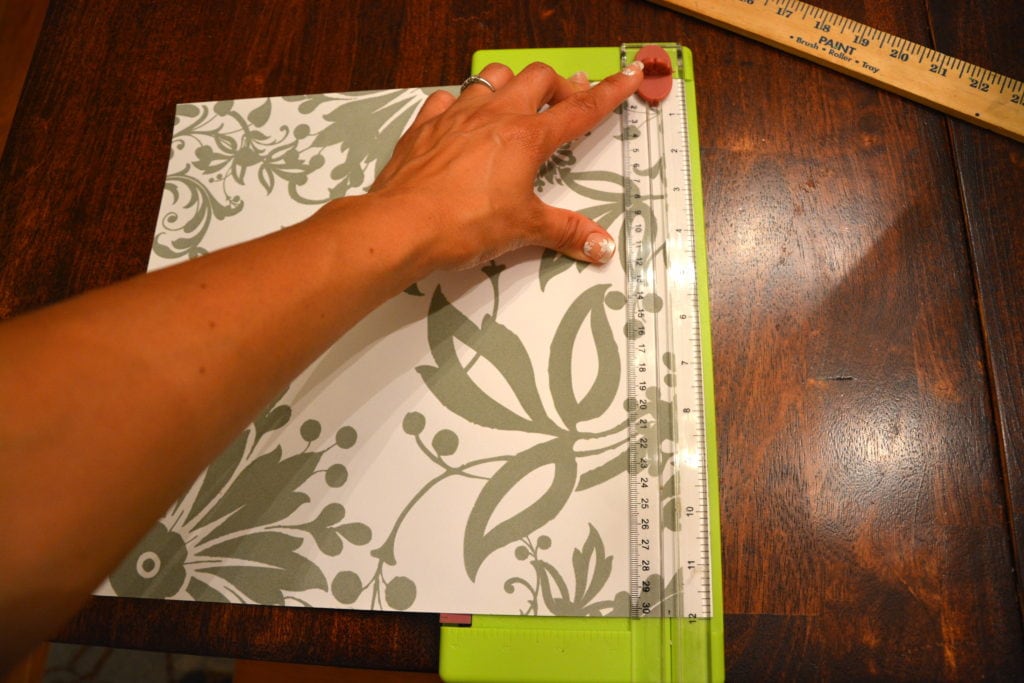
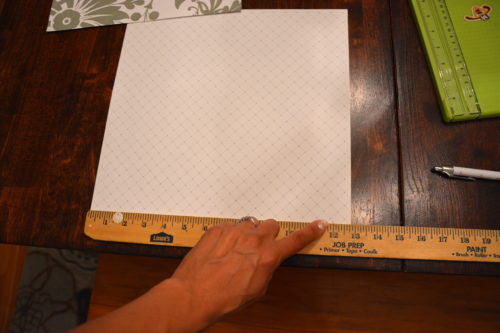
Make sure your paper is a perfect 12″ x 12″ square. Most scrapbook pages are–BUT, I have found that the ones that come in the packs that you have to tear away, tend to be a little longer. Just make sure you’ve got a perfect square. A sheet of 12″ x 12″ paper will make a 4″ x 4″ box.
Use a paper cutter to make trimming easier.
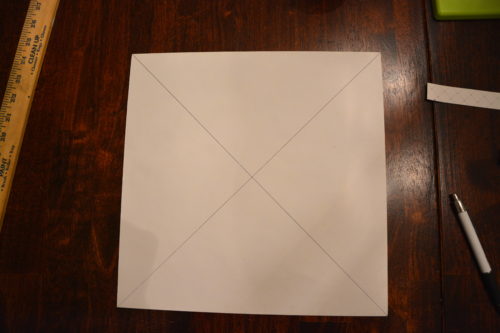
STEP 3: Draw an “X” across the back of the paper.
Flip your scrapbook paper to the wrong side and draw an “X” from one corner to the other.
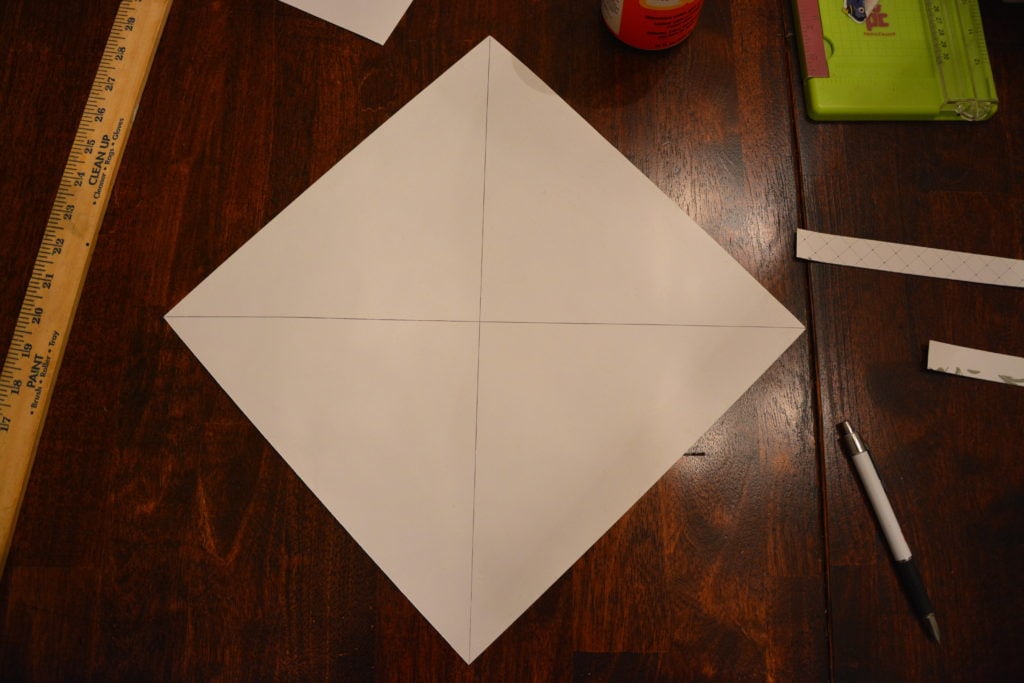
STEP 4: Turn your paper into a diamond shape.
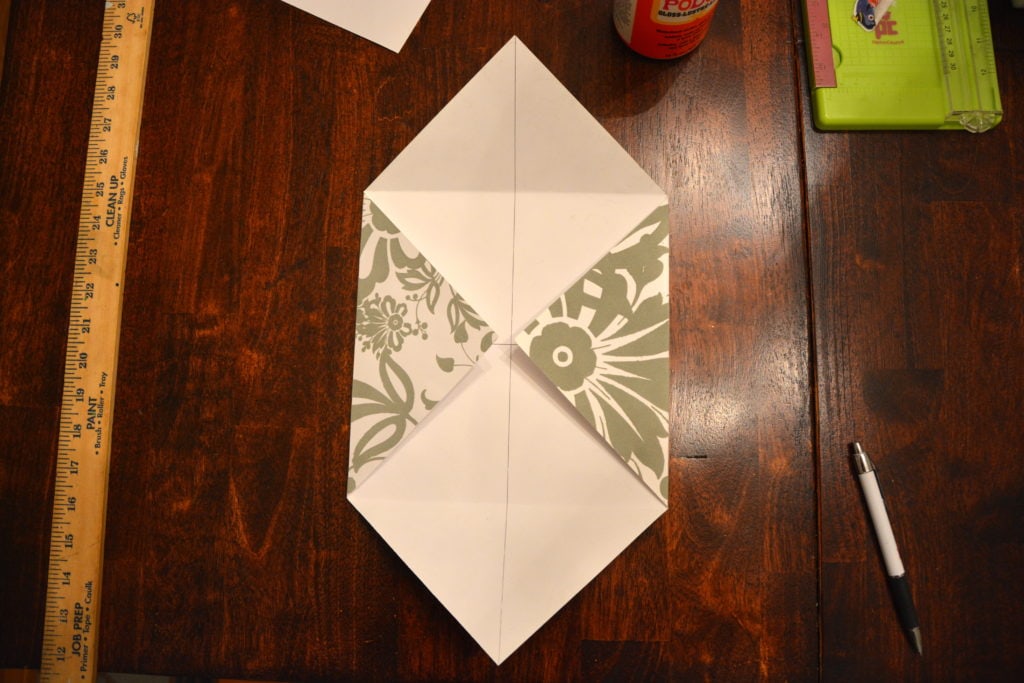
STEP 5: Fold in all four sides to meet at the center point.
This is what it should look like after all 4 sides are turned in.
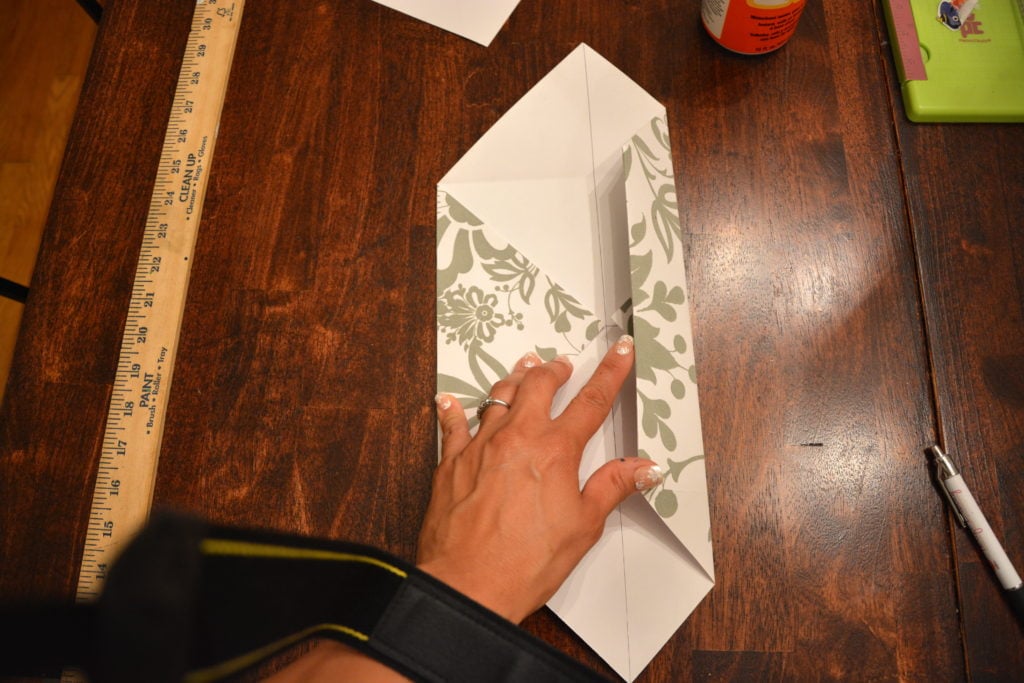
STEP 6: Unfold the top and bottom fold.
Leave the left and right side turned in.
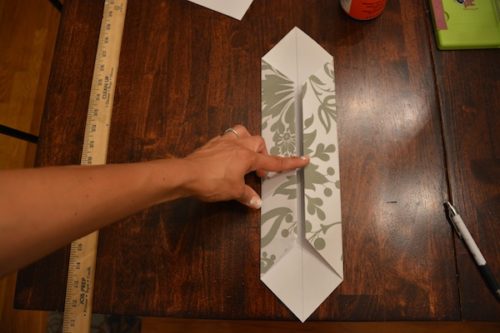
STEP 7: Fold the sides in on itself.
Fold the left and right side in on itself, meeting up at the center line.
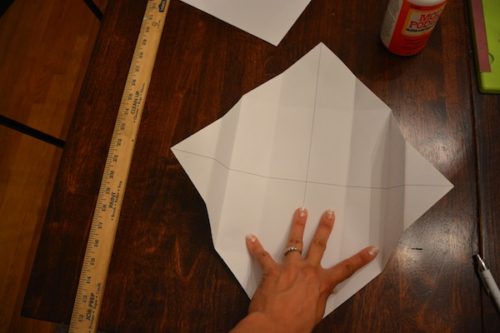
STEP 8: Now unfold the whole sheet.
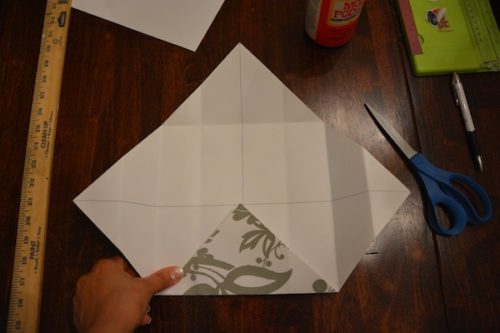
STEP 9: Fold up the bottom corner to the center.
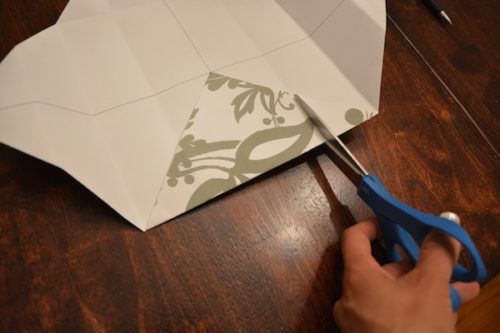
STEP 10: Cut the fold, only up to edge of the corner.
Sounds confusing, but just cut on that folded line ONLY up to the edge of that corner is snipped.
Snip the other edge, too, and here’s what you’re left with:
Now rotate your paper and do the same for the other side. See how that side is snipped, too?
STEP 11: Turn down the tips on the flaps.
Now that you’ve got that little flap part from those snips, fold down the top part of that. Do this for both sides you snipped.
Both sides snipped will look like this:
After you’ve folded the flaps out, this is what it should look like. It’s okay to let them “go” after you’ve folded them. You really just want the creases.
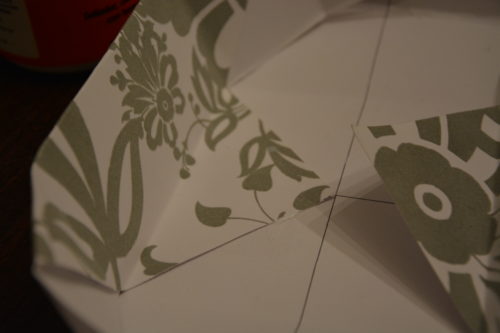
STEP 12: Turn the sides in.
Now you’ll turn in the sides and are left with this little flap.
STEP 13: Fold creases in the little side flap.
Fold these side flaps on all sides. There are 4 pieces of them.
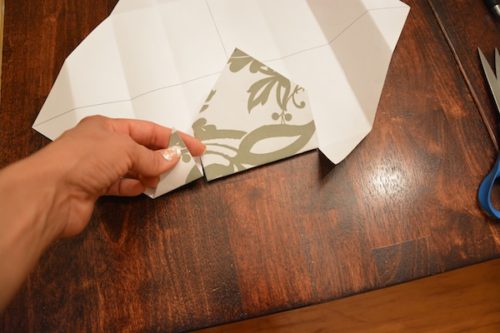
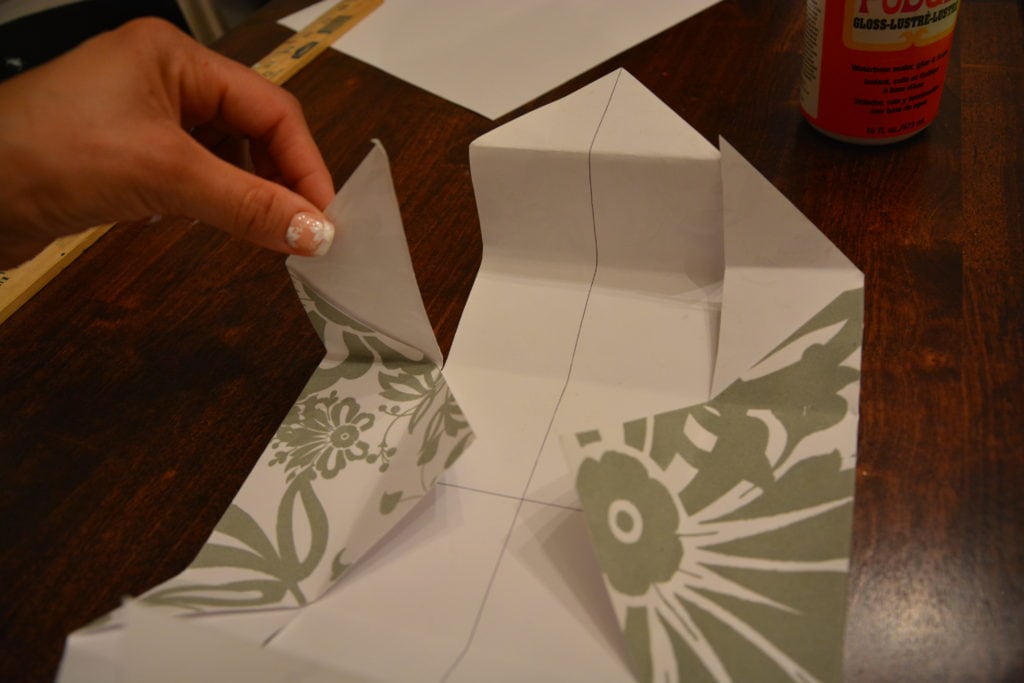
STEP 14: Mod Podge the side flaps.
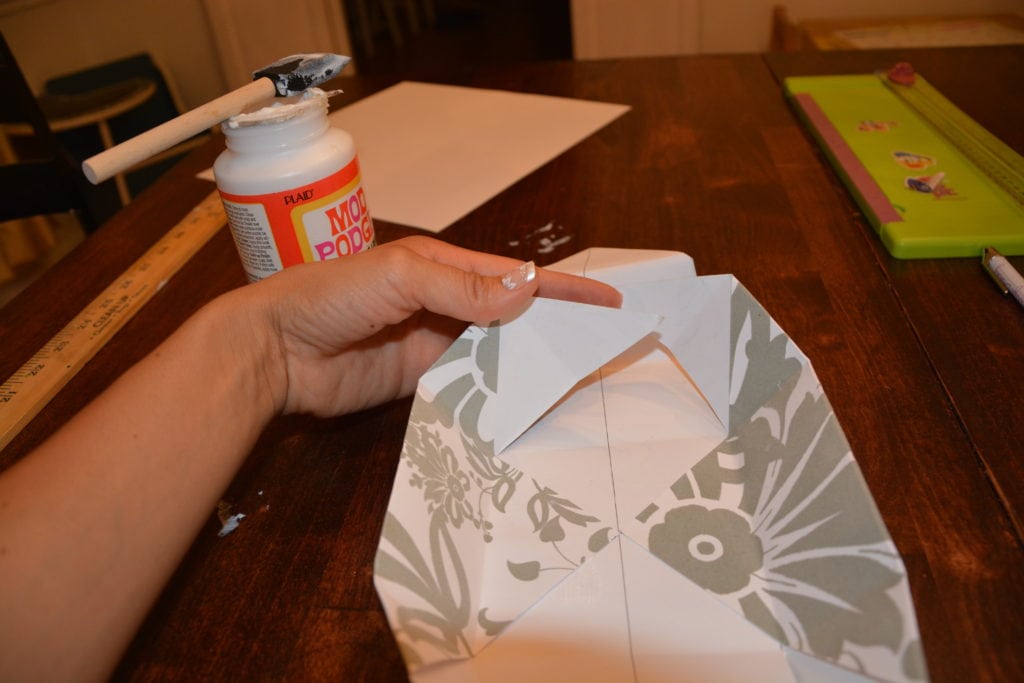
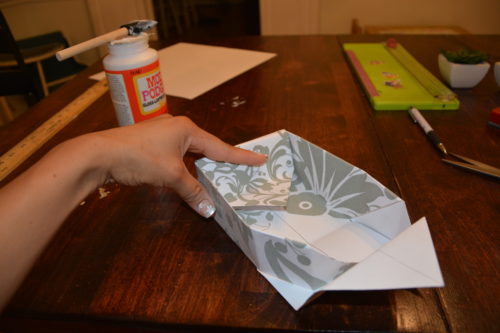
Okay, don’t let me lose ya here. At this point, you’ll release the little flap, which is just for creasing the sides/corners of your box.
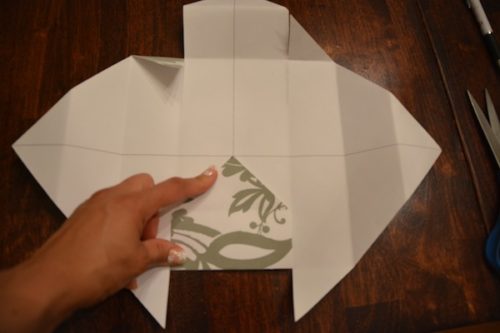
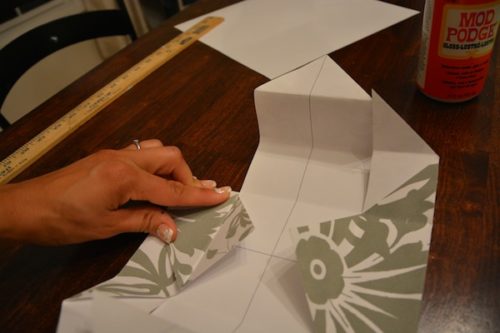
Now see where my thumb is? That’s the little side triangle flap part that you’ll Mod Podge down. Mod Podge is just a glue but is also used as a sealer for a bunch of awesome projects, like this wooden wine box on which I glued paper. If you have a glue stick, that works fine, too.
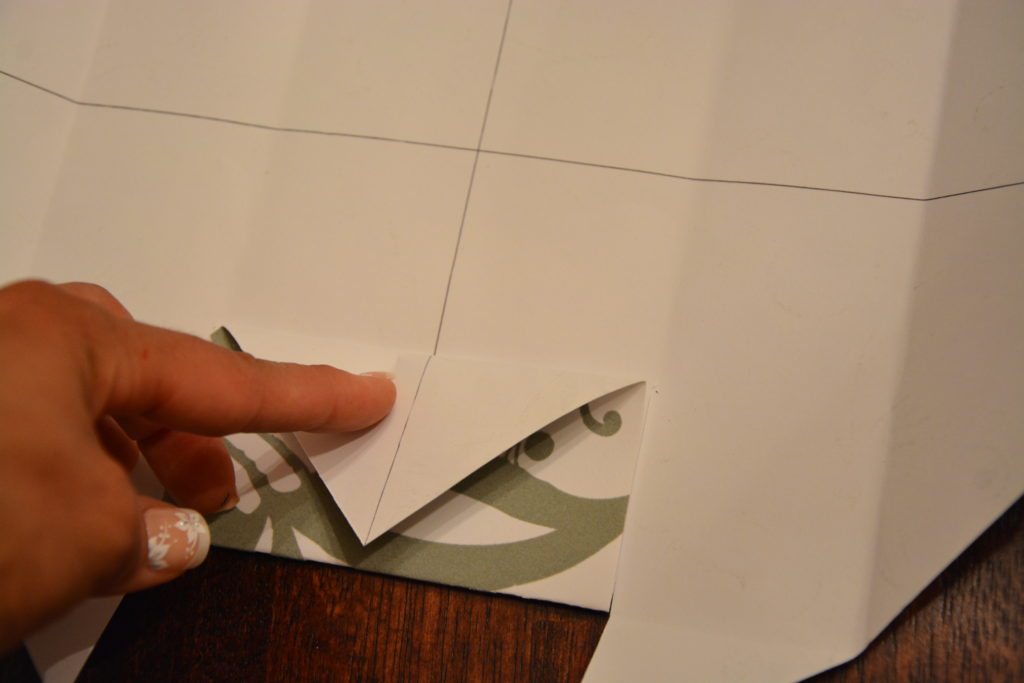
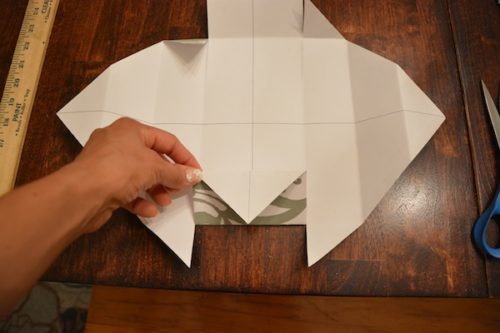
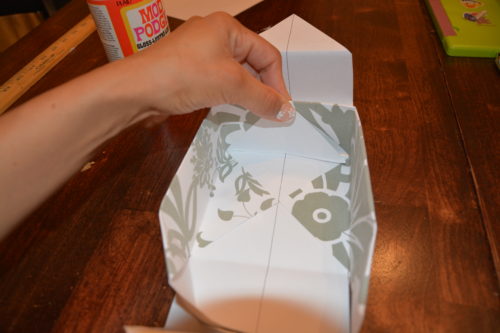
It should look like this. This will form the inside base of your box. See that other flap on the right side? Mod Podge that one, too:
After you’ve Mod Podged them, you should be left with two pointy pieces glued down, pointing towards the center.
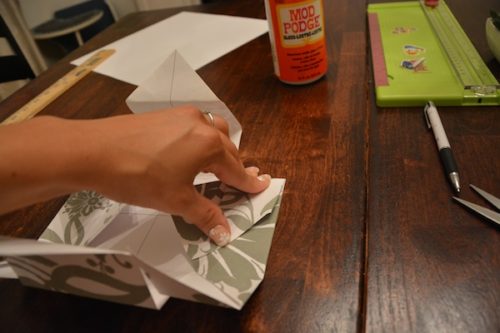
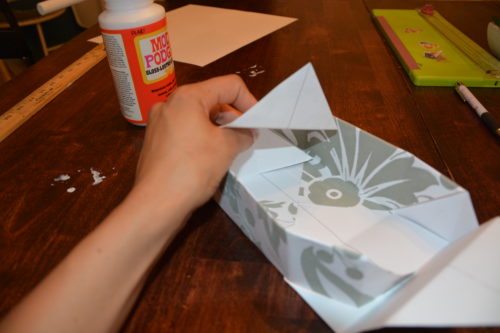
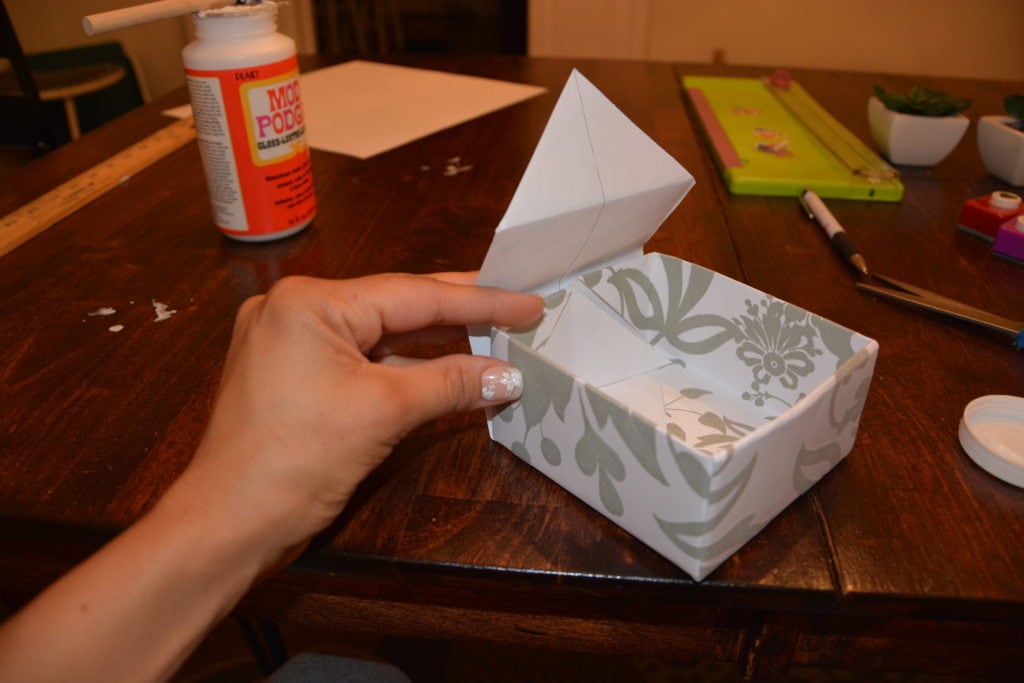
STEP 15: Grab the two flaps.
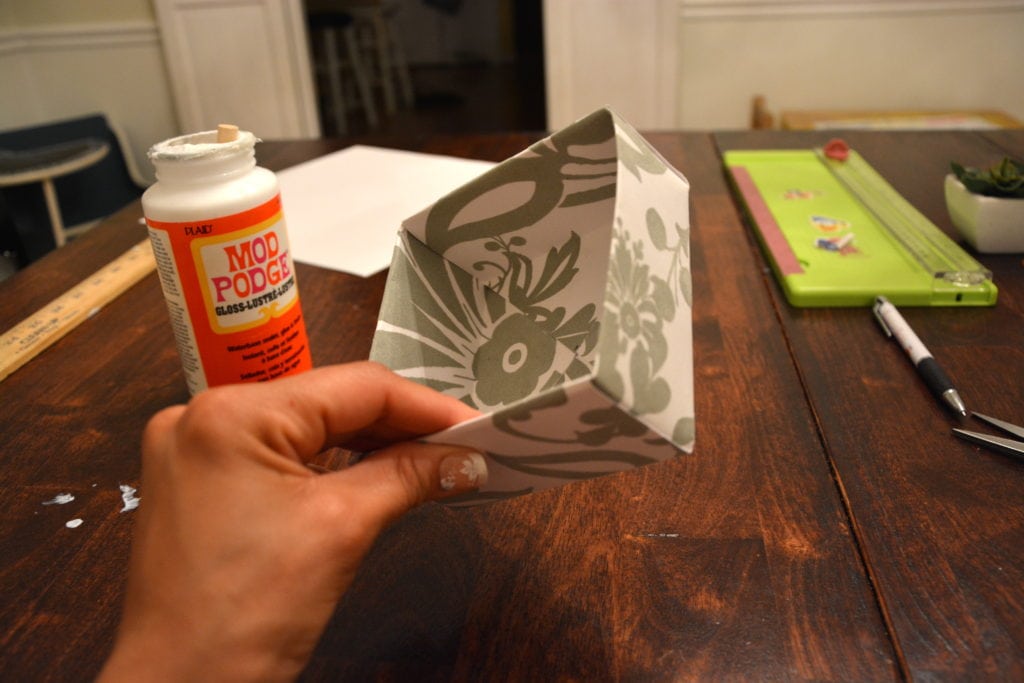
Now, you’ll grab the two pointy pieces and hold them in your hand.
Next, you’ll wrap the edge over those pieces to cover them. Your box should be taking shape now.
Now you’ve got 3 edges up. You can glue this triangle down, too, if you’d like.
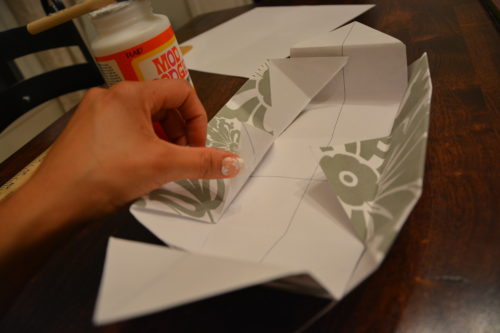
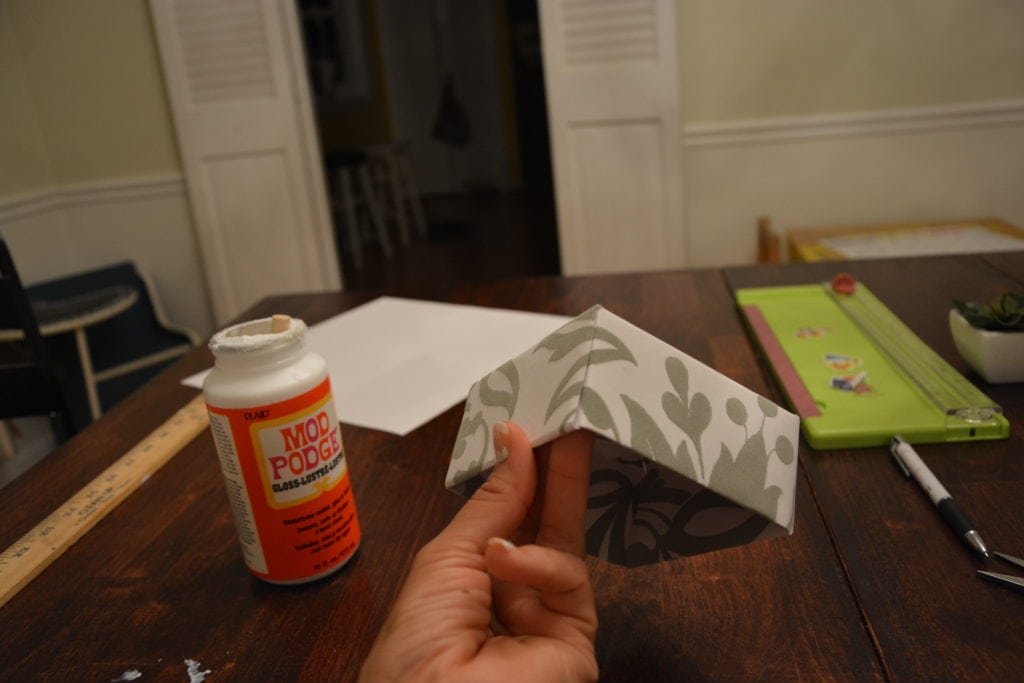
One side flipped over…one to go….
Now turn your box the other way and fold that flap over. Secure with the Mod Podge or glue.
STEP 16: Admire your work!
The top is now DONE, baby! That was easy, right??
How to Make the Bottom of the Gift Box
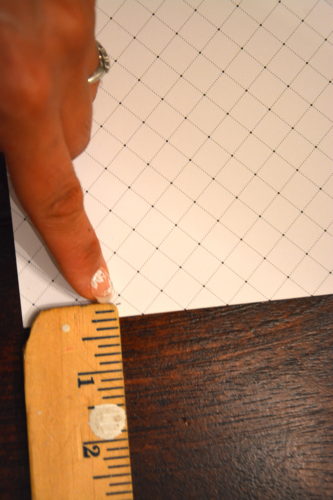
To make the bottom of the gift box, you’ll do all the same steps, but this time, you’ll first need to trim two of the adjacent sides 1/8″ so that the gift box will be slightly smaller and will fit snugly under the top lid of the box.
STEP 1: Measure to 12″ x 12″ and trim, if necessary.
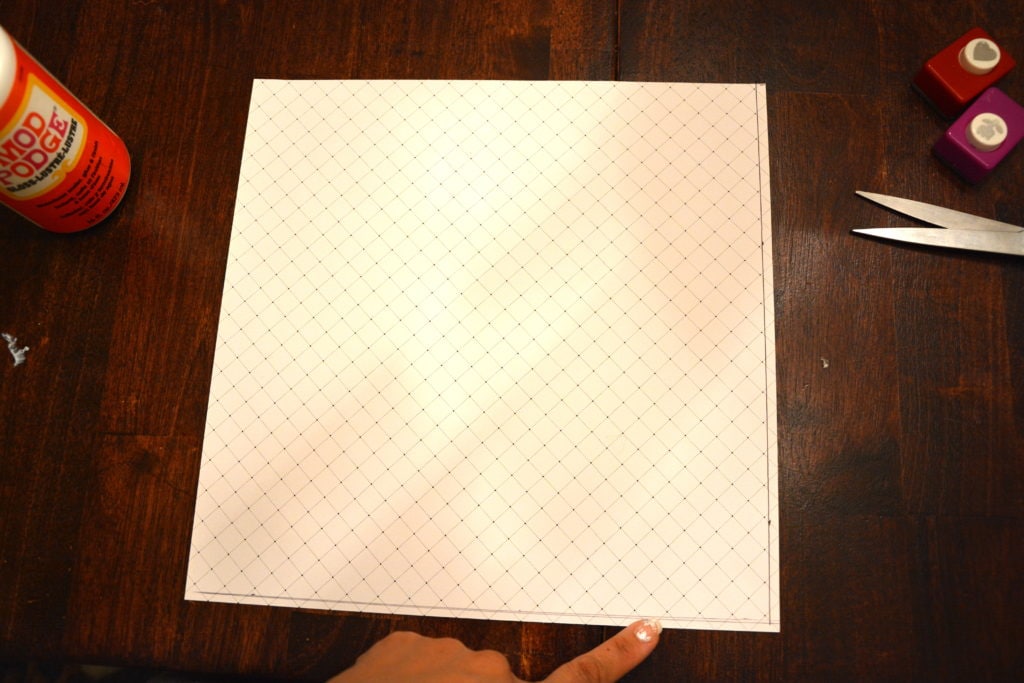
STEP 2: Cut 1/8″ from the BOTTOM and one SIDE.
This will ensure that the gift box is just a little smaller than the top so that the two fit snugly.
Here you see I measured along the edge and bottom, 1/8″. Then I trimmed it.
Continue making the bottom the same as the top.
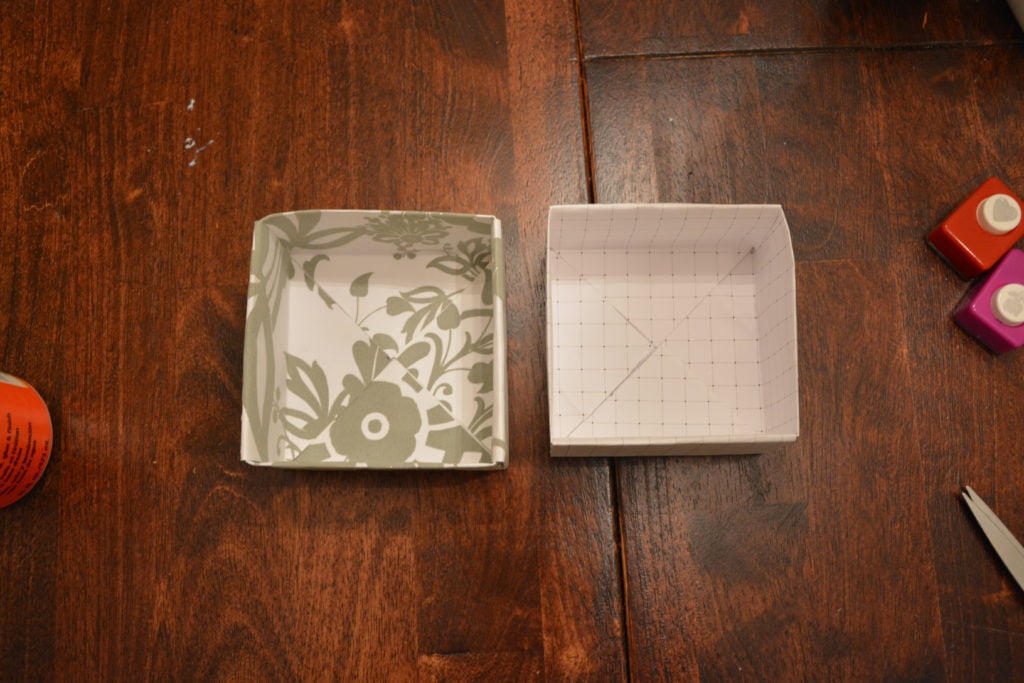
This is what it should look like when you’re done both. Don’t mind if your inside doesn’t line up perfectly. This is good enough. 🙂
If done correctly, the bottom should fit right inside the top.
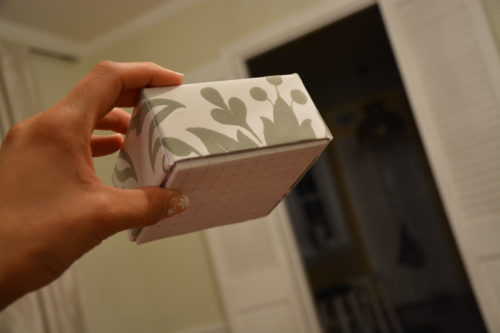
Next, grab some pretty tissue paper. As I mentioned, it’s good to have an assortment of tissue paper on hand so that you always have some available to match your box.
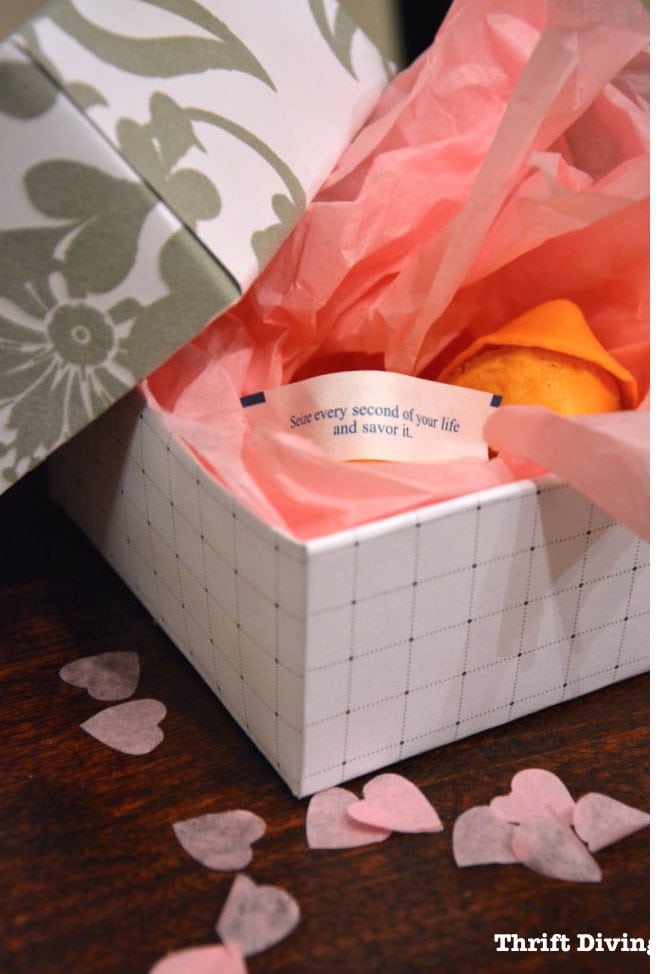
Stuff your box with any little treasure, treat, or trinket. Your friends and family will thank you! And they’ll love the custom box!!
Here are some ideas for things you can put in the DIY gift box:
- Candy
- Baked goods
- Jewelry
- Small toys for kids
- Goodie boxes for a kid’s party
- Left-overs to send friends and family home with (just line them with wax paper first).
- Soaps/creams
- So many possibilities!
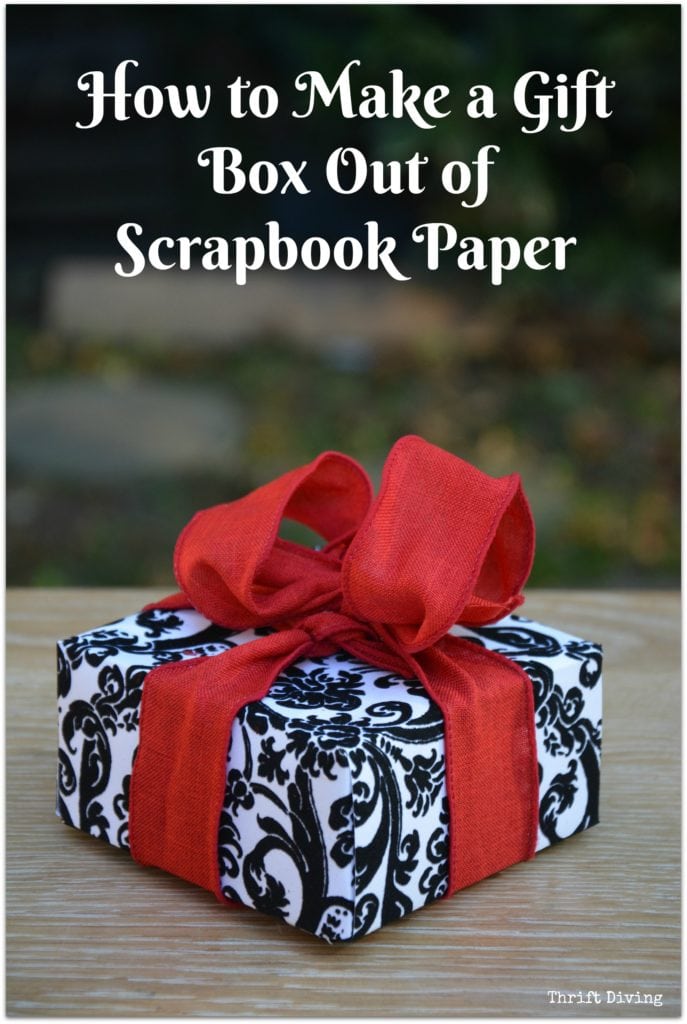
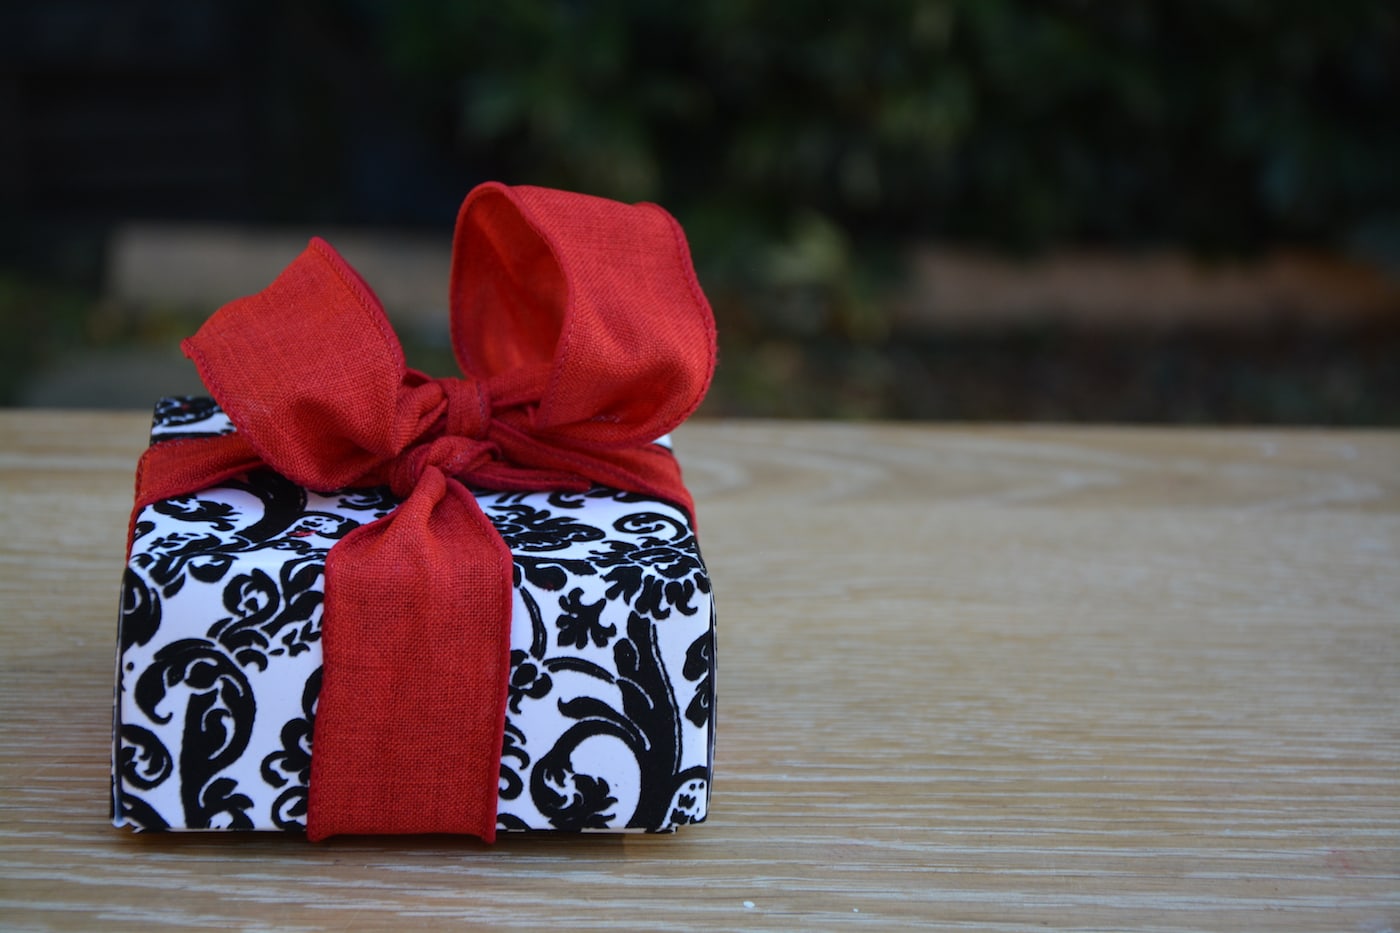
Here is favorite DIY gift box: black and white velvet paper with a red ribbon! So pretty!
Take This Project One Step Further
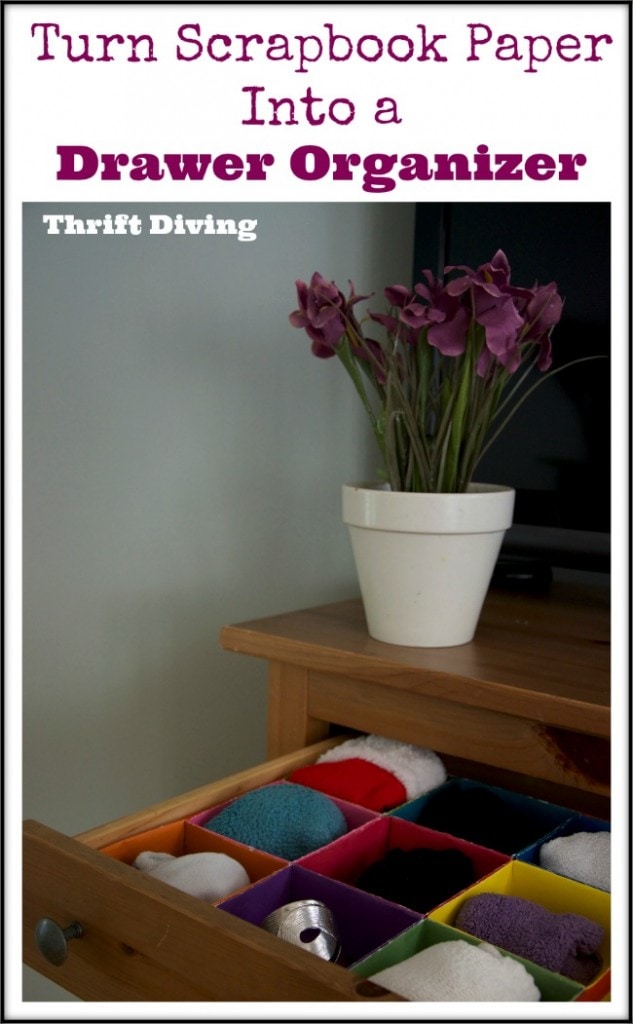
So I got a little creative and decided to make a bunch of these little gift box tops and glue them together to make a DIY drawer organizer! HA! 🙂 Isn’t that clever? And so easy! Read the full tutorial here!
See More Projects
If you enjoyed this crafty project, you’ll love these other projects of mine, too!
What little gifts would you wrap in these cute little DIY gift boxes made with scrapbook paper? Leave a comment and add to the discussion to keep the ideas flowing!
Download the 5 freebies!

Thrift Diving inspires women to decorate, improve, and maintain their home themselves...using paint, power tools, and thrift stores! Use these 5 printables, checklists, and ebooks to get started!








Thankyou so much. I’m desperately working in my craft room trying to rein in the chaos of 2 years of being very ill and still not 100% better yet. And of my craft room having become the place everything that didn’t have a place right that moment was put in there. Feeling exhausted and overwhelmed i came to have a 5 minute break and a look on Pinterest for Inspiration and then immediately i saw your gorgeous little boxes. I can’t tell how delighted i am. Your tutorial is outstanding in the way that i can understand your verbal instructions which i normally can’t follow verbal instructions from anyone because I’m a visual learner. And then to top it off the video and written instructions plus photos make it a 100% success. I’m now looking forward to organizing my whole house not just my workrom. Thankyou for bringing such joy to my day. Happy crafting Hugs Glenne 💖
This would be a cute and personalized way to gift money or gift cards too. Pinned.