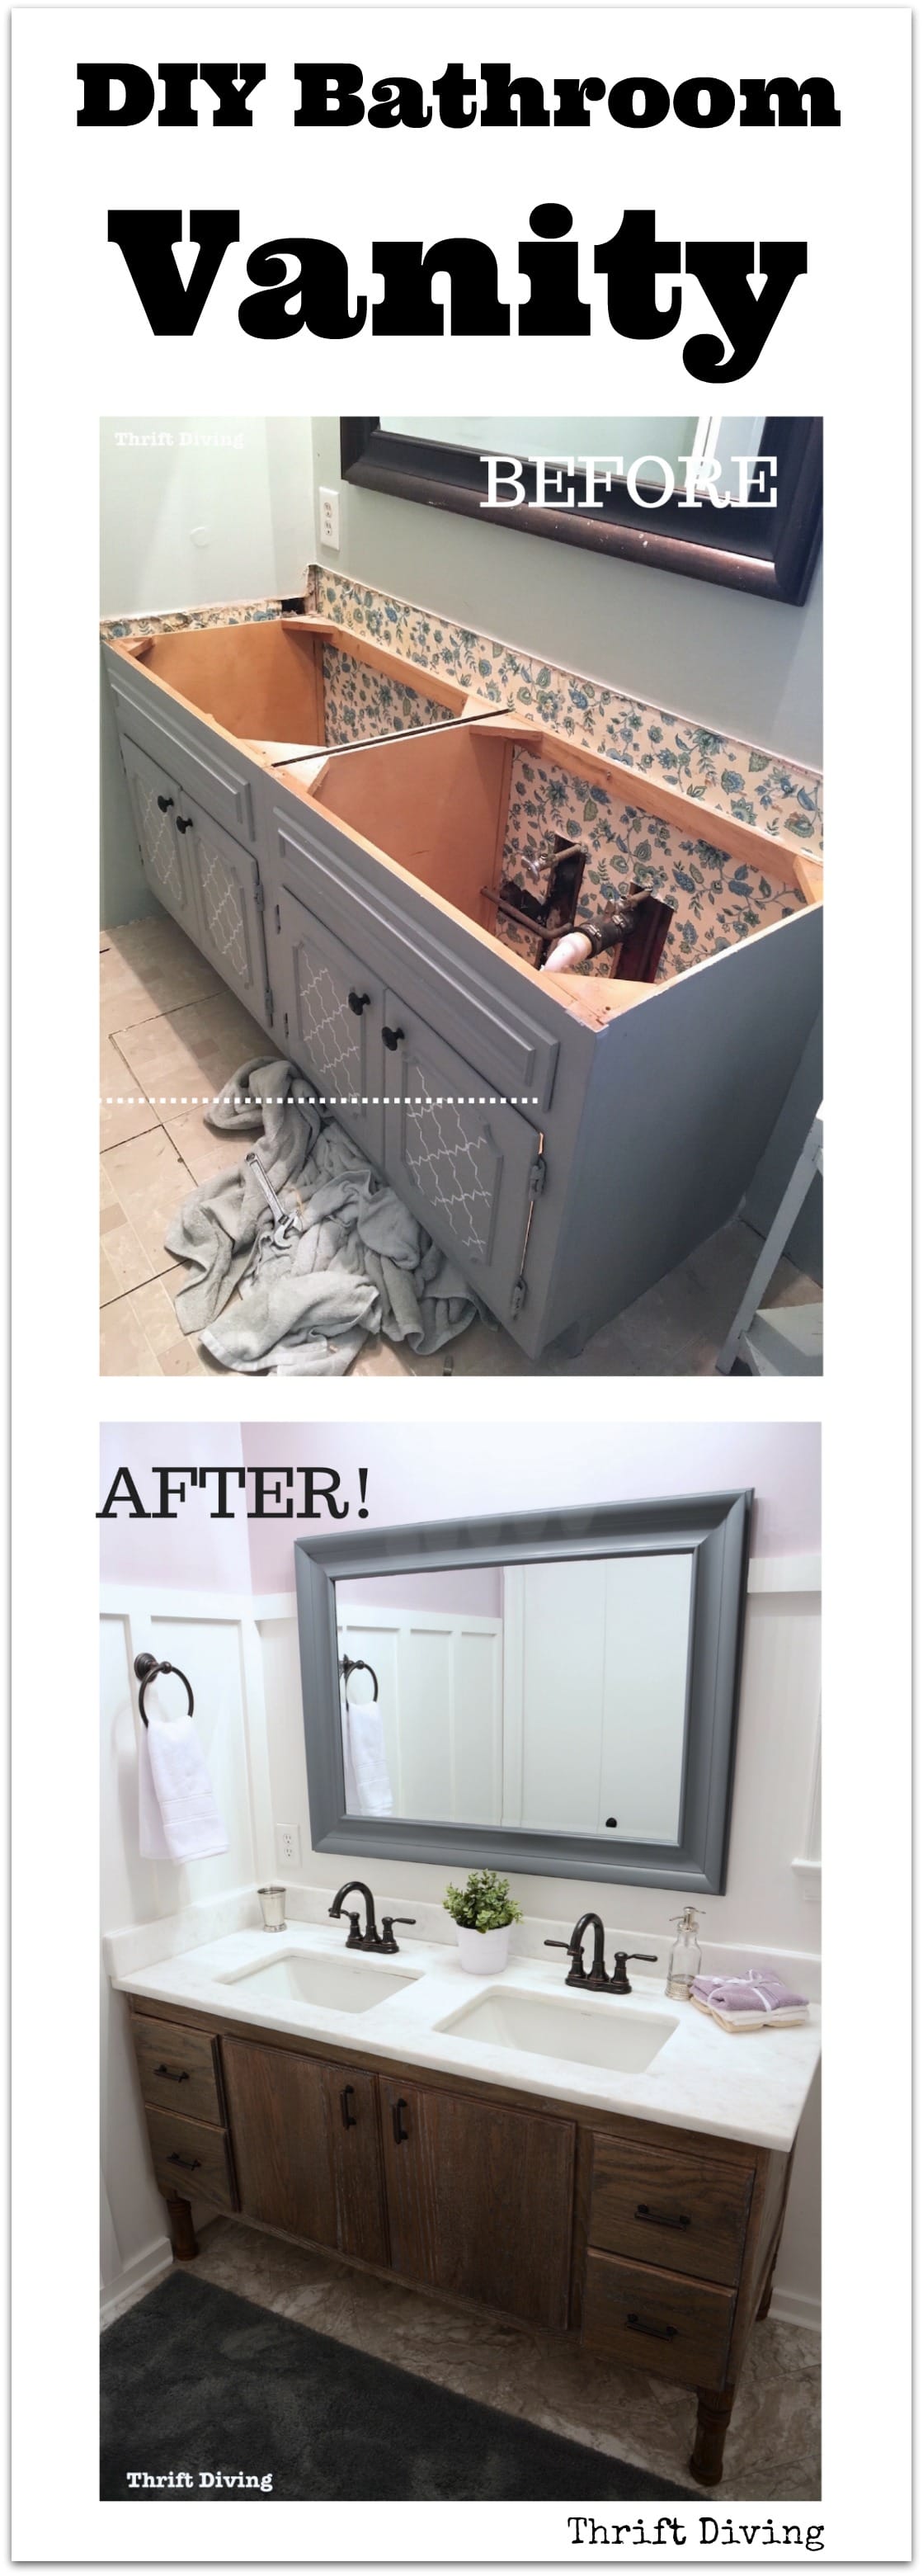
BEFORE & AFTER: How to Build a DIY Bathroom Vanity From Scratch
If you give a girl a power tool, she’ll cut a piece of wood.
Then she’ll realize that wood can actually build something cool in her house.
She’ll go rip out her old ugly bathroom vanity and start nailing and screwing pieces of wood together.
Suddenly, she’ll have a new vanity!
Well, that’s exactly what happened to me.
This girl right here got the ingenious idea that she’d remove her old vanity and simply build a new one.
Even though she’s never ever, ever….(did I mention ever??)….built something so large that had to be so functional for her home.
How to Build a DIY Bathroom Vanity
My bathroom was desperately in need of a master bathroom makeover! I had done it before, but that was when I knew nothing about DIY or makeovers.
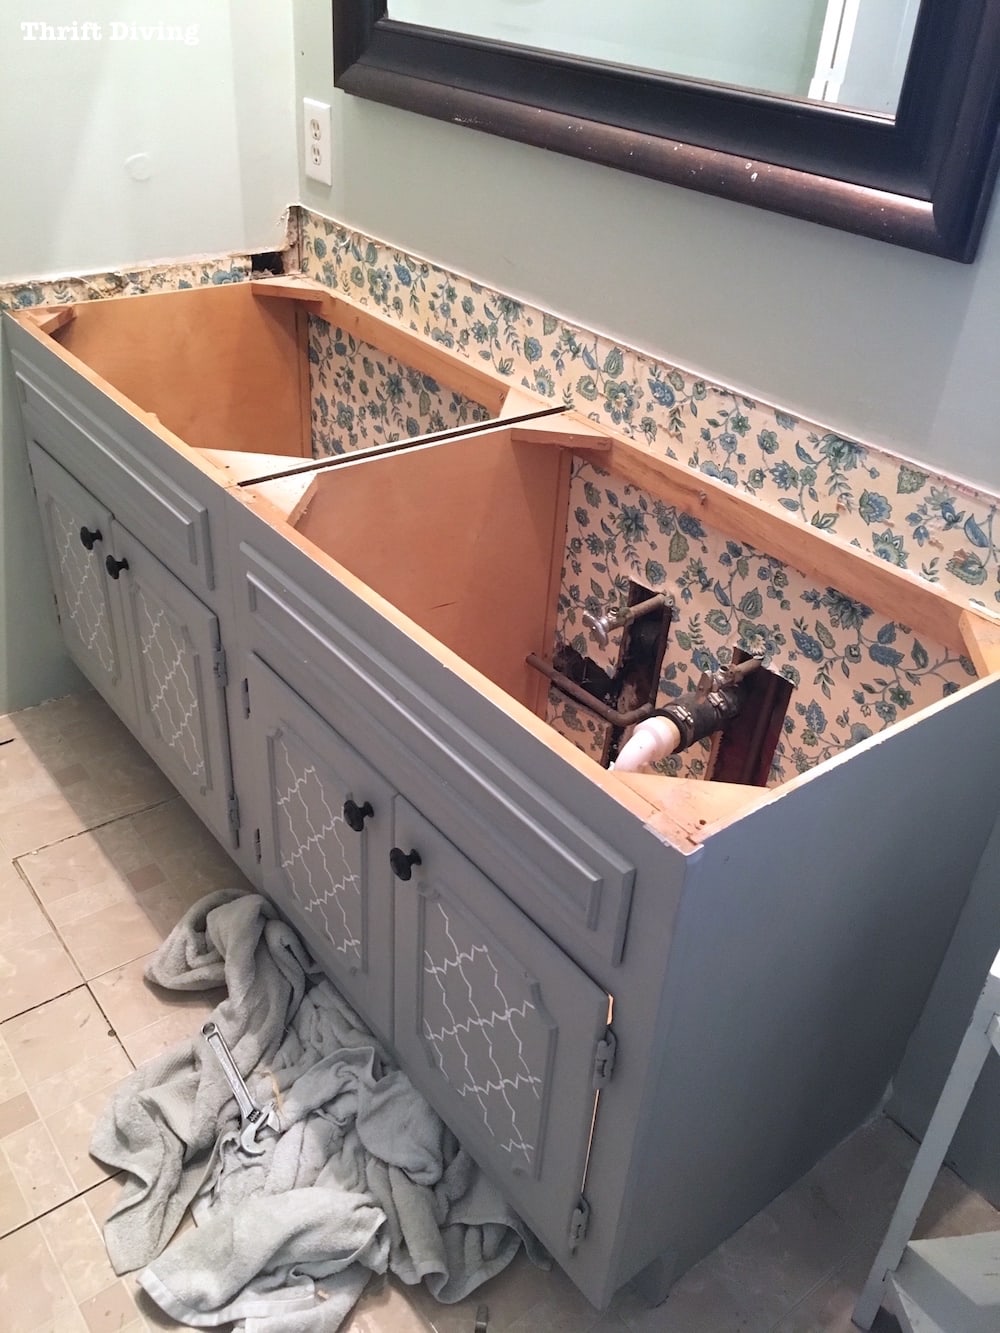
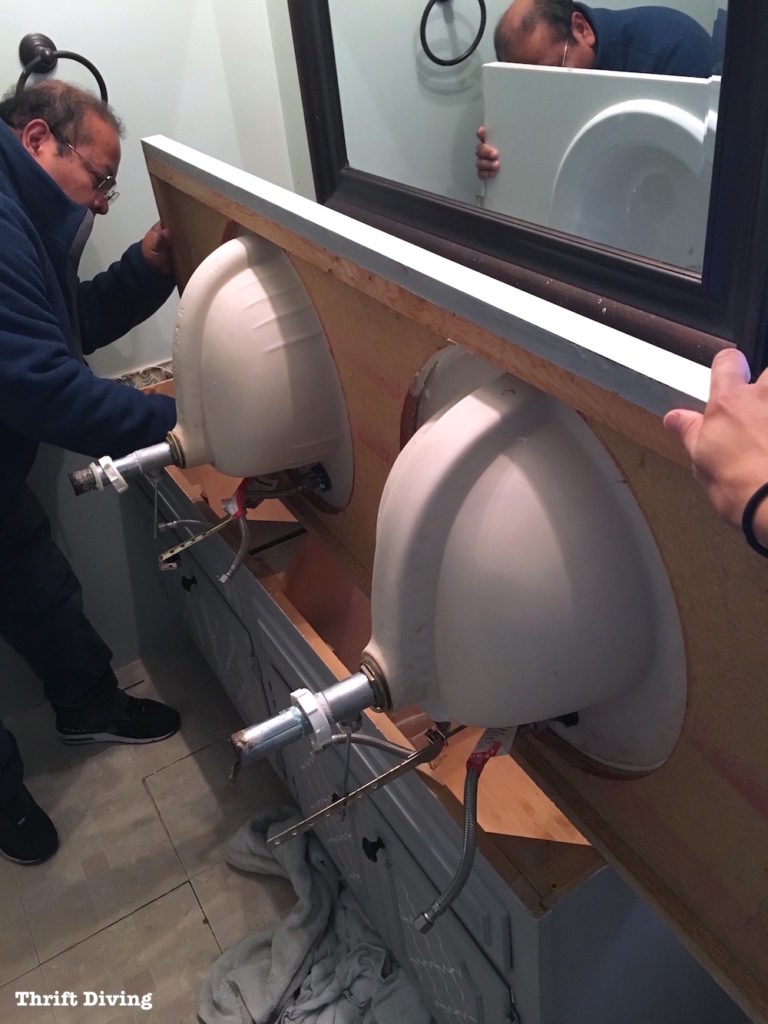
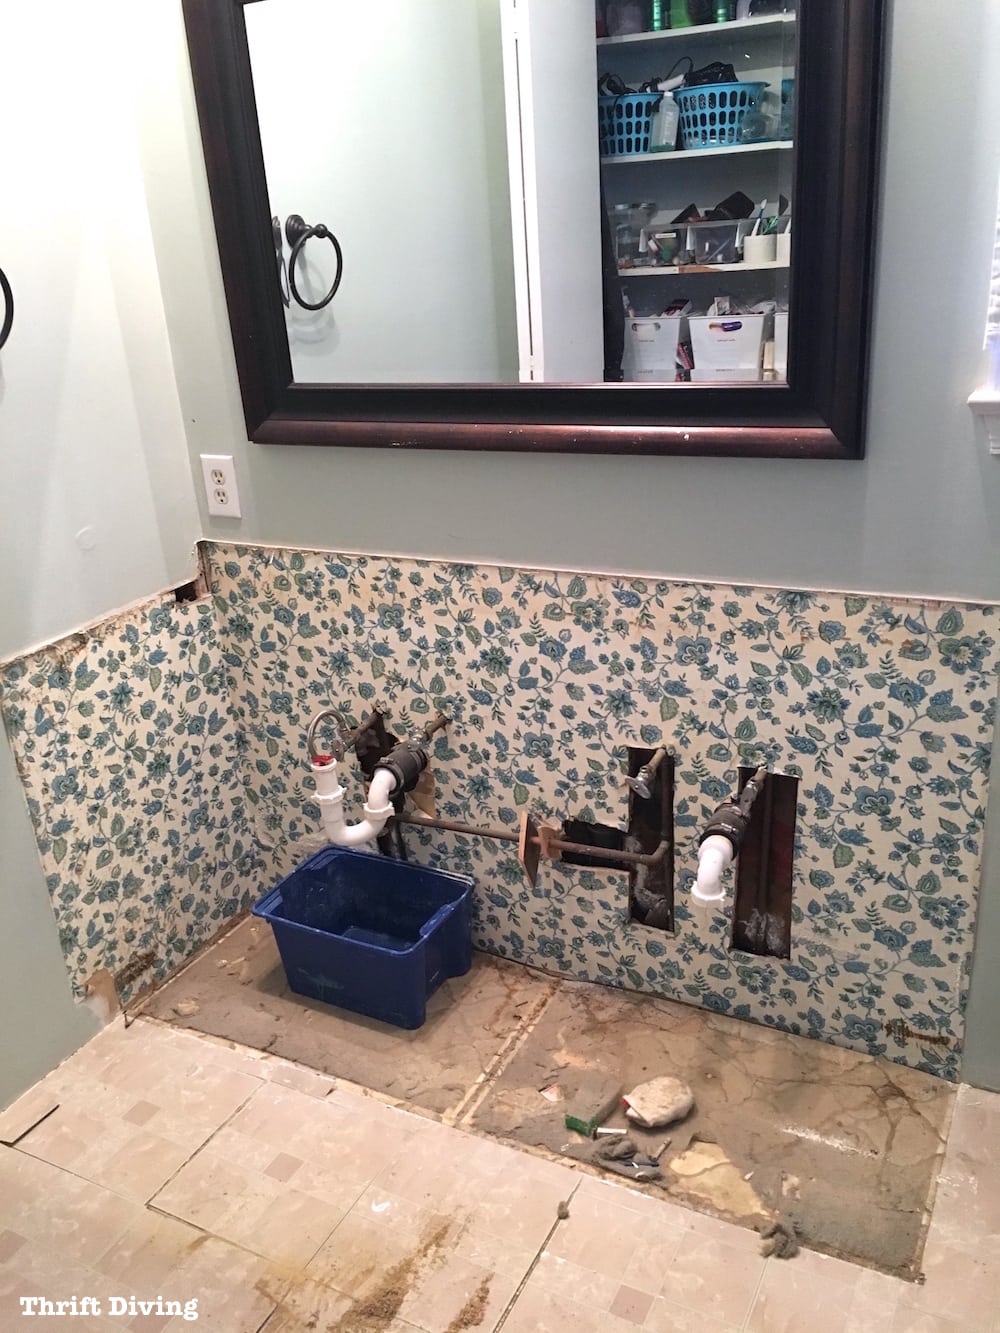
Here’s how the bathroom looked after removing the old top, right before the whole thing has been ripped out.
BEFORE
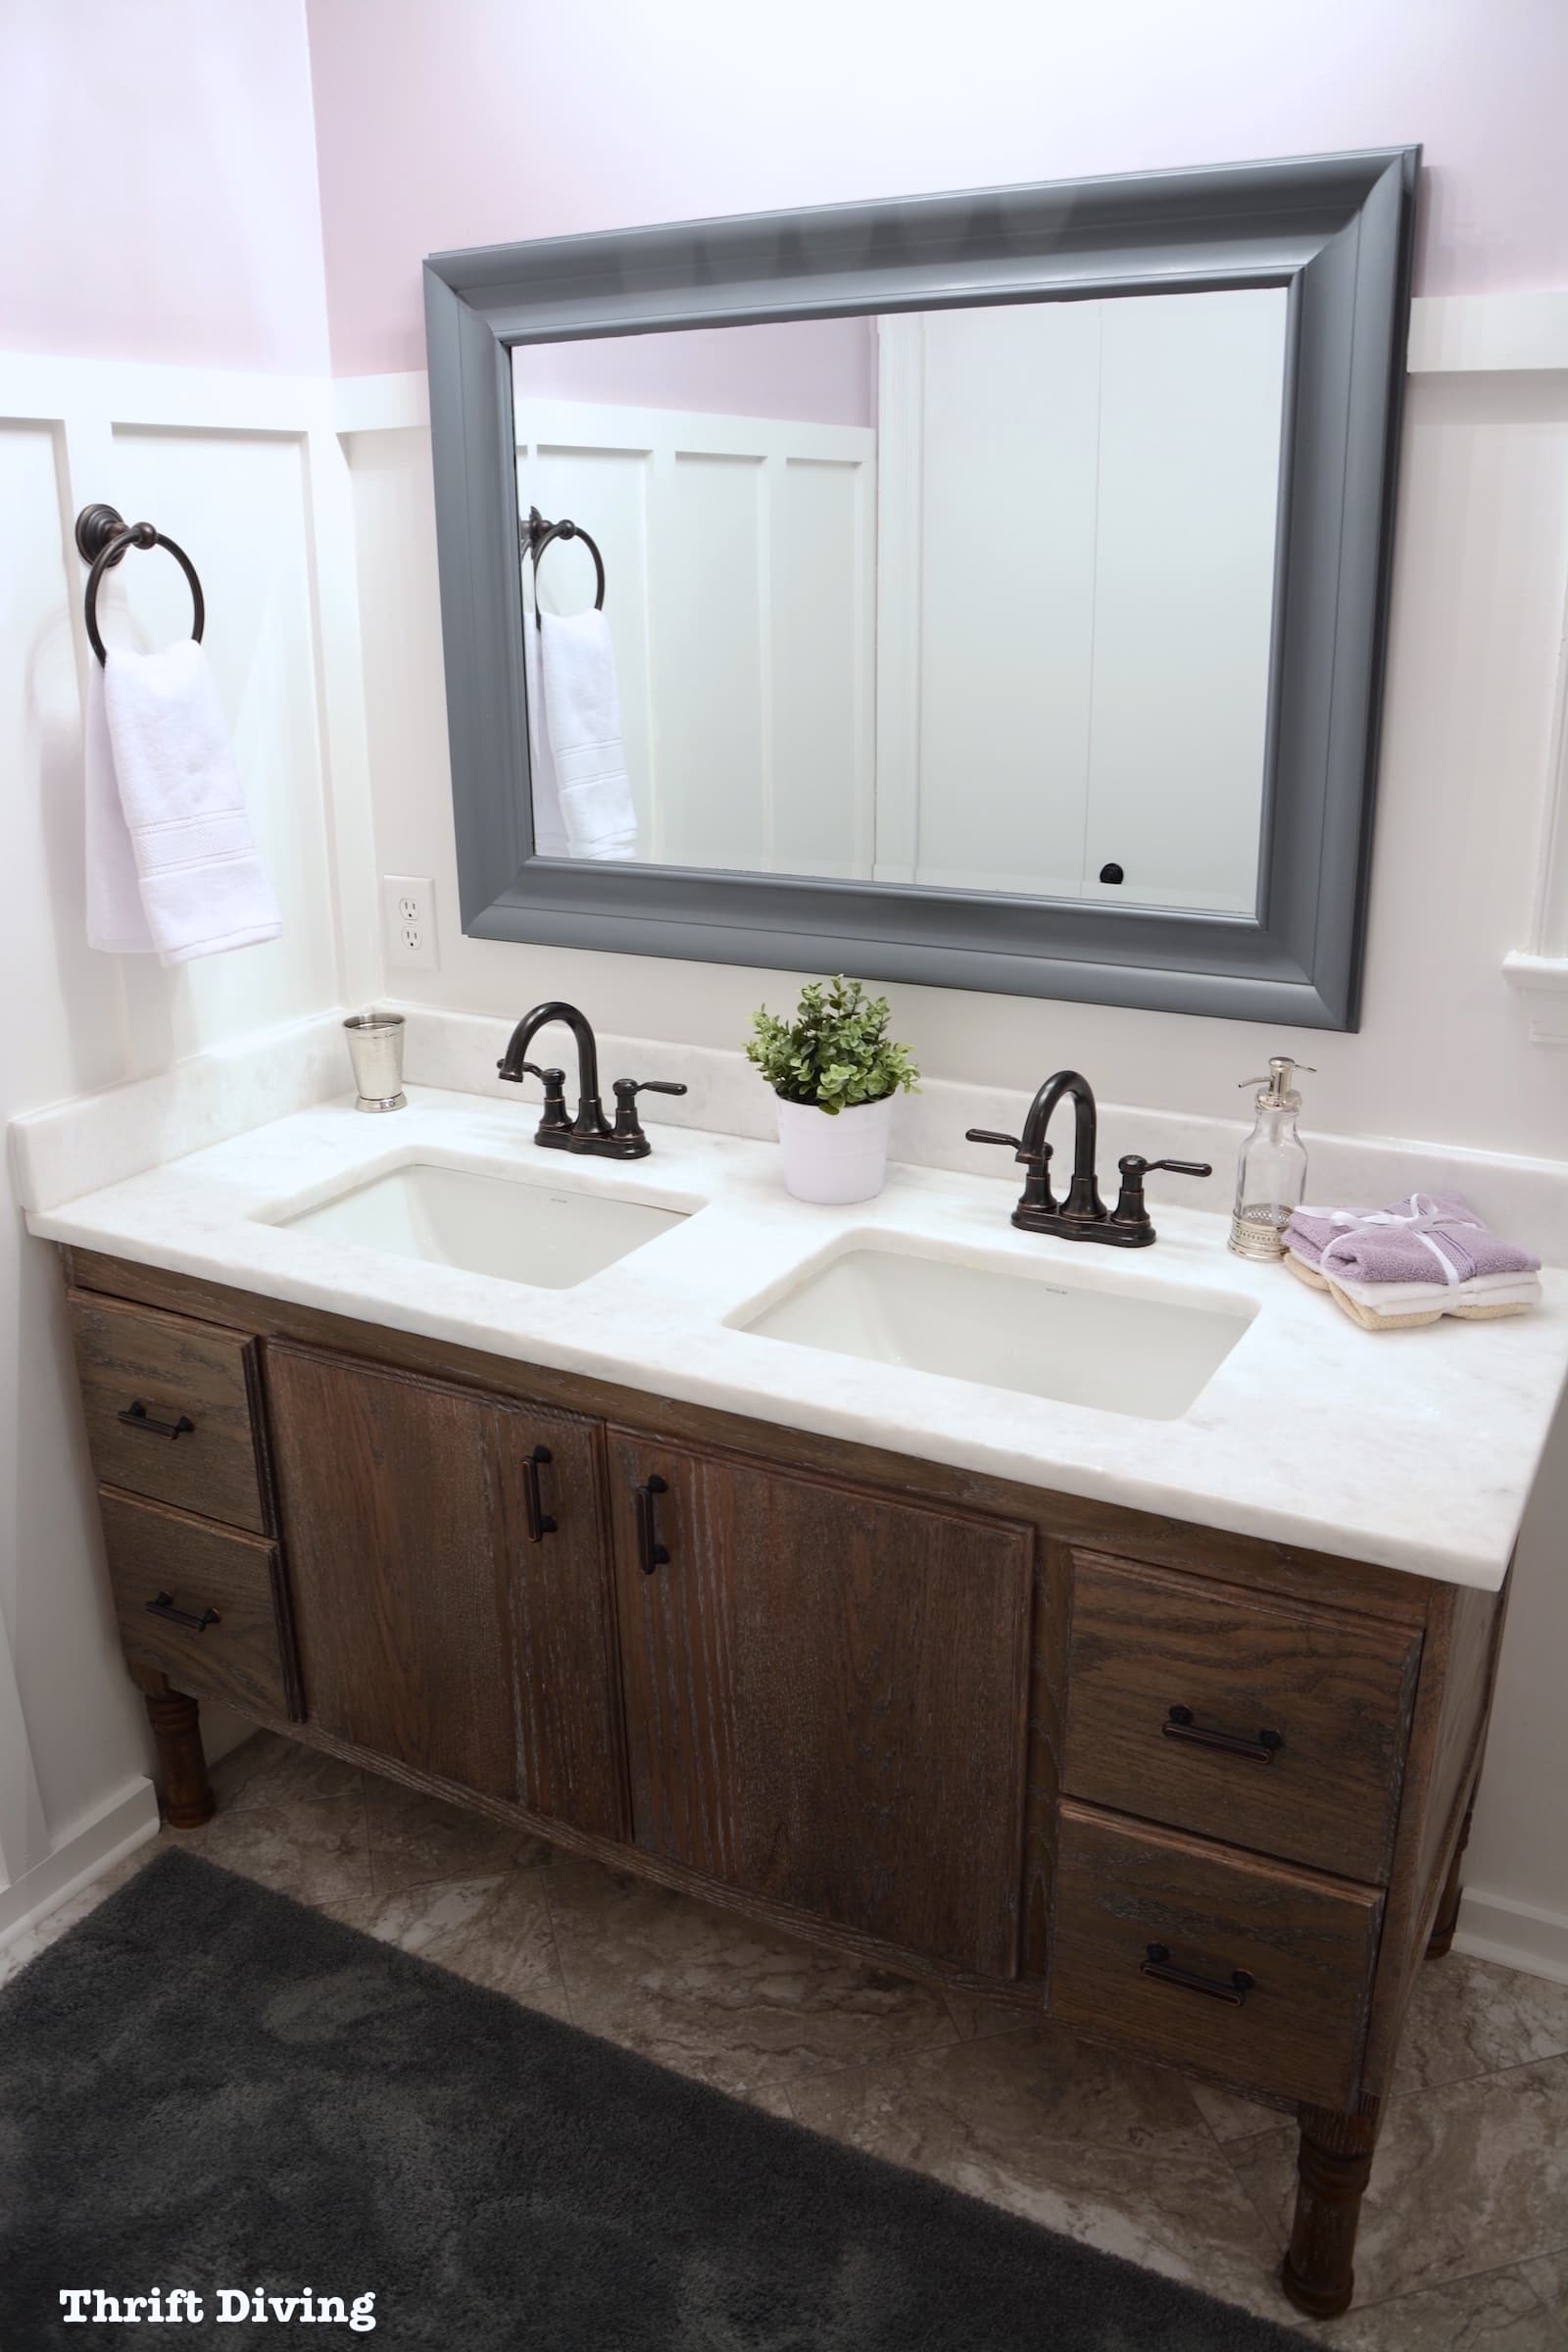
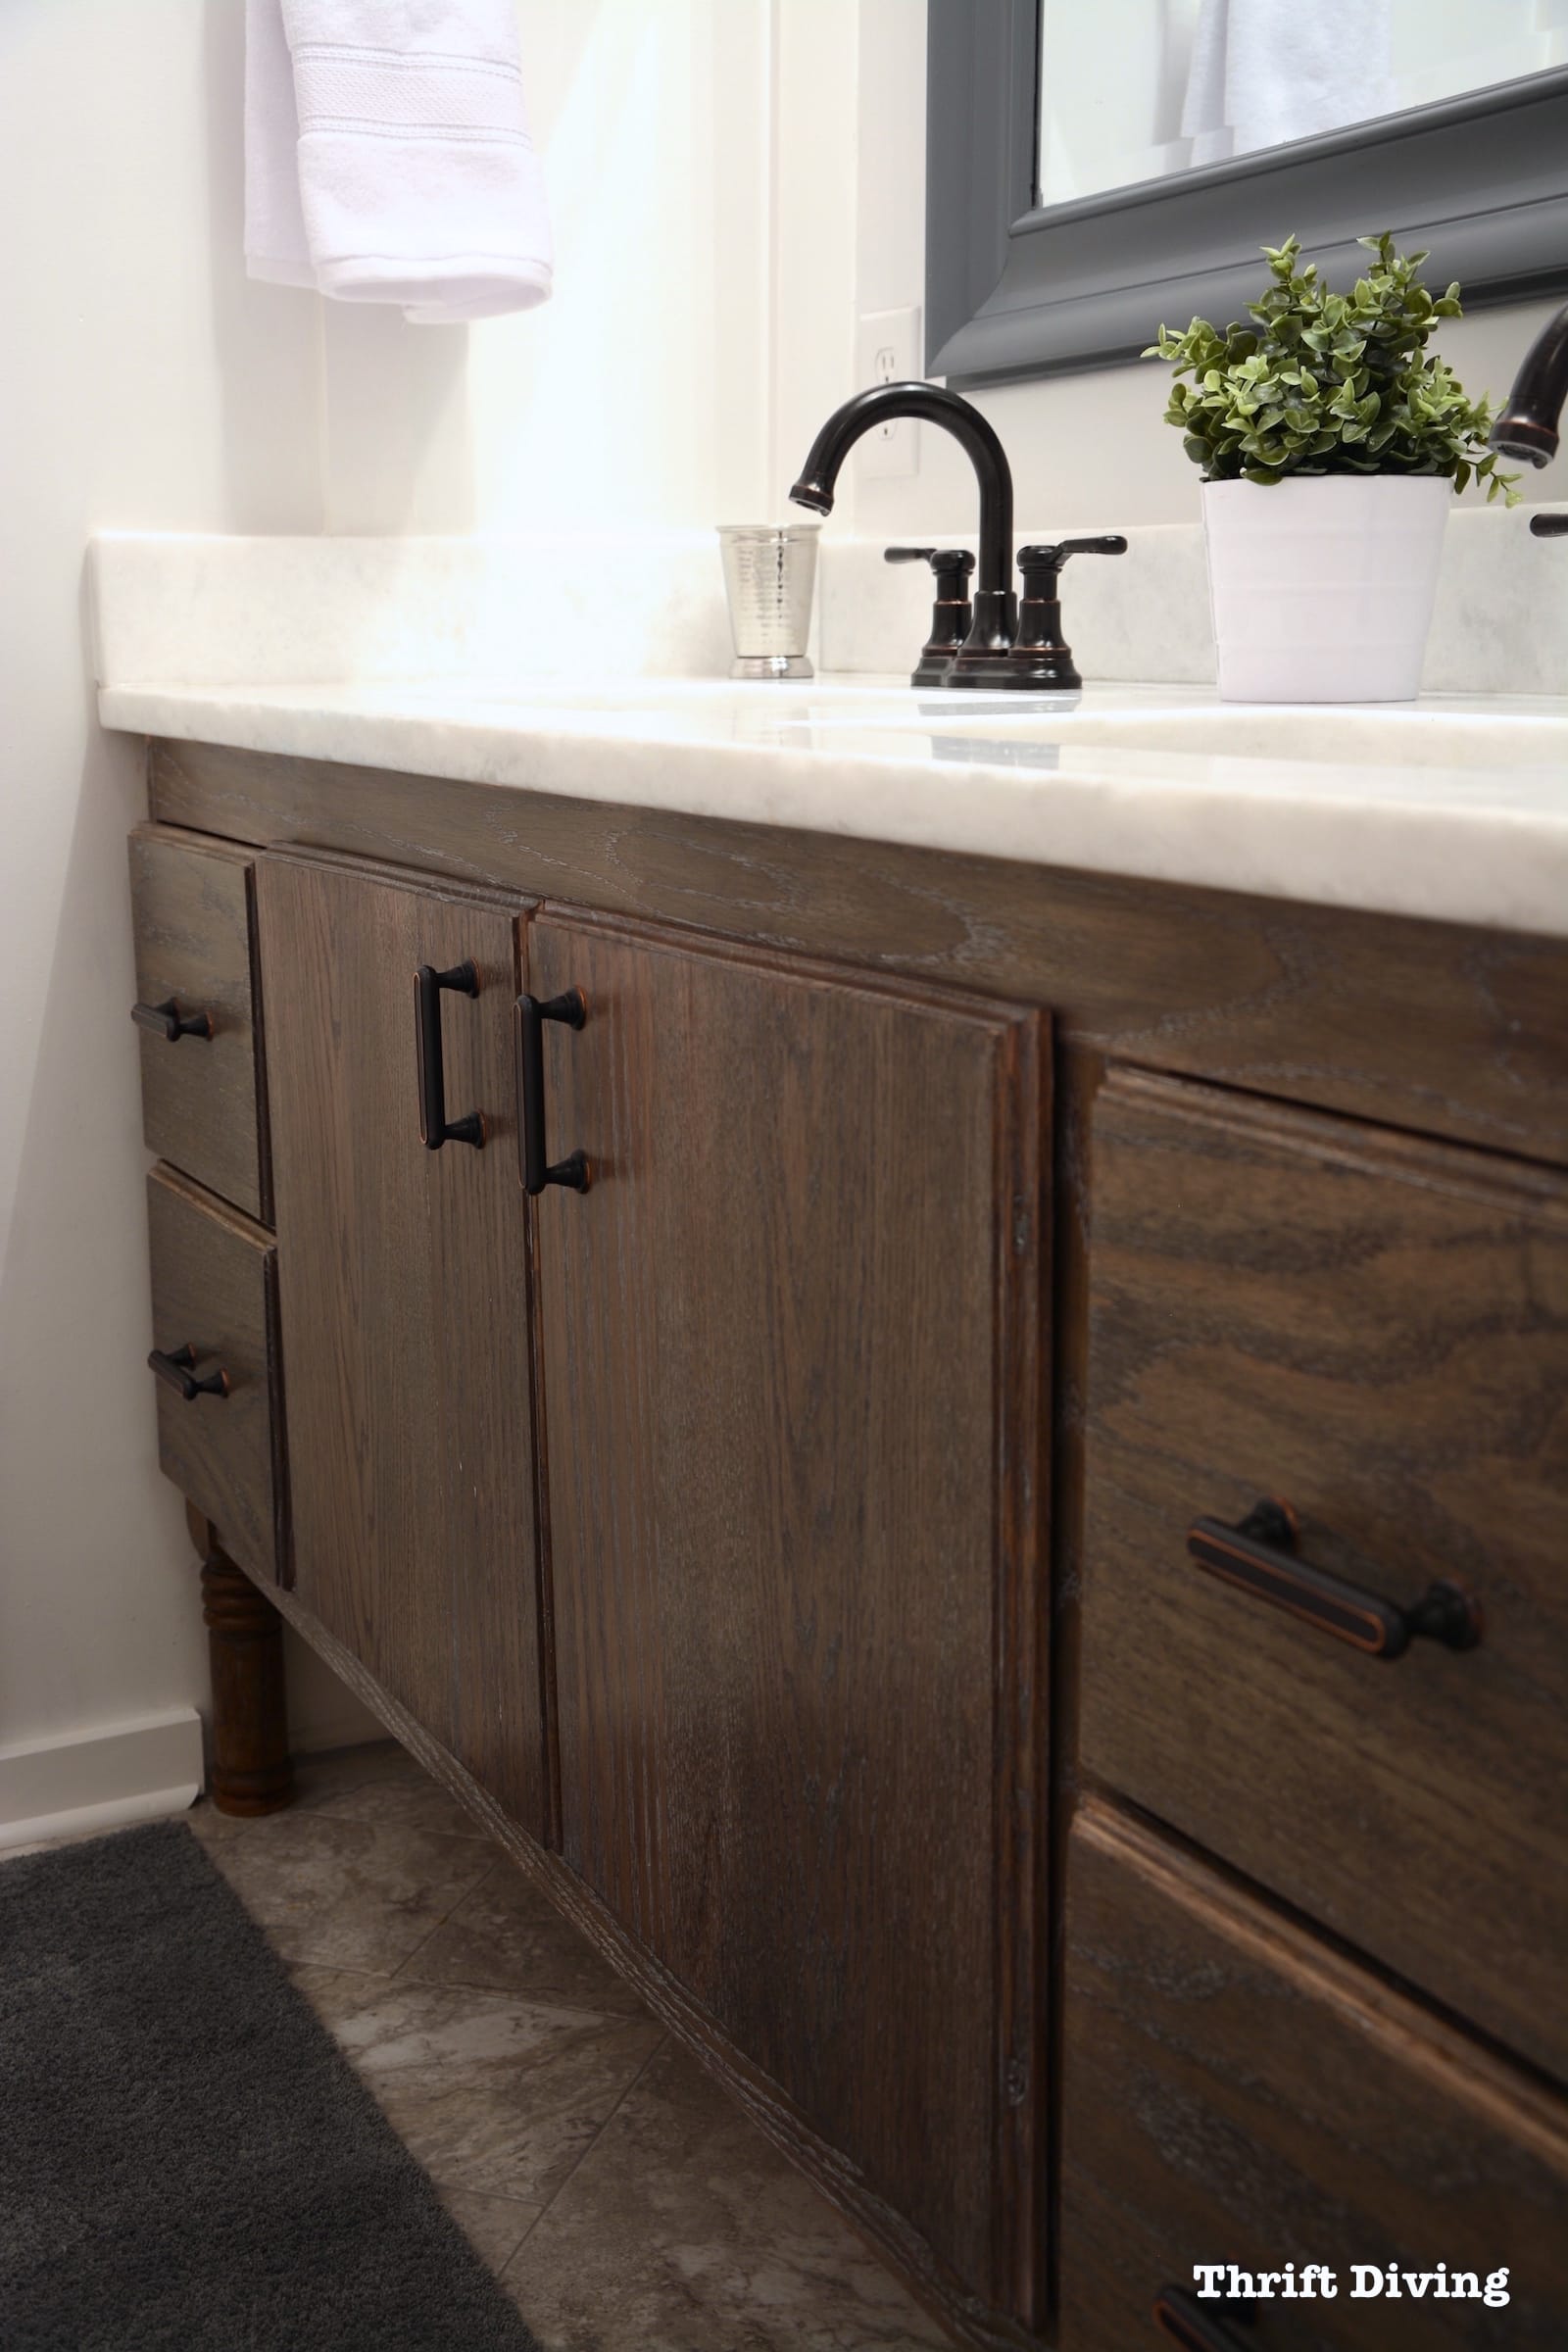
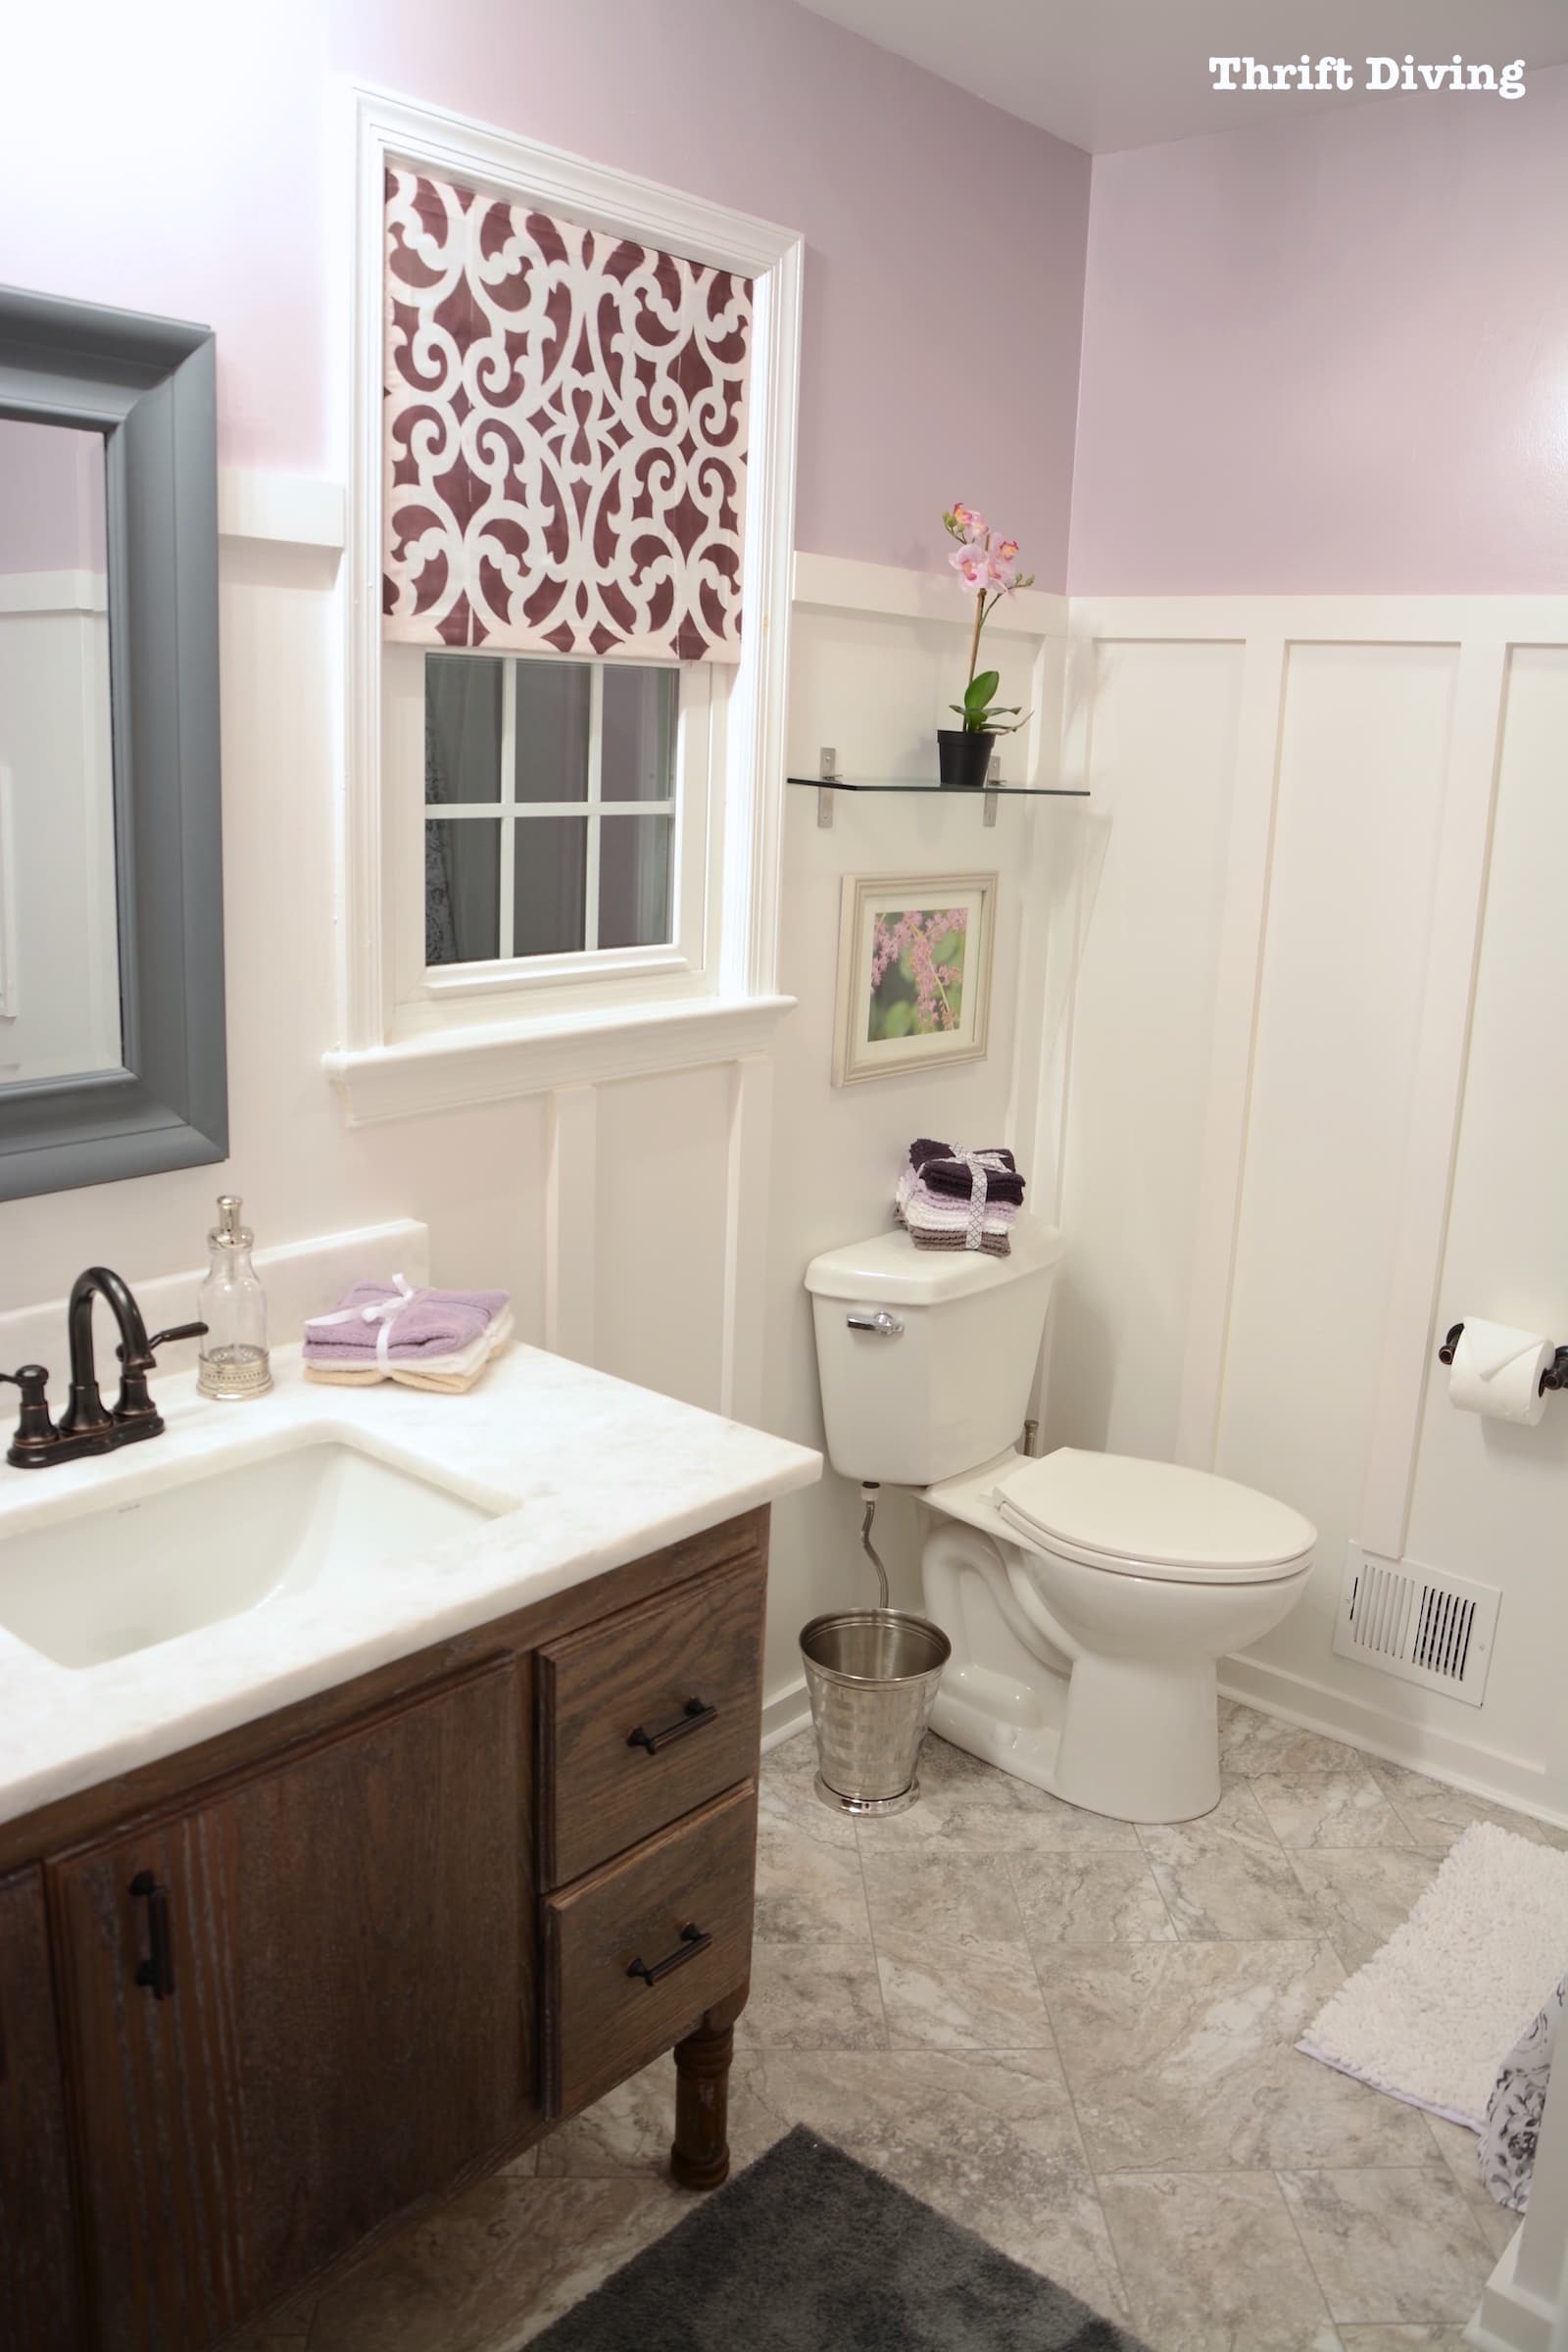
AFTER!
So clean and pretty now!
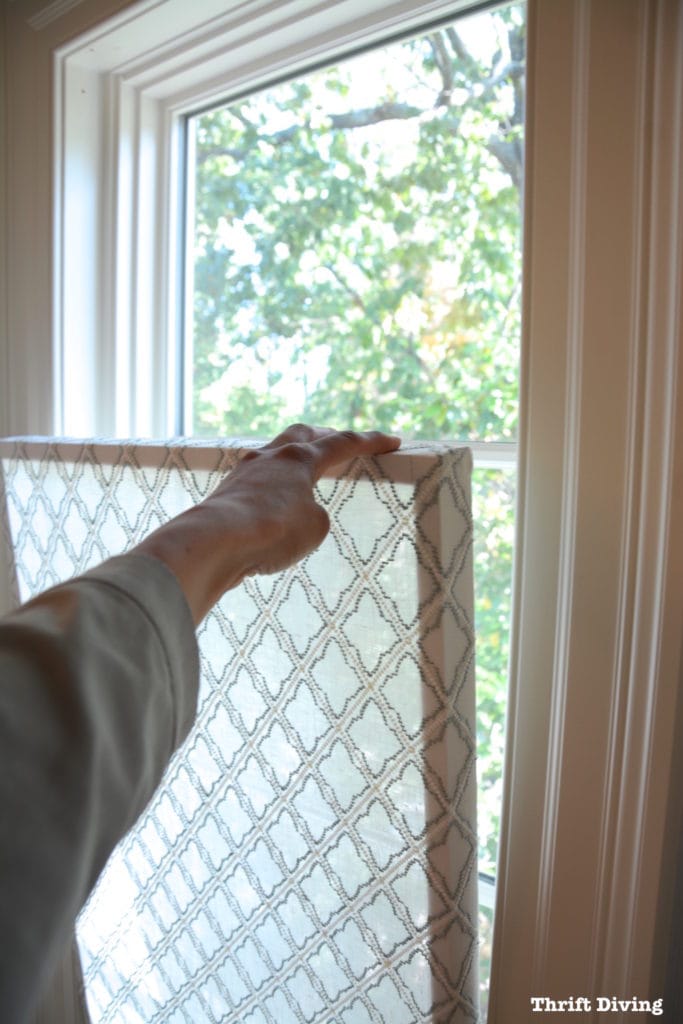
(Interested in this window treatment?? SEE MORE: How to Make a DIY Window Privacy Screen, which uses no hardware to stay attached!)
How I Built a DIY Bathroom Makeover From Scratch
To build your own vanity, you don’t have to use the exact resources and materials I used, but here’s the list for you (affiliate links included).
Resources and Materials
- Vanity Sinks – DECOLAV rectangular under mount sinks
- Vanity Faucets – Kohler Worth 4 in. oil rubbed bronze
- Wood dye – Grey
- Briwax Liming Wax
- General Finishes High Performance top coat
- Kreg Hardware Cabinet Jig Super Pack
- Red Oak for vanity
- RYOBI Power Drill
- RYOBI circular saw
- RYOBI jig saw
- Kreg Pocket Hole Jig
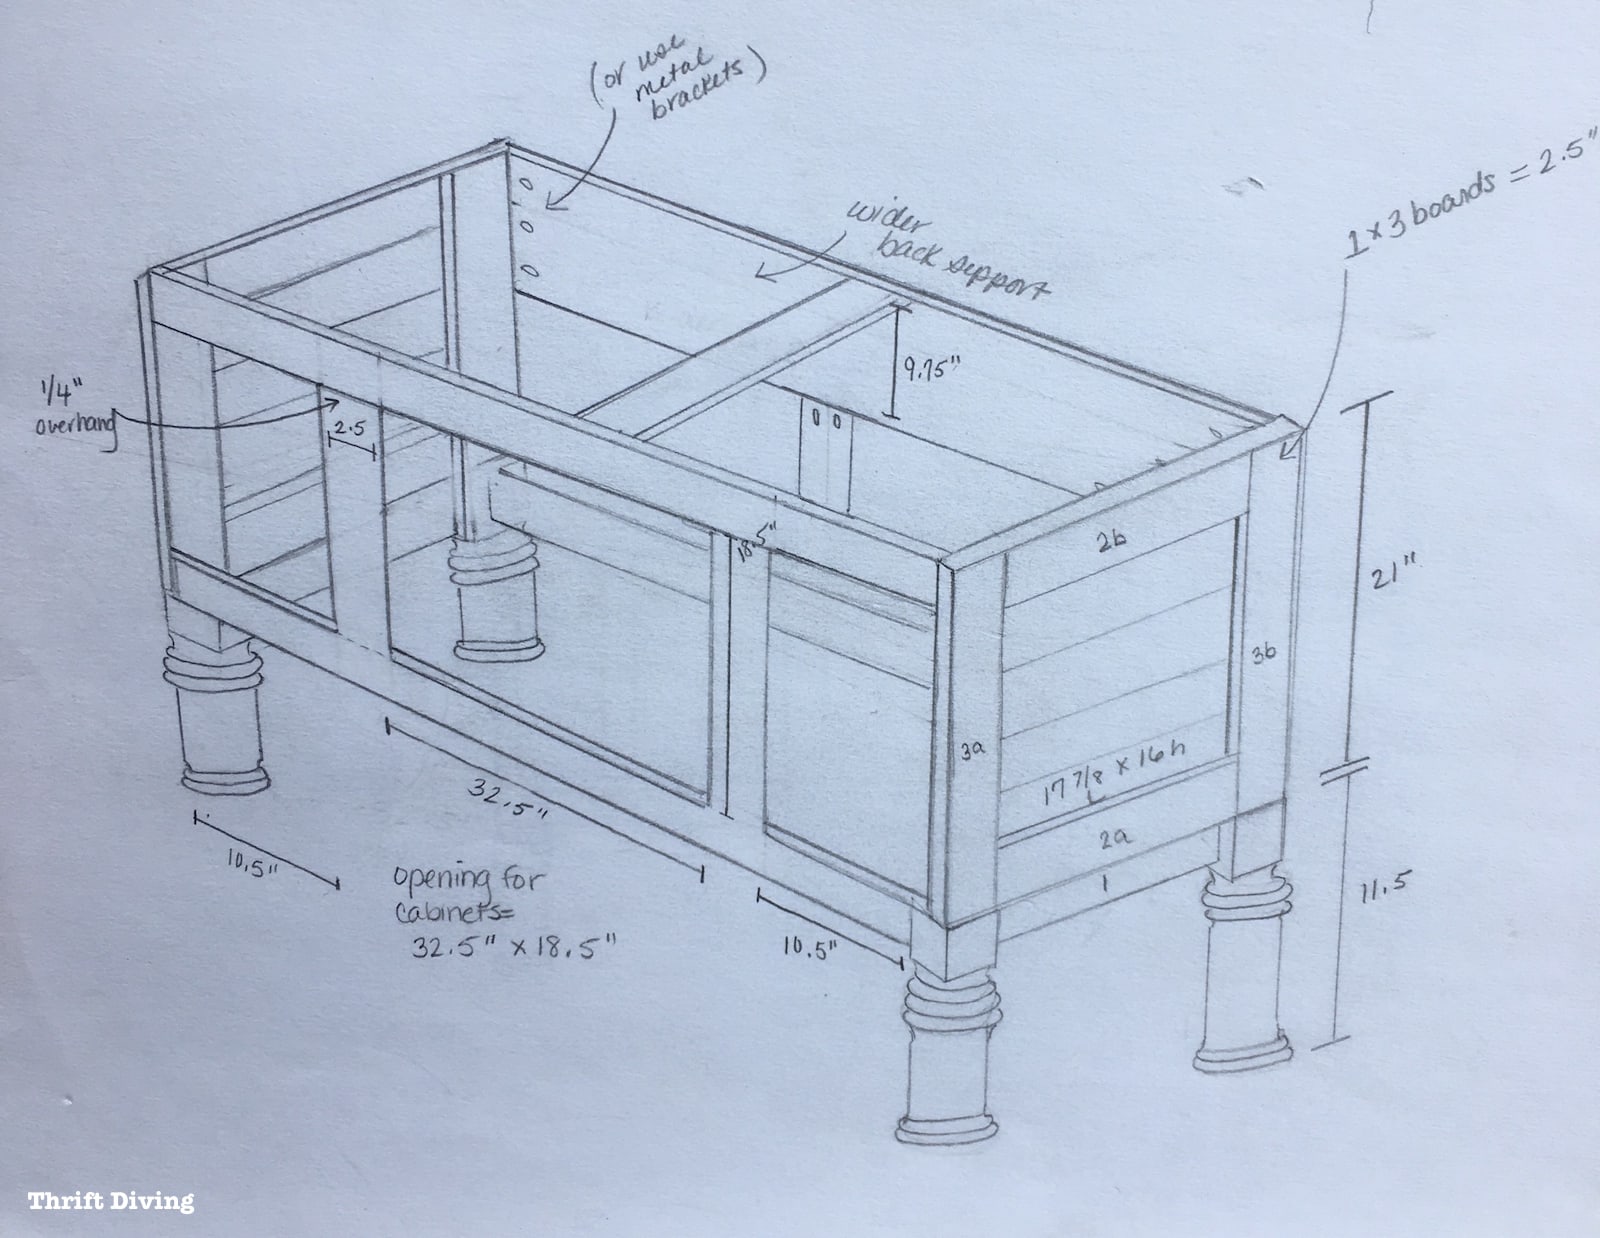
STEP 1: Building the Base
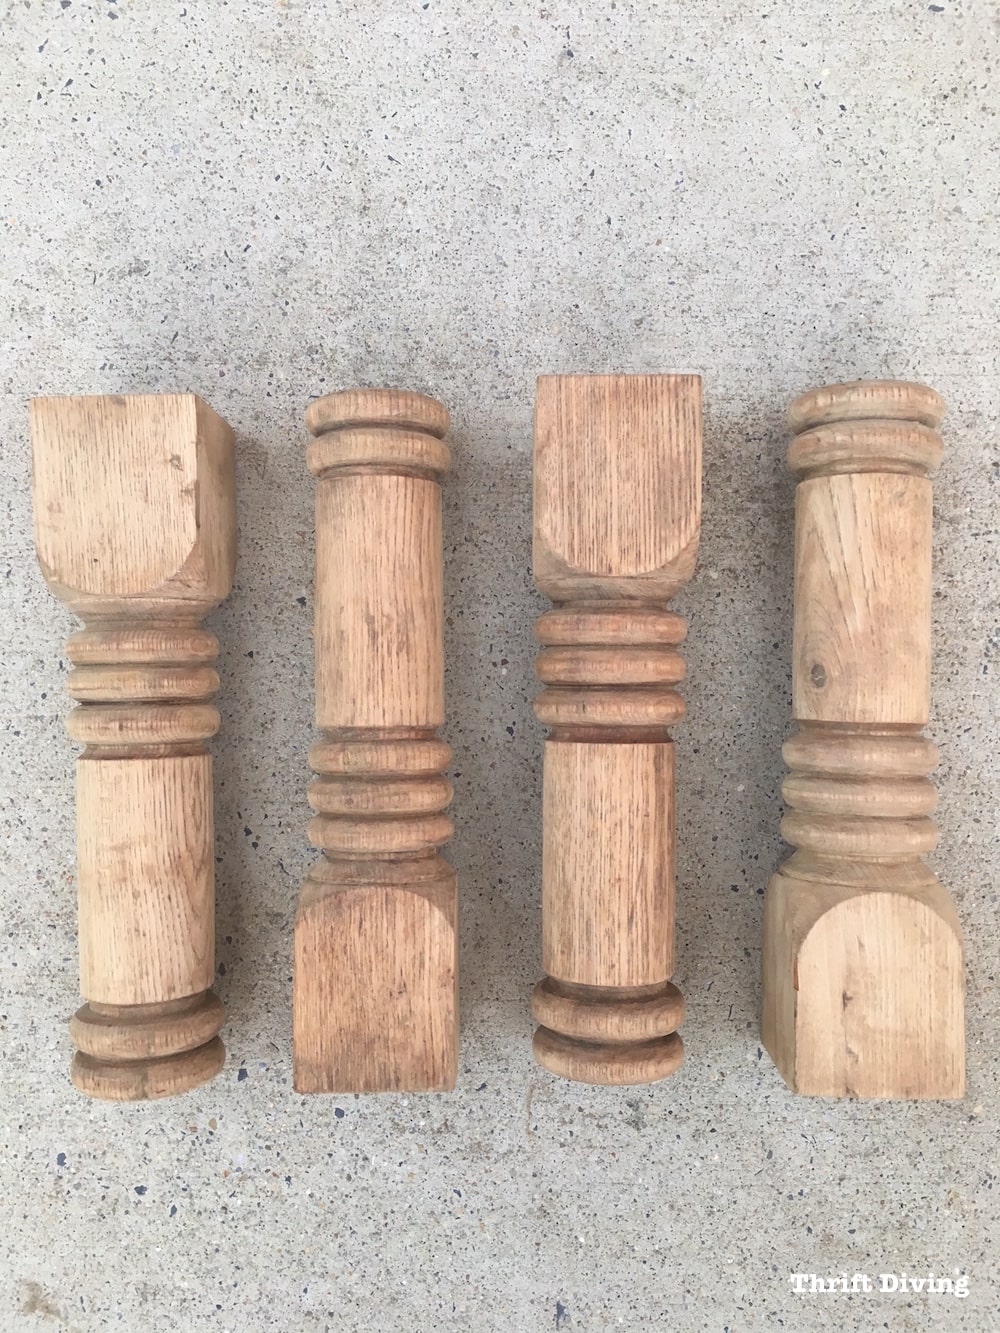
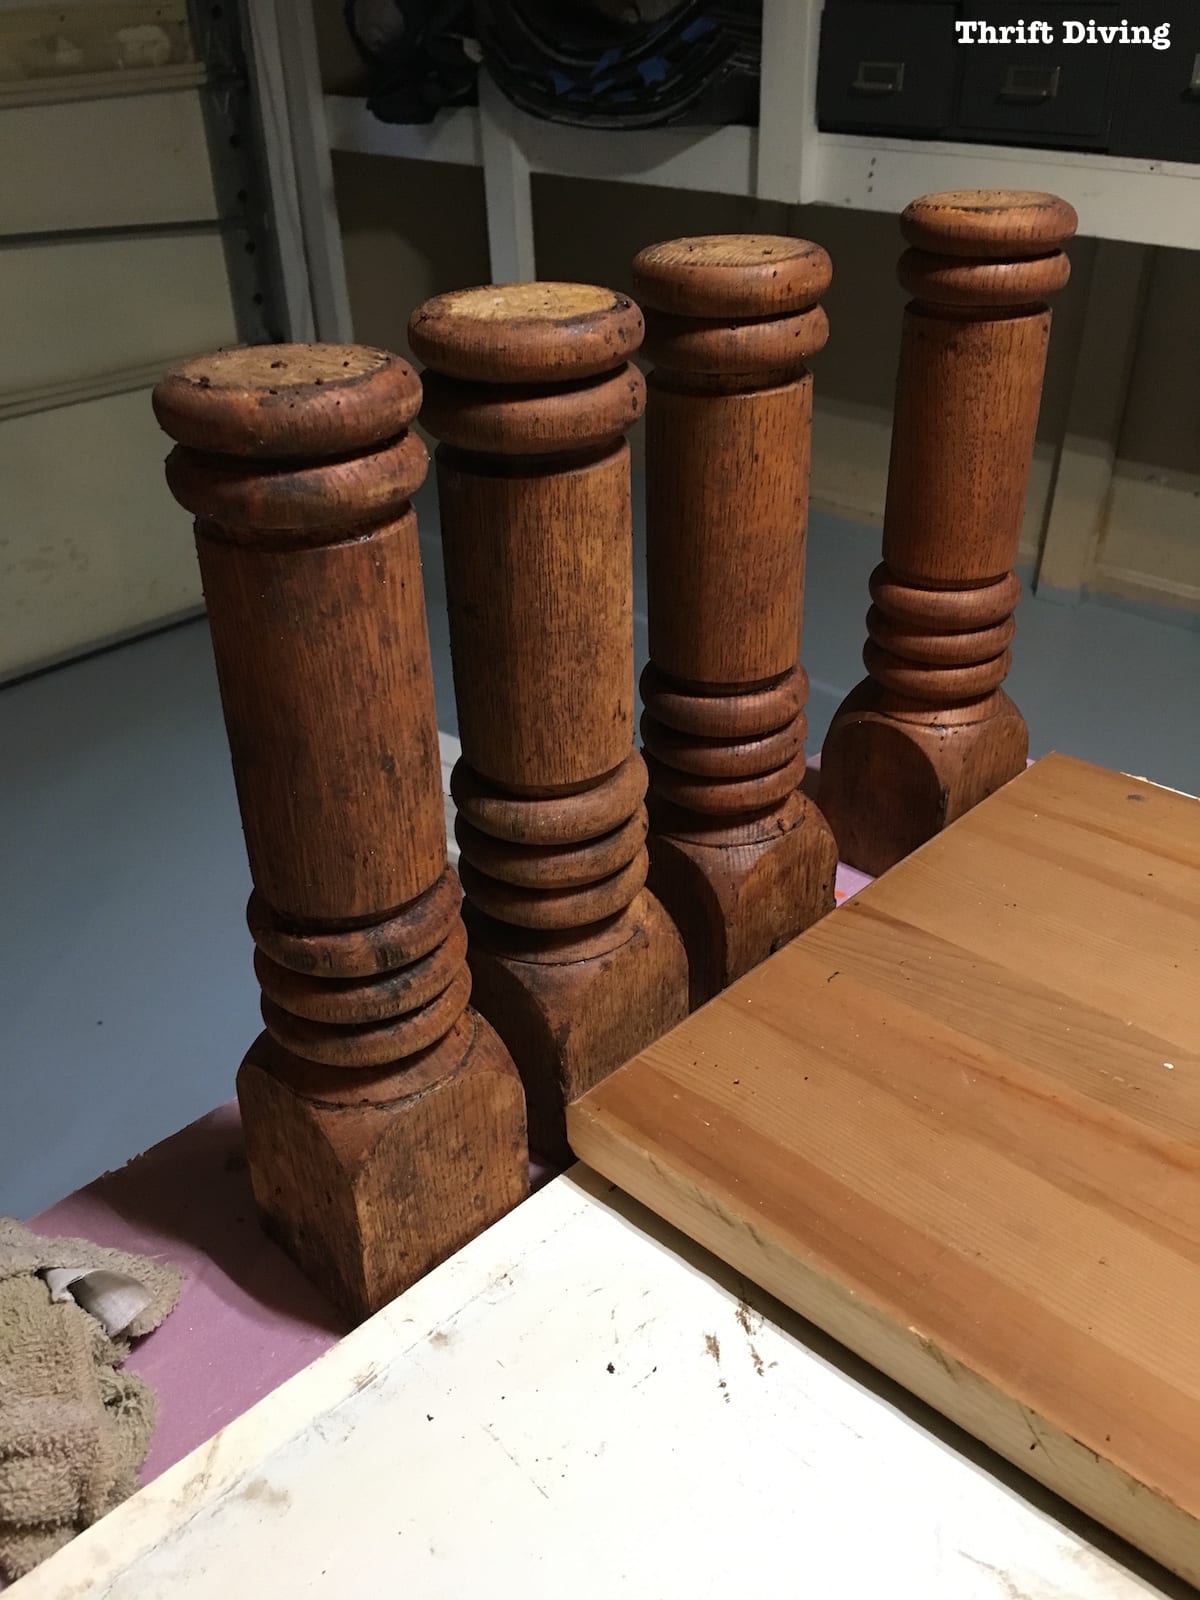
It all started with these solid oak legs.
You know how it is when you’re at a salvage shop or thrift store, and you see something old and discarded and you inhale, with eyes huge as saucers, “They’re perfect!!”
That’s what happened to me.
This is what I saw when I went there in search of vanity legs.
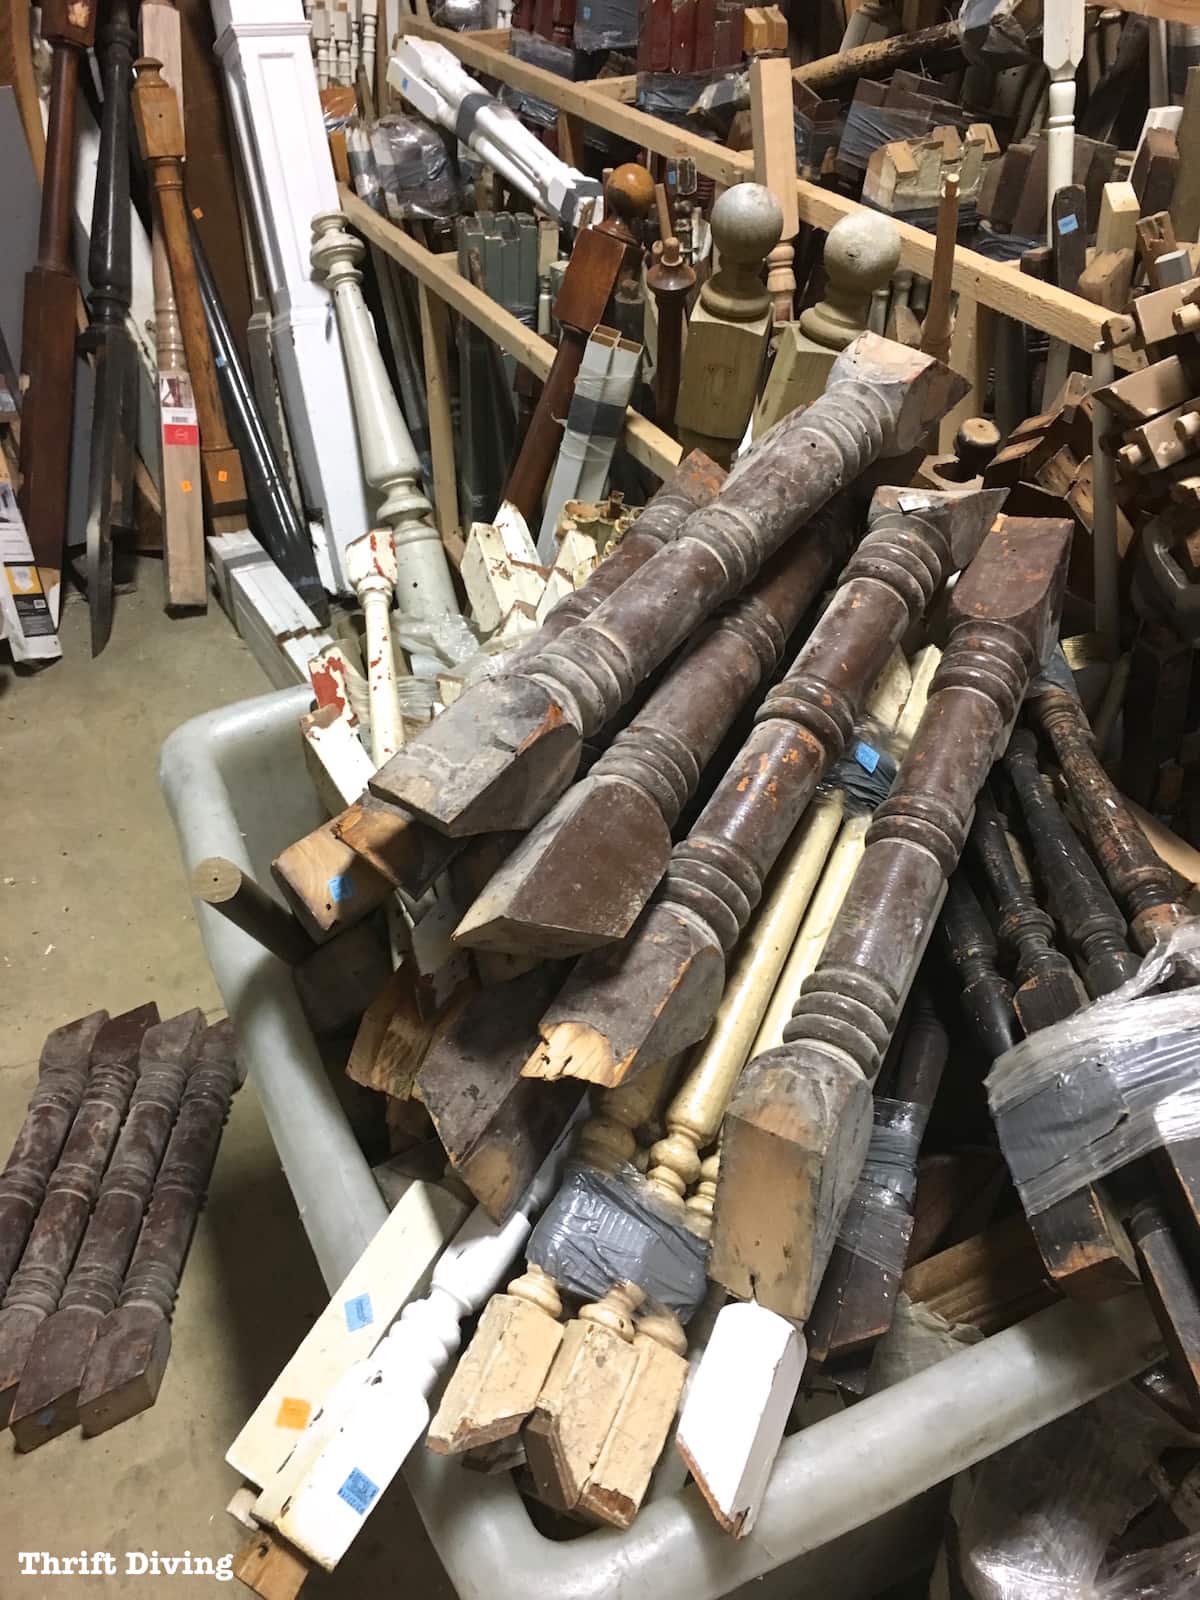
I knew they’d be a lot of work to strip, but they were exactly what I was looking for for my DIY bathroom vanity!
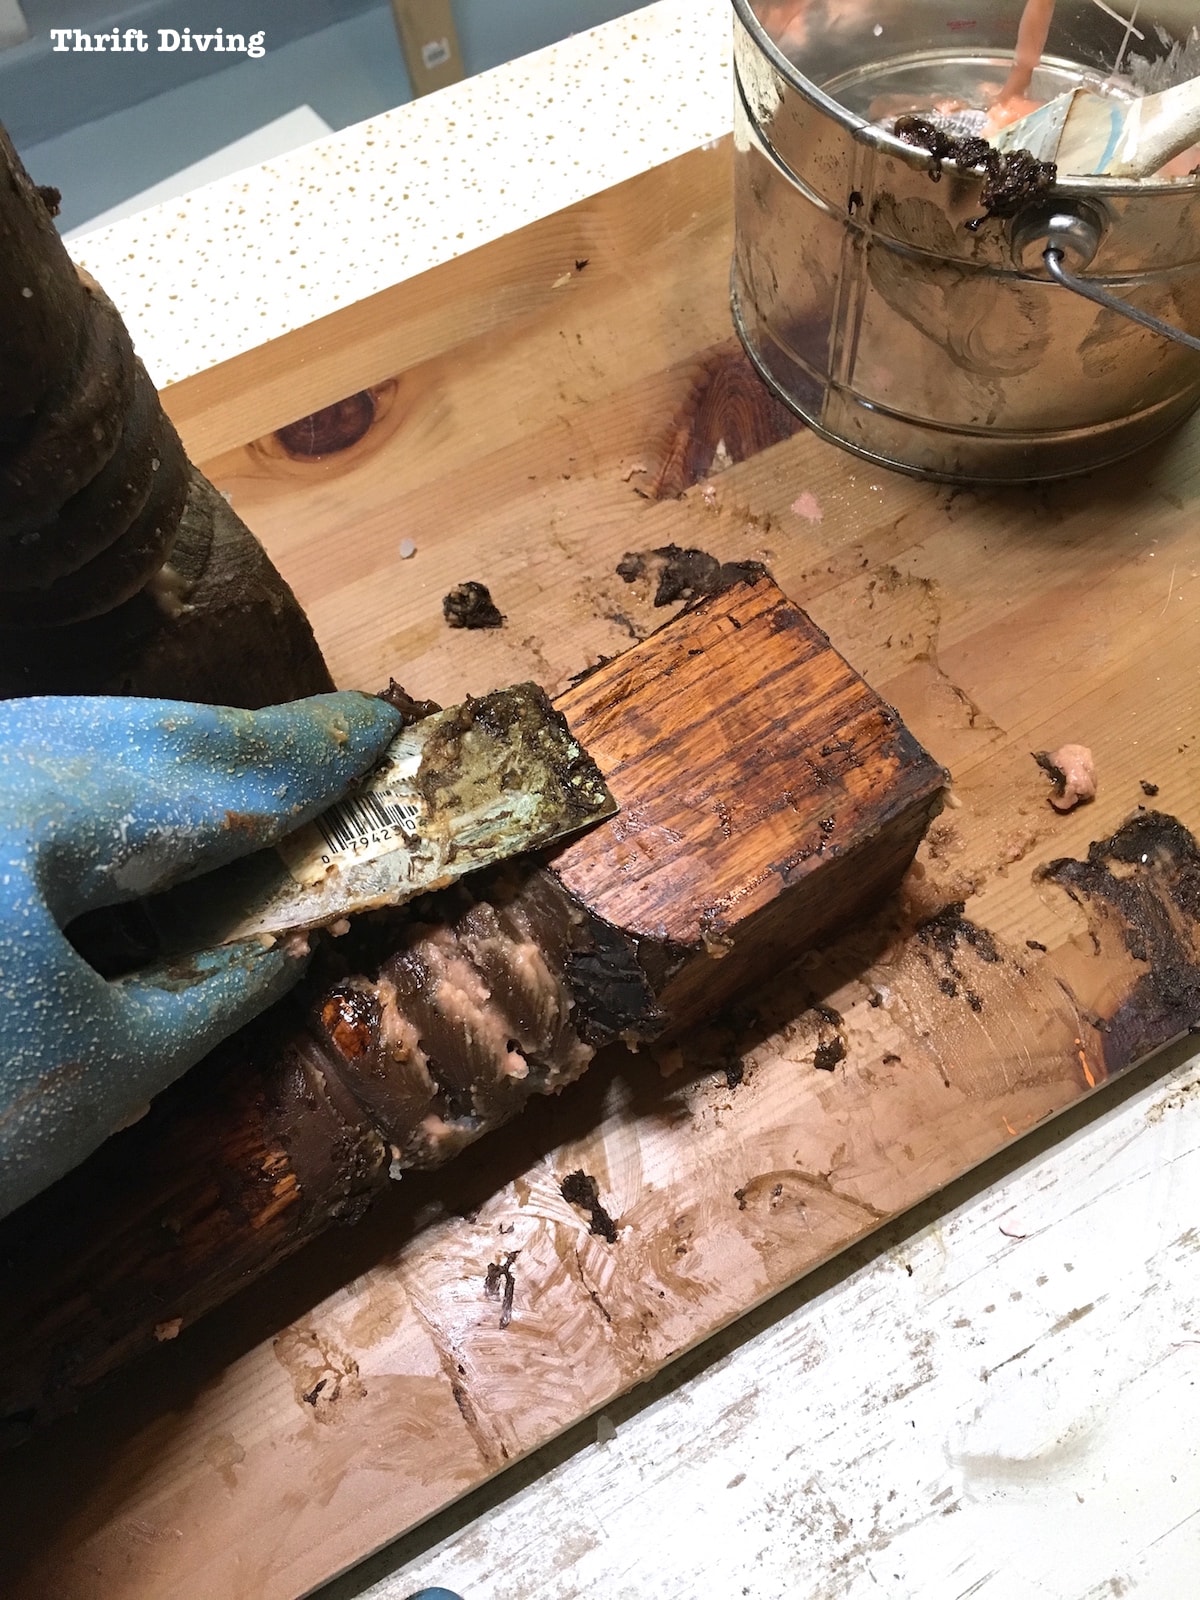
After a good clean-up, they were ready for the Red Oak frame to be attached.
The Red Oak 1″x3″ boards would attach to each leg like this, using pocket holes.
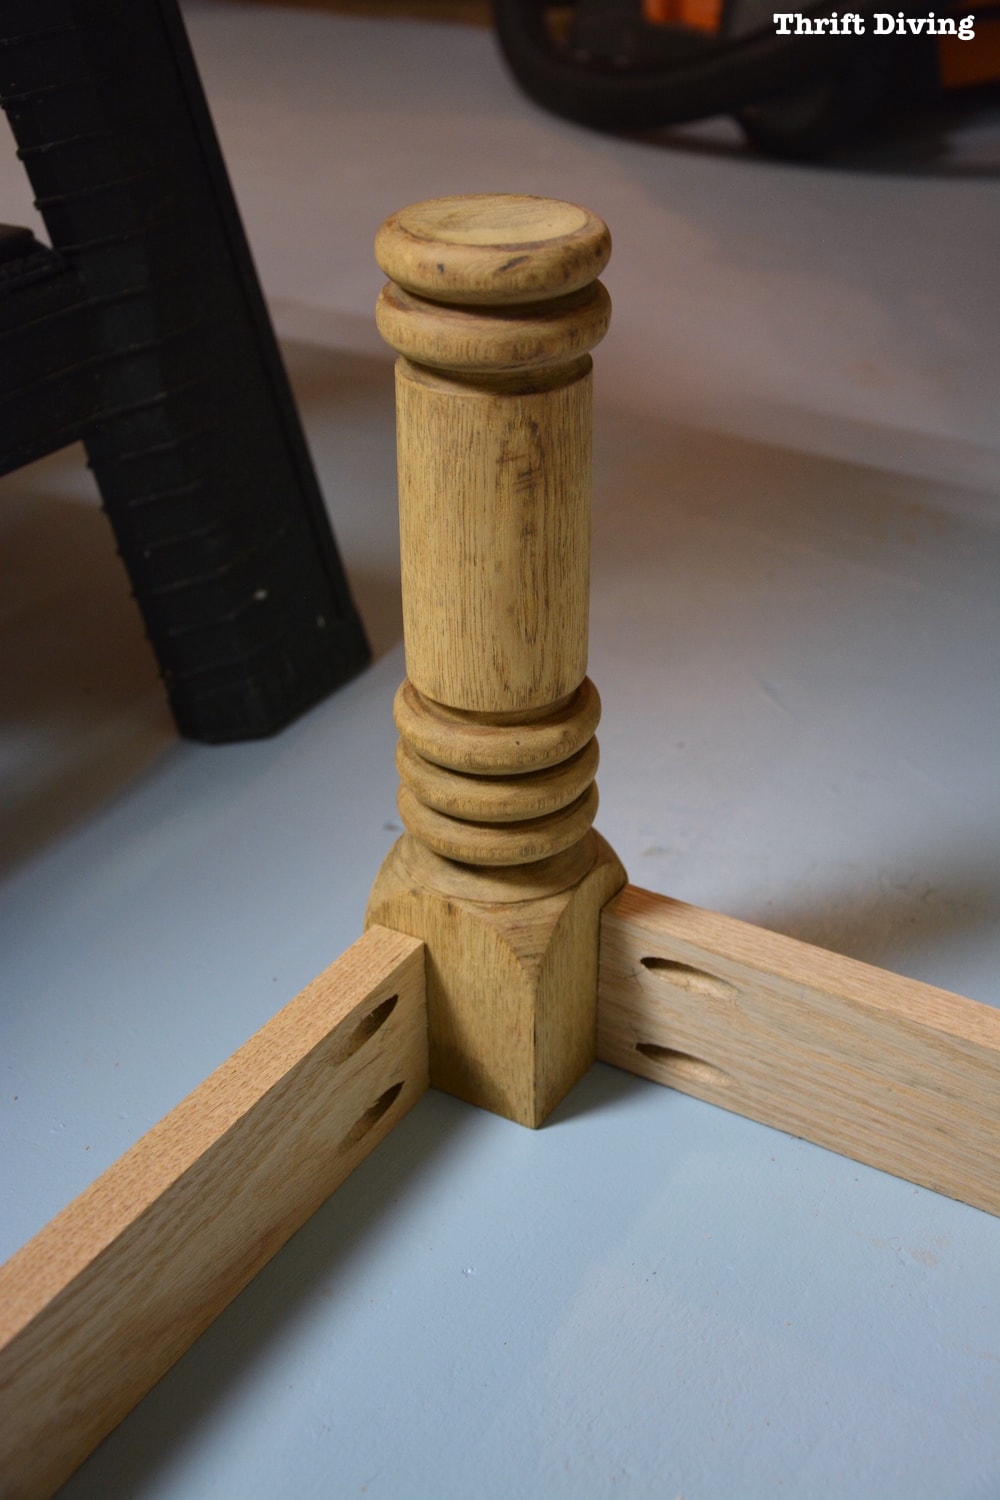
Using my circular saw, I cut out a 1/2″ birch plywood base. Then, using my jigsaw, I cut notches to fit around the leg.
The pocket hole screws attached to the plywood to the vanity base.
Once the body was ready, I had to figure out how to build the sides!
SEE THE FULL TUTORIAL: Be sure to check out the full tutorial on how I built the vanity base: PART 1 – Attaching Legs and a Base.
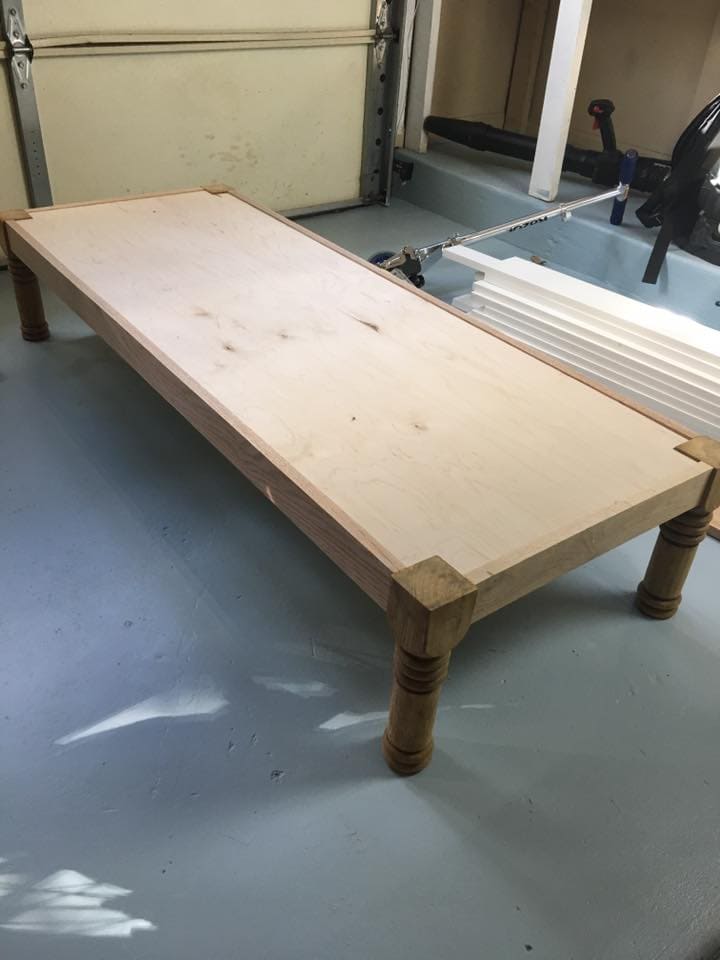
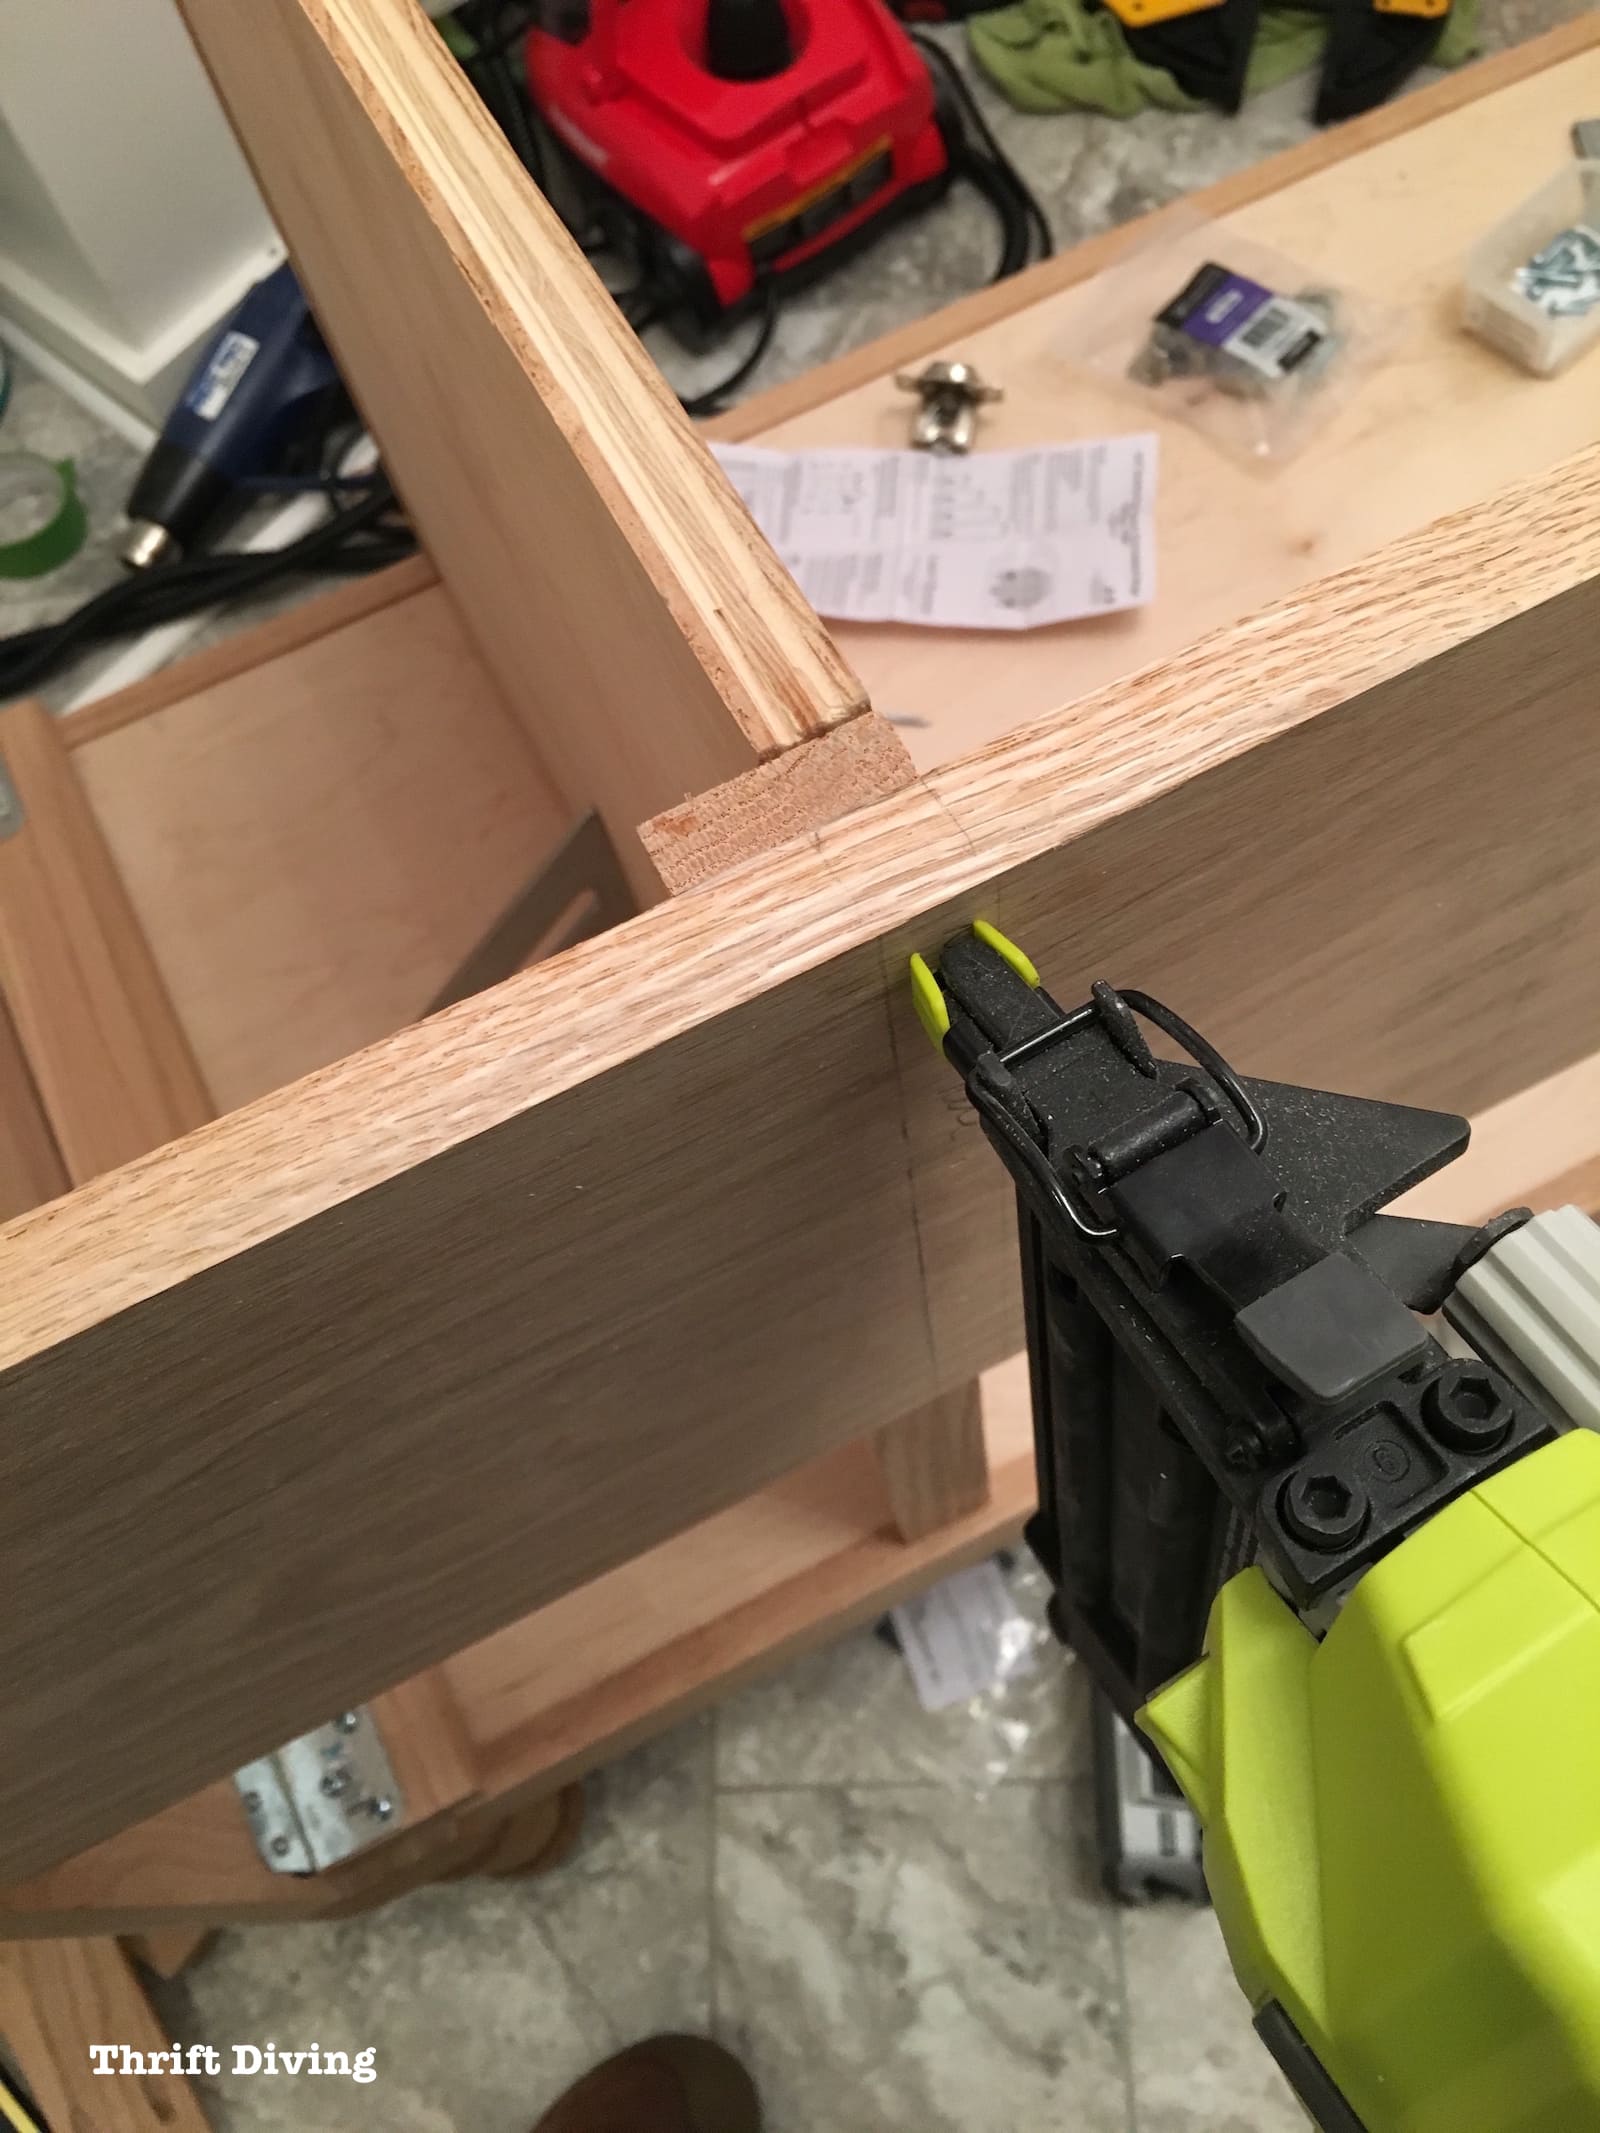
STEP 2: Attaching the Sides
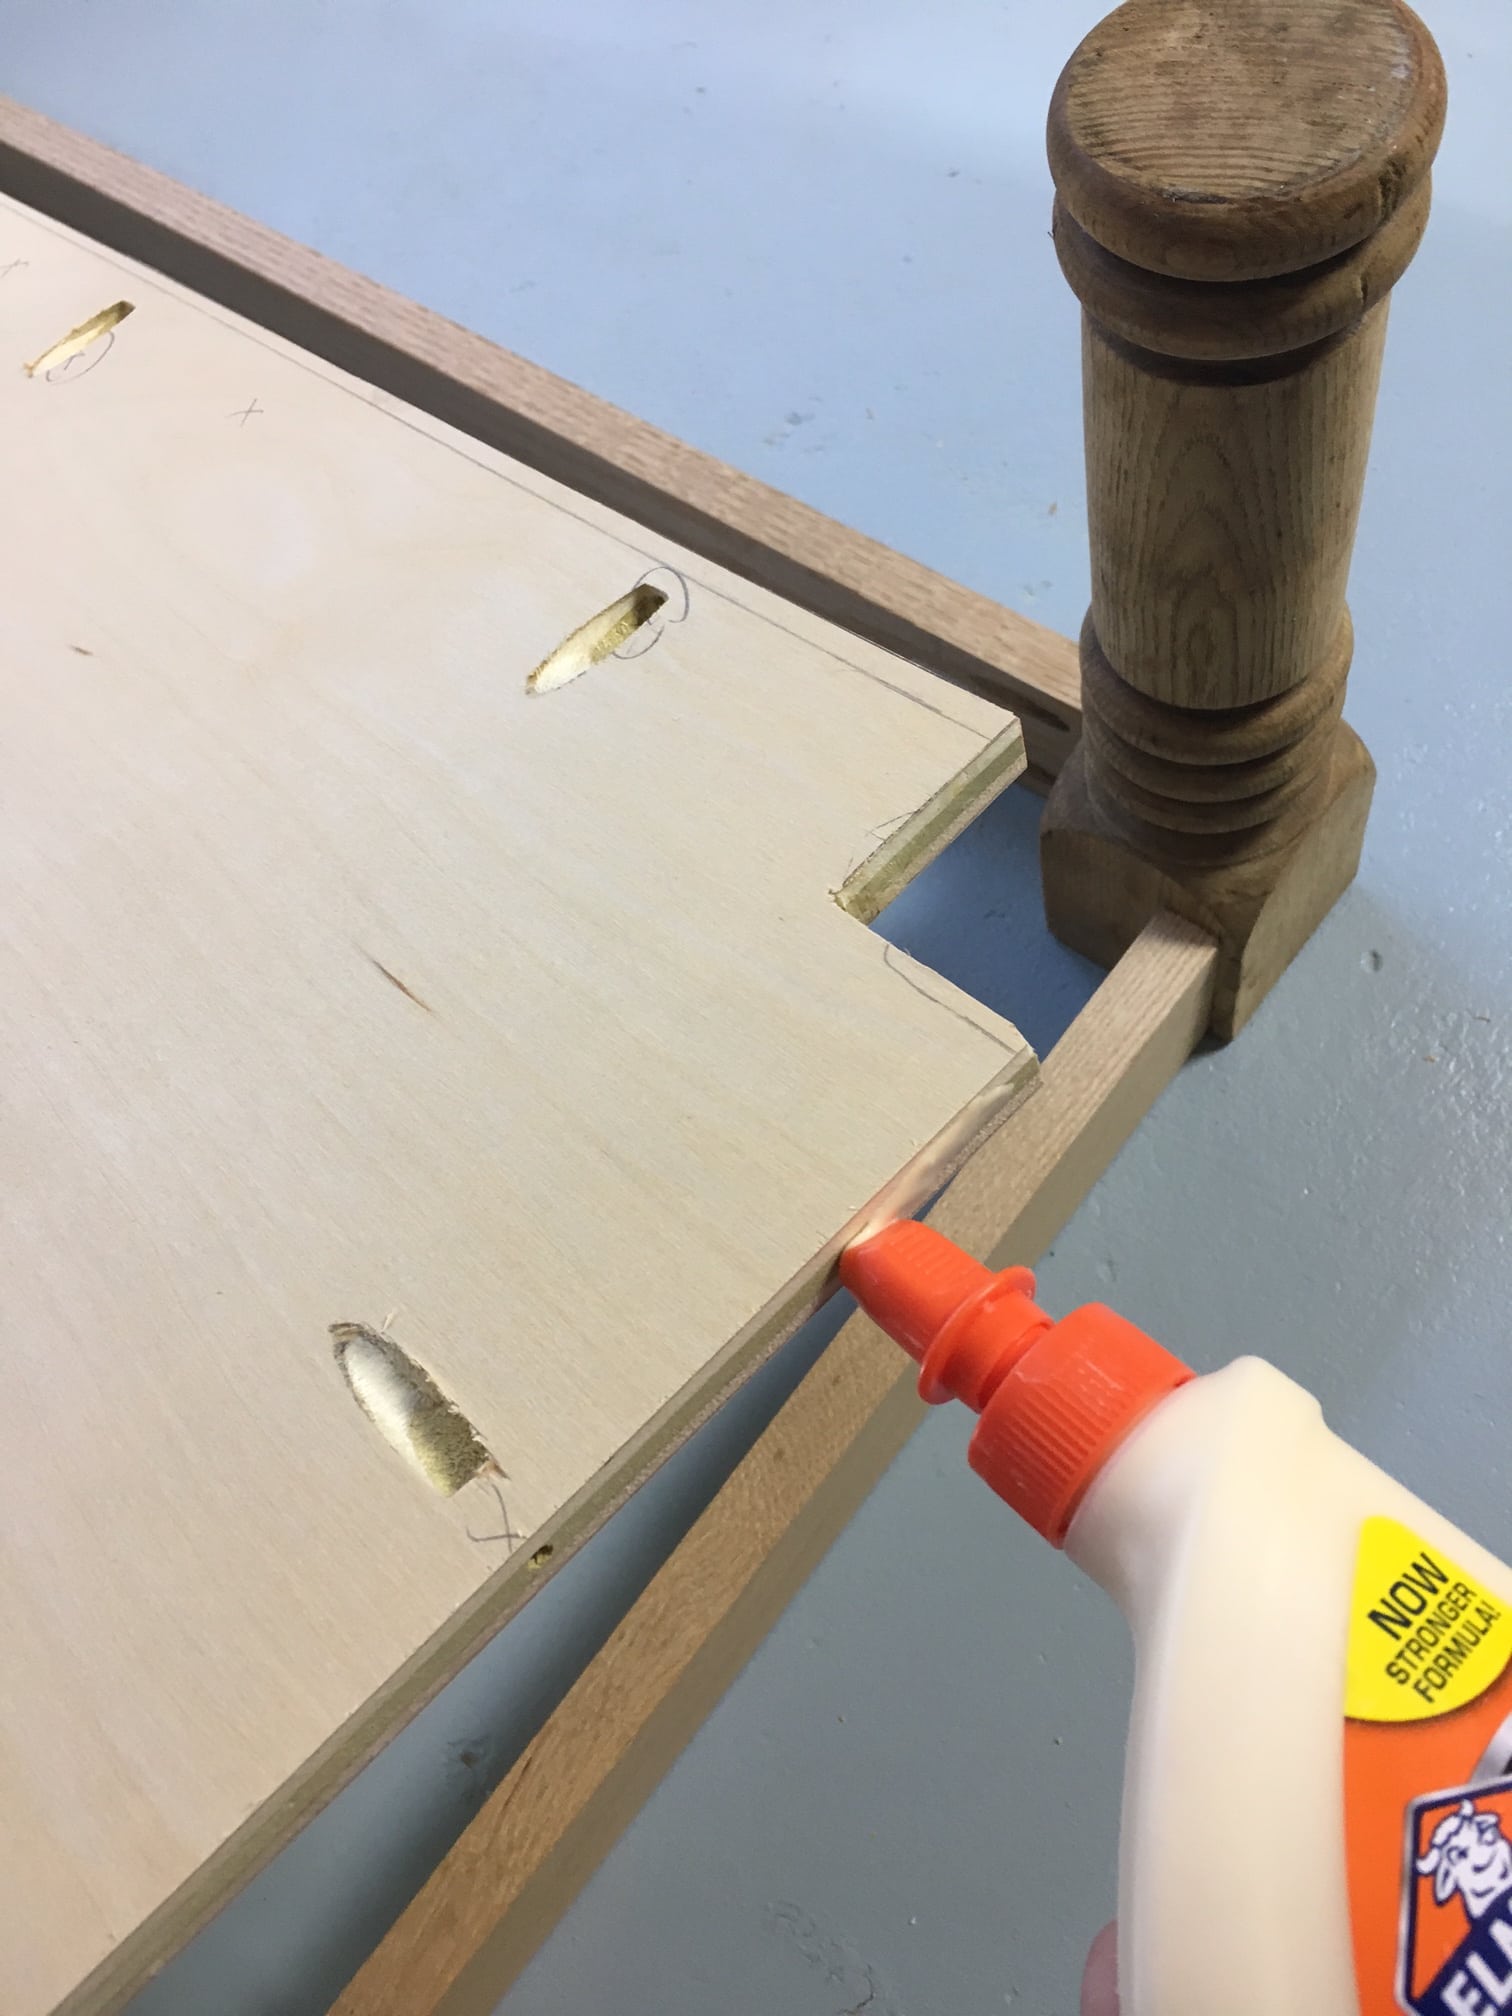
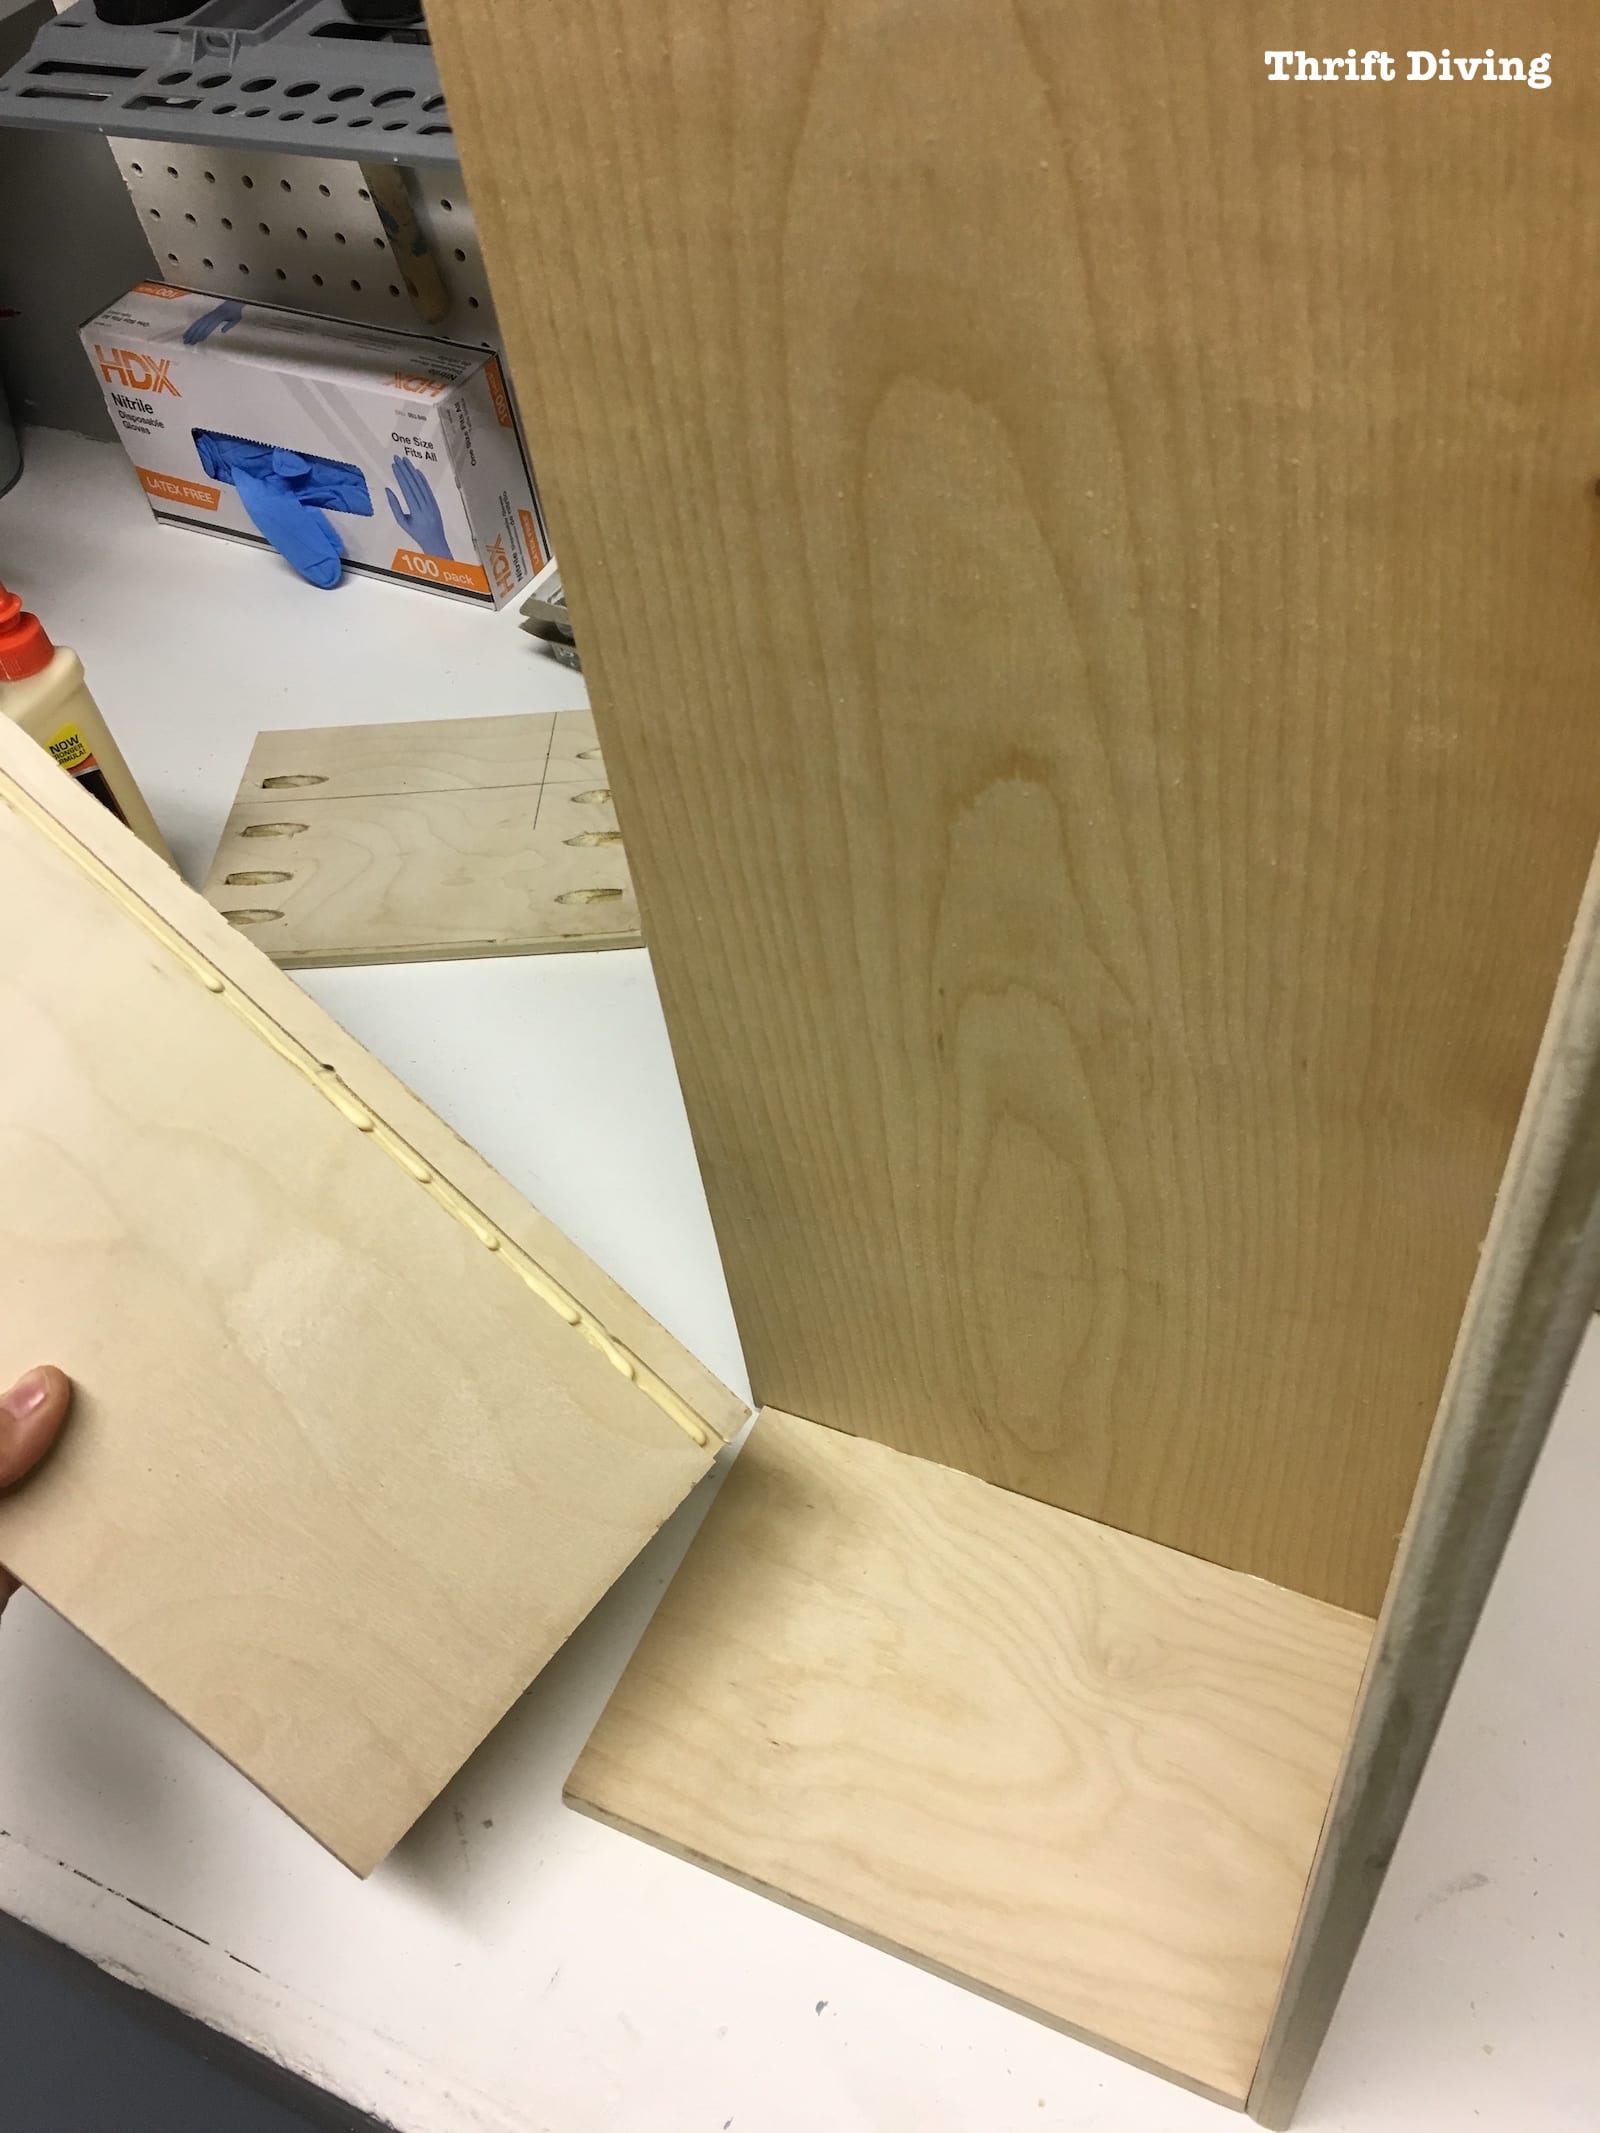
Once the base of the vanity was constructed, I had to figure out how to build and securely attach sides to the vanity.
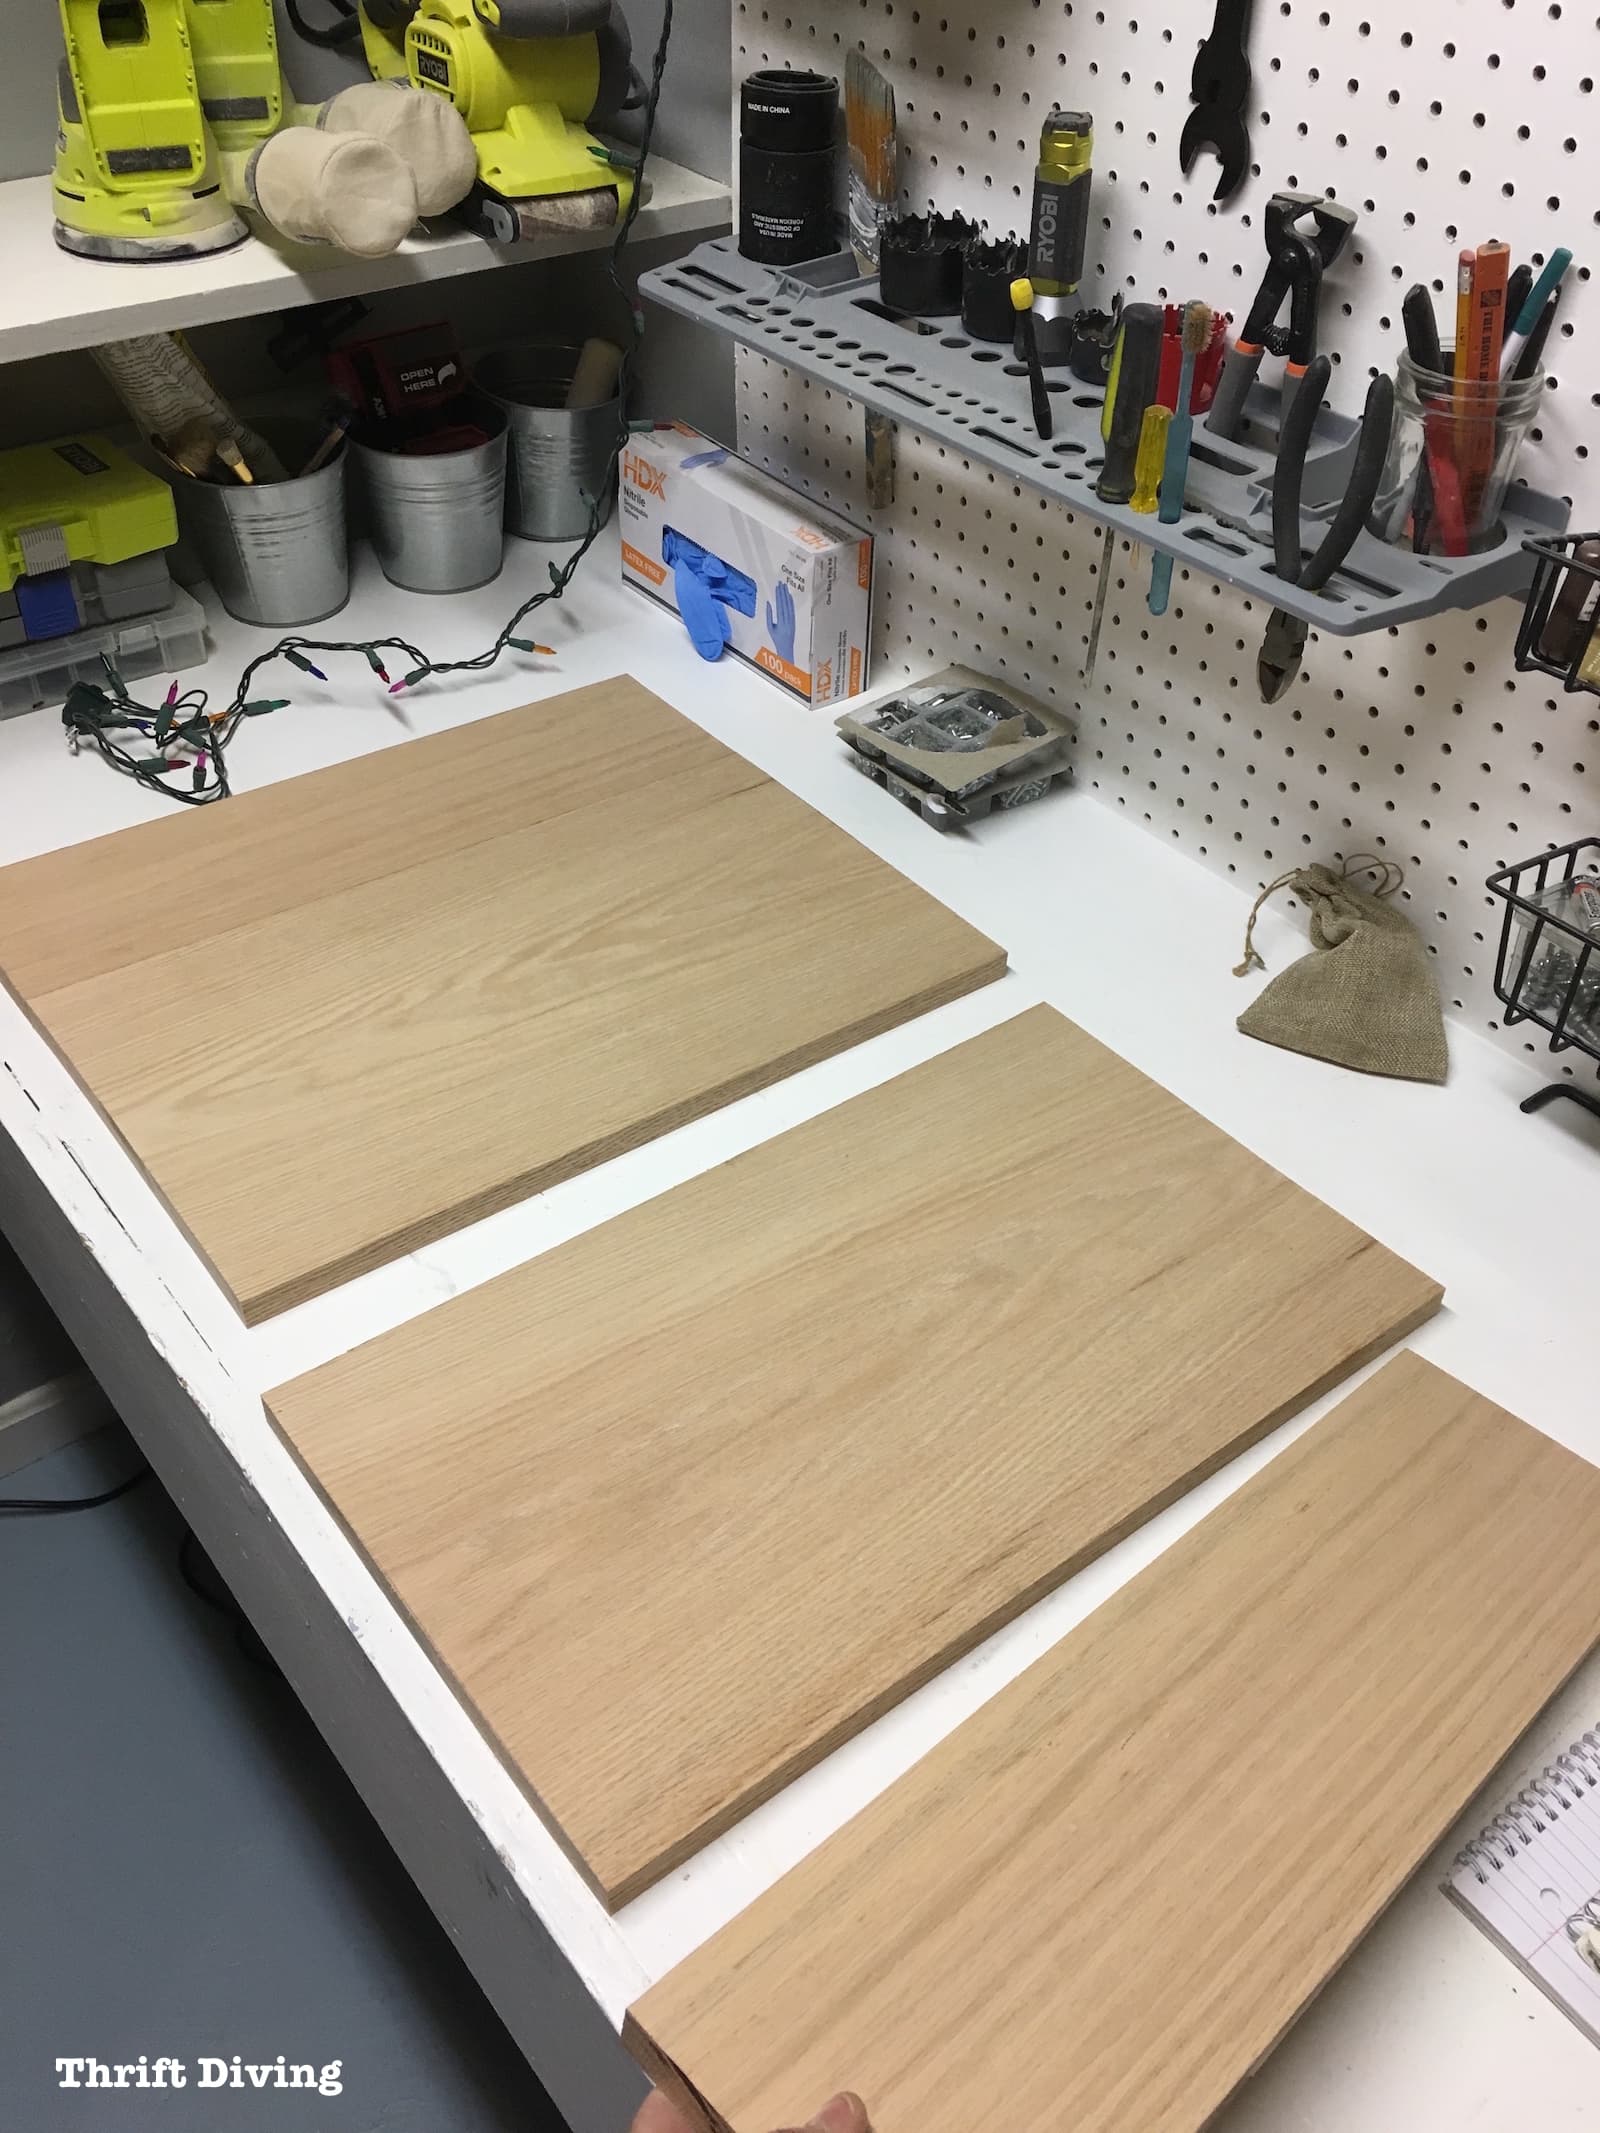
Using 1″x3″s of Red Oak, I made frames and glued 1/2″ thick Red Oak hobby boards in the middle of the frames.
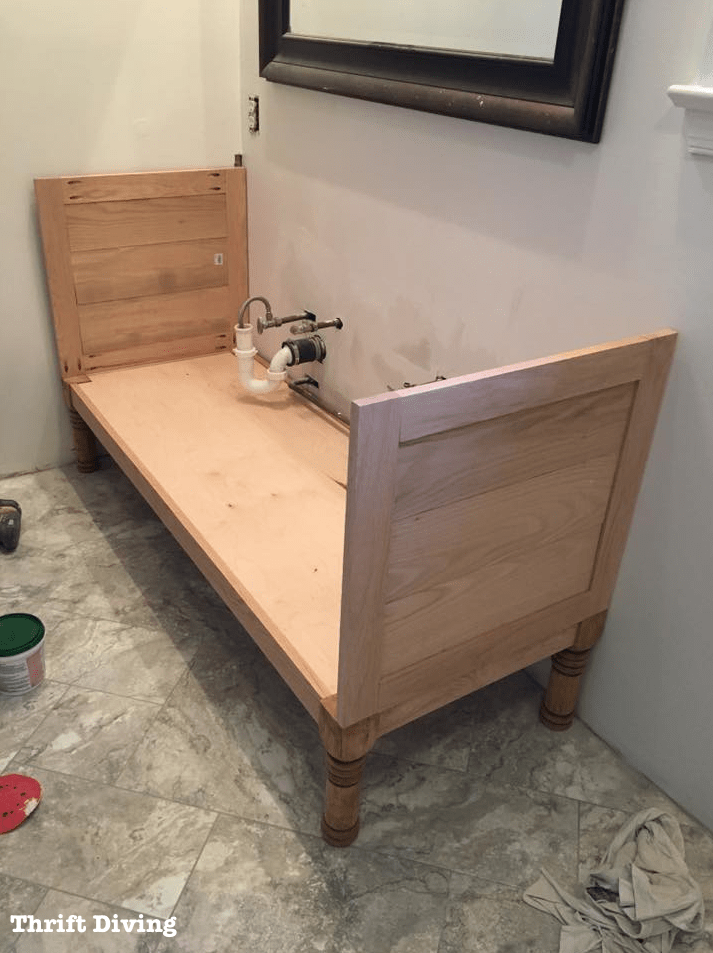
My biggest concern was how I was going to attach the sides so that they were strong and wouldn’t collapse.
I decided to add metal brackets.
I had a problem with stripping screws, despite drilling pilot holes, though! LOL. At some point, I just gave up and left stripped screw sticking up. It didn’t compromise the structure, thankfully!
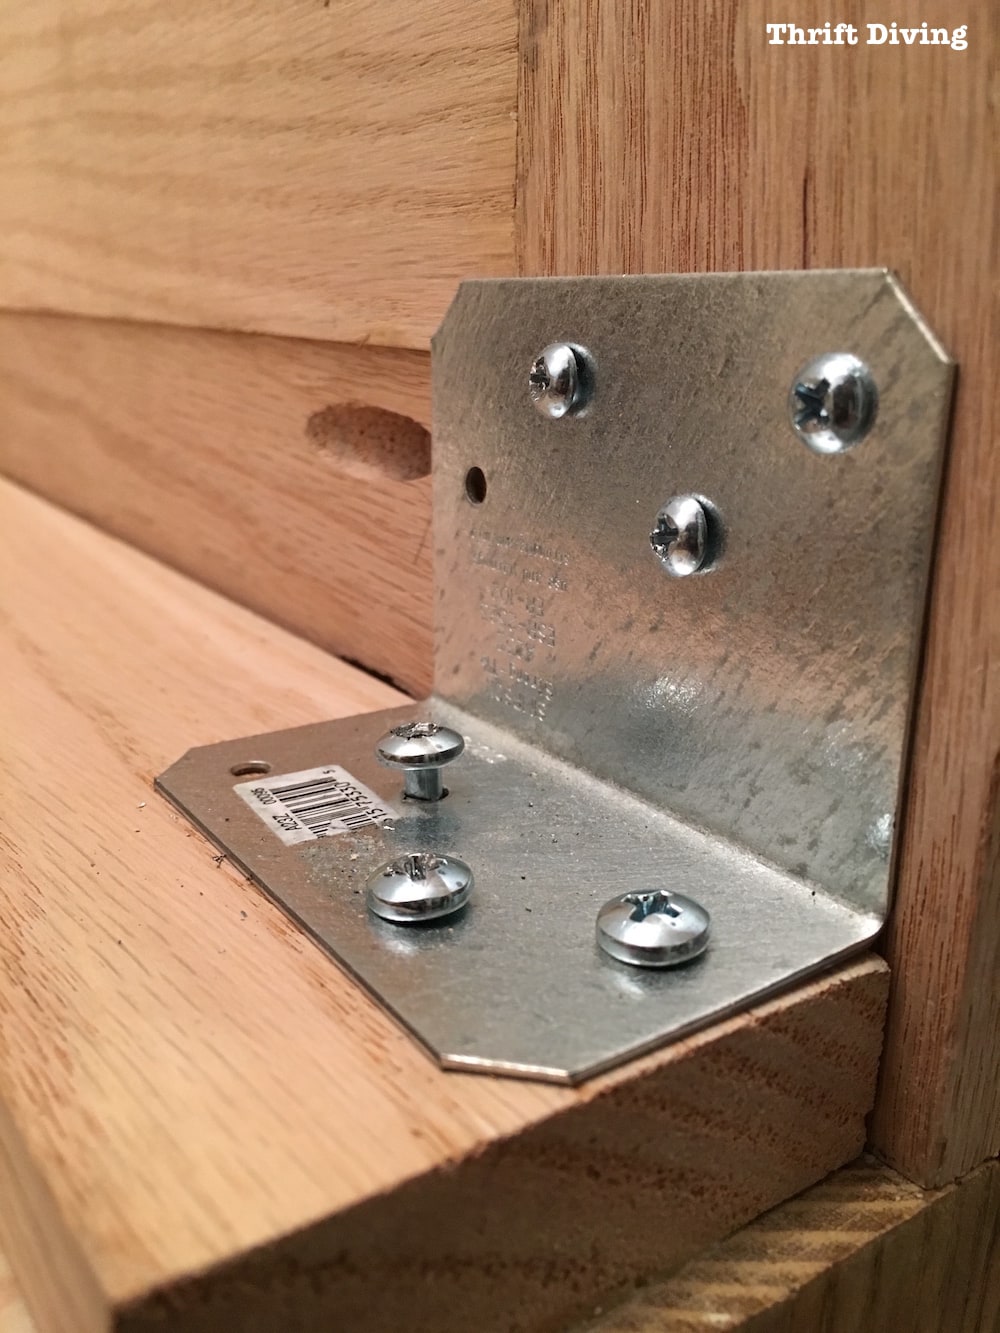
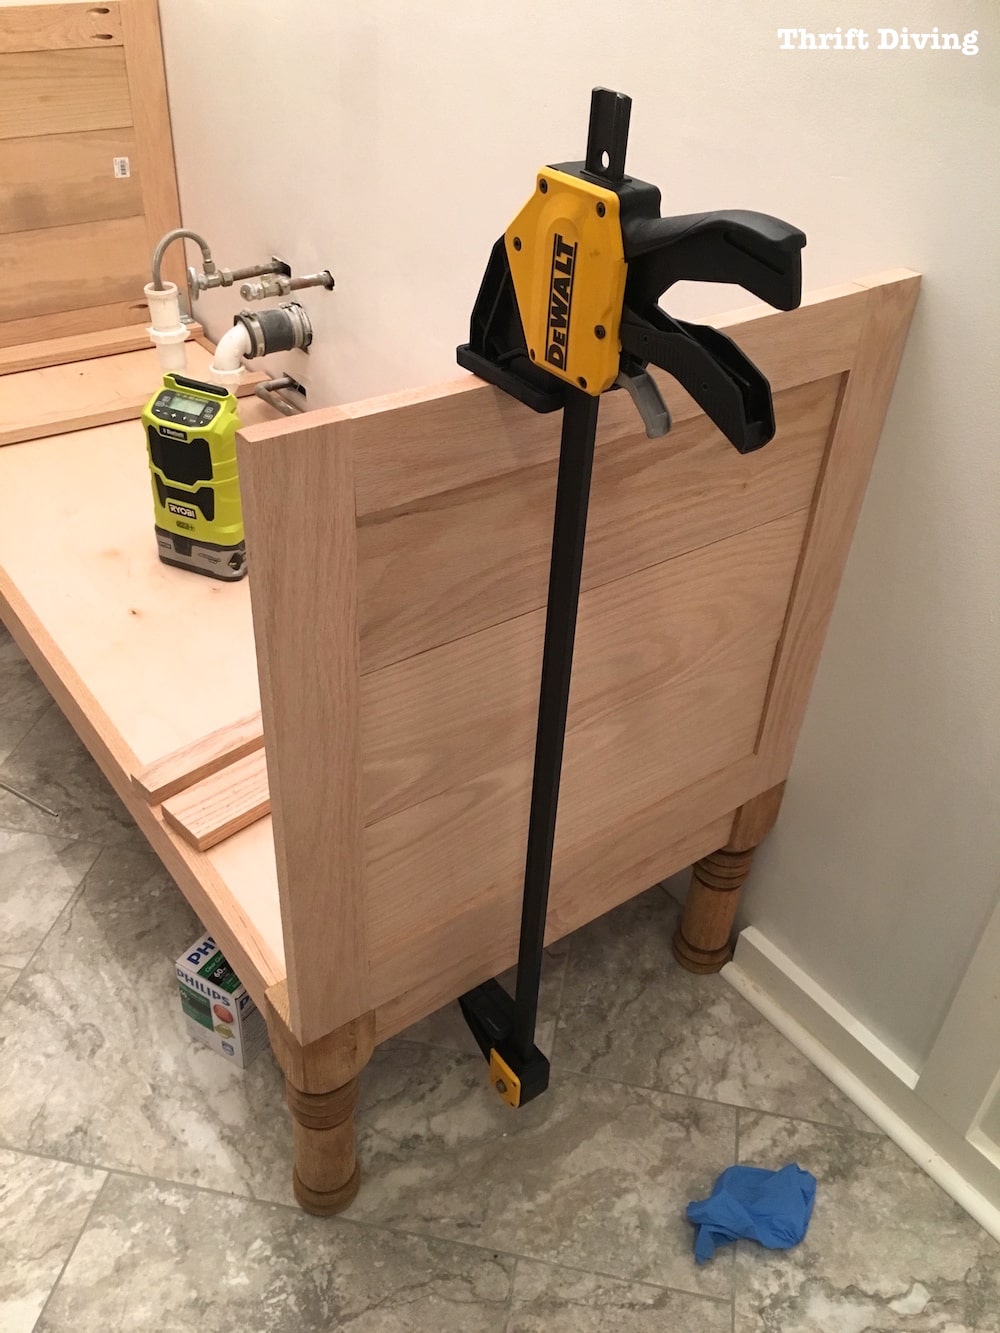
I also made sure that I glued and clamped the sides prior to securing it with pocket holes and brackets.
Once the sides were attached, I added a back support, a rail, and two stiles.

SEE THE FULL TUTORIAL: Check out the in-depth tutorial on how I build the sides, back, rail, and siles: PART 2 – Attaching the Sides.
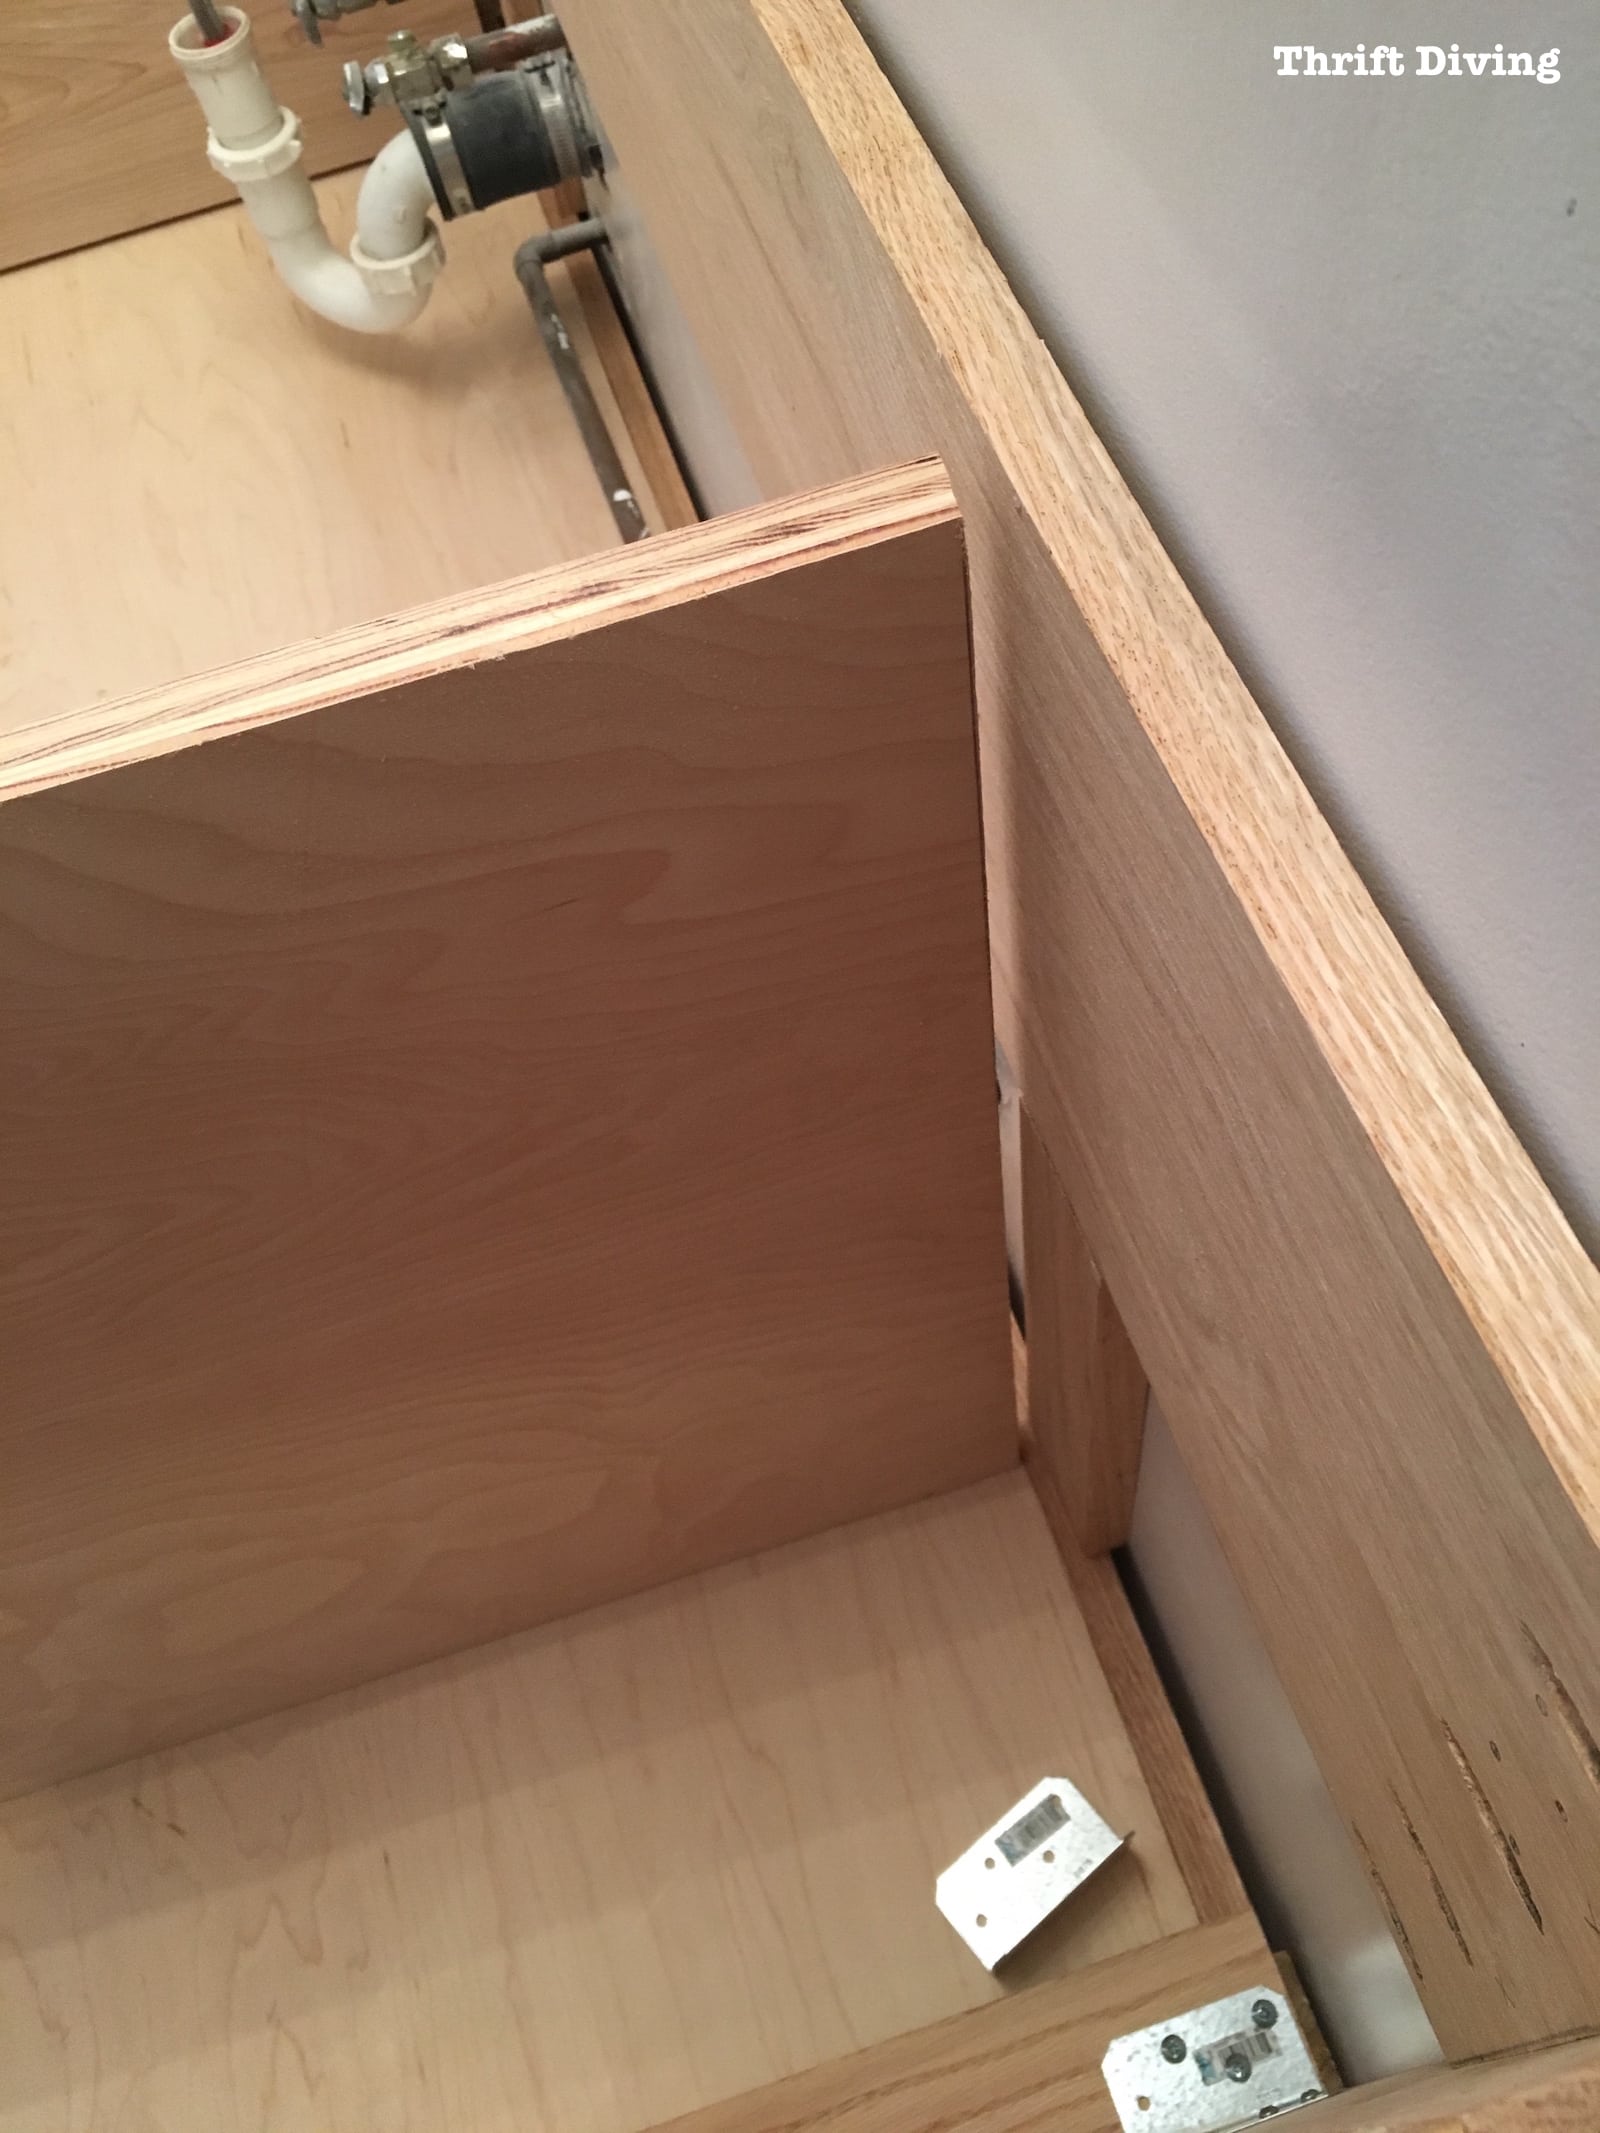
STEP 3: Building the Partitions
This vanity was going to have drawers.
But to have drawers, they’ve got to attach to something, right?
I’m sure that’s not always the case, but that’s the only way I knew how to construct it. 🙂
So I needed to build partitions for the drawers.
I ran into some problems with them fitting properly, as you can see by the gaps and incorrect measuring. LOL
But when DIY gives you lemons, you squeeze ’em until you’ve got the sweetest lemonade. 🙂
That’s what I did.
I found some skinny 1/2″ thick pieces of boards and used my nailer to secure them in there.
Problem solved!
Never be afraid to make adjustments if your measurements are slightly off. That’s what faux shims are for. 🙂

SEE THE FULL TUTORIAL: Check out my full tutorial on building the partitions and getting them to fit properly: STEP 3 – Creating the Partitions.
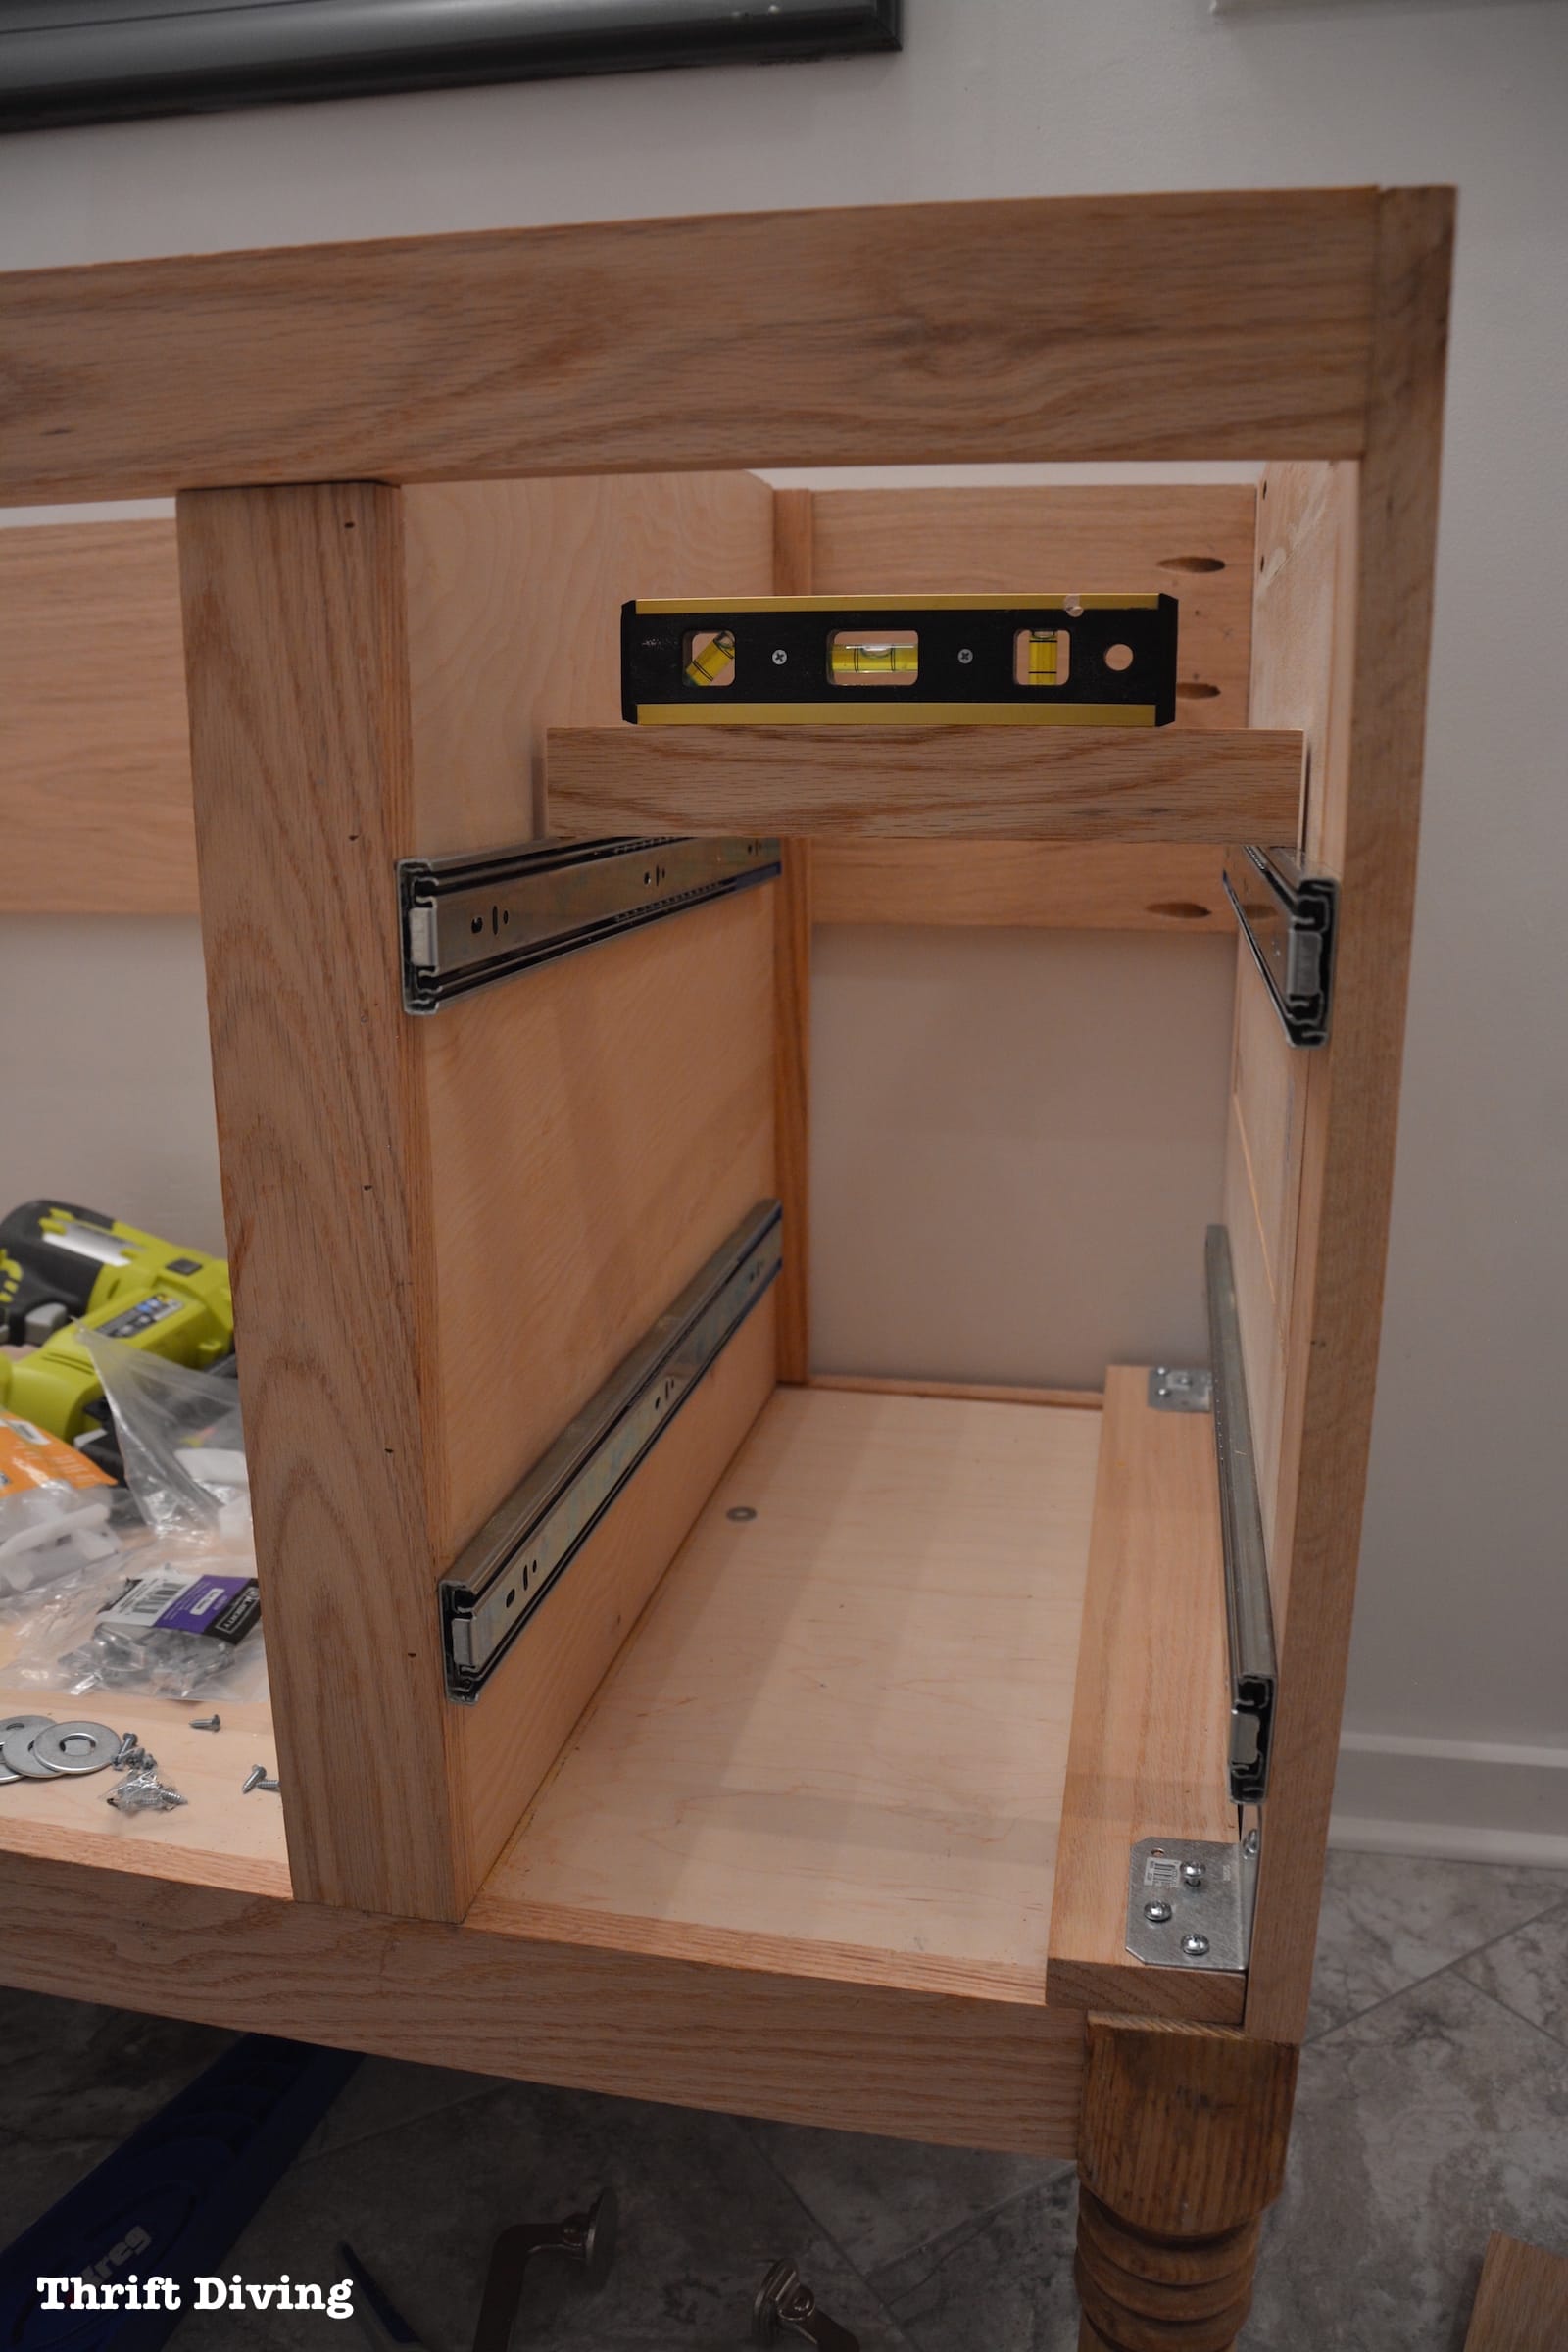
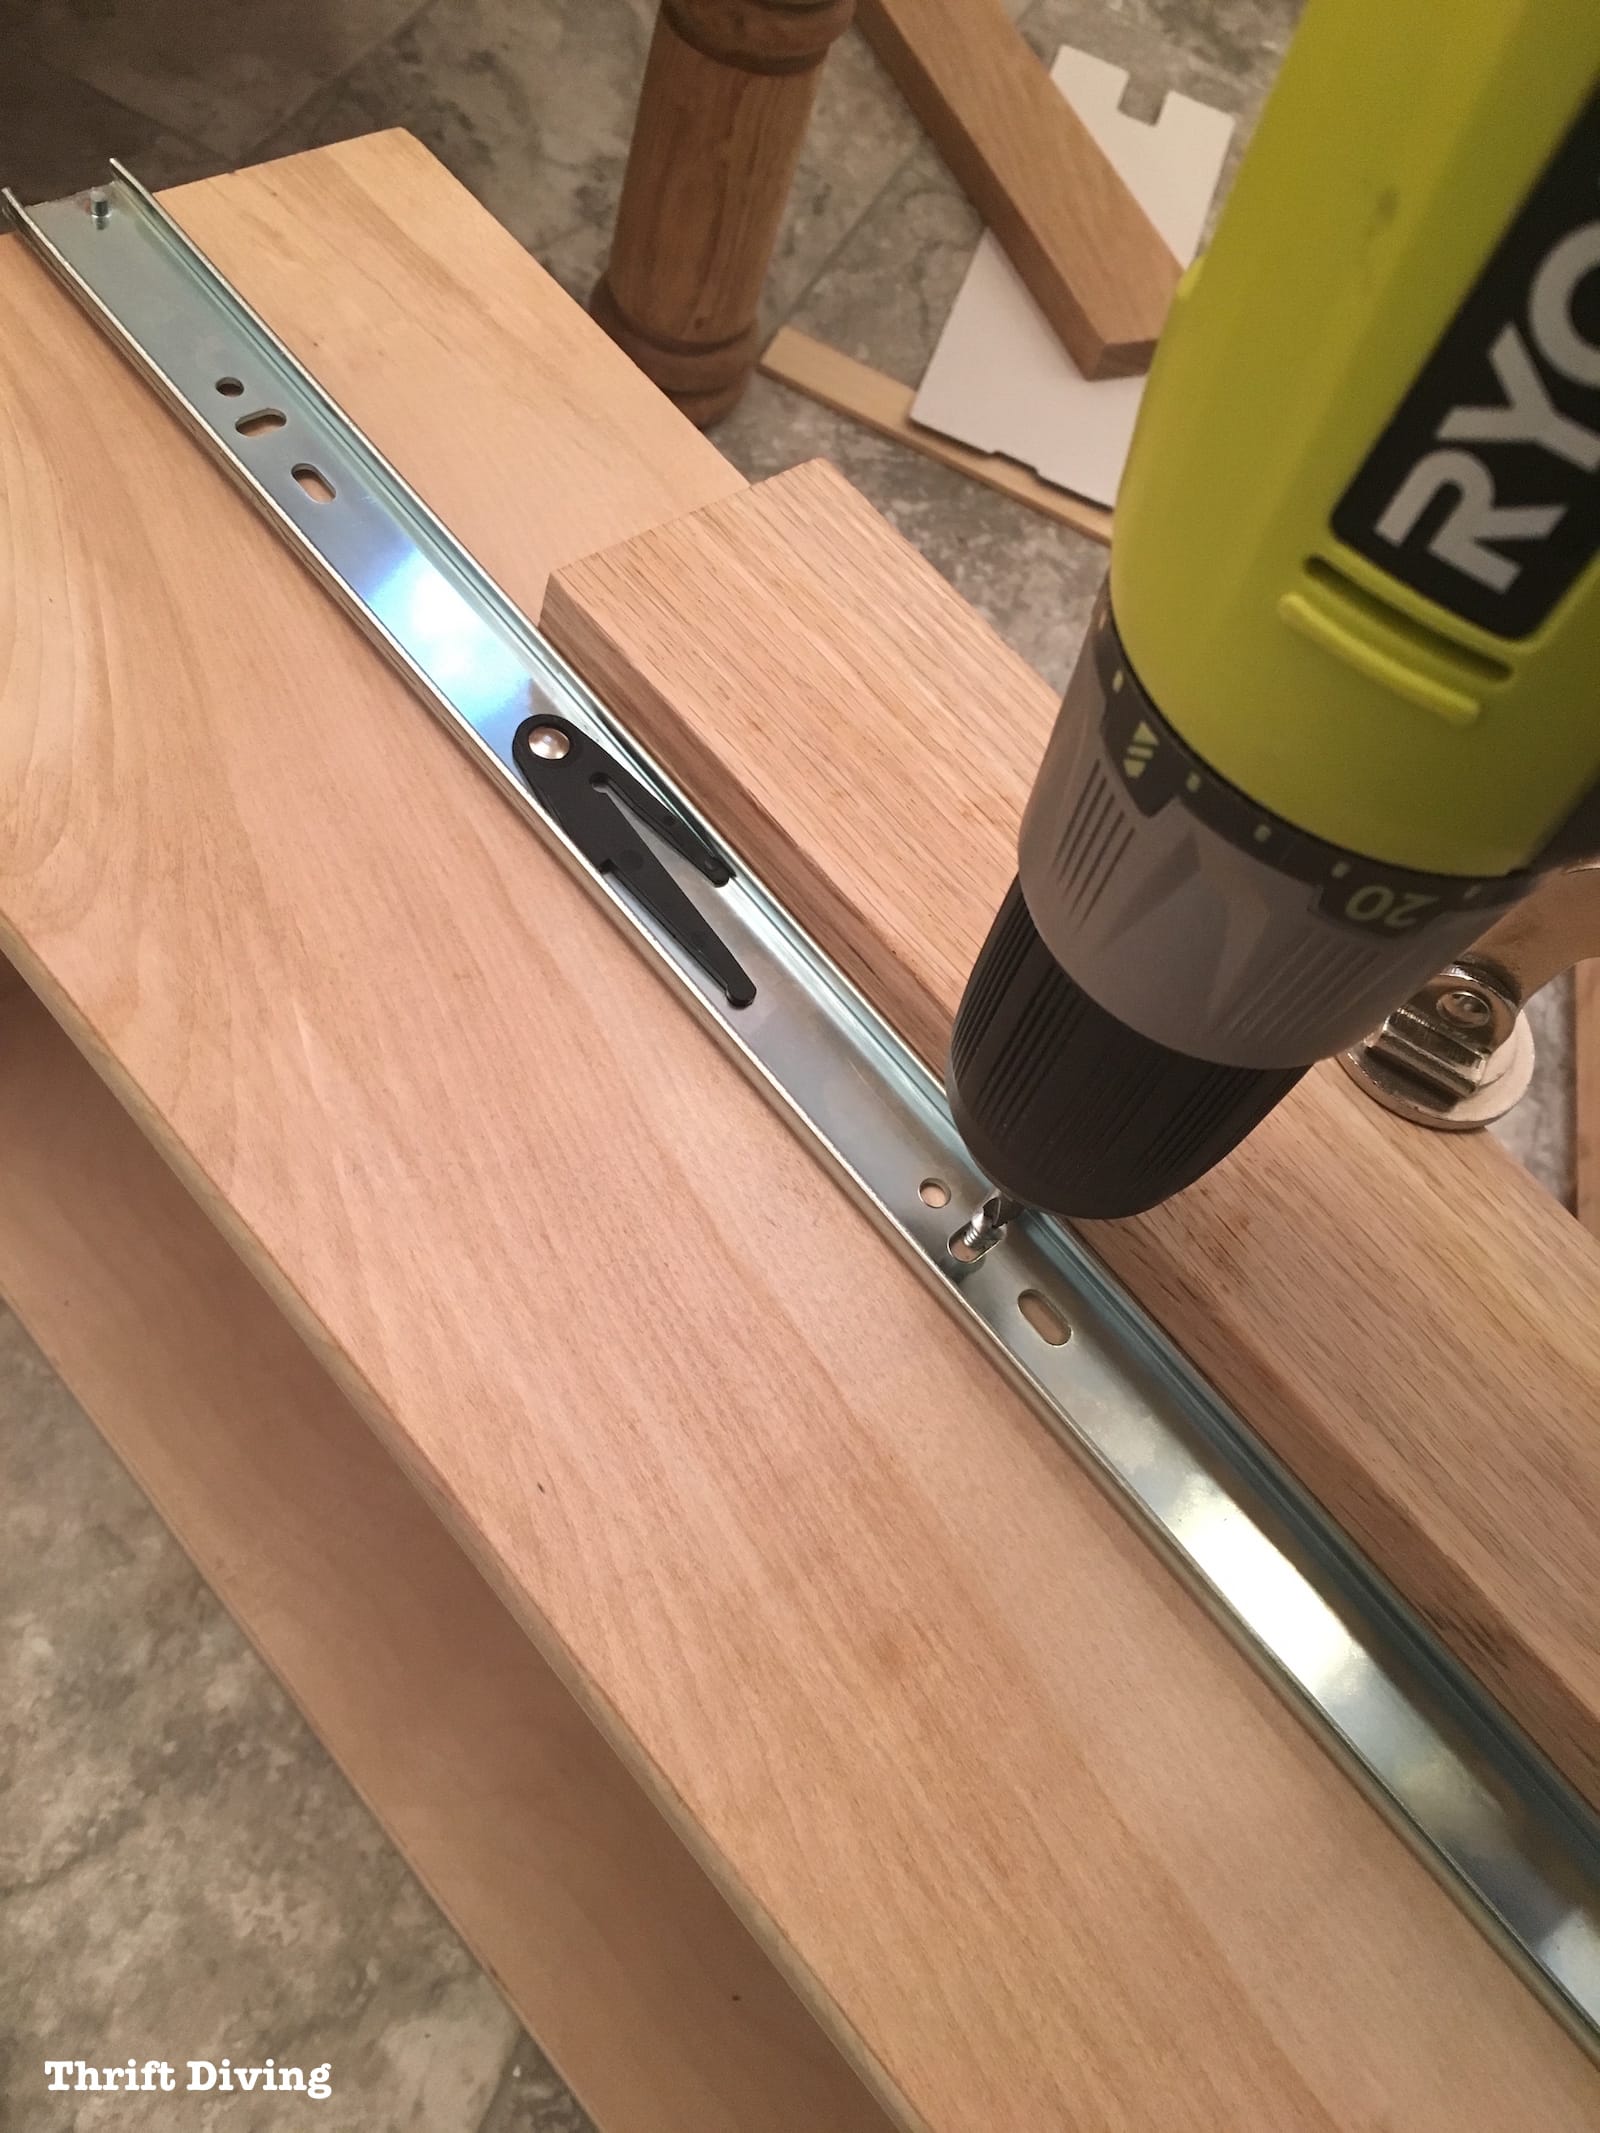
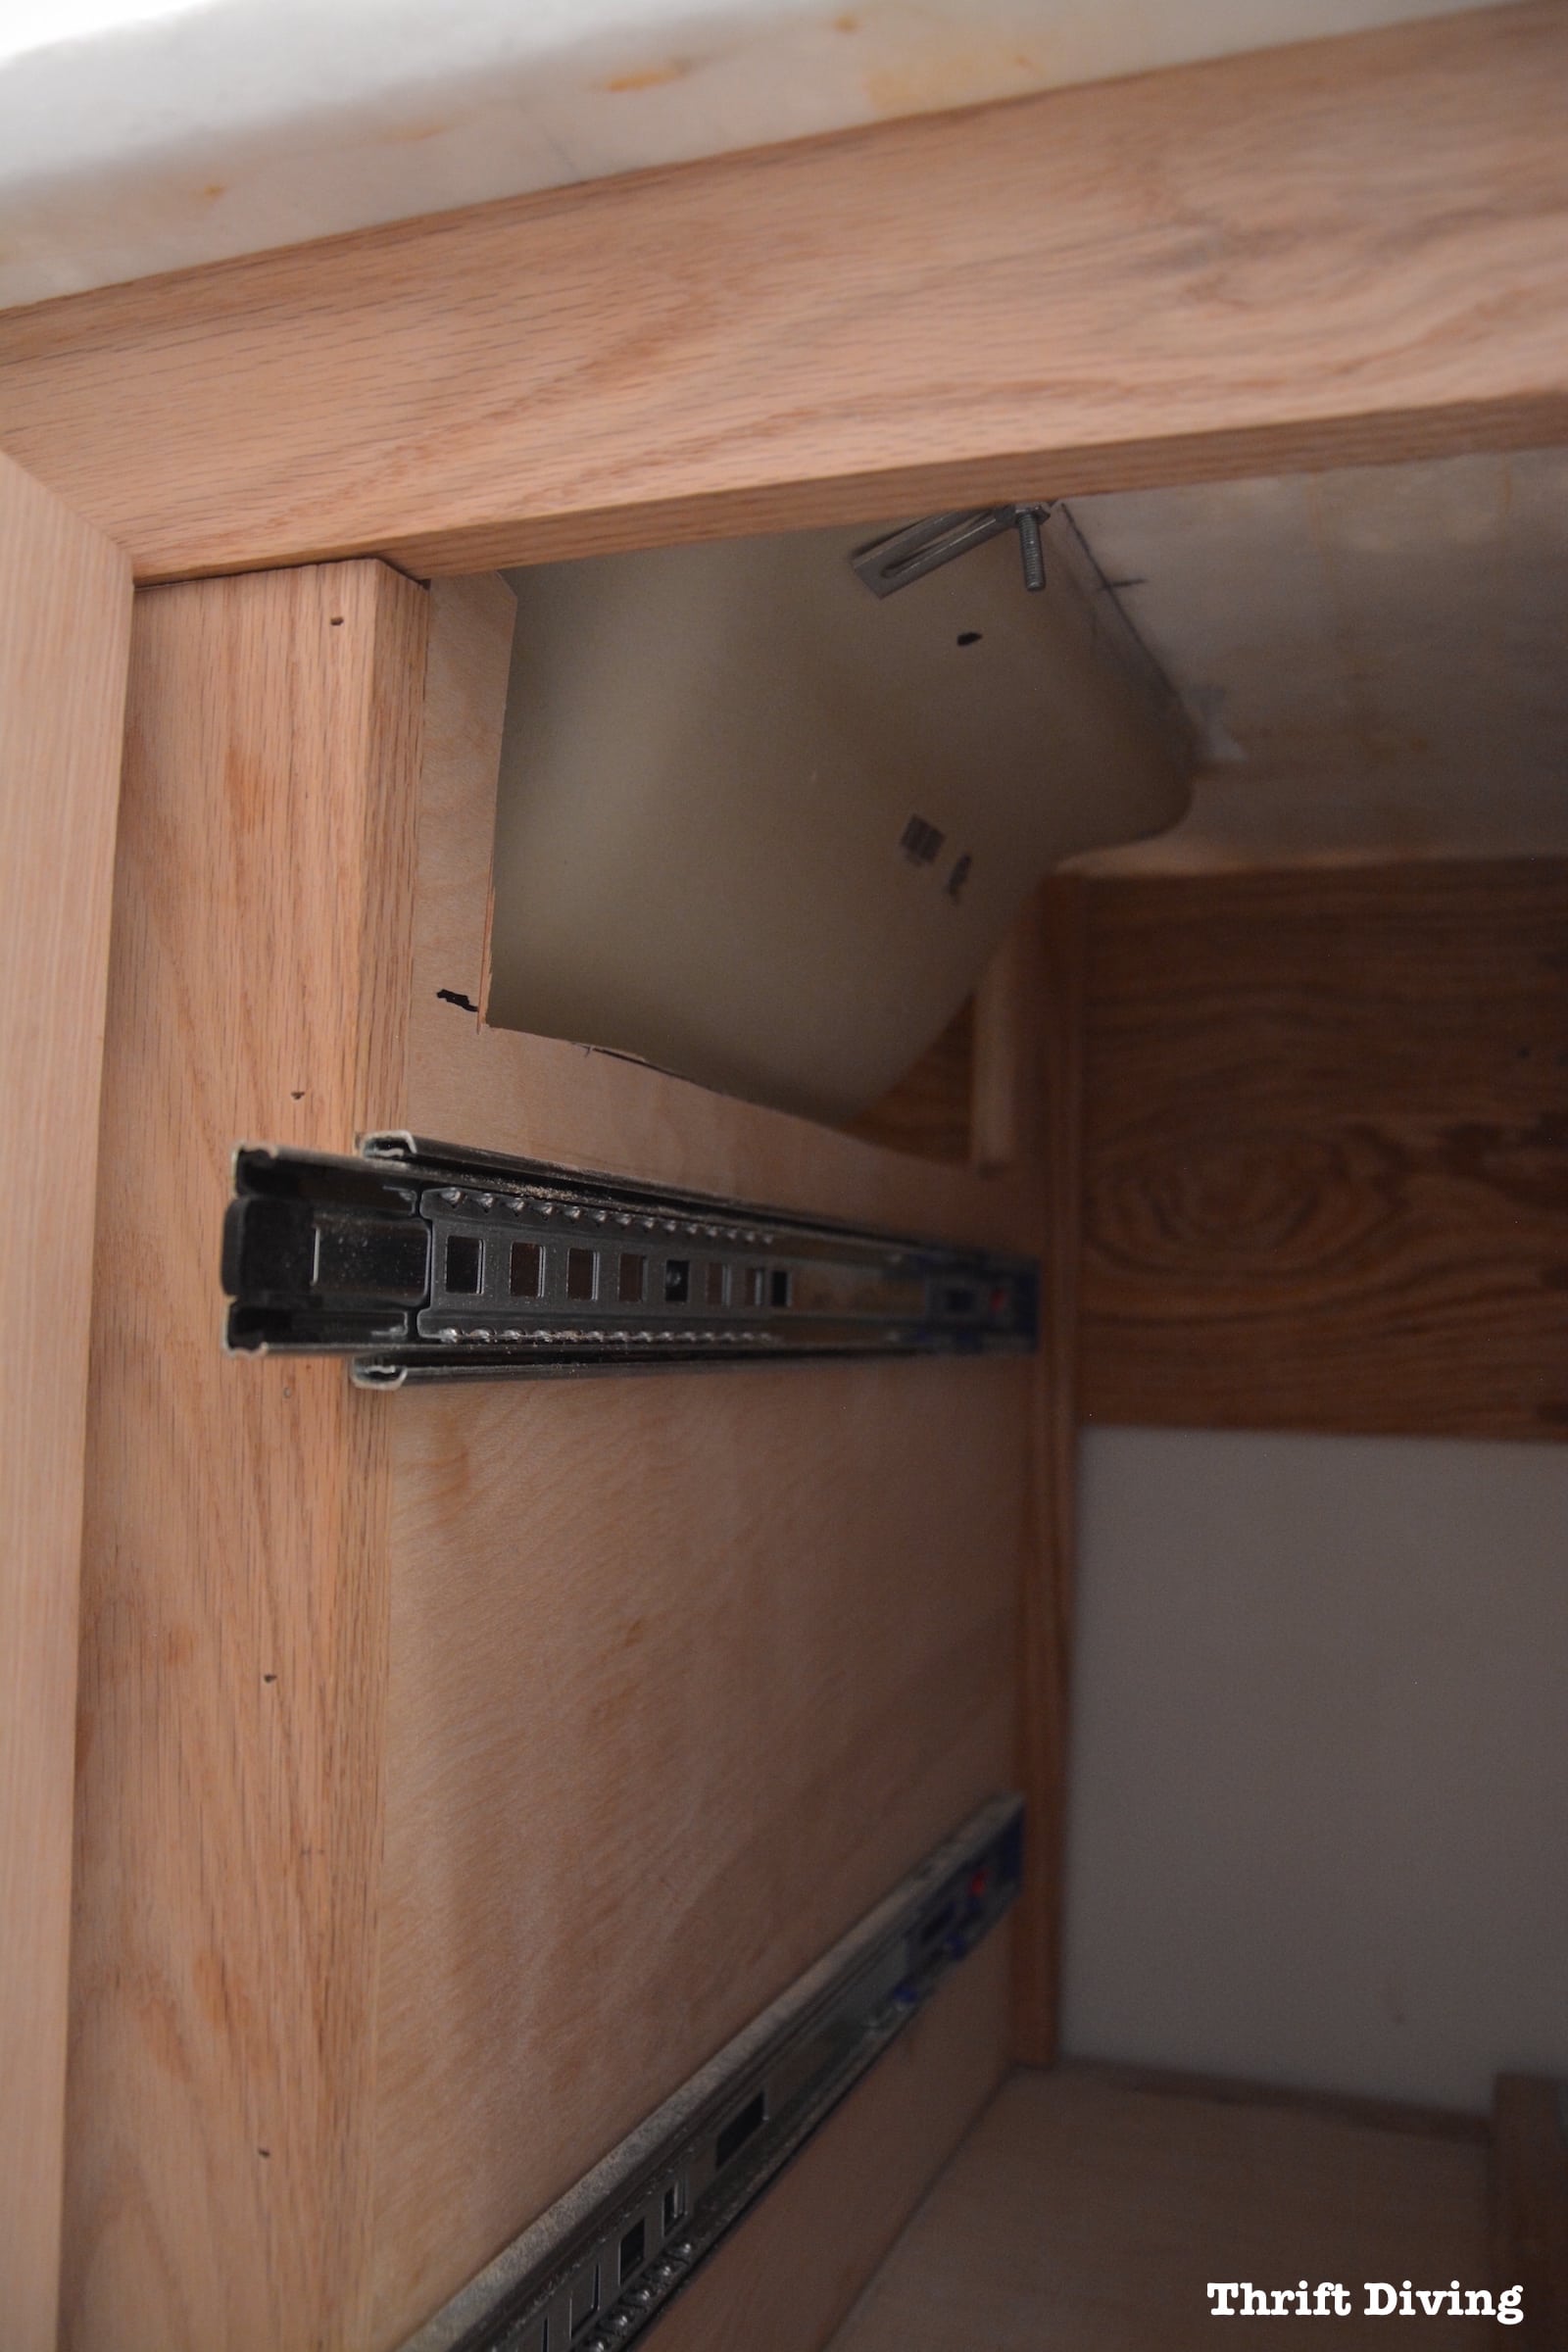
STEP 4: Marking Drawers
This was the part that I was going to freak out over.
I’d never installed cabinet drawer slides before, nor have I made drawers. How the heck was I going to do it properly so that they actually fit??
Home Depot doesn’t have a selection of brands of slides, so I just went with whatever they had (next time, I will likely use Blum drawer slides, which are an upgrade).
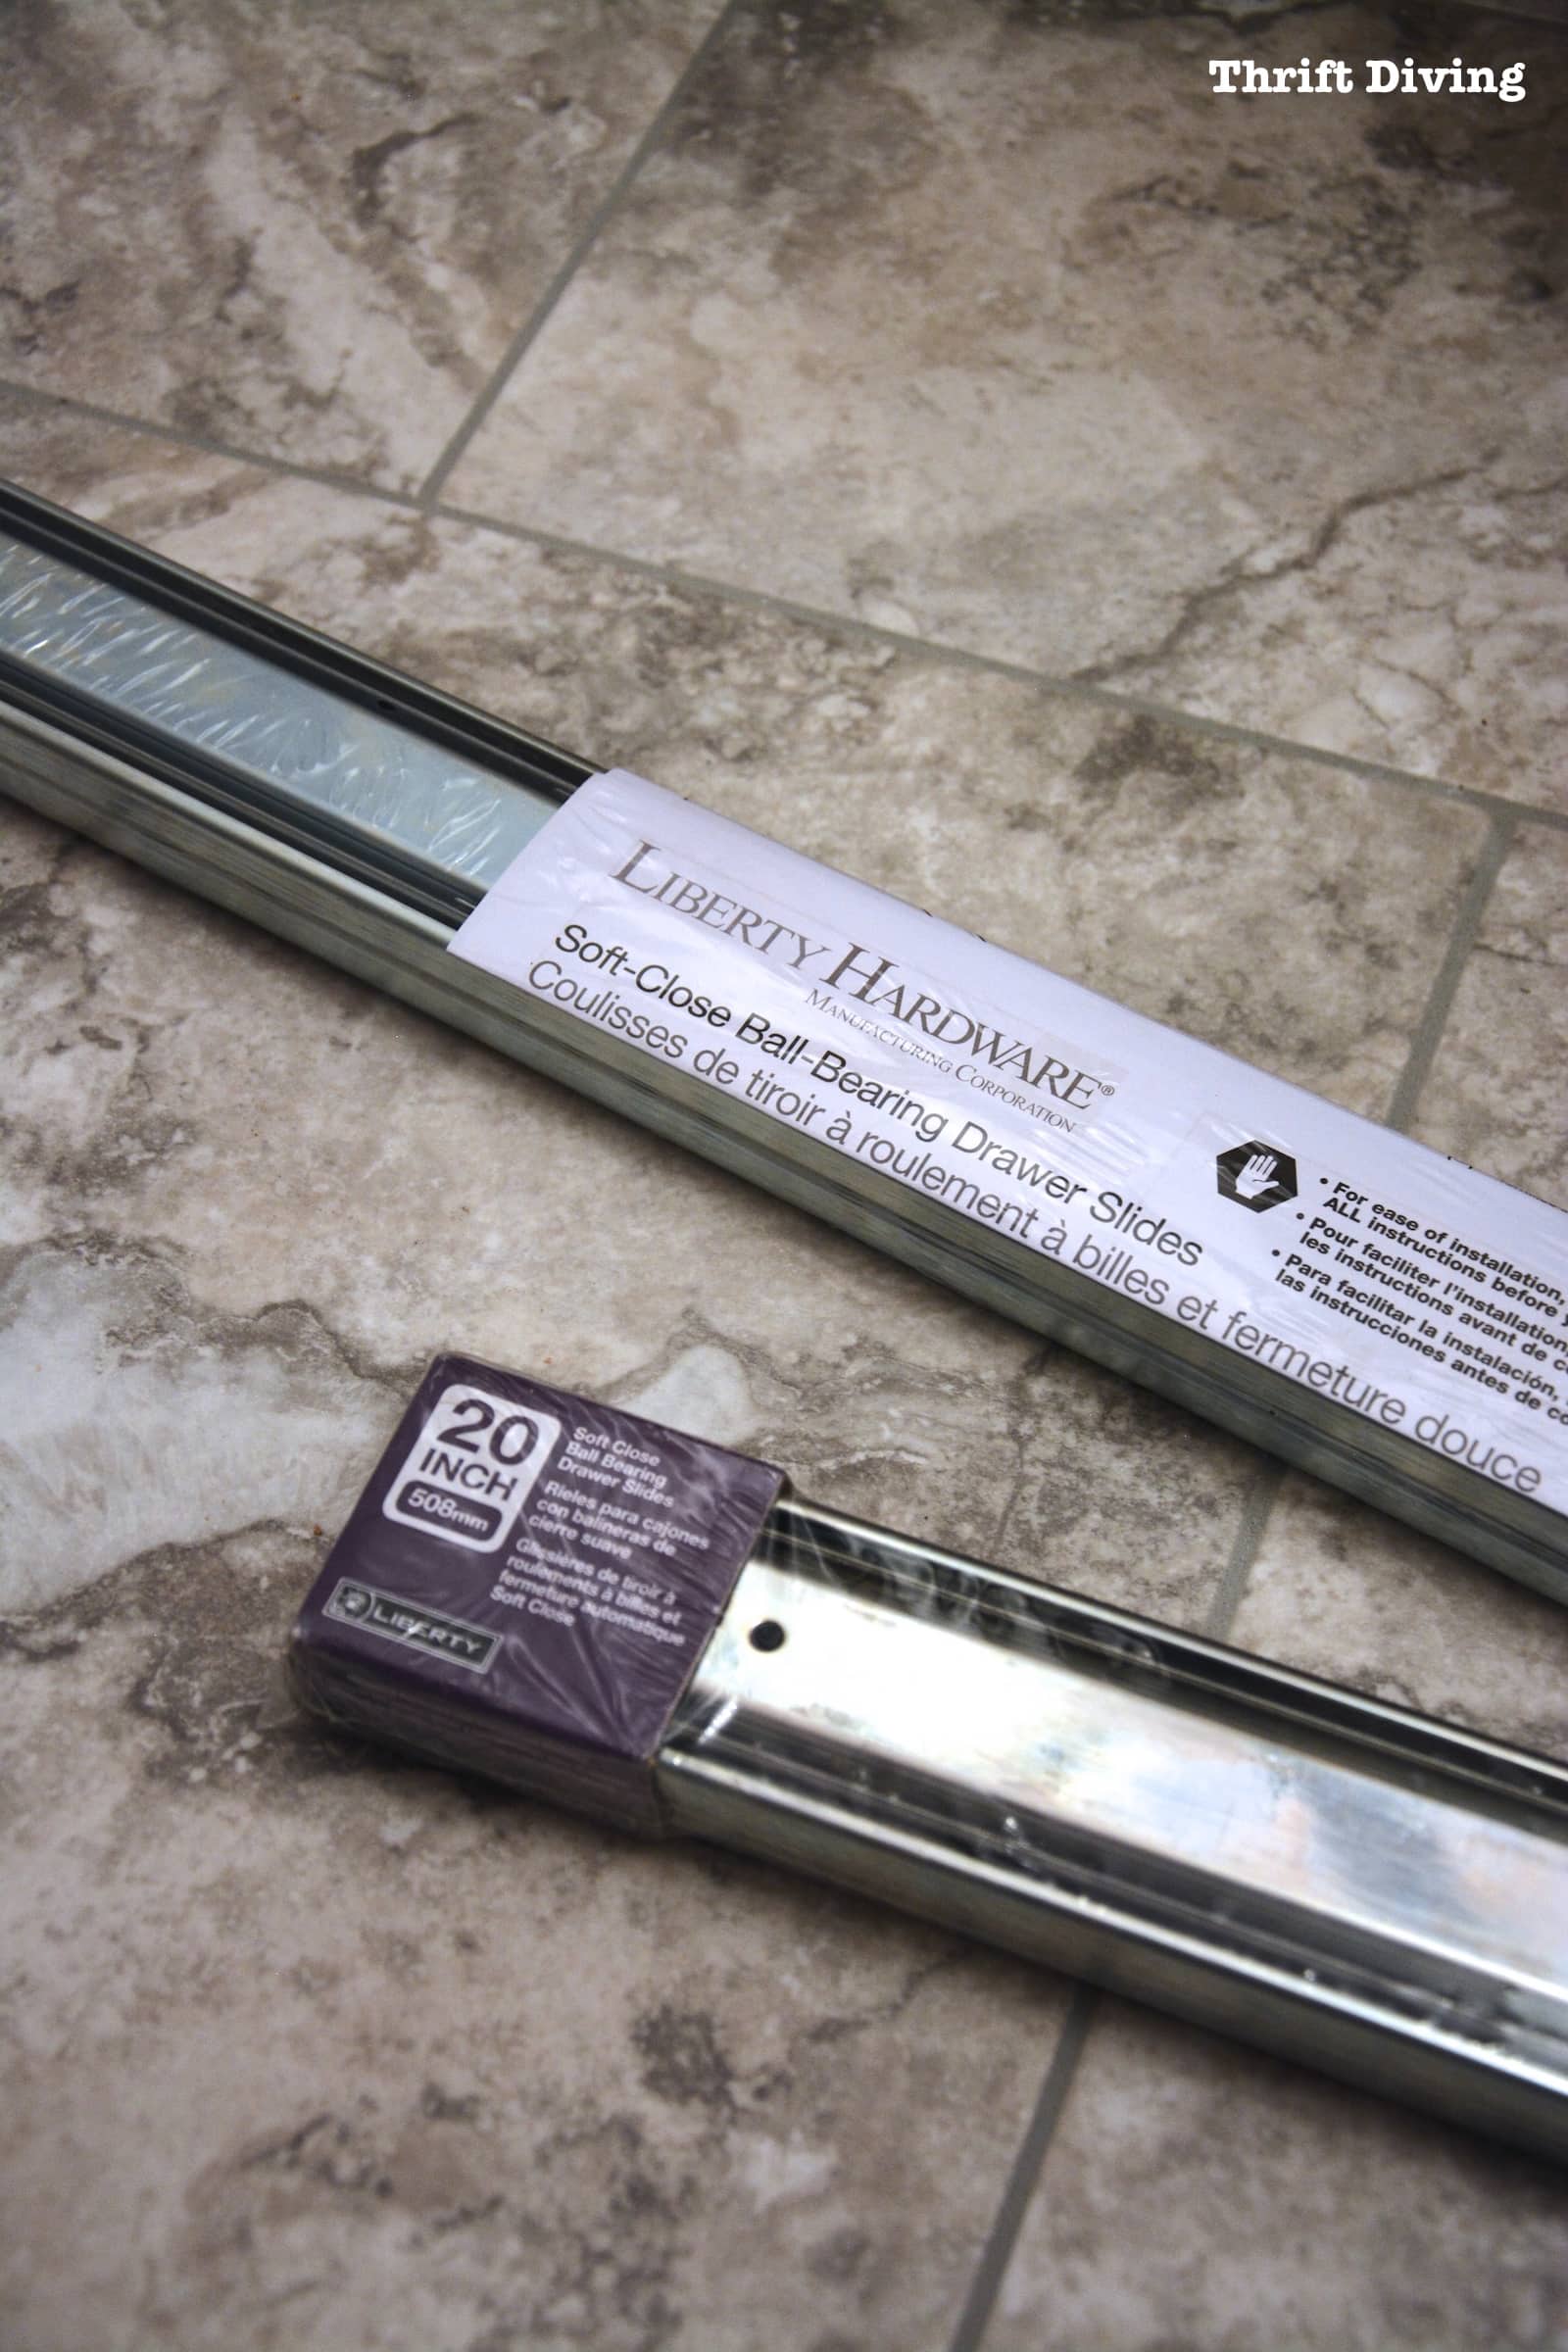
I figured out where to attach them, followed the instructions in the packaging, and installed the sliders.
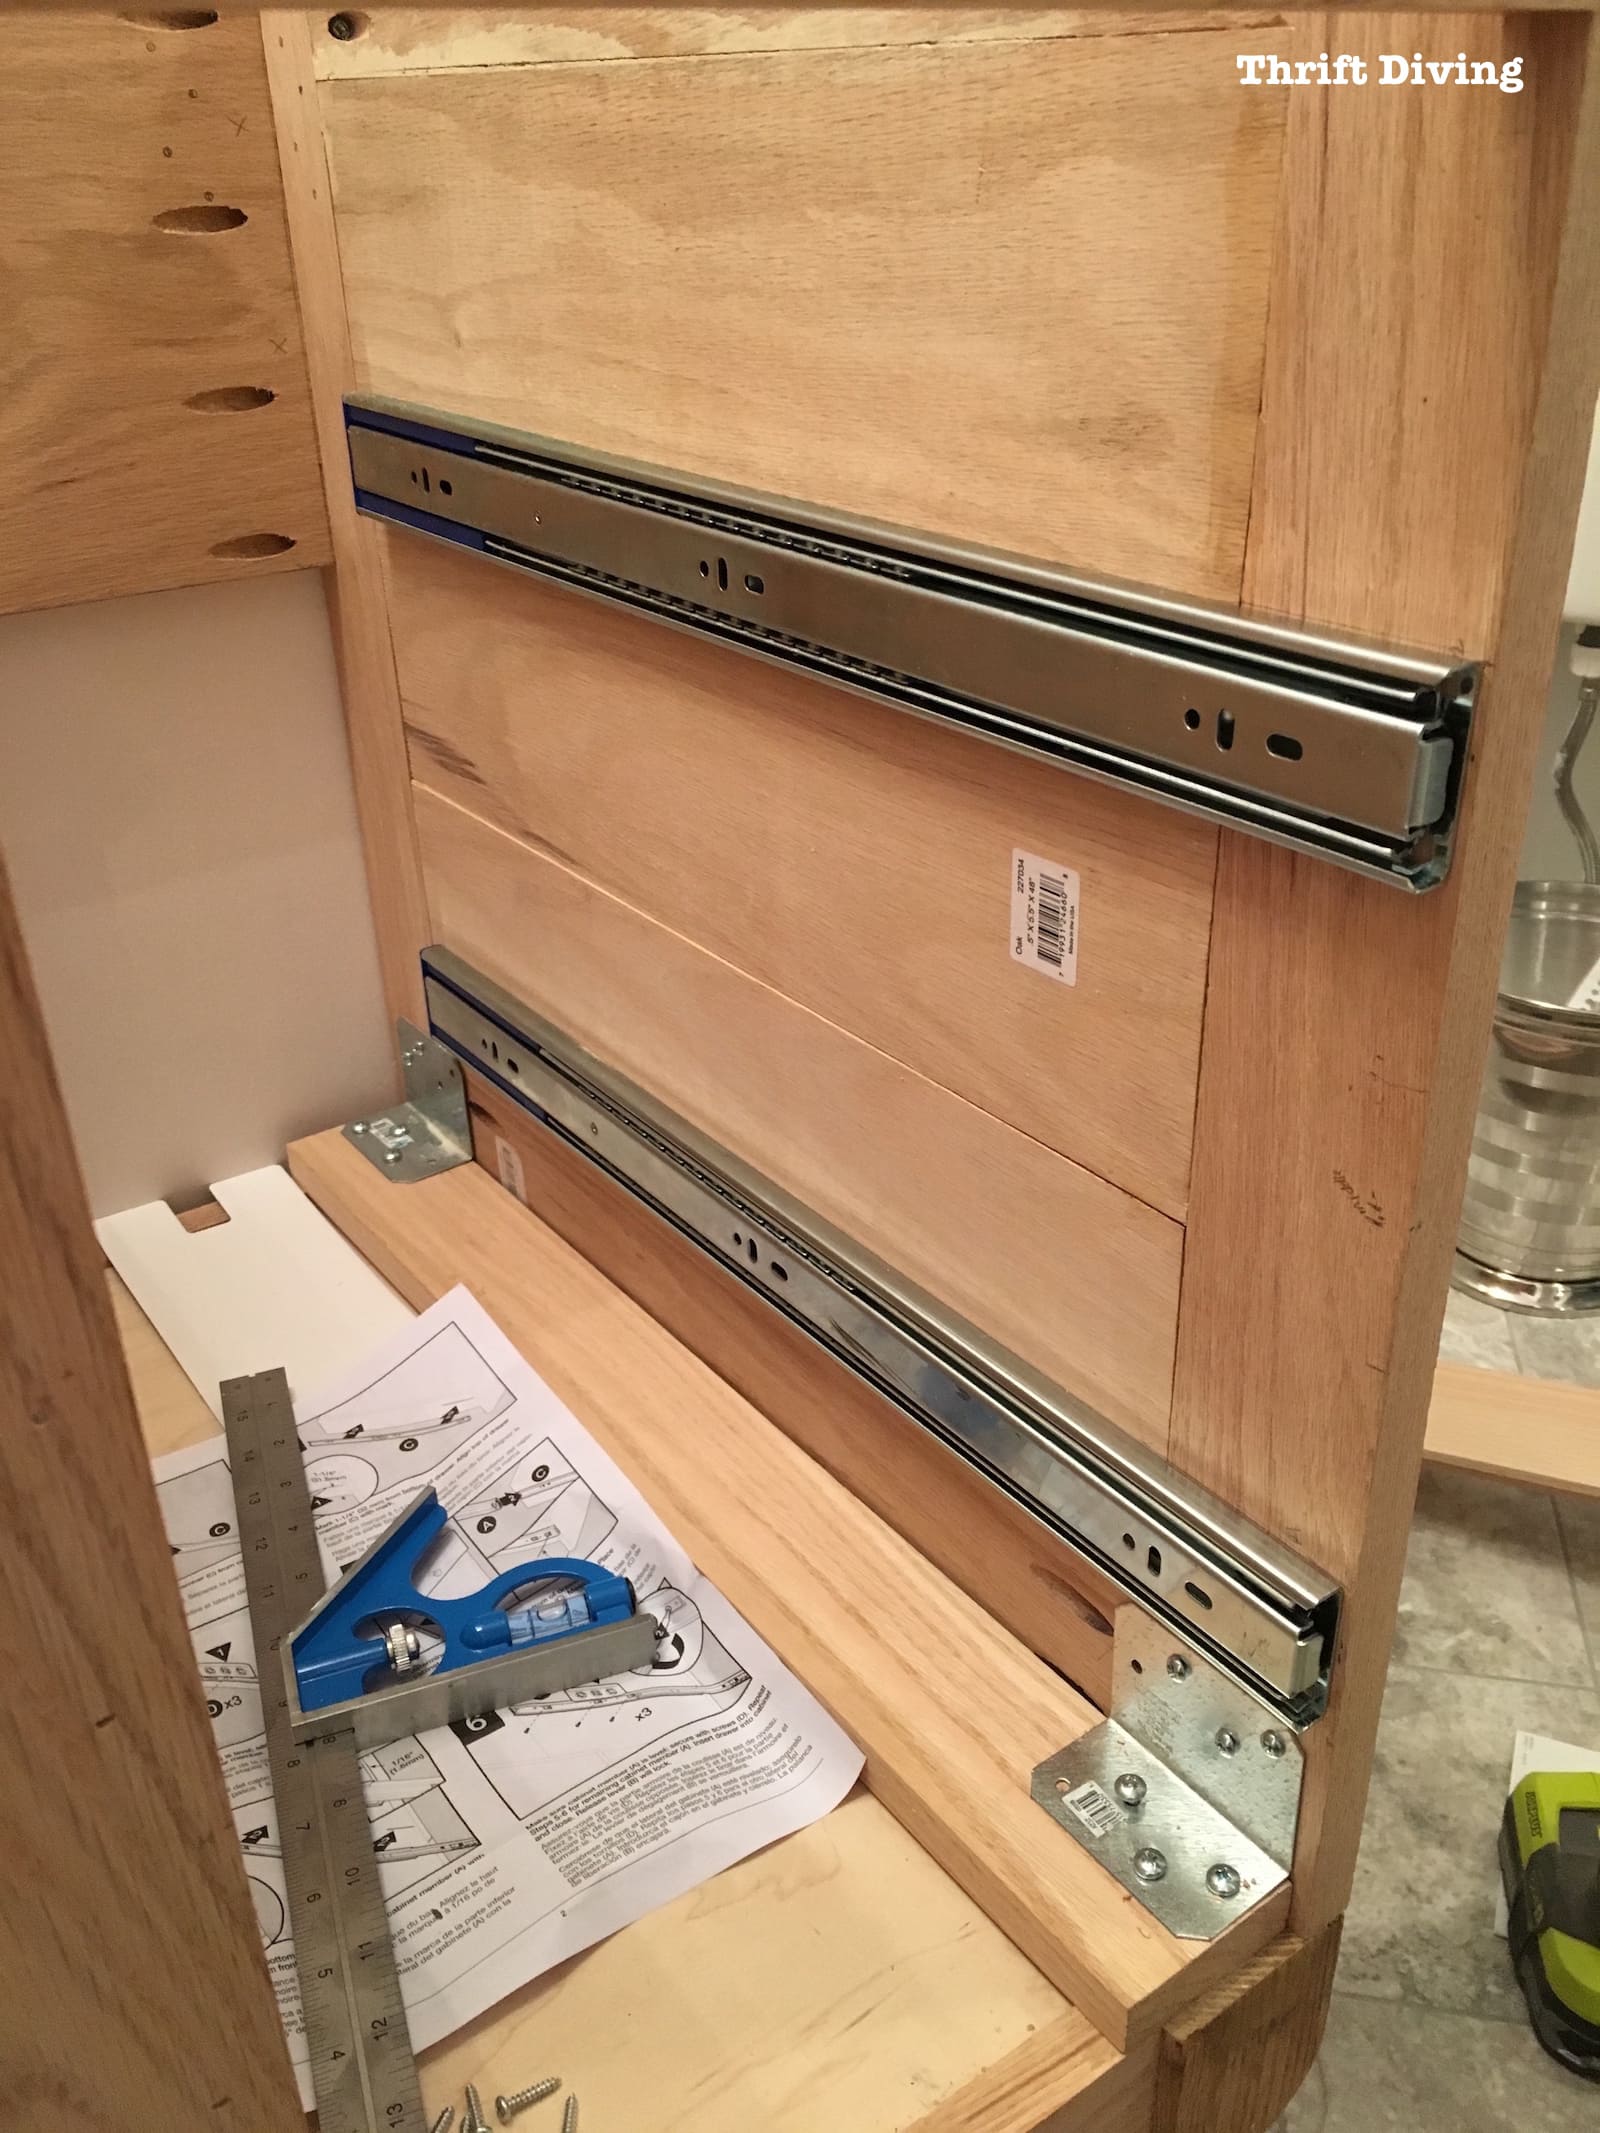
The important thing to remember is to use a level to check your accuracy while you’re working.
And don’t be afraid to use jigs, washers, or whatever else you need for support while you’re attaching the slides, helping to keep them in place so they’re the perfect, level height.
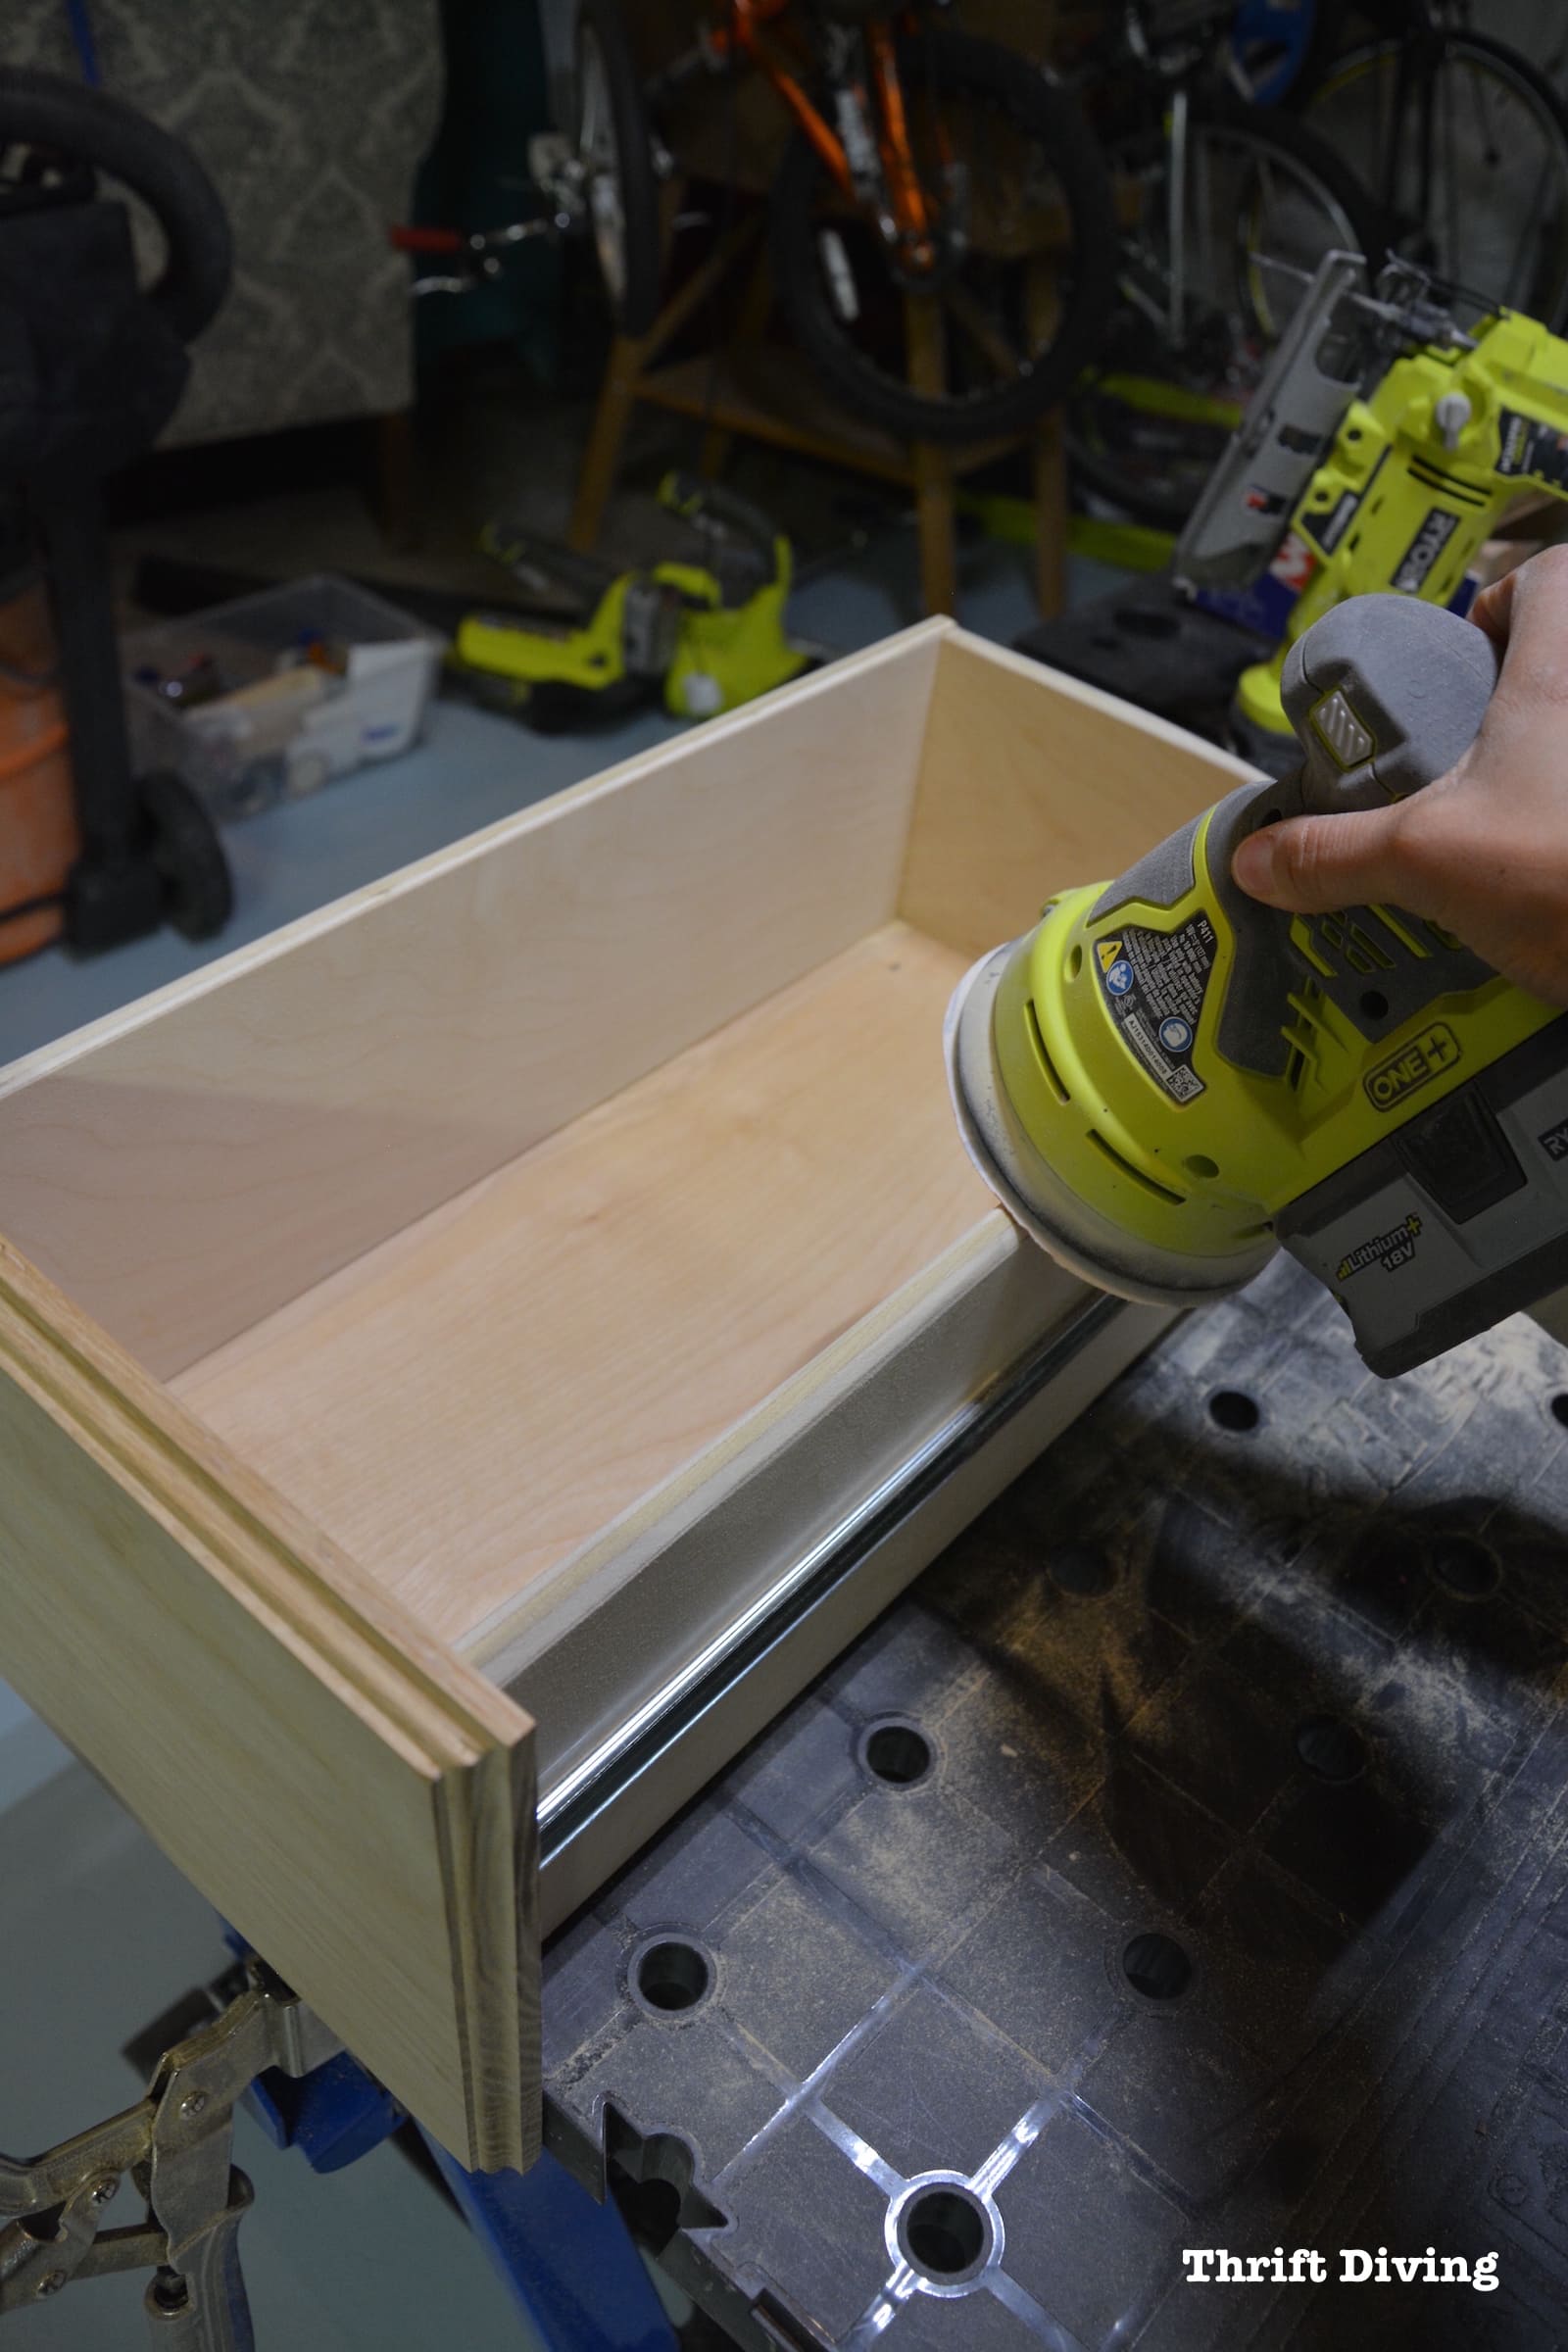
Using 1/2″ birch plywood, I constructed a sample drawer to make sure that it would fit properly.
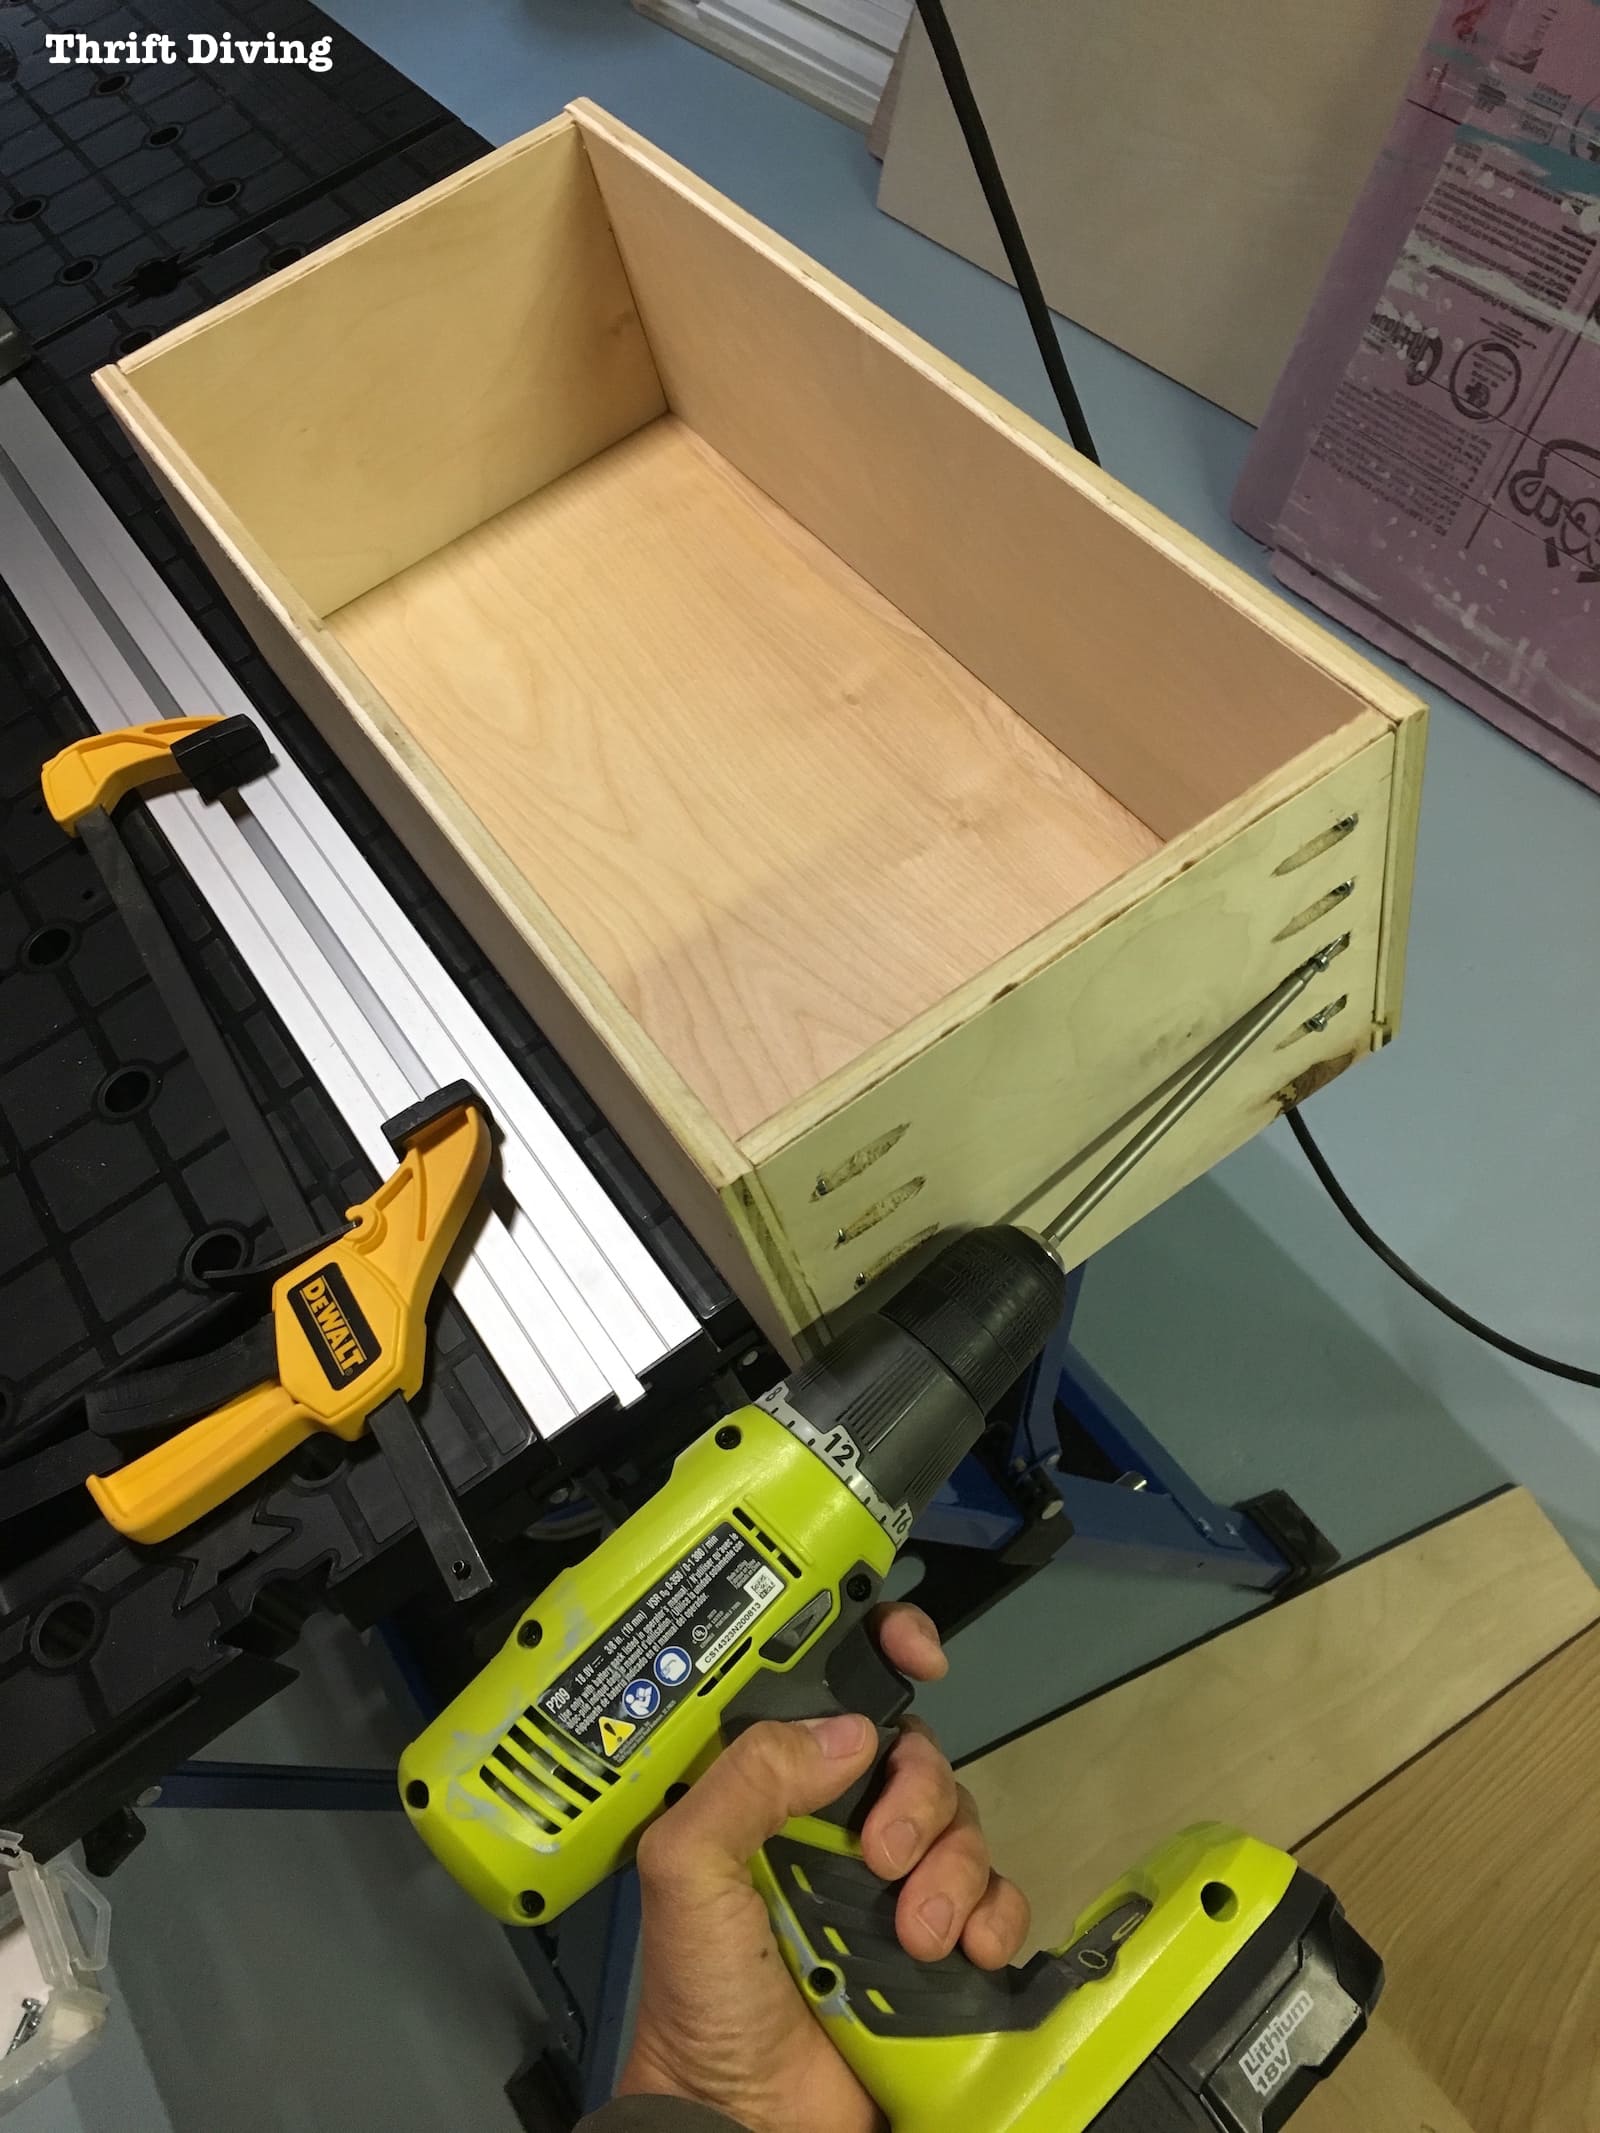
I added the slider to the drawer side, using scrap wood to help keep it level and even.
I test fitted the drawer to make sure it functioned properly, and it did!
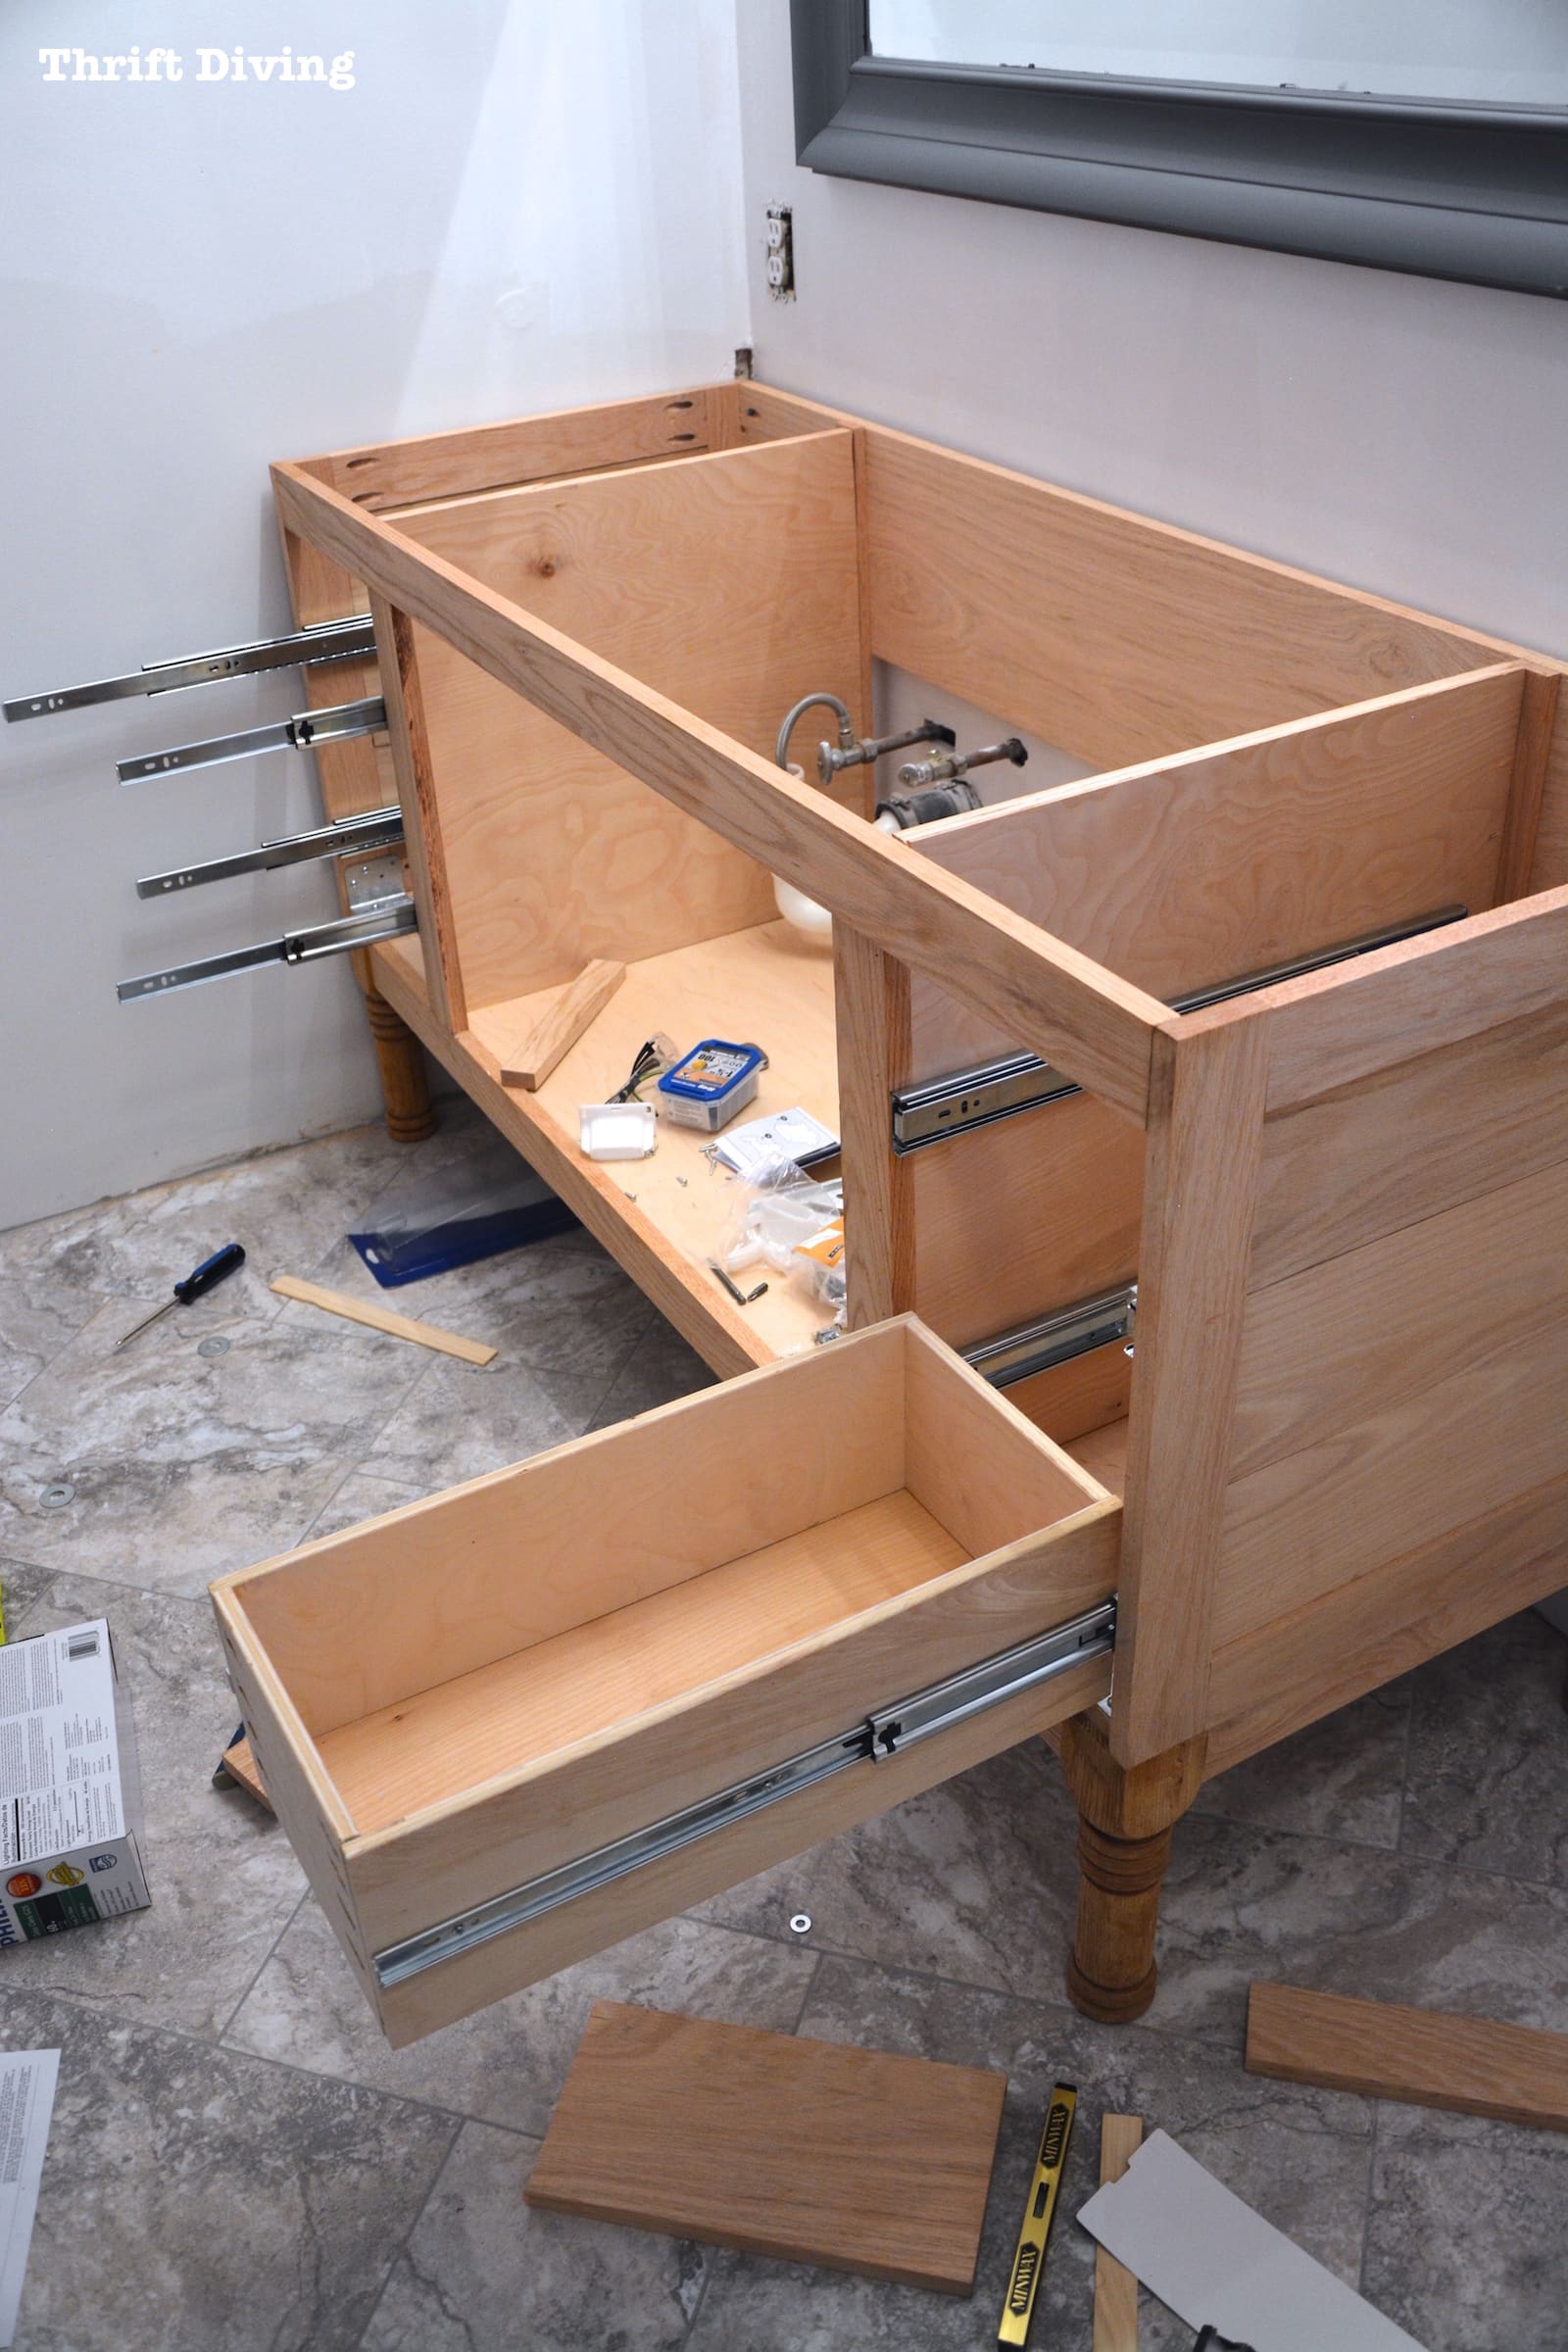
I went ahead and made more drawers.
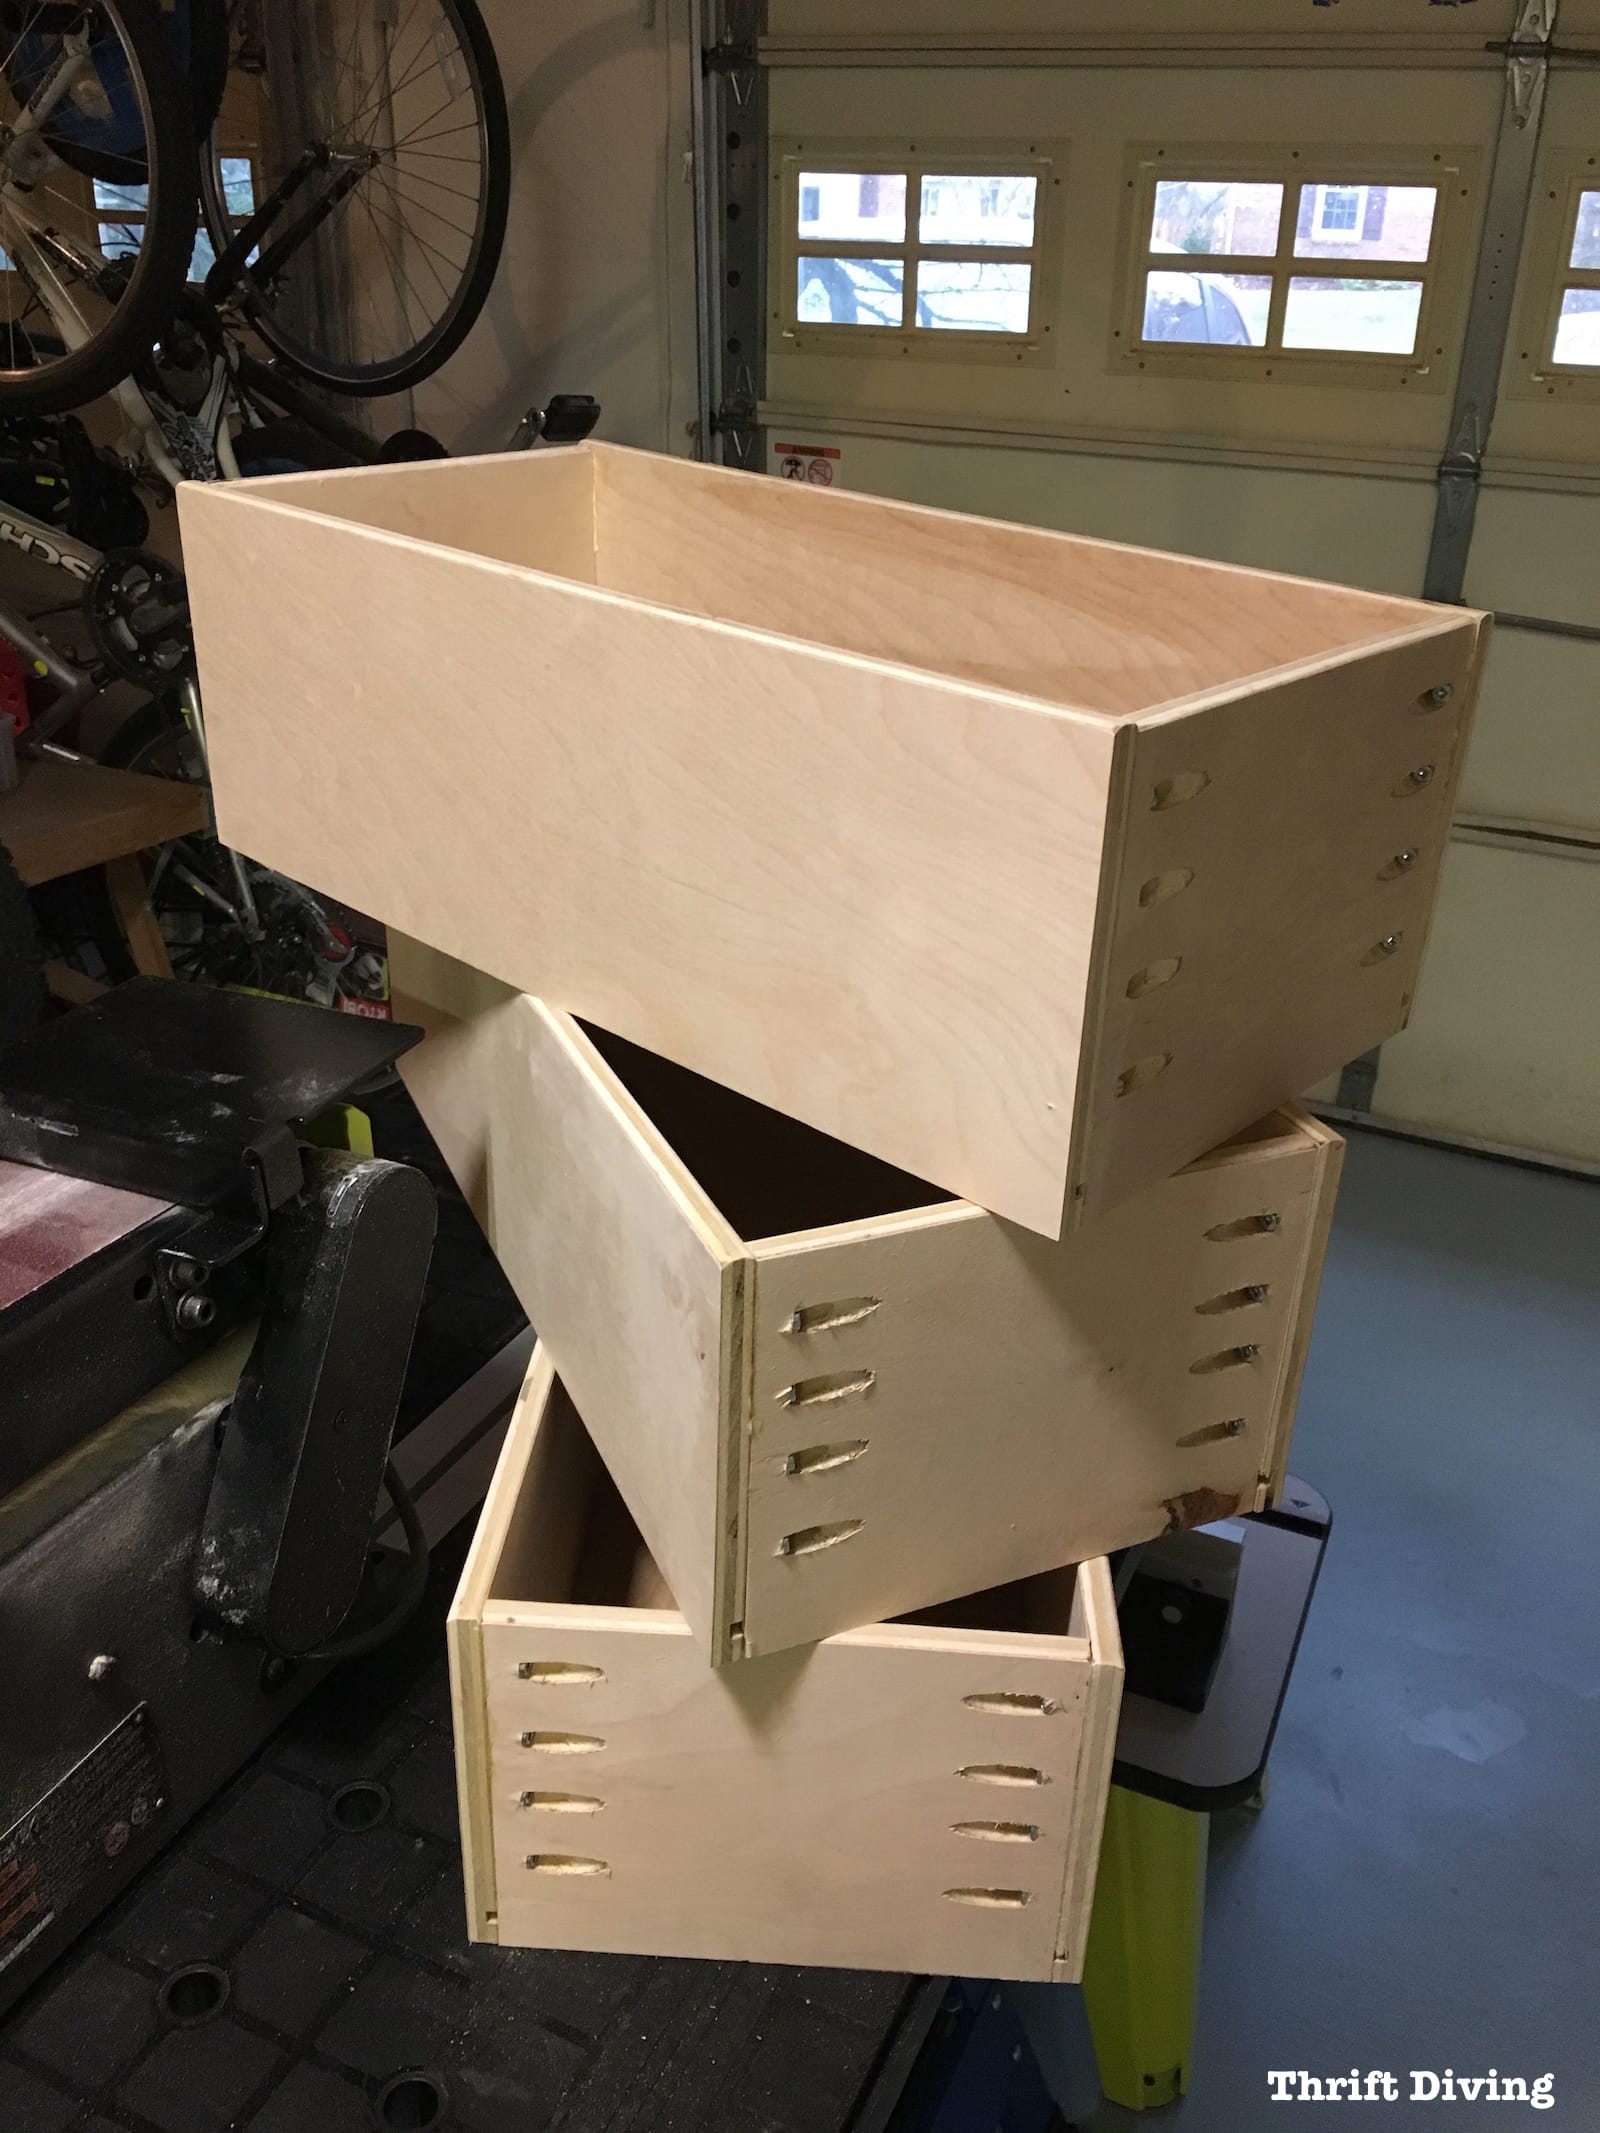
But I did run into some issues with the drawers I made. You can read all about it in the full tutorial:
SEE THE FULL TUTORIAL: Check out the full tutorial here in Part 4: Making Drawers.
STEP 5: Making Cabinet Doors
The opening of the cabinet doors was about 30″ wide.
Home Depot doesn’t sell Red Oak in that width. So I had to get creative and glue a couple boards together in order to create doors that were wide enough for the opening.
Once glued together, it wasn’t too too noticeable. 🙂

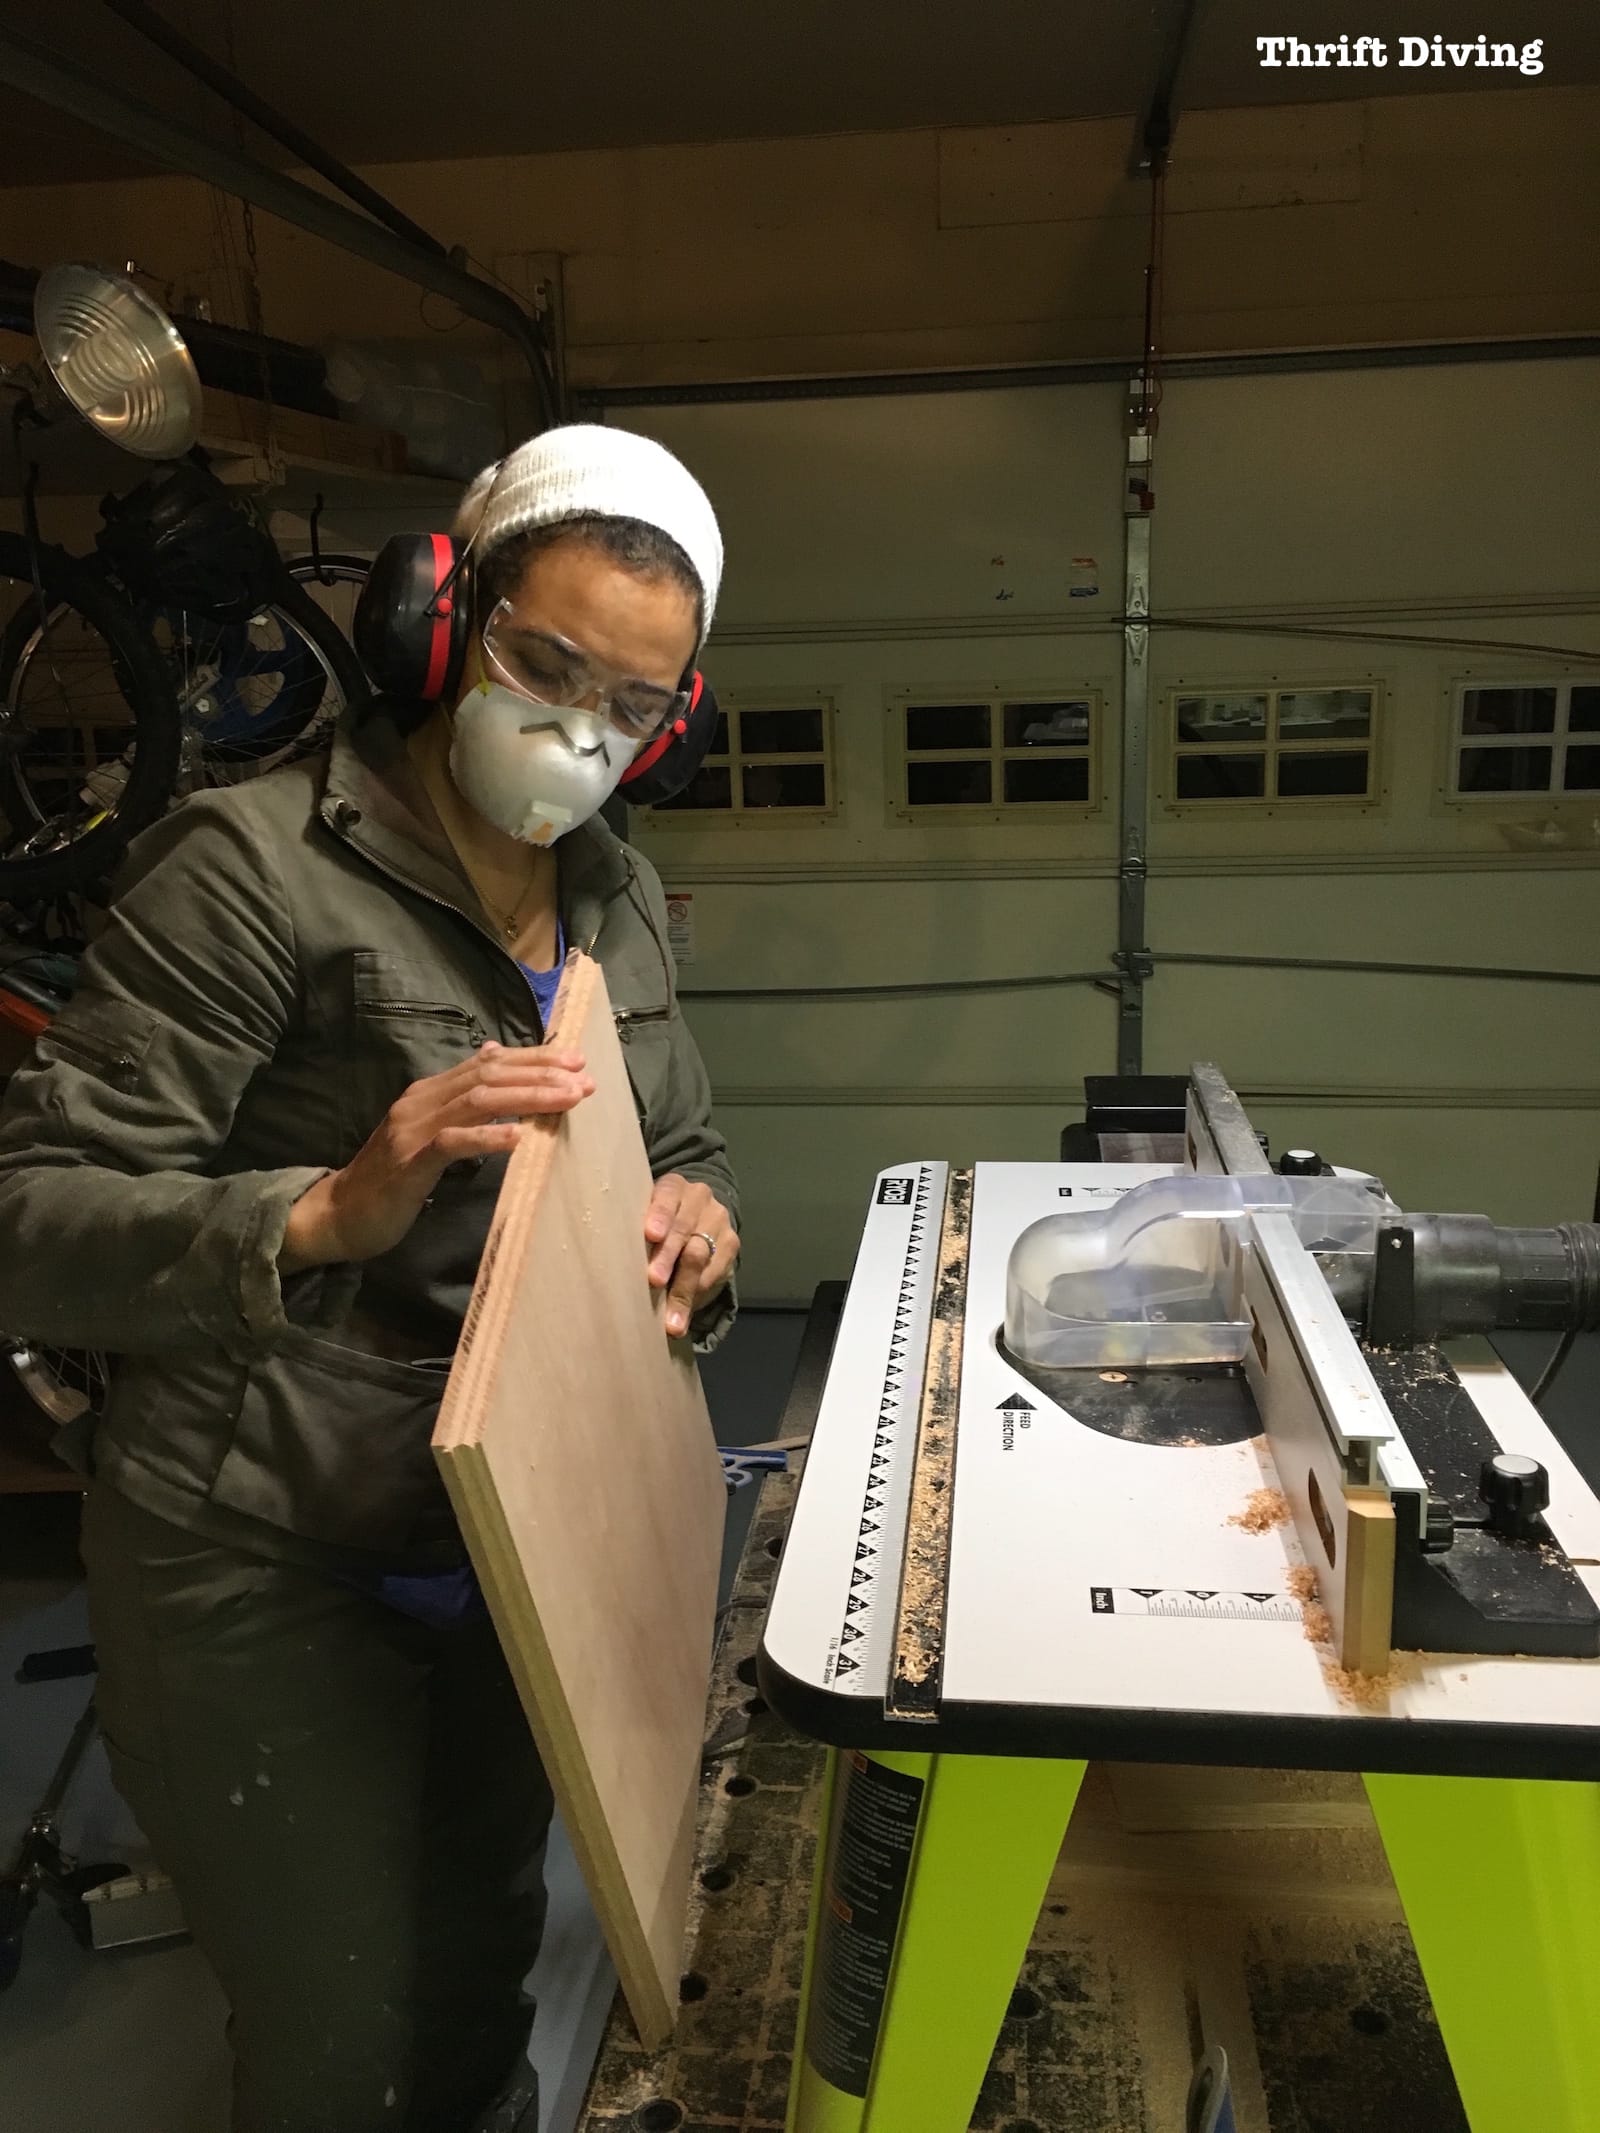
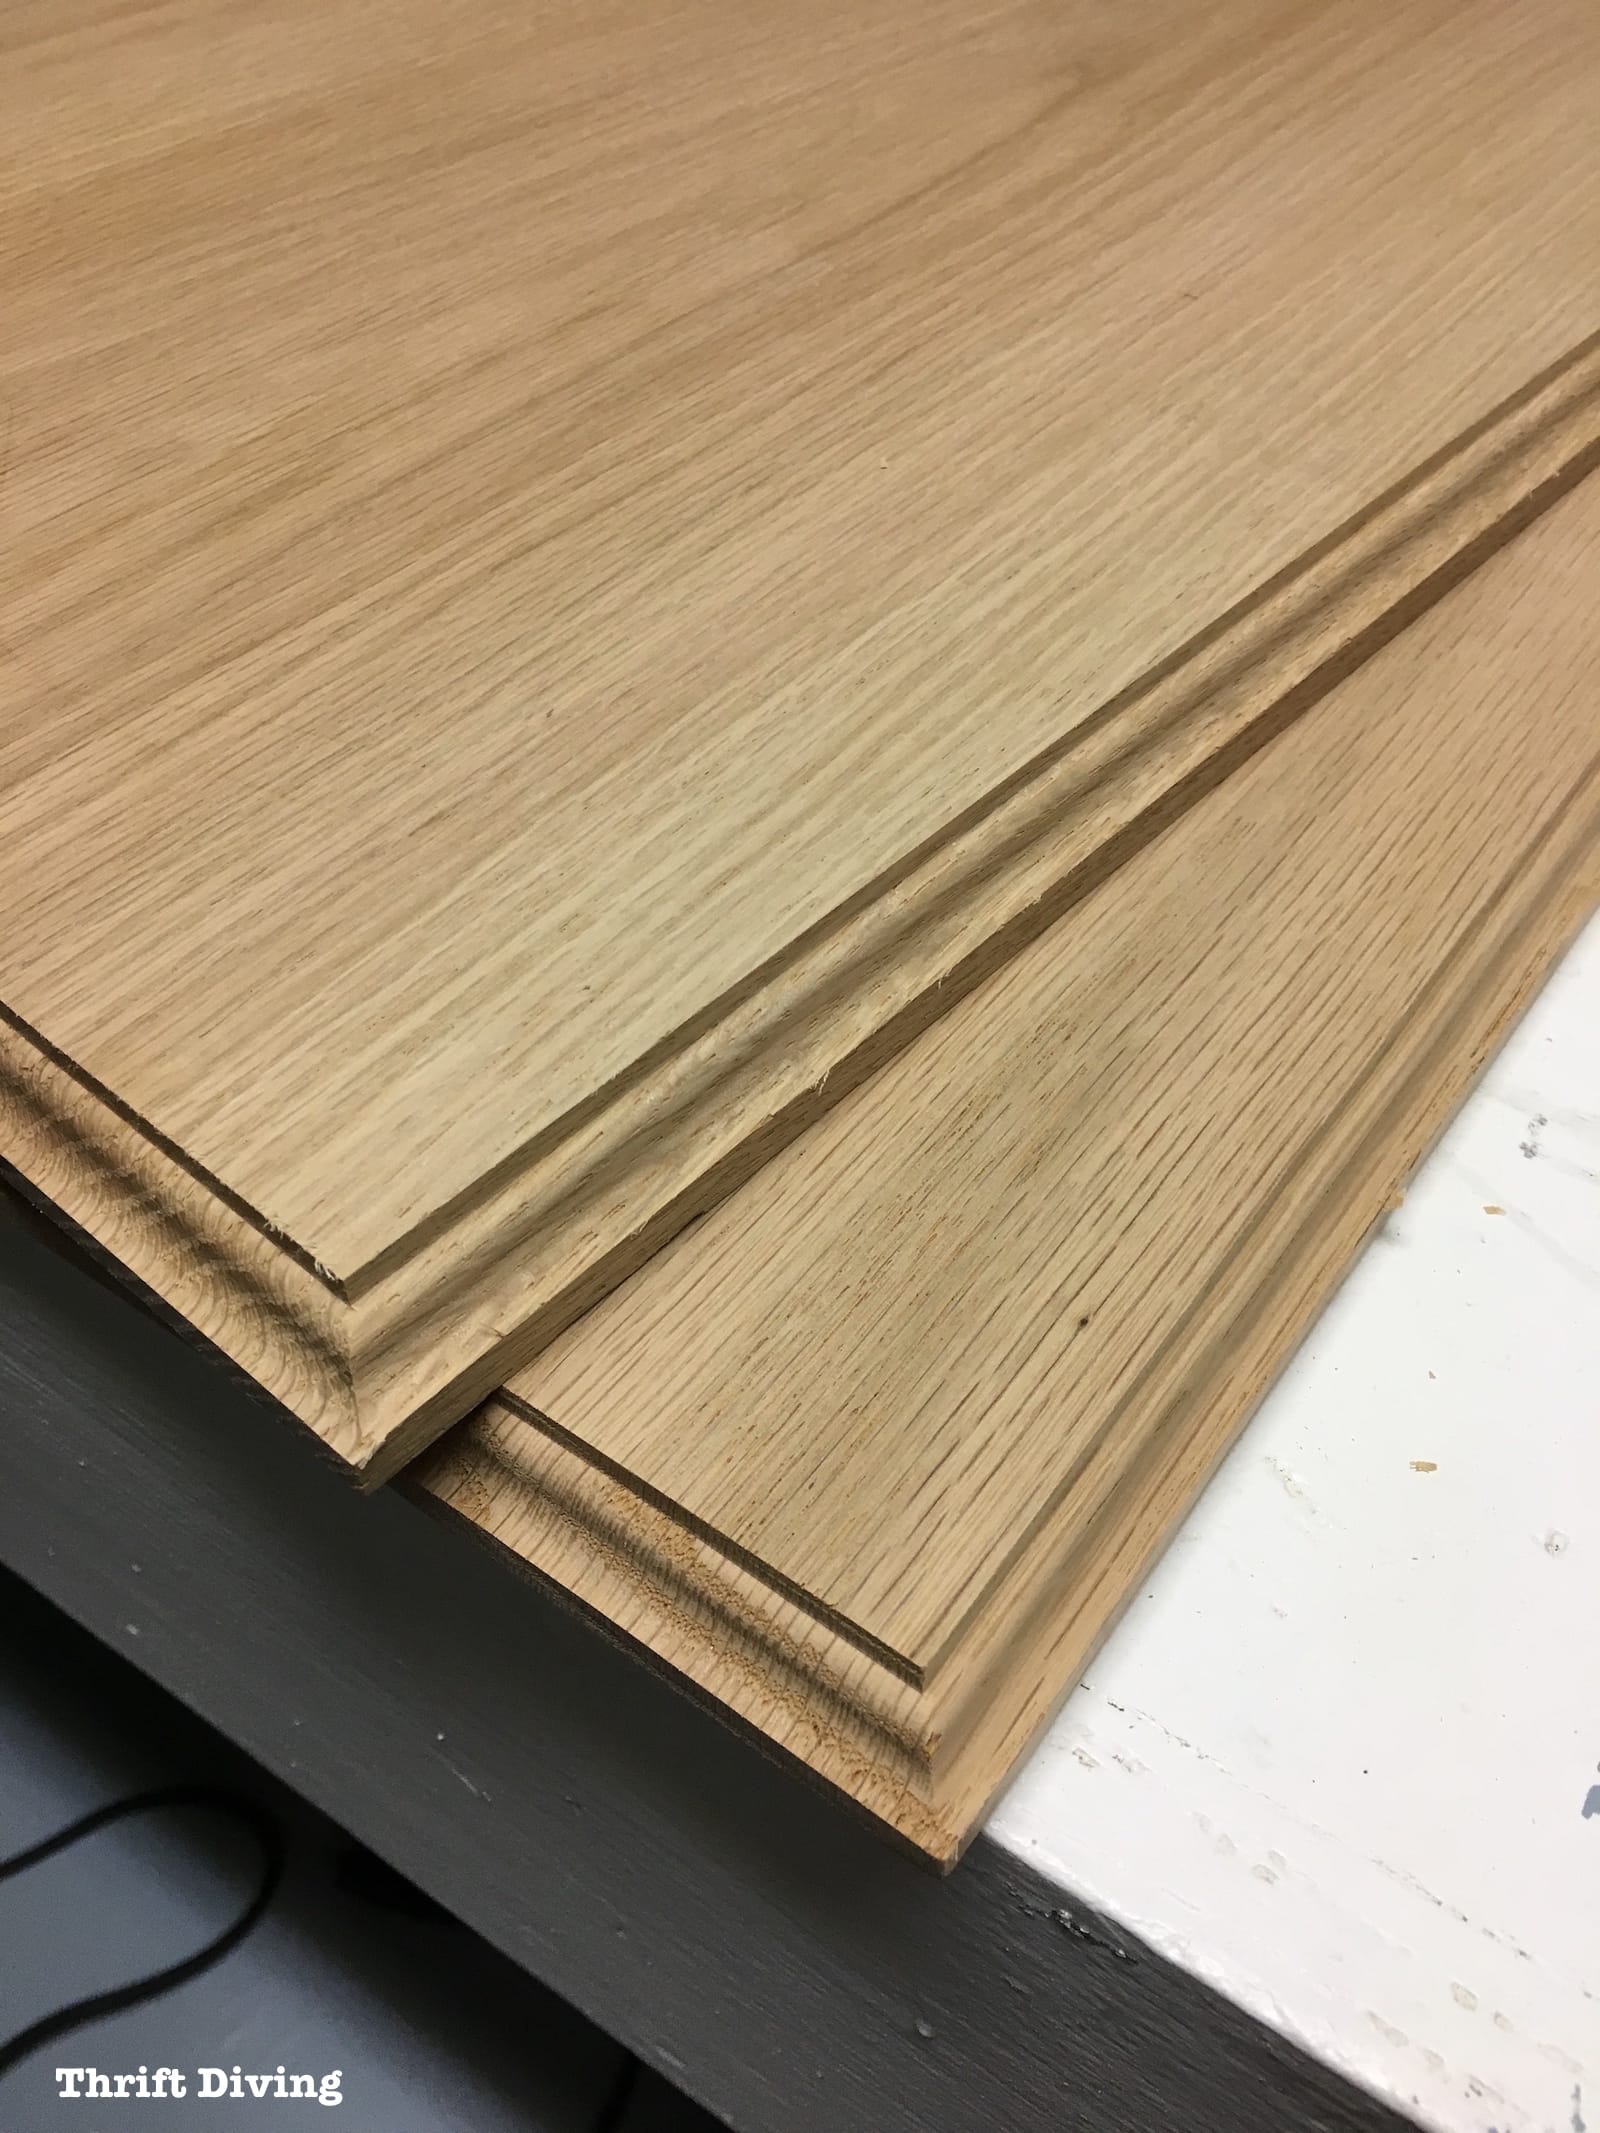
I also routed the edges for a decorative look using my router with router table.
First, let me just say, that the Kreg Cabinet Hardware Jig is perfect for accurately drilling holes for cabinet hardware!
If you ever need to make cabinet doors, this tool is a must.
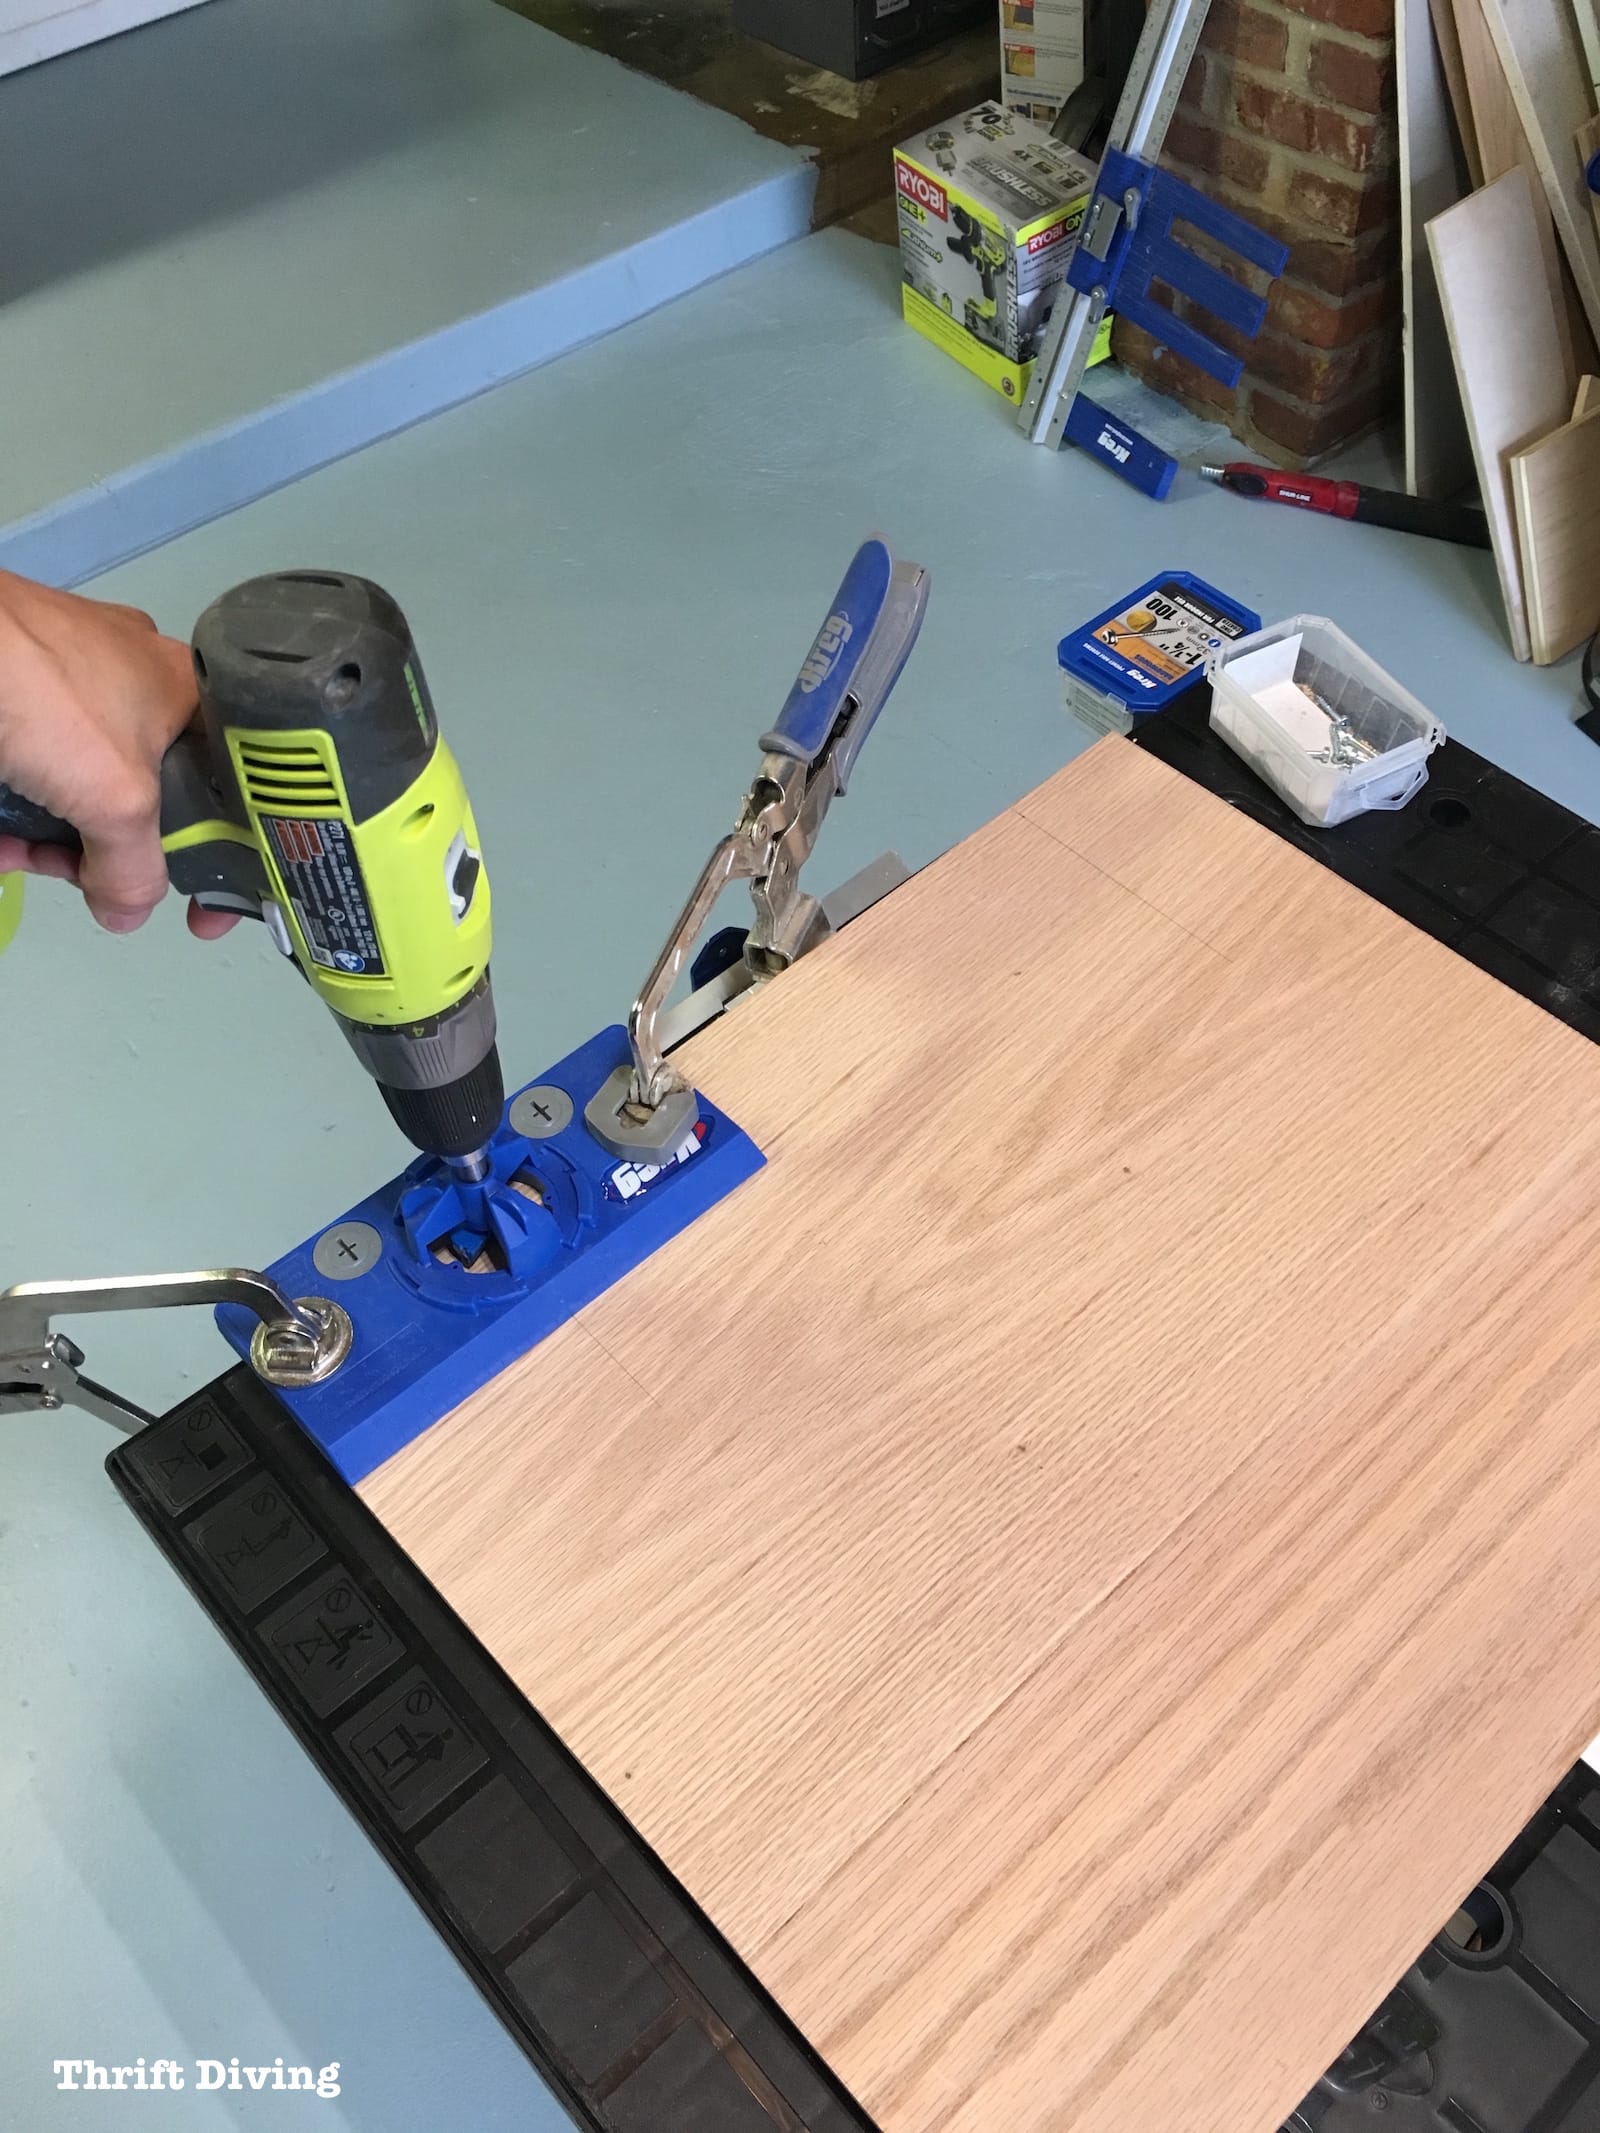
The only problem was that, because I had routed out so much of the board away at the edges, the router actually cut into area needed for the cabinet hardware. I was left with big holes! Oops!
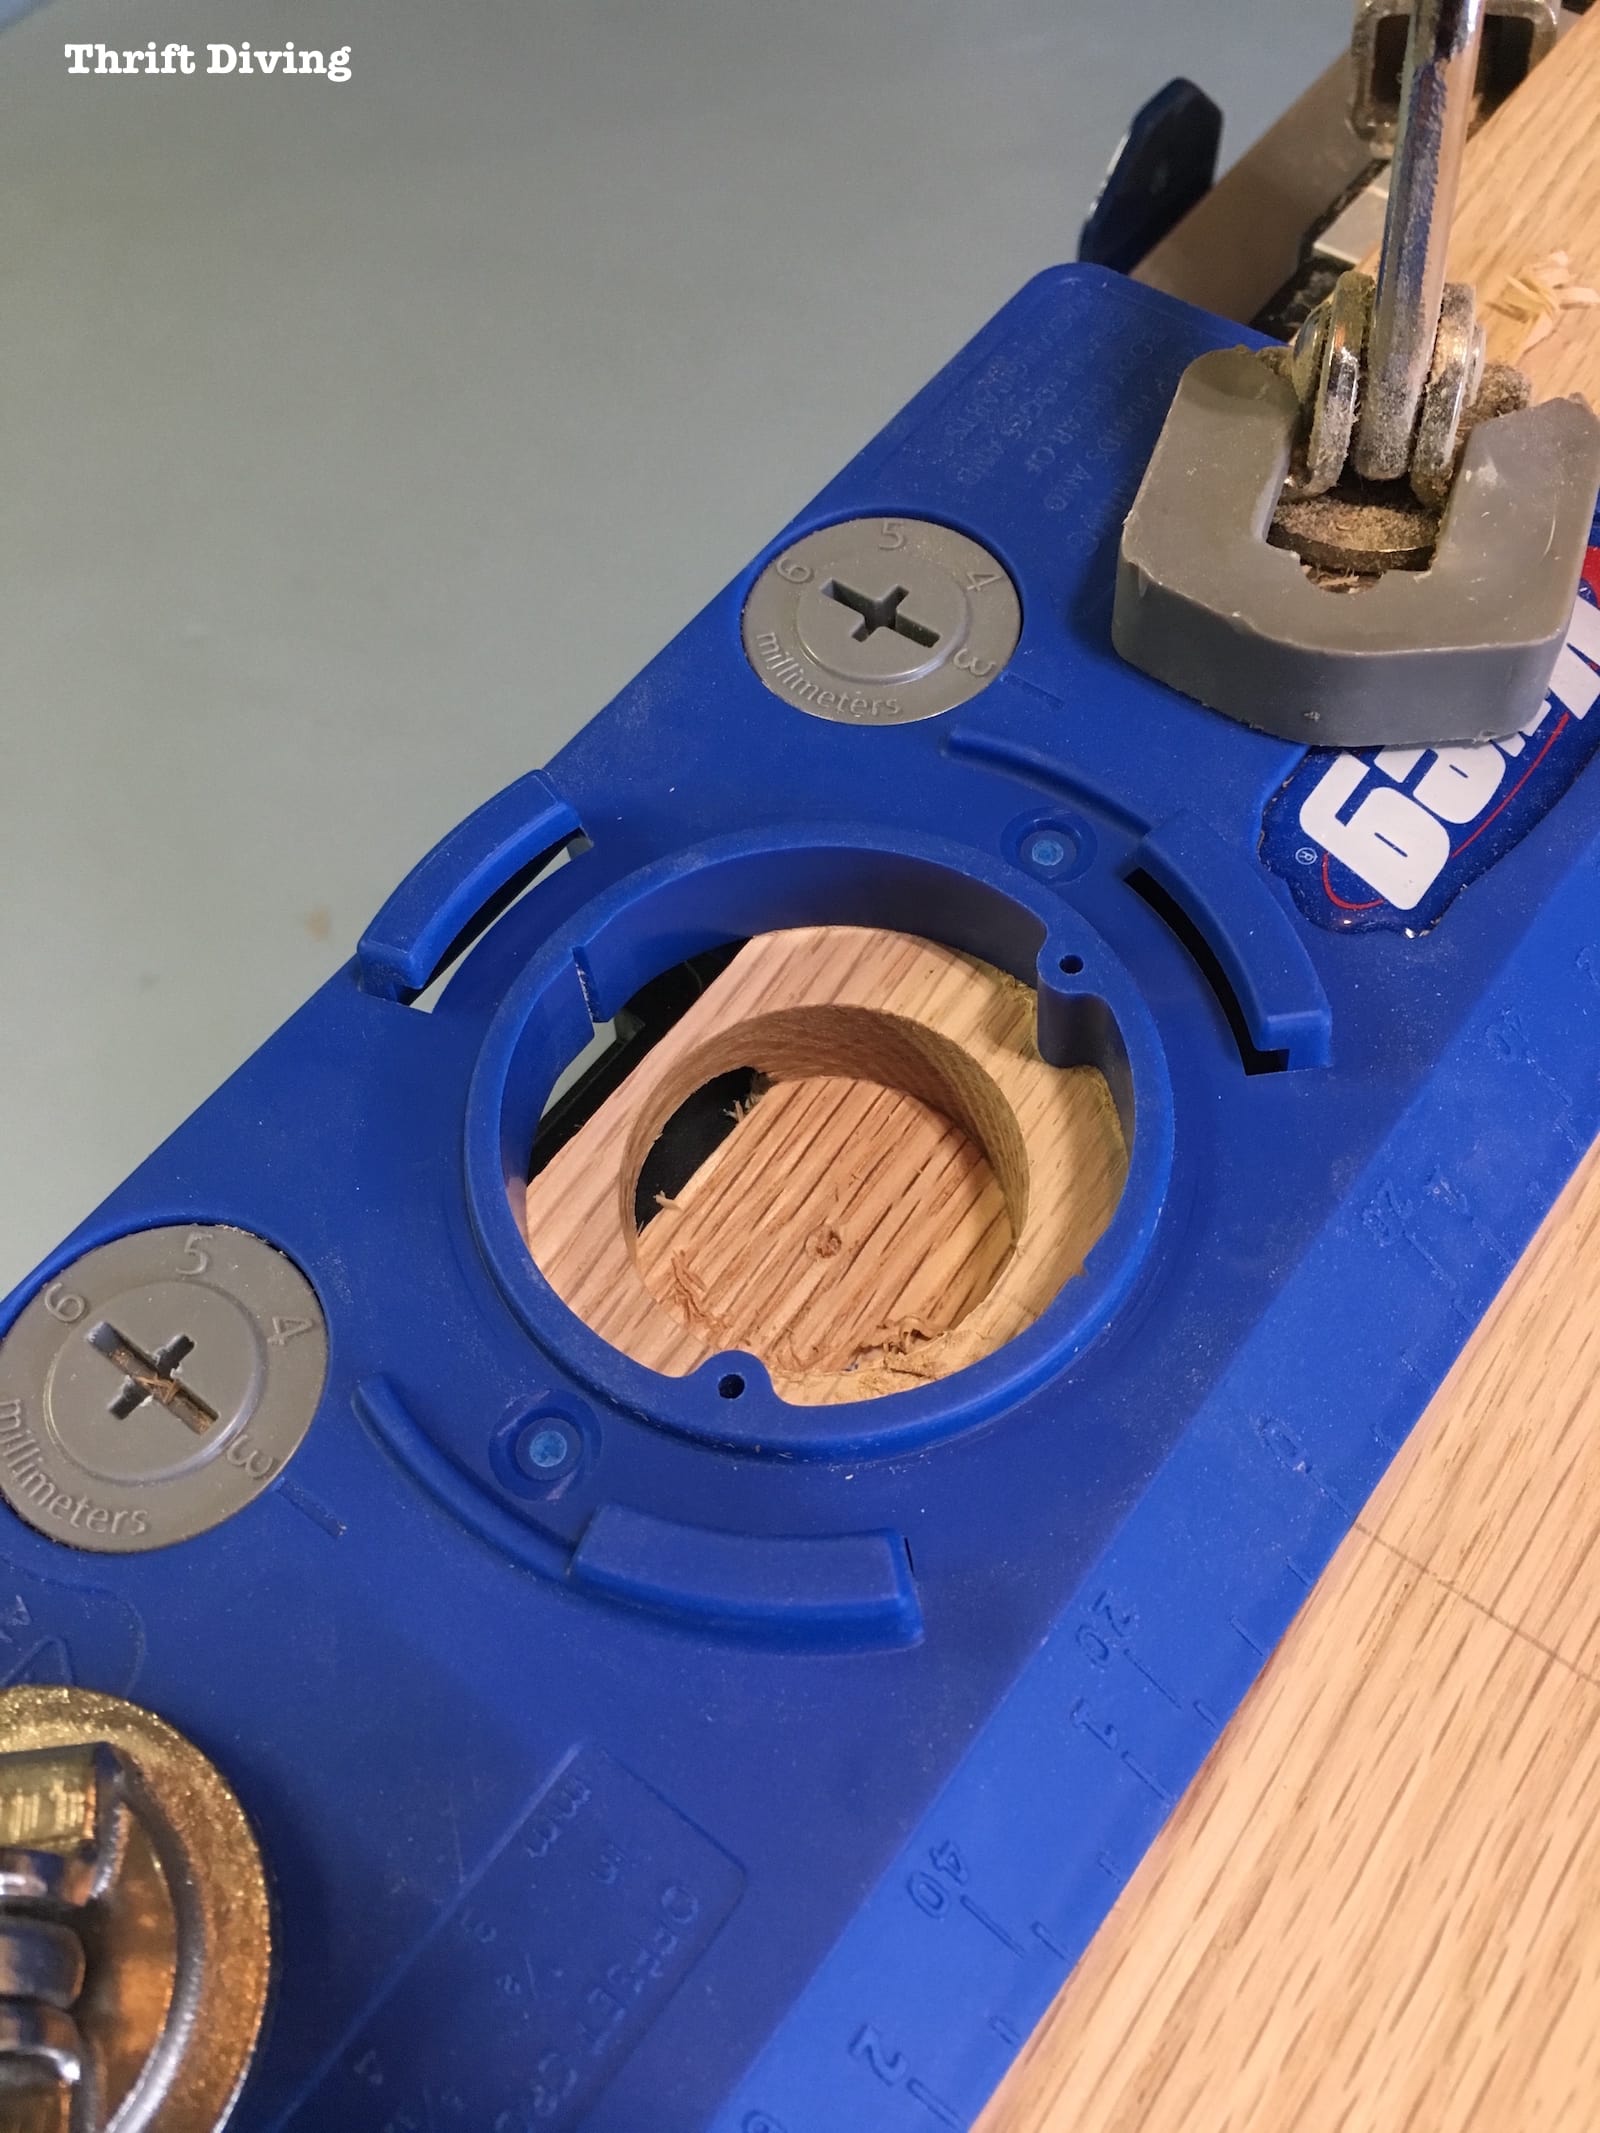
I ended up just filling the holes as best as I could instead of spending $50 on more wood to create new doors.
The best part is that it’s not really that noticeable! 🙂
SEE THE FULL TUTORIAL: Be sure to check out the full tutorial on how I made the cabinet doors and worked around the problems that came up: PART 5 – Making Cabinet Doors
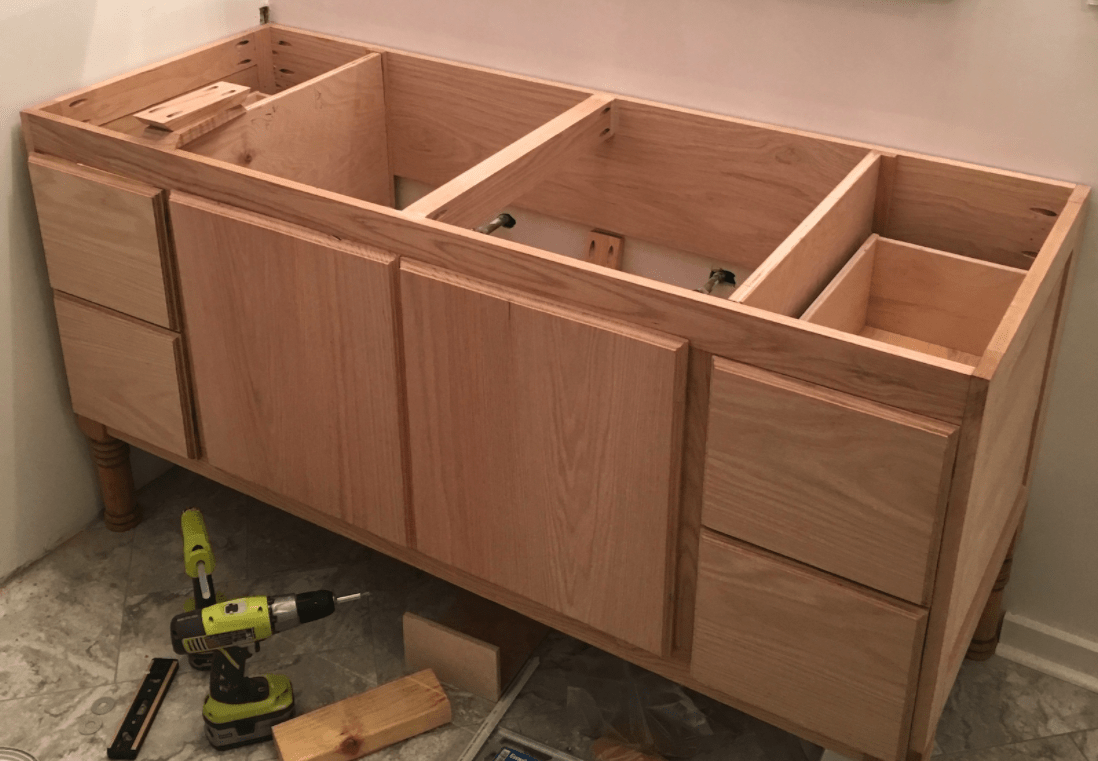
STEP 6: Fitting the Granite Top
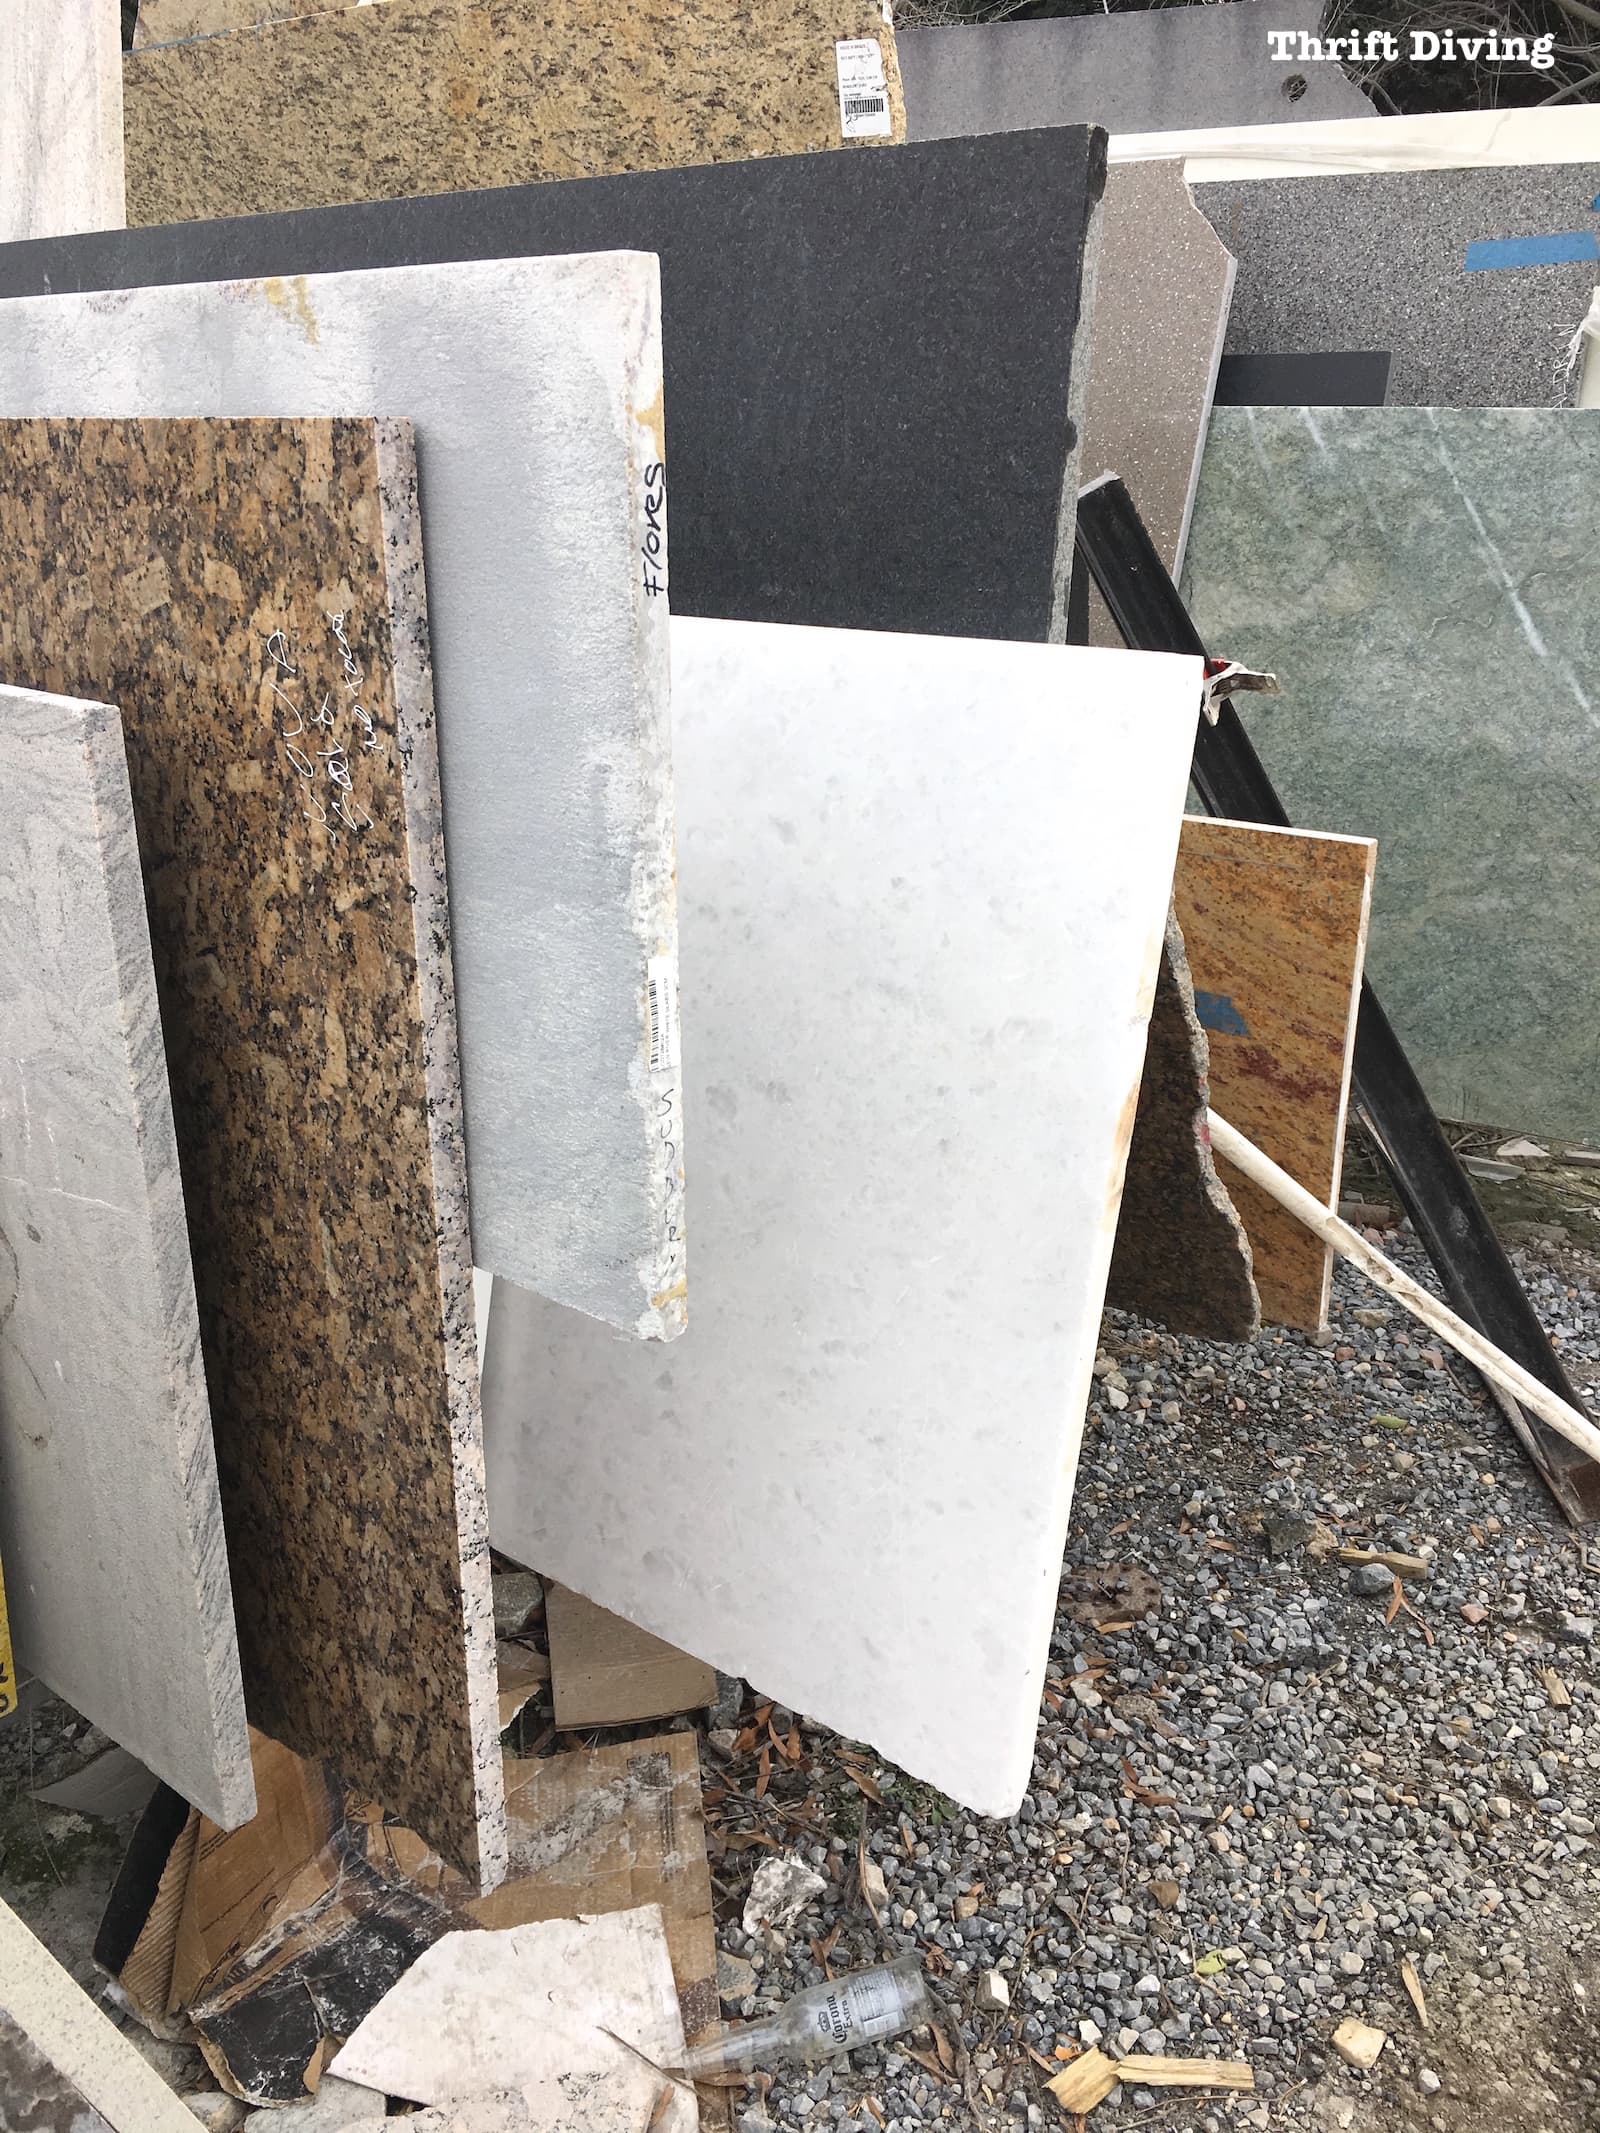
I’ve got an awesome contractor friend named Edmundo that helps me out with things here and there.
He was the one who provided the granite top, and, came over to help put it on!
With the body built, had to figure out the color of granite I wanted.
Since Edmundo specializes in granite, he had connections. I got to go pick out a piece of granite, and I chose that pretty white one.
There were a lot of little adjustments that needed to be made to the vanity in order for it to fit properly, including cutting down the partitions so that the sinks could fit!
I knew we’d have to make these adjustments, but I didn’t realize we would need to cut an additional 5″ down!
It would have helped to have measured first before building, huh? That’s what naivety will get you. LOL
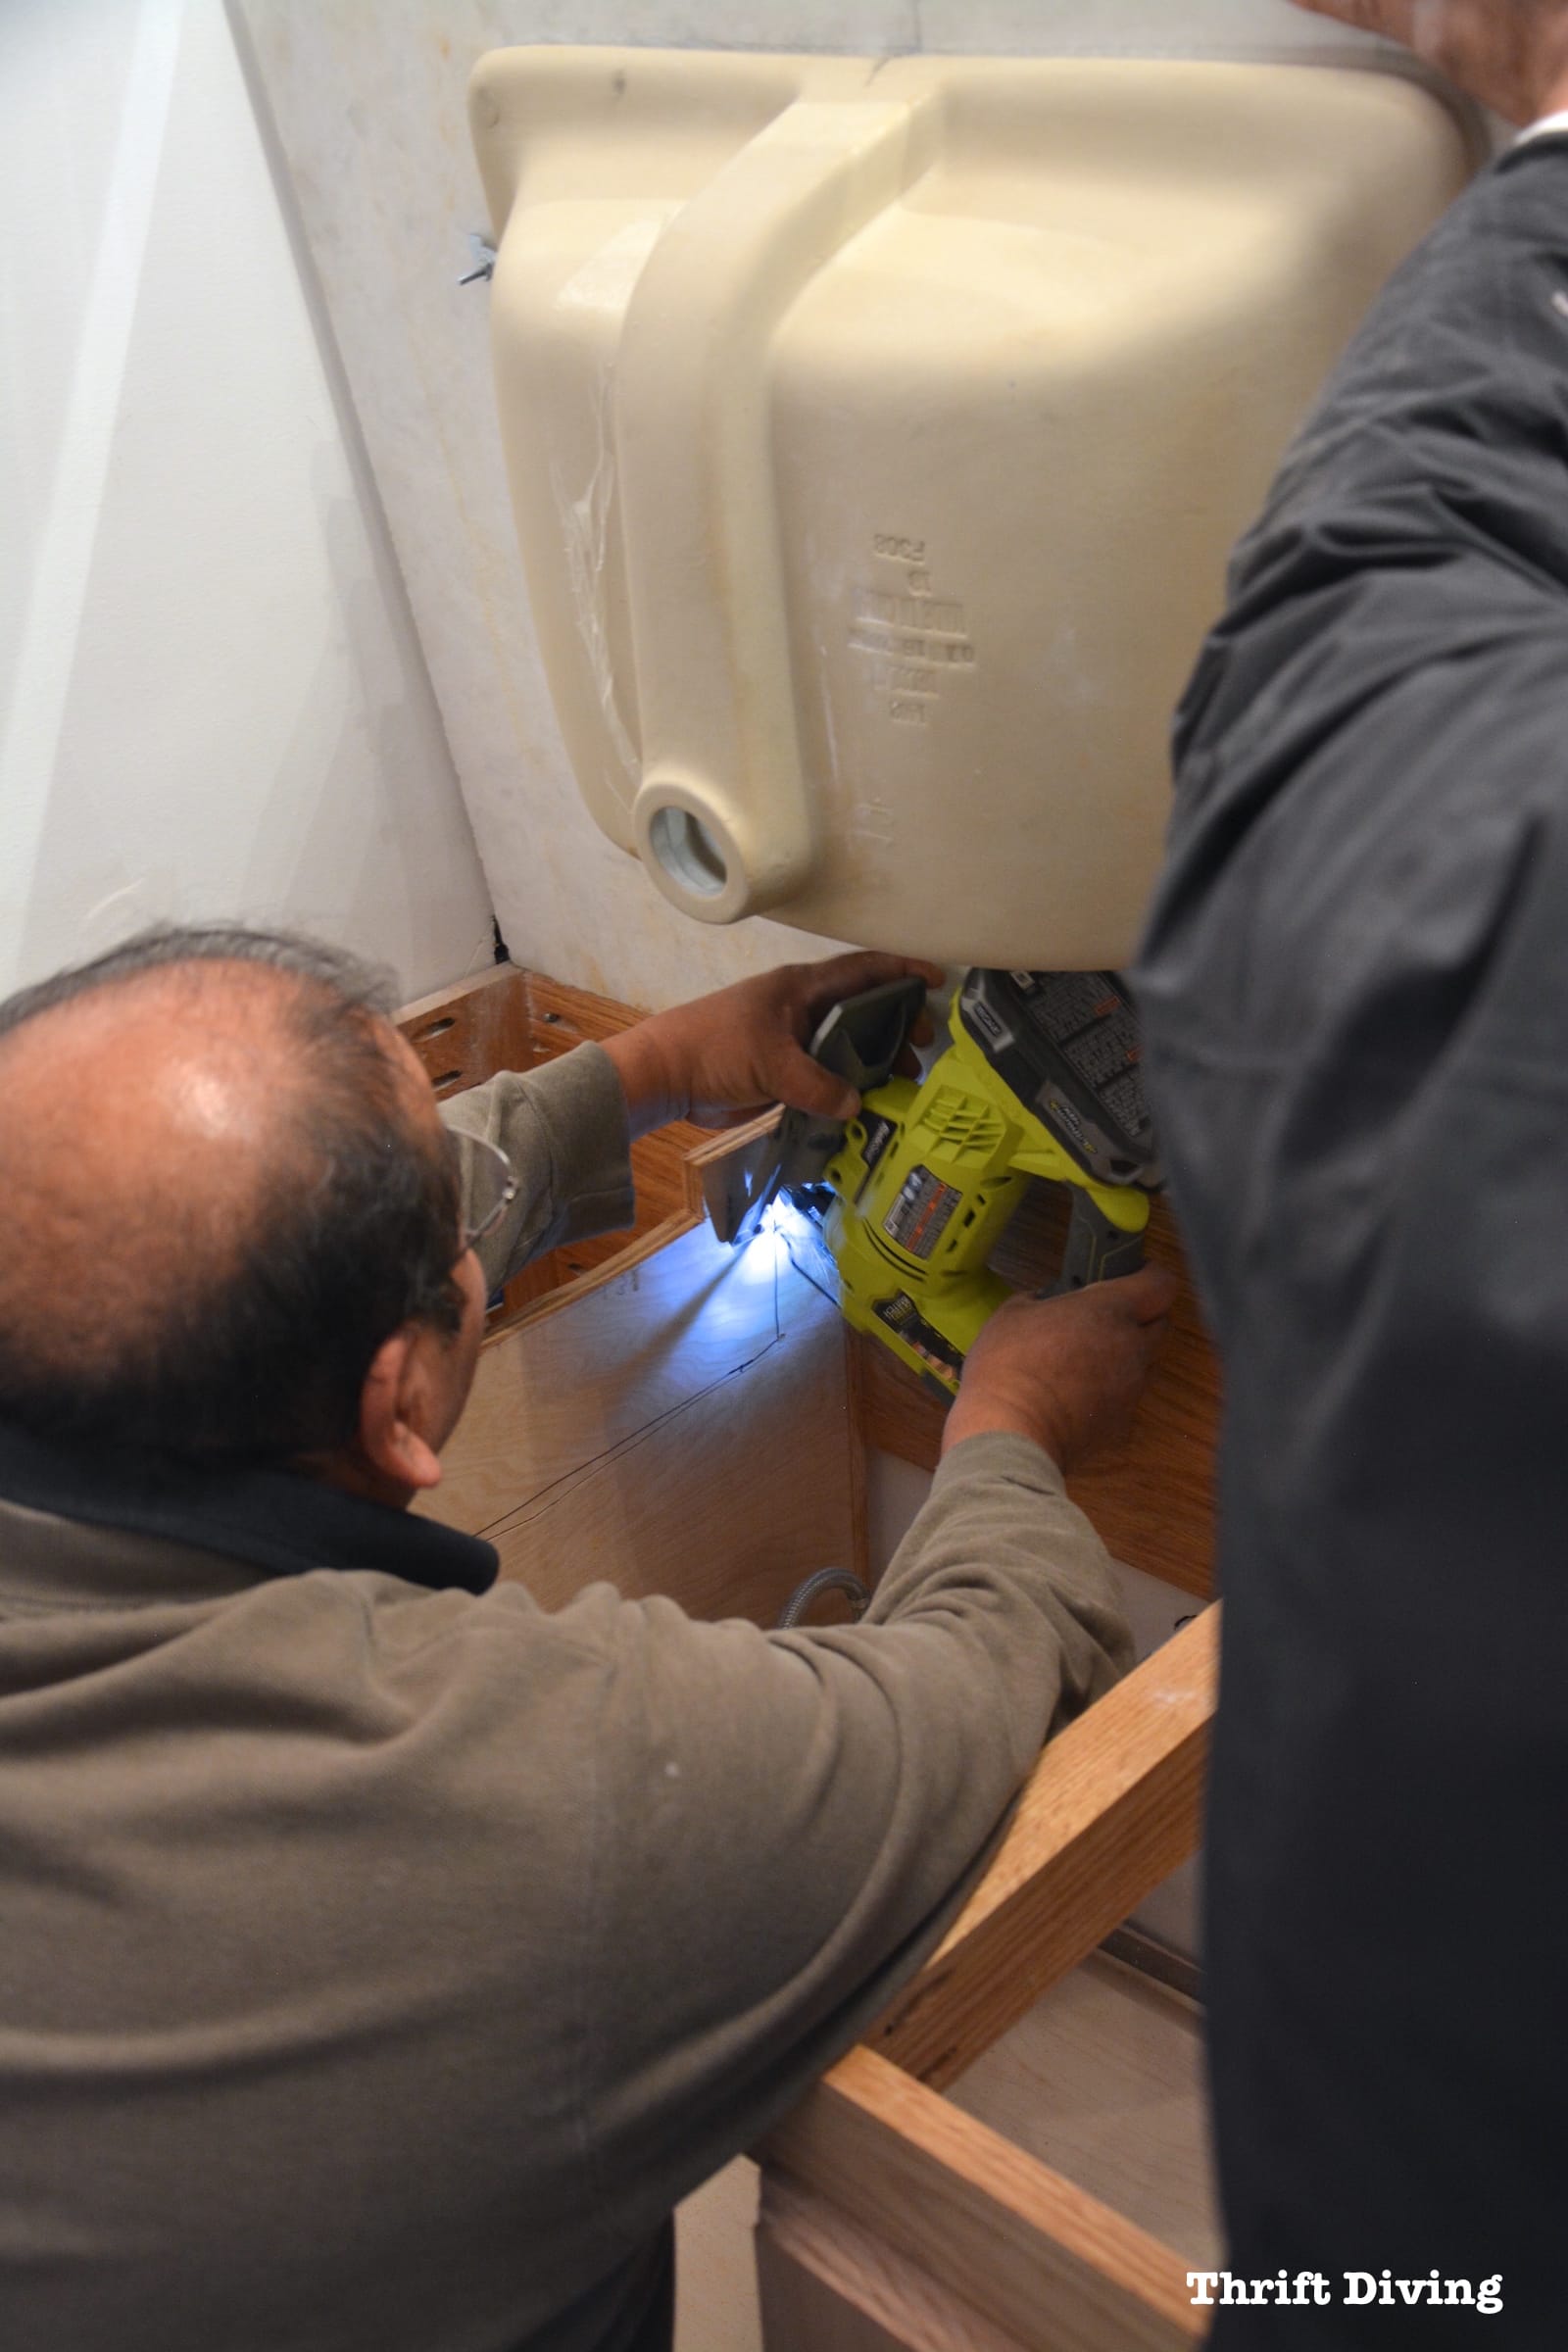
I also had to shave down the top drawers to accommodate the new sinks because the top drawers would fit back in smoothly! LOL
SEE THE FULL TUTORIAL: Want to know more about the fitting the granite top and the problems we needed to work through to get the top to fit? Check out: PART 6: Fitting the Granite Vanity Top.
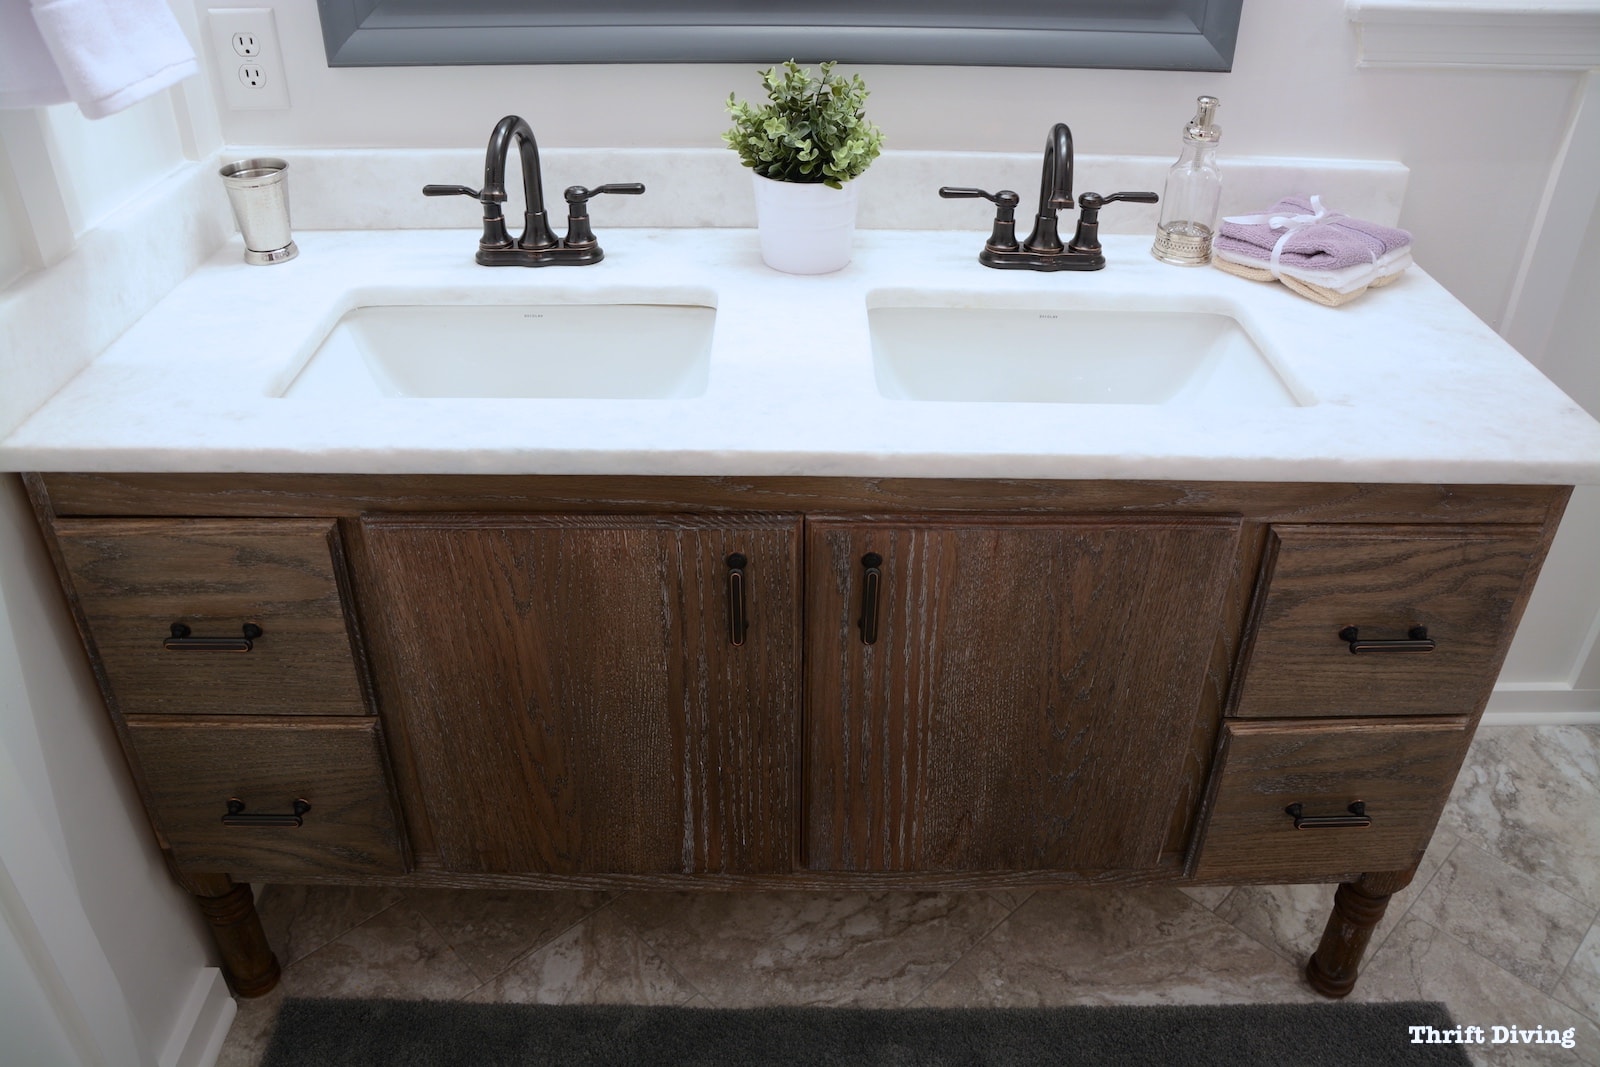
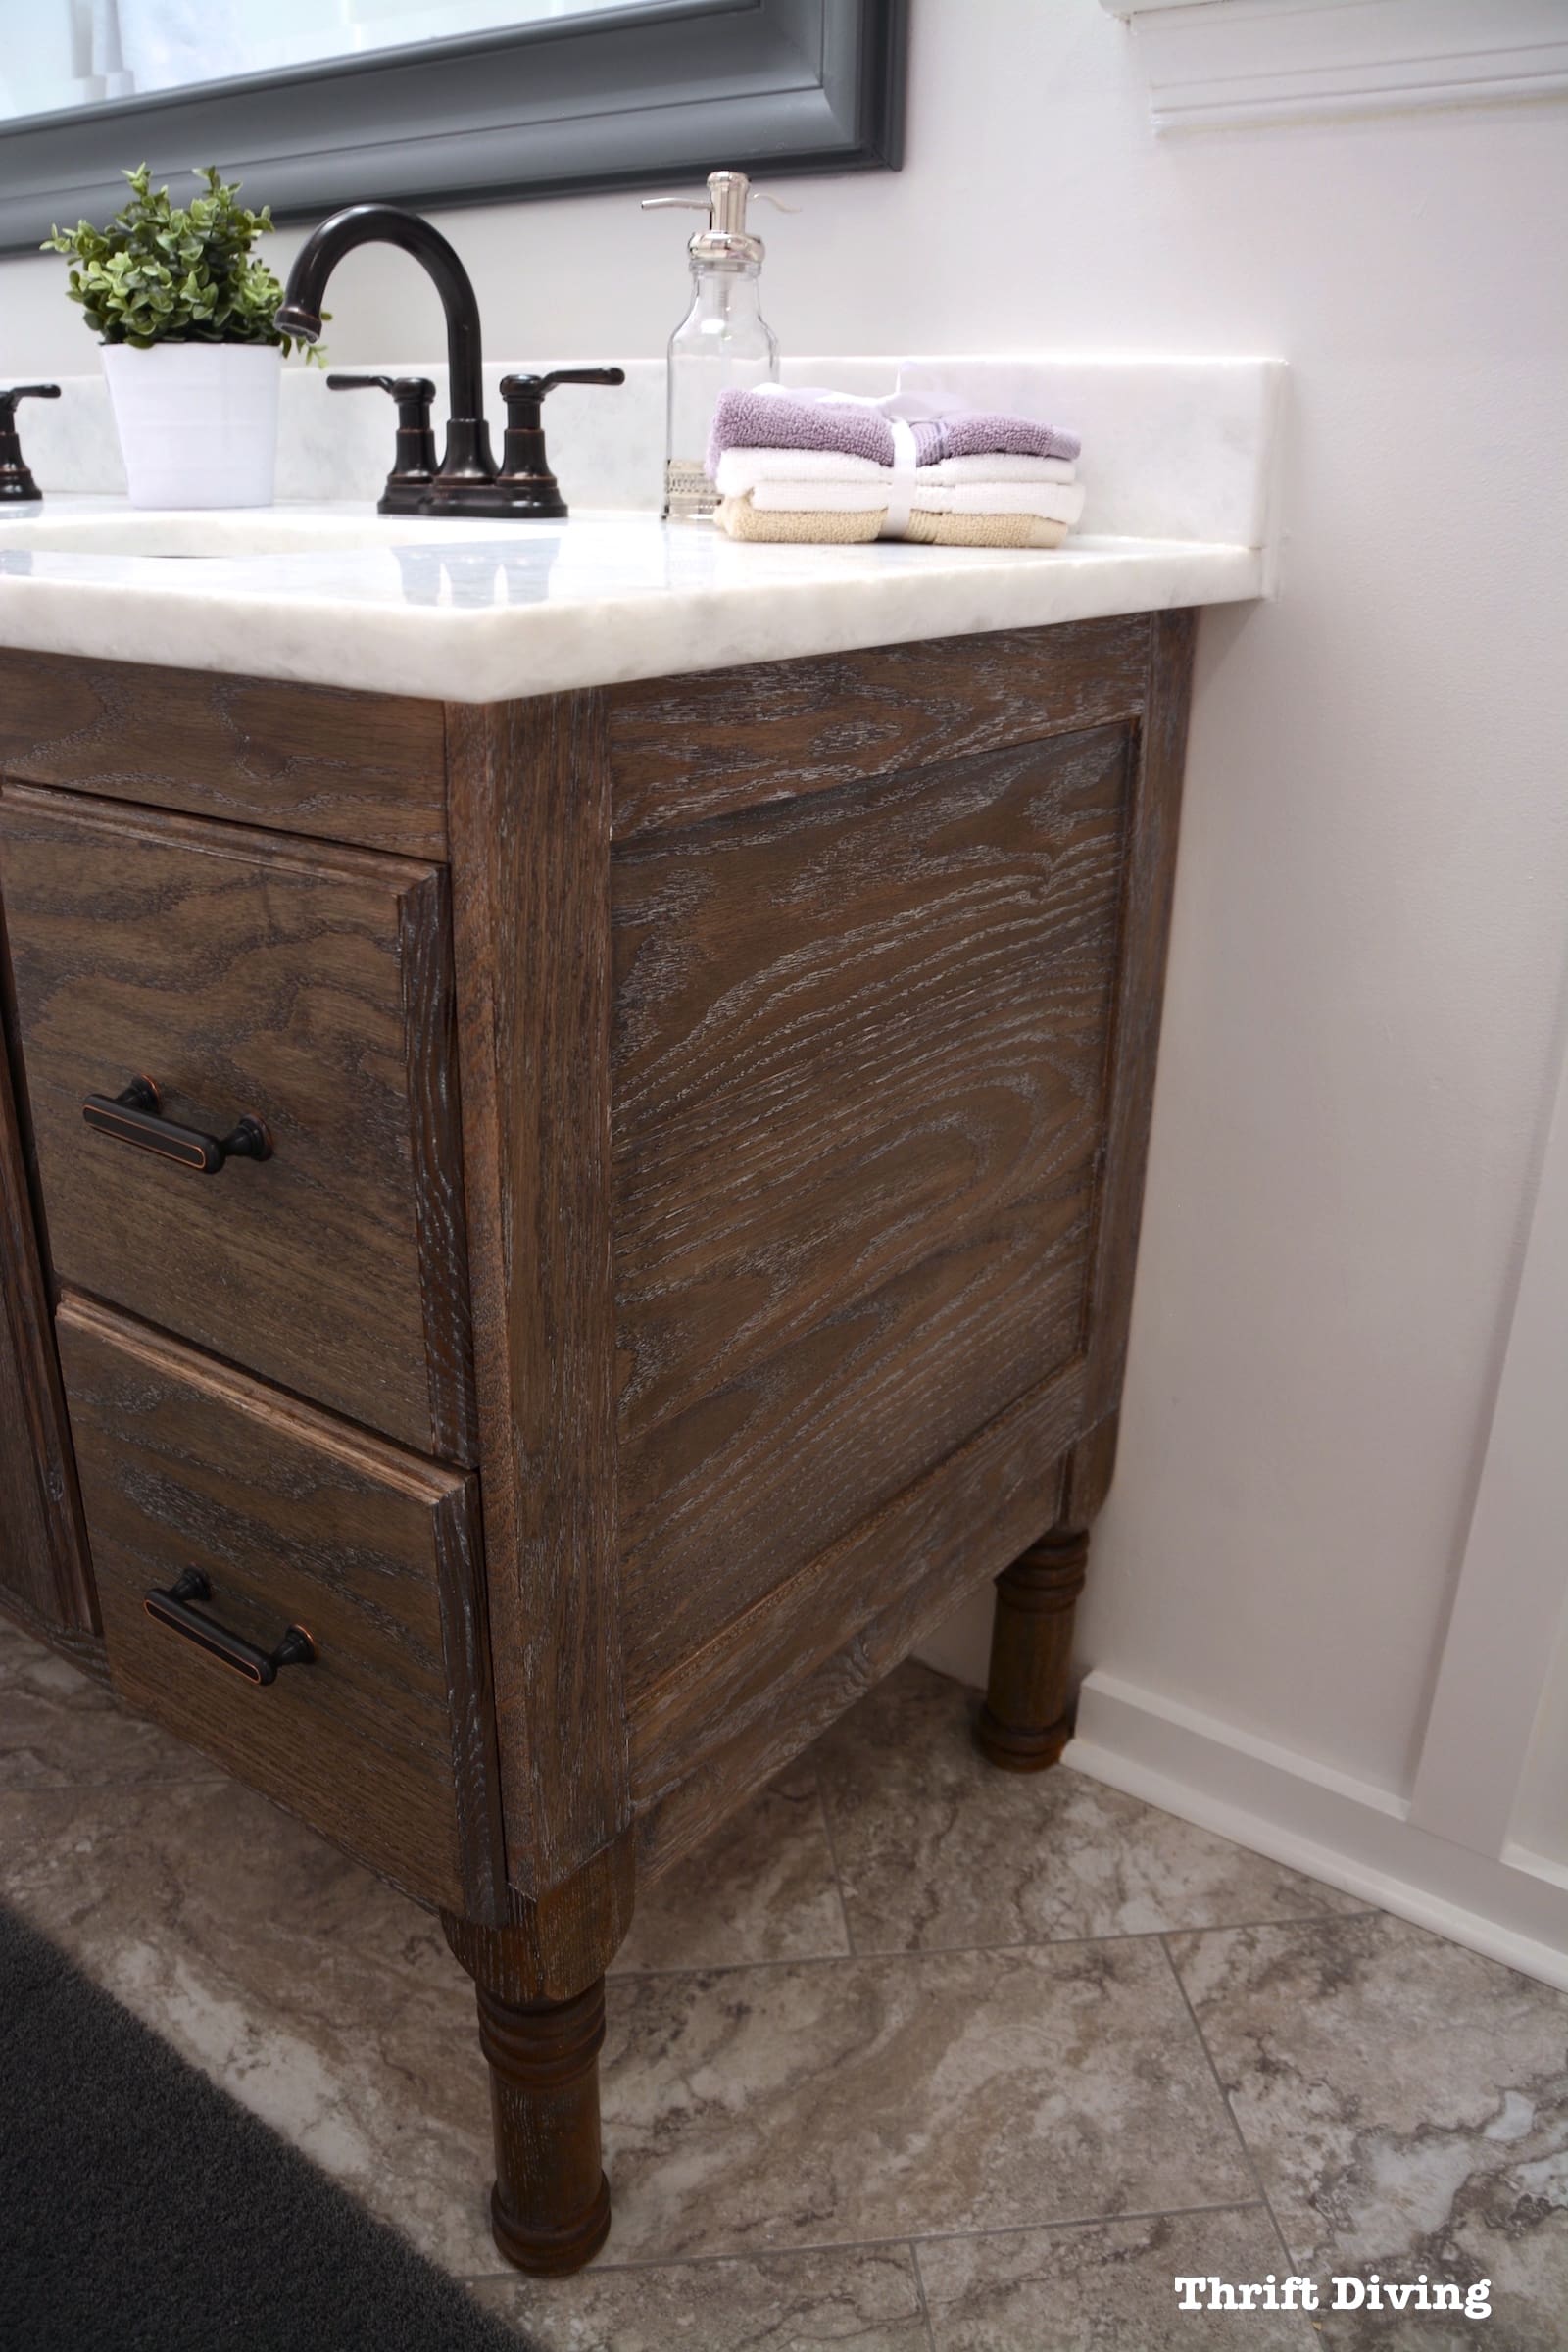
STEP 7: Finishing the Vanity
I’ve heard two woodworkers already tell me this wise advice:
For as long as it takes you to build something, you should spend the same amount of time finishing it.
That definitely was the case with this vanity!
After it was all built and the top was on, it took me weeks to figure out how to finish it!
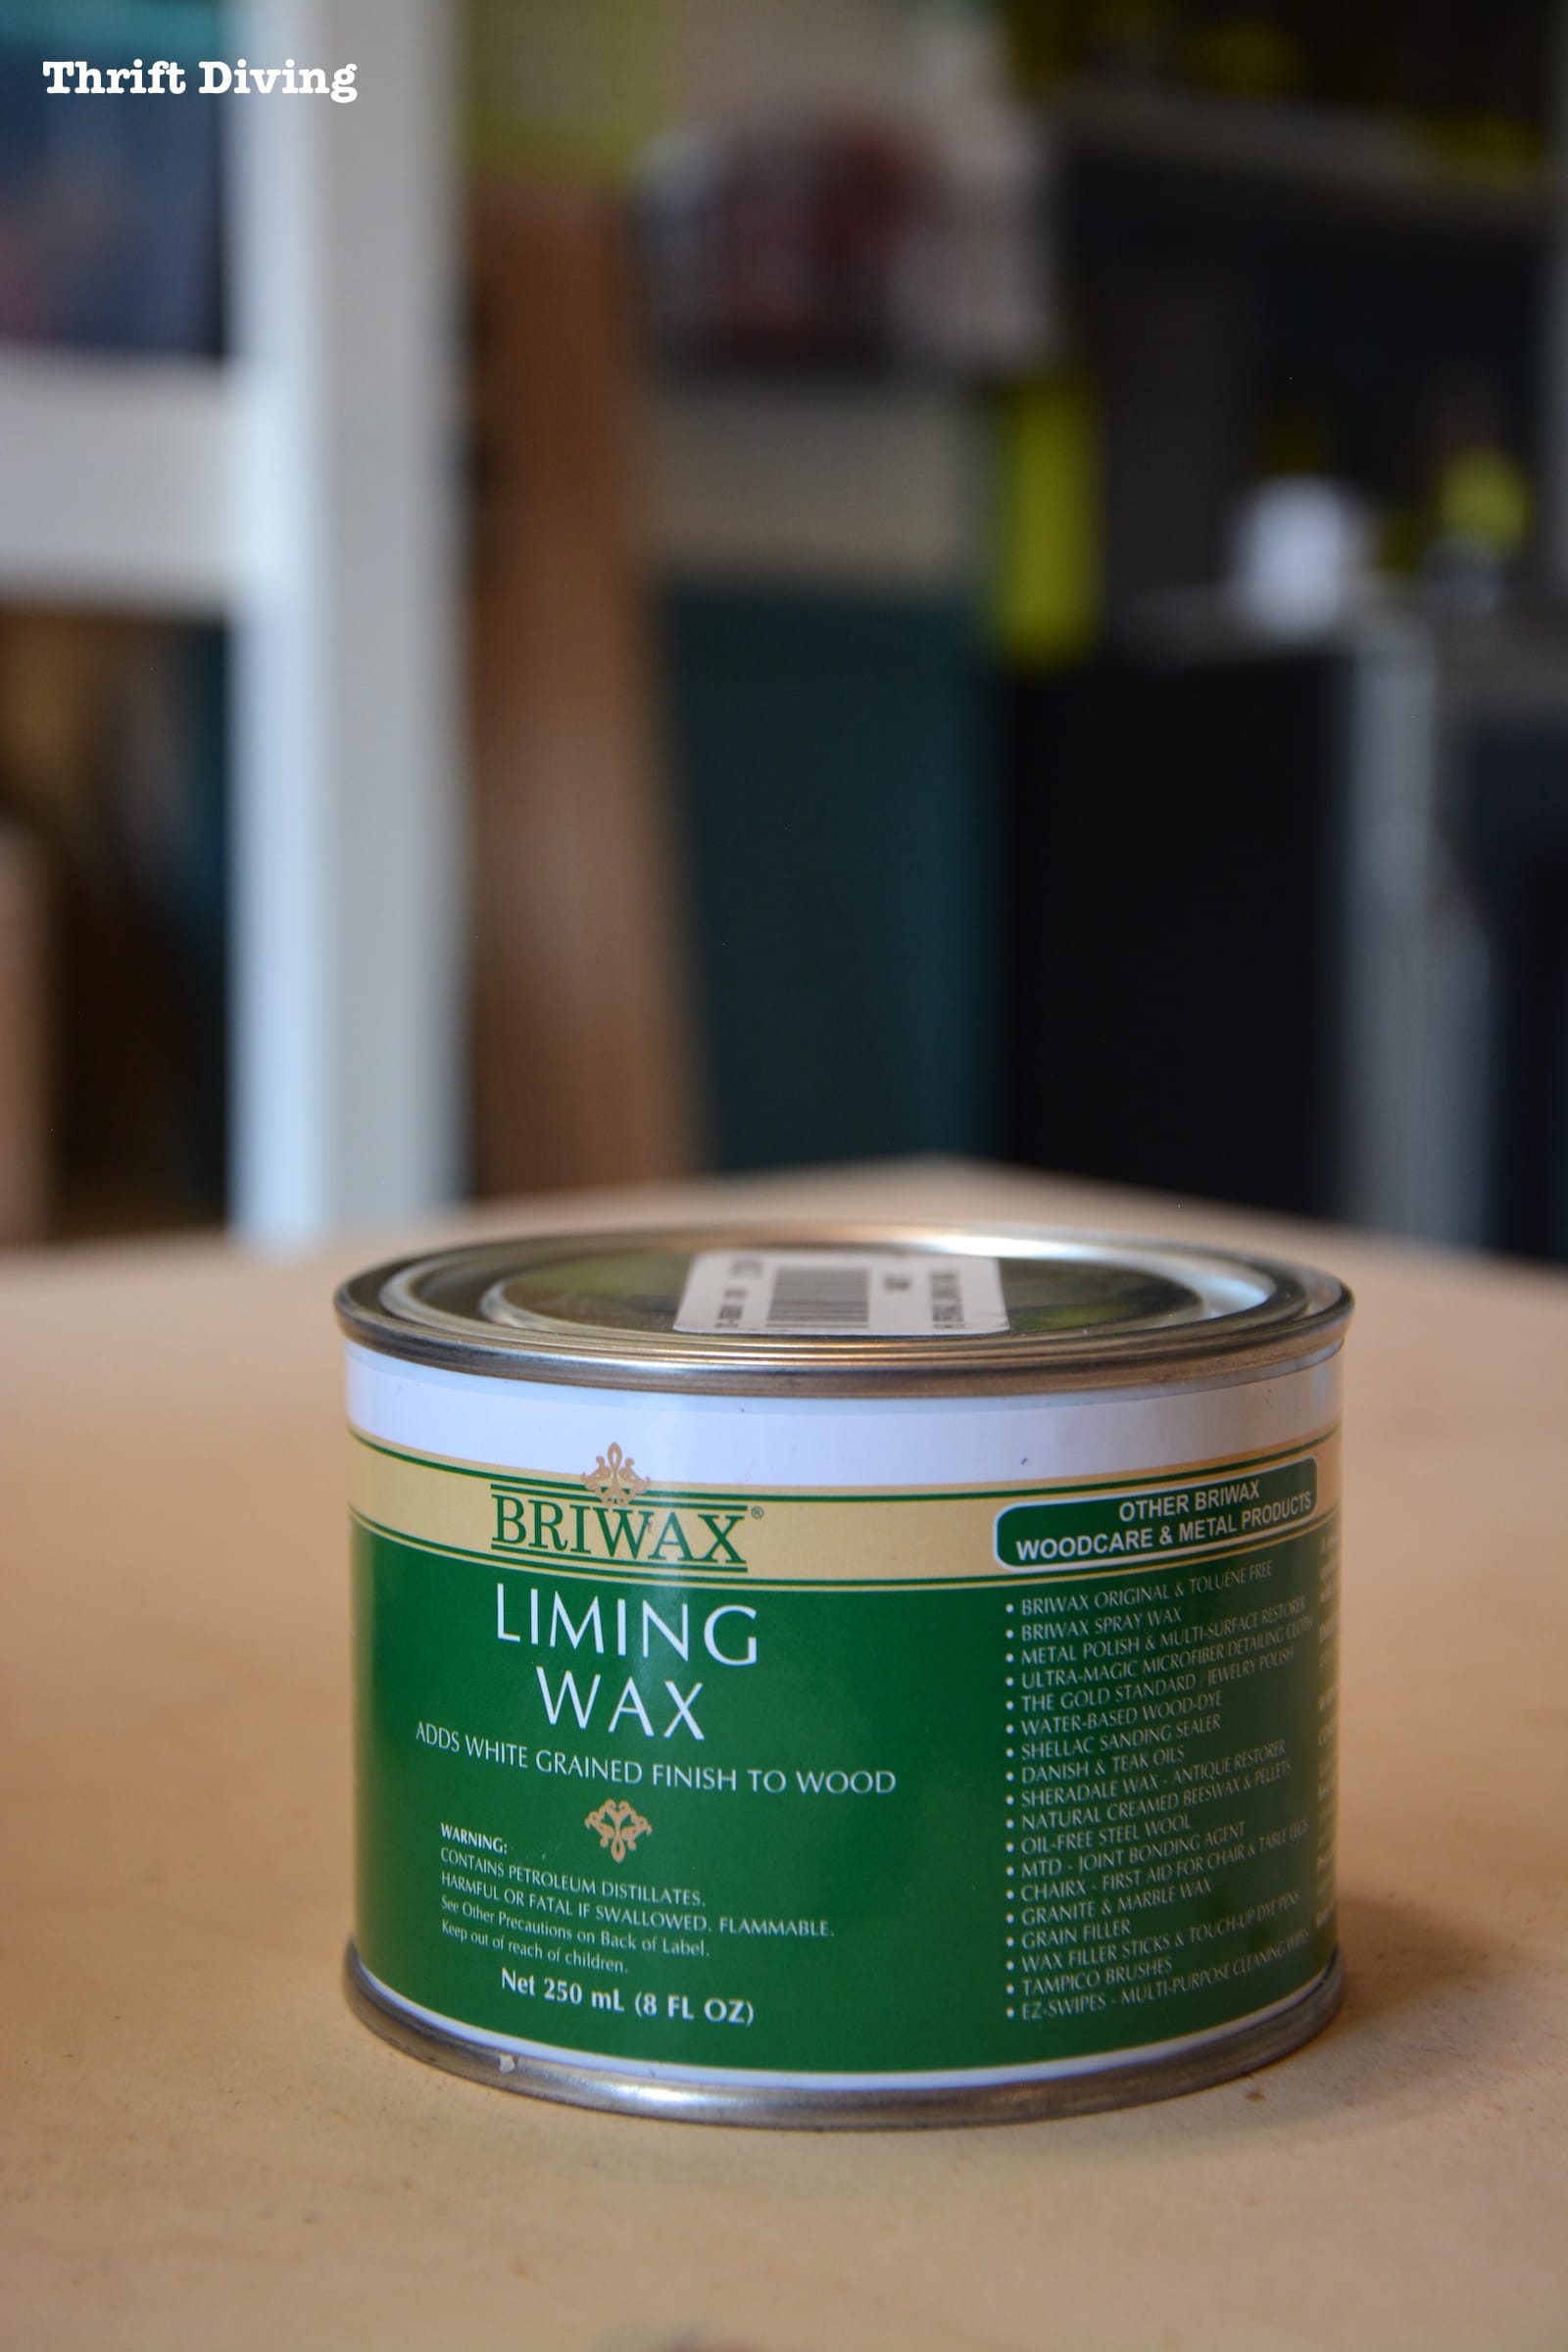
I wanted a cerused oak vanity, where the grain is highlighted in white.
I did a bunch of test boards, but couldn’t come up with the right look until I made these sample boards, which I fell in love with! (See my post: How to Dye Wood and Use Liming Wax to Finish Oak for the tutorial).
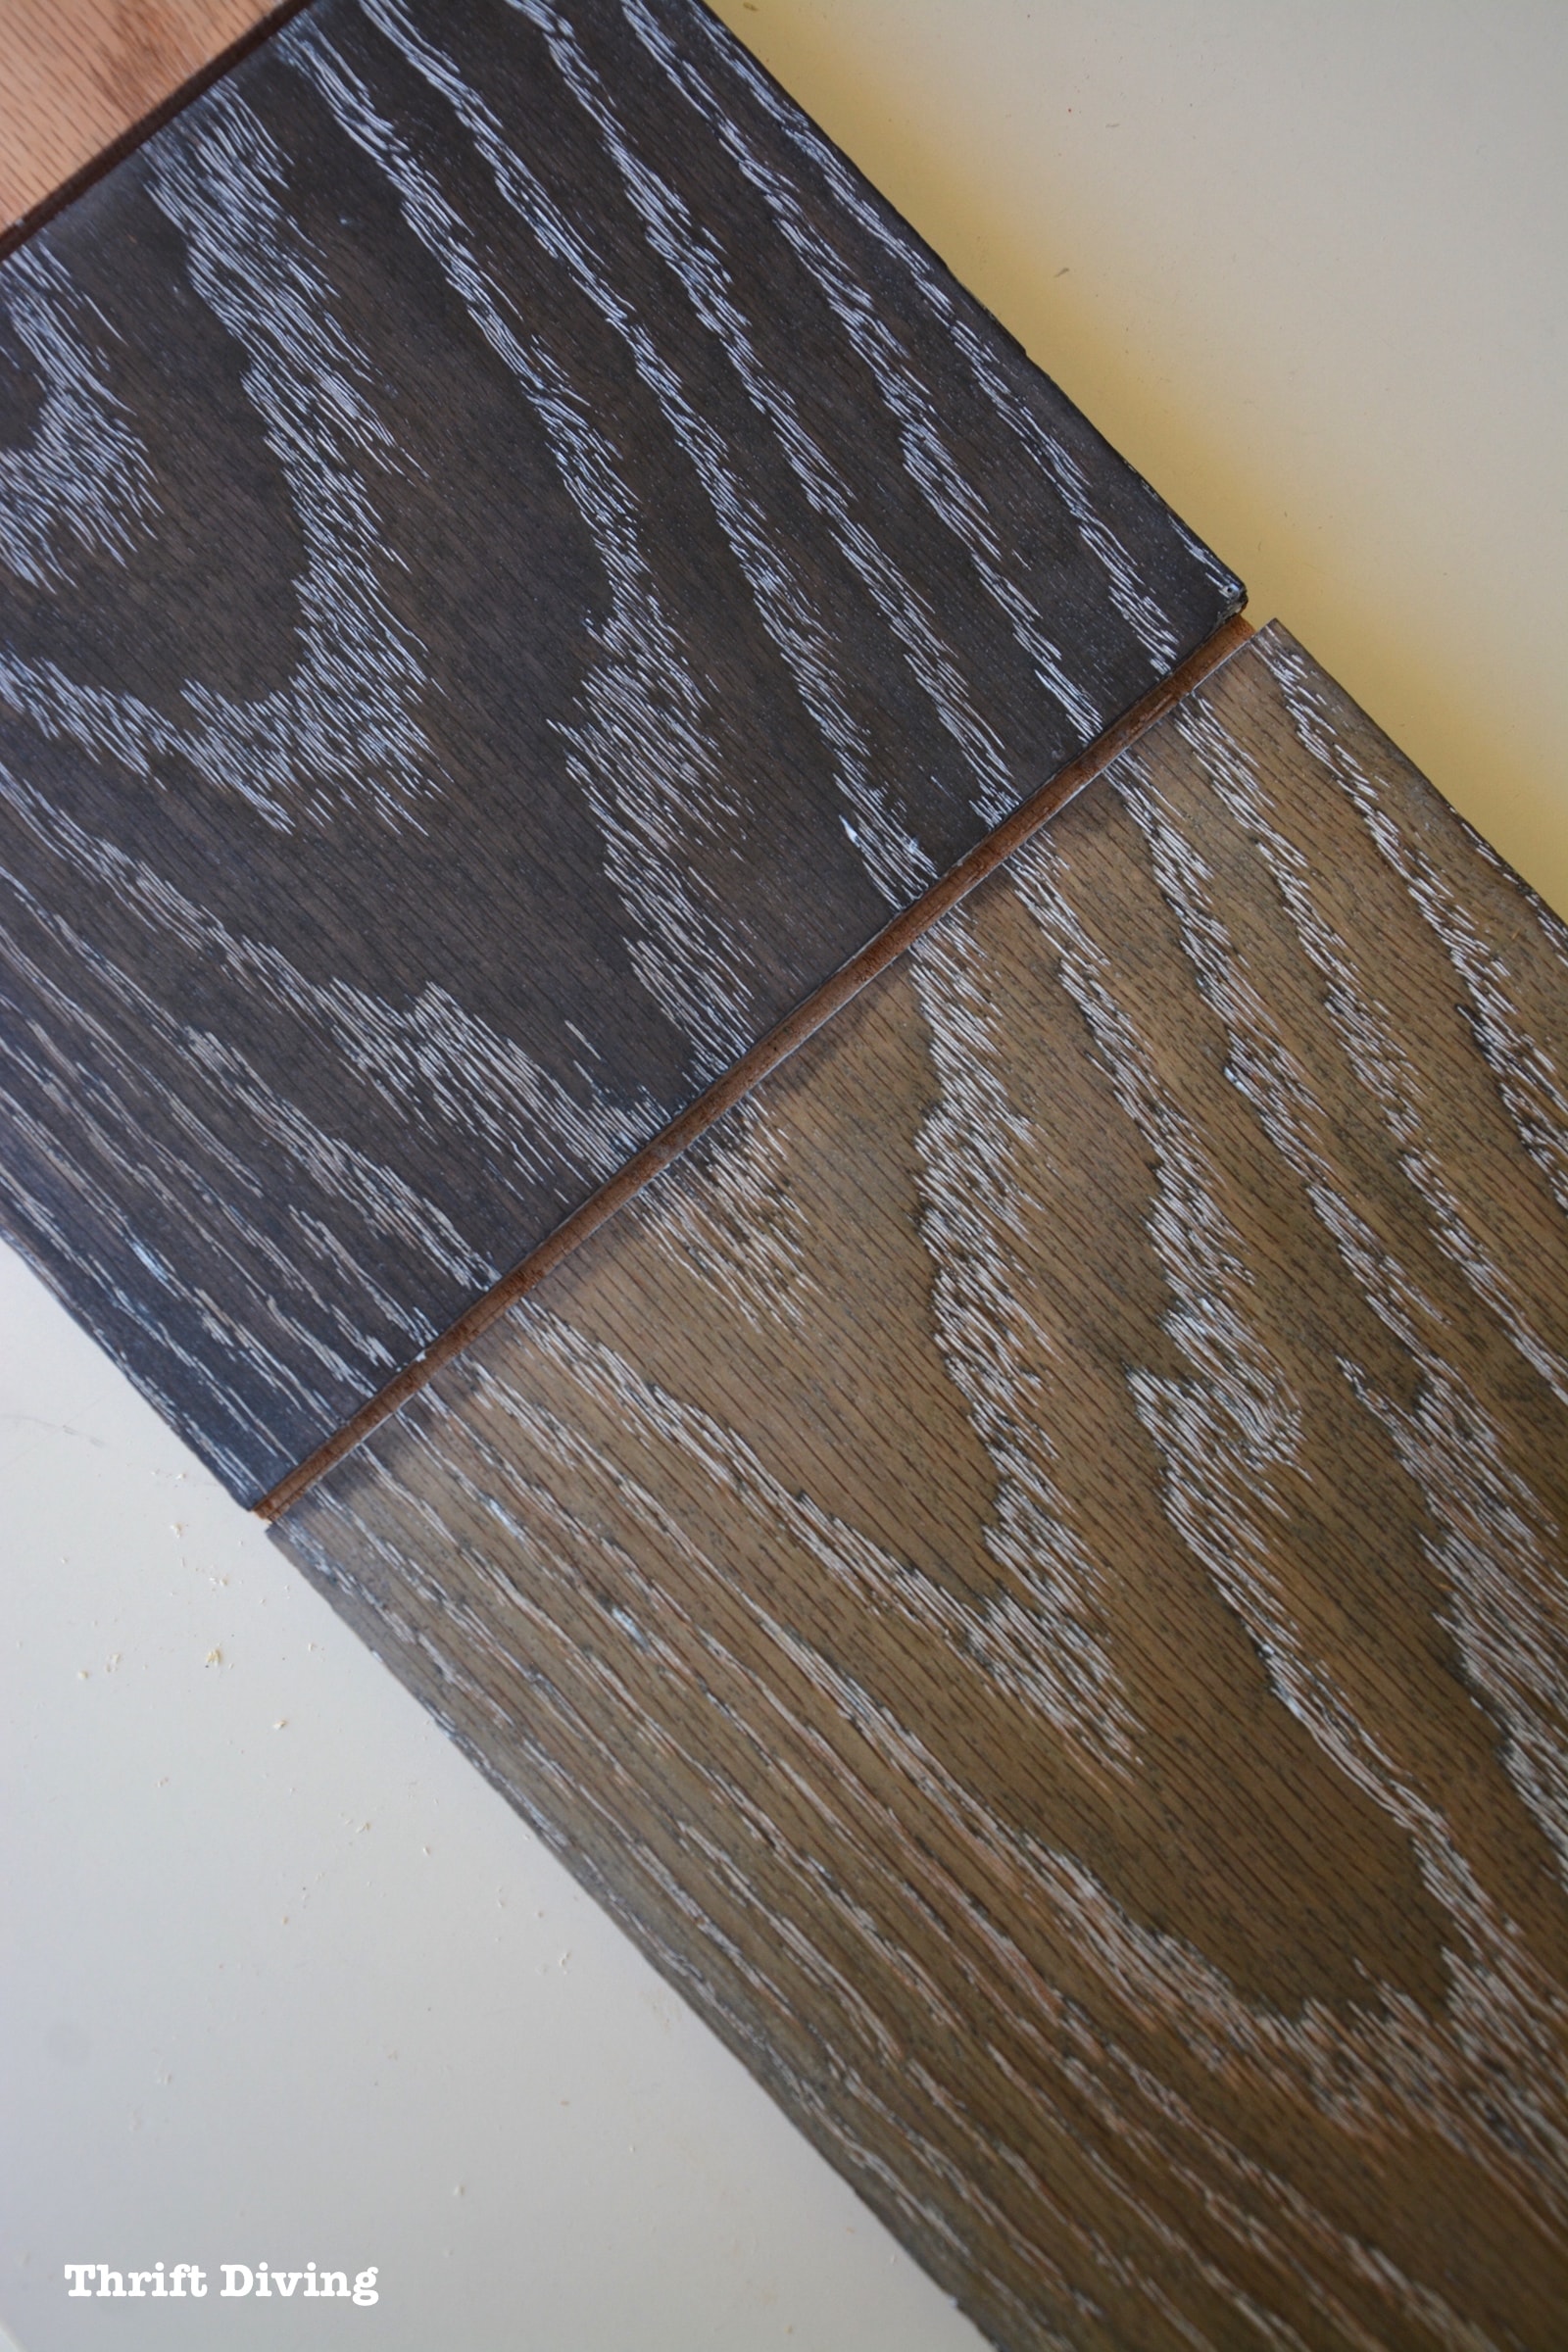
So I mixed up some wood dye and applied it all over the vanity, starting with the backs of the cabinet doors and drawer fronts so that if I made a mistake, I wouldn’t have ruined anything.
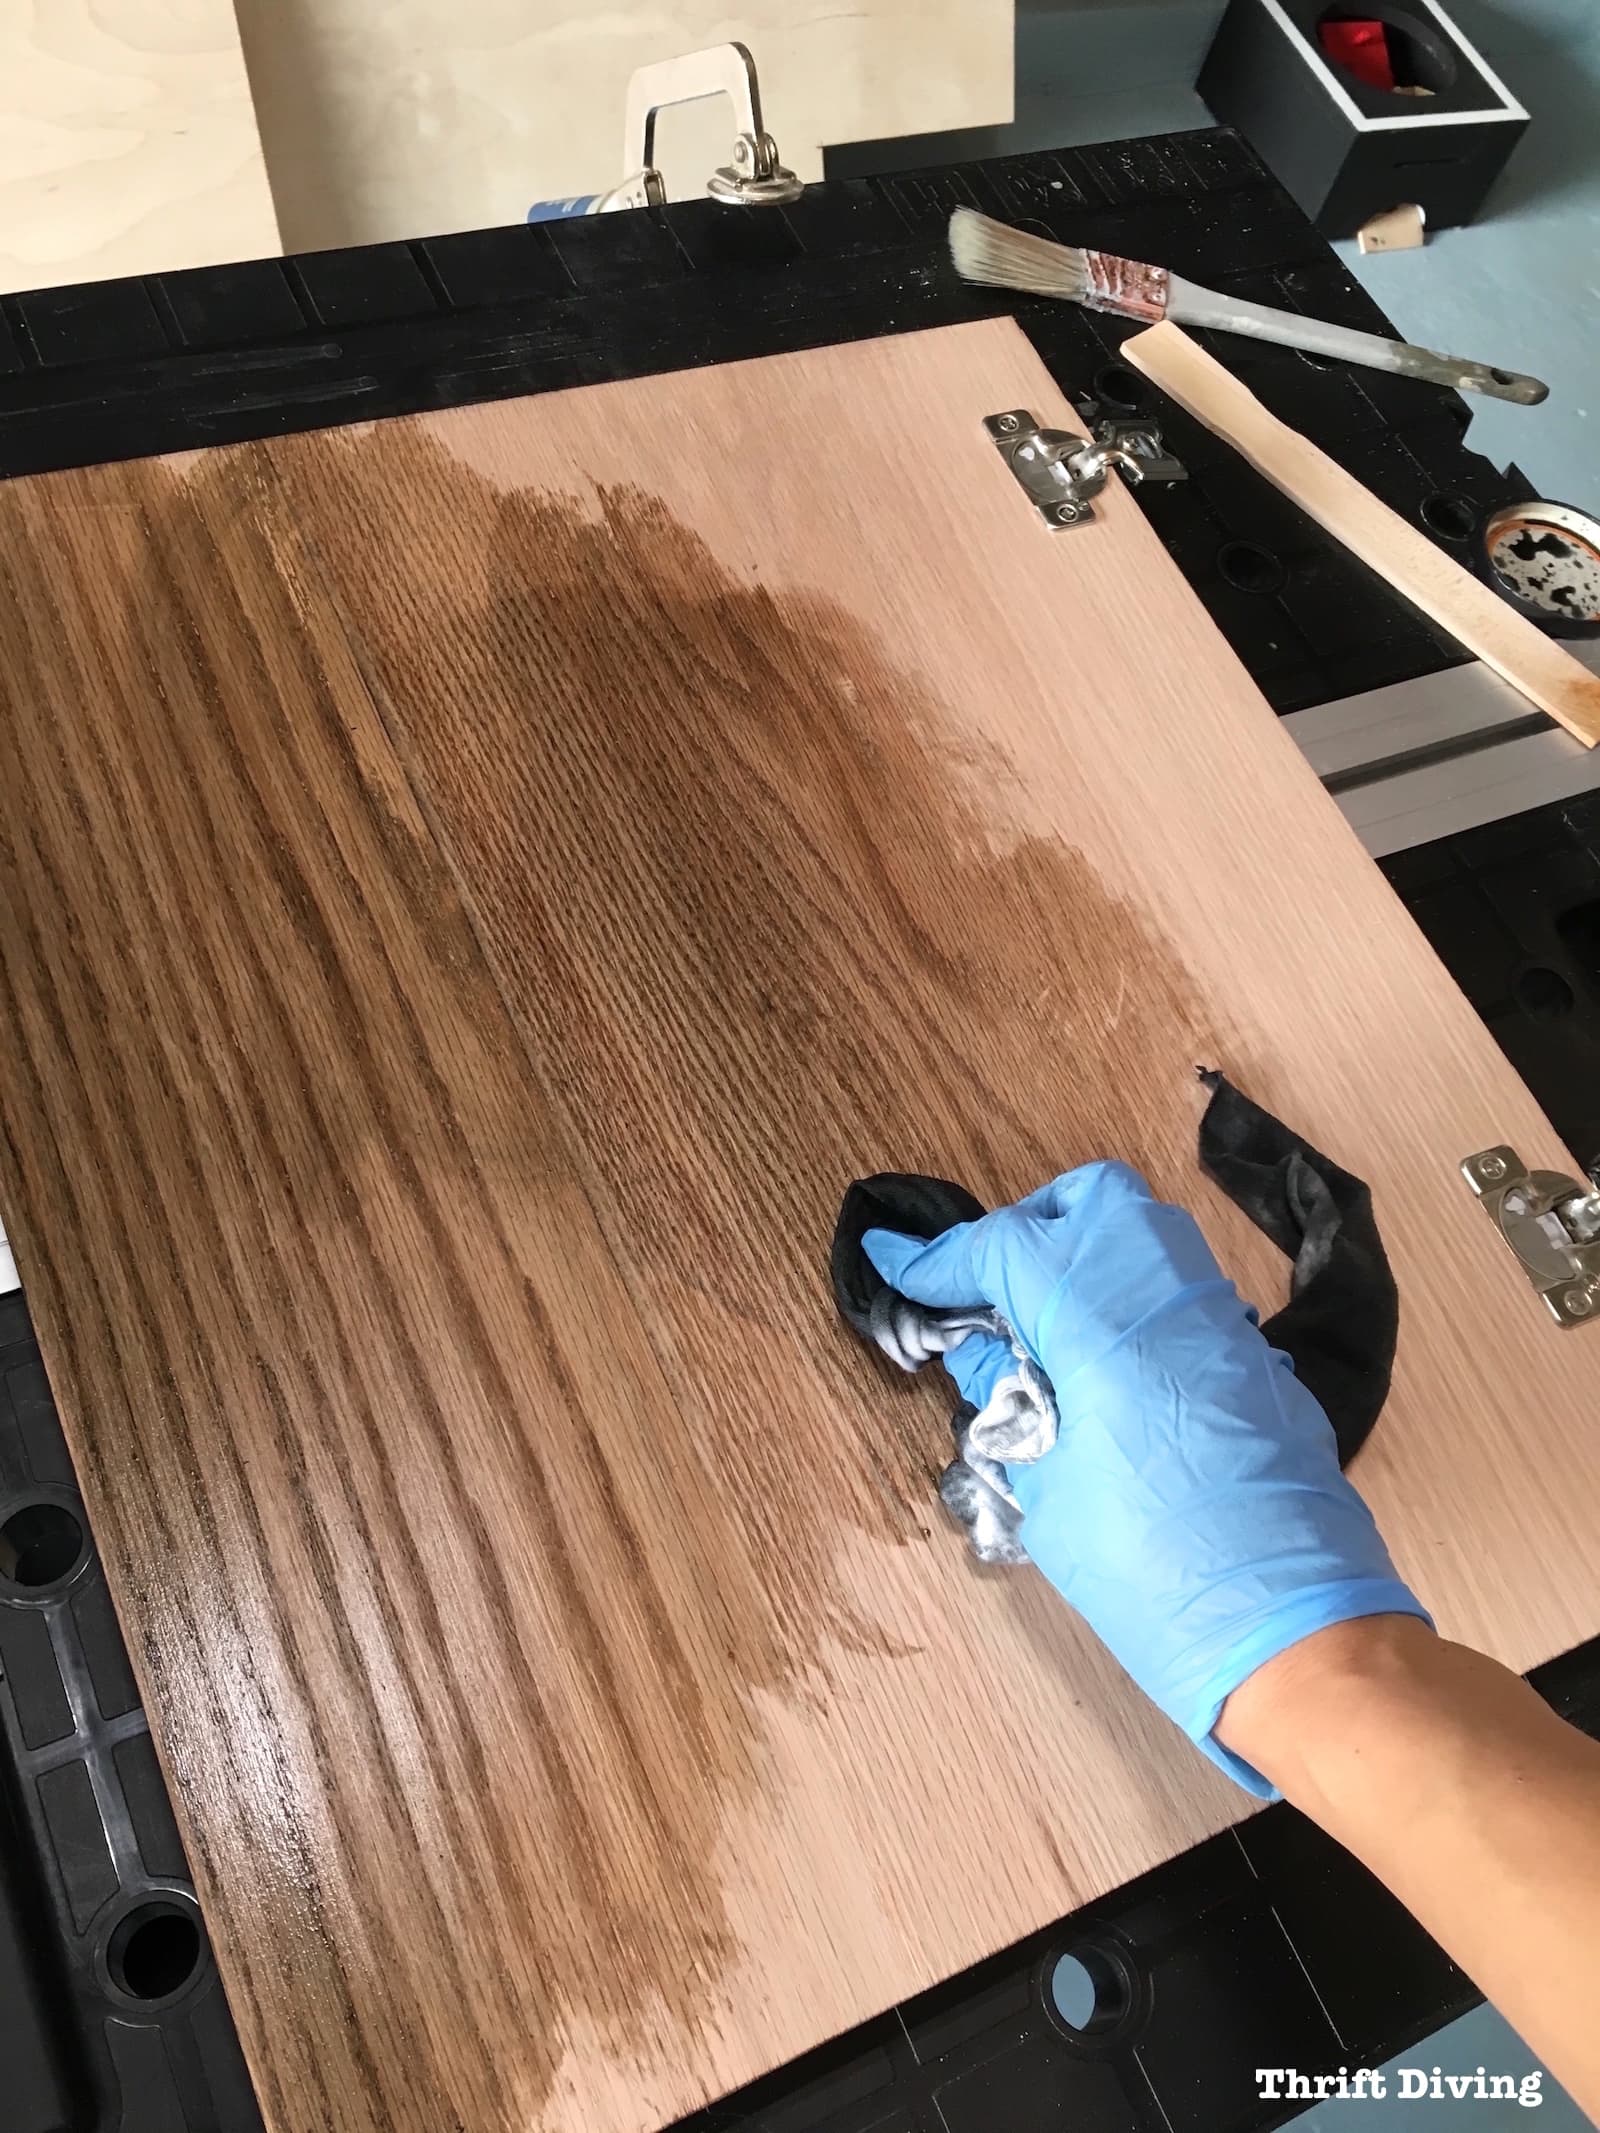
I was absolutely in love with the way the liming wax settled into the oak grain!

To create the look, I used Briwax liming wax, which reminds me very much of the old-school Noxema I used to use as a teenager! 🙂
SEE THE FULL TUTORIAL: If you’d like to see each step for creating a highlighted grain with wood dye and liming wax, be sure to check out my post: PART 7 – Finishing the Oak Vanity
I’m so happy with how the DIY bathroom vanity turned out!!

Is it perfect?
Definitely not. There are some wonky parts that I’ll just have to live with.
But considering that I built this with my own two hands and this was my first true build, you better believe I absolutely love it!
And even though I’ll always fight my fears of, “What if it falls apart?!
The answer to that question is, “Well, just built it again!”
Resources for DIY Bathroom Vanity
I used a lot of products and tools to create this DIY bathroom vanity! Click on each one to learn more about each product. Affiliate links may be included:
- Vanity Sinks – DECOLAV rectangular under mount sinks
- Vanity Faucets – Kohler Worth 4 in. oil rubbed bronze
- Wood dye – Grey
- Briwax Liming Wax
- General Finishes High Performance top coat
- Kreg Hardware Cabinet Jig Super Pack
- Red Oak for vanity
- RYOBI Power Drill
- RYOBI circular saw
- RYOBI jig saw
- Kreg Pocket Hole Jig
What Do You Think??
I’m excited to know what you guys think of the DIY bathroom vanity!
And while you’re here, don’t forget to check out the rest of the bathroom makeover series!
DAY 1: The Evolution of a Master Bathroom Makeover
DAY 4: Picking Out New Flooring: Which One Do You Like?
DAY 6: How to Remove an Old Bathroom Vanity
DAY 27: Removing Wallpaper, Repairing Walls, and Removing an Old Toilet
DAY 29: Installing New Flooring in Our Master Bathroom
DAY 49: The Bathroom Makeover That Would Never End (An Update!)
Day 52: How to Remove a Toilet Yourself
DAY 57: How to Install a Toilet Yourself
TUTORIAL: How to Make a DIY Window Privacy Screen
If you enjoyed this post, go ahead and PIN IT!
![]()
Have you ever tried to build a DIY bathroom vanity? Leave a comment below and tell me about it!

Download the 5 freebies!

Thrift Diving inspires women to decorate, improve, and maintain their home themselves...using paint, power tools, and thrift stores! Use these 5 printables, checklists, and ebooks to get started!

Well done. The best build webpage I’ve seen. Thank you.
Awww, thank you so much, Arlene! I hope it was helpful! 🙂
Wow, beautifully done! I can’t stop looking at those legs… Perfection!
WOW!! This looks stunning! You did such a fabulous job at building a new vanity! I don’t know that I would attempt that but you have inspired me! Come link up to Centerpiece Wednesday Linky Party on my blog and share this post with us. https://karinskottage.com/2020/07/centerpiece-wednesday-linky-party-july-22.html
Karin
How tall is your vanity overall? And how tall are the legs you upcycled? Trying to recreate this (with a few modifications for my own flair) and those dimensions would he really helpful! 🙂
Do you have the plans for this? I’d love to have it built, but only half of it at 30″ W.
This is an amazing transformation. Thanks so much for sharing with Funtastic Friday.
I love this! I would love to build this for my bathroom! how much would you say it cost you to build this?
That’s a good question! The wood was expensive, so maybe a few hundred dollars…? I lost count. Probably because I just didn’t want to know! LOL
While the finished result looks great, you really shouldn’t use a level to make furniture, you can use it to hang or MoU the furniture but often floors, especially bathroom and kitchen floors, Have high and low spots, it’s better to use a square than a level.
If your vanity is on a sloped floor your drawers will be sloped relative to the piece.
That is so impressive!! That was so cool seeing how you built that vanity from the ground up! That was awesome and I tip my hat to you because it is HARD to just tackle something when you are thinking…..where do I start- I have never done this before! It takes me a while to even attempt…..lots of pacing! You just dove right in! Awesome project Serena! Pinned:)